
Medical Instruments for Nurses: 108 Names, Pictures, Uses and Nursing Care
Medical instruments and hospital appliances are tools used to assess patients, assist care, perform procedures and support treatment. Knowing the name is only the first step: a nurse should also recognize the working parts, explain the purpose, prepare the equipment safely and identify complications or contamination.
This illustrated nursing guide covers 108 instruments and appliances, from bedside elimination aids and examination tools to surgical forceps, airway devices and urinary catheters. Each entry explains identification, clinical uses, nursing responsibilities, equipment care and an important examination point.
For nursing students and clinical revision in Uganda and beyond. Read the shared safety principles first, then use the index to find an instrument. Device sizes, models and local procedures vary; use the actual manufacturer instructions and the approved clinical protocol for the patient.
Find an instrument · Safety and preparation · Compare similar instruments · Revision questions · Clinical references
What you should be able to do
- Name the instrument and identify its working end, mechanism and important parts.
- Explain why it is selected for a particular patient, tissue or procedure.
- Prepare the patient, equipment and appropriate clean or sterile field.
- Describe specific nursing observations, aftercare and warning signs.
- Differentiate cleaning, disinfection and sterilization and follow the correct device pathway.
- Recognize similar instruments without treating them as interchangeable.
Shared nursing safety principles
Instrument knowledge combines recognition, clinical judgement and safe handling. The following principles apply across the guide, while each instrument has additional precautions.
Before the procedure
- Confirm the purpose and patient: check identity, indication, allergies, relevant anatomy, consent and whether the planned procedure is within the operator competence. An invasive procedure requires a justified clinical plan.
- Inspect function: check tips, hinges, ratchets, blades, valves, tubing, connectors, power and calibration where relevant. Remove damaged, incomplete or poorly functioning equipment from use.
- Prepare the right field: gather the correct size and model, required protective equipment, suitable lighting, specimen containers and any emergency support. Keep clean supplies separate from used equipment.
- Check readiness of the patient: explain expected sensations, preserve dignity and assess pain relief, position, breathing, circulation and movement restrictions relevant to the task.
During and after the procedure
- Handle with control: keep the working end visible, avoid unnecessary force and use the approved sharps-passing method. Never substitute a strong traumatic clamp where delicate tissue needs a gentler grip.
- Observe the patient: assess the response relevant to the procedure, including pain, bleeding, consciousness, breathing or drainage. Stop and escalate unexpected resistance, severe pain or deterioration.
- Account for items: maintain the required instrument, needle and swab counts. Document any packing or device left in place, including its purpose and removal or review plan.
- Complete aftercare: provide comfort and hygiene, reassess the affected site, explain warning signs and document the procedure, findings, complications and follow-up. Reprocess or discard equipment through the correct route.
Cleaning, disinfection and sterilization
Cleaning removes soil; disinfection reduces microorganisms to a specified level; sterilization eliminates viable microorganisms including bacterial spores through a validated process. Choose the process according to device contact, construction and manufacturer instructions. Reusable devices must be cleaned before further processing; single-use equipment is not routinely reprocessed at the bedside.
On a phone, swipe the table sideways to read all columns.
| Contact category | Examples in this guide | Required principle |
|---|---|---|
| Critical: enters sterile tissue or the vascular system | Surgical instruments and suitable invasive devices | Use a sterile device; sterilize reusable devices through their validated pathway. |
| Semicritical: contacts mucosa or non-intact skin | Suitable reusable examination and respiratory devices | At least high-level disinfection where applicable; follow the device and procedure instructions, which may require sterilization. |
| Noncritical: contacts intact skin or care-area surfaces | Backrests, overbed tables and suitable external equipment | Clean and use an appropriate compatible disinfection process when indicated. |
See CDC processing guidance. A shiny surface, antiseptic jar, closed drum or changed chemical indicator alone does not establish sterility.
Detailed medical instruments and appliances
The original image sequence is retained so each instrument can be located by number. Images illustrate a pattern; the actual instrument label, size and instructions determine its clinical use.
001. Sandbags
Sandbags are weighted positioning aids used to support a body part and reduce unwanted movement. They provide external support; they do not replace a prescribed splint, traction system or fracture assessment.

The retained photograph shows a generic filled bag, not an approved clinical positioning product. Use purpose-made patient-care equipment.
Identification and distinguishing features
A strong, sealed fabric or washable outer cover surrounds sand or another approved weighted filling. Different sizes allow support beside a limb or around a positioning device.
Uses and clinical purpose
- Maintain a prescribed limb position during selected investigations or recovery.
- Support a body part beside, rather than directly over, a vulnerable wound or bony prominence.
Nursing responsibilities and patient care
- Confirm the intended position and assess pain, skin condition and distal circulation before application.
- Place bags securely so they cannot fall onto the patient; protect tubing and avoid compressing vessels or nerves.
- Reassess colour, warmth, sensation, movement and comfort, especially when the patient cannot report discomfort.
Care, cleaning and storage
Inspect seams for leaks and the cover for damage; clean the outer surface using a compatible method and keep the filling dry.
Important precautions
Do not place a heavy bag on the chest, abdomen, injured limb or insensate skin without a specific assessed indication.
002. Bed blocks
Bed blocks are purpose-made supports placed beneath selected bed legs to alter the height or tilt of a compatible bed. Modern adjustable beds usually achieve positioning more safely through their built-in mechanisms.
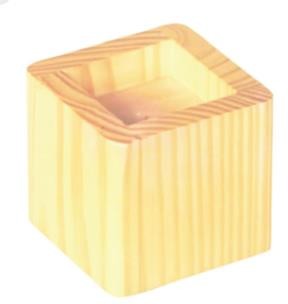
Identification and distinguishing features
They are solid, weight-rated blocks with a recess that securely accommodates the bed leg. All supporting surfaces must remain level and stable.
Uses and clinical purpose
- Provide prescribed bed tilt when a compatible adjustable bed is unavailable.
- Raise a bed to an assessed working height where the manufacturer allows this arrangement.
Nursing responsibilities and patient care
- Check the bed model, patient weight, block rating and reason for positioning before use.
- Use the correct number of matching blocks and obtain assistance; never lift an occupied bed by improvisation.
- Reassess comfort, breathing and stability, and lower the bed safely when the purpose has ended.
Care, cleaning and storage
Clean and dry blocks, inspect for cracks and store as a matched set in a dry area.
Important precautions
Do not improvise with bricks, loose wood or stacked blocks. Head-down positioning is not a routine treatment for shock.
003. Mouth gag
A mouth gag is a device that holds the mouth open during selected oral, dental or surgical procedures. Its use requires an appropriate clinical setting and attention to the teeth, tongue and airway.
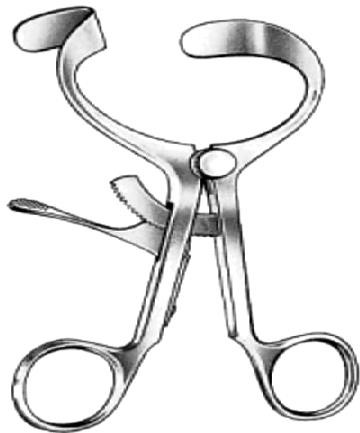
Identification and distinguishing features
Patterns include hinged or ratcheted metal devices and padded bite blocks; the opening mechanism and contact surfaces distinguish the type.
Uses and clinical purpose
- Maintain access during an oral procedure under an appropriately trained operator.
- Prevent biting of selected equipment when a suitable bite block is specifically indicated.
Nursing responsibilities and patient care
- Assess loose teeth, dentures, oral injury and the planned airway management before insertion.
- Prepare suction and observe lips, tongue and teeth for pressure or entrapment throughout the procedure.
- Count and remove the device at completion, and assess for bleeding, damaged teeth or mucosal injury.
Care, cleaning and storage
Check hinges, ratchets and padding. Reprocess reusable components according to their mucosal contact and manufacturer instructions.
Important precautions
Never force the mouth open or insert a gag, spoon or other object during a seizure. It is not routine airway first aid.
004. Air ring and pump
An air ring is an inflatable circular cushion traditionally used under the buttocks. Although common in older equipment lists, ring-shaped cushions are not recommended for preventing pressure injuries.

Identification and distinguishing features
A circular rubber or polymer cushion has a central opening and an inflation valve; a small pump fills it with air.
Uses and clinical purpose
- Recognize the device during equipment identification and understand its historical use.
- Choose an assessed pressure-redistributing support surface instead when preventing pressure injury.
Nursing responsibilities and patient care
- Assess mobility, skin, sensation, continence and ability to reposition rather than relying on a cushion alone.
- Use an appropriate support surface and individualized repositioning plan; inspect bony prominences and device contact areas.
- Explain that a central hole does not guarantee pressure relief: its rim can concentrate pressure and obstruct local circulation.
Care, cleaning and storage
If kept for demonstration, deflate, clean and dry it; inspect the valve, seams and pump for damage.
Important precautions
Do not prescribe or teach routine donut-ring use for pressure-injury prevention. See the International Guideline reference.
Related guidance: NPIAP, EPUAP and PPPIA International Guideline: Seating: pressure-injury prevention guidance.
005. Cardiac table / overbed support table
A cardiac table is an adjustable overbed table that may support the arms and upper body of a patient who finds a forward-leaning position comfortable. It is an aid to positioning, not a treatment for the cause of breathlessness.

Identification and distinguishing features
It usually has a flat height-adjustable surface, a wheeled base and a locking mechanism; some designs have a tilting top.
Uses and clinical purpose
- Support the arms during an assessed upright or forward-leaning position.
- Provide a surface for meals, reading or selected care activities when this is safe.
Nursing responsibilities and patient care
- Assess breathing, alertness and ability to maintain posture; support the feet and back as needed.
- Lock the base, adjust height without compressing the chest and pad the arm-support surface.
- Reassess work of breathing, fatigue and pressure on the forearms; escalate acute breathlessness rather than leaving the patient unsupported.
Care, cleaning and storage
Clean the top, adjustment controls and frame, and report loose locks or unstable wheels.
Important precautions
Do not allow a drowsy or weak patient to sleep unsupported over the table. Do not use it as a walking frame.
006. Bedpan
A bedpan is a receptacle used for defecation and sometimes urination when a patient cannot safely reach a toilet or commode. It allows elimination while maintaining prescribed movement restrictions.
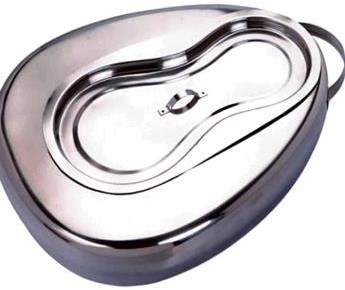
Identification and distinguishing features
Standard bedpans have a broad supporting rim; fracture pans have a lower profile for patients with limited ability to lift the pelvis.
Uses and clinical purpose
- Assist a patient confined to bed with bowel or bladder elimination.
- Collect excreta for observation or measurement when required.
Nursing responsibilities and patient care
- Explain the procedure, provide privacy and choose the correct pan for mobility and body size.
- Use safe rolling or assisted positioning; protect wounds and avoid dragging the pan against skin.
- Remove promptly, offer perineal hygiene and hand hygiene, and document stool characteristics, urine volume or difficulty passing stool when relevant.
Care, cleaning and storage
Empty without splashing and use the approved bedpan washer-disinfector or designated reprocessing system; inspect for cracks.
Important precautions
Do not leave a patient sitting on a bedpan for a prolonged period because the rim can injure skin.
007. Dirty-linen container
A dirty-linen container holds used linen at the point of removal so it can be transported safely for laundering. It separates contaminated textiles from clean supplies and patient-care surfaces.
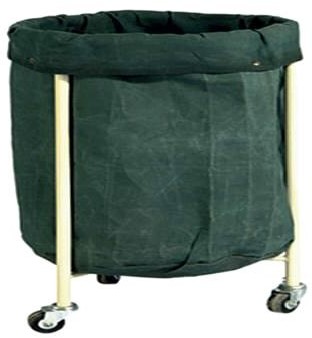
Identification and distinguishing features
Usually a covered hamper or trolley with an appropriate laundry bag; the bag and container must withstand the facility collection process.
Uses and clinical purpose
- Collect used sheets, gowns and towels immediately after removal.
- Contain wet or contaminated linen in a suitable leak-resistant system according to local policy.
Nursing responsibilities and patient care
- Wear protection matched to the exposure risk and handle linen with minimal agitation.
- Check carefully for forgotten instruments without placing hands blindly into bags; dispose of sharps through the sharps system.
- Bag linen where it is used, avoid holding it against the uniform and do not overfill the bag.
Care, cleaning and storage
Clean the frame, lid and contact surfaces when soiled and on the facility schedule; use a fresh appropriate bag.
Important precautions
Do not shake linen, sort it on the floor or send sharps and clinical waste to the laundry.
008. Male urinal
A male urinal is a shaped container that collects urine from a patient who cannot conveniently use a toilet. It may support independence and accurate fluid-balance records.
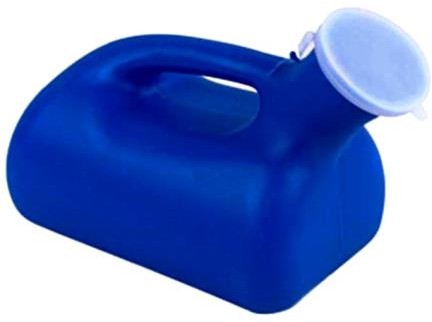
Identification and distinguishing features
It has a wide or shaped entry, a handle and a reservoir, often with graduations and a lid. Graduations may be approximate.
Uses and clinical purpose
- Assist urination in bed or at the bedside.
- Measure and observe urine when intake-and-output monitoring is prescribed.
Nursing responsibilities and patient care
- Provide privacy, hand hygiene and a comfortable position, then place the opening without trapping or abrading the penis.
- Allow time and assistance as needed; assess inability to void, suprapubic discomfort or unexpectedly low output.
- Read the volume on a level surface, document accurately and report blood or a significant change in output in context.
Care, cleaning and storage
Dedicate to one patient during use and reprocess through the approved excreta-container system; keep dry between uses.
Important precautions
A urinal is not a catheter and cannot relieve established urinary retention. Do not diagnose infection from smell alone.
009. Kidney dish / emesis basin
A kidney dish is a curved basin used to receive small amounts of fluid or hold items during care. Its shape allows it to fit near the body, such as under the chin or beside a wound.
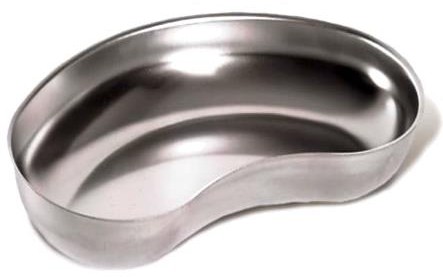
Identification and distinguishing features
The shallow kidney-shaped bowl may be stainless steel, plastic or disposable pulp; sterility depends on its packaging and preparation, not its material.
Uses and clinical purpose
- Receive saliva or small amounts of vomit during oral care or a procedure.
- Hold dressings or instruments on an appropriate clean or sterile field, with separate dishes for contaminated items.
Nursing responsibilities and patient care
- Select a clean or sterile dish according to the task and explain its purpose to the patient.
- Keep clean and dirty contents separate, and position the dish without contaminating a sterile field.
- Observe and measure collected fluid if clinically relevant before safe disposal.
Care, cleaning and storage
Discard single-use dishes correctly; clean and reprocess reusable dishes according to their intended contact and contamination.
Important precautions
Do not put loose needles or blades in a kidney dish as a substitute for a sharps container.
010. Sponge-holding forceps
Sponge-holding forceps grasp a swab or sponge for preparation, cleansing or controlled tissue handling during a procedure. They are often called ring forceps because of their oval, fenestrated jaws.
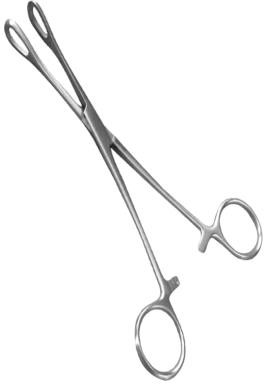
Identification and distinguishing features
Long shafts, finger rings, a ratchet and broad ring-shaped jaws allow a sponge to be held securely with relatively wide contact.
Uses and clinical purpose
- Hold a swab for skin or mucosal preparation according to the procedure.
- Assist surgical handling of swabs or selected tissue when directed by the operator.
Nursing responsibilities and patient care
- Check jaw alignment and secure the swab so it cannot slip into a cavity.
- Use the prescribed preparation solution and prevent contaminated forceps from returning to the sterile field.
- Maintain swab and instrument counts when used in surgery, and communicate any missing item immediately.
Care, cleaning and storage
Open the ratchet and clean hinges and jaw fenestrations thoroughly before the approved reprocessing cycle.
Important precautions
Do not confuse them with dressing forceps or use excessive ratchet pressure on delicate tissue.
011. Cheatle forceps / transfer forceps
Cheatle forceps are long transfer forceps used to handle selected sterile items without touching them by hand. Their role depends on a transfer system that preserves sterility throughout handling and storage.

Identification and distinguishing features
They have long shafts and angled or curved grasping ends; patterns differ, so identify them by the complete instrument and intended use.
Uses and clinical purpose
- Transfer suitable sterile articles using an approved aseptic system.
- Retrieve selected items during tray preparation without reaching into the sterile container by hand.
Nursing responsibilities and patient care
- Confirm that the instrument, its storage and the receiving field are appropriate for sterile transfer.
- Keep the working tips from touching unsterile surfaces and stop if contamination occurs.
- Use sterile gloves or another validated transfer method where the forceps system cannot maintain asepsis.
Care, cleaning and storage
Reprocess and package appropriately; inspect tips and gripping surfaces for corrosion or loss of alignment.
Important precautions
Standing forceps in a jar of antiseptic does not establish or reliably maintain sterility.
012. Ampoule
An ampoule is a sealed small container, commonly glass, holding a medicine or solution for single use. Opening breaks the seal, so it cannot be closed again as a sterile storage container.
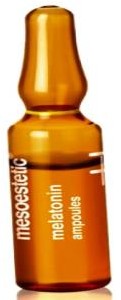
Identification and distinguishing features
A narrow neck, break point and labelled body are typical; some have a dot or coloured ring showing the opening point.
Uses and clinical purpose
- Supply a measured quantity of injectable medicine or another labelled sterile solution.
- Protect the unopened contents from environmental contamination until preparation.
Nursing responsibilities and patient care
- Check the medicine, strength, route, expiry, solution appearance and integrity against the prescription.
- Move liquid out of the neck and open away from the body with appropriate protection; use a filter device for glass ampoules when indicated by product or facility guidance, changing to the appropriate administration device.
- Label the prepared syringe and dispose of the broken glass immediately.
Care, cleaning and storage
Store as labelled, protected from damage and inappropriate heat or light. Discard opened leftovers unless the product explicitly provides otherwise.
Important precautions
A glass cut, medication error or contamination can occur during opening. Never identify a medicine by ampoule shape or colour alone.
013. Vial
A vial is a small medicine container with a rubber stopper beneath a protective cap. It may hold a liquid or a powder requiring reconstitution with the specified diluent.
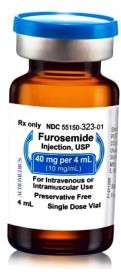
Identification and distinguishing features
The label states the drug, concentration or powder quantity, route and whether the product is single-dose or multidose.
Uses and clinical purpose
- Withdraw injectable medicine through the prepared stopper.
- Reconstitute a powder using the correct diluent and final concentration.
Nursing responsibilities and patient care
- Check the prescription and product instructions before preparation, including storage after opening or reconstitution.
- Disinfect the stopper and allow it to dry; use a new sterile needle and syringe for every entry.
- Record the opening or reconstitution time and beyond-use limit when required, and label the final syringe clearly.
Care, cleaning and storage
Store and discard according to the actual product instructions; protect the stopper from contamination.
Important precautions
Never re-enter a vial with equipment that has contacted a patient. A vial with remaining liquid is not automatically safe to reuse.
014. Episiotomy scissors
Episiotomy scissors are strong angled scissors used by a trained maternity clinician when an episiotomy is clinically indicated. The angle helps orient the cut while protecting adjacent structures.
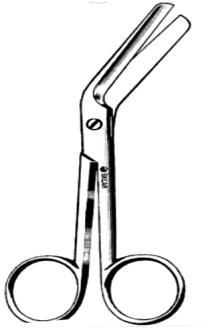
Identification and distinguishing features
They have finger rings, sturdy blades and an angled working end; designs may include a blunt or protected lower tip.
Uses and clinical purpose
- Make a controlled perineal incision during a selected birth where the expected benefit justifies it.
- Support an obstetric procedure under direct visualization and appropriate pain relief.
Nursing responsibilities and patient care
- Prepare the correct sterile scissors, explain the proposed intervention and support informed consent appropriate to the situation.
- Help protect the baby and maternal tissue while the operator uses the instrument.
- Observe bleeding, assist repair and document the indication, analgesia, procedure and post-birth assessment.
Care, cleaning and storage
Inspect blade sharpness and alignment; send through the validated surgical-instrument reprocessing pathway.
Important precautions
Episiotomy should not be routine for every vaginal birth. Do not use blunt or damaged scissors on tissue.
015. Auriscope / otoscope
An otoscope is an illuminated instrument used to inspect the external ear canal and tympanic membrane. It helps assess symptoms such as pain, discharge, hearing change or suspected wax blockage.
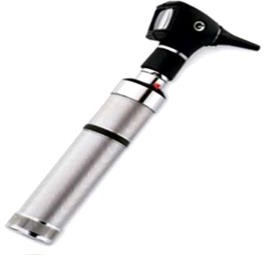
Identification and distinguishing features
A lighted viewing head, magnifying lens, handle and removable ear speculum are typical; pneumatic models can assess membrane mobility.
Uses and clinical purpose
- Examine the canal and visible eardrum for wax, inflammation, discharge, perforation or another abnormality.
- Guide assessment before ear procedures, while recognizing that an obstructed view limits findings.
Nursing responsibilities and patient care
- Ask about pain, ear surgery, discharge and a possible foreign body; select the correct speculum size.
- Support the examining hand against the head and avoid deep or forceful insertion, particularly in an uncooperative child.
- Record what was actually visible and escalate a concerning finding rather than assuming a normal membrane.
Care, cleaning and storage
Discard disposable specula and clean the head and handle as instructed; reprocess reusable specula appropriately.
Important precautions
Do not irrigate an ear simply because wax is suspected without first checking suitability and contraindications.
016. Ear syringe / ear-irrigation device
An ear syringe delivers fluid into the external ear canal to remove selected softened wax under an assessed protocol. Controlled electronic irrigation is used in many modern services instead of traditional manual syringing.
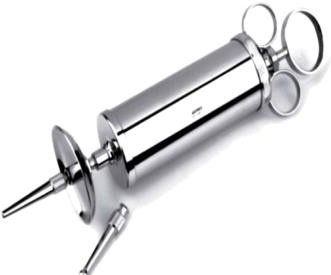
Identification and distinguishing features
Traditional versions have a large barrel, plunger and nozzle; controlled irrigators provide a regulated stream through a disposable tip.
Uses and clinical purpose
- Remove appropriate wax after assessment, consent and any recommended softening treatment.
- Help restore a view of the tympanic membrane when wax is the confirmed obstruction.
Nursing responsibilities and patient care
- Ask about perforation, ear surgery, pain, discharge and previous problems with irrigation; refer unsuitable patients.
- Use the approved device and comfortably warm fluid, protect clothing and direct the stream as trained without sealing the canal.
- Stop for pain, dizziness, bleeding or sudden hearing change and reassess the ear afterward.
Care, cleaning and storage
Use a fresh patient-contact tip where specified and clean the reservoir and device according to its instructions.
Important precautions
Avoid irrigation with a perforated eardrum, relevant ear surgery or another contraindication. Never use high pressure to overcome resistance.
Related guidance: Northern Care Alliance NHS Foundation Trust: Audiology: clearance of earwax.
017. Tuning fork
A tuning fork produces a defined vibration for selected bedside hearing and neurological tests. Interpretation depends on the fork frequency, technique and the patient response.
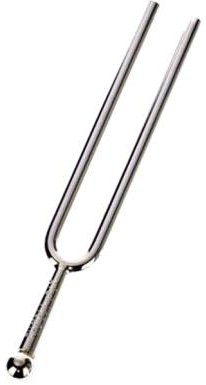
Identification and distinguishing features
It has two metal prongs, a stem and a frequency marking. A 512-Hz fork is commonly used for bedside hearing tests; lower-frequency forks are used for vibration sense.
Uses and clinical purpose
- Perform Rinne and Weber tests as part of a hearing assessment.
- Assess vibration perception over a bony prominence with a suitable fork during neurological examination.
Nursing responsibilities and patient care
- Explain the test and strike the fork gently on an appropriate resilient surface rather than a hard object.
- Use the correct test position, compare sides and avoid giving visual cues that influence answers.
- Record the side, method and response, and arrange further assessment where hearing loss is suspected.
Care, cleaning and storage
Clean between patients and inspect for bent prongs or damage that alters vibration.
Important precautions
Bedside tuning-fork tests do not replace formal audiometry, and a normal result does not exclude all hearing loss.
018. Specimen bottles / specimen containers
Specimen containers safely hold material collected for laboratory testing. The correct container preserves the specimen and prevents leakage, contamination and misleading results.
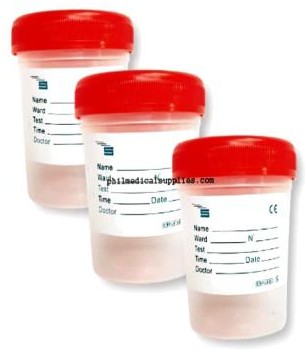
Identification and distinguishing features
They vary by size, sterility and additive; examples include wide-mouthed sputum pots, urine containers and blood-culture bottles.
Uses and clinical purpose
- Collect and transport the specimen requested for a defined investigation.
- Maintain the correct relationship between specimen, preservative and laboratory test.
Nursing responsibilities and patient care
- Confirm patient identity, request, specimen site, container and collection timing before starting.
- Use the correct aseptic or clean collection method and avoid touching the inside of the container or lid.
- Label at the bedside with required identifiers and collection details, close securely and send promptly in the approved transport packaging.
Care, cleaning and storage
Check expiry and container integrity before use; do not rinse out additives or reuse single-use specimen pots.
Important precautions
A specimen in the wrong preservative may be unusable even when the label is correct. Never place routine microbiology specimens in formalin.
019. Calibrated medicine cup
A calibrated medicine cup measures and delivers oral liquids. Its accuracy depends on choosing a cup whose scale is appropriate for the prescribed volume.

Identification and distinguishing features
A small transparent cup has graduations, usually in millilitres. Some also show other units, which can cause confusion if the wrong scale is read.
Uses and clinical purpose
- Administer suitable volumes of prescribed oral liquid medicine.
- Allow the patient to take a measured dose without drinking directly from a stock bottle.
Nursing responsibilities and patient care
- Check the medicine concentration and calculate the required volume before pouring.
- Place the cup on a level surface and read the appropriate mark at eye level; use an oral syringe for small or difficult-to-measure doses.
- Confirm swallowing ability, supervise administration where needed and document the dose actually taken.
Care, cleaning and storage
Use a clean cup for each administration according to facility policy; discard single-use cups rather than returning them to stock.
Important precautions
Do not estimate a paediatric dose with a household spoon or an oversized cup. Oral devices must not be connected to intravenous access.
020. Dental probe / periodontal probe
A dental probe is a slender hand instrument used during dental assessment. A periodontal probe measures the depth of the gingival sulcus or periodontal pocket; a sharp explorer has a different function.
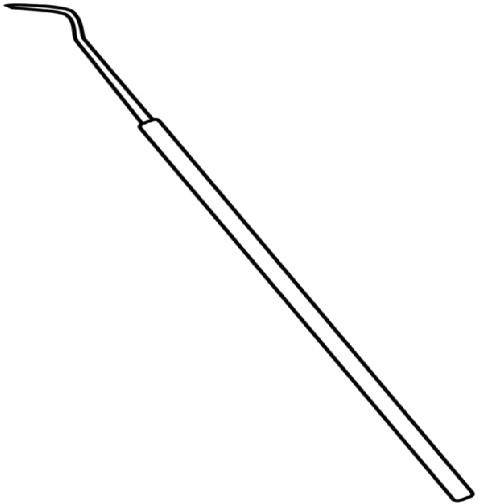
Identification and distinguishing features
A handle supports a fine working tip, often angled. Periodontal probes have depth markings and a relatively blunt tip; explorer tips may be pointed and ungraduated.
Uses and clinical purpose
- Measure periodontal pocket depth with a graduated periodontal probe.
- Assess selected tooth surfaces with the appropriate dental examination instrument.
Nursing responsibilities and patient care
- Identify the exact tip and markings before naming its function; similar handles do not make instruments interchangeable.
- Prepare a good light, dental mirror and appropriate protective equipment; support the patient during examination.
- Record measurements or findings as directed and report pain, bleeding or a loose tooth.
Care, cleaning and storage
Protect fine tips during transport and processing, and remove bent or damaged instruments from use.
Important precautions
Do not call every pointed dental instrument a periodontal measuring probe or force a sharp tip into tissue.
021. Mosquito artery forceps
Mosquito forceps are small haemostatic forceps used to clamp small blood vessels and assist delicate dissection. They apply controlled compression through narrow jaws.
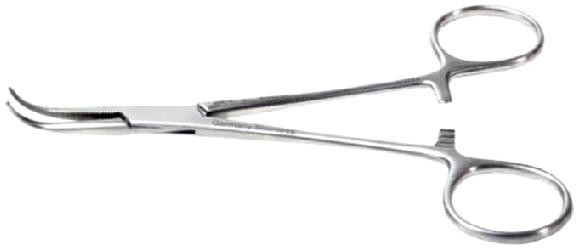
Identification and distinguishing features
Small finger rings, a locking ratchet and fine straight or curved serrated jaws distinguish them from larger artery forceps.
Uses and clinical purpose
- Control bleeding from a small vessel during a procedure.
- Handle fine material or assist careful superficial dissection when selected by the operator.
Nursing responsibilities and patient care
- Check the jaw tips, hinge and ratchet before placing the forceps on the tray.
- Pass with the working end visible and handles accessible, keeping the sterile instrument within the sterile field.
- Anticipate the need for a ligature and include the forceps in the instrument count.
Care, cleaning and storage
Clean serrations and the box joint with the ratchet open; inspect for misalignment before reprocessing.
Important precautions
Small size does not make a clamp atraumatic. Excessive pressure or use on an unsuitable vessel can tear tissue.
022. Curved artery forceps
Curved artery forceps are locking clamps used for haemostasis and selected surgical handling. The curve helps the operator approach tissue and maintain visibility around the working end.
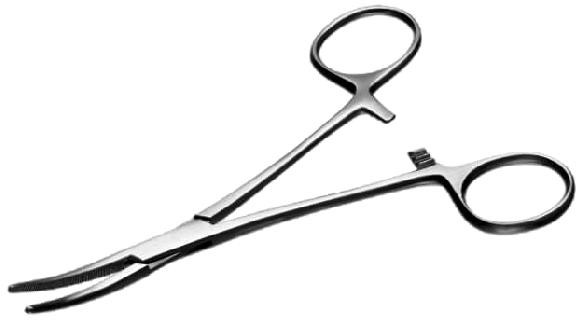
Identification and distinguishing features
They have finger rings, a box joint, ratchet and curved serrated jaws; jaw length and serration patterns vary between named types.
Uses and clinical purpose
- Clamp a bleeding vessel before ligation or another definitive method of haemostasis.
- Assist controlled blunt dissection or passage of a ligature when appropriate to the pattern.
Nursing responsibilities and patient care
- Select the requested size and pattern, and check that the jaws close evenly.
- Pass the clamp securely without catching a glove or drape in the ratchet.
- Observe the operative field, anticipate ligature needs and account for all clamps at closure.
Care, cleaning and storage
Clean hinges and serrations, release the ratchet for processing and inspect the tips for damage.
Important precautions
Do not substitute a toothed clamp for a non-toothed haemostat without the operator checking suitability.
023. Straight artery forceps
Straight artery forceps are ratcheted haemostats with straight serrated jaws. They compress selected vessels or tissue during a procedure until definitive haemostasis is achieved.
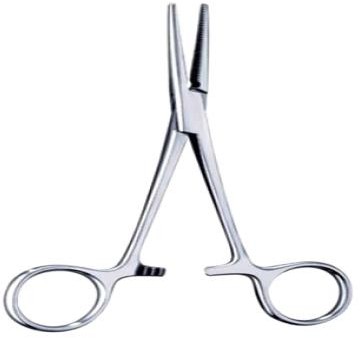
Identification and distinguishing features
The straight working end aligns with the shafts; finger rings and a locking ratchet maintain the grip.
Uses and clinical purpose
- Clamp an accessible bleeding vessel under direct visualization.
- Hold selected surgical materials or assist controlled dissection when the operator chooses this instrument.
Nursing responsibilities and patient care
- Inspect the jaws and locking mechanism, and select the correct length rather than choosing by appearance alone.
- Pass safely with the jaws controlled and avoid touching unsterile surfaces.
- Maintain instrument counts and communicate any breakage or missing component immediately.
Care, cleaning and storage
Open the joint and ratchet for cleaning; inspect serrations for retained material and corrosion.
Important precautions
Do not use an artery forceps as a needle holder: its jaws may allow the needle to rotate or become damaged.
024. Long artery forceps
Long artery forceps provide reach for haemostasis or handling in a deeper operative field. Their length changes access, but does not mean every long clamp is suitable for every vessel or tissue.
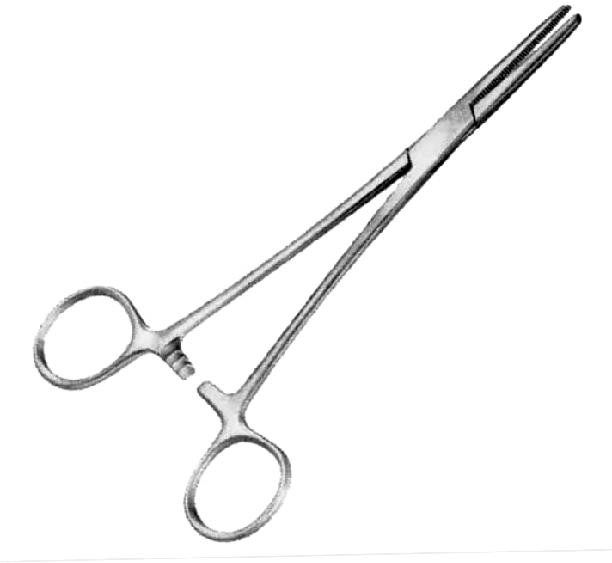
Identification and distinguishing features
Long shafts end in straight or curved serrated jaws and usually have finger rings and a ratchet.
Uses and clinical purpose
- Reach a vessel or structure beyond the comfortable reach of a shorter haemostat.
- Assist selected clamping tasks, including temporary cord clamping when an appropriate sterile clamp is used by the maternity team.
Nursing responsibilities and patient care
- Confirm the precise pattern and intended task with the operator.
- Keep the tips under observation and avoid levering against a wound edge or neighbouring structure.
- Count the instrument and assess that any temporarily clamped structure is managed definitively before completion.
Care, cleaning and storage
Check shaft alignment and the jaw tips, and clean the long working surfaces and box joint thoroughly.
Important precautions
Do not assume a long haemostat is a vascular atraumatic clamp or a permanent newborn cord clamp.
025. Dental spatula
A dental spatula mixes or transfers selected dental materials. Its working blade is shaped for spreading and blending rather than cutting tissue.
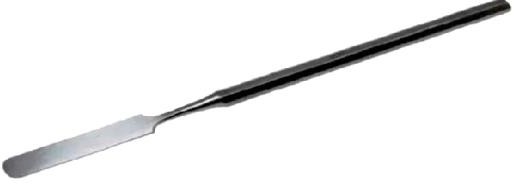
Identification and distinguishing features
A flat, usually flexible metal blade joins a handle; blade width and flexibility differ according to the material being mixed.
Uses and clinical purpose
- Mix a compatible dental cement, impression-related material or other product as specified.
- Transfer and spread prepared material during a dental procedure.
Nursing responsibilities and patient care
- Confirm the correct product, mixing surface, proportions and working time from the material instructions.
- Prepare only the required amount and keep the material free from blood, saliva and incompatible residues.
- Pass the instrument safely and remove setting material promptly after use.
Care, cleaning and storage
Clean before residues harden, inspect the blade for distortion and process according to its actual clinical contact.
Important precautions
Do not mix medicines or unrelated materials with a dental spatula simply because it has a flat blade.
026. Ovum forceps
Ovum forceps are long, usually fenestrated forceps used by a trained clinician to grasp tissue during selected obstetric and gynaecological procedures. They are designed to hold tissue rather than measure the uterine cavity.
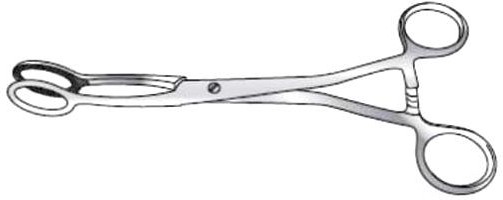
Identification and distinguishing features
Long shafts, finger rings and broad oval or ring-like grasping jaws are characteristic; some patterns have a ratchet.
Uses and clinical purpose
- Remove accessible retained tissue when clinically indicated within an appropriate uterine-evacuation plan.
- Hold tissue during selected gynaecological procedures under suitable visualization or guidance.
Nursing responsibilities and patient care
- Prepare the correct sterile instrument and support consent, analgesia and assessment of bleeding.
- Assist the operator without encouraging blind, forceful traction; keep removed tissue for examination when requested.
- Monitor pain, pulse, blood pressure, bleeding and signs of deterioration during recovery.
Care, cleaning and storage
Check jaw alignment and clean the fenestrations and joint before validated processing.
Important precautions
Risks include cervical trauma, uterine perforation, bleeding and infection. Use is restricted to appropriately trained personnel.
027. Towel clip / towel clamp
A towel clip secures surgical towels or drapes around an operative field. Different patterns either pierce the material or grip without penetrating it.
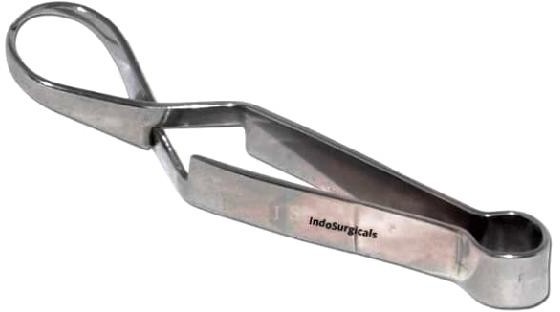
Identification and distinguishing features
The pictured pattern is a spring-action towel clamp; other common towel clips have finger rings, a ratchet and pointed ends.
Uses and clinical purpose
- Keep surgical drapes in position during preparation and surgery.
- Secure selected sterile materials where the clip design and theatre policy permit.
Nursing responsibilities and patient care
- Identify whether the clip penetrates the drape before placement.
- Keep tips away from the patient, tubing and staff hands; pass pointed patterns with controlled tips.
- Treat a clip that has contacted unsterile skin or passed through a contaminated layer according to theatre aseptic policy.
Care, cleaning and storage
Inspect spring action or the ratchet and protect pointed tips during transport and processing.
Important precautions
Do not puncture intravenous lines, oxygen tubing or a catheter to anchor them.
028. Uterine curette
A uterine curette is a long instrument with a looped or spoon-like end used for selected endometrial sampling or uterine procedures. Sharp and blunt designs have different purposes and risks.
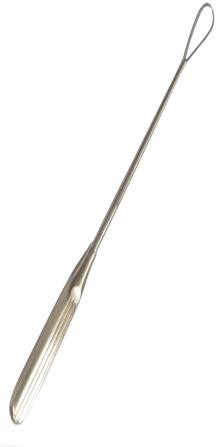
Identification and distinguishing features
A slim shaft leads to a small loop or scoop; the handle and working-end size vary.
Uses and clinical purpose
- Obtain endometrial tissue when clinically indicated.
- Perform a specifically selected uterine procedure by a trained clinician where that method is appropriate.
Nursing responsibilities and patient care
- Check the indication, consent, pregnancy-related assessment and required pain relief.
- Prepare a correctly sized sterile instrument and collect specimens in the container appropriate to the requested test.
- Observe for heavy bleeding, severe pain, faintness or other signs of perforation or haemodynamic compromise.
Care, cleaning and storage
Inspect the loop for damage and protect the working end during cleaning and processing.
Important precautions
For early surgical uterine evacuation, WHO recommends vacuum aspiration rather than routine sharp curettage; sharp curette checks after aspiration are not recommended.
Related guidance: World Health Organization: Abortion care guideline, second edition.
029. Umbilical cord clamp
An umbilical cord clamp closes the cut newborn cord to prevent blood loss. A purpose-made disposable clamp remains attached until removal according to the maternity service protocol.

Identification and distinguishing features
Usually a plastic hinged clamp with serrated inner surfaces and a secure locking catch.
Uses and clinical purpose
- Secure the newborn side of the cord when clamping is indicated.
- Maintain haemostasis after the cord is cut.
Nursing responsibilities and patient care
- Use an intact sterile single-use clamp and follow the birth team protocol on timing and placement.
- Check the lock and inspect the cord for bleeding after cutting and during subsequent observations.
- Teach clean, dry cord care and explain that persistent bleeding, spreading redness, pus or a sick baby requires urgent assessment.
Care, cleaning and storage
Store packaged clamps dry and check expiry and packaging integrity; discard after use.
Important precautions
Do not leave a poorly locking clamp in place or assume an initially dry cord cannot bleed later.
030. Patellar hammer / reflex hammer
A reflex hammer elicits deep tendon reflexes as part of neurological examination. The response provides information about the reflex arc and must be interpreted with the rest of the examination.
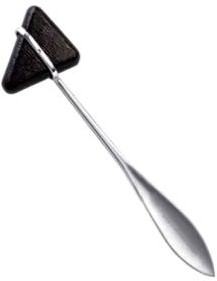
Identification and distinguishing features
The pictured Taylor pattern has a triangular rubber head on a handle; other designs use circular or weighted heads.
Uses and clinical purpose
- Elicit knee, ankle and selected upper-limb tendon reflexes.
- Compare symmetry and identify a pattern requiring further neurological assessment.
Nursing responsibilities and patient care
- Explain the examination and position the limb so the relevant muscles are relaxed.
- Strike the tendon with controlled movement rather than striking bone or repeatedly hitting painful tissue.
- Compare sides and document the reflex and any reinforcement used, following the clinical recording system.
Care, cleaning and storage
Clean the head and handle between patients and replace hardened or damaged rubber.
Important precautions
An absent response may reflect poor technique or inability to relax; it should not be interpreted in isolation.
031. Surgical probe
A surgical probe is a slender instrument used to explore or define a tract, opening or tissue plane when clinically appropriate. Some probes have an eye for passing material.
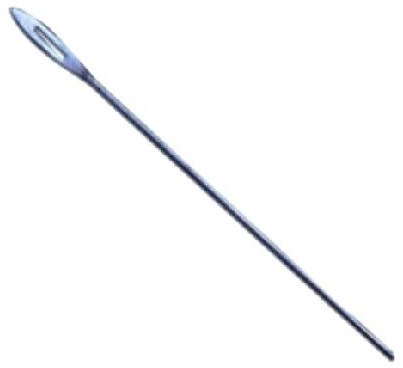
Identification and distinguishing features
A narrow metal shaft may have a blunt rounded end, an eye or a shaped tip; the purpose depends on the particular pattern.
Uses and clinical purpose
- Assess an accessible tract or opening during a selected examination.
- Guide a ligature or help delineate anatomy in an appropriate procedure.
Nursing responsibilities and patient care
- Select the correct sterile probe and confirm the purpose before use.
- Support direct visualization and avoid encouraging blind or forceful probing.
- Observe for pain, bleeding or resistance and report findings and any specimen or procedure details accurately.
Care, cleaning and storage
Inspect the tip for rough edges or bending and protect the narrow shaft during processing.
Important precautions
Do not probe an undiagnosed wound or sinus indiscriminately; force can create a false passage or injure deeper structures.
032. Oropharyngeal airway / Guedel airway
An oropharyngeal airway helps prevent the tongue obstructing the upper airway in a suitably unresponsive patient without an active gag reflex. It supports ventilation but does not protect the airway from aspiration.
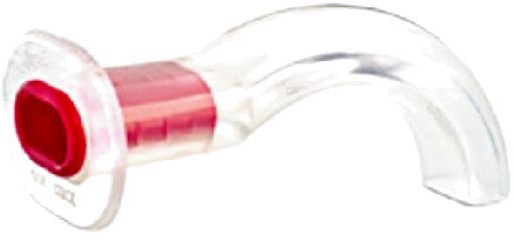
Identification and distinguishing features
A curved rigid body has a flange that rests outside the mouth and a bite-resistant section; several sizes are available.
Uses and clinical purpose
- Support airway patency during resuscitation or assisted ventilation when indicated.
- Facilitate airway management while definitive assessment and treatment continue.
Nursing responsibilities and patient care
- Assess responsiveness, breathing and gag reflex, and choose the correct size using the taught clinical method.
- Insert using the age-appropriate trained technique without pushing the tongue backward or injuring teeth.
- Continue observing chest movement, ventilation and oxygenation, with suction and alternative airway equipment ready.
Care, cleaning and storage
Use a clean, correctly processed reusable airway or an intact single-use device as specified; inspect for cracks and blockage.
Important precautions
Do not insert into an alert or gagging patient because vomiting, laryngospasm or trauma may result.
033. Bed trapeze / lifting pole
A bed trapeze is an overhead support with a handgrip that helps a patient assist with repositioning. It can improve independence when upper-body strength and the clinical condition permit.
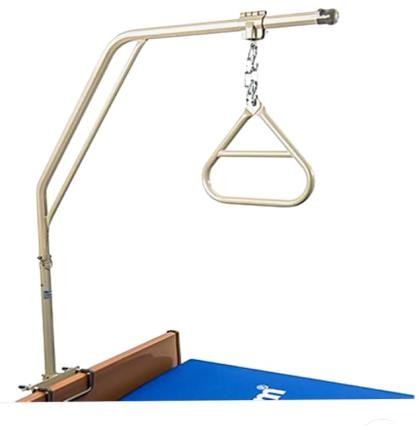
Identification and distinguishing features
A bed-mounted or freestanding frame supports a hanging triangular grip with an adjustable chain or strap.
Uses and clinical purpose
- Help a suitable patient lift or reposition the upper body in bed.
- Assist transfers or bed mobility within an assessed rehabilitation plan.
Nursing responsibilities and patient care
- Assess strength, cognition, shoulder function and restrictions such as recent surgery or unstable injuries.
- Check the mounting, weight rating and grip height; demonstrate a controlled movement with staff support when required.
- Observe fatigue, pain and skin shear, and ensure the patient can release the grip safely.
Care, cleaning and storage
Inspect fasteners, straps or chains and the handgrip; clean frequent-touch surfaces.
Important precautions
Do not use as an unassessed lifting device or allow a patient with prohibited arm loading to pull on it.
034. Bed cradle
A bed cradle lifts bedclothes away from a painful or vulnerable body part. It reduces direct fabric contact while allowing the patient to remain covered.
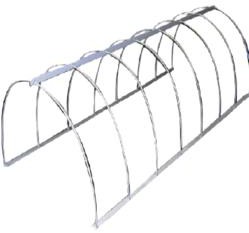
Identification and distinguishing features
An arched or rectangular frame supports sheets and blankets above the limb or affected area.
Uses and clinical purpose
- Keep bedclothes off burns, wounds or a hypersensitive limb where indicated.
- Reduce contact pressure from linen over selected injuries or postoperative sites.
Nursing responsibilities and patient care
- Choose a cradle large enough to avoid contact with the body and secure it in the correct position.
- Check that bedding does not sag onto the wound and that no sharp edge presses on skin.
- Maintain warmth, access for observations and freedom from trapped tubing or restricted movement.
Care, cleaning and storage
Clean and dry the frame, and inspect joints and edges for instability or damage.
Important precautions
A cradle removes blanket contact; it does not offload heel pressure from the mattress or replace pressure-injury prevention.
035. Backrest
A backrest supports the trunk in an upright or semi-upright position when the bed itself cannot provide the required adjustment. It helps comfort and posture during selected care activities.

Identification and distinguishing features
A rigid adjustable frame supports a fabric or padded back surface; a locking mechanism maintains the chosen angle.
Uses and clinical purpose
- Support sitting for meals, conversation or care when clinically suitable.
- Assist positioning for breathing comfort or recovery according to the patient assessment.
Nursing responsibilities and patient care
- Check spinal or movement restrictions and assess the patient ability to maintain the position.
- Pad contact areas, lock the backrest securely and support the head, arms and feet.
- Prevent sliding and reassess sacral pressure, pain, breathing and fatigue; assist repositioning rather than dragging.
Care, cleaning and storage
Clean the cover and frame, inspect locks and remove damaged or unstable equipment from service.
Important precautions
An upright angle can increase shear when the patient slides down; comfort does not remove the need for skin checks.
036. Bedside screens / privacy screens
Privacy screens create a visual barrier during examination and personal care. They support dignity but do not provide soundproofing or replace infection-isolation measures.

Identification and distinguishing features
Foldable panels or curtains are mounted on a stable frame, often with wheels; surfaces may be washable or disposable.
Uses and clinical purpose
- Provide privacy during bathing, elimination, wound care and examination.
- Separate the immediate care area while preserving access for staff and equipment.
Nursing responsibilities and patient care
- Explain care before screening and obtain consent; expose only the body area required.
- Position the screen securely without blocking exits, call bells, observation or emergency access.
- Speak discreetly because a visual barrier does not protect confidential conversation from being overheard.
Care, cleaning and storage
Clean high-touch frames and wheels and launder or replace panels according to contamination and facility policy.
Important precautions
Do not treat a screen as a substitute for a room, ventilation or respiratory precautions when isolation is needed.
037. Instrument trays
An instrument tray organizes equipment for a defined task and provides a surface for presentation or transport. A metal tray is not sterile merely because it looks clean.
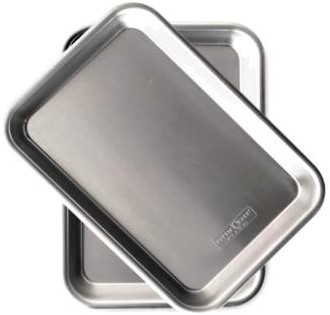
Identification and distinguishing features
Usually a shallow rectangular stainless-steel or polymer container with raised edges; some have a fitted lid or belong to a sterilization system.
Uses and clinical purpose
- Arrange equipment in a logical order for a procedure.
- Carry a defined clean or sterile set using the correct packaging and handling method.
Nursing responsibilities and patient care
- Check the required contents and the cleanliness or sterility needed for the procedure.
- Keep the tray dry, arrange sharp items safely and separate sterile supplies from contaminated returns.
- Count relevant instruments and swabs before and after procedures where counting is required.
Care, cleaning and storage
Remove debris and reprocess the tray according to its role; inspect edges and surfaces for corrosion or damage.
Important precautions
Do not return used items to a clean tray or place unwrapped supplies on a nonsterile surface.
038. Dressing trolley / procedure trolley
A dressing trolley is a mobile working platform used to organize supplies for wound care or another procedure. Its layout supports a clean-to-dirty workflow.
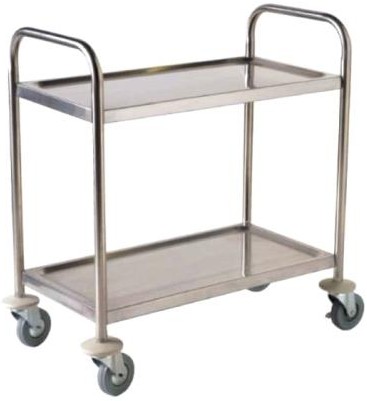
Identification and distinguishing features
A wheeled frame usually has an upper working surface and one or more lower shelves, with rails or handles.
Uses and clinical purpose
- Bring the required wound-care or procedure equipment to the bedside.
- Support an organized aseptic field with waste kept in a separate designated area.
Nursing responsibilities and patient care
- Clean the trolley before preparation, check wheel brakes and collect supplies without overloading it.
- Place sterile or clean items on the prepared working area and keep waste away from them.
- Move safely, preserve patient privacy and complete cleaning after the procedure before preparing for another patient.
Care, cleaning and storage
Clean shelves, handles, rails and wheels using compatible products; report loose wheels or damaged surfaces.
Important precautions
A clean trolley is a supporting surface, not a sterile field unless a sterile field has been created and maintained on it.
039. Sims vaginal speculum, double-ended
A Sims speculum is a non-self-retaining instrument used to retract the vaginal wall so the cervix or vaginal tissues can be seen. The double-ended design offers two blade sizes.
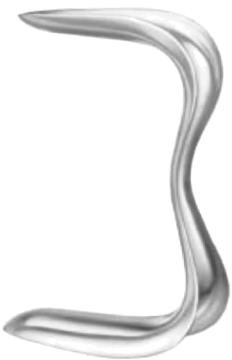
Identification and distinguishing features
It has two curved, trough-shaped blades joined by a central handle and usually lacks a screw that holds the vagina open.
Uses and clinical purpose
- Assist examination of the cervix and vaginal walls.
- Provide exposure during selected gynaecological procedures, often with an assistant or another retractor.
Nursing responsibilities and patient care
- Explain the intimate examination, support consent, privacy and a chaperone according to policy.
- Prepare the correct sterile or appropriately processed instrument and assist comfortable positioning and suitable lighting.
- Watch for pain, bleeding or distress, and ensure the operator releases pressure before removal.
Care, cleaning and storage
Clean both blades and the curved junctions thoroughly and process according to mucosal contact and the procedure performed.
Important precautions
Never force insertion or assume the patient must tolerate severe pain. The correct term is speculum, not spectrum.
040. Cusco vaginal speculum
A Cusco speculum is a self-retaining bivalve instrument that separates the vaginal walls to expose the cervix. It is commonly used for cervical examination and specimen collection.
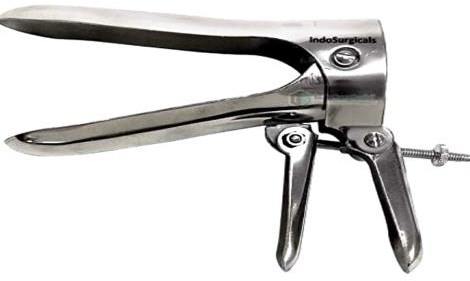
Identification and distinguishing features
Two hinged blades open through a handle and screw or locking mechanism; metal reusable and plastic single-use versions exist.
Uses and clinical purpose
- Visualize the cervix during appropriate examination or screening.
- Facilitate collection of cervical or vaginal specimens and selected procedures.
Nursing responsibilities and patient care
- Obtain consent, preserve privacy and prepare the correct size, lighting and required sample equipment.
- Use lubrication only as compatible with the planned test and local instructions; monitor discomfort and allow the patient to pause.
- Before removal, assist the operator to release the lock and close safely without trapping tissue.
Care, cleaning and storage
Inspect the hinge and lock; reprocess reusable versions appropriately and discard single-use devices.
Important precautions
Do not over-open the blades or use an unsuitable size simply to improve visibility.
041. Dissecting forceps / thumb forceps
Dissecting forceps are spring-action instruments used to pick up or stabilize tissue and materials. The operator controls pressure between the thumb and fingers rather than with a ratchet.

Identification and distinguishing features
Two flexible arms join at one end; working tips may be smooth, serrated or toothed and may be straight or angled.
Uses and clinical purpose
- Hold tissue edges during dissection or suturing using the appropriate tip.
- Handle dressings or fine material with a suitable non-toothed pattern.
Nursing responsibilities and patient care
- Identify toothed and non-toothed versions before passing the instrument.
- Check tip alignment and choose a grip appropriate to the tissue; avoid crushing delicate structures.
- Keep the working ends visible and protect the sterile field from contamination during handling.
Care, cleaning and storage
Clean grooves and teeth carefully and protect the tips from bending during transport.
Important precautions
Toothed tips can damage bowel, vessels or other delicate tissue. Different thumb-forceps patterns are not interchangeable.
042. Sputum mug
A sputum mug is a covered receptacle traditionally used for expectorated sputum at the bedside. A laboratory specimen should be collected into the specific container required by the laboratory.
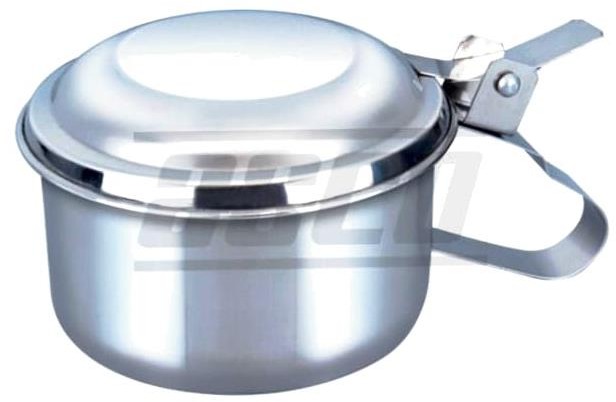
Identification and distinguishing features
The pictured model is a wide-mouthed metal container with a lid and handle, designed to reduce spillage during use.
Uses and clinical purpose
- Receive sputum from a patient who needs a bedside receptacle.
- Support observation of expectoration while infection-control and diagnostic needs are addressed separately.
Nursing responsibilities and patient care
- Provide tissues or the locally preferred single-patient receptacle and teach cough etiquette and hand hygiene.
- When a specimen is needed, use the correct labelled specimen pot and collect in an appropriate ventilated setting.
- Observe blood-staining, quantity and respiratory deterioration and report clinically important changes.
Care, cleaning and storage
Keep covered and empty and reprocess through the approved contaminated-container pathway without splashing.
Important precautions
A sputum mug does not replace a sterile or specified laboratory specimen container, and a lid does not replace airborne precautions.
043. Colostomy bag / ostomy pouch
An ostomy pouch collects stool leaving the body through a surgically created stoma. An effective seal protects the surrounding skin and allows comfortable, dignified daily activity.
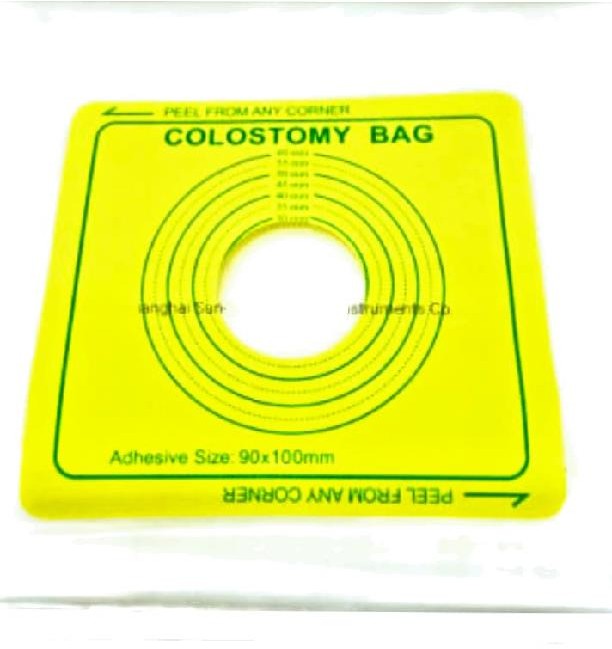
Identification and distinguishing features
A pouch attaches to a skin barrier around the stoma; systems may be one-piece or two-piece and drainable or closed-ended.
Uses and clinical purpose
- Collect faecal output from a colostomy.
- Contain odour and effluent while protecting clothing and peristomal skin.
Nursing responsibilities and patient care
- Assess stoma colour, moisture, output and surrounding skin; a dusky or black stoma or marked deterioration needs urgent review.
- Measure the stoma and fit the barrier closely without constricting it, recognizing that size changes after surgery.
- Empty or change according to the pouch type before weight causes leakage, and teach the patient skin care and supply use.
Care, cleaning and storage
Clean gently and dry the skin before fitting; store unused pouches away from heat and discard used equipment appropriately.
Important precautions
Do not apply a tight opening, harsh antiseptic or improvised adhesive to damaged peristomal skin.
044. Mortar and pestle
A mortar is a bowl and a pestle is the tool used within it to crush or grind a substance. In medicine preparation, this is acceptable only when crushing the particular product is safe.
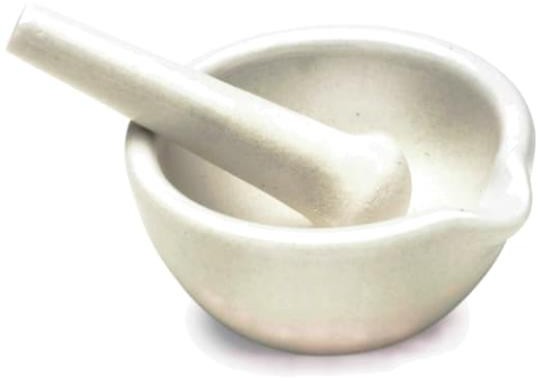
Identification and distinguishing features
The bowl has a stable base and rounded interior; the pestle has a rounded grinding end and a handgrip.
Uses and clinical purpose
- Crush a suitable tablet when a pharmacist or product instruction confirms that modification is appropriate.
- Prepare selected approved compounds using a controlled method.
Nursing responsibilities and patient care
- Check whether a liquid formulation or another suitable medicine is available before crushing.
- Confirm that the tablet is not modified-release, enteric-coated, hazardous or otherwise unsuitable, and prepare one medicine at a time.
- Minimize powder loss, give the full prepared dose using the correct route and document an authorized formulation change.
Care, cleaning and storage
Clean thoroughly between medicines and patients and dry completely to prevent contamination and carry-over.
Important precautions
Do not crush all tablets indiscriminately or mix several medicines in a common batch.
045. Footrest / foot-support board
A footrest supports the feet during sitting or selected bed positioning. Its purpose is to improve alignment and comfort; prolonged pressure against it can still injure the skin.
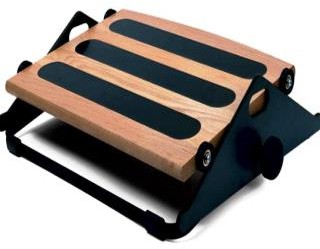
Identification and distinguishing features
The pictured adjustable platform has a broad foot-support surface and a stable base; bed-end footboards are another design.
Uses and clinical purpose
- Support the feet when they would otherwise hang unsupported.
- Maintain an assessed ankle position during an individualized mobility or rehabilitation plan.
Nursing responsibilities and patient care
- Assess ankle range, sensation, circulation, skin and movement restrictions before positioning.
- Adjust the support so the feet rest comfortably without forcing the ankle or pressing the toes.
- Reassess heel and foot pressure, remove for skin care as appropriate and combine with prescribed exercise or splinting.
Care, cleaning and storage
Clean the contact surface, inspect padding and verify the adjustment mechanism is secure.
Important precautions
A footrest alone does not prevent every contracture or replace heel offloading and active rehabilitation.
046. Bulb syringe
A bulb syringe is a hand-operated suction device that removes small visible amounts of fluid from an accessible area. It has limited suction control and must be used only for an appropriate indication.
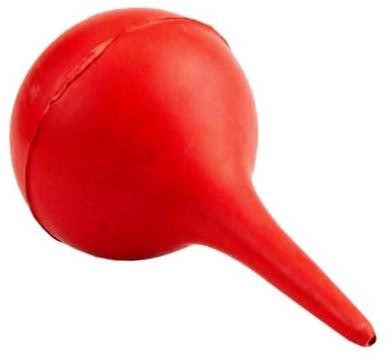
Identification and distinguishing features
A compressible bulb joins a short tapered nozzle; releasing the compressed bulb creates suction.
Uses and clinical purpose
- Clear an obstructing small amount of secretion when clinically indicated and the device is suitable.
- Support selected oral or nasal care under a trained protocol.
Nursing responsibilities and patient care
- Assess whether secretion is actually obstructing breathing; prioritize effective ventilation when needed.
- Compress before approaching the opening, use gentle superficial technique and avoid repeated traumatic insertion.
- Observe breathing and heart rate where relevant, and stop if the patient deteriorates or bleeding occurs.
Care, cleaning and storage
Use a single-patient device or reprocess as the manufacturer permits; dry the interior fully if reusable.
Important precautions
Do not routinely suction a well newborn, including after meconium exposure. Unnecessary suction can cause trauma and delay ventilation.
Related guidance: Resuscitation Council UK: Newborn resuscitation and support of transition of infants at birth: 2025 Guidelines.
047. Manual suction machine
A manual suction machine uses hand or foot power to generate negative pressure. It is useful when electrical suction is unavailable or as a checked backup.
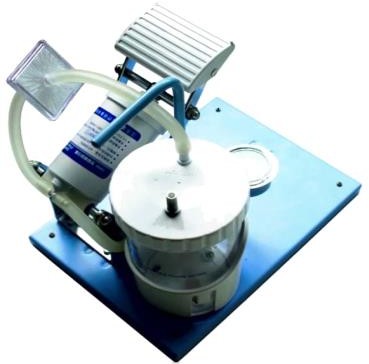
Identification and distinguishing features
The unit usually has a pump, collection bottle, tubing, connector and sometimes a gauge or overflow protection.
Uses and clinical purpose
- Remove obstructing secretions or fluids using an appropriate suction catheter or tip.
- Provide backup suction in an emergency or a resource-limited setting.
Nursing responsibilities and patient care
- Test suction, assembly, tubing and bottle seal before the emergency occurs.
- Choose the correct patient-contact device and pressure according to age, route and protocol; monitor the patient during use.
- Keep the collection bottle upright and below its fill limit, and ensure suction does not delay oxygenation or ventilation.
Care, cleaning and storage
Empty safely, change or reprocess patient-contact parts as instructed and maintain filters and valves.
Important precautions
Excessive or prolonged suction can cause hypoxaemia and mucosal injury. A functioning pump does not guarantee a safe suction technique.
048. Vulsellum forceps
Vulsellum forceps grasp and steady the cervix or other selected firm tissue during gynaecological procedures. Their toothed ends hold securely but can injure tissue.
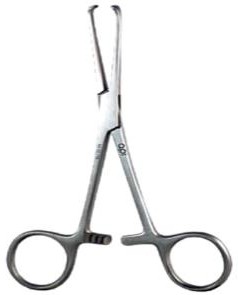
Identification and distinguishing features
Long shafts, finger rings, a ratchet and opposing toothed jaws are characteristic; tooth patterns vary.
Uses and clinical purpose
- Stabilize the cervix during selected uterine procedures.
- Provide controlled traction when the clinician requires alignment of the cervix and uterine canal.
Nursing responsibilities and patient care
- Prepare the correct sterile pattern and support consent and suitable analgesia.
- Observe traction and assist the operator without pulling on the instrument independently.
- After release, assess the grasping site and monitor bleeding and pain during recovery.
Care, cleaning and storage
Inspect tooth alignment and the ratchet and clean the toothed tips carefully before processing.
Important precautions
Avoid traumatic use on delicate or unsuitable tissue; cervical bleeding or tearing must be recognized promptly.
049. Umbilical cord scissors
Cord scissors are scissors used to divide the cord after the required clamps have been applied. They must cut cleanly without causing traction on the baby or contaminating the stump.

Identification and distinguishing features
They are sturdy scissors with short or curved blades; some designs have blunt ends to reduce accidental injury.
Uses and clinical purpose
- Divide a correctly clamped umbilical cord at birth.
- Assist selected cord procedures within a trained maternity workflow.
Nursing responsibilities and patient care
- Ensure the appropriate clamp arrangement and timing have been decided by the birth team.
- Keep the baby, maternal tissue and staff fingers clear of the blades before cutting.
- Inspect the newborn cord for haemostasis and account for scissors and clamps after use.
Care, cleaning and storage
Check sharpness and blade alignment and reprocess reusable scissors through the approved instrument pathway.
Important precautions
Do not cut before checking which side is securely clamped. Follow the birth protocol rather than applying one timing rule to every situation.
050. Kocher forceps
Kocher forceps are toothed locking clamps used to grasp tough tissue securely. The terminal tooth differentiates them from many non-toothed artery forceps.
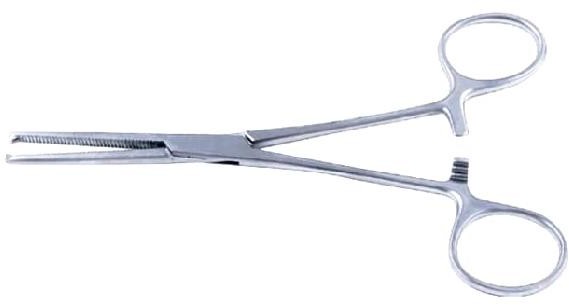
Identification and distinguishing features
Finger rings, ratchet, serrated jaws and a characteristic tooth-and-recess at the tip are typical.
Uses and clinical purpose
- Hold firm tissue such as fascia during selected surgical steps.
- Clamp tissue where a secure traumatic grip is specifically appropriate.
Nursing responsibilities and patient care
- Inspect the tip closely so a toothed instrument is not passed as a smooth haemostat.
- Select the size requested and protect neighbouring structures from the teeth.
- Maintain the instrument count and check for jaw damage after forceful use.
Care, cleaning and storage
Clean the tooth recess and serrations carefully; remove instruments with damaged tips or a slipping ratchet.
Important precautions
Do not use a toothed Kocher to grasp delicate bowel, vessels or other structures requiring an atraumatic hold.
051. Proctoscope
A proctoscope is a short instrument used to inspect the anal canal and lower rectum. It permits direct examination when symptoms or findings justify the procedure.
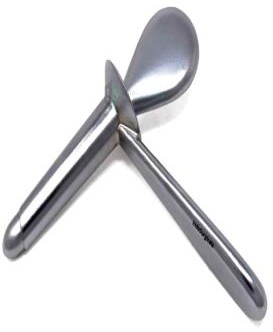
Identification and distinguishing features
A hollow tubular body with a handle is supplied with an obturator for insertion; illumination may be separate or built in.
Uses and clinical purpose
- Examine selected anorectal symptoms such as bleeding or a suspected local lesion.
- Facilitate a targeted procedure or specimen collection by a trained clinician.
Nursing responsibilities and patient care
- Explain the intimate examination, obtain consent and offer a chaperone according to policy.
- Prepare the correct size, light, lubricant and collection equipment; assist positioning and draping.
- Watch for pain, bleeding, dizziness or a vasovagal response and provide aftercare and documentation.
Care, cleaning and storage
Inspect the tube and obturator and process reusable parts according to their mucosal contact and manufacturer instructions.
Important precautions
Severe pain or resistance requires reassessment, not forceful advancement. The correct name is proctoscope.
052. Uterine packing forceps
Packing forceps place or retrieve packing material in a selected cavity or operative area. The intended site and exact pattern must be confirmed rather than inferred from length alone.
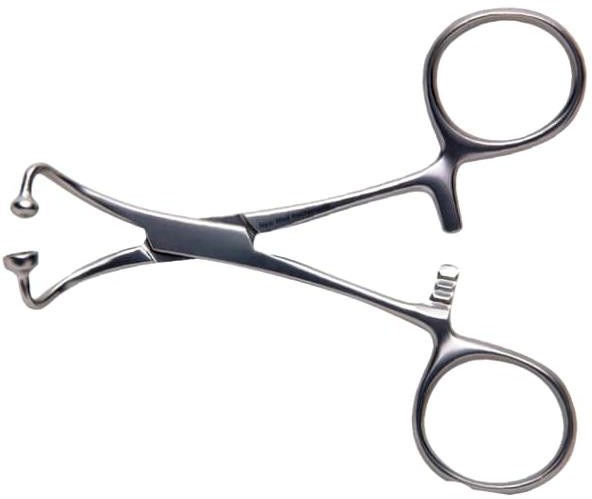
Identification and distinguishing features
Common patterns have long slender shafts and narrow jaws, sometimes with a curve or locking mechanism; models differ.
Uses and clinical purpose
- Place or remove prescribed vaginal or uterine packing within a defined specialist procedure.
- Carry a strip of packing to a controlled location under appropriate visualization.
Nursing responsibilities and patient care
- Confirm the specific procedure, material and plan for removal with the clinician.
- Record the type, number and length where required, and leave a clearly documented removal plan.
- Monitor bleeding, pain, vital signs and the effect of any packing on urinary drainage or comfort.
Care, cleaning and storage
Check jaw function and clean narrow spaces and joints before appropriate reprocessing.
Important precautions
Packing must not be left without documentation and review. It does not replace definitive treatment of uncontrolled bleeding.
053. Tenaculum forceps
A tenaculum is a sharp-pointed grasping instrument used to hold and stabilize tissue, especially the cervix during selected gynaecological procedures. It permits controlled traction.
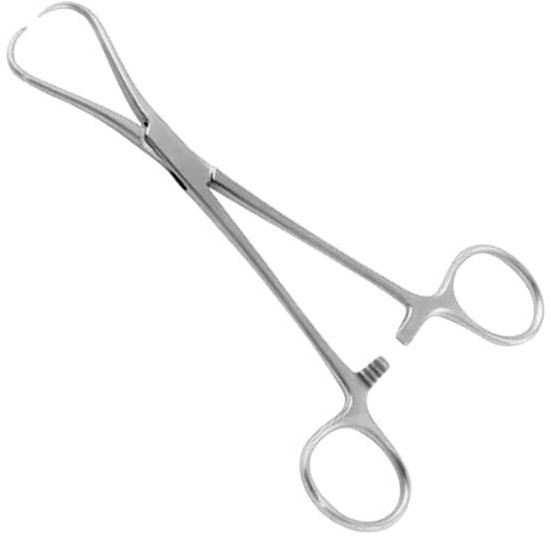
Identification and distinguishing features
Long shafts and finger rings end in one or a small number of sharp opposing hooks, usually with a ratchet.
Uses and clinical purpose
- Stabilize the cervix during selected intrauterine procedures.
- Help align the cervical canal when the operator judges traction necessary.
Nursing responsibilities and patient care
- Prepare the correct sterile pattern and support explanation, consent and pain management.
- Keep sharp tips controlled during passing and avoid unrequested traction on the attached instrument.
- Assess the puncture site and monitor bleeding, pain or faintness after release.
Care, cleaning and storage
Protect the tips and inspect their alignment; clean hinges and hook recesses before processing.
Important precautions
The hooks penetrate tissue and can cause bleeding or a tear, especially with excessive traction.
054. Uterine sound
A uterine sound is a graduated instrument used by a trained clinician to assess the direction and depth of the uterine cavity when indicated. It is not a general screening device.
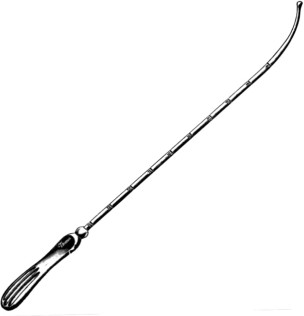
Identification and distinguishing features
A slender, often gently curved shaft has depth markings and a rounded working tip, with a handle for controlled movement.
Uses and clinical purpose
- Assess uterine cavity length and direction before selected procedures.
- Help the operator choose or position equipment appropriately when sounding is part of the procedure.
Nursing responsibilities and patient care
- Confirm the indication, consent, relevant pregnancy assessment and appropriate aseptic preparation.
- Prepare the correct sterile sound and ensure the clinician can read the markings clearly.
- Record the measured depth and direction if requested, and watch for severe pain, bleeding or suspected perforation.
Care, cleaning and storage
Check tip smoothness, shaft integrity and legibility of markings before reprocessing.
Important precautions
Never force a sound through resistance or treat sounding as harmless routine manipulation.
055. Sterilization drum / instrument drum
A sterilization drum is a reusable container designed to hold compatible supplies during a validated sterilization and storage process. A closed metal drum alone is not proof that its contents are sterile.
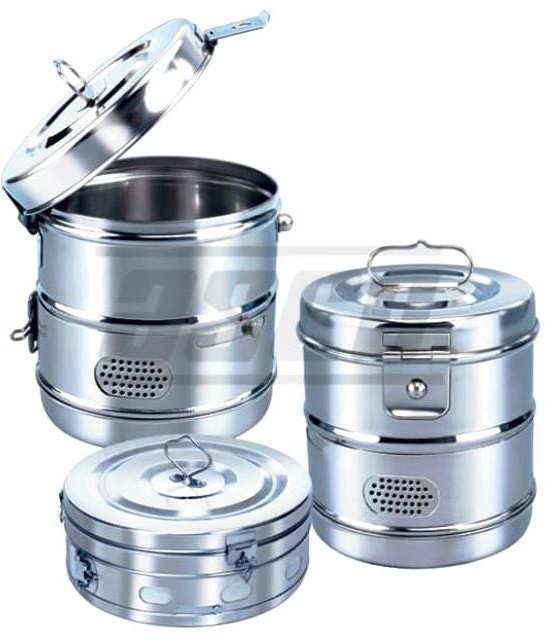
Identification and distinguishing features
Traditional drums have a lid, locking catch and adjustable vents; approved modern container systems may use filters or valves.
Uses and clinical purpose
- Hold suitable dressings or instruments during an approved processing cycle.
- Present and store processed supplies only where the drum system has a validated barrier and handling method.
Nursing responsibilities and patient care
- Check the container design, loading arrangement, vent position and cycle requirements against the approved system.
- Verify process indicators, package integrity, dryness and traceability before releasing contents for use.
- Open aseptically and avoid repeated unprotected access that contaminates remaining supplies.
Care, cleaning and storage
Inspect the lid, seals, vents, filters and catches; follow the manufacturer maintenance and replacement schedule.
Important precautions
Do not use a traditional unvalidated drum as indefinite sterile storage, or treat an indicator colour change alone as proof of a successful cycle.
Related guidance: Centers for Disease Control and Prevention: Recommendations for Disinfection and Sterilization in Healthcare Facilities.
056. Ophthalmoscope
An ophthalmoscope is an illuminated instrument for examining the red reflex and internal eye structures such as the optic disc and retina. The examination requires appropriate technique and interpretation.
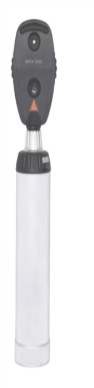
Identification and distinguishing features
A lighted head has an aperture, viewing window and lens-selection wheel; it attaches to a battery or powered handle.
Uses and clinical purpose
- Assess the red reflex and examine visible fundal structures.
- Support assessment of selected visual symptoms or systemic conditions affecting the eye.
Nursing responsibilities and patient care
- Explain the examination and ask about discomfort, visual symptoms and any planned dilating drops.
- Provide suitable room lighting, check the light and lenses, and assist the patient to maintain the requested gaze.
- Record the examination findings and escalate sudden visual loss, severe eye pain or another urgent symptom.
Care, cleaning and storage
Clean patient-contact and hand-contact surfaces with compatible products; protect optics from immersion and scratching.
Important precautions
A poor view is not a normal result. Do not administer dilating drops without the appropriate prescription or protocol.
057. Tracheostomy tube
A tracheostomy tube maintains an airway through a surgically created opening in the neck into the trachea. Tube care must be matched to the patient, tube type and maturity of the tract.
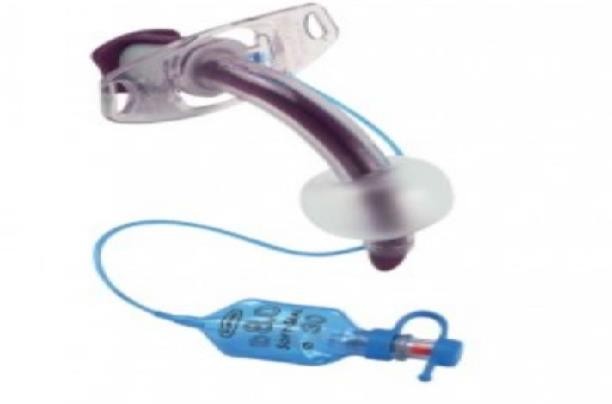
Identification and distinguishing features
Parts may include an outer tube, flange, inner cannula, obturator and cuff with pilot balloon. Not every tube has every component.
Uses and clinical purpose
- Maintain an airway where upper-airway access is bypassed or prolonged support is needed.
- Permit ventilation and secretion management as part of an individualized airway plan.
Nursing responsibilities and patient care
- Know the tube type, size, cuff status and emergency plan; keep the prescribed emergency equipment accessible.
- Secure the tube appropriately, assess skin and stoma, provide humidification and suction only when indicated.
- Watch for increasing effort, noisy or absent airflow, falling oxygenation, bleeding or displacement and call for urgent airway assistance.
Care, cleaning and storage
Handle the inner cannula and reusable parts exactly as instructed; replace single-use parts and keep an appropriate spare tube available.
Important precautions
A new displaced tracheostomy is an airway emergency; blind reinsertion can create a false passage.
058. Inhaler
An inhaler delivers a prescribed medicine to the respiratory tract. Pressurized metered-dose inhalers, dry-powder devices and soft-mist inhalers require different techniques.
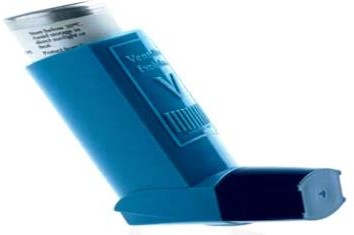
Identification and distinguishing features
The illustrated pressurized device has a canister, actuator and mouthpiece; a compatible spacer can reduce coordination demands.
Uses and clinical purpose
- Deliver bronchodilator or other prescribed inhaled therapy.
- Provide maintenance treatment or symptom relief according to the medicine and action plan.
Nursing responsibilities and patient care
- Check the exact medicine, dose counter and device type; distinguish reliever from maintenance therapy.
- Demonstrate the device-specific technique and ask for a return demonstration, using a spacer when indicated.
- Assess response and adverse effects; advise mouth rinsing after inhaled corticosteroids according to product instructions.
Care, cleaning and storage
Clean the mouthpiece, actuator and spacer as directed, keeping parts dry where required; check expiry and remaining doses.
Important precautions
Do not teach one breathing pattern for every inhaler. Severe breathlessness or poor response requires clinical reassessment.
059. Crocodile forceps / alligator forceps
Crocodile forceps have a long narrow shaft with jaws that open at the distal end. They allow selected objects or material to be grasped in a confined space under direct vision.
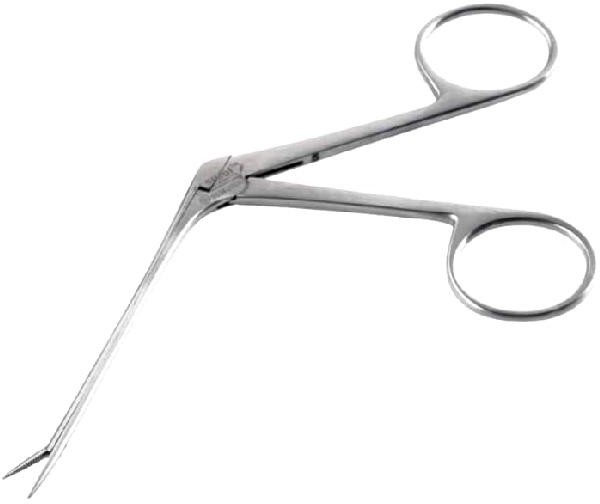
Identification and distinguishing features
Finger rings control a small hinged tip; the shaft remains narrow while only the distal jaws open.
Uses and clinical purpose
- Retrieve an accessible foreign body during an appropriate ear or nasal procedure.
- Handle small materials in a narrow field using the correct specialist pattern.
Nursing responsibilities and patient care
- Confirm the site, lighting and visualization equipment before the procedure.
- Help stabilize and reassure the patient; children may need specialist support rather than repeated unsuccessful attempts.
- Watch for bleeding, pain or displacement of the object and stop for reassessment if the procedure becomes unsafe.
Care, cleaning and storage
Inspect the fine hinge and jaw alignment and protect the tip during cleaning and processing.
Important precautions
Do not blindly grasp deep foreign bodies. Button batteries require urgent specialist management because rapid tissue injury can occur.
060. Nebulizer
A nebulizer converts a prescribed liquid medicine into an aerosol that the patient inhales. It is a delivery system, not a medicine and not automatically an oxygen source.
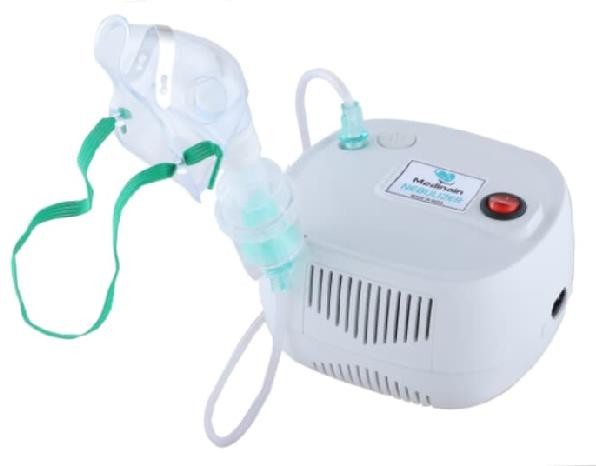
Identification and distinguishing features
A compressor or gas source connects to a medicine chamber and mouthpiece or mask; mesh and ultrasonic models use different mechanisms.
Uses and clinical purpose
- Deliver an appropriate prescribed inhaled medicine when a nebulizer is indicated.
- Support treatment of selected respiratory conditions under an assessed clinical plan.
Nursing responsibilities and patient care
- Check the medicine, dose, diluent, device and driving gas or flow required by that model and patient plan.
- Position the patient comfortably, assemble the chamber correctly and encourage the instructed breathing pattern.
- Monitor symptoms, pulse, respiratory effort and oxygenation where indicated; assess response and escalate deterioration.
Care, cleaning and storage
Use patient-dedicated equipment where specified, discard leftover solution and clean, disinfect and dry components according to instructions.
Important precautions
Do not use unprescribed solutions or assume a compressor-driven nebulizer corrects hypoxaemia. Apply respiratory-infection precautions appropriate to the situation.
Related guidance: Centers for Disease Control and Prevention: Recommendations for Disinfection and Sterilization in Healthcare Facilities.
061. Tongue depressor
A tongue depressor gently lowers the tongue to improve the view of the mouth and pharynx. It is used with adequate light and a clear reason for examination.
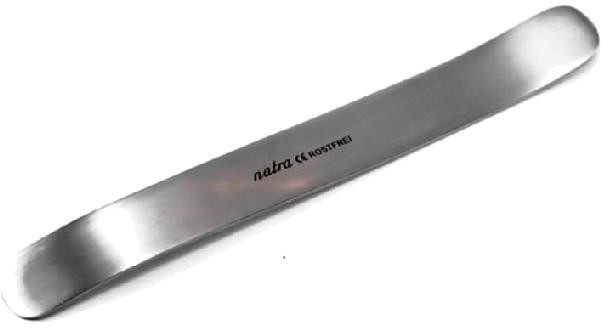
Identification and distinguishing features
A flat broad spatula may be single-use wood or reusable metal, often with rounded ends.
Uses and clinical purpose
- Inspect the oral cavity and selected throat findings.
- Assist collection of an appropriate oral or throat specimen without unnecessary contact.
Nursing responsibilities and patient care
- Explain the examination and assess the patient ability to cooperate.
- Use gentle pressure on the appropriate part of the tongue and avoid provoking unnecessary gagging.
- Observe lesions, swelling or secretions and document findings rather than diagnosing from redness alone.
Care, cleaning and storage
Discard a wooden depressor after use; reprocess reusable metal versions according to their mucosal contact.
Important precautions
Do not put a depressor into the mouth during a seizure. Avoid throat instrumentation in a child with suspected epiglottitis outside a controlled specialist airway setting.
062. Pinard fetoscope / fetal stethoscope
A Pinard fetoscope is an acoustic instrument for listening to the fetal heart through the maternal abdomen. It requires skill in positioning and distinguishing the fetal heart from maternal sounds.
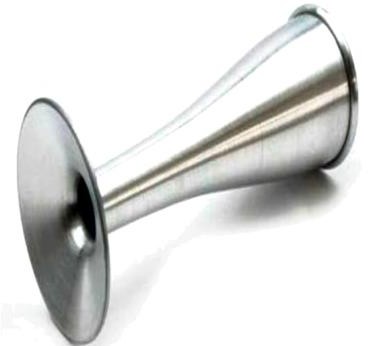
Identification and distinguishing features
A hollow trumpet-shaped tube has a broad abdominal end and a smaller listening end; wood, metal and plastic patterns exist.
Uses and clinical purpose
- Auscultate the fetal heart during antenatal assessment or labour when suitable.
- Support intermittent fetal monitoring within the applicable maternity protocol.
Nursing responsibilities and patient care
- Locate the likely fetal back and explain the examination before placing the instrument.
- Check the maternal pulse at the same time when needed to avoid mistaking it for the fetal heart.
- Count and document according to the protocol, including timing in relation to contractions during labour, and escalate an abnormal or uncertain finding.
Care, cleaning and storage
Clean the contact surfaces between patients and inspect for cracks or damage that affects sound transmission.
Important precautions
Failure to hear a heartbeat requires reassessment; do not make a definitive diagnosis from one unsuccessful attempt.
063. Allis tissue forceps
Allis forceps are ratcheted graspers with multiple interlocking teeth. They hold tissue firmly but cause tissue trauma at the grasping point.

Identification and distinguishing features
Finger rings and a ratchet lead to short jaws with several teeth at the tip.
Uses and clinical purpose
- Hold firm tissue or tissue intended for excision during selected operations.
- Provide traction where a traumatic grasp is acceptable to the surgeon.
Nursing responsibilities and patient care
- Inspect the teeth and confirm the requested pattern before passing.
- Avoid substituting an Allis where the surgeon needs a gentler bowel or tubal grasp.
- Maintain safe passing, asepsis and instrument counts, and report any broken tooth immediately.
Care, cleaning and storage
Clean between the teeth and around the box joint; protect the working end from impact.
Important precautions
Do not use on delicate viable bowel or vessels that require an atraumatic hold.
064. Auvard weighted vaginal speculum
An Auvard speculum retracts the posterior vaginal wall using the weight of its handle. It helps provide exposure during selected vaginal procedures.
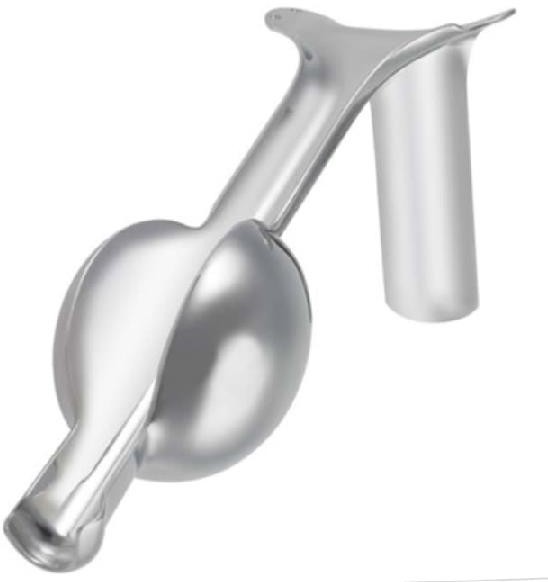
Identification and distinguishing features
A single trough-shaped blade joins a heavy weighted handle that hangs outside the vagina.
Uses and clinical purpose
- Maintain posterior-wall retraction during selected vaginal surgery or procedures.
- Free an assistant from continuous manual retraction when the clinical setting is suitable.
Nursing responsibilities and patient care
- Explain the procedure, support consent and prepare the correct size and operative position.
- Check that the weight hangs safely and does not pull excessively or press against neighbouring tissue.
- Observe for slipping, excessive pressure or tissue injury and assist controlled removal when requested.
Care, cleaning and storage
Inspect the blade, weight connection and surfaces for damage and send through the appropriate reprocessing pathway.
Important precautions
Do not leave the instrument unattended where movement or loss of support could cause a fall or tissue injury.
065. Cervical dilator
A cervical dilator is used by a trained clinician to gradually enlarge the cervical canal for a selected procedure. Mechanical dilators come in a series of sizes.
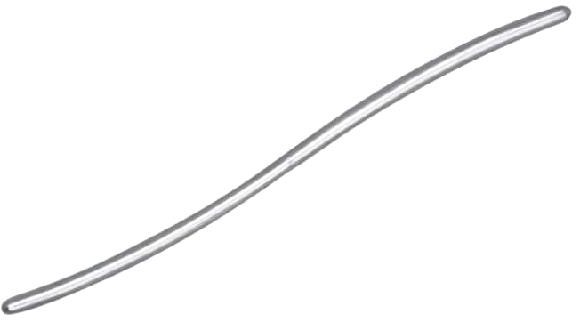
Identification and distinguishing features
The pictured Hegar-type pattern is a smooth, curved, often double-ended metal rod with size markings.
Uses and clinical purpose
- Prepare the cervix for a clinically indicated intrauterine procedure when mechanical dilation is appropriate.
- Provide a graded opening rather than attempting to force a large instrument through a narrow canal.
Nursing responsibilities and patient care
- Arrange the requested sizes in order and check that markings are legible.
- Support consent, analgesia, aseptic technique and any prescribed cervical preparation.
- Observe for pain, bleeding or deterioration and document the procedure and recovery findings.
Care, cleaning and storage
Check smoothness, curvature and integrity; protect against damage and reprocess as a surgical instrument.
Important precautions
Force can create a false passage, cervical tear or uterine perforation. Resistance requires reassessment by the operator.
066. Enema can / irrigation can
An enema can holds fluid that flows through tubing into the rectum for a prescribed purpose. Its use requires assessment because rectal procedures can worsen some conditions.
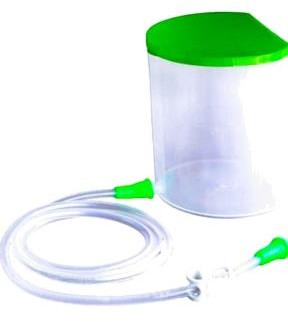
Identification and distinguishing features
A reservoir connects to tubing, a flow-control clamp and an appropriate rectal nozzle or catheter.
Uses and clinical purpose
- Administer a prescribed rectal solution for selected constipation or preparation needs.
- Deliver controlled gravity irrigation where a specific protocol authorizes it.
Nursing responsibilities and patient care
- Confirm the indication, solution, prescribed volume and relevant contraindications; assess pain, bleeding and recent surgery.
- Provide privacy, use the trained technique and control pressure and temperature according to the protocol.
- Stop for significant pain, resistance, bleeding or collapse, and document the fluid given and result.
Care, cleaning and storage
Use suitable patient-contact equipment and clean and dry reusable components as instructed.
Important precautions
Do not give an enema for unexplained acute abdominal pain or suspected obstruction without clinical assessment. Avoid improvised solutions and excessive pressure.
067. Endoscope
An endoscope allows inspection of internal spaces through a tube containing an optical or digital viewing system. Flexible gastrointestinal endoscopes also have channels for suction, irrigation or accessories.
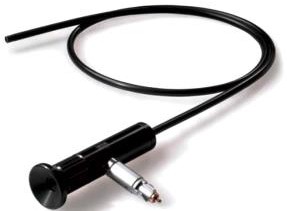
Identification and distinguishing features
A flexible insertion tube or rigid shaft connects to a viewing system; flexible models have controls and internal channels.
Uses and clinical purpose
- Inspect a defined internal area for diagnosis.
- Guide biopsy, retrieval or treatment using compatible accessories in a specialist setting.
Nursing responsibilities and patient care
- Verify consent, preparation and any sedation plan; check allergies and relevant medicines as directed.
- Assist identity and procedure checks, monitor the patient and handle specimens with accurate site labelling.
- Observe recovery and report severe pain, bleeding, breathing difficulty or other procedure-specific complications.
Care, cleaning and storage
Follow the full model-specific cleaning, leak-testing, channel processing, disinfection or sterilization and drying pathway with traceability.
Important precautions
Surface wiping alone cannot clean internal channels. Processing requirements depend on device design and intended contact.
Related guidance: Centers for Disease Control and Prevention: Recommendations for Disinfection and Sterilization in Healthcare Facilities.
068. Penlight / examination torch
A penlight provides a directed light for bedside examination. It is useful for pupil assessment and inspection of superficial structures where a bright, controlled beam is needed.
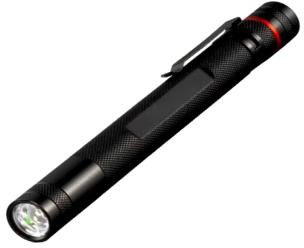
Identification and distinguishing features
A small handheld light has a switch and battery compartment; some include a pupil-size comparison scale.
Uses and clinical purpose
- Assess pupil size, symmetry and response to light within a neurological examination.
- Illuminate the mouth, skin or another accessible area during assessment.
Nursing responsibilities and patient care
- Check the light before use and explain that brief eye illumination may be uncomfortable.
- Compare pupils under similar conditions and record size and response, alongside consciousness and other findings.
- Escalate a new neurological change or sudden visual symptom promptly rather than relying on the torch finding alone.
Care, cleaning and storage
Wipe hand-contact surfaces and replace weak batteries; avoid fluid entering the device.
Important precautions
Do not shine unnecessarily prolonged or excessively intense light into the eyes, especially in vulnerable infants.
069. Mucus extractor
A mucus extractor collects secretions through a patient-contact tube into a small chamber. It is used for selected suction or specimen tasks when the device is appropriate.
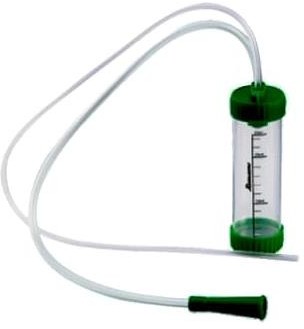
Identification and distinguishing features
A graduated collection chamber connects to tubing and a patient tip; some designs include a protective filter and a suction connector.
Uses and clinical purpose
- Remove a specific obstructing secretion when indicated.
- Collect respiratory material using a suitable system when a diagnostic specimen is requested.
Nursing responsibilities and patient care
- Check the device type, flow direction, protective filter and compatible suction source before use.
- Use gentle trained technique only for a defined indication and observe breathing and heart rate where appropriate.
- Label any diagnostic specimen correctly and arrange safe disposal or transport of the chamber.
Care, cleaning and storage
Use a sealed single-use or appropriately processed device and prevent contaminated fluid from entering the suction system.
Important precautions
Do not apply unprotected mouth suction or routinely suction a healthy newborn. A device without reliable exposure protection is unsuitable.
Related guidance: Resuscitation Council UK: Newborn resuscitation and support of transition of infants at birth: 2025 Guidelines.
070. Laryngoscope
A laryngoscope is an illuminated instrument used by a trained airway practitioner to view the larynx during airway management. It does not itself ventilate the patient.
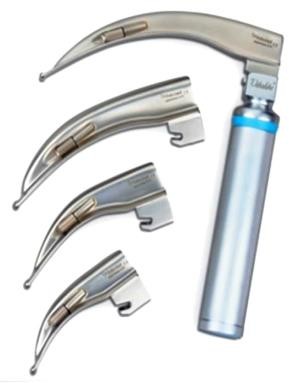
Identification and distinguishing features
A handle attaches to a straight or curved blade; direct and video laryngoscopes have different viewing systems.
Uses and clinical purpose
- Expose the glottis during tracheal intubation.
- Assist selected airway examination or removal of an obstruction under direct vision.
Nursing responsibilities and patient care
- Check the blade, light, handle and backup equipment before use, and prepare oxygenation, suction and confirmation equipment.
- Assist the operator while monitoring the patient and limiting avoidable interruption of ventilation.
- After intubation, help secure the tube and verify placement using the appropriate clinical and carbon-dioxide monitoring methods.
Care, cleaning and storage
Separate and process blade and handle as instructed; inspect batteries, contacts and mechanical locks.
Important precautions
Using the teeth as a fulcrum can cause injury. Repeated unsuccessful attempts require an airway escalation plan.
071. Tonsil-holding forceps
Tonsil-holding forceps grasp the tonsil during selected ear, nose and throat surgery. Their shape permits access while the surgeon works around the held tissue.
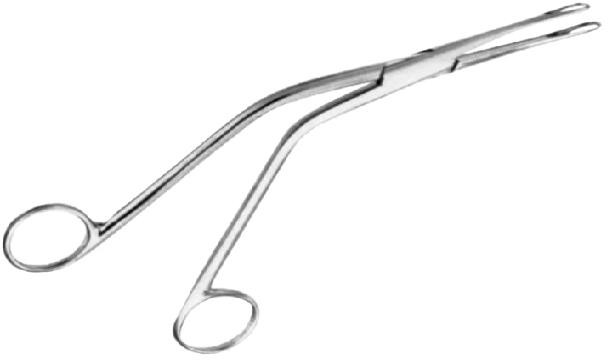
Identification and distinguishing features
Long angled shafts lead to grasping jaws, usually with finger rings and a locking mechanism; the named pattern determines the jaw design.
Uses and clinical purpose
- Stabilize the tonsil during tonsillectomy or another selected procedure.
- Provide controlled traction to expose the operative area.
Nursing responsibilities and patient care
- Prepare the requested sterile pattern and coordinate with the airway and surgical teams.
- Keep the instrument controlled so it does not strike the teeth or interfere with the airway device.
- Maintain counts and observe the operative and recovery plan for bleeding and airway risk.
Care, cleaning and storage
Clean jaw recesses and hinges carefully, and inspect for loose or damaged components.
Important precautions
Post-tonsillectomy bleeding or repeated swallowing of blood requires urgent assessment; the instrument name does not reduce that risk.
072. Tonsil scissors
Tonsil scissors are long surgical scissors used for controlled cutting or dissection during selected tonsil procedures. Their length allows work in the oral surgical field.
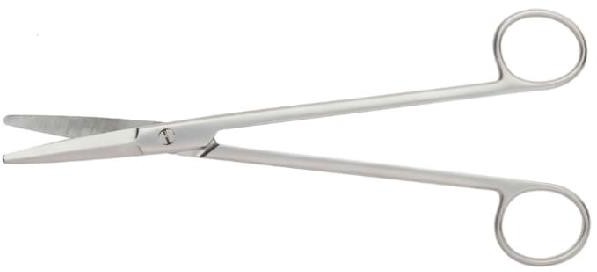
Identification and distinguishing features
They have finger rings, long shanks and straight or curved blades; tip shape varies by pattern.
Uses and clinical purpose
- Dissect or divide tissue during an appropriate tonsil operation.
- Cut selected tissue in a confined field with the surgeon controlling the working ends.
Nursing responsibilities and patient care
- Confirm the required pattern and check sharpness and blade alignment.
- Pass safely, protect lips and teeth and avoid contact with the airway equipment.
- Include the scissors in counts and assist postoperative observation for bleeding, breathing difficulty and pain.
Care, cleaning and storage
Remove tissue residue from the joint and blades and reprocess through the surgical-instrument pathway.
Important precautions
Do not use blunt, misaligned scissors or cut where the working tips cannot be safely controlled.
073. Nasal dressing forceps
Nasal dressing forceps place or remove dressing material within the nasal cavity during selected procedures. The angled shape helps the operator work while maintaining a view of the tip.
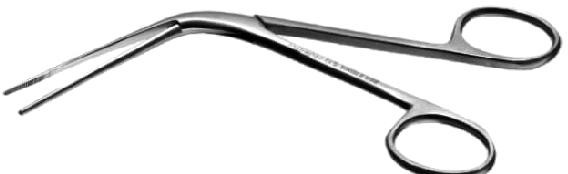
Identification and distinguishing features
Long slender jaws and an angled shaft are controlled by finger rings; many patterns do not require a locking ratchet.
Uses and clinical purpose
- Place or retrieve prescribed nasal packing under appropriate visualization.
- Handle dressings or accessible material during an ear, nose and throat procedure.
Nursing responsibilities and patient care
- Prepare lighting, suction and the correct packing, and assist patient positioning.
- Record the packing type, side and removal plan, and observe breathing and swallowing discomfort.
- Monitor recurrent bleeding or deterioration and communicate clearly during handover if packing remains in place.
Care, cleaning and storage
Check alignment and clean the long jaws and joint before appropriate processing.
Important precautions
Do not force the instrument blindly or remove packing without the prescribed plan, especially where significant bleeding may recur.
074. Tracheal dilator
A tracheal dilator opens an operative tracheal incision during selected tracheostomy procedures. It is a specialist instrument, not a routine bedside airway adjunct.
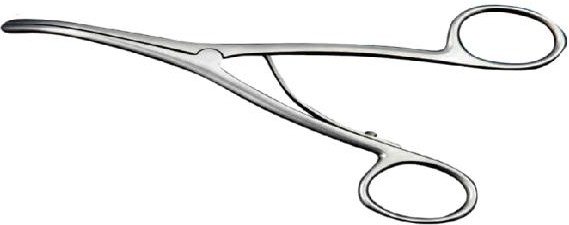
Identification and distinguishing features
Finger rings operate blunt spreading tips; the design separates the tips when the handles are manipulated.
Uses and clinical purpose
- Assist controlled opening of a tracheal incision during a surgical tracheostomy.
- Support selected specialist tube-placement tasks within an airway plan.
Nursing responsibilities and patient care
- Prepare the exact sterile pattern requested with the rest of the tracheostomy set.
- Coordinate with the surgical and anaesthetic teams and monitor the patient while the airway is being established.
- Account for the instrument and ensure emergency tube and ventilation equipment remain available afterward.
Care, cleaning and storage
Inspect tip smoothness, movement and alignment; clean the joint carefully before processing.
Important precautions
Do not use a dilator blindly through a newly displaced tracheostomy at the bedside; a false passage may result.
075. Hot-water bottle
A hot-water bottle provides local warmth for comfort when heat is appropriate. It can cause serious burns, particularly in people with reduced sensation or impaired ability to move.

Identification and distinguishing features
A flexible heat-resistant reservoir has a filling neck and a secure stopper; a cover prevents direct contact with skin.
Uses and clinical purpose
- Provide gentle warmth for an assessed comfort need.
- Support selected non-pharmacological care when heat is safe and not contraindicated.
Nursing responsibilities and patient care
- Assess sensation, circulation, skin integrity and the patient ability to report excessive heat.
- Use water and filling methods permitted by the manufacturer, expel excess air as directed and check the stopper and cover.
- Keep away from direct skin contact, reassess frequently and remove before sleep or when the patient cannot monitor comfort.
Care, cleaning and storage
Check for cracks, perishing and leaks before each use; empty, dry and store without damaging the reservoir.
Important precautions
Never use boiling water or apply to an unconscious patient, insensate skin or poorly perfused tissue without an approved controlled-warming plan.
076. Pulse oximeter
A pulse oximeter estimates peripheral oxygen saturation and pulse rate using light transmitted through or reflected from tissue. It supports assessment but cannot replace examination of the patient.
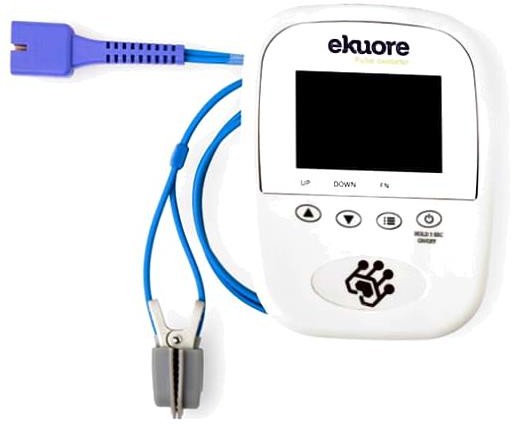
Identification and distinguishing features
A finger clip or other sensor connects to a display showing SpO2 and pulse; some models also display a waveform or signal-quality indicator.
Uses and clinical purpose
- Trend oxygenation in a patient with a relevant respiratory or circulatory concern.
- Monitor response to oxygen or other treatment within the prescribed target and observation plan.
Nursing responsibilities and patient care
- Choose the correct sensor, assess perfusion and keep the site still; check that the displayed pulse is plausible.
- Interpret the reading alongside breathing, consciousness and circulation, and repeat or obtain another assessment when findings disagree.
- Check for pressure injury during prolonged use and document the reading, oxygen device and clinical context.
Care, cleaning and storage
Clean the sensor between patients and protect optical surfaces and cables from damage.
Important precautions
Poor perfusion, movement and other factors affect accuracy; overestimation can occur with darker skin pigmentation. Do not dismiss a sick patient because the number appears normal.
Related guidance: United States Food and Drug Administration: Pulse Oximeters.
077. Glucometer / blood-glucose meter
A glucometer measures glucose in a small blood sample using a compatible test strip. It provides rapid information for assessment and monitoring, but extreme or discordant readings require action and confirmation as appropriate.
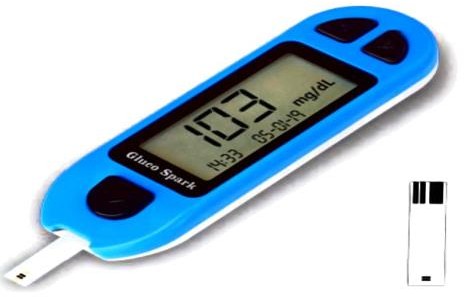
Identification and distinguishing features
A handheld meter accepts a test strip; a separate single-use lancet obtains the capillary sample.
Uses and clinical purpose
- Check blood glucose in a symptomatic patient or as prescribed.
- Monitor diabetes treatment, acute illness or a protocol requiring bedside glucose assessment.
Nursing responsibilities and patient care
- Confirm identity, units, strip compatibility, expiry and quality-control status before testing.
- Use clean dry skin and a new single-use lancet, avoid unsafe sharps handling and obtain the sample as instructed.
- Record the value and symptoms, act promptly on dangerous results under the clinical protocol and arrange laboratory confirmation when needed.
Care, cleaning and storage
Clean and disinfect a shared meter between patients using its approved method; never share fingerstick devices.
Important precautions
Do not delay treatment of a critically ill patient while repeating a meter result. Poor perfusion, contamination or incorrect strips can distort values.
Related guidance: Centers for Disease Control and Prevention: Considerations for Blood Glucose Monitoring and Insulin Administration.
078. Height board / stadiometer
A height board measures standing height using a vertical scale and movable headpiece. For infants and patients unable to stand appropriately, a different length-measuring method is needed.

Identification and distinguishing features
A stable base or fixed wall scale supports a perpendicular headpiece; the scale must be readable and correctly installed.
Uses and clinical purpose
- Measure standing height for growth, nutritional assessment or body-mass-index calculation.
- Provide a reproducible baseline for follow-up.
Nursing responsibilities and patient care
- Confirm the patient can stand safely, remove shoes and bulky headwear and position according to the measurement standard.
- Ensure the headpiece contacts the crown with the head appropriately aligned and heels supported.
- Read at eye level, record the unit and method, and repeat an implausible result.
Care, cleaning and storage
Clean the contact surfaces and check the scale, base and headpiece alignment regularly.
Important precautions
Do not record a standing height as accurate when the patient cannot maintain the required posture; document an alternative measurement method.
079. Urinometer
A urinometer is a hydrometer used to estimate urine specific gravity. It reflects the density of the sample relative to water, but does not identify the cause of an abnormal result.
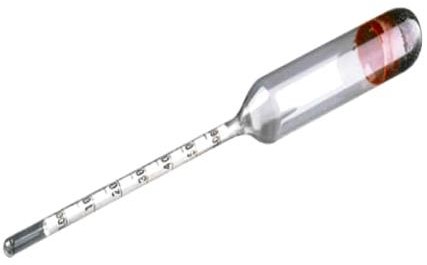
Identification and distinguishing features
A weighted floating bulb carries a graduated stem and is used in a suitable urine cylinder with enough sample for free flotation.
Uses and clinical purpose
- Estimate urine specific gravity where the method is used.
- Support assessment of urine concentration together with clinical and laboratory information.
Nursing responsibilities and patient care
- Check that the instrument and cylinder are clean, intact and suitable for the sample.
- Allow the device to float without touching the side or bottom and read the scale using the method and temperature correction specified for the instrument.
- Document the result and method and relate it to hydration status, medicines and other urine findings.
Care, cleaning and storage
Handle glass carefully, decontaminate after use and protect the weighted bulb and stem in storage.
Important precautions
Glucose, protein and some administered substances can affect specific gravity. A single reading is not a diagnosis of dehydration or kidney disease.
080. Medical goggles / protective eyewear
Medical goggles protect the eyes from anticipated splashes and sprays of blood, body fluids or chemicals. The correct design and fit depend on the exposure risk.
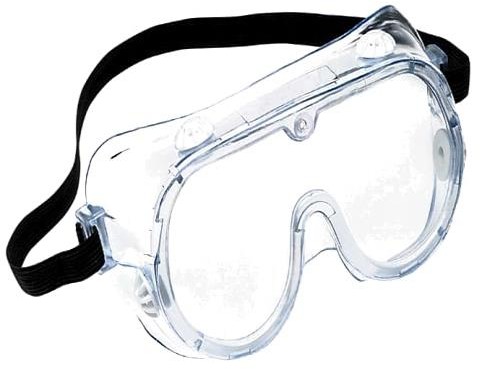
Identification and distinguishing features
They have a transparent eye-covering lens and a close-fitting frame or strap; splash-resistant ventilation and prescription-compatible designs are available.
Uses and clinical purpose
- Protect conjunctival mucosa during a procedure with splash risk.
- Provide eye protection as part of the personal protective equipment selected for the task.
Nursing responsibilities and patient care
- Choose an appropriate device, check fit and visibility and use it with other indicated protection.
- Avoid touching the front during care; remove using the strap or clean side according to the doffing sequence.
- If an exposure occurs, follow the immediate irrigation, reporting and occupational-health pathway.
Care, cleaning and storage
Clean and disinfect reusable goggles as instructed and store dry without scratching the lens; discard damaged or single-use items.
Important precautions
Ordinary spectacles may not provide adequate splash protection. Goggles do not replace a mask or respirator where one is needed.
081. Surgical drape / fenestrated drape
A surgical drape creates a barrier around the procedure site. A fenestrated drape has an opening that exposes the required area while covering neighbouring skin and surfaces.
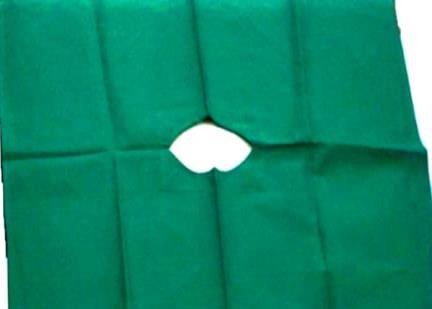
Identification and distinguishing features
It may be reusable textile or single-use material; sterile drapes have packaging and performance characteristics appropriate to the procedure.
Uses and clinical purpose
- Define and maintain the operative field.
- Limit exposure and help separate prepared skin from surrounding unprepared areas.
Nursing responsibilities and patient care
- Check packaging, dryness and the required drape size before opening.
- Handle aseptically, place in a controlled movement and avoid shifting a contaminated edge back over the prepared field.
- Monitor fluid accumulation, skin pressure and access to the airway and monitoring devices.
Care, cleaning and storage
Send reusable drapes through the approved laundry and sterilization system; discard single-use drapes and any unsuitable damaged material.
Important precautions
A wet or torn barrier may allow contamination. Do not cover the patient in a way that obstructs breathing or monitoring.
082. Babcock tissue forceps
Babcock forceps grasp delicate tubular or soft structures with a broader contact area than toothed clamps. They are relatively atraumatic when used correctly, but can still injure tissue if over-tightened.
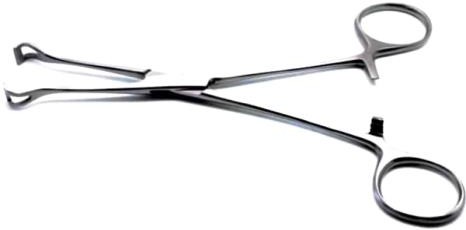
Identification and distinguishing features
Finger rings and a ratchet lead to rounded, fenestrated jaws without the sharp interlocking teeth of an Allis.
Uses and clinical purpose
- Hold selected bowel, appendix or fallopian-tube tissue during surgery.
- Provide gentle traction where a toothed traumatic clamp would be unsuitable.
Nursing responsibilities and patient care
- Identify the rounded fenestrated tips and check that the jaws meet evenly.
- Pass the correct size and avoid using a tighter ratchet setting than required by the operator.
- Maintain counts and watch for damaged jaws that could change the tissue grip.
Care, cleaning and storage
Clean the fenestrations and hinge thoroughly and inspect for distortion before processing.
Important precautions
Relatively atraumatic does not mean harmless; prolonged pressure can still damage tissue.
Related guidance: Sklar Corporation: Babcock forceps: manufacturer product reference.
083. Needle holder
A needle holder grips a surgical needle securely during suturing. Its jaw design resists rotation and helps the operator control the needle through tissue.
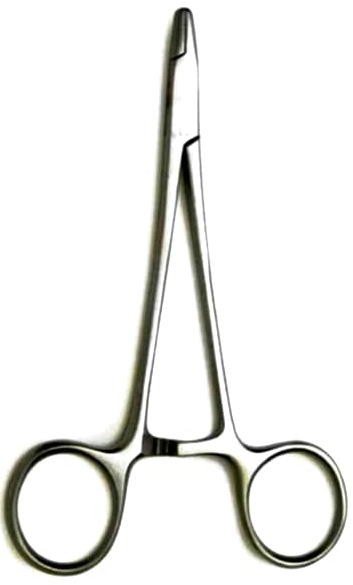
Identification and distinguishing features
Typically has finger rings, a ratchet and short strong jaws with a cross-hatched gripping surface; fine and heavy patterns differ.
Uses and clinical purpose
- Hold and drive a suitable suture needle during wound closure.
- Assist controlled suturing while reducing direct hand contact with the needle.
Nursing responsibilities and patient care
- Match the holder size to the needle and procedure and inspect jaw alignment.
- Pass using the theatre sharps-safety method or designated neutral zone and maintain awareness of the needle tip.
- Account for needles and instruments and dispose of damaged needles safely.
Care, cleaning and storage
Clean the gripping surface and joint and check for worn inserts or a slipping ratchet.
Important precautions
Do not use an ordinary artery forceps as a substitute or clamp the needle so tightly that it becomes damaged.
084. Dressing forceps
Dressing forceps handle dressings, swabs and selected materials during wound care. They may be thumb-operated or scissor-handled, and their use depends on their exact design.
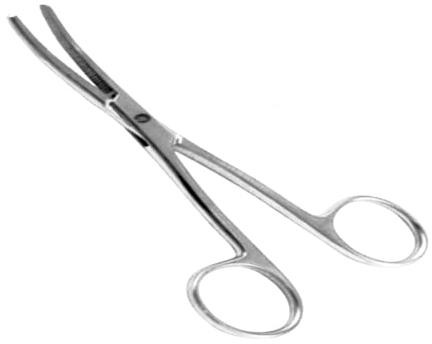
Identification and distinguishing features
The pictured pattern has finger rings and long serrated jaws; other common dressing forceps are spring-action thumb forceps.
Uses and clinical purpose
- Place or remove dressing material using the appropriate clean or sterile technique.
- Handle swabs without touching the wound-contact surface by hand.
Nursing responsibilities and patient care
- Prepare separate clean and contaminated handling areas.
- Avoid reusing a forceps that has contacted a dirty dressing to handle a fresh sterile dressing unless it has been appropriately replaced.
- Observe the wound, pain, exudate and surrounding skin and document the dressing procedure.
Care, cleaning and storage
Clean serrations and joints and process according to actual contact with the wound and the required aseptic field.
Important precautions
A forceps does not preserve asepsis if its tip touches an unclean surface. Do not use a general dressing pattern for delicate internal tissue.
085. Amniotomy hook / amnihook
An amniotomy hook is used by a trained maternity clinician to rupture the amniotic membranes when clinically indicated. Artificial rupture requires assessment because it changes the course and risks of labour.
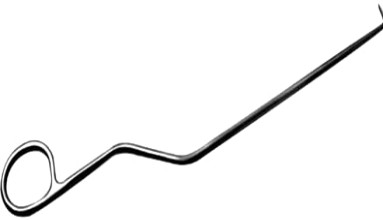
Identification and distinguishing features
A slender handle ends in a small protected hook; disposable plastic and reusable metal patterns exist.
Uses and clinical purpose
- Perform a selected artificial rupture of membranes as part of a maternity care plan.
- Allow assessment of liquor and facilitate a specifically indicated labour intervention.
Nursing responsibilities and patient care
- Confirm the indication, consent, fetal presentation and relevant risk assessment, including cord-prolapse risk.
- Prepare the device and fetal-heart assessment equipment and support the operator during the procedure.
- Assess fetal heart rate and the colour, amount and odour of liquor; document the time and promptly escalate an abnormal finding.
Care, cleaning and storage
Check packaging for a single-use device or process a reusable device as instructed; inspect the hook for damage.
Important precautions
Do not rupture membranes simply because the device is available or when the risk assessment is incomplete.
086. Bladder sound / urethral sound
A bladder or urethral sound is a solid instrument used in selected urological assessment or dilation by a trained practitioner. Historical patterns were also used to detect bladder stones.

Identification and distinguishing features
A smooth metal shaft has a curved working end and a handle; graded sounds may have size markings.
Uses and clinical purpose
- Perform a specific urethral dilation or urological procedure when indicated.
- Demonstrate a historical instrument used for assessing a suspected bladder calculus.
Nursing responsibilities and patient care
- Confirm the exact instrument and modern procedure rather than assuming every curved metal shaft is a catheter.
- Support consent, sterile preparation and the prescribed pain-management plan.
- Observe for pain, bleeding, inability to void or other signs of urethral injury after the procedure.
Care, cleaning and storage
Inspect for roughness and distortion and process through the appropriate urological-instrument pathway.
Important precautions
Do not use blind force or teach historical stone sounding as routine current diagnosis. Suspected urethral injury needs specialist assessment.
087. Dental root elevator
A root elevator is a dental instrument that applies controlled leverage or wedging to loosen a tooth or retained root. It is used by a trained dental practitioner with assessment of surrounding structures.
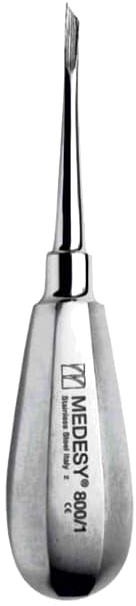
Identification and distinguishing features
A robust handle joins a narrow shaft and a shaped working blade; straight and angled patterns exist.
Uses and clinical purpose
- Loosen a tooth or root before removal with appropriate extraction forceps.
- Assist removal of a retained root when the dental assessment supports the chosen technique.
Nursing responsibilities and patient care
- Prepare the correct sterile pattern, adequate light, suction and other extraction equipment.
- Support the patient and operator while protecting soft tissues and adjacent teeth.
- Observe bleeding and recovery, provide the prescribed postoperative advice and record the procedure.
Care, cleaning and storage
Inspect the blade for chips, bending or wear and protect its working end during processing.
Important precautions
Using an adjacent tooth as an uncontrolled fulcrum can damage it. Excessive force may fracture bone or displace a root.
088. Wrigley obstetric forceps
Wrigley forceps are short obstetric forceps used in selected low or outlet assisted vaginal births by an appropriately trained operator. They assist delivery only when the clinical prerequisites are satisfied.
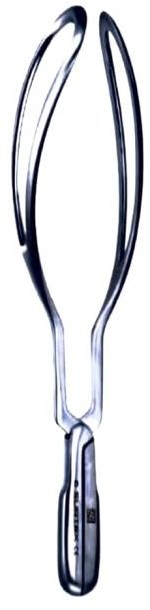
Identification and distinguishing features
A paired set of short blades with handles and a locking arrangement is shaped to accommodate the fetal head.
Uses and clinical purpose
- Assist a carefully selected birth when the fetal head position and station are suitable.
- Support an operative vaginal-birth plan with immediate assessment and backup available.
Nursing responsibilities and patient care
- Confirm that the maternity team has completed the prerequisites, consent, analgesia and preparation checks.
- Prepare maternal and newborn resuscitation equipment, monitor fetal heart findings and assist positioning without applying traction independently.
- After birth, assess maternal bleeding and trauma and the newborn condition, and document the procedure.
Care, cleaning and storage
Check that the paired components match, articulate correctly and have no rough edges; reprocess as surgical instruments.
Important precautions
Forceps application and traction require specialist competence. Stop criteria and an alternative delivery plan are essential.
089. Dental extraction forceps — straighter pattern
Dental extraction forceps grasp a tooth or root during a planned extraction after appropriate assessment and loosening. Many patterns are specific to an arch, side or tooth group.
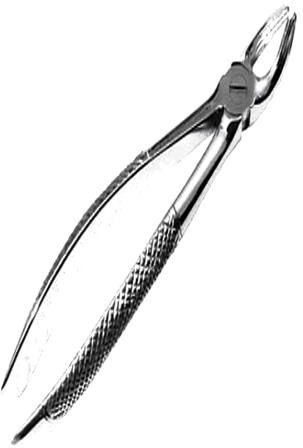
Identification and distinguishing features
The image shows textured handles, a hinge and beaks broadly aligned with the handle direction. The exact tooth-specific pattern must be checked from the instrument marking and design.
Uses and clinical purpose
- Grasp and deliver a selected tooth or root during dental extraction.
- Provide controlled movement after the practitioner confirms the appropriate forceps pattern.
Nursing responsibilities and patient care
- Check the requested pattern, grip, hinge movement and beak condition before use.
- Prepare suction, gauze and the planned haemostasis materials and support the patient during the procedure.
- Observe bleeding and recovery and provide the dental team instructions on clot protection and warning signs.
Care, cleaning and storage
Clean the hinge and beak recesses thoroughly and inspect for roughness or misalignment.
Important precautions
Do not assign a particular tooth number from this photograph alone or use an unsuitable forceps because its handles look similar.
090. Dental extraction forceps — angled pattern
Angled dental extraction forceps use a change in beak direction to reach selected teeth or roots. The exact instrument must match the dental anatomy and procedure.
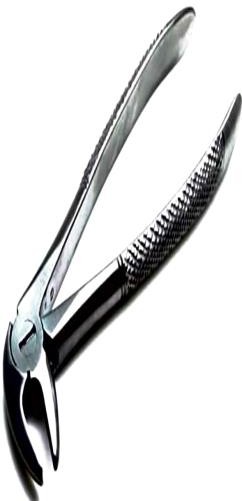
Identification and distinguishing features
The image shows a pronounced angle between the working beaks and handles; the textured handles provide a controlled grip.
Uses and clinical purpose
- Grasp an appropriately selected tooth or root during extraction.
- Provide access where the required dental pattern has angled beaks rather than a straighter arrangement.
Nursing responsibilities and patient care
- Confirm the arch and tooth-specific pattern from the actual instrument rather than from the angle alone.
- Prepare the correct extraction set and assist with retraction and suction while protecting soft tissues.
- Monitor pain, bleeding and recovery, and reinforce the prescribed aftercare and review instructions.
Care, cleaning and storage
Check beak alignment and the hinge, remove debris before it dries and reprocess as a reusable dental surgical instrument.
Important precautions
An inappropriate forceps or uncontrolled force can fracture the tooth, injure adjacent structures or displace a root.
091. Nasogastric tube
A nasogastric tube passes through the nose into the stomach for a defined feeding, medicine-delivery or decompression purpose. Correct position must be established before anything is introduced through it.
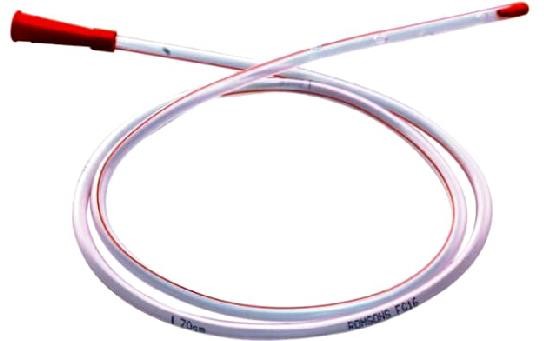
Identification and distinguishing features
A flexible radiopaque tube has length markings, drainage or feeding openings and a proximal connector; feeding and decompression models differ.
Uses and clinical purpose
- Provide enteral nutrition or suitable medicines when indicated.
- Drain or decompress the stomach using an appropriate tube and clinical plan.
Nursing responsibilities and patient care
- Assess the indication and suitability, select the correct tube and support consent and safe insertion by trained staff.
- Confirm position using an approved method: gastric aspirate pH in the accepted range or correctly interpreted X-ray when required; do not use the air-bolus listening test.
- Document confirmation and external length, secure without nasal pressure and reassess after displacement concerns and before use according to protocol.
Care, cleaning and storage
Keep connectors clean, use compatible enteral equipment and maintain patency with the prescribed flushing plan.
Important precautions
Do not feed, flush or give medicines through an unconfirmed or possibly displaced tube. For NHS guidance, the accepted aspirate range is pH 1–5.5; follow the applicable validated local policy.
Related guidance: NHS England: Medical device safety: enduring nasogastric-tube placement standards.
092. Intravenous giving set / infusion set
An intravenous giving set connects a prescribed fluid container to vascular access. It controls delivery by a roller clamp or compatible pump, depending on the set and treatment.
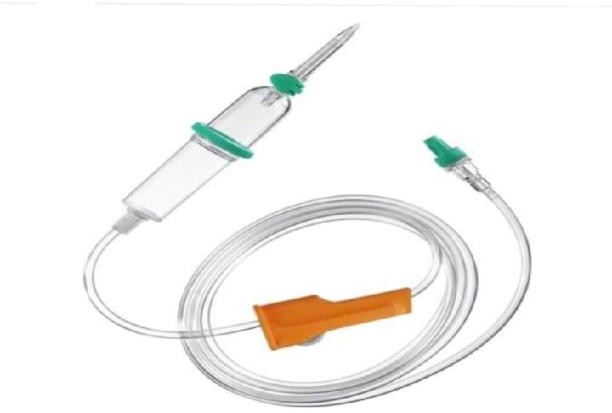
Identification and distinguishing features
A spike, drip chamber, tubing, flow controller and distal connector are typical; some sets include filters, ports or specialized pump segments.
Uses and clinical purpose
- Administer prescribed intravenous fluids or compatible medicines.
- Provide a controlled infusion route using a set appropriate to the fluid, medicine and delivery device.
Nursing responsibilities and patient care
- Check the prescription, patient, fluid, compatibility, set type and expiry before priming.
- Prime correctly, maintain aseptic connections and set the prescribed rate using the appropriate device and independent checks where required.
- Monitor the access site, patient response, fluid balance and actual infusion delivery; trace lines before any connection or change.
Care, cleaning and storage
Maintain a closed system, protect access ports and replace sets according to product, fluid type and facility policy.
Important precautions
Do not assume all sets have the same drop factor or are suitable for blood, lipids, light-sensitive medicines or every infusion pump.
093. Snellen visual-acuity chart
A Snellen chart assesses distance visual acuity using letters or symbols of progressively smaller size. The result records what the patient can resolve at a defined test distance.
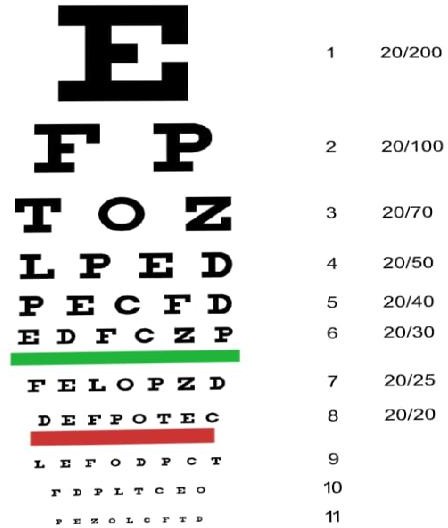
Identification and distinguishing features
Rows of optotypes carry acuity labels; standard charts may use a 6-metre or 20-foot scale, and shortened-distance systems require their own setup.
Uses and clinical purpose
- Measure and document distance vision in each eye.
- Screen for reduced visual acuity and assess change over time.
Nursing responsibilities and patient care
- Use the correct distance and lighting for that chart and record whether the patient wore usual distance correction.
- Test one eye at a time with a proper occluder, preventing peeking or pressure on the covered eye.
- Record the smallest line read according to the local method, including incomplete lines or a pinhole result if assessed.
Care, cleaning and storage
Keep the chart clean, legible and mounted correctly; replace faded or damaged charts.
Important precautions
Sudden vision loss needs urgent assessment even before formal chart testing is completed. Do not mix metric and imperial notation without conversion.
094. Aneurysm needle / ligature passer
An aneurysm needle is a curved, usually blunt ligature-passing instrument used to guide a thread around a structure. Despite its name, it is not used to puncture an aneurysm.

Identification and distinguishing features
A handle joins a curved or hooked shaft with an eye near the tip; the exact curve suits a particular approach.
Uses and clinical purpose
- Pass a ligature around a vessel or pedicle during surgery.
- Help the operator reach behind a structure under controlled visualization.
Nursing responsibilities and patient care
- Prepare the requested curve and suitable ligature material.
- Load and pass as directed without contaminating the thread or pulling on an unidentified structure.
- Account for the instrument and monitor the surgical field for bleeding as part of the operative team.
Care, cleaning and storage
Inspect the eye and tip for roughness that could damage a thread or tissue; clean the eye carefully.
Important precautions
Blind passage can injure a neighbouring vessel or nerve. The operator must know what lies behind the structure.
095. Vomit bowl / emesis bowl
A vomit bowl receives vomit or other expelled fluid during illness or a procedure. It supports hygiene and observation but does not protect an unconscious patient airway.
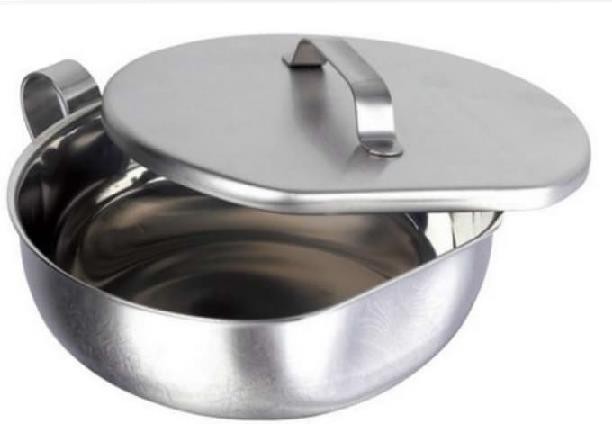
Identification and distinguishing features
A wide shallow or moderately deep bowl, sometimes with a lid, is easy to hold close to the mouth; disposable emesis bags are another option.
Uses and clinical purpose
- Receive vomitus in an alert patient who can protect the airway.
- Allow observation and measurement of emesis where clinically relevant.
Nursing responsibilities and patient care
- Help the patient into a safe position, keep the receptacle accessible and provide tissues and mouth care.
- Observe volume, colour and concerning material such as blood; record losses in fluid balance where indicated.
- Assess hydration, pain and deterioration, and urgently address reduced consciousness or aspiration risk.
Care, cleaning and storage
Empty safely and reprocess reusable bowls through the designated contaminated-container pathway; discard disposable versions.
Important precautions
Do not leave a drowsy patient supine simply because a bowl is available. Blood in vomit requires prompt clinical assessment.
096. Endotracheal tube
An endotracheal tube is placed through the mouth or nose into the trachea by an appropriately trained practitioner to support oxygenation, ventilation or airway management.
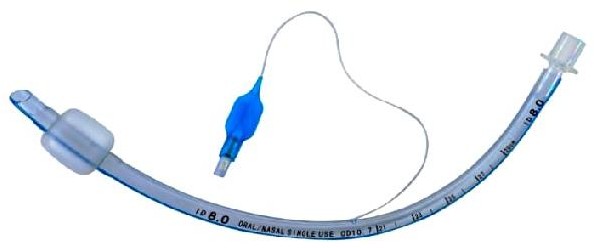
Identification and distinguishing features
A curved tube has length markings, a radiopaque line and a standard connector; cuffed versions have a cuff, pilot balloon and inflation valve.
Uses and clinical purpose
- Provide a route for assisted ventilation during anaesthesia, resuscitation or critical care.
- Maintain a tracheal airway in a patient requiring that level of support.
Nursing responsibilities and patient care
- Prepare the correct size and backup equipment and assist preoxygenation and the intubation plan.
- Help confirm tracheal placement with waveform capnography where available and required, together with appropriate clinical checks; secure and document the depth.
- Monitor ventilation, oxygenation, tube security, cuff pressure when relevant and signs of obstruction or displacement.
Care, cleaning and storage
Maintain humidification and oral care, suction only when indicated and protect the closed breathing system.
Important precautions
A tube can enter the oesophagus or move after initial confirmation. Chest movement alone is not sufficient reassurance.
097. Manual vacuum aspiration set / MVA set
An MVA set uses a hand-held vacuum source and a suitable cannula to aspirate uterine contents in selected care. It requires a trained provider, an appropriate indication and preparation for complications.
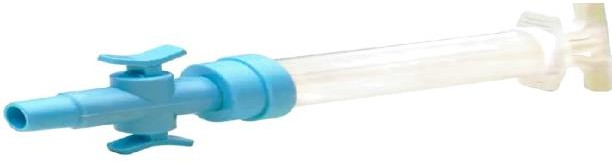
Identification and distinguishing features
The system includes a vacuum syringe or aspirator, valves and compatible cannulae in different sizes; accessories depend on the procedure.
Uses and clinical purpose
- Provide selected early uterine evacuation or post-abortion care when clinically indicated.
- Offer an appropriate vacuum method where the assessment and available service support it.
Nursing responsibilities and patient care
- Support assessment, consent, pain relief and infection-prevention measures before the procedure.
- Check the aspirator, valves, vacuum function and cannula compatibility and prepare emergency support equipment.
- Monitor bleeding, pain, pulse and blood pressure, arrange specimen assessment where needed and provide clear recovery and warning-sign advice.
Care, cleaning and storage
Follow the exact device instructions for single-use or reusable components, disassembly, cleaning and processing.
Important precautions
Uterine perforation, haemorrhage and infection are possible. Vacuum aspiration should not be followed by routine sharp curette checks.
Related guidance: World Health Organization: Abortion care guideline, second edition, World Health Organization: Clinical practice handbook for quality abortion care.
098. Four-prong retractor
A four-prong retractor holds back a wound edge or superficial tissue to improve operative exposure. Sharp and blunt versions suit different tissues and tasks.

Identification and distinguishing features
A handle or finger-ring grip joins a shaft ending in four prongs; some patterns resemble a small rake.
Uses and clinical purpose
- Retract superficial tissue during selected surgery.
- Improve visibility while the operator works in a controlled field.
Nursing responsibilities and patient care
- Identify sharp versus blunt prongs and prepare the requested size.
- Apply only the direction and tension requested and protect underlying structures from the tips.
- Release or reposition as directed to reduce sustained pressure and observe the retracted edge for injury.
Care, cleaning and storage
Protect the prongs during transport and check that none are bent, broken or loose.
Important precautions
Excessive traction or a misplaced sharp tip can tear tissue or injure a deeper structure.
099. Metal urinary catheter
A metal urinary catheter is a rigid hollow instrument used for selected bladder drainage or specialist urological tasks. Flexible sterile catheters are used for most routine catheterization.

Identification and distinguishing features
A smooth metal tube has a curved tip, drainage openings and an external handle or connector; patterns differ by intended anatomy and use.
Uses and clinical purpose
- Drain the bladder in a specifically selected situation managed by a trained practitioner.
- Demonstrate the distinction between a hollow catheter and a solid urethral sound.
Nursing responsibilities and patient care
- Confirm the indication and exact device rather than substituting it for a routine flexible catheter.
- Support consent, sterile preparation, suitable lubrication and specialist assessment where difficult catheterization is anticipated.
- Monitor pain, bleeding, urine drainage and subsequent ability to void, and report possible injury.
Care, cleaning and storage
Check that the lumen is clear and the tip and openings are smooth; use a validated cleaning and sterilization process.
Important precautions
A rigid device can cause substantial urethral injury if forced. Suspected urethral trauma or resistance requires specialist review.
100. Foley catheter, two-way
A two-way Foley catheter drains urine from the bladder and is retained by an inflatable balloon. It should be used for a defined indication and removed when no longer needed.
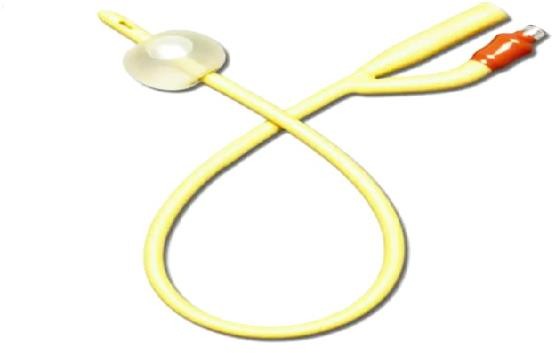
Identification and distinguishing features
One channel drains urine and the second inflates the retention balloon; size, material and balloon capacity are labelled.
Uses and clinical purpose
- Relieve selected urinary retention or provide drainage for another valid clinical indication.
- Measure urine output when the clinical need justifies an indwelling catheter.
Nursing responsibilities and patient care
- Use trained aseptic insertion, the smallest suitable catheter and the labelled balloon instructions; inflate only after correct bladder placement is established.
- Secure without traction and maintain unobstructed closed drainage, with the bag below bladder level and off the floor.
- Review the ongoing need, provide routine hygiene and document insertion, output, concerns and removal.
Care, cleaning and storage
Keep the drainage system closed and obtain samples from the designated sampling port using the approved method.
Important precautions
Do not inflate the balloon against pain or resistance, and do not use an indwelling catheter merely for staff convenience.
Related guidance: Centers for Disease Control and Prevention: CAUTI: Summary of Recommendations.
101. Three-way Foley catheter
A three-way Foley catheter has separate channels for urine drainage, balloon inflation and irrigation. It is commonly used when prescribed bladder irrigation is needed after selected urological procedures or for clot-related problems.
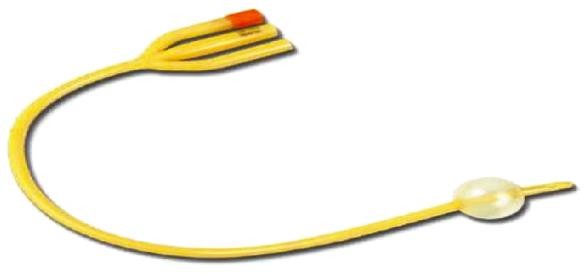
Identification and distinguishing features
Three labelled branches connect to the drainage system, balloon syringe port and irrigation line.
Uses and clinical purpose
- Provide bladder drainage with a separate route for prescribed irrigation.
- Help maintain drainage where bleeding and clot formation create an obstruction risk.
Nursing responsibilities and patient care
- Identify each port and confirm the irrigation prescription, solution and monitoring plan.
- Keep drainage unobstructed, observe colour and clots and calculate net urine output by subtracting irrigation infused from total fluid drained.
- Escalate pain, bladder distension or poor return promptly; do not continue uncontrolled inflow into an obstructed system.
Care, cleaning and storage
Maintain aseptic closed connections and secure tubing so the irrigation and drainage routes cannot be confused.
Important precautions
Manual washout or changes in irrigation require the appropriate order and competence; forceful irrigation can cause harm.
Related guidance: Centers for Disease Control and Prevention: CAUTI: Summary of Recommendations.
102. Penile sheath / external urinary catheter
A penile sheath collects urine externally through a condom-like sleeve attached to drainage tubing. It is an option for selected patients with incontinence who do not have urinary retention.
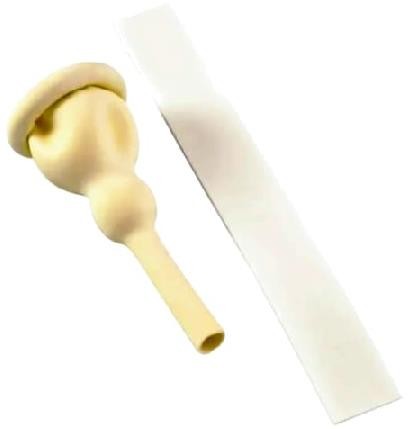
Identification and distinguishing features
A flexible sheath fits over the penis and connects to a drainage bag; attachment may be adhesive or another manufacturer-approved system.
Uses and clinical purpose
- Collect urine in an appropriately assessed male patient without inserting a urethral catheter.
- Support continence care and skin protection when the patient and device are suitable.
Nursing responsibilities and patient care
- Check skin, anatomy, circulation and ability to void, and choose the correct size.
- Apply without constriction, leave the required space at the tip and ensure tubing drains without kinking.
- Inspect the skin and seal regularly and change according to the product and care plan.
Care, cleaning and storage
Clean and dry the skin before application; discard single-use sheaths and maintain the drainage system appropriately.
Important precautions
Do not apply a tight band, ignore swelling or use a sheath to manage an undiagnosed distended bladder.
Related guidance: Centers for Disease Control and Prevention: CAUTI: Summary of Recommendations.
103. Sterilization forceps / transfer forceps
Sterilization or transfer forceps handle selected items during equipment processing or aseptic transfer. The name does not mean that the forceps sterilize anything they touch.
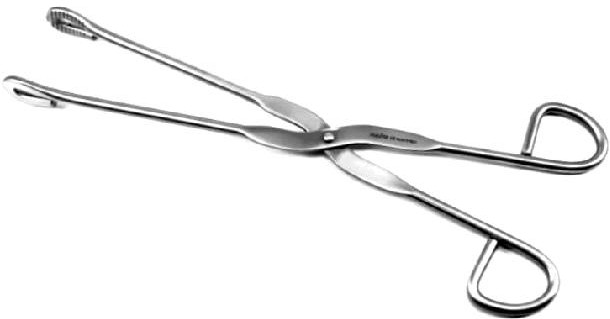
Identification and distinguishing features
Long handles and shaped grasping ends allow a controlled grip; the pictured pattern has finger rings and broad distal jaws.
Uses and clinical purpose
- Handle compatible items within an approved processing workflow.
- Transfer selected sterile articles only when the forceps and handling system remain sterile.
Nursing responsibilities and patient care
- Confirm whether the instrument is being used on the clean, contaminated or sterile side of processing.
- Use a secure grip and keep unsterile handles and surrounding surfaces away from sterile contents.
- Change the instrument or method immediately if contamination occurs.
Care, cleaning and storage
Clean and process according to its intended role and inspect gripping surfaces and joints.
Important precautions
A disinfectant jar is not a validated substitute for sterile storage. Do not lift hot heavy containers with an unsuitable forceps.
104. Right-angle forceps / right-angle clamp
A right-angle clamp has a working end angled approximately perpendicular to its shaft. It helps pass a ligature or dissect around a structure in a controlled operative field.
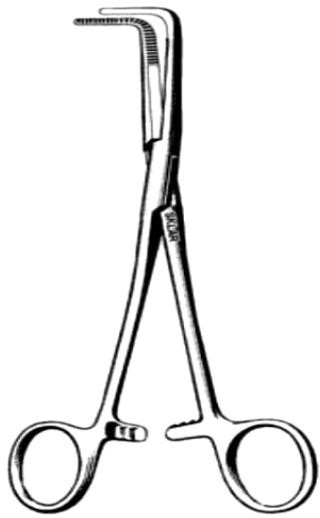
Identification and distinguishing features
Finger rings, a ratchet and a sharply angled pair of jaws are characteristic; the length and angle vary between patterns.
Uses and clinical purpose
- Pass ligatures around vessels or pedicles during surgery.
- Assist careful dissection where the angle improves access and visualization.
Nursing responsibilities and patient care
- Select the requested pattern and check that the jaws close evenly.
- Prepare the ligature as directed and pass the instrument with the angled tip controlled.
- Maintain awareness of nearby structures and account for the clamp during instrument counts.
Care, cleaning and storage
Clean the angled jaws, serrations and joint and inspect for distortion or rough edges.
Important precautions
Do not pass blindly behind an unidentified structure or use the clamp as an uncontrolled lever.
105. Lane tissue-holding forceps
Lane tissue forceps are strong grasping instruments used for selected firm tissue during surgery. Named patterns vary, so the actual jaw design must be checked.
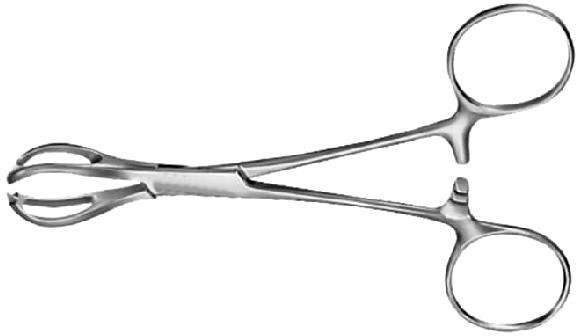
Identification and distinguishing features
A ring-handled locking instrument has broad, often fenestrated working jaws with a firm gripping surface; inspect the tips for teeth or serrations.
Uses and clinical purpose
- Hold tough tissue where a secure grasp is appropriate.
- Provide traction on selected surgical tissue under the operator direction.
Nursing responsibilities and patient care
- Confirm the exact pattern requested rather than relying on the surname alone.
- Check jaw alignment and avoid substituting a strong traumatic grasper for a gentle tissue instrument.
- Maintain safe passing and counts and report damage or a slipping grip.
Care, cleaning and storage
Clean jaw recesses and the joint thoroughly and remove forceps with defective tips or locking mechanisms.
Important precautions
A strong hold can crush or tear tissue. Do not assume every broad-jawed forceps is atraumatic.
106. Duval tissue forceps / Duval lung forceps
Duval forceps have broad triangular fenestrated jaws that spread the grip over a larger area. They are commonly associated with handling lung tissue and may have other selected soft-tissue uses.
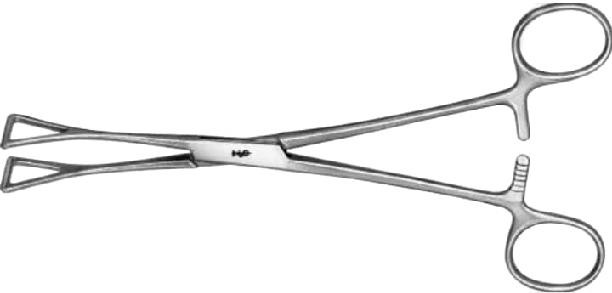
Identification and distinguishing features
Long shafts with finger rings and a ratchet end in triangular open jaws.
Uses and clinical purpose
- Grasp selected delicate tissue during an operation when the pattern is suitable.
- Provide controlled traction over a broader surface than a narrow pointed clamp.
Nursing responsibilities and patient care
- Recognize the triangular jaw pattern and confirm the intended tissue with the operator.
- Use the requested size and avoid excessive ratchet pressure or prolonged traction.
- Inspect the instrument after use and maintain operative counts.
Care, cleaning and storage
Clean inside the triangular fenestrations and around the hinge and check for distortion.
Important precautions
The original label may associate Duval with intestinal handling, but suitability must be judged from the actual instrument and tissue; it is not a universal bowel clamp.
107. Sinus forceps
Sinus forceps are slender instruments used to explore or gently open an accessible tract or cavity during selected surgical procedures. Many common patterns have no locking ratchet.
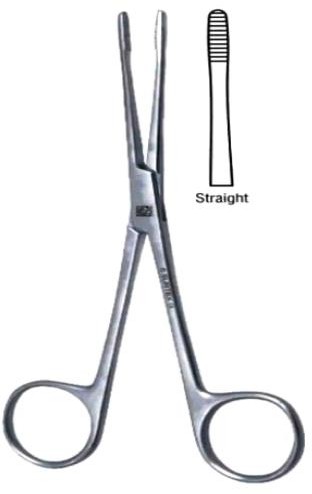
Identification and distinguishing features
Long narrow jaws may be straight or curved and end in relatively blunt tips; the absence of a ratchet permits a controlled non-locking action.
Uses and clinical purpose
- Assist exploration or drainage of a suitable abscess cavity after clinical assessment.
- Handle material or gently separate tissue in a selected tract under trained control.
Nursing responsibilities and patient care
- Confirm the intended procedure and prepare sterile equipment, specimen containers and dressing materials.
- Support visualization and pain relief and avoid encouraging forceful blind exploration.
- Observe bleeding, pain and systemic deterioration and document drainage and the aftercare plan.
Care, cleaning and storage
Inspect tips and joint movement and clean narrow serrations and spaces before processing.
Important precautions
A sinus may lead near important structures; an instrument must not be forced into an unexplained tract.
108. Scalpel handle / blade holder
A scalpel handle securely mounts a compatible disposable surgical blade for precise cutting. The handle and blade are separate components with a defined fitting system.
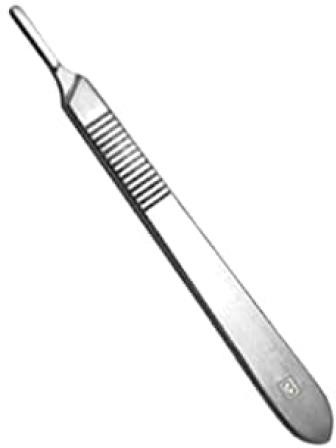
Identification and distinguishing features
A flat or shaped metal handle has a slotted mounting end and often textured grip; handle numbers match specific blade families.
Uses and clinical purpose
- Hold an appropriate surgical blade during incision or controlled dissection.
- Permit blade selection for the tissue and procedure without replacing the reusable handle each time.
Nursing responsibilities and patient care
- Check handle-blade compatibility and mount using the approved instrument-assisted or safety-device method.
- Pass through the designated neutral zone or other approved sharps-safe method and keep the blade tip controlled.
- Remove with an approved blade remover or instrument technique and discard directly into a sharps container; account for blades and handle.
Care, cleaning and storage
Clean the mounting slot and grip, inspect for damage and sterilize the reusable handle through the validated pathway.
Important precautions
Never mount or remove a conventional blade with bare fingers or leave a loose blade hidden under a drape.
Compare commonly confused instruments
On a phone, swipe the table sideways to read all columns.
| Instruments | Main distinction | Nursing implication |
|---|---|---|
| Artery forceps and needle holder | A haemostat compresses tissue; a needle holder controls a suture needle with short strong gripping jaws. | Do not exchange them merely because both have finger rings and a ratchet. |
| Mosquito and larger artery forceps | Mosquito forceps have fine small jaws for smaller structures. | Select the requested size and pattern; a small instrument can still crush tissue. |
| Allis, Kocher and Babcock | Allis and Kocher use a traumatic toothed grip; Babcock has rounded fenestrated jaws. | Match the grasp to the tissue and avoid excessive ratchet pressure. |
| Babcock and Duval | Babcock has rounded fenestrated jaws; Duval has broad triangular fenestrated jaws. | Confirm the actual pattern and intended tissue instead of treating all fenestrated forceps as identical. |
| Sims, Cusco and Auvard specula | Sims is usually hand-supported, Cusco is self-retaining and bivalve, and Auvard uses a weighted handle. | Prepare the correct type, size, assistance and positioning for the procedure. |
| Vulsellum and tenaculum | Both stabilize tissue, but common vulsellum patterns have multiple teeth while a tenaculum has one or a few sharp hooks. | Expect possible puncture-site bleeding and avoid uncontrolled traction. |
| Uterine sound, dilator and curette | The sound measures; the dilator enlarges the canal; the curette samples or scrapes tissue in a selected procedure. | Confirm the indication and order of preparation without assuming one replaces another. |
| Two-way and three-way Foley catheters | Two-way: drainage and balloon. Three-way: drainage, balloon and irrigation. | Identify every port and subtract irrigation from total drainage when calculating urine output. |
| Penile sheath and urethral catheter | A sheath collects externally voided urine; a urethral catheter drains the bladder. | A sheath does not relieve urinary retention. |
| Otoscope and ophthalmoscope | The otoscope views the ear canal and eardrum; the ophthalmoscope views internal eye structures. | Use the correct head, light and examination technique. |
| Oropharyngeal airway and endotracheal tube | An oral airway supports upper-airway patency; an endotracheal tube sits in the trachea for advanced airway support. | Patient selection, confirmation and ongoing monitoring are different. |
| Kidney dish and vomit bowl | Both may receive fluid, but the kidney dish fits closely beside a body area while a bowl provides a broader receptacle. | Choose the size and cleanliness required, and assess the patient rather than only collecting fluid. |
How to answer an instrument-identification question
- Name it precisely. Use the accepted name and an appropriate synonym. If a named subtype is uncertain, describe the working end instead of inventing a label.
- Describe the identifying parts. Mention the tip, jaw shape, teeth, fenestrations, curve, ratchet, channels or measuring scale that distinguish the instrument.
- State a specific use. Name the clinical task and explain how the instrument helps. For example, a Babcock distributes a grasp over rounded jaws for selected delicate tissue.
- Prepare for safe use. Discuss patient assessment, consent, size, function, clean or sterile technique and any essential accompanying equipment.
- Give a relevant precaution. Choose a risk particular to that device: pressure injury, tissue trauma, misplacement, inaccurate reading, contamination or wrong connection.
- Explain aftercare and processing. State what to monitor, what to document and whether the item is discarded or reprocessed according to its instructions.
Frequently asked revision questions
What are the main types of medical instruments used by nurses?
They include assessment tools, bedside care appliances, surgical cutting and grasping instruments, retractors, airway and respiratory devices, enteral equipment and urinary drainage devices. Grouping by function helps revision, but the actual instrument design determines safe use.
How do I distinguish similar surgical forceps?
Inspect the working end before the handles. Look for teeth, rounded or triangular fenestrations, the jaw length, curve and locking mechanism. Then relate the design to the tissue: a secure traumatic grip is different from a broad gentler hold.
Does a stainless-steel instrument need sterilization?
Material alone does not determine processing. An instrument entering sterile tissue requires a sterile condition; other contact categories have different requirements. The device must tolerate the chosen validated process, and it must be cleaned first.
Can boiling or soaking in antiseptic replace sterilization?
Do not label an item sterile simply because it was boiled, soaked or stored in a covered container. Use the validated process and packaging system required for that device and its intended clinical contact.
Are air rings recommended for pressure-injury prevention?
No. Ring or donut-shaped cushions can concentrate pressure around their edges. Use an assessed pressure-redistributing surface, repositioning and skin surveillance rather than teaching a ring as routine prevention.
Can a nasogastric tube be checked by listening after air is injected?
No. The air-bolus listening test is not an acceptable placement confirmation method. Use the approved gastric aspirate pH process or an appropriately interpreted X-ray when indicated, and do not use a tube whose position is unconfirmed.
Should every newborn be suctioned with a bulb syringe?
No. A well newborn does not need routine suction, and unnecessary suction may delay effective ventilation. Assess for a real obstruction and follow the trained newborn-resuscitation pathway.
Does a normal pulse-oximeter reading exclude respiratory failure?
No. Readings can be inaccurate and do not measure carbon dioxide or ventilation. Assess breathing, consciousness and circulation and escalate a clinically unwell patient even when the displayed saturation appears reassuring.
What does three-way mean on a Foley catheter?
There is a drainage channel, a balloon-inflation channel and an irrigation channel. When irrigation is used, the total drained volume includes irrigation fluid; subtract the infused irrigation to estimate net urine output.
Can the same instrument be used for every patient after wiping?
No. The required processing depends on the device, intended contact and manufacturer instructions. A superficial wipe is unsuitable for instruments with internal channels or devices that require high-level disinfection or sterilization.
Clinical references and further reading
These sources support the safety updates and selected clinical principles in this guide. Exact device instructions, approved local protocols and the patient assessment remain essential. References were checked during preparation on 15 October 2026.
- Centers for Disease Control and Prevention. Recommendations for Disinfection and Sterilization in Healthcare Facilities. Cleaning before processing; critical, semicritical and noncritical device principles.
- Centers for Disease Control and Prevention. CAUTI: Summary of Recommendations. Appropriate catheter indications, closed drainage and review of ongoing need.
- NHS England. Medical device safety: enduring nasogastric-tube placement standards. Approved placement checks and avoidance of the air-bolus listening test.
- United States Food and Drug Administration. Pulse Oximeters. Interpretation, limitations and factors affecting accuracy.
- NPIAP, EPUAP and PPPIA International Guideline. Seating: pressure-injury prevention guidance. Pressure redistribution and avoidance of ring or donut-shaped cushions.
- Resuscitation Council UK. Newborn resuscitation and support of transition of infants at birth: 2025 Guidelines. Avoidance of routine newborn suction and prioritization of effective ventilation.
- Centers for Disease Control and Prevention. Considerations for Blood Glucose Monitoring and Insulin Administration. Single-use fingerstick devices and cleaning of shared glucose meters.
- World Health Organization. Abortion care guideline, second edition. Vacuum aspiration and recommendations against routine sharp curettage for early surgical evacuation.
- World Health Organization. Clinical practice handbook for quality abortion care. Assessment, preparation and supportive care around uterine evacuation.
- Northern Care Alliance NHS Foundation Trust. Audiology: clearance of earwax. Controlled irrigation and relevant contraindications.
- Sklar Corporation. Babcock forceps: manufacturer product reference. Named instrument pattern and model-specific product identification.
- World Health Organization. Surgical care at the district hospital. Foundational district-hospital surgical context; this older manual is read alongside current device instructions and clinical guidance.