
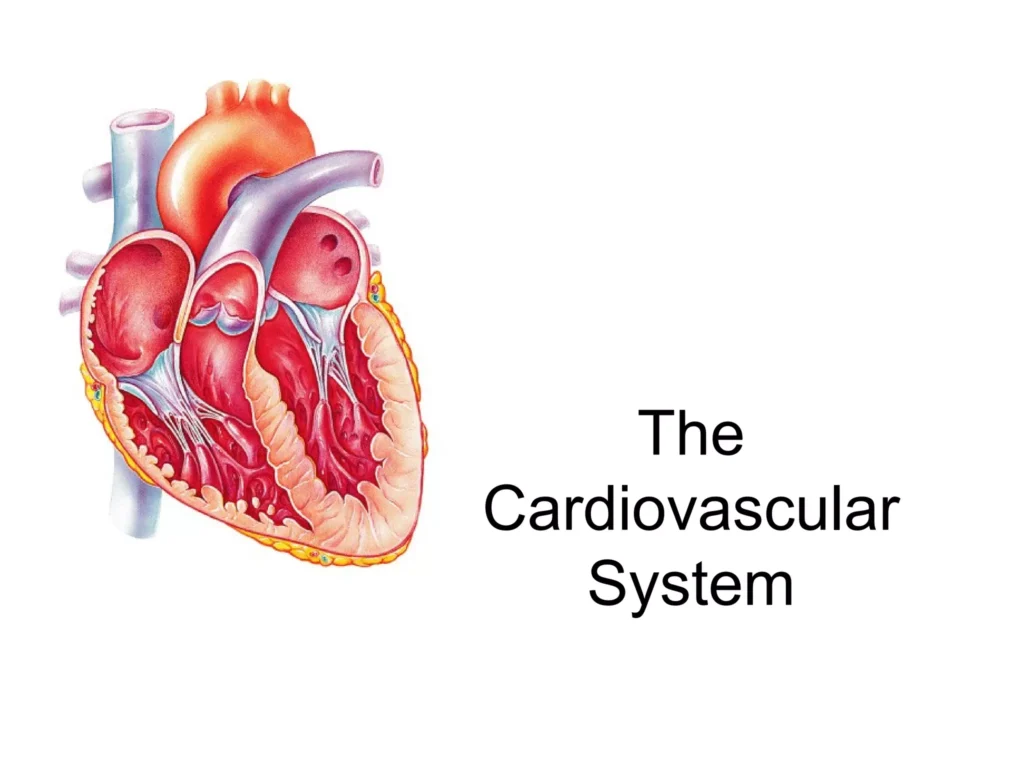
By the end of this session, the nursing student should be able to:
- Take a focused cardiovascular history using symptom-based questions.
- Perform general inspection, vital signs, pulse, and blood pressure assessment correctly.
- Assess Jugular Venous Pressure (JVP), precordium, heart sounds, murmurs, and peripheral perfusion.
- Recognize urgent cardiovascular findings and communicate them clearly to the medical team.
- Document findings using accepted clinical language and avoid vague terminology.
- Detect evidence of cardiovascular disease, complications, and patient deterioration.
- Establish a baseline in patients with risk factors (e.g., hypertension, diabetes) or known cardiovascular disease.
- Assess circulation and tissue perfusion — remember, you are not only assessing the heart itself, but how well it delivers blood to the entire body.
- Identify findings that require urgent investigation or rapid escalation of care.
- Monitor response to treatment (e.g., diuresis in heart failure) and track changes over time.
A cardiovascular examination is a structured, systematic assessment of cardiac function, circulation, and tissue perfusion. It is never just about listening to the chest; it encompasses the whole body from the nails to the jugular veins.
Think in a logical, systematic sequence: Prepare ➔ Observe ➔ Measure ➔ Examine ➔ Interpret ➔ Report.
- Prepare: Gather equipment, ensure safety and privacy.
- Inspect: Look before you touch.
- Measure: Obtain accurate vital signs.
- Palpate: Feel for pulses, thrills, and heaves.
- Listen: Auscultate heart sounds and extra sounds.
- Report: Document and escalate using standard frameworks like SBAR.
Patient-centered throughout: Always prioritize consent, privacy, dignity, infection prevention, and patient comfort. Balance Safety, Technique, Reasoning, and Action.
- Use a quiet, warm, well-lit room and strictly maintain patient privacy.
- Perform hand hygiene before and after the examination to prevent cross-infection.
- Equipment needed: Prepare a high-quality stethoscope, an appropriate BP cuff/device, a watch or clock with a second hand, and ensure the examination couch or bed is adjustable.
- Use a pulse oximeter when clinically indicated (e.g., shortness of breath).
- Explain the examination clearly, obtain informed consent, and expose only the area required at any given time to maintain dignity.
- Keep the patient comfortable throughout the process and stop if severe distress develops.
Introduce yourself ➔ Confirm identity ➔ Explain procedure ➔ Obtain consent ➔ Position and expose appropriately.
Patient positioning drastically alters hemodynamics and the sounds you will hear. Reposition deliberately when a maneuver is intended to change venous return or sound transmission.
- General inspection/JVP: Begin with the patient at about 30–45°. Inspect the patient from the end of the bed before moving in for focused examination.
- BP and peripheral pulses: Seated or supine as appropriate, with the arm supported at heart level.
- Apex beat/precordial palpation: Usually supine. Use the left lateral decubitus position if the apex is difficult to feel (this brings the heart closer to the chest wall).
- Mitral stenosis/low-pitched apical sounds: Listen using the bell in the left lateral position.
- Aortic regurgitation: Have the patient sitting up, leaning forward, and holding their breath in expiration (end-expiration).
- Edema/peripheral vascular examination: Legs adequately exposed; supine or seated.
Symptoms tell you exactly where to look during the physical examination. Always take a thorough, focused history before touching the patient.
- Chest pain: Evaluate site, character, radiation, severity, timing, triggers, relief, and associated symptoms. (Example: Use the SOCRATES mnemonic - Site, Onset, Character, Radiation, Associations, Time course, Exacerbating/Relieving factors, Severity).
- Dyspnea (Shortness of breath): Ask about exertional dyspnea, orthopnea (needing multiple pillows to sleep), paroxysmal nocturnal dyspnea (PND - waking up gasping for air), cough, or wheeze.
- Palpitations: Inquire about onset, whether the beats are regular or irregular, duration, associated syncope (fainting), and use of caffeine, alcohol, or illicit drugs.
- Swelling (Edema): Ask about ankle/leg or abdominal swelling, sudden weight gain (a key sign of fluid retention), changes in urine output, and relevant drug history (e.g., calcium channel blockers can cause pedal edema).
- Risk factors: Screen for hypertension, diabetes mellitus, smoking, kidney disease, HIV, pregnancy history (e.g., pre-eclampsia), and a family history of early cardiovascular disease.
Stand back at the end of the bed and scan the whole patient. Often, the diagnosis can be suspected from the end of the bed.
- Level of distress: Are they comfortable, dyspneic (struggling to breathe), profusely sweating (diaphoretic), confused, or collapsed?
- Position: Are they sitting upright comfortably, in a tripod position (leaning forward to breathe), or unable to lie flat (severe orthopnea)?
- Color: Look for pallor (anemia or shock), cyanosis (blue discoloration indicating hypoxia), jaundice (right heart failure causing liver congestion), or peripheral mottling (poor perfusion).
- Body habitus and nutrition: Note obesity (risk factor) or cardiac cachexia (severe muscle wasting seen in end-stage heart failure).
- Medical surroundings: Note surgical scars (e.g., midline sternotomy for bypass), devices (pacemakers), oxygen delivery, and IV lines.
- Visible signs: Look for visible precordial pulsations, increased respiratory effort, massive edema, or limb asymmetry.
Do not complete a long, comprehensive exam before acting on danger signs!
| Danger Sign Cluster 1 | Danger Sign Cluster 2 | Danger Sign Cluster 3 |
|---|---|---|
| Chest pain with sweating or radiation to arm/jaw (Query Myocardial Infarction). | Severe breathlessness or low SpO₂ (Query Pulmonary Edema / Embolism). | Syncope, shock, acute confusion, or very low BP (Query Cardiogenic Shock). |
| New focal neurologic signs or severe worst-ever headache (Query Stroke). | Pulse very fast/slow or highly irregular with symptoms (Query unstable arrhythmia). | Cold clammy skin, weak pulses, or oliguria/no urine output (Poor perfusion). |
Call for help immediately! Check ABCDE (Airway, Breathing, Circulation, Disability, Exposure), monitor vital signs, administer oxygen if indicated, request an urgent 12-lead ECG, check capillary blood glucose, establish IV access, and request an urgent medical review.
Always measure, track the trend, and interpret vital signs together. A single reading is a snapshot; the trend matters far more.
- BP (Blood Pressure): Indicates hypertension, shock, or orthostasis.
- SpO₂ (Oxygen Saturation): Reflects systemic oxygenation and peripheral perfusion.
- Pulse: Note the rate, rhythm, and volume (strength).
- Temperature: Essential for infection context (e.g., infective endocarditis, myocarditis).
- Respiratory Rate: Often the earliest physiological marker of clinical deterioration and fluid overload.
- Pain Score: Indicates chest pain severity and tracks response to analgesia/nitrates.
Small technique errors can drastically change clinical decisions and lead to misdiagnosis. Correct technique is a matter of patient safety.
- Rest: Allow the patient to rest for 3–5 minutes where possible. There should be NO talking during the measurement.
- Position: Patient must be seated with their back fully supported, feet flat on the floor, and legs uncrossed.
- Arm Placement: Arm must be supported precisely at heart level. Apply the correct cuff size directly on a bare upper arm.
- Execution: Palpate the brachial artery; place the cuff's artery marker appropriately over it. Inflate, then deflate slowly.
- Documentation: Record SBP/DBP, the arm used (Left/Right), the patient's position (Sitting/Lying/Standing), and the cuff size if non-standard (e.g., large adult).
| Error | Resulting Inaccuracy (Example) |
|---|---|
| ✕ Wrong cuff size | Too small overestimates BP; too large underestimates BP. |
| ✕ Arm unsupported | Isometric muscle contraction artificially raises diastolic pressure. |
| ✕ Patient talking | Can falsely elevate readings by 10-15 mmHg. |
| ✕ Legs crossed | Increases systolic BP due to venous pooling and muscle contraction. |
| ✕ Cuff placed over clothing | Muffles Korotkoff sounds and alters pressure dynamics. |
| ✕ Rapid deflation | Causes underestimation of systolic and overestimation of diastolic pressure. |
| ✕ No repeat reading | Fails to account for initial anxiety ("white coat syndrome"). |
Assess orthostatic (postural) BP when dizziness, falls, severe dehydration, internal bleeding, or adverse medication effects (e.g., massive vasodilation from antihypertensives) are suspected.
- Measure baseline BP and pulse after the patient has been lying supine for at least 5 minutes.
- Stand the patient safely; stay close to support them if they feel weak or are at risk of falls. (Never leave an unstable or dizzy patient standing alone!)
- Repeat the BP and pulse measurements exactly at 1 minute and 3 minutes after standing.
- Positive Result: A Systolic BP (SBP) drop of ≥20 mmHg, OR a Diastolic BP (DBP) drop of ≥10 mmHg, OR if the patient experiences profound symptomatic dizziness upon standing.
Assess much more than just the rate. You must evaluate rhythm, volume, symmetry, and character.
- Use the pads of your index and middle fingers. Never use your thumb, as it has its own strong pulse which can confuse your reading.
- Count for 30 seconds and multiply by 2 if the rhythm is perfectly regular. If it is irregular, you MUST count for a full 60 seconds.
- Describe the rhythm:
- Regular: Evenly spaced beats.
- Regularly irregular: A repeating pattern of irregularity (e.g., bigeminy, second-degree heart block).
- Irregularly irregular: Chaotic, unpredictable beats (highly indicative of Atrial Fibrillation).
- Compare pulses: Always compare radial pulses bilaterally simultaneously to check for symmetry (a delay suggests aortic dissection or coarctation). Then assess brachial, carotid, femoral, popliteal, posterior tibial, and dorsalis pedis pulses as indicated.
- Check delays: Assess radio-radial delay, and radio-femoral delay when clinically relevant.
| Grade | Clinical Description |
|---|---|
| 0 | Absent / Non-palpable |
| 1+ | Weak / Thready / Diminished (often seen in shock or severe dehydration) |
| 2+ | Normal / Expected |
| 3+ | Full / Increased |
| 4+ | Bounding (often seen in fluid overload, aortic regurgitation, or severe anxiety) |
Note: Normal adult resting pulse is typically 60–100 beats/minute. Well-trained athletes may naturally have a lower resting pulse (bradycardia).
Peripheral signs should always be interpreted in context. The hands offer a wealth of cardiovascular information.
- Temperature and perfusion: Feel the hands. Are they warm and well-perfused, or cold and clammy (shock)?
- Capillary Refill Time (CRT): Press the nail bed firmly for 5 seconds until it blanches white, then release. Normal color should return in <2 seconds in a warm room. Prolonged CRT indicates poor peripheral perfusion.
- Visual clues: Look for pallor (pale creases indicating severe anemia), cyanosis (blue nail beds), clubbing (loss of the angle at the nail bed, seen in congenital cyanotic heart disease or infective endocarditis), splinter hemorrhages (tiny linear blood streaks under nails seen in endocarditis), and tar staining (indicates a heavy smoking history).
- Other signs: Assess for peripheral edema, fine tremors, abnormal sweating, and side effects of medications.
- Functional capacity: Ask practical questions about their walking distance, ability to climb stairs, and performance of activities of daily living (ADLs) without getting breathless.
Examine both legs simultaneously to accurately describe distribution and severity.
- Expose both legs fully; inspect the ankles, shins, and specifically the sacrum if the patient is bed-bound (fluid pools in dependent areas).
- Press firmly over the bony prominence of the tibia or the medial malleolus (ankle) for 5 full seconds.
- Remove your finger and look for pitting (an indentation left behind). Estimate the depth and the time it takes to rebound.
- Compare symmetry; assess for tenderness, unnatural warmth, calf swelling, and overlying skin changes (e.g., stasis dermatitis or ulceration).
- Document the grade (see below), the anatomical site, and specify whether it is unilateral or bilateral.
| Grade | Description | Rebound Time |
|---|---|---|
| 1+ | Slight pit | Rapid rebound (almost instant) |
| 2+ | Deeper pit | Few seconds |
| 3+ | Noticeable pit | 10–20 seconds |
| 4+ | Very deep pit | >20 seconds |
Bilateral edema is common in systemic issues like heart failure. However, unilateral, painful, warm swelling is NOT "routine edema." You must immediately consider Deep Vein Thrombosis (DVT) and escalate the patient's care to prevent a fatal pulmonary embolism.
This is especially critical in patients with diabetes, hypertension, smoking history, and complaints of limb pain.
- Inspect skin color, notable hair loss on the shins/toes (a sign of chronic poor arterial flow), arterial/venous ulcers, surgical scars, and thickened nail changes.
- Compare limb temperature bilaterally using the back (dorsum) of your fingers, moving from distal to proximal.
- Palpate peripheral pulses systematically: Femoral, Popliteal, Posterior Tibial, and Dorsalis Pedis.
- Check capillary refill and sensory function (neuropathy) where appropriate.
- Ask about claudication: "Do you get severe cramping pain in your calves, thighs, or buttocks when walking, which is relieved when you stop and rest?" (Classic sign of Peripheral Arterial Disease - PAD).
Pain (acute and severe), Pallor (white limb), Pulselessness, Paresthesia (pins and needles), Paralysis (inability to move), and Poikilothermia (limb is ice cold and adapts to room temperature). This is a surgical emergency!
JVP acts as a direct clinical manometer, estimating right atrial pressure and overall systemic fluid volume status.
- Position the patient at 30–45° and ask them to turn their head slightly away from you.
- Use a tangential (side-lighting) penlight to cast shadows, helping you identify the subtle double-venous pulsation of the internal jugular vein deep to the sternocleidomastoid muscle.
- Measure the vertical height from the sternal angle (Angle of Louis) to the highest point of visible pulsation.
- Normal JVP is generally ≤3–4 cm above the sternal angle.
- Interpretation: A raised JVP strongly suggests systemic fluid overload, right-sided heart failure, pulmonary hypertension, or cardiac tamponade. Interpret this alongside other clinical findings.
- Assess the waveform and response to positioning.
- Carotid Bruit: Listen gently over the carotid artery with the bell of the stethoscope while the patient briefly holds their breath. Do not press hard, and never compress both carotids simultaneously (can cause profound bradycardia and syncope).
- Hepatojugular Reflux: Apply firm, sustained pressure to the Right Upper Quadrant (RUQ) of the abdomen for 10–30 seconds while closely observing the JVP in the neck. A sustained rise indicates the right heart cannot accommodate the increased venous return (positive in right heart failure).
Always look and feel the chest wall before you auscultate.
- Inspect the chest wall for surgical scars (e.g., pacemaker insertion, sternotomy), bony deformities (pectus excavatum), visible visible pulsations, and increased respiratory effort.
- Locate the apex beat: Normally found in the 5th intercostal space (ICS), mid-clavicular line (MCL) on the left side.
- Describe the apex: Document its exact position (is it displaced laterally? indicating cardiomegaly), size, amplitude (forcefulness), and duration.
- Palpate for heaves and thrills: Use the palm or the ulnar edge of your hand along the left sternal border. A heave feels like the chest is lifting your hand (indicating right ventricular hypertrophy). A thrill is a palpable vibration caused by turbulent blood flow (a "purring cat" sensation, indicating a loud murmur).
- Maneuver: Ask the patient to roll into the left lateral decubitus position if the apex beat is difficult to feel.
Use both the diaphragm (for high-pitched sounds like S1, S2, aortic regurgitation) and the bell (for low-pitched sounds like S3, S4, mitral stenosis). Compare areas systematically.
| Valve Area | Anatomical Location |
|---|---|
| Aortic Area | 2nd Intercostal Space (ICS), Right Sternal Border |
| Pulmonic Area | 2nd Intercostal Space (ICS), Left Sternal Border |
| Erb's Point | 3rd Intercostal Space (ICS), Left Sternal Border |
| Tricuspid Area | 4th/5th Intercostal Space (ICS), Left Lower Sternal Border |
| Mitral Area (Apex) | 5th Intercostal Space (ICS), Mid-clavicular Line |
Standard Order of Auscultation: Aortic ➔ Pulmonic ➔ Erb’s point ➔ Tricuspid ➔ Mitral.
First, train your ears to learn the normal pattern clearly before trying to identify complex murmurs.
- S1 ("lub"): Caused by the closure of the atrioventricular (mitral and tricuspid) valves at the start of systole. It is loudest near the apex.
- S2 ("dub"): Caused by the closure of the semilunar (aortic and pulmonic) valves at the end of systole. It is loudest at the base of the heart.
Systematically listen for: Rate • Rhythm • S1/S2 intensity • Added sounds (e.g., S3 gallop in heart failure, S4 in hypertension) • Murmurs • Pericardial rubs (a scratchy, sandpaper sound indicating pericarditis).
Nursing documentation must be clear, objective, and clinically useful.
- Timing: Does it occur in systole (between S1 and S2), diastole (after S2), or is it continuous?
- Location: Where on the chest wall is the sound loudest?
- Radiation: Does the sound travel to the neck (carotids - common in aortic stenosis), axilla (armpit - common in mitral regurgitation), or back?
- Intensity (Grading 1–6): A grade of 1 is faintly heard; a grade of 4 or higher is accompanied by a palpable thrill.
- Pitch/Quality: Describe it as blowing, harsh, or rumbling.
- Dynamic auscultation: Does it change with position or breathing? (e.g., murmurs on the right side of the heart typically increase with inspiration).
"Grade 3/6 harsh systolic murmur loudest at the apex, radiating to the left axilla; no palpable thrill present."
Escalate immediately if you find: A new, undocumented murmur accompanied by fever (query endocarditis), chest pain, syncope, signs of heart failure, pregnancy, or systemic sepsis.
The heart and lungs are intimately connected and must be assessed together.
- Orthopnea / PND (Paroxysmal Nocturnal Dyspnea)
- Basal crackles (Heard at the lung bases indicating pulmonary edema)
- Wheeze / persistent cough ("Cardiac asthma")
- Raised JVP
- Peripheral edema
- Profound fatigue / severely low exercise tolerance
Together, this specific constellation of signs and symptoms points heavily toward congestive heart failure or fluid overload.
Write exactly what you found, not what you assume. Avoid vague terms alone like “CVS normal”—this does not legally show what you actually assessed.
Vitals: BP 128/76 mmHg sitting, right arm, adult cuff; HR 86 regular; RR 18; SpO₂ 98% RA.
CV: Hands warm, CRT <2 sec, no cyanosis. JVP not elevated at 45°. Apex not displaced. S1/S2 normal, no added sounds or murmurs.
Peripheral: Radial pulses equal bilaterally; dorsalis pedis palpable bilaterally. No pedal edema.
Clear, structured handover saves critical time and massively reduces clinical errors.
| S | Situation | “Mr. X has acute central chest pain and is profusely sweaty.” |
| B | Background | “He has known hypertension and a history of smoking; the pain started 30 minutes ago while resting.” |
| A | Assessment | “BP is 90/60, pulse is 118 and irregular, SpO₂ is 92% on room air. I am concerned about cardiogenic shock or an MI. An ECG is pending.” |
| R | Recommendation | “Please come to the ward to review him urgently. I have started cardiac monitoring, applied oxygen, and secured IV access.” |
During the lab component, students will rotate through the following stations (Observe ➔ Perform ➔ Receive Feedback):
- Station 1: BP technique
- Station 2: Peripheral pulses
- Station 3: JVP positioning and measurement
- Station 4: Precordial palpation (Apex beat, heaves, thrills)
- Station 5: Auscultation sequence
- Station 6: Edema grading
Use this to practice consistently for your exams:
- Introduces self, confirms patient identity, explains the procedure, and obtains consent.
- Performs proper hand hygiene, positions the patient, ensures privacy, and exposes the chest respectfully.
- Takes a focused history and checks vital signs accurately.
- Inspects hands, face, chest, and overall general condition.
- Assesses pulse, BP, JVP, precordium, and auscultates all 5 sites systematically.
- Assesses peripheral edema/perfusion and communicates findings clearly to the examiner.
Scenario: A 58-year-old woman with known hypertension comes to the Outpatient Department (OPD) with shortness of breath on walking, ankle swelling, and reporting that she now needs 3 pillows to sleep at night.
Example Student Response:1. Focused History Questions:
- "When exactly did the swelling and shortness of breath start?"
- "Do you ever wake up in the middle of the night gasping for air?" (PND)
- "Have you experienced any chest pain or palpitations?"
- "Are you currently taking your hypertension medications regularly?"
2. Examination Findings to actively look for:
- Elevated JVP (fluid overload).
- Displaced apex beat (indicating cardiomegaly/enlarged heart).
- Basal crackles in the lungs on auscultation (pulmonary edema).
- Pitting edema in the ankles/shins.
- An added S3 heart sound (gallop rhythm).
3. Red Flags requiring urgent escalation:
- An SpO2 dropping below 90% on room air.
- The development of severe acute chest pain with hypotension.
4. Documentation:
- Normal finding: "Radial pulses equal and regular bilaterally at 82 bpm."
- Abnormal finding: "Grade 3+ bilateral pitting pedal edema extending to the mid-shin, with JVP elevated at 6cm above the sternal angle."
These are easily correctable with mindful practice:
- Starting auscultation immediately without performing general inspection and palpation first.
- Trying to listen to heart sounds through clothing or in a noisy, crowded room.
- Forgetting to compare radial pulses bilaterally, or forgetting to assess both legs for edema.
- Calling every extra sound heard a "murmur" without taking the time to describe its timing, location, or pitch.
- Failing to state the patient's position when documenting BP or JVP findings (e.g., BP changes depending on if they are lying or standing).
- Documenting simply “normal” without showing the exact parameters that were examined.
- Be systematic: Always follow the structure—history, vital signs, inspection, palpation, auscultation, and peripheral vascular exam.
- Technique matters: BP, pulse, and auscultation are only clinically useful when performed with strict, correct technique.
- Describe findings accurately: Avoid vague, lazy documentation. Paint a clear clinical picture for the next nurse or doctor reading your notes.
- Escalate red flags early: Never delay action for chest pain, signs of shock, syncope, severe dyspnea, or highly abnormal vital signs.
Quick Quiz
Cardiovascular Examination Quiz
Health Assessment
Privacy: Your details are used only for quiz tracking and certificates.
Cardiovascular Examination Quiz
Health Assessment
Preparing questions...
Choose your answer and keep your streak alive.
Great effort.
Here is your quick performance summary.