Medicine Introduction and General Causes of Disease
Module Unit: CN-2102 - Medical Nursing (I)
Module Unit Description
This module unit is intended for students to acquire competencies in providing high quality evidence-based nursing care in traditional as well as innovative healthcare settings. This will mainly cover introduction to medical nursing, study of conditions of circulating, respiratory systems and conditions of hematology.
Learning Outcomes
By the end of this module unit, students shall be able to;
INTRODUCTION TO MEDICINE
DEFINITION OF MEDICINE
This is the study or science of treating diseases especially by means of internal remedies (drugs) as distinct from mechanical and operative procedures which is the domain of surgery.
TERMS USED IN MEDICINE
- Health: is a state of complete physical, social, mental and spiritual wellbeing of an individual and not merely the absence of diseases or infirmity.
- Aetiology: is the study of the causes of diseases and the facts that influence their occurrence. The causes are divided into 2; the exciting cause (the micro-organism responsible for that particular disease) and predisposing causes/factors (these are factors encouraging/promoting/influencing/aggravating/precipitating the occurrence of that particular disease.
- Pathology: is the study of the disease process/developing or study of changes which occur in the diseased organs so as to produce signs and symptoms.
- Signs: are the abnormal things that we can see in a patient with our naked eyes, e.g. a rash, swelling, diarrhea, ulcer, scar, etc.
- Symptom: the abnormal things that we can not see in a patient with our naked eyes, e.g. pain, nausea, musclé ache, etc.
- Physical sign: is what is found on examination of the patient, e.g. an enlarged spleen, liver, full urinary bladder, a pregnant uterus, anaemia seen from the pale tongue and mucous membrane, fracture, sore, etc.
- Inspection: is the general observation of the patient by use of eyes only and this reveals many abnormalities such as deformity, diminished movements on the affected side of the body, etc.
- Palpation: this is feeling a patient by use of the palms of the hands for swellings (whether painful, hot, cold, smooth, fluctuant, fixed/mobile, round/irregular). It is a manual examination of the patient by placing the hands on the chest/abdomen and trying to feel the nature of underlying organs.
- Percussion: this is the tapping of the chest or abdominal wall using flat hands and fingers, then striking over them with fingers from the opposite hands. This is to detect normal sounds and abnormal ones from the underlying cavities or hollow organs as the tapping sounds are transmitted through the skin, muscles and into the cavities/organs. A dull sound in the chest indicates fluid filled cavities or consolidated hollow organ (filled and without any space), and a loud sound is heard over the normal area where the air is freely entering into the free space. The same to the abdomen and the organs contained there in.
- Auscultation: this is listening with the stethoscope on the chest wall/abdominal wall to enable the clinician/doctor/nurse to hear the normal breathe/abdominal sounds and the abnormal ones or for peristaltic movements in the abdomen in post-operative abdominally operated patients. Those with intestinal obstruction or abdominal post-operative patients who have taken 2 days may have no sounds at all.
- Complications: this is a lesion/damage/symptom which results from the original disease and not necessarily part of that disease, e.g., a complication of gonorrhea is urethral stricture, or meningitis results in paralysis if the brain was involved.
- Sequeale: is a symptom persisting after the original disease has subsided. It is a permanent complication that remains with the patient for life. The sequale of meningitis is permanent mental retardation.
- Diagnosis: is the recognition of a particular disease. It is arrived at through good history taking, physical examination and laboratory findings.
- Laboratory diagnosis: this is through identification of micro-organisms under the microscope in the laboratory to confirm the clinical diagnosis. In urgent situations, the patient should be treated according to the clinical diagnosis and not to wait for confirmation from the laboratory.
- Differential diagnosis: this is the knowledge of other diseases which resemble the disease in question and it points the difference which will help in performing a final diagnosis, e.g. malaria +meningitis are all fever causing diseases unless blood slide and lumbar puncture are done to differentiate btn the 2.
- Prognosis: is the act of foretelling how the disease will end judging from the course/progress/worsening reduction in the progress of the disease. E.g. the disease started like this, it later changed like this and it might end this way.
- Prophylaxis: this is the prevention of a disease by vaccination, giving treatment before the disease starts. It may be for an individual, or for the whole community.
- Path gnomic sign: this is a sign occurring in one disease only and not found in any other condition. When present, it affords the establishment of a certain disease. E.g., koplick’s spots in measles, polyarthritis in rheumatic fever which is shifting in nature.
- Syndrome: is a collection of signs and symptoms which constitute a special disease, e.g. Aids.
- Epidemiology: is the study of the diseases by reference to its incidence in the population, e.g., during which season, in which geographical areas, which group of people are more affected.
- Geriatric: is a branch of medicine which is concerned with the prevention of social neglect in the elderly. It is the health care given to the elderly.
- Infection: is a successful invasion of the body tissues by micro-organisms without showing any sign and symptoms.
- Inflammation: is the body’s reaction/response to infection (by developing fever in order to make the temperature unsuitable for the survival of microbes; swelling to take more cells-soldiers to the invaded area in much blood supply; pain is caused by the overstretching of a part due to swelling, due to destruction of tissues and nerves; loss of function in order for the affected part to rest and to heal without being disturbed. The inflammation can be acute or chronic.
INTRODUCTION TO DISEASES
Disease: is any alteration in the structure and function of an organ.
Types of diseases
- Communicable/infectious diseases
- Non-communicable/non-infectious diseases
Communicable/infectious diseases
Definition: Communicable disease is an illness due to specific infectious agents in its toxic products, which under certain conditions tends to spread among individuals in a community.
Period of communicability or communicable period: refers to the time during which an infectious agent may be transferred directly or indirectly from an infected person to a susceptible person. This period is usually equal to the maximum known incubation period for that disease.
Examples of Communicable / infectious Diseases
- Tuberculosis
- Cholera
- Malaria
- Meningococcal meningitis and Viral meningitis
- Plague
- HIV
- Ebola virus and Marburg virus
- Hepatitis A, B, C and E
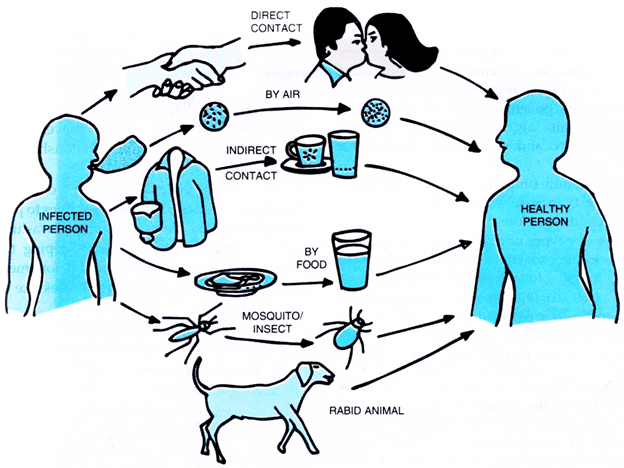
Modes of Transmission of communicable diseases
The modes of transmission may be classified into two broad categories: direct and indirect.
Direct Transmission
- Direct contact: e.g., sexual contact, kissing, etc., and continued close contact. Diseases transmitted here include STI/HIV, Leprosy, and Scabies.
- Droplet infection: Through coughs, sneezes. Diseases include common cold, TB, measles, whooping cough, meningitis, etc.
- Contact with infected soil: e.g., Tetanus, infective hookworm larvae.
- Inoculation into skin or mucosa: e.g., animal bites (dog bites - rabies) and HIV or Hepatitis B virus from contaminated needle pricks.
- Trans-placental or vertical transmission: e.g., toxoplasmosis, HIV, rubella virus, syphilis.
Indirect Transmission
- Vehicle-borne transmission: The common vehicle of transmission is water, milk, or food; other vehicles may be blood, serum, plasma, and other biological products. This group includes water-borne, milk-borne, food-borne, and blood-borne infections. Examples: enteric fever, cholera, dysentery, diarrhea, hepatitis A, B, E, food poisoning.
- Vector-borne transmission: e.g., malaria, filarial, kala-azar, and plague are transmitted by insects. The mode of transmission is vector transmission.
- Air-borne transmission: e.g., Droplet nuclei - (very small infective particles which float in the air, e.g., TB), infected dust (due to sweeping or dusty infected settled droplets on the ground).
- Fomite-borne transmission: Fomites are articles that convey infection to others because they have been contaminated, e.g., handkerchiefs, drinking glasses, door handles, clothing, etc. Highly infectious diseases, e.g., Ebola, can be easily transmitted by fomites.
Other terms used in communicable diseases
- Zoonoses: An infectious disease transmissible under natural conditions from vertebrate animals to man is called a zoonoses. There are over 150 diseases common to man and animals. Examples include anthrax, liver fluke, bovine TB, salmonellosis, brucellosis, rabies, plague, typhus, and yellow fever.
- Nosocomial infections: An infection occurring in a patient in a hospital or other healthcare facility and in whom it was not present or incubating at the time of admission or arrival at a healthcare facility is called a nosocomial infection. It refers to diseases transmitted from a hospital. Usually such infections are more difficult to manage as they are generally resistant to most of the common antibiotics. Nosocomial infections also include those infections, which were contacted in the hospital but manifested after discharge, and also infections suffered by staff members if they contacted the infection from the hospitalized patients.
- Herd Immunity: The immune status of a group of people/community is called herd immunity as it is the immune status of the 'herd' of people. For many communicable diseases, an outbreak of disease is only possible if the level of immunity is sufficiently low and there are a large number of susceptible individuals in the population. In diseases like poliomyelitis, diphtheria, measles, etc., herd immunity plays an important role. However, in a disease like tetanus or rabies where every individual is at risk unless specifically protected, herd immunity plays no role.
Factors responsible for the increased risk of infectious diseases are;
- Failure to control vectors especially mosquitoes
- Break down of the water and sanitation system.
- Failure to detect the disease early.
- Lack of immunization programmes
- High risk human behavior.
When the immune system is compromised especially in children and elderly, various conditions or diseases set in.
Control of communicable diseases
This refers to the reduction of the incidence and prevalence of communicable diseases to a level where it cannot be a major public health problem.
There are three main methods of controlling communicable diseases:
- Eliminating the reservoir (attacking the source)
- Interrupting transmission
- Primordial prevention
Eliminating the reservoir (attacking the source)
- Detection and adequate treatment of cases: This arrests the communicability of the disease, e.g., control of tuberculosis and leprosy and most sexually transmitted diseases.
- Isolation: This means that the person with the disease is not allowed to come into close contact with other people except those who are providing care; therefore, the organism cannot spread. It is used to control highly infectious diseases such as hemorrhagic viral fevers.
- Quarantine: Limitation of the movement of apparently well person or animal who has been exposed to the infectious disease for the duration of the maximum incubation period of the disease.
- Reservoir control: In those diseases that have their main reservoir in animals, mass treatment or chemoprophylaxis or immunization of the animals can be carried out, e.g., in brucellosis. Other ways include separating humans from animals or killing the animals and so destroying the reservoir, e.g., plague, rabies, and hydatid disease.
- Notification: Means immediately informing the local health authorities (e.g., the District Medical Officer) that you suspect a patient is suffering from an infectious disease.
Interrupting transmission
This involves the control of the modes of transmission from the reservoir to the potential new host through:
- Environmental sanitation
- Personal hygiene and behavior change.
- Vector control, e.g., mosquitoes
- Disinfection and sterilization
- Protection of susceptible host
- Immunization: This increases host resistance by strengthening internal defenses. It is one of the most effective controls of communicable diseases in Africa. To be more effective, immunization has to be given to a high proportion of the people (at least 80%).
- Chemoprophylaxis: Drugs that protect the host may be used for suppressing malaria and for preventing infection with such diseases as plague, meningitis, and tuberculosis.
- Personal protection: The spread of some diseases may be limited by the use of barriers against infection, e.g., shoes to prevent entry of hookworms from the soil, bed nets, and insect repellents to prevent mosquitoes.
- Better nutrition: Malnourished children get infections more easily and suffer more severe complications. Prevention and actions aimed at eradicating, eliminating, or minimizing the impact of disease and disability.
Primordial prevention
This consists of actions and measures that inhibit the emergence of risk factors in a country or population. It begins with the change in the social and environmental conditions. Examples of primordial prevention actions:
- National policies and programs on nutrition involving agricultural sector, the food industry.
- Comprehensive policies to discourage smoking
- Programs to promote regular physical activity
- Primary prevention: This is action prior to the onset of disease which removes the possibility that the disease will occur. Its objectives are to promote health, prevent exposure, and prevent disease.
- Secondary prevention: This is the action which halts the progress of a disease and limits permanent damage through early detection and treatment of disease.
- Tertiary prevention: This is to limit disabilities and to promote the patients' adjustments to irremediable conditions. Interventions include disability limitation and rehabilitation.
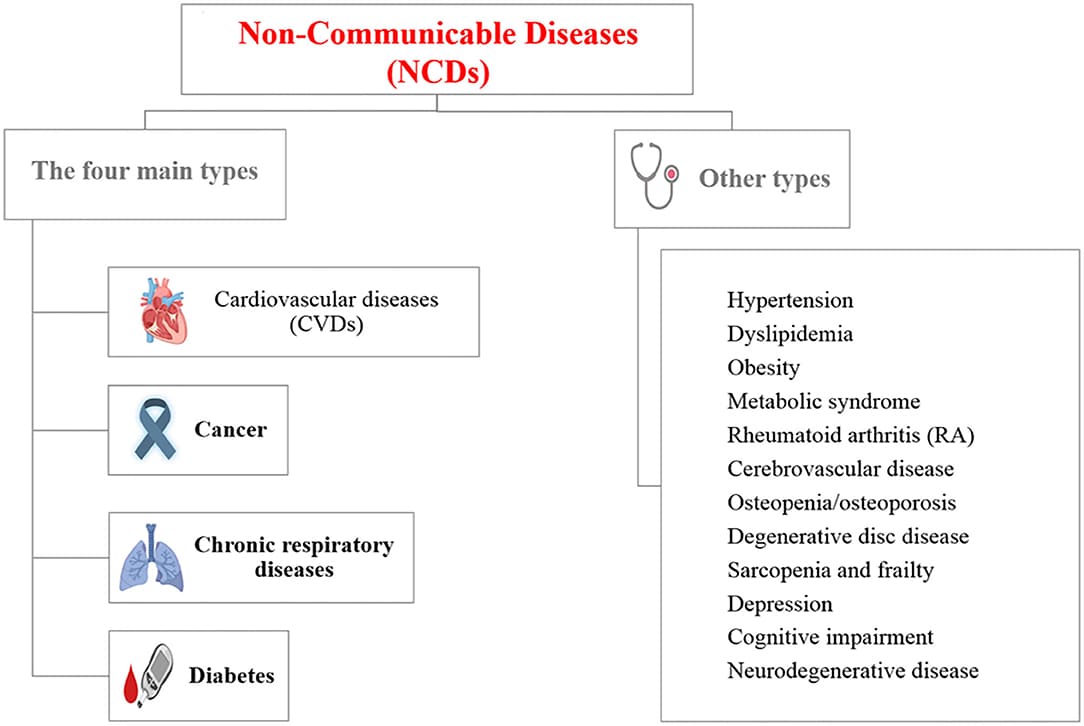
Non-communicable diseases
These are types of diseases which cannot be transmitted from one person to another.
Types of non-communicable diseases
- Congenital disease: It is a disease or an abnormality somebody is born with, e.g., syphilis, AIDS, extra digits, or an imperforate anus. These abnormalities may be caused by drugs, viral infections, radiations, and genetic factors like sickle cell disease (the passage of a gene of abnormal red blood cell shape to the offspring from the parents).
- Inherited disease: This is a disease which is hereditary and runs in families, such as SCD, diabetes mellitus (type one), or hemophilia, a condition of blood clotting abnormalities.
- Traumatic disease: Is a disease due to injury by mechanical means, e.g., fractures, burns, wounds, ruptured organs, etc.
- Inflammatory disease: Is a disease caused by an infection with pathogenic organisms. This can be acute or chronic. Acute disease occurs suddenly but chronic disease occurs slowly.
- Circulatory disease: This is a disease which affects the circulatory system like blood vessels; blood itself, the heart, and so on.
- Neoplasm/new growths: These are swellings or ulcers which result from overgrowth of new tissues from abnormal cells.
- Degenerative diseases/miscellaneous diseases: Degeneration means wearing out of cells and the gradual replacement of tissues by fats, fibrous tissues, or some other material. It may occur as a result of action of toxic metabolic changes or diminished blood supply. The diseases of degeneration may occur because of disease or old age. Examples of these diseases are diabetic and other metabolic disorders, blood vessel diseases, or brain deterioration due to old age.
- Allergic diseases: Allergy means an abnormal reaction or response of an individual to a normal allergen which would not cause any reaction to another individual. These abnormal allergens lead to the formation of antibodies (immunoglobulin Igb) and a high concentration of these in blood suggests an allergic reaction. The examples of allergic diseases are bronchial asthma, anaphylactic shock, and other minor ones which provoke characteristic symptoms whenever they are consequently encountered.
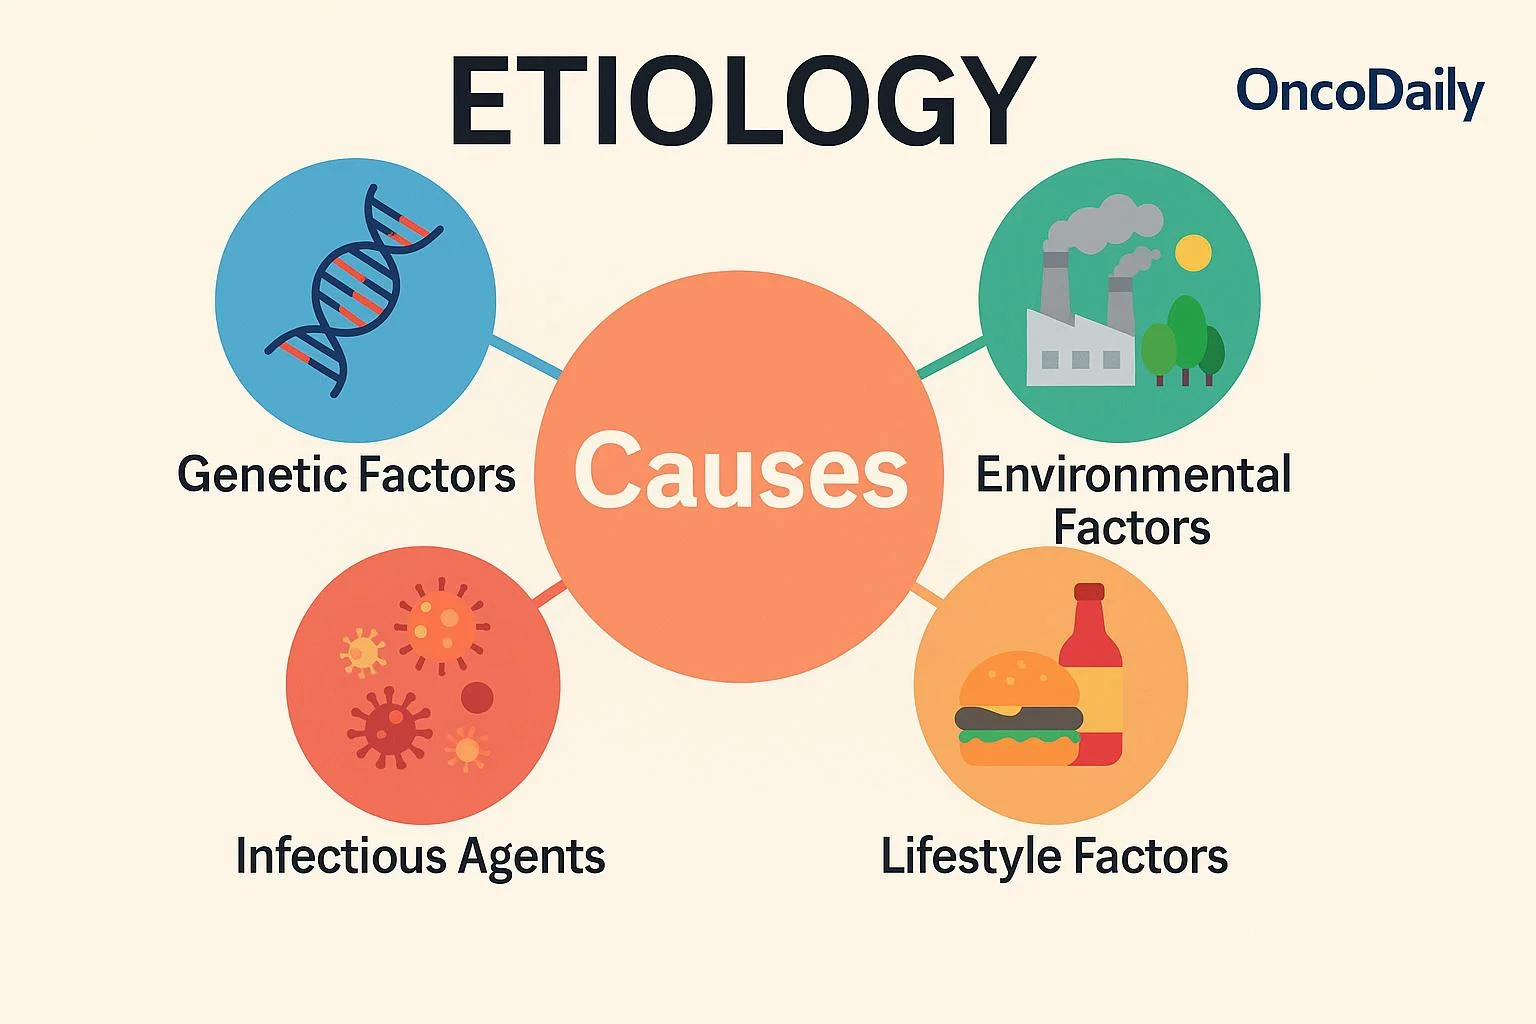
Etiology of diseases
Introduction
- There are 3 elements that determine the etiology of health problems in population; these are: Agent, the Host, and Environment.
- They are referred to as an epidemiological triad.
- Epidemiology is a study of distribution and determinants of the diseases and health related events in human population.
- Disease or disorder occurs when the agent is more powerful than the host and causes the host to become weaker and the environment becomes favorable for growth, multiplication, and survival of the agent.
- This is possible when the host becomes stronger and the agent is moved and the environment becomes unfavorable to the agent.
Agent
It is a factor whose presence or absence causes a disease.
It is a specific factor without that a disease cannot occur.
A disease agent is defined as a substance living or non-living or a force; tangible or non-tangible, the excessive presence or relative lack of that is the immediate cause of a particular disease.
The disease agent is classified as follows:
1. Physical Agents: Various mechanical forces of frictions that may produce injury as well as atmospheric abnormalities such as extremes of heat, cold, humidity, pressure, radiation, electricity, sound, etc.2. Biological Agent: Include all living organisms, e.g., Viruses, Bacteria, Rickettsia, Chlamydia, Protozoa, Fungi, Helminthes, among others.
3. Chemical Agents:
5. Mechanical Agent: Chronic friction and other mechanical forces resulting in injuries, trauma, fractures, sprain, dislocation, and even death
6. Nutrient Agents: Dietary components we need to survive, e.g., proteins, fats, Carbohydrates, vitamins, minerals, and H2O.
Host
This refers to humans or animals that come in contact with the agent.
Host factors influence the interaction with the agent and the environment as follows:
- Age: Certain diseases are more frequent in certain age groups than others, e.g.,
- Childhood age; Measles, whooping cough
- Advanced age, e.g., diabetes, hypertension, cardiovascular
- Sex: There are certain anatomical and hormonal differences between the two sexes, e.g., disorders associated with pregnancy in females; Prostatic hypertrophy in males.
- Race: Some races also suffer from particular diseases, e.g., Negroes suffer from sickle cell Anemia (SCA).
- Genetical factors: Behavioral disorders and diseases of blood run in the family due to chromosomal factors.
- Habits: Living habits or lifestyles such as dietary patterns, use of tobacco, alcohol, narcotics, and drugs are the factors that influence the susceptibility of disease, e.g., Malnutrition, drug dependence, sexual excesses.
- Nutrition: The effects of poor nutrition lead to susceptibility to various infections.
- Customs: Certain traditional systems like superstition lead to diseases, e.g., fixed belief in gods of disease in Hindu society makes people not to believe in immunization that leads to childhood diseases.
- Human Mobility: Frequent diseases in place may cause, e.g., malaria, cholera, AIDS, syphilis, etc.
- Immunity: The reaction of the human host to infection depends upon his previous immunological experience, e.g., infection, immunization. Those who acquired natural immunity will not be easily susceptible to disease.
- Social Status: Certain diseases occur according to social class, e.g., low social classes are susceptible to Bronchitis, TB. Usually, upper classes have lower mortality and morbidity than lower classes.
- Economic status: Person’s occupation itself may be the cause of certain occupational hazards and infections, e.g., Brucellosis, Dermatitis, etc., and unemployment also leads to diseases.
- Educational status: Diseases can be easily controlled and managed in the educated class whereas it will be difficult in the case of the uneducated class.
Environment
This refers to the aggregate of all external conditions and influences affecting the life and development of organisms, human behavior, and society.
- Physical Environment: It includes non-living things and physical factors like H2O, Air, Soil, Heat, Light, Radiation, Noise, Housing, Climate, etc. Alteration or disease in this environment due to various causes leads to H2O pollution, Air pollution, soil pollution, Noise pollution that is too may cause diseases, e.g., heavy flooding in the village or town can cause the likelihood that the area H2O sources will be contaminated with waste products.
- Biological Environment: Includes all the living things created in the world. Man lives around the living things that include bacteria, Viruses, and other various Microorganisms which may cause diseases and mal-adjustment in the ecological system leading to the causative factor of the disease.
- Social Environment: Man has to live in society and should follow the accepted patterns of particular society such as cultural values, customs, habits, beliefs, attitudes, and morals, religion, and other psychological factors. Any alteration in these factors may lead to conflicts and tensions that may cause behavioral diseases. Habits like smoking, alcohol, drug dependence are well known to cause diseases.
Medicine Introduction and General Causes of Disease Read More »