

Types of Drains:
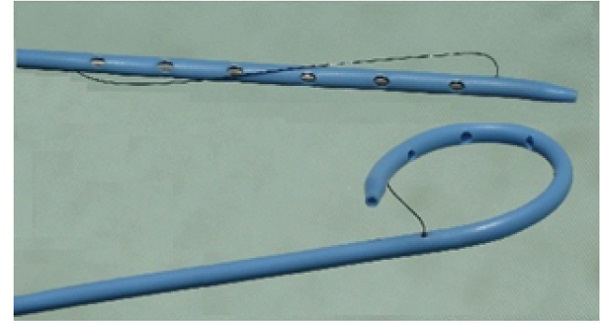
Pigtail Drain:
- Inserted under radiological guidance: This ensures precise placement and minimizes complications.
- Used to remove unwanted body fluids from organs, ducts, or abscesses: This includes fluids like pus, bile, blood, or urine.
- The tip forms a pigtail shape, facilitating drainage: This shape helps prevent the drain from getting clogged and ensures efficient removal of fluids.
- Advantages:
- Can be placed in difficult-to-reach areas.
- Low risk of tissue damage due to its flexibility.
- Effective in draining thick, viscous fluids.
Disadvantages:
- May be prone to blockage.
- Requires radiological expertise for insertion and maintenance.
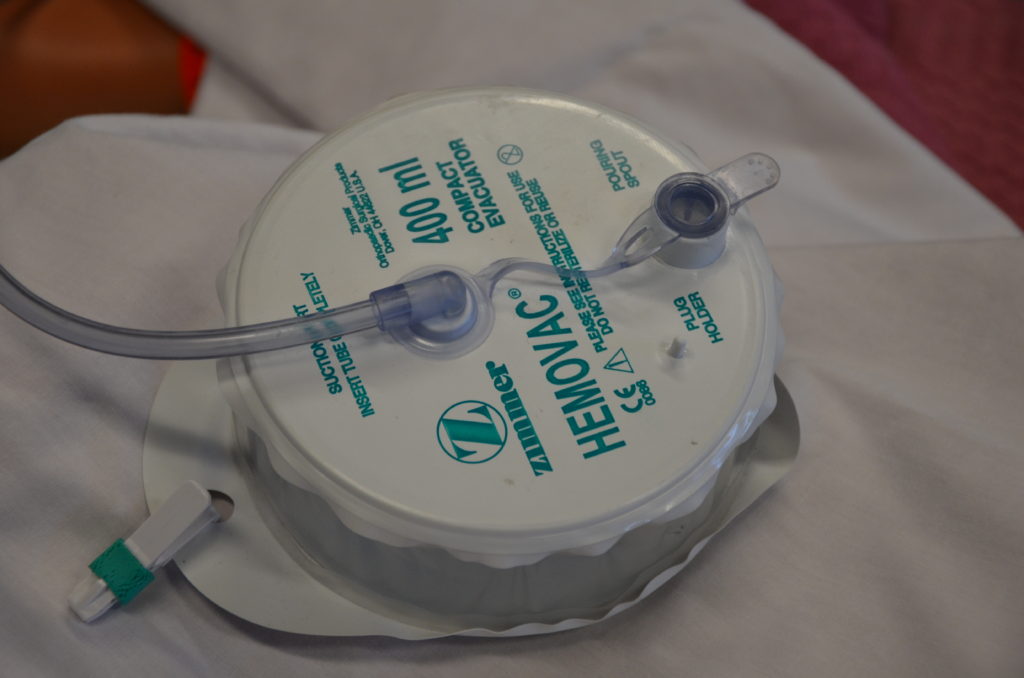
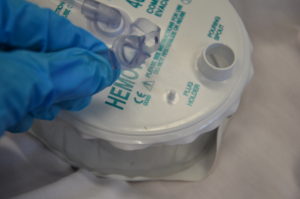
Hemovac Drain:
- A fine tube with multiple holes at the end: Allows for efficient collection of fluids from a larger area.
- Attached to an evacuated glass bottle for suction: Provides continuous suction, promoting rapid drainage.
- Drains blood under the skin: Often used for post-operative drainage following surgery or trauma.
- Advantages:
- Efficient in removing blood and other fluids.
- Provides constant drainage, reducing the risk of blood clots forming.
Disadvantages:
- Risk of suction malfunction or breakage.
- May cause discomfort or pain if placed incorrectly.
- Requires regular emptying and monitoring.
Penrose Drain (Open Drain):
- A soft, flexible drain: Easy to insert and adapt to various anatomical structures.
- Empties into absorptive dressing material passively: Relies on gravity and capillary action for drainage.
- Prevents fluid from moving from areas of greater pressure to areas of lesser pressure: Helps control fluid accumulation and reduce swelling.
- Advantages:
- Simple design and low cost.
- Can be used for short-term drainage.
- Minimal risk of mechanical complications.
Disadvantages:
- Less efficient drainage than closed systems.
- Increased risk of infection due to the open design.
- Not suitable for large volume drainage or high-risk areas.
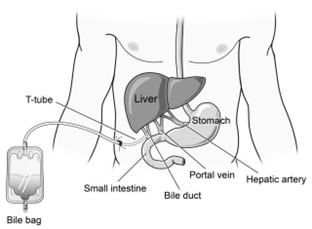
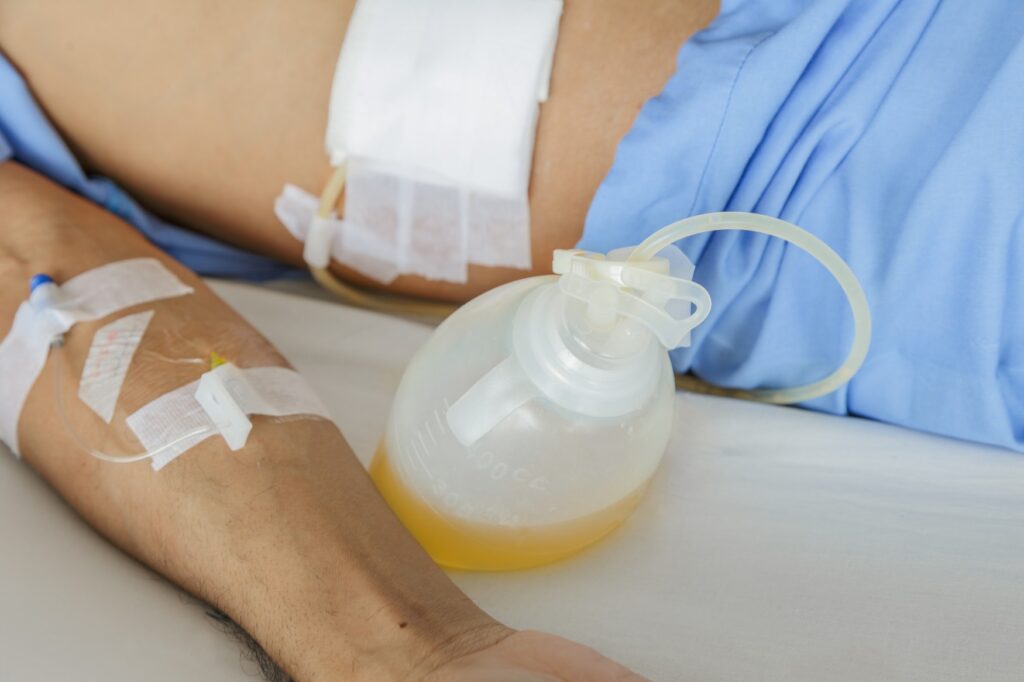
T-Tube:
- Placed into the common bile duct: Allows for drainage of bile after biliary surgery.
- Connected to a small pouch (bile bag): Collects and allows for easy monitoring of bile drainage.
- Used for temporary post-operative drainage of the common bile duct removed once the bile duct is healed.
- Advantages:
- Helps prevent bile duct obstruction.
- Facilitates healing by allowing bile to drain.
- Allows for monitoring of bile drainage.
Disadvantages:
- Can cause discomfort or pain.
- Requires regular emptying and monitoring.
- May be prone to blockage or leakage.

Chest Tube (Closed Drain):
- Used to drain hemothorax, pneumothorax, pleural effusion, chylothorax, and empyema: Effective for removing fluid and air from the chest cavity.
- Inserted into the pleural space in the 4th intercostal space above the upper border of the rib below (4th to 6th): Requires careful placement to ensure effectiveness and minimize complications.
- Advantages:
- Efficient in removing fluids and air from the chest cavity.
- Reduces pressure on the lungs, allowing for better breathing.
- Minimizes the risk of infection due to the closed system.
Disadvantages:
- Requires specialized training and equipment for insertion and management.
- Can cause pain or discomfort.
- May be prone to kinking or blockage.
- Complications to assess for include arterial thrombosis, air embolism, hematoma, bleeding, and infection.
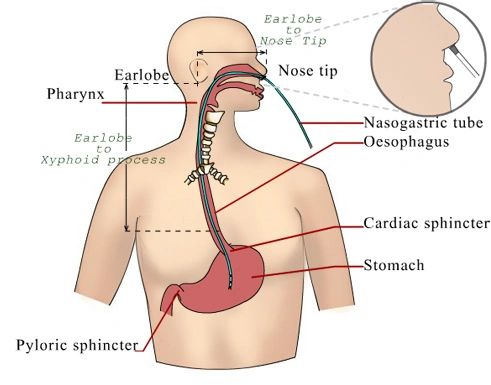
Nasogastric Tube (NG Tube):
- Passed through the nostrils to the stomach: Allows for access to the stomach for various procedures.
- Indications include gastric juice aspiration, lavage in cases of poisoning, overdose medication, and feeding: Versatile tool for managing stomach contents and providing nutritional support.
- Advantages:
- Provides access to the stomach for various procedures.
- Relatively safe and easy to insert.
- Can be used for short-term or long-term management.
Disadvantages:
- Can cause discomfort or irritation.
- May cause nausea or vomiting.
- Complications include epistaxis, aspiration, and erosions in the nasal cavity and nasopharynx.
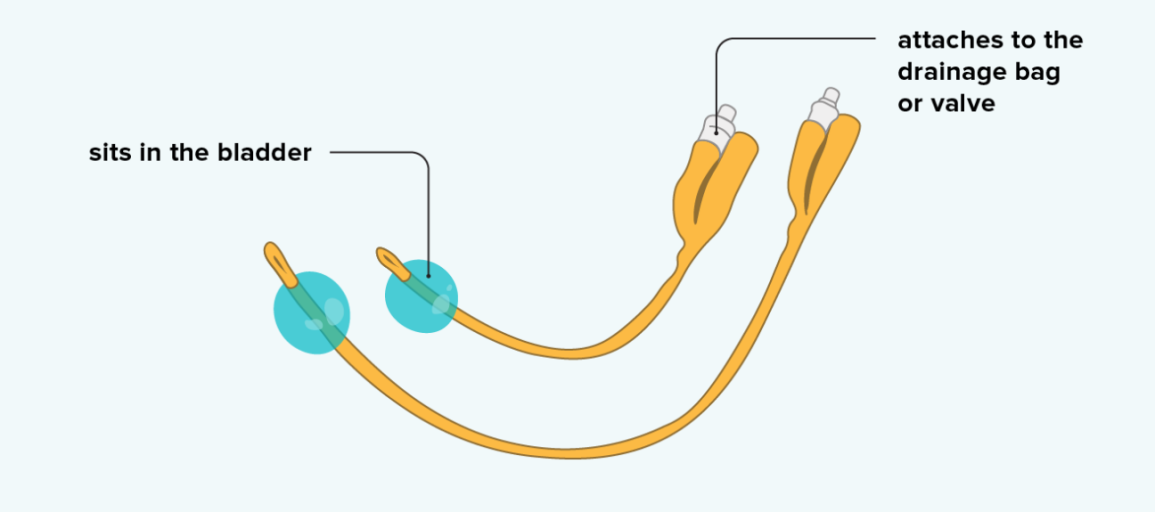
Urinary Catheters:
- Hollow, flexible tubes used to collect urine from the bladder: Provides a way to drain urine from the bladder.
- Indications include relieving urinary obstructions, managing bladder weakness or nerve damage, draining the bladder during and after surgery, and treating urinary incontinence: Essential for managing urinary issues and ensuring bladder health.
- Catheter materials can include rubber, silicone, or latex
- Advantages:
- Allows for effective urine drainage.
- Reduces urinary tract infections.
- Provides a way to monitor urine output.
Disadvantages:
- Can cause discomfort or pain.
- Risk of infection if not properly maintained.
- May be associated with bladder stones or urinary retention.
Hospital Standards Procedures.
Emptying a Drain

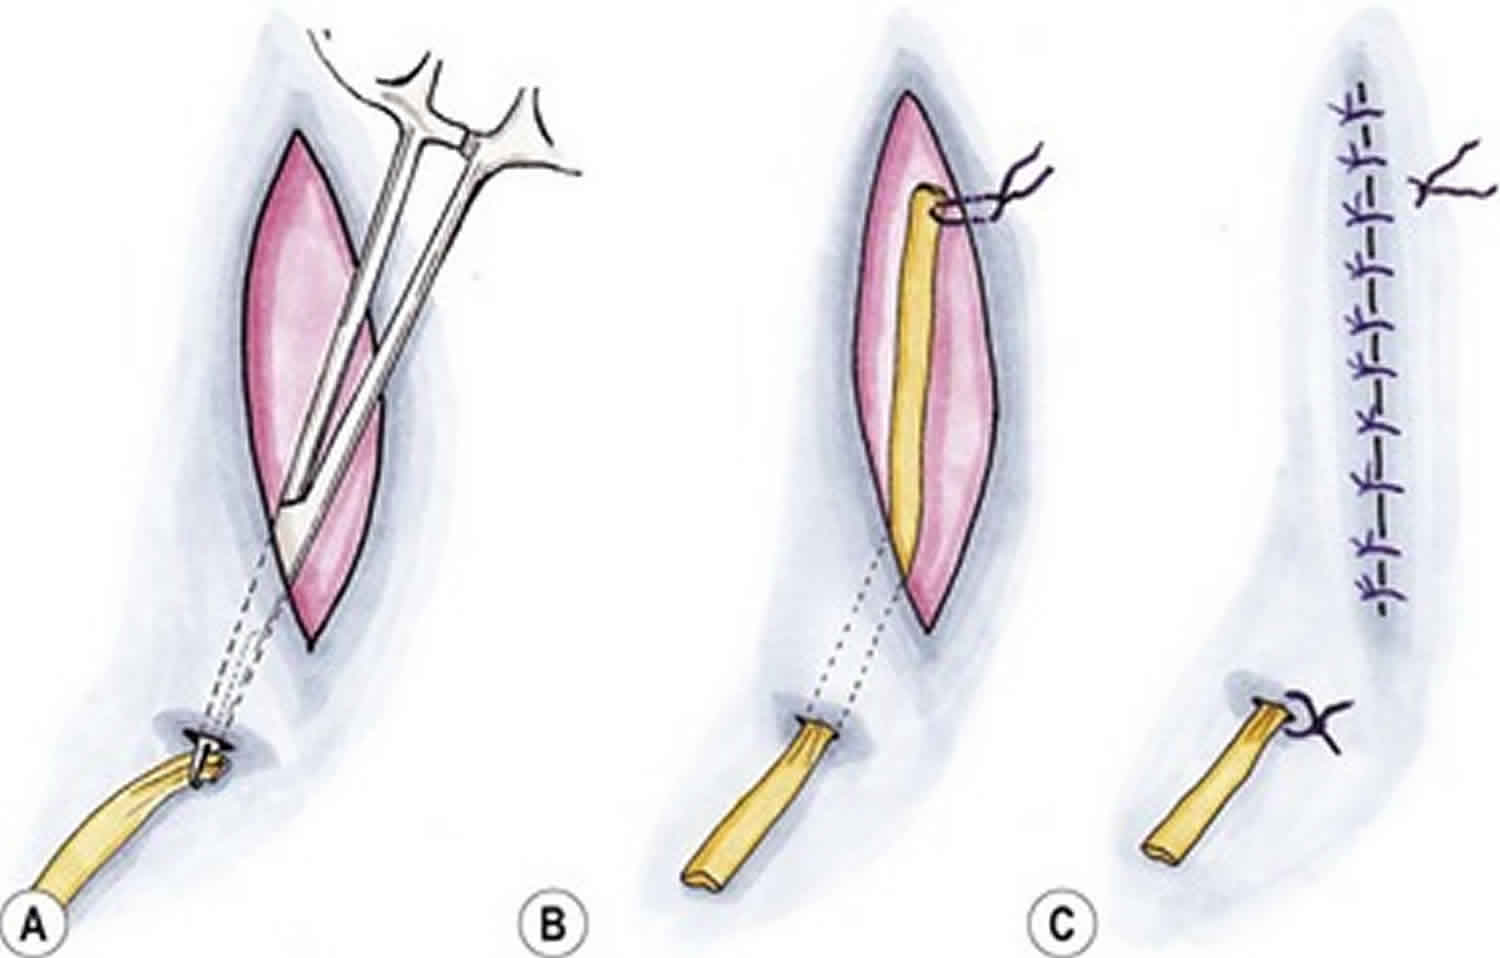
Removal of Drains


We are actually satisfied with this
Thanks for your commitment
Thanks for effort
Very relevant info thanx for the research well done
Why shortening of drains and procedure not discussed in the article…??
Yet vitals
How are they shortened and what is the indication for shortening drains?
Thanks for the good work
Thanks
Gd morning Mr nurses revision
Kindly join me on nurses revision 1:1
Whatsapp
Send a whatsapp message on 0726113908
Bravo for nursing course semplicity 🤝
How do shorten the drains and the indication for shortening of the drains.
Thanks for making it easy for us … happy future nurses…
am grateful
Summarize in 15 points the specific nursing interventions in management of a patient before, during and after shortening and removal of drainage