

Administer drugs appropriately
Administer Prescribed Medicines Appropriately
A medicine is any chemical substance in a regulated dose intended for use in the medical diagnosis, cure, treatment, or prevention of disease or any substance that is prescribed and administered to patients to produce therapeutic effects in the body.
Rights Related to Medicine Administration
The rights that should be observed:
- Right patient.
- Right medicine.
- Right dosage.
- Right route.
- Right time.
- Right storage.
- Right formulation.
- Right disposal.
- Right site.
- Right equipment.
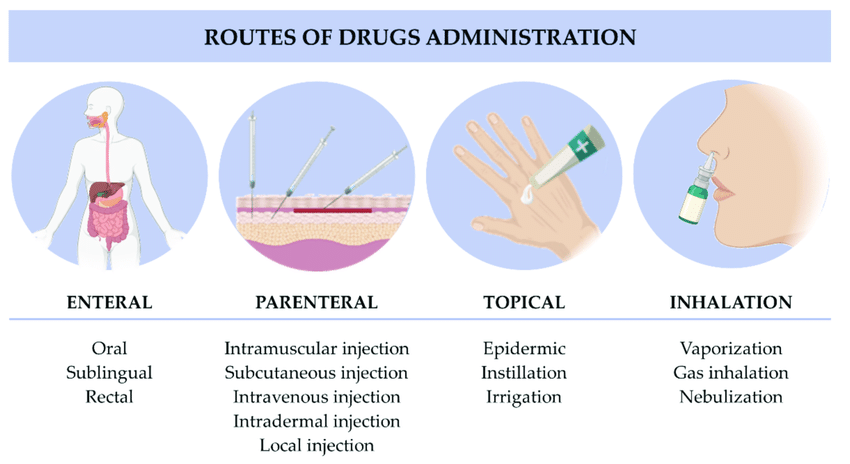
Routes Used in Administering Medicines
SYSTEMIC ROUTE
ENTERAL ROUTE
- Oral: Drugs taken by mouth, including tablets, capsules, liquids, and suspensions, that are absorbed through the stomach or intestinal lining.
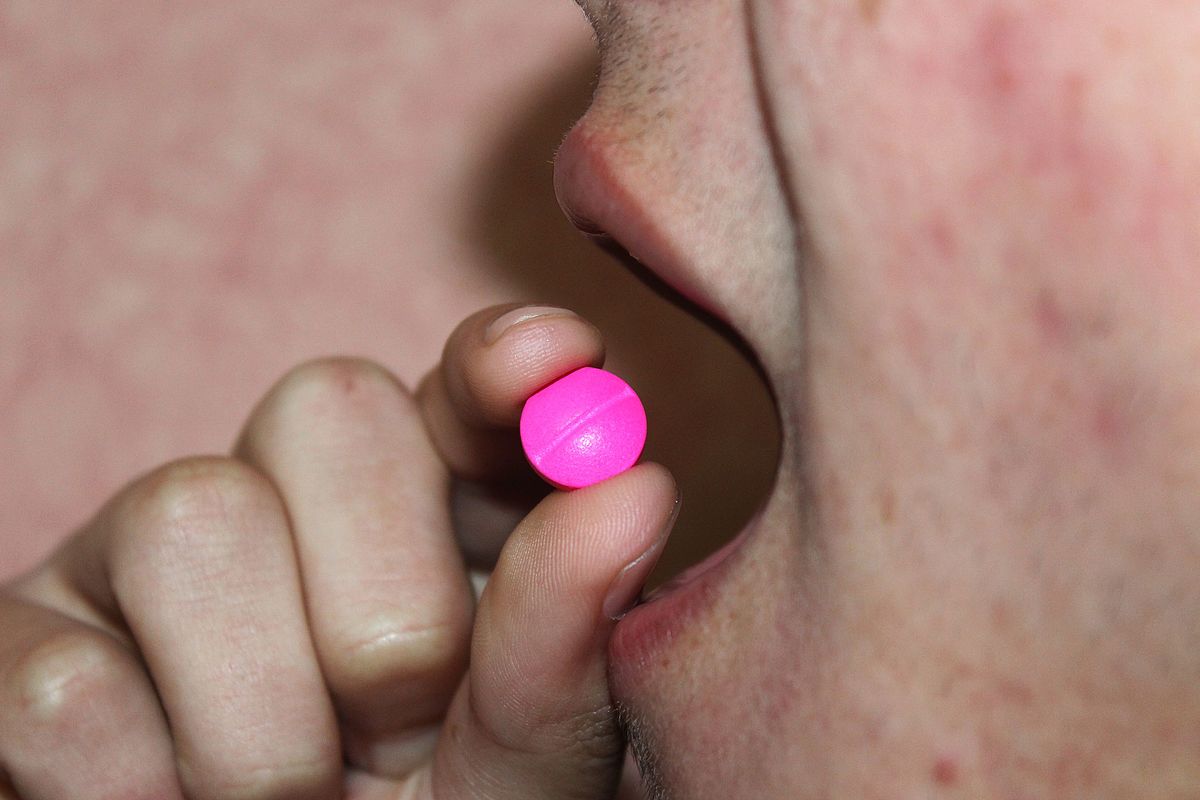
- Sublingual: Drugs placed under the tongue that dissolve and are absorbed into the bloodstream via the tissues under the tongue, providing rapid onset of action.
- Buccal: Drugs placed between the gums and cheek, where they dissolve and are absorbed into the bloodstream through the buccal mucosa.
- Rectal: Suppositories or enemas administered into the rectum, where they are absorbed through the rectal mucosa.
PARENTERAL ROUTE
Injections:
- Intravenous (IV): Direct injection into a vein for immediate systemic effect.
- Intramuscular (IM): Injection into a muscle, where the drug is absorbed into the bloodstream.
- Subcutaneous (SC): Injection into the fatty tissue under the skin.
- Intra-arterial: Injection directly into an artery, typically used in specialized medical procedures.
- Intra-articular: Injection into a joint space for local effect.
- Intrathecal: Injection into the cerebrospinal fluid in the spinal canal.
- Intradermal: Injection into the dermis layer just beneath the epidermis, often used for allergy testing and tuberculosis screening.
- Epidural: Injection into the epidural space surrounding the spinal cord, commonly used for pain relief during labor and surgery.
- Intraperitoneal: Injection into the peritoneal cavity in the abdomen, used in some chemotherapy treatments.
- Intracardiac: Injection directly into the heart muscle, often used in emergencies.
LOCAL ROUTE
- Skin topical: Application of creams, ointments, gels, or lotions to the skin for local treatment of skin conditions.
- Intranasal: Sprays or drops administered through the nasal passages for local or systemic effect.
- Ocular drops: Solutions or suspensions administered into the eyes to treat local conditions like infections or glaucoma.
- Otic drops: Solutions administered into the ear canal to treat local ear conditions such as infections.
- Intraosseous: Injection directly into the bone marrow, used in emergency situations when IV access is not available.
- Intralymphatic: Injection into the lymphatic system, used in certain cancer treatments and vaccinations.
- Intrapleural: Injection into the pleural space surrounding the lungs, used for treating pleural effusions and certain cancers.
- Inhalation: Drugs administered through the respiratory tract, typically using inhalers or nebulizers, for rapid absorption into the bloodstream via the lungs.
- Transdermal: Patches or gels applied to the skin that release the drug slowly for absorption over time.
- Mucosal:
- Throat: Lozenges, sprays, or gargles for local treatment of throat conditions.
- Vaginal: Creams, tablets, or rings inserted into the vagina for local treatment of infections or hormonal therapy.
- Rectal: Suppositories or enemas for local treatment of rectal or lower gastrointestinal conditions.
INHALATION
Inhalation is the breathing of air vapor or volatile medicine into the lungs.
Types
- Dry inhalation: Oxygen Administration: this is given when the respiratory capacity is diminished as in chest injuries, pneumonia and cardiac failure.
- Moist/steam inhalation: It is used in case of inflammation of air passages and the nasal sinuses. These are given to:
- Warm and moisten the air breathed in and relieve irritation e.g. in bronchitis, after tracheotomy and other chest conditions.
- To relieve inflammation and coughing e.g. in colds.
- To relieve congestion and oedema e.g. in sinusitis and acute laryngitis.
- Nebuliser: this produces vapors which is inhaled by the patient for example in asthma to relieve spasms of the bronchial tubes or for the relief of chest pain in angina pectoris. Other indications include Respiratory diseases eg asthma, pneumonia, Airway obstruction, Nasal congestion, Nasal bleeding, Chest injuries and Cardiac failure.
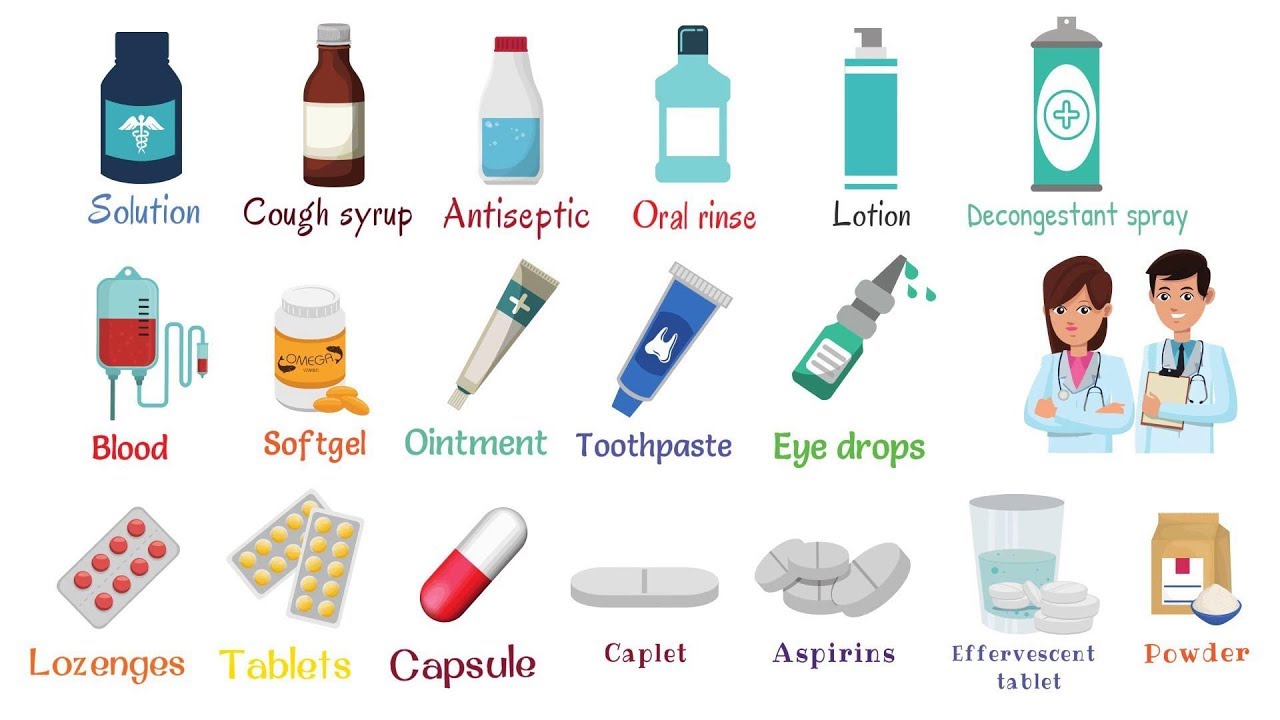
Forms of Medicines
Liquids:
- Solutions: Medicine dissolved in water.
- Syrups: Medicine dissolved in sugar and water.
- Mixtures: Medicine mixed with liquid but not dissolved in it.
- Milks: White medicine substances mixed with water.
- Emulsions: Medicine mixed with oil and water.
- Elixirs: Medicine dissolved in a sweetened flavored solution containing alcohol.
- Tinctures: Medicine dissolved in alcohol or alcohol and water.
- Fluidextracts: Medicine that has been boiled and evaporated to concentrate their strength and dissolve them in alcohol.
- Liniments: Medicine mixed in oil, soap, or alcohol (for external use only).
- Lotion: Mixed with water for external application.
Solids and Semisolids:
- Capsules: Medicine enclosed in gelatine containers used for liquids, powders, and oils.
- Powders: Medicine in powder form.
- Pills: Medicines molded in a round shape coated with sugar.
- Tablets: A solid dosage form of varying weight, size, and shape.
- Enteric Coated Tablets: A tablet coated with a substance that blocks absorption of the medicine until it reaches the small intestines.
- Lozenges: To be dissolved in the mouth for throat or oral treatment.
- Ointment: Medicines mixed with oil or fat.
- Pastes: Ointments with various powders added.
- Suppositories: Medicines mixed with a firm base, which can be molded for insertion into a body cavity.
- Ampoules: Sealed glass containers that contain a dose of powdered or liquid medicine.
- Vials: Rubber-stoppered glass containers that may contain a single or several doses of medicines.
Time for Administering Medication
- Four hourly: (eight times in 24 hours) 2 am., 6 a.m., 10 a.m., 2 p.m., 6pm, and 10 p.m.
- Six hourly: (four times a day) 6 a.m., 12 p.m., 6pm, and 12 midnight.
- Eight hourly: (three times a day) 6 a.m., 2 p.m., and 10 p.m.
- Twelve hourly: (twice daily) 6 a.m. and 6 p.m.
Abbreviations Used in Prescriptions
- Aa.: of each
- Ad lib.: as much as desired
- B.i.d. or b.d.: twice a day
- t.d.s. or t.i.d.: three times a day
- a.c.: before
- P.c.: after
- g.: gram
- Gr.: grain
- Gutt.: a drop
- Mane: in the morning
- Mist.: a mixture
- Nocte: at night
- q.h.: every hour
- o.m.: every morning
- o.n.: every night
- p.r.n.: whenever necessary
- q.4h: every 4 hours
- s.o.s.: if necessary in an emergency
- Stat: immediately
- q.i.d.: 4 times a day/every 6 hours
- o.d.: once a day
GENERAL RULES OF DRUG ADMINISTRATION
- Read the instructions carefully and incase of any doubt ask the Doctor or ward in charge.
- Never give a drug from a container or a bottle which is not clearly labeled.
- Check the label against the instructions 3 times .The 1 st time before having the container, 2nd time before the drug is drawn, 3rd time before the drug is administered to the patient.
- Give the drug following 10Rs i.e -right patient, right time, right dose, right route, right drug/medication, right formulation, right disposal, right storage, right equipment and right site.
- Once a drug is drawn from its container it shouldn’t be returned.
- Always identify the drug by reading its label on the container not by its color, smell, shape and size.
- Do not transfer drugs to another container when the old label is still on.
- Ask for clarification if any order regarding the dose is not readable.
- Watch all patients for drug reactions, especially parental drugs.
- If any drug changes its color, it should not be administered.
- Liquid preparations should always be shaken before drawing from the bottles.
- Never use a drug which has been left in an unlabeled container.
- Always measure the dose of the drug in good light.
- Observe strictly the time of administration of medication.
Requirements
Trolley
Top Shelf:
- Bottles of mixtures
- Bottle or boxes of tablets, capsules
- Medicine cups
- Teaspoons, mortar and pestle
- Jug of drinking water, milk/fruit juice
- Glasses
- Medicine charts
- Small medication tray
- Scissors
- Kidney dish
Bottom Shelf:
- 1 bowl of soapy water
Bedside:
- Hand washing equipment
Procedure for Oral Administration
| Steps | Action | Rationale |
|---|---|---|
| 1. | Follow general rules of nursing procedures. | Ensures accuracy and prevents errors |
| 2. | Observe the rules of medicine administration. | Ensures accuracy and prevents errors |
| 3. | Arrange medication trolley in nurse’s station. | To save time and reduce error in medication administration |
| 4. | Prepare medicine of one patient at a time, keeping medicine lists/charts together. | Ensures accuracy and prevents errors |
| 5. | Verify the order for medication from the patient’s chart comparing with the medicine list and the label on the bottle. | Ensures accuracy |
| 6. | Check the label on the medicine container three times (i.e. when taking it from the shelf, before pouring it into the medicine cup and before returning it to the shelf). | Ensures accuracy |
| 7. | For tablets/capsules, pour required number from bottle into bottle cap and transfer to medication cup, for packaged tablet/capsule pour directly over the cup retain the strip. | Reduces errors in medication administration |
| 8. | For liquid, hold medication cup to eye level and pour the prescribed amount. | Ensures accuracy |
| 9. | For volume of less than 5ml, use a 5ml syringe without a needle to measure the amount prescribed. | Ensures accuracy |
| 10. | Keep the label on the bottle uppermost against the palm of hand when pouring. | To avoid spilling liquid in place. |
| 11. | Wipe the rim of the bottle before replacing the cork. | Prevents cap from sticking. |
| 12. | Use only the dropper-supplied with liquids measured in drops. | Ensures accuracy |
| 13. | Read the label again before replacing the container on the trolley. | Third check reduces errors. |
| 14. | Place the measuring cup on the tray together with the drinking cup with water and then take it to the patient at the correct time. | Ensures timely administration |
| 15. | Call the patient’s name, check the room or bed number against the medicine list before giving the medicine. | Confirms the patient’s identity |
| 16. | Assess the patient’s condition including the level of consciousness and vital signs. For instance patients having digitalis the pulse rate should be checked before administering the medicine. | To rule out likely contraindications or side effects. |
| 17. | Explain to the patient the medications to be given to the patient and clarify any questions or doubts. | Promotes the patient’s rights and compliance. |
| 18. | Assist patient in sitting or side lying position. | Prevents aspiration |
| 19. | Administer medicine properly, only one medicine at a time and offer a glass of water or milk. | Aids swallowing. |
| 20. | If a patient has difficulty swallowing, grind the tablets in a mortar with pestle, crush it to fine powder and mix it with a small amount of water. | To ease swallowing. |
| 21. | Prepare powdered medication at the bedside and give it to the patient. | Increases compliance. |
| 22. | Give effervescent tablets immediately after dissolving. | It helps to improve the taste of medicine. |
| 23. | If the patient is unable to hold medication in hand; assist to place the cup to the lip and slowly transfer medicine into the mouth using a spoon. | To support the patient. |
| 24. | If medicines fall on the floor, discard and replace them. | To avoid contaminated medicine |
| 25. | Stay with the patient until the medicine has been swallowed; if the patient is confused or disoriented his/her mouth should be checked to confirm that the patient has swallowed the medicine. If the medicine is vomited within 5 minutes report to the In-charge or Doctor. Medicines must never be left on the bedside table. | Ensures that patient receives prescribed medication at the correct time |
| 26. | Assist the patient to a comfortable position. | Maintains patient’s comfort |
| 27. | Dispose of soiled supplies, clean work area and wash hands. | Reduces transmission of infection |
| 28. | Document the administration of the medication with date, time and signature immediately after administration. | To avoid errors and promote proper accountability. |
| 29. | Reassess the patient’s response to the medicine within one hour after giving it and any ill effects reported. | To detect therapeutic/ side effects or adverse effects. |
| 30. | The medicine cups are washed and returned to their proper place. | Promote hygiene. |

Thanks for the good summarized notes
Thanks for the precised notes
Thanks so summarized notes
We really appreciate u for your endless efforts in compiling of these precise and understandable notes . Personally am too grateful
Thanks you for the great work.
You make the world a better place by making things easier.
Really this can save someone
Thanks for the initiative
Thanks for the notes
Thanks for the good info. But of late they recommend that the blood is administered at its temperature from the fridge not warming it. Thanks
Thanks for this well eleborated notes..
Thanks but how can I access the revision questions
Thanks for the good work
Thx alot but formulate revision questions also..
Good resource for nurse
WITH LOVE JOY AND COMPASSION,I TAND HERE BY SAYING THAT THANK YOU SO MUCH FOR YOUR PRE_SIZED NOTES FOR THE BETTER LEARNING OF OUR BELOVED NURSES AND MIDWIVES IN OUR COUNTRY,C,CONTINENT THE WORLD AT LARGE
THANK YOU, YOURS
GODFEARING JB