Nurses Revision

Uncategorized

Injuries and trauma fractures

Injuries And Trauma

Injuries and Trauma

FRACTURE 

A fracture is a break in the continuity of a bone.  Any injury involving a bone should be considered a fracture until proved otherwise.

CAUSES OF FRACTURE

  1. A fracture can be caused by direct force. This is when the injury occurs at the site where the forces have been applied e.g. blow, accident
  2. Indirect force. For this case, the bone breaks a distance from where the force is applied. This means that the force is transmitted an example is fall from a tree.
  3. Strong muscular action, this is common with the patella bone. 
  4. Stress i.e. repetitive force
  5. Fracture may also be caused by bone diseases ( pathological) responsible diseases e.g.
  • Osteomyelitis
  • Tuberculosis of bones 
  • Cancer
  • Old age 
  • Bone tumors.

 Classification by Fracture Location

TYPES OF FRACTURES 

  1. SIMPLE OR CLOSED FRACTURE : This is fracture in which the bone is broken but the skin remains intact. A simple fracture can become complicated if not handled properly.
  2. COMPOUND OR OPEN FRACTURE : This is when there is a wound associated with the fracture sometimes the wound is caused by a protruding piece of broken bone. This may be associated with extensive blood loss.
  3. COMPLICATED FRACTURES: This may be open or closed but there may be injury to internal or surrounding structures. It could be the lungs incase of fracture of the ribs etc.
  4. COMMUNITED FRACTURES: In this type of fracture, the bone is broken into several pieces.
  5. IMPACTED FRACTURES: Here the broken bone enters into each other.
  6. DEPRESSED FRACTURE: The broken parts are pushed in wards.
  7. GREENSTICK FRACTURE: Is where the bone is cracked or bent. It’s common in children because their bones are still soft.

GENERAL SIGNS

  • There is pain and tenderness at the site.
  • There is difficulty in movement.
  • There is swelling and oedema
  • Deformity.
  • Discoloration
  • Loss of function
  • There may be unnatural or abnormal movement of the affected part.
  • Crepitating (grating sound) if limb is moved gently.
  • The patient may also go into shock. 
  • Warmth due to increased blood supply

AIMS OF FIRST AID

  1. To prevent further damage of the fracture.
  2. To prevent pain or reduce.
  3. To make the patient as comfortable as possible as you wait for expertise.
  4. To prevent shock.

RULES FOR TREATMENT OF FRACTURES

  1. Do not remove the affected part if not in danger.
  2. Steady and support the injured part at once and prevent movement.
  3. Reassure your casualty and send for medical aid 
  4. Stop bleeding if any.
  5. Cover any wound with a sterile dressing.
  6. Do not remove the casualty’s clothes unnecessarily.
  7. Try to prevent/ counter act shock. This is by handling the casualty gently, keeping him warm, and give sweeter fluids incase if there is no possibility of anaesthia. 

GENERAL MANAGEMENT OF A CASUALTY WHO HAS SUSTAINED A FRACTURE.

  • Prevent rubbing of the broken bones by immobilization and keeping the pieces of broken bones together.
  • Re – assure the patient.
  • Ensure the clear air way.
  • Stop hemorrhage if any. 
  • Treat shock
  • Relieve pain
  • Immobilize the fracture using splints and apply a sling.
  • Do not move the injured part unnecessarily.

FRACTURE HEALING

FACTORS THAT IMPEDE BONE HEALING

  • Excessive motion of fracture fragments
  • Poor approximation of fracture fragments-inaccurate reduction-excessive bone loss during fracture.
  • Compromised blood supply-damage to blood vessel-muscular injury-
  • Excessive edema at fracture
  • Infection at fracture site.
  • Metabolic disorders or diseases (cancer, diabetes, malnutrition)-they retard osteogenesis.
  • Soft tissue injury-disrupts blood supply.
  • Medication use e.g. steroids, anticoagulants.  Steroids can cause osteoporosis and long term use of heparin also causes the same.

COMPLICATION OF FRACTURES

  • General-blood loss, deep vein thrombosis, pulmonary embolism, respiratory distress
  • Early complication- infection, septicemia, plaster sores.
  • Late complication-joint instability, osteoarthritis, mal union, delayed union, non union. 

MANAGEMENT OF SPECIFIC FRACTURES

  1. FRACTURE OF THE SKULL. 

This fracture may be associated with injuries to the spinal cord and to the brain. Fracture may also be associated with condition like concussion.

Concussion is the shaking of the brain leading loss of consciousness. It may also be due to compression and hence also leading to the (compression/pressure) on brain. Patient may bleed from the nose or ears and the casualty may be unconscious.   

SIGNS AND SYMPTOMS 

  • There may be history of an accident
  • Bleeding from the skull.
  • Pupils may be unequal, dilated.
  • Partial unconsciousness 
  • Vomiting may be there
  • Pulse rate is slow.
  • There might be paralysis of the limb.
  • Eye movements may also be disturbed 
  • Speech disorders.

MANAGEMENT

  • A person who has sustained a head injury should be carefully watched and arranged to send to the doctor as soon as possible.
  • Patient should be nursed in a spine position with head turned to one side and shoulders slightly elevated if conscious 
  • If there is bleeding as discharge from ear then the head should be turned to the side of the bleeding ear. But do not plug the ear. 
  • Patient should be kept quite. Nurse him/her in a quite environment. 
  • In case of any wound, dress it
  • If unconscious, change to recovery position check breathing, pulse, level of response and record.

FRACTURE OF THE SPINE

  • The danger of this type of fracture is injury with the spinal cord.
  • You treat shock as you make arrangements to transport the patient.
  • You tie the legs together
  • You put padding between the knees and thighs so that they are not touching directly
  • You need four people to lift this patient
  • You should avoid bending or twisting of the spine.
  • The best position for transporting this person is recumbent position.
  • The patient is transported by stretcher with hard surface.

FRACTURE OF THE RIBS

The broken ribs may be pushed inwards making the fracture to be complicated.

  • The patient will complain of local pain.
  • It is worsened by breathing, severing.
  • The fractured end may manage the underlying part which may lead to blood stained sputum.
  • If the rib has pieced the lungs, the patient may have shallow respiration.
  • Patient may have signs of internal bleeding 
  • Air may escape to the plural cavity or escape to tissues and may lead to lung collapse.

If the air finds its ways to the tissues, we talk of a condition known as Emphysema.

IF THE PATIENT PRESENT WITH THIS;

  • Make the patient sit.
  • Restrict chest movement by applying broad bandages and fix on the opposite side.
  • Support the arm using a sling.
  • If there is an open wound, cover it, immediately to keep out air.
  • You can lay, lean patient on the affected side
  • Support the patient using pillows.
  • Transfer the patient to hospital.

FRACTURE OF THE CLAVICLE

This usually occurs due to indirect pressure like falling on an out stretched arm.

TREATMENT

  • Support the arm of the injured.
  • Put padding in the axilla.
  • Tie the arm to the chest using abroad bandage.
  • Alternatively support with a sling.

FRACTURE OF THE UPPER ARM

  • The humerus may be fractured at a part close to the shoulder.
  • The fracture may be at the shaft or it may be towards the elbow.
  • Sometimes the lower end of the radius may be broken.
  • Sometimes the person sustains the fracture of metacarpal bones. This may be associated with bleeding into the palms of the hand.

MANAGEMENT

  • The limb must be immobilized 
  • If the elbow can comfortably bend without increasing the pain, flex the arm against the chest with the fingers touching the opposite shoulder.
  • Put padding between the limb and chest and fix it with a collar sling.
  • Bind the arm firmly to chest. 
  • If the elbow can’t be bent without causing pain, tie the limb to the trunk. And again fix with broad bandages.    
  • Alternatively, a splint may be used to fix the limb. Transport the patient in any position that he/she is comfortable in. 

FRACTURE OF THE FORE ARM (ULNA, RADIUS)

  • For this, you ask the casualty to sit. Place the arm on the/ across the chest with the thumbs upper most.
  • Use a padded splint which is applied to the front from the elbow up to the fingers.
  • Fix it with bandages.
  • Support the arm with a sling with fingers upper most.
  • Watch the fingers for signs of interference with circulation.

FRACTURE OF THE PELVIS

These usually occur due to indirect force. It may be a car accident, falling from height.

A fracture pelvis may be complicated due to injury of the urinary bladder system.

SIGNS AND SYMPTOMS

History of injury

  • Patient unable to stand
  • Pain may be in hips, back.
  • Pain increase with movement 
  • Difficulty and pain in passing urine.
  • Sometimes the urine is stained.
  • May have desire of passing urine but he finds it difficult. And the patient may present shock signs.

MANAGEMENT

  • Help the patient lie down with the head lower than the rest of the body 
  • Keep the legs straight or the patient can bent the knees slightly and they should be supported in the position.
  • Abroad bandage can be applied around the pelvis
  • But you still put pads between legs and ankles and tie legs safely. 
  • The patient is lifted onto the stretcher with the pelvis supported.

FRACTURE OF THE FEMUR

The femur is the longest bone in the body. And it has every rich blood supply. A fracture of the neck of the femur is common in the elderly but it can affect any part of the femur.

SIGNS AND SYMPTOMS

  • Severe pain 
  • Shortening of the bone
  • And the foot may be turned out upwards.
  • Patient may go into shock because of pain.
  • The broken bone ends may piece blood vessels leading to blood loss.

TREATMENT

  1. Help the casualty to lie down as you support the injured limb.
  2. Treat shock if any.
  3. Immobilize the limb as follows,
  • Tie together the knees, the hips and above and below the site of the fracture.
  • Re-assure the casualty.
  • Arrange for transport to hospital.

If the distance to the hospital is long, do the following.

  • Apply a padded splint from the axilla down to the foot on the outside and put a short splint that starts from the groin (between the legs) up to the foot so that you maintain the injured part. 
  • Tie with a number of bandages.
  • First bandage across the chest.
  • Second bandage a cross the pelvis
  • Third above the fracture
  • Fourth under the fracture
  • Fifth fix the knees.
  • Sixth bandage fixes the ankles.

In some cases there is a splint known as THOMAS SPLINT

Then after, you can transport the patient. 

DISLOCATION

Is a displacement of the bones which form a joint. The most commonly affected joints are the shoulder joints, elbow joints, lower jaw.

SIGNS AND SYMPTOMS

  • Severe pain at the sight of the injury.
  • Movement is restricted at the joint.
  • Deformity of the limb.
  • Swelling may set in especially if there is collection of blood.

TREATMENT

  • Support the limb in the most comfortable position.
  • Relieve pain and refer the patient to hospital.

A SPRAIN

This is an injury to the joint associated with tearing of the ligament. It is sometimes associated with injury to the soft tissues which surround the joints. And this could be a tendon.

SIGNS AND SYMPTOMS

  • Severe pains at first but reduce slowly.
  • Swelling
  • Bruising which is due to collection of blood at the site.
  • Loss of movement.

TREATMENT

  • You can place the limb in a comfortable position. 
  • Apply a firm bandages.
  • Apply cold compress to reduce on swelling.
  • Gently massage the muscle above the sprain.
  • Encourage the patient to try to move the joint 
  • Then advise him to go to hospital to rule other injuries.

STRAIN

This is an injury to a muscle or tendon when it’s forcefully stretched beyond its proper length. It is sometimes associated with tearing of muscle fibers.

SIGNS AND SYMPTOMS

  • The patient will complain of sudden sharp pain at the site of pain.
  • The pain is worsened by movement 
  • Swelling
  • Loss of power.

TREATMENT

  • Place the patient in a comfortable position 
  • Apply bandage or plaster to the affected part.
  • In case of a fracture, you immobilize.

STITCH

It is a painful spasm of diaphragm. It usually occurs during games or running.

Treatment 

  • Rest
  • If not relieved by rest, give sips of hot water and rub the affected area.

BITES AND STINGS

Many insect stings cause irritation, swelling, pain and some are poisonous. Bites from sharp pointed teeth cause deep puncture wounds which can damage tissues and introduce germs. Some of them might crash the tissues. Any bite that breaks the skin needs prompt first aid because it increases the risk of infection.

SNAKE BITES

These can cause punctured wounds. The wound may not be serious but it’s important to determine whether it’s poisonous or not.

SIGNS AND SYMPTOMS

  • The wound may be visible.
  • The patient may show signs of poisoning like bleeding, paralysis of affected limb.
  • Signs of shock may be present.
  • Pulse may be weak and rapid.
  • Visual disturbance.
  • They may have nausea and vomiting
  • Small punctures may appear at the sight which is painful.
  • Swelling.
  • Breathing may become difficult or may completely fail.
  • Patient may start sweating.
  • He/she may become unconscious.

 TREATMENT FOR SNAKE BITES.

  • Tie a piece of cloth or tourniquet.
  • It’s tied above the site to prevent venous blood return
  • It should be tight enough so that blood can’t flow through vein but not too tight to obstruct arterial flow.
  • This tourniquet should be loosen every after 10- 20 minutes
  • Keep the bitten limbs hanging.
  • Re – assure the patient.
  • Keep the patient warm
  • Ensure rest.
  • Examine the wounds for any marks.
  • If there are marks, people think it is not poisonous and if no marks, it is poisonous.
  • Try to get to hospital immediately.
  • And this patient should be given an anti – venom injection.
  • If you are not able to get the patient to hospital immediately, you can do the following:
  • Wash the wound with lukewarm water.
  • You can add potassium permanganate if it is available.
  • Get sterilized knife or a new razor blade, make a cut across the site about 1cm, put a cloth and suck out the poison and spit it out.
  • Apply a clean dressing.
  • Treat shock
  • Refer to the nearest hospital.
  • If breathing fails, start artificial respiration continue monitoring vital signs as you wait for transport.

SCORPION BITE

Scorpion bites or stings or bites from other insects like spiders, mosquitoes etc. can cause serious illness and may be fatal if not treated promptly. A scorpion sting is poisonous so if it bites a person who is weak, it may produce serious results.

SIGNS AND SYMPTOMS

  • Severe pain at the site.
  • Sweating
  • Swelling
  • In case of children, the children may get convulsion.

TREATMENT

  • Reassure the casualty.
  • If the sting is visible, scrap it or brush it a way.
  • Raise the broken part if applicable.
  • Apply a cold compress.
  • Treat for shock.
  • Give a hot drink and keep the patient warm.
  • If the pain and swelling persist and the patient shows signs of shock, advise him to seek medical advice
  • Keep monitoring the vital signs.
  • Check out for allergic reactions like wheezing.

STINGS FOR BEES AND WASPS.

  • These stings occur quite often in rural areas especially if their nests are disturbed.
  • These are very painful but not that dangerous. However, if bitten by many insects (bees).
  • They have a sting which is left at the site and it should be removed.
  • If the person bitten is prone to allergies, then it may cause serious effect or condition because he/she may go into shock.
  • A sting in the mouth or throat is dangerous because the swelling can obstruct the air way.
  • Multiple insect bites cause/ produce serious reaction.

SIGNS AND SYMPTOMS

  • Pain at the site.
  • Swelling
  • Discoloration of the skin.

FIRST AID TREATMENT

  • Remove the sting using your finger, brush, or pair of forceps.
  • Re – assure the casualty.
  • Elevate the affected part if possible.
  • Apply a cold compress and keep it in position for at least 10 minutes.
  • Monitor the vital signs.
  • Treat shock.
  • Watch out for signs of allergic reaction.
  • Advise the patient or casualty to seek medical advice.
  • If the pain persists.

WOUNDS

A wound is a break or tears in the continuity of the skin. 

Wounds can be classified into different types depending on the cause and appearance. And each type has specific risks associated with the surrounding tissue damage.

TYPES OF WOUNDS

  1.  AN INCISED WOUND: Its clean cut wound. It’s usually caused by a sharp object like a razor blade, knife. It has straight edges. And it’s usually accompanied by profuse bleeding because blood vessels are cut across. Surrounding structures like the tendons and nerves may be injured.
  2. LACERATED WOUNDS (TORN WOUND): They are caused by blunt instruments. These wounds do not bleed much but more tissues may be damaged and this type of wound is more prone to infection.
  3. CONTUSED (BRUISED) WOUND: This can be caused by falling down on something that is blunt leaving bruises on the surrounding tissue. The capillaries beneath the skin may rapture and blood may leak into the tissues. And this will result into color change. If the injury is severe, there may be damage to the underlying structure.

This patient may present with the following:

  • Pain and swelling.
  • There are may be discoloration at the site of injury.

The aim of treatment is to reduce blood flow by cooling and gentle compression.

MANAGEMENT

  • Raise and support the injured part in the most comfortable position for the patients.
  • Then apply a cold compress to restrict the bleeding 
  • If you are in doubt about the severity of the injury, refer for medical aid.
  1. PUNCTURED (STAB) WOUNDS: These are caused by sharp pointed instrument e.g. knife, needle, bullet or anything that penetrates into tissues. They tend to cause internal bleed which is dangerous. It can also introduce germs into the bottom of the wound. There is a danger of injury to the internal organs (structure).

The patient may present with following (signs and symptoms)

  • T here might be a wound.
  • There is some bleeding which may not be much.
  • Shock may be there or not.

FIRST AID

  • Handle the injured patient gently as possible.
  • Seat/ lay the patient and raise the injured part.
  • Stop bleeding.
  • Do not disturb any formed clot.
  • If the wound is too big, it requires suturing, just apply a dressing and transfer to hospital.
  • If it’s a limb, immobilize to prevent unnecessary movements.
  • All punctured wounds of the chest and abdomen must be referred to hospital for the doctor to see. 

In case of a small wound 

  • Seat or lay the patient down handle the injured part with water and soap.
  • Clean the injured part with water and soap.
  • Stop bleeding using direct pressure.
  • If it is small wound, apply an antibiotic ointment and cover with a clean dressing.
  1. GUNSHOT WOUNDS: These tend to have a small entry and a big exit. As the missile passes through the body, it may damage internal organs tissues and even some blood vessels. In addition to the external bleeding, there is also internal bleeding the deeper the wound, the more are the chances of becoming infected. Aim of treatment is to stop bleeding and to prevent infection.

           6. PENETRATING CHEST WOUNDS: The rib cage protects not only the lungs, the heart and blood vessels above the diaphragm but it also protects the liver and the spleen below the diaphragm in the upper abdominal cavity. A wound to the front or back of the chest penetrating into the chest allows air to enter the space occupied by the lungs and this will interfere with bleeding and the lungs on the affected side collapses. 

Air in the chest cavity interferes with functions of the sound lung and sometimes the function of the heart is affected. If the wound is not the left lower part of the chest, it may penetrate into the abdominal cavity causing severe hemorrhage.

SIGNS AND SYMPTOMS

  • The casualty may complaint of chest pain.
  • Difficulty in breathing 
  • Breathing is narrow.
  • Cyanosis may be present indicating lack of oxygen.
  • A patient may cough up bright red frothy blood
  • Funny noise may be heard as the patient breathes in.
  • The patient may have signs and symptoms of shock.

AIM OF TREATMENT

To ease breathing by sealing off the wound immediately.

  • Arrange agent transfer to hospital.
  • Place the patient in a half sitting position with the head and shoulder supported.
  • Turn the body to the injured or affected side.
  • Gently cover the wound with a sterile dressing as soon as possible.
  • Form an air tight seal. It can be plastic cover.
  • Support the arm with a sling and make the patient as comfortable as possible.
  • Watch out for signs of internal bleeding.
  • If the casualty becomes unconscious, ensure a clear airway, place in a recovery position with the injured part. Upper most and keep checking breathing.
  • Arrange for urgent remove to hospital.
  1. BED SORE WOUND: Caused by being confined in bed with poor nursing care. It results from bed sore to bed sore wound. When micro organisms invade any of the above wounds, sepsis (pus formation) will occur, and the wound will be dirty and when these micro organisms are destroyed by the use of antiseptics or disinfectants e.g. hibitane, hydrogen peroxide then the wound will be clean.
  2.  ABRASSION: Is caused by tying round a string in a part of the body and it causes a peel of tissues.

Signs and symptoms 

  • Is easily seen
  • Bleeding- external or internal 
  • Pain.
  • Swelling can occur.
  • There can be sweating.
  • Hot and tender.
  • Increased blood supply to the site.

Many wounds do not bleed very much and this slight bleeding may soon stop on its own as clot forms. The process of arresting hemorrhage can be helped by giving the following management.

  1. It is better to wash your hands before dealing with the wound. If the wound is dirty, wash it under running water.
  2. Protect the wound with sterile swab and carefully clean the surrounding area with soap and water.
  3. Gently wipe away from the wound. Do not take off any clot which is forming. You should use each swab once only if the bleeding continues.
  4. Apply direct pressure on the wound using the sterile swab.
  5. Dress small wounds with adhesive dressing while larger ones with addressing pad and bandage.
  6. Raise and support the bleeding part unless you suspect a fracture.
  7. If you do not achieve the objective or you have doubts about the injury seek medical help. 
  1. Eye wounds:  All eye injuries can be serious, even the smallest injury on the eye can affect the cornea. It can also lead to infection with deterioration of the eye sight and even permanent blindness. The cut may be bruised or cut by direct broken fragments, metallic materials, pieces of stone or broken glasses.

Signs and symptoms

  • Patient may complaint of partial or total loss of vision of the affected eye.
  • The eye might appear red; there may be a visible wound.
  •  Blood may be seen or a clear wound on the eye.
  • The shape of eye ball may have become flat.

The aim of treatment is to protect the eye by preventing the movement and seeking medical aid.

Management 

  • Let the casualty lie on the back and keep it as still as possible.
  • Do not attempt to remove any foreign body which is embedded. 
  • Ask the casualty to close the injured eye and cover it with an eye pad or clean dressing then secure the dressing with a bandage or plaster.
  • Advise the casualty not to move the good eye.
  • It may be necessary to cover both eyes and re-assure the patient.
  • Arrange to transfer the casualty to hospital maintaining the treatment position.

10.Wounds which occur in the hand palms: These wounds can occur when a person handles or touches broken pieces of glass, broken objects and cut. Or: If a person falls putting hands on something sharp. These wounds tend to bleed profusely. It can be associated to a fracture. If the wound is deep, some nerves tendons might be affected.

Signs and symptoms

  • Pain at the sight of the wound
  • Bleeding which is sometimes profuse.
  • Loss of sensation, this is because nerves have been injured

Management 

Aim 

  • To control bleeding
  1. Make arrangement to transfer the patient without disturbing any foreign body. 
  2. To control bleeding, you place a sterile dressing over the wound and apply pressure.
  3. Elevate the injured part; put it above the level of the heart.
  4. Encourage the patient to maintain the pressure if the casualty can do it him or himself.
  5. You can also use bandage to support the casualty.
  6. Support the arm with sling as the casualty is being transferred to hospital
  1. ABDOMINAL WOUNDS: These usually occur due to sharp, instruments, gunshots, or anything that penetrates the abdominal wall. A deep wound is serious because it causes internal or external bleeding. But also it might have caused injury to the internal structures. If it has caused internal damage, this may cause severe internal bleeding.

Signs and symptoms 

  • Patient may complaint of general abdominal pain.
  • Bleeding might be there.
  • There might be a wound which may appear small.
  • Sometimes part of the intestine is visible.
  • The casualty may be vomiting.
  • He/she may have signs of shock

AIM:

  1. To protect the wound so that chances of infection are decreased.
  2. Make arrangements to send the casualty to hospital as quickly as possible.

Management 

  • Patient lies at the back with knees upwards. This helps in gaping of the wound.
  • This position helps to decrease strain on the injured part.
  • Knees should be supported in the position.
  • Apply a sterile dressing and secure it with a bandage or plaster.
  • Prevent or treat shock.
  • Do not remove any protruding object in the wound.
  • Do not give anything by mouth.
  • Check the breathing and pulse every 10 minutes.
  • Watch out for any signs of internal bleeding.
  • If the casualty coughs or vomits, support the abdomen gently so that the wound is not strained. It also helps to prevent protrusion of the intestines.
  • If the casualty becomes unconscious, open airway, check breathing and place her in a recovery position while supporting the abdomen. 
  • Quickly transfer the patient to hospital maintaining the treatment position.
  • Do not touch protruding intestines because you may cause infection. You continue supporting the abdomen during coughing and vomiting.

FACTORS AFFECTING WOUND HEALING

  1. Type and severity of the wound: The type and extent of the wound play a significant role in the healing process. Different wounds, such as surgical incisions, lacerations, or burns, may have different healing needs.
  2.  Infections:  Bacterial or fungal infections can significantly affect the healing process and may require medical intervention, such as antibiotics or antifungal medications.
  3.  Blood supply: An adequate blood supply is essential for wound healing. Blood carries oxygen and nutrients to the wound, promoting cell growth and tissue repair. Poor blood circulation, often associated with conditions like diabetes or peripheral artery disease, can delay healing.
  4.  Chronic conditions: Chronic health conditions like diabetes, autoimmune disorders, and cardiovascular disease can affect wound healing. These conditions can impair the body\’s ability to deliver necessary nutrients and oxygen to the wound site and weaken the immune response.
  5.  Age: Advanced age can slow down the wound healing process. Older individuals may have reduced collagen production, decreased immune function, and other age-related factors that affect wound healing.
  6.  Nutrition: Adequate nutrition is crucial for proper wound healing. A balanced diet rich in protein, vitamins (mainly vitamin C and A), and minerals (such as zinc) supports the body\’s healing processes. Malnutrition or deficiencies in these essential nutrients can impair wound healing.
  7.  Medications: Certain medications, such as corticosteroids or immunosuppressants, can hinder with wound healing. Also, treatments like radiation therapy or chemotherapy may negatively affect the healing process.
  8.  Lifestyle factors: Lifestyle choices, such as smoking or excessive alcohol consumption, can impair wound healing. Smoking, in mainly, reduces blood flow and oxygen delivery to the wound site, hindering the healing process.
  9.  Psychological factors: Psychological stress, anxiety, and depression can influence wound healing. High-stress levels may negatively affect the immune system and slow down the healing process.
  10. Wound care: Proper wound care is crucial for maximum healing. Factors such as keeping the wound clean, moist, and protected can  affect the healing process. Neglecting wound care or using inappropriate wound dressings can affect healing.

Injuries And Trauma Read More »

First Aid Medical emergency

First Aid Medical Emergencies

First Aid Medical Emergencies.

First aid is a crucial skill that everyone should possess, as it enables individuals to provide immediate care and assistance to someone who has been injured or is experiencing a medical emergency.

There are various medical emergencies that require prompt first aid intervention. Some of the most common ones include:

 DROWNING

Drowning is defined as the process of experiencing respiratory impairment due to being submerged or immersed in water.

It occurs when the airway is blocked, preventing the person from breathing properly and leading to oxygen deprivation.

Drowning can result into death from hypothermia due to immersion in cold water, sudden cardiac arrest due to spasm of the throat blocking the air way or inhalation of water and consequent air way obstruction.

CAUSES OF DROWNING

  1. Lack of swimming ability: Inability to swim or lack of proper swimming skills increases the risk of drowning, especially in situations where individuals find themselves unexpectedly in water.

  2. Absence of barriers: Insufficient barriers, such as pool fences or lifeguards, can lead to unsupervised access to water bodies, putting individuals, especially children, at higher risk of drowning.

  3. Alcohol consumption: Alcohol impairs judgment, coordination, and reaction time, increasing the likelihood of accidents and drowning incidents in water-related activities.

  4. Seizures or medical conditions: Individuals with conditions like epilepsy or seizure disorders face a higher risk of drowning if an episode occurs while they are near water.

  5. Lack of supervision: Insufficient adult supervision, particularly for children and inexperienced swimmers, can lead to tragic outcomes when accidents happen in or near water.

  6. Fatigue: Especially when a person has been swimming for too long and gets too tired to continue.

Question: What happens during drowning?  The drowning victim struggles of inhale air as much as possible but eventually he goes beneath the water whereby he must exhale air and inhale water.

If this person is not rescued as early as possible, accidental death will result.

SIGNS AND SYMPTOMS

  • Difficulty in breathing
  • Noisy breathing
  • Water comes out from the mouth and the nose.
  • Distended abdomen
  • Cyanosis
  • Confusion
  • Rapid pulse
  • Unconsciousness
  • Fits may occur
  • Breathing may stop.

FIRST AID MANAGEMENT:

Aims of Management

  1. To restore adequate breathing.
  2. To keep the casualty warm.
  3. To arrange for urgent transport to hospital.

(a) REACHING A VICTIM

  • Pull the victim from the water using a rope, a branch of a tree, a stick, a shirt etc.
  • Lie down flat on your stomach and extend your hand or leg to the victim.
  • Throw him an object that will float for example a tire, a log, plastic toes, cautions etc. 
  • Make sure that your own position is safe to rescue to the victim.
  • You can also use a boat and a life jacket if available and swim or tow the casualty to shore or bank.

(b) WHEN THE CASUALTY HAS REACHED THE SHORE

  • Help him lie down a coat, or a rug or any piece of cloth with his head lower than the rest of the body so that the water can drain easily from the mouth and nose. This reduces the risk of inhaling water.
  • Treat the casualty for hypothermia, remove wet clothing and replace with dry ones if possible and cover him with dry blanket or any piece of cloth.
  • If the casualty is fully conscious, give him a warm drink if available.
  • If the casualty is unconscious, open the air way, check the breathing and if not breathing , initiate cardiopulmonary resuscitation. (CPR)
  • Give five (5) initial rescue breaths before you start chest compressions.
  • Call for emergency help even if the casualty appears to have recovered fully because of the risk of secondary drowning.
  • Any water entering lungs causes them to become irritated and the air passages may begin to swell several hours later this condition is known as secondary drowning.
  • Monitor and record vital signs such as level of response, breath and pulse until help arrives.

PREVENTING DROWNING

  1. Learn to swim: Acquiring swimming skills and encouraging others, especially children, to learn how to swim significantly reduces the risk of drowning.

  2. Constant supervision: Ensure active and serious supervision when individuals, especially children, are in or near water. Avoid distractions like phones or other activities that may take away attention.

  3. Use appropriate barriers: Install and maintain proper barriers like pool fences, covers, or gates to restrict access to water bodies and prevent unsupervised entry. Pool nets to cover pools are helpful too when having children around.

  4. Wear life jackets: In situations where swimming ability is limited or uncertain, wearing properly fitted life jackets can be essential  and increase safety.

\"DIAGRAM

BURNS AND SCALDS:

BURNS: Are tissue injuries caused by dry heat, extreme cold corrosive substances, friction or radiation. Or: Is the destruction of the body surface by dry heat.

SCALDS: Are tissue injuries caused by wet heat from hot liquids and vapor.

TYPES OF BURNS:

(a) DRY BURNS: Dry burns occur when the skin comes into direct contact with a dry heat source. Examples of dry heat sources include flames, hot objects, or heated surfaces such as stoves, flat iron.

COMMON CAUSES

  • Contact with hot object
  • Friction
  • Flames

(b)  ELECTRICAL BURNS: Electrical burns occur when the body comes into contact with an electrical current. These burns can result from accidents involving faulty electrical appliances, exposed wiring, lightning strikes, or high-voltage power lines.

COMMON CAUSES

  • High voltage current
  • Lightening

(c) CHEMICAL BURNS: Chemical burns occur when the skin or eyes come into contact with corrosive or harmful chemicals. Chemical burns can result from contact with acids, alkalis, solvents, cleaning agents, or industrial chemicals.

COMMON CAUSES

  • Industrial chemicals including inhaled fumes and corrosive gases, domestic chemicals and agents. For example paint, pesticides, bleaching agents or any other strong acid or alkaline chemical.

(d) RADIATION BURNS: These are caused by over exposure to ultraviolet rays from the sun, exposure to radioactive sources such as x – rays.

(e) COLD INJURY: Cold burns, also known as frostbite, occur when the skin and underlying tissues are exposed to extreme cold temperatures. Cold burns can result from direct contact with extremely cold objects, exposure to freezing temperatures, or prolonged exposure to cold, contact with freezing vapor such as oxygen or nitrogen. Frostbite can cause the affected areas to become numb, pale, and firm to the touch. 

 PEOPLE AT RISK OF BURNS 

    1. Children mostly under five years of age.
    2. Elderly.
    3. Those with medical related conditions like seizure due to epilepsy, diabetes, leprosy, and albinism.
    4. Alcoholic or drug abusers.
    5. Factory workers.
    6. Petrol station pump attendants/ workers.

 CAUSES:

The causes of burns and scalds are external and can be grouped as follows.

  • Dry heat can be from flame or any hot object.
  • Moist heat can be from hot water or steam.
  • Corrosive chemicals such as acid and alkaline 
  • Electricity.
  • X –rays or ionizing radiation including radiation dermatitis.
  • Friction.
  • Smoke and inhalation of toxic substances.

SIGNS AND SYMPOMS

  • Reddening of the skin
  • Swelling
  • Blister formation
  • Pain due to exposure to the nerves common in 2nd degree burn
  • Peeling off the skin.
  • The victim is restless.
  • Dehydration
  • Signs may be present
  • For air way burns, there is;
  1. Difficulty in breathing
  2. Hoarseness of the voice.
  3. Shivering due heat loss.

CLASSIFICATION OF BURNS:

Burns are classified according to depth and the extent of damage.

(a)BASED ON DEPTH

  1. Superficial burns.
  2. Partial thickness burns
  3. Full thickness burn.

1. SUPERFICIAL BURNS/ FIRST DEGREE BURNS

This involves only the outer most layer of the skin. It is characterized by pain, redness, swelling, and tenderness but do not result in blistering. It usually heals well if first aid is given promptly.

2. PARTIAL THICKNESS/ SECOND DEGREE BURNS

It involves the epidermis and dermis layers of the skin, the skin may peel off. In this case, medical treatment may be needed. 

3. FULL THICKNESS BURNS/ THIRD DEGREE BURNS.

All the layers of the skin are burnt. There may be some damage to the nerves, the fatty tissues and muscles. Full thickness burns are characterized by loss of pain sensation. This may mislead both the first aider and the casualty about the true severity of the injury. Urgent medical attention is always essential for such burns (pain loss is a sign of nerve damage and not a sign of fairness).

( b)BASED ON DEGREE OF SEVERITY

(i) FIRST DEGREE: Epidermis is only involved reddening of the skin (erythema), no blisters formed.

(ii) SECOND DEGREE: Epidermis and some dermis are destroyed, blister formation, severe pain due to nerve exposure, mild to moderate edema.

(iii) THIRD DEGREE: Epidermis, dermis and hypodermis are involved some muscles get burnt it looks dry, waxy or hard skin and there is no pain.

(iv) FOURTH DEGREE: The whole skin is burnt including muscles, bones, tendons and ligaments.

EXTENT OF BURNS

It is vital to assess the extent of the area affected by the burn. This is because, the greater the surface area affected, the greater the fluid loss and the higher the risk for shock.

The extent of the burnt area is assessed using a simple formula known as WALLACE’S RULE OF NINE TO ADULTS.

The rule of nine divides the body into areas of about 9% as follows

  1. Head and neck – 09%
  2. Frontal trunk – 18%
  3. Back trunk – 18%
  4. Each arm – 9*2= 18%
  5. Lower limbs – 18*2=36%
  6. Perineum – 1%
  •  Total – 100%

RULE OF SEVEN FOR CHILDREN:

  1. Head – 28%
  2. Front trunk – 14%
  3. Back trunk – 14%
  4. Each lower limb – 14*2=28%
  5. Each upper limb – 7*2=14%
  6. Perineum – 2%
  • Total – 100%

This formula divides the body in areas about 7% and is used in estimation of burns in children.

NOTE: If 60% of the skin is burnt or 40% in the very young or very old, kidney failure is likely to occur up to 6 weeks post burning. 30 – 40% burns and above, the patient is considered as having severe burns and should be hospitalized. 

FIRST AID MANAGEMENT

(a) FOR MINOR BURNS

These include superficial burns and those covering a small area.

Aims

  • To reduce pain
  • To prevent complications
  • To reassure the victim
  • To arrange for urgent transport.

MANAGEMENT

  1. Put out the fire by pouring water or rapping the victim in a blanket. Do not allow the person on fire to run about especially into fresh air
  2. Cool the burnt area immediately by immersing it in cold water or putting it under gentle cold water for at least 10 minutes. Do not apply ice onto the skin. 
  3. A clean cold towel can also be applied to help in reducing the pain (cold compress).
  4. If blister form, leave them untempered with i.e. do not break them.
  5. Dry the area with clean piece of cloth and cover with a dry sterile non adhesive dressing to help prevent contamination on and infection.
  6. The first aider should pack the area while drying.
  7. Protect the burn area from pressure and friction.
  8. Reassure the casualty to reduce on the anxiety.
  9. Seek medical help if the burn involves the airways, eyes, hands or genitals.
  10. Seek medical advice if the patient develops signs of infection.
  11. Obtain an up to date information from the patient about tetanus immunization i.e. is this casualty fully immunized against tetanus.

FIRST AID MANAGEMENT FOR SUPERFICIAL BUT EXTENSIVE BURNS:

Burns that are not deep but cover a bigger %age of the body require a prompt medical attention.

  1. Call for help
  2. Put out fire by pouring in water or rapping a blanket.
  3. Remove clothing’s from the burnt area if they come off easily, otherwise do not disrupt the burn if the clothing’s are stuck to the skin.
  4. Reassure the victim to relieve anxiety.
  5. Remove any ring or constricting items since the burnt area may swell any time making it difficult to remove them.
  6. If the burnt area is smaller than the victim’s chest, cool the burn by lowering it with a clean cold wet towel or gently running cold water.
  7. If the burn is larger than the victims chest do not immerse the burn in cold water because there is risk of overcooling the victim instead cover the burn with a dry sterile non adhesive dressing to prevent contamination.
  8. If fingers or toes are burnt, separate them with a dry sterile non adhesive dressing. 
  9. If there is shock, carry out measures to treat it or other ways to prevent it.
  10. Treat shock.
  11. Transfer to hospital as early as possible and keep the head in one position during transit.
  12. Stay with victim until he gets medical help.
  13. Keep dressing clean, dry and change them whenever necessary.
  14. Obtain information about tetanus immunization.

COMPLICATIONS OF BURNS

Immediate

  • Vascular, tendon& nerve injury
  • Foreign body inclusion
  • Skin loss& necrosis
  • Airway obstruction of respiratory distress 

Intermediate

  • Secondary infection
  • Shock due to pain
  • Dehydration
  • Reduced circulatory volume 
  • Electrolyte imbalance

Late 

  • Infections
  • Contractures
  • Renal failure
  • Unstable scars
  • Alopecia
  • Marjolin’s ulcer(squamous cell carcinoma developing from the old scar)

ELETRIC BURNS:

Electric injuries are due to effect of high electric current voltage. The heat generated during the passage of current then through the body causes the deep burns.

In case of direct shock at the source, the victim remains stuck to the source of electricity until current is less. There may be:

  • Physical injury when the victim falls down
  • Respiratory arrest.
  • Cardiac arrest.

Sources of electric current.

 High current from cables from the main sources or low current from appliances.

  • Electrical appliances such as coffee grinders, iron boxes, shaving machines, washing machines, television sets, work shop and shops’ appliances, offices installations, etc.   These are usually connected to a direct power source either of low voltage or high voltage.

Note: Dump clothing’s, foot wear and ground increases electrical conductivity and makes the damage worse.

DANGERS OF ELECTRIC BURNS:

  • Cardiac arrest due to passage of current through the heart
  • Severe burns
  • Shock
  • Unconscious

MANAGEMENT

  1. Switch off the current and remove the plug from the socket to break contact of the casualty with the electric source.
  2. If the patient is lying in water keep out of it yourself as water is an excellent conductor of electricity.
  3. If the patient is in contact with a live wire and the current cannot be switched off, separate the wire from the victim using a long wooden stick and while standing on a non – conductor of electricity such as a wooden board or a pile of news papers. Wear gloves if available.
  4. Give artificial respiration and external cardiac massage if necessary.
  5. Flood the injury with cold water at least 10 minutes or until the pain is relieved. If water is not available, any cold harmless liquid can be used.
  6. Gently remove any jewelry, watches, belts or constricting clothes from the injured area before it begins to swell.
  7. Cover the burnt area using a sterile non – adhesive dressing and bandaging loosely.
  8. Treat shock if present.
  9. Give fluids to drink if conscious.
  10. Reassure the casualty.
  11. Monitor and record vital signs e.g. level of response, breathing and pulse.
  12. Arrange and send the casualty to hospital.

DON’TS

  • Do not touch the casualty if he is in contact with electric current.
  • Do not use any thing that is wet to break the electrical contact with victim.
  • Do not approach high voltage wires until the power is turned off.
  • Do not move a person with electrical injury unless he is immediate danger and is no longer in contact with one.

PREVENTION OF ELECTRICAL INJURIES IN THE HOMES OR AT WORK PLACE

  1. Wiring in the house must be checked by a competent electrician at intervals and rewiring is necessary 
  2. Adequate number of power points is essential instead of having only one plug where many appliances are run risking power over load is very dangerous.
  3. Plugs should also be wired correctly 
  4. Follow manufacturer’s instructions when using electrical appliances.
  5. Switches and electrical appliances must not be touched with wet hands or wall heaters and lights should be having cord pulls.
  6. Electrical appliances should be kept out of bath rooms
  7. Shavers should be used with properly insulated sockets.
  8. Children should not be allowed to have access in areas where these appliances are connected or used and should be taught dangers of electric shock.

CHEMICAL BURNS:

Certain chemicals may irritate, harm or be abserbed through the skin, causing wide spread and sometimes fetal damage. Signs however, develop slowly unlike in burns.

SIGNS AND SYMPTOMS

  • – Evidence of chemical in the vicinity.
  • – Intense, stinging pain.
  • – Later, discoloration, and blistering, peeling and swelling of the affected area.

TREATMENT

Aims

  1. To disperse the harmful chemical.
  2. To arrange transport to hospital.
  3. To make the area safe and inform the relevant authorities.

STEPS

  • First make sure the area is safe by assessing for signs of hazardous substances around you and the casualty.
  • Remove the casualty from the area if necessary.
  • Flood the affected area with water to disperse the chemical and to stop the burning. Do this for as long as 20 minutes.
  • Gently remove any contaminated clothing while flooding the injury.
  • Take or send the casualty to hospital, watch for airway and breathing closely.
  • Ask the casualty if she can identify the chemical, and take care not to contaminate yourself by putting on gloves.
  • Never attempt to neutralize an acid or alkali burns unless you are trained to do so and do not delay starting treatment by searching for an antidote.
  • Note and pass the details about the chemical to the medical personnel.

CHEMICAL BURN TO THE EYE

  • Splashes of chemicals in the eye can cause serious injury if not treated quickly.
  • Chemical can damage the surface of the eye, resulting in scarring and blindness. 
  • When irrigating the eye, be especially careful that the contaminated rinsing water does not splash you or the casualty.
  • Wear gloves if available.

SIGNS AND SYMPTOMS

    1. Intense pain in the eye.
    2. Inability to open the injured eye.
    3. Redness and swelling around the eye
    4. Copious watering of the eye.
    5. Evidence of chemical substances or containers in the immediate area.

TREATMENT

AIMS

  • To disperse the harmful chemical
  • To arrange removal to the hospital.

STEPS OF ACTIONS

  • Do not allow the casualty to touch the injured eye or forcifully remove contact lens.
  • Hold the affected eye under gently running cold water for at least 10 minutes.
  • Make sure that you irrigate both sides of the eye eyelid thoroughly. It is easier to pour water from a glass or eye irrigator or tap.
  • If the eye is shut in a spasm of pain, gently but firmly pull the eye lids open. Be careful that the contaminated water does not splash to uninjured eye.
  • Ask the casualty to hold a sterile eye pad of clean, non – fluffy material over the injured eye and put bandage over the eye pad.
  • Take or send the casualty to the hospital.
  • Identify the chemical if possible and give details.

SHOCK 

Shock is a condition which occurs when the circulatory system fails. And as a result, vital organs like heart, brain are deprived from oxygen. 

OR: Shock is a cute circulatory failure. The severities of shock vary with nature and extend of injury. It is a common cause of death incase of severe injury.  Shock may develop suddenly or gradually. It can be made worse or pain.

Inadequate tissue perfusion can result in:

  • Generalized cellular hypoxia (starvation)
  • Wide spread impairment of cellular metabolism.
  • Tissue damage – organ failure
  • Death

Shock can be of two types i.e.

1. PRIMARY SHOCK: This is shock which occurs immediately after injury. It is due to excessive stimulation of nerve endings at the site of the injury, but recovers quickly if treated promptly.

2. SECONDARY SHOCK: This develops within the next 30 minutes or even an hour. This is usually caused by hemorrhage. Secondary shock is a serious condition and if not treated properly and promptly, it can cause death. Therefore, the first aider should every possible think to prevent shock development or reduce its effects.

TYPES OF SHOCK ACCORDING TO THE CAUSES:

  1. NERVOUS SHOCK (PSYCHOGENIC SHOCK): This type of shock is due to strong emotional upset. This could be caused by fear, pain; it could also be caused by good or bad news. It can also be due to spinal or head injury because this comes from the shock.
  2. HAEMORRHAGIC OR HYPOVOLEMIC SHOCK: This is due to loss of blood or loss of fluids. Bleeding could be external. It could be due to multiple injuries. It can also be due to severe vomiting or diarrhea.
  3.  CARDIOGENIC SHOCK: This is when the cardiac muscles can not pump blood infectively either due to injury or if the person has a heart disease. This means the damaged muscles have no enough pressure to the rest of the body.
  4. BACTERIAL OR SEPTIC SHOCK: This refers to severe infection where there is discharge of poisons or toxin the blood stream. These bacteria or toxin tend to cause dilatation of blood vessels, and when the blood vessels are dilated they tend to withdraw blood.
  5. ANAPHYLATTIC SHOCK: This due to severe allergic reaction of the body to some drugs. They may also react to foreign items. In this case there is dilatation of blood vessels and again blood is withdrawn from some of the organs.
  6. ELECTRIC SHOCK: This is due to high voltage of an electric current. If any part of the body comes in contact with a live wire or an electric cable which has leaking current, then the person will get electric shock.
  7.  NEUROGENIC SHOCK: Chemical injury – association with aspiration of gastrointestinal contents during general anesthesia especially in cesarean section. It is also due to dry induced – associated with spinal anesthesia.

POSSIBLE CAUSES OF SHOCK

  • The most common cause of shock is severe blood loss. (Hemorrhage or bleeding)
  • Other causes include severe burns and scalds.
  • Fractures can also lead to shock possibly because of pain and some fractures are associated to bleeding.
  • Severe pain.
  • Excess fluid losses from the body – diarrhea, vomiting etc.
  • Excessive fear can lead to shock.
  • Some conditions like heart disease if severe.
  • Severe infections.
  • Low blood sugar in the body (Hypoglycemia).
  • Severe allergic reactions. (Anaphylactic shock)
  • Drug over dose.
  • Exposure to heat and cold.

SIGNS AND SYMPTOMS OF SHOCK

  • Giddiness and fainting
  • Patient may have nausea and vomiting. 
  • Pulse is rapid and weak.
  • Blood pressure is low.
  • Patients may be restless.
  • Breathing is shallow and rapid. (gasping)
  • Temperature is sub – normal.
  • The extremities are cold.
  • The patient may become unconsciousness and eventually the heart may stop.
  • Dizziness and weakness.
  • Thirst.

GENERAL TREATMENT FOR SHOCK

It is important to treat primary shock promptly in order to avoid secondary shock.

AIMS OF TREATMENT

  • Is to improve blood supply to the brain, heart, lungs refer the patient as soon as possible.
  1.  Let the patient lie down with the head lower than the rest of the body. This helps to send blood to the vital organs.
  2.  The head should be turned to one side.
  3.  The casualty should be moved as little as possible and should not be handled unnecessarily.
  4.  Keep the casualty warm but not over heated.
  5.  Stop any bleeding if there.
  6.  Immobilize any fracture if present
  7.  Treat any injuries.
  8.  Loosen any tight clothing around the neck, waist.
  9.  Check the breathing, the pulse and level of responsiveness every 10 minutes.
  10.  If breathing becomes difficult or this patient like vomit put him/her in recovery position.
  11.  If the casualty becomes unconscious, ensure an open airway, check breathing.
  12.  Take/ arrange for transfer of casualty to hospital maintaining the treatment position.
  13.  Re-assure the casualty if conscious or the relatives.
  14.  If the patient is not in severe shock and is conscious, give fluids to drink.
  15.  If the cause of the shock is not established, just give sips of clear water.
  16.  If oral fluids are contra – indicated, patient is put on intravenous fluids, I.V fluids should be given with care to avoid over loading the heart. When a patient is on intravenous, watch the pulse rate carefully.
  17.  Relief of pain in case of a fracture, it should temporarily be splinted.
  18.  In case of burns, cover with smooth and clean cloth.
  19.  Give analgesics (pain killer) e.g. morphine. Morphine should not be given if the patient has a respiratory problem, because it depresses the respiratory center which is found in the brain.
  20.  You continuously re-assure the casualty and attendants or relatives.

ASPHYXIA

Asphyxia is a fatal condition which occurs if there insufficient oxygen to the tissues of the body. 

The deficiency may be due to insufficient amounts of oxygen in the breathed in. It may also due to interference or injury to the respiration system.  Without adequate supply of oxygen, the tissues deteriorate very rapidly. So the vital structures will lack enough oxygen leading to loss of conscious or even death.

CAUSES OF ASPHYXIA

Many conditions can lead to asphyxia. And these are conditions which affect the air way and the lungs i.e.

  1. Fluids in the air passages. For example, drowning
  2. Obstruction to the air way. This may be caused by; the tongue falling back in case of an unconscious casualty can also be caused by food, vomit, it could be foreign body.
  3.  Swelling and edema of the tissue with in the throat. This may be due to severe burns of face and neck, it may be due to a sting (wasp or bee), and blood can also cause a blockage, swelling.
  4. Compression of the wind pipe. This may due to strangulation or compression of the chest.
  5. It may be due injury to lungs.
  6. Fits can also disturb the respiratory passage.
  7. Conditions which may affect the brain (respiratory centre) e.g. electrical injury (shock), poisoning, stroke by lightning , paralysis (which may be due to injury of spinal code) 
  8. Inhalation of harmful gases or fumes in the air, passages, e.g. coal gas, motor exhaust fume, smoke sewage gas and ammonia affect the level of oxygen in blood.Note: some gases affect the respiratory centre in addition.
  9. Suffocation is also a possible cause of suffocation is a condition in which air is prevented from reaching the air passage by external prevention.

SIGNS AND SYMPTOMS OF ASPHYXIA

  • The patient feels dizzy and weak.
  • Difficulty in breathing.
  • Later the breathing may become noisy.
  • The pulse is rapid but as the condition worsens, it becomes slow and irregular.
  • The neck veins might swell.
  • Cyanosis (bluish discoloration of the skin, nailed, membrane) may be present (patient may be semi conscious)

Aim

  • To restore adequate breathing and transfer.

MANAGEMENT

  • Immediately remove obstruction or remove the casualty
  • Ensure free passage for air especially for unconscious patients protecting the tongue obstructing the air way
  • If the casualty is conscious re – assure as you wait for transport.
  • If unconscious just keep a clear air way as you keep an eye on breathing.
  • Seek medical advice if you have doubt about the medical condition.
  • If there is frothing at the mouth.
  • If there is cyanosis.
  • If there is confusion.
  • If the level of responsiveness is getting low.
  • And if there is a change in breathing.

MANAGEMENT OF ASPHYXIA DEPENDING ON THE CAUSE

  1. Drowning: while artificial respiration is being performed, instruct by standers to remove wet clothing as far as practicable and wrap the casualty in dry blanket or other dry clothing.
  2. Choking: to dislodge the obstruction, bend the casualty’s head and shoulder forward or in case of a small child, hold him upside down and thump his back hard between the shoulder blades. If this is not successful encourage vomiting by passing two fingers right to the back of the casualty’s throat. 
  3. Swelling of the tissues within the throat: If breathing has not ceased or when it has been restored, or give ice to sock or failing, ice cold water to sip. Butter, olive oil or medicinal paraffin may also be given.
  4. Suffocation by smoke: Protect yourself by tying a towel, hand kerchief or cloth, preferable wet, over your mouth and nose. Keep low and remove the casualty as quickly as possible.
  5. Suffocation by poisonous gas: Before entering any closed space known or suspected to contain poisonous gas of any kind, take a deep breath and hold it. Ensure a free circulation of air by opening or if necessary by breaking doors or windows.
  6. Hanging, strangling and throttling:
  • Hanging: This involves suspension of the body. Grasp the lower limbs and raise the body. Free the neck by loosening or cutting the rope. Do not wait for a police man.
  •  Strangling: This is cutting off the air supply by constricting the neck. Cut and remove the band constricting the throat.
  • Throttling: This is cutting off air supply by squeezing a person’s throat.

SIGNS AND SYMPTOMS 

  • For the case of hanging, the body might be still hanging
  • If the person has not died, the pulse rate is high/ rapid, breathing is rapid, cyanosis, conscious is impaired, congestion of the face.
  • Neck veins are prominent (large or protruding)
  • There might be marks to indicate where the rope passed.
  • Sometimes constriction (squeeze) may still be visible around neck, e.g. a scarf or it may be hidden in the folds of the skin e.g. wire.

AIM OF TREATMENT

  • Restore adequate breathing and arrange moving to hospital.

MANAGEMENT

  • Remove the constriction immediately, supporting the weight of the body if hanging.
  • If there is knot, cut below it (a knot is difficult to cut and it may be useful evidence).
  • If the casualty is unconscious, open the air way and check breathing. Complete ABC of resuscitation if required and place the casualty in the recovery position. 
  • Arrange for shifting to hospital.

Note: seek medical aid even if recovery seems complete.

SUFFOCATION

Suffocation results when air is prevented from reaching the air passages by external obstruction such as a plastic bag, soft pillow or a fall on sand. A baby may be suffocated through lying face down on a pillow or cushion.

GENERAL SIGNS AND SYMPTOMS:

  1. Difficulty in breathing. The rate and depth of breathing increases.
  2. Breathing may become noisy with snoring or gurgling. (low bubbling sound)

AIM

  • Restore supply of air to the casualty and seek medical aid.

MANAGEMENT

  1. Immediately remove any obstruction or move the casualty to fresh air.
  2. If the casualty is conscious and breathing, reassure and observe.
  3. If the casualty is unconscious, open air way and check breathing. Complete the ABC of resuscitation if required and place the casualty in recovery position.
  4. Seek medical aid, if in doubt about the condition, arrange moving to hospital.
  5. Possible frothing at the mouth.
  6. Blueness of face, lips and finger nails (cyanosis)
  7. Confusion
  8. Lowering of level of responsiveness
  9. Possible unconsciousness.
  10. Breathing may stop.

CARDIAC ARREST

 Cardiac arrest is a sudden stoppage of the heart resulting in adequate cerebral circulation, which leads to coma within one minute but recovery would be complete if the oxygen deficiency is relieved within 3 minutes.

If oxygen deficiency exceeds more than 4 – 6 minutes severe and permanent brain damage will occur.

CAUSES OF CARDIAC ARREST

  1. Heart attack and myocardial infarction 
  2. Obstruction in the cardiac (heart) circulation.
  3. Injury to the heart.
  4. Electrolytes imbalances.
  5. Lack of oxygen to the heart.
  6. Severe drug reaction.
  7. Electric shock
  8. Due to anesthetic drugs.
  9. Severe bleeding.

SIGNS AND SYMPTOMS OF CARDIAC ARREST

  1. Absence of pulse in the major arteries like carotid or femoral arteries 
  2. The patient will be unconscious
  3. The skin color will turn into blue (cyanosis) 
  4. Respiration will stop.
  5. Pupils are widely dilated.
  6. If the operation is in progress there will be no bleeding or if there is bleeding it will stop.

FIRST AID MANAGEMENT

AIMS

  1. To save life.
  2. To preserve life.

MANAGEMENT OF CARDIAC ARREST

  • First confirm the diagnosis (unconscious, death like appearance, no pulse and no respiration)
  • Call for help e.g. passersby and an ambulance.
  • Remove tight clothes around the neck, chest, waist, etc which may interfere with circulation.
  • Place the casualty on spine position on a firm ground or a hard board.
  • Do not waste time and start cardiopulmonary resuscitation(CPR)
  • Follow ABC of resuscitation.
  1. A – Form airway clearance, i.e. remove vomits, secretions or any dentures.
  2.  B – For breathing, i.e. assist breathing by artificial means.
  3. C – For circulation i.e. chest circulation by chest compression.
  • Continue chest compressions and mouth to mouth respiration at the rate of 5:1.
  • Hyperextend the neck by tilting. It back ward as far as possible and start artificial respiration (mouth to mouth respiration) with chest compressions.
  • Monitor vital signs such as level of response, pulse, check papillary reaction which indicated successful efforts.
  • Continue basic life support and transport the patient to hospital.

POISOINING

Poison is any substance which when taken into the body in sufficient quantities it can cause injury to health or it can completely destroy life.  It is taken either accidently or intentionally.

HOW POISONS ENTER THE BODY

Poisons enter using different ways;

  1. They can be ingested (swallowed). This is by eating or drinking a poisonous substance. When eaten, they enter the circulatory system through the walls of intestines.
  2. Inhalation: Of fumes/ gases or even smoke from poisonous substance.
  3. Injection. What is intravenously introduced into the body may be poisonous.
  4. By contact. For example if a strong acid or spray comes into contact with the skin.

EFFECTS OF THE POISONS TO OUR BODIES

When poisons reach inside the body, they act in the ways:

  • Once in the blood stream, they can affect the central nervous system whereby they prevent some vital activities like breathing.
  • They may affect action of the heart and even other vital organs.
  • They can also disturb oxygen distribution.
  • When poisons reach the brain, the person may have convulsion or may be delirious.
  • A poison which is swallowed, it affects the food passages directly causing vomiting, pain and sometimes diarrhea.
  • If a person has taken a corrosive poison, it will burn the lips, mouth and the whole of the food passage.
  • Inhaled poisons will cause severe respiratory distress.
  • An over load of poisons will damage the body’s poison filter, i.e. kidney and liver.
  • Poison in the digestive system can cause vomiting, abdominal pain and diarrhea.
  • Poison in the blood may interfere with the red blood cells and if these red blood cells are disturbed, they may not carry adequate oxygen to the tissues.

TYPES OF POISON 

  1. Food poisoning 
  2. Drug poisoning
  3. Alcohol poisoning
  4. Industrial poisoning

AIMS OF FIRST AID:

  • To maintain the airway, breathing and circulation.
  • To identify the type of poison.
  • To obtain medical aid.
  • Aim at removing any contaminated clothing or article.
  • Remove the casualty from danger.

GENERAL TREATMENT FOR POISON 

  • Seek for medical aid as soon as possible because the case may become medical legal
  • Save the container 
  • Do not throw away the vomits in case of vomiting.
  • If the casualty is unconscious put in prone position with the head turned to one side.
  • You can also lay the patient in lateral position if the patient is vomiting.
  • And continue watching the breathing 
  • Start artificial respiration if necessary.
  • If the patient is conscious, you can give salty water or warm water to induce vomiting and also dilute the poison.

FOOD POISONING

Food poisoning, also known as foodborne illness, refers to the illness caused by consuming contaminated food or beverages.

 Contamination can occur due to the presence of harmful microorganisms such as bacteria, viruses, parasites, or toxins produced by certain bacteria or molds. When ingested, these contaminants can cause adverse reactions in the body, resulting in food poisoning.

Common Causes of Food Poisoning

Food poisoning can be caused by various factors, including:

1. Bacterial Contamination Bacterial contamination is a leading cause of food poisoning. Bacteria such as Salmonella, Escherichia coli (E. coli), Campylobacter, and Listeria monocytogenes can contaminate food during production, processing, handling, or storage. Improper cooking, inadequate refrigeration, and poor hygiene practices can contribute to bacterial growth and subsequent foodborne illness.

2. Viral Contamination Viruses such as rotavirus, and hepatitis A can contaminate food and cause food poisoning. Viral contamination often occurs through improper hand hygiene by food handlers or exposure to fecal matter during food preparation.

3. Parasitic Contamination Parasites such as Giardia, Cryptosporidium, and Toxoplasma can contaminate food and water sources. Consuming raw or undercooked contaminated meat, seafood, fruits, or vegetables can lead to parasitic infections and subsequent food poisoning.

4. Toxins and Chemicals Toxins produced by certain bacteria, such as Staphylococcus aureus and Clostridium botulinum, can contaminate food and cause food poisoning. Chemical contaminants, including pesticides, heavy metals, and cleaning agents, can also lead to foodborne illness if present in unsafe levels

MANAGEMENT

It is caused by eating contaminated food (by bacteria).

THE PERSON MAY PRESENT WITH;

  1. Gastrointestinal Symptoms Gastrointestinal symptoms are predominant in food poisoning and may include nausea, vomiting, abdominal pain, diarrhea, and sometimes bloody stools.
  2. Systemic Symptoms In some cases, food poisoning can also cause systemic symptoms such as fever, headache, muscle aches, fatigue, and weakness. (Some times may go into shock)

TREATMENT

  • Give plenty of fluids to prevent dehydration.
  • If the poison was corrosive, do not induce vomiting.
  • Collect and keep any vomitus for examination.
  • For corrosive substances give milk or water to dilute.
  • For example if one has taken an acid, you can give an alkaline like sodium bicarbonate to counteract.
  • And if it was a strong alkaline, you give a weak acid. A weak acid could be lime juice (2 spoons full in a pile of water).
  • You give soothing drinks, while egg, rice water. And still arrange to transfer the casualty.

Prevention of Food Poisoning

Prevention is key in reducing the risk of food poisoning. Effective preventive measures include:

1. Safe Food Handling Practicing proper hand hygiene, using clean utensils and surfaces, and preventing cross-contamination between raw and cooked foods are essential for safe food handling.

2. Proper Cooking and Storage Cooking foods thoroughly and maintaining proper storage temperatures to prevent bacterial growth are vital in reducing the risk of food poisoning.

3. Hygiene Practices Maintaining personal hygiene, such as regular handwashing, especially before food preparation, can help prevent foodborne illness.

4. Avoiding Cross-Contamination Separating raw and cooked foods and using different utensils and cutting boards for each can prevent cross-contamination and reduce the risk of food poisoning.

ALCOHOL POISONING

Alcohol poisoning refers to a severe and potentially fatal condition that occurs when an individual\’s blood alcohol concentration rises to toxic levels. 

It happens when a person consumes a large amount of alcohol within a short period. Alcohol is a depressant that affects the central nervous system, and when consumed excessively, it can lead to significant impairment of vital functions.

Signs and Symptoms of Alcohol Poisoning

 Common signs and symptoms include:

1. Mental and Behavioral Symptoms

  • Confusion and disorientation
  • Agitation or aggression
  • Delirium or unconsciousness
  • Slow or irregular breathing
  • Seizures

2. Physical Symptoms

  • Pale or bluish skin
  • Vomiting or retching
  • Hypothermia (low body temperature)
  • Slow heart rate
  • In severe cases, respiratory failure or cardiac arrest

Immediate First Aid for Alcohol Poisoning

When encountering a person with alcohol poisoning, it is essential to take immediate action while waiting for emergency medical assistance. Follow these steps:

  1.  Call for Help / Emergency Assistance Contact emergency services and provide them with accurate information about the person\’s condition and the amount of alcohol they have consumed.
  2.  Stay with the Person Do not leave the individual alone, especially if they are unconscious or experiencing severe symptoms. Stay with them to monitor their condition and provide reassurance.
  3.  Monitor and Support Breathing Check the person\’s breathing and make sure they are lying on their side in the recovery position to prevent choking on vomit. If breathing becomes irregular or stops, be prepared to perform CPR if you are trained to do so.
  4.  Do Not Leave the Person Alone Continue to monitor the person\’s vital signs, mental status, and breathing until medical professionals arrive.

Complications

Alcohol poisoning can have severe consequences and potential long-term effects, including:

  • Brain damage due to lack of oxygen
  • Liver damage or alcoholic hepatitis
  • Damage to the gastrointestinal system
  • Increased risk of accidents or injuries
  • Worsening of existing health conditions

Prevention of Alcohol Poisoning

Preventing alcohol poisoning involves responsible drinking practices and promoting a safe drinking environment,

  1.  Responsible Drinking Drink alcohol in moderation and know your limits. Pace yourself, alternate alcoholic beverages with non-alcoholic ones, and avoid drinking games or excessive peer pressure.
  2.  Know Your Limits Understand your tolerance for alcohol and know when to stop drinking. Avoid trying to keep up with others or exceeding your personal limits.
  3.  Avoid Peer Pressure Resist peer pressure to drink excessively or engage in risky behaviors. Surround yourself with supportive friends who respect your choices.
  4.  Education and Awareness Promote education and awareness about the risks of alcohol poisoning. Encourage open conversations about responsible drinking and the importance of looking out for one another.

DRUG POISONING

Drug poisoning refers to the harmful effects caused by the ingestion, inhalation, or exposure to excessive amounts of medication or drugs.

 It can occur due to accidental overdoses, intentional self-harm attempts, adverse reactions to medications, or interactions between different drugs.

TYPES OF DRUG POISONING

  1.  Accidental Overdose Accidental overdose happens when a person unintentionally takes an excessive amount of a medication or drug, either due to misreading labels, miscalculations, or improper dosing.
  2.  Intentional Overdose Intentional overdose occurs when an individual purposely takes an excessive amount of a medication or drug with the intent to harm oneself or commit suicide.
  3.  Adverse Reactions Adverse drug reactions can lead to drug poisoning. Some individuals may have a hypersensitivity or allergic reaction to certain medications, resulting in severe and potentially life-threatening symptoms.
  4.  Drug Interactions Drug interactions can occur when two or more medications or drugs interact with one another, leading to unexpected side effects or toxicity.

Signs and Symptoms of Drug Poisoning

The signs and symptoms of drug poisoning can vary depending on the type of drug involved and individual factors. Common manifestations include:

1. Central Nervous System Symptoms

  • Confusion or disorientation
  • Agitation or restlessness
  • Drowsiness or coma
  • Seizures or convulsions
  • Hallucinations or delirium

2. Cardiovascular Symptoms

  • Rapid or irregular heartbeat
  • High blood pressure
  • Chest pain or tightness
  • Palpitations or arrhythmias

3. Respiratory Symptoms

  • Shallow or labored breathing
  • Slow or irregular breathing
  • Respiratory distress or failure

TREATMENT.

  • If the casualty is conscious, help him to be in a comfortable position and ask him what he has taken.
  • Monitor and record the vital signs and if necessary transport or refer.

Prevention of Drug Poisoning

  1.  Proper Medication Use Follow prescribed dosages, administration instructions, and recommended durations when taking medications. Avoid self-medicating or altering dosages without medical advice.
  2.  Awareness of Drug Interactions Be aware of potential drug interactions between prescribed medications, over-the-counter drugs, and herbal supplements. 
  3.  Storage and Disposal of Medications Store medications securely and out of reach of children or individuals who may misuse them. Dispose of expired or unused medications properly to prevent accidental ingestion.
  4.  Seeking Professional Help If struggling with substance abuse or mental health issues, seek professional help. Proper treatment and support can reduce the risk of drug poisoning and promote overall well-being.

INDUSTRIAL POISOINING

Industrial poisoning occurs when individuals are exposed to hazardous substances present in industrial environments. 

These substances can enter the body through inhalation, ingestion, or skin contact. Industrial poisons can be in the form of chemicals, heavy metals, or biological agents, and their toxic effects can range from acute to chronic.

Common Types of Industrial Poisons

  1. Chemical Poisons Chemical poisons are substances that have toxic properties and can cause harm to humans upon exposure. Examples include solvents, pesticides, acids, alkalis, and industrial gases, Carbon monoxide (toxic),  irritant gases like ammonia and many others.
  2.  Heavy Metal Poisons Heavy metal poisons, such as lead, mercury, cadmium, and arsenic, are metallic elements that can accumulate in the body over time, leading to chronic poisoning and organ damage.
  3.  Biological Poisons Biological poisons are toxic substances produced by living organisms, such as bacteria, fungi, or plants. They can cause various diseases and health problems when individuals are exposed to them in industrial settings.

Signs and Symptoms of Industrial Poisoning

The signs and symptoms of industrial poisoning can vary depending on the specific toxic substance involved, the duration and intensity of exposure, and individual factors. Some common manifestations include:

1. Acute Symptoms

  • Difficulty breathing or shortness of breath
  • Nausea, vomiting, or abdominal pain
  • Dizziness or lightheadedness
  • Skin rashes or irritation
  • Headaches or migraines

2. Chronic Symptoms

  • Fatigue or weakness
  • Memory loss or cognitive difficulties
  • Chronic respiratory problems
  • Organ dysfunction or failure
  • Development of cancers or other long-term health conditions

GENERAL ROLES FOR TREATMENT OF SWOLLOWED POISONS

  1. Get medical aid as soon as possible.
  2. Keep only container which you think might help to identify the poison.
  3. Check for any signs of burning on the lips. And if the mouth is okay, you can induce vomiting.
  4. If the casualty is conscious, give fluids to dilute the poison.
  5. Where possible give an anti – dot.
  6. Give soothing drinks.
  7. Treat shock if necessary.
  8. Keep the casualty warm.
  9. Loosen any tight, clothing.
  10. If unconscious, put in a semi prone position, watch.
  11. Breathing and give artificial respiration if necessary.

PREVENTION OF POISONING

  1. All medicine bottles and pockets should be labeled containers with unlabeled medicines should not be used.
  2. For toxic medicines, indicated the word poison on the container to enable any person that it’s dangerous.
  3. And put them under lock.
  4. Never take medicine where the label isn’t clear.
  5. Always read the label 3 times.
  6. Label substances used for specific purposes.
  7. And all poisonous substances should be kept out reach of children.
  8. For these cases , as a first aider, always make sure you obey safety regulations so that you don’t become the second victim.
  9. For most of these poisons, you should neutralize so that they are not very harmful.
  10. In some cases, stomach wash out is done.

Question:  What is done for a person who has taken? 

  • Acid 
  •  Alkali
  • Mercury poisoning 
  • Opium
  1. Acid Poisoning:

    • Immediately call emergency services or poison control for assistance.
    • While waiting for help, carefully remove any contaminated clothing and rinse the affected areas with copious amounts of water for at least 20 minutes.
    • Do not induce vomiting unless specifically advised to do so by medical professionals.
    • Keep the person calm and reassured until medical help arrives.
  2. Alkali Poisoning:

    • Contact emergency services or poison control immediately.
    • Rinse the affected areas with large amounts of water for at least 20 minutes to dilute the alkali.
    • If the substance was ingested, give the person small sips of water or milk, unless they are unconscious or experiencing convulsions.
    • Do not induce vomiting.
    • Stay with the person until medical assistance arrives.
  3. Mercury Poisoning:

    • In cases of elemental mercury exposure (liquid mercury), avoid direct contact and prevent further spread by isolating the area.
    • If mercury is present on the skin or clothing, do not touch it with bare hands. Use gloves or a barrier to remove the mercury if possible.
    • Ventilate the area by opening windows and doors to allow the mercury vapor to disperse.
    • Contact emergency services or poison control for guidance on proper disposal and cleanup of the mercury.
    • Seek medical attention to assess the extent of exposure and receive appropriate treatment.
  4. Opium Poisoning:

    • If someone has ingested opium and is unconscious or having difficulty breathing, call emergency services immediately.
    • Do not induce vomiting unless advised to do so by medical professionals.
    • Keep the person lying on their side to prevent choking on vomit.
    • Monitor their breathing and provide first aid, such as CPR, if necessary.
    • Provide all relevant information about the substance and its ingestion to medical professionals.

First Aid Medical Emergencies Read More »

First aid kit

First Aid Kit

FIRST AID KIT

First aid kit or medical kit is a collection of supplies and equipment used to give immediate medical treatment, primarily to treat injuries and other mild or moderate medical conditions.

It is mandatory to have first aid kit in every work place like school, college, house and vehicles. It should be kept at such a place that is easily accessible. Also everyone should be aware of it. It should be labeled as “First Aid” and should have a red cross on a white background. From time to time, its items should be checked and replaced. All the required items should be available and ready for use at all times.

Components of a First Aid Kit

The minimum contents of the first aid box are as follows.

  • Torch 01
  • Thermometer – 01
  • Tongue Depressor (Disposable ice cream spatula)
  • Writing pad
  • Pen/pencil
  • Bandages of various types
  • Gauze pieces
  • Cotton
  • Eye pads
  • Scissors
  • Plaster
  • Safety pins
  • Tourniquet
  • ORS packets
  • Glucose packets
  • Methylated spirit
  • Tincture of iodine
  • Tincture of benzoin.     

PERSONAL PROTECTION OF A FIRST AIDER DURING FIRST AID.

It is important to protect yourself and the casualty from infection as well as injuries. I.e. transmitting germs or infections to a casualty or contracting infection yourself from casualty. 

This is because blood borne viruses such as hepatitis B, HIV may be transmitted by contact with body fluids and through giving mouth to mouth resuscitation. This increases if an infected person\’s blood makes contact with yours through a cut. 

 Always be watchful   for your personal safety, do not put yourself personal safety, do not put yourself at risk by attempting heroic rescues in hazardous circumstances.

WAYS OF MINIMISING THE RISK OF CROSS INFECTION 

  1. Do wash your hands and wear latex free disposable gloves. If gloves are not  available, ask the casualty to dress his or her own wound or enclose your hands in clean plastic bags.
  2. Do cover cuts on your hands with water proof dressing.
  3. Do wear a plastic apron if dealing with large quantities of body fluids and wear plastic glasses to protect your eyes.
  4. Do dispose of all waste safely.
  5. Do not touch any part of the dressing that will come into contact with the wound.
  6. Do not breathe, cough or sneeze over a round while treating the casualty.

OBSERVATION TECHNIQUE USED IN FIRST AID

Every injury and illness manifests itself in distinctive ways that may help your diagnosis. These clues (guide to solution of problem) are divided into two groups: – signs and symptoms. Some will be obvious, but other valuable ones may be overlooked unless you examine the casualty, thoroughly from head to toe.

A conscious casualty should be examined, in the position found,  with any obvious injury comfortably supported, an unconscious casualty\’s airway must first be opened and secured.

Use your senses: – sight, touch, hearing and smell. Be quick and alert, but be thorough and do not skimp or make assumptions. Ask the casualty to describe any sensations caused by touch as the examinations proceeds. Though you should handle the casualty gently, your touch must be firm enough to ensure that you will feel any swelling or irregularity or detect a tender spot.

What to observe for.

                           SYMPTOMS

  1. These are sensations that the casualty feels or experiences and may be able to describe. You may be able to describe. You may need to ask questions to establish their presence or absence.
  2. Ask a conscious casualty if there is any pain and exactly where it is felt. Examine that part particularly and then any other sites where pain is felt, severe pain in one place can mask a more serious, but less painful injury at another place. 
  3. Other symptoms that may help you include nausea, giddiness (loss of balance), heat, cold, weakness and impaired sensation.
  4. All symptoms should be assessed and confirmed, whenever appropriate, by an examination for signs of injury or illness.

                                     SIGNS.

  1. These are details discovered by applying your senses: – sight, touch, hearing, and smell, often in the course of examination.
  2. Common signs of injury include: – bleeding, swelling, tenderness or deformity, signs of illness that are very often evident are pale or flushed skin, sweating, a raised body temperature and a rapid pulse.
  3. Many signs are immediately obvious, but others may be discovered only in the course of thorough physical examination.
  4. If the casualty is unconscious, your diagnosis may have to be formed purely on the basis of the circumstances of the incident, information obtained from onlookers and signs discover.

EMERGENCY

An emergency refers to a sudden and potentially life-threatening situation that requires immediate medical attention.

PREPARING FOR EMERGENCY:

If you are prepared for unforeseen emergencies, you can ensure that care begins as soon as possible for yourself, your family and your fellow citizens. 

You can be ready for most emergencies, if you do the following things now:

  1. Keep important information about you and your family in a handy place. Information regarding address, age, medical conditions, allergies, prescription, doctor\’s name and phone number.
  2. Keep to emergency:
  3. Learn and stay practiced in first aid skills, such as cardiopulmonary resuscitation (CPR).
  4. Keep the first kit readily available in your home, work place, leisure center, and cars. Any first kit must be kept in a dry place and checked and replenished (refilled) regularly, so that items are always ready for use.

GOALS OF EMERGENCY MEDICAL TREAMENT

When care is being given to a patient in an emergency situation, many crucial decisions must be made. Such decisions require sound judgment based on understanding of the condition that produced the emergency and its effect on the person.

The major goals of emergency medical treatment are:

  1. To preserve life.
  2. To prevent deterioration before more definitive treatment can be given
  3. To restore the patient to useful living. 

When the patient is first received into the emergency department, the goal is to determine the extent of injury (illness) and to establish priorities for the initiation of treatment. These priorities are determined by the comparative threat to the person\’s life. Injuries or conditions interfering with vital physiologic function (obstructed airway, massive bleeding) take precedence (priority). Usually, injuries of the face, neck and chest that impair respiration command the highest priorities. Every member of the emergency team must be alert to the total problem of the patient, since the body cannot be isolated into parts. 

PRINCIPLES APPLIED IN EMERGENCY MANAGEMENT

The following principles are applicable to the emergency management of any patient:

  1. Maintain a patient airway and provide adequate ventilation, employing resuscitation measures when necessary. Assess for chest injuries with subsequent airway obstruction.
  2. Control hemorrhage and its consequences.
  3. Evaluate and restore cardiac output.
  4. Prevent and treat shock, maintain or restore effective circulation.
  5. Carry out a rapid initial and ongoing physical examination, the clinical course of the injured or seriously ill patient is not static.
  6. Assess whether or not the patient can follow commands, evaluate the size and reactivity of the pupils and motor responses.
  7. Start electrocardiogram (ECG) monitoring, if appropriate.
  8. Splint suspected fractures of the cervical spine in patients with head injuries.
  9. Protect wounds with sterile dressings.
  10. Check to see if the patient has a medical alert tag or any similar identification designating allergies.
  11. Start a flow sheet of the patient\’s vital signs, blood pressure, neurological status, etc. to guide decision making.

                         ASSESSING A CASUALTY.

This involves finding out what is wrong as quick as possible, however your first priority is to make sure that your not endangering yourself by approaching the casualty unless your sure that the incident area is safe. 

AIMS OF ASSESSMENT

  1. To check the situation quickly and calmly while first protecting yourself and the casualty from any danger. 
  2. To find out and treat any life threatening injuries first.
  3. To carry out more detailed findings of each casualty.
  4. To seek for appropriate help, in case of an emergency or if you suspect a serious injury or illness.
  5. To be aware of your own needs.

There are two methods of assessment namely:

  1. Primary survey.
  2. Secondary survey.
  1. 1. Primary survey:

This is an initial, quick and systematic assessment of casualty to establish and treat conditions that are an immediate threat to life. When dealing with each life threatening condition, work in the following order; ABC principle 

  1. Airway: Is the airway open and clear? If not, open and clear it. An obstructed airway will prevent breathing causing hypoxia and ultimately death. Breathing: Note if breathing is slow, fast, absent or gasping. 
  2. Pulse : Note the pulse for its rate, rhythm, volume and tension.
  3. Breathing: Is the casualty breathing normally? Look, listen and feel for breaths. Blueness of tongue, lips, ear lobe and nail – Indicates lack of oxygen.  If not call for emergence help and start chest compressions with rescue breaths (Cardio pulmonary resuscitation).
  4. Circulation: Is the casualty bleeding severely? This must be treated since it can lead to life threatening condition such as shock
  5. Pallor : Note pallor or the degree of whiteness of tongue, conjunctiva and nails. This indicates the severity of bleeding. Therefore, control the bleeding and treat the casualty to minimize the risk of shock.  Bleeding from any part of body and swelling. N.B: If the threatening conditions are successfully managed or there are none, you carry on assessment and perform a secondary survey.
  1. 2. Secondary survey: This is a detailed examination of the a casualty to look for other injuries or conditions after a primary survey has been done it involves;


  • Head to toe 


(i) Head: 

– Observe skin color, wound, confusion and facial symmetry.

– Check pupils

– Assess level of consciousness

– Palpate for depression of the skull.

– Check ears and nose for fluids or blood.

– Check the mouth for bleeding, dentures and any foreign body.

(ii) The neck: Observe and palpate for areas of tenderness and deformity.

(iii) Chest: 

  • Palpate clavicles and shoulders. 
  • Observe for wounds and whether the chest expands normally upon respiration.
  • Press gently on sternum and ribs to check integrity.

(iv) Arms:

  • Palpate entire length for pain, wounds, deformity and sensation.
  • Ask about pain, tingling, numbness and movement. 

(v)  Abdomen:

  • Observe for distension or wounds.
  • Pal pet for rigidity or tenderness.

(vi) Pelvis:

– Palpate the iliac crest and the pubis for pain.

– Observe for incontinence of the bladder and the bowel.

(vii) Spine: Palpate for tenderness, wounds and deformity.

(viii) Legs: Palpate entire length for pain; deformity and sensation.

(b) HISTORY TAKING

– Ask what happened

– Ask about medical history to find out if there is ongoing and previous condition 

– Ask about medication the casualty is taking currently

– Find out if the person has any allergy.

– Check when the person last had something to eat or drink 

NOTE: Use ‘’AMPLE’’ as a reminder when assessing a casualty to ensure that you have covered all aspects of examination.

A – Allergy

M – Medication

P – Previous medical history

L – Last meal

E – Event history (what happened).

(c) SYMPTOMS: These are sensations that the casualty feels and describes to you. For example if the casualty complain of pain.
(d) SIGN: These are features that can detect by observing and feeling the casualty such as swelling, bleeding, discoloration, deformity and smells. Use all your senses to look, listen, feel and smell.

POINTS TO CONSIDER WHEN DEALING WITH CASUALTY

  1. Make eye contact but look away now and then so as not to stare.
  2. Use a calm, confident voice that is loud enough to be heard but do not shout.
  3. Do not speak to quickly.
  4. Keep instructions simple by using short sentences and simple wards.
  5. Use affirming nods and ‘mmms’ to show that you are listening when the casualty is speaking.
  6. Check that the casualty understands what you mean.
  7. Do not interrupt the casualty but always acknowledge what you are told. For example summarizing what the casualty has told you to show that you understand.
  8. Be aware of risks.
  9. Build and maintain the casualty trust.
  10. Call appropriate help. 

POSITIONING OF A CASUALTY:

A casualty is nursed in different positions in different situations. The commonly used positions are;

  1. Recovery position
  2. Prone position
  3. Fowler’s position/ sit up position
  4. Dorsal recumbent position.
  5. Positioning in shock.

RECOVERY POSITION:

This is used in unconscious patients/ casualties if breathing and has heart beat should be nursed in recovery position.

ADVANTAGES:

  • It maintains open air way.
  • The tongue cannot fall to the back of the throat.
  • Head and neck will remain in the extended position so that the air passage is widened and that any vomiting or other fluid in the casualty’s mouth will drain freely.

\"recovery

The recovery position is as follows:

  • Place the body in the prone position.
  • Turn the head down to the one side. No pillows should be used under the head.
  • Pull up the leg and the arm on the side to which the head is facing.
  • Pull up the chin.
  • Stretch other arm out as shown.
  • His clothes should be loosened at the neck and waist and any artificial tooth should be removed.

NOTE:  Recovery position cannot be used in:

  • When there are fractures to the upper or lower body.
  • When the casualty is lying in a confined space or if it is not possible to bend the limbs.
  1. PRONE POSITION

A patient is placed on his abdominal with head turned to one side. A pillow is placed under the head and hand’s kept on sides. This position is used for patients with burns of the back.

\"prone

  1. FOWLER’S POSITION/ SIT UP POSITION

When a patient is having difficulty in breathing, this position is used. The patient is kept in a sitting position with the help of 3 or 4 pillows.

\"FOWLER’S

              4.  DORSAL RECUMBENT POSITION

The patient is kept on his back. A pillow is placed under the head. It is used for examination of the patient. This position without pillow is used in case of fracture of the spine and also to give CPR (cardio pulmonary resuscitation)

\"DORSAL

          5. POSITIONING IN SHOCK.

Lay the casualty on the back turn head to one side. Raise the legs with two pillows to improve blood supply to the heart. If the victim has fracture on the lower limbs, it should not be elevated unless they are well splinted.

\"POSITIONING

RESUSCITATION (BASIC LIFE SUPPORT)

Basic life support is an emergency life saving procedure that consists of recognizing and correcting failure of the respiratory and the cardio vascular system.

Basic life support comprises of ABC steps which concern the Airway, Breathing, and Circulation respectively. 

For any one’s life to continue, the body needs adequate supply of oxygen to enter the lungs and transferred to all cells of the body through the blood stream. The most critical organ that should not fall short of Oxygen is the brain since it’s the master controller of all body functions.

Brain damage is possible if the brain is deprived of Oxygen for 4-6 minutes.

NOTE: Once you have started basic life support, do not interrupt it for more than 5 seconds for any reason accept it’s necessary to move the patient. Even in that interruption should not exceeds 7 seconds each.

THE RESUSCITATION SEQUENCE
  1. 1. CHECKING RESPONSE:
  • On discovering a collapse casualty, you should first establish whether he/she is conscious by asking simple questions like, what has happened or command the patient to do something e.g. ‘’open your eye’’.
  • Speak loudly and clearly close to the casualty’s ears. If the casualty does not respond, try to shake his shoulders gently as you speak to him/her (fully unconscious casualty will make no response at all).
  • The casualty may respond to pain, so you can gently pitch his/her skin.
  • A casualty who is partially conscious makes unnecessary movements on pitching.

NOTE: Quick assessment can be done using the ‘’AVPU’’ code.

A – Alert

V – Response to voice

P – Response to pain

U – Unresponsive.

CHECK POINTS

  1. Eyes
  2. Speech
  3. Movement

HOW TO OPEN THE AIRWAY

  1. Place the person in are recumbent position (face up) on a hard surface.
  2. Place one hand on his fore head and gently tilt his head back.  As you do this, the mouth will fall open slightly. 
  3. Place the finger tips of your hand on the point of the casualty’s chin and lift the chin up.
  4. Check the casualty’s breathing.

              HOW TO CHECK FOR BREATHING:

Keeping the air way open look, listen and feel for normal breath.

  1. Look for chest movements.
  2. Listen for sounds of breathing.
  3. Feel for breaths on your own cheek and see movement.
  4. Along her chest and abdomen.

Do this for not more than 10 seconds before deciding whether the casualty is breathing normally.

  NOTE: If there is any doubt, act as if breathing is not normal.

IF THE CASUALTY IS BREATHING

  1. Check the casualty for any life threatening injuries e.g. severe bleeding and manage it as necessary
  2. Place the casualty in a recovery position.
  3. Call for emergency help e.g. call for the nearest ambulance services.
  4. Monitor and record vital signs for example, level of response, breathing as you wait for help to arrive. 

IF THE CASUALTY IS NOT BREATHING

  1. Shout or ask for help (dial for an ambulance).
  2. Begin cardio- pulmonary resuscitation with chest compressions.

HOW TO GIVE CARDIO PULMONARY RESUSCITATION

  1. Kneel the casualty’s level with his chest.
  2. Place the heel of one hand on the center of the casualty’s chest.
  3. Place the heel of your other hand on top of the first hand and interlock your fingers making sure the fingers are kept off the ribs
  • Leaning over the casualty with your arms straight, press down vertically on the breast bone. (Sternum) and depress the chest 5 – 6cm (2 – 2 1/2inch).
  • Allow the chest to come back up fully before giving the next compression.
  1. Compress the chest 30 times at a rate of 100 – 120 compressions per minute. The time taken for compression and release should be about the same.
  2. Move the casualty’s head and make sure that the airway is still opened.
  • Put one hand on his fore head and two fingers of the other hand under tip of his chain.
  • Move the hand that was on the fore head down to pitch the soft part of the nose with the finger and the thumb.
  • Allow the casualty’s mouth to fall open.
  1. Take a breath and place your lips around the casualty’s mouth making sure that you have made a good seal. Blow into the casualty’s mouth until the chest rises. A complete rescue breath should take one second. Adjust the head position if the chest doesn’t rise.
  2. Maintaining the head tilt and chin lift, take your mouth off the casualty’s mouth and look to see the chest fall.  If the chest rises visibly as 61,000 and falls fully when you lift your mouth a way, you have given a rescue breath. Give a second rescue breath.

8. Continue the cycle of 30 chest compressions followed by two rescue breaths. This is done until emergency help arrives or another first aider takes over or until the casualty shows signs of regaining consciousness, such as coughing, opening eyes, speaking or moving purposely e.tc. It can also be until you are too exhausted to continue.

\"HOW

First Aid Kit Read More »

First aid

First Aid

First Aid

First aid: refers to initial or immediate assistance given to someone who has sustained an injury or got a sudden illness before the arrival of an ambulance, a doctor or any other qualified person.

Or: Is immediate care given to the injured or suddenly ill person. First aid does not take place in presence of proper medical treatment.

It consists only of giving temporary assistance until competent medical care, if needed, is obtained, or until the chance of recovery without medical care is ensured. Most injuries and illnesses require only first aid care. 

First aid includes assessing the victim for life-threatening conditions, performing appropriate intervention to sustain life and mental conditions until he/she can enter the emergency or casualty unit in the hospital.

F-Fast arrival

I-Intelligent

R-Recording and reporting

S-Safety precautions

T-Timely action

A-Alertness

I-Initiation and implementation

D-Decision making


  • First aider: Is a person who is capable of providing first aid to a casualty.
  • A casualty: This is any person who has sustained an injury or a sudden illness.
  • By- standers or on- lookers: These are people around the accident or the emergency scene.

AIMS OF FIRST AID

  • Save life 
  • Promote life
  • Prevent worsening of the casualty’s condition
  • Relive pain and anxiety
  • Make the casualty as comfortable as possible
  • Ensure that proper and immediate medical care is available.
  • Transport the casualty to the nearest hospital at the earliest.

SCOPE OF FIRST AID

    • Diagnosis: Determine the nature of the case requiring attention so far, as is necessary for intelligent and efficient treatment or diagnosis. I.e. Diagnosis: – Taking proper history, checking signs (bleeding pile) and symptoms (pain).
  • Treatment: To decide the character and extent of the treatment to be given and to apply the treatment, which is most suited to the circumstances until medical aid is available. I.e. Treatment: Remove the cause. Make the casualty comfortable and continue assistance till doctors arrives.

Apply treatment which is most suited to the circumstances until medical aid is available.

  • Disposal: Arrange for disposal of the casualty by shifting him either to his home or other suitable shelter or to hospital. I.e. Disposal: To nearest shelter, by the quickest means and to send a word to relatives.

PRIORITIES OF TREATMENT IN CASE OF AN ACCIDENT

The first aider should;

  • Observe carefully
  • Think carefully
  • Act quickly

OTHER FIRST AID PRIORITIES:

  • Assess the situation quickly and calmly. 
  • Protect yourself and the casualty from danger. Never put yourself at risk.
  • Prevent cross infection between yourself and casualty as possible.
  •  Comfort and reassure casualties at all times.
  • Assess the casualty by identifying the injuries or nature of illness affecting him or her.
  • Give early treatment and treat the casualties with the most serious or life threatening conditions first. 
  • Arrange for appropriate help. I.e. call for emergence help if you suspect a serious injury or illness or arrange for transportation of the casualty hospital or his home.

QUALITIES OF A GOOD FIRST AIDER

  • Observant: First aider should use all his senses and closely observe the cause of accident and its effect on the casualty.
  • Tactful: First aider should be tactful in dealing with casualty, crowd, doctor and relatives. He should be sensitive to the needs of the casualty and take prompt action. 
  • Selfcontrol: On seeing the accident, the first aider should have self-control and not get panic or excited.
  • Resourceful: First aider should be resourceful and make use of anything available at site of rescue to save life.
  • Knowledgeable: One should have good knowledge of accidents, emergencies, rescue measure, disease conditions, disasters, etc.
  • Skillful: One should have skill in taking vital signs, control of bleeding, cardio pulmonary resuscitation, bandaging, caring for sick, etc.
  • Empathy: A good first aider must have empathy and be understanding. (This is known as a good Samaritan principle).
  • He/she must be able to act quickly.
  • He must have common sense.
  • Discriminating: First aider may decide which of the several injuries should be given attention.
  • Explicit: Giving clear instructions to the patient and advice to the assistants.
  • A good first aider must be updated with knowledge and skills.
  • He/she must have the ability to make decisions quickly.

OBJECTIVES OF FIRST AID

The objectives of first aid are:

  • To preserve life.
  • To prevent further injury and deterioration of the condition.
  • To prevent complications related to injury or illness conditions.
  • To make the victim as comfortable as possible to conserve the strength.
  • To put the injured person under professional medical care at the earliest.

BASIC OBJECTIVES OF PSYCHOLOGICAL FIRST AID

  • To establish a human connection in anon intrusive compassionate manner.
  • To enhance immediate and ongoing safety, and provide physical and emotional comfort. Calm and orient emotionally overwhelmed or distraught survivors.
  • To help survivors to articulate immediate needs and concerns, and gather additional information as appropriate. 
  • To offer practical assistance and information to help survivors address their immediate needs and concerns.
  • To connect survivors as soon as possible to social support networks, including family, neighbors and community helping resources.
  • To support adaptive coping, acknowledge coping efforts and strengths, and empower survivors, encourage adults, children and families to take an active role in their recovery. 
  • To provide information that may help survivors to cope effectively with the psychological impact of disasters. 
  • Facilitate continuity in disaster response efforts by clarifying how long the psychological first aid provider will be available and (when appropriate) linking the survivor to another member of a disaster response team or to indigenous recovery systems, mental health services, public sector services and organizations. 

GOLDEN RULES OF FIRST AID

  • Do first things quickly and without fuss or panic.
  • Give artificial respiration, if breathing has stopped every second.
  • Stop any bleeding. 
  • Guard against or treat for shock by moving the casualty as little as possible and handling him gently.  
  • Do not attempt too much do the minimum that is essential to save life and prevent the condition from worsening. 
  • Reassure the casualty and those around and so help to lessen anxiety. 
  • Do not allow people to crowd round as fresh air is essential. 
  • Do not remove clothes unnecessarily. 
  • Arrange for the removal of the casualty to the care of a doctor or hospital as soon as possible.

PRINCIPLES OF FIRST AID (ACTION AT AN EMERGENCY)

  1. Remove the casualty to a place of safety
  2. Loosen clothing around the neck and waist, to help breathing
  3. Reassure the patient
  4. Look for the following:
  • Is there any failure of breathing? If yes, start artificial respiration.
  • Is there any failure of circulation? If yes, start external cardiac massage.
  • Is there severe bleeding? If yes, stop bleeding by pressing firm on pressure areas with a clean pad for few minutes.
  • Are there any signs and symptoms of shock? If yes, treat shock
  • 5. Relieve pain
  • 6. Avoid handling the casualty unnecessarily. 
  • 7. Arrange for safe removal of the casualty to the hospital. 

GENERAL RULES OF FIRST AID

  • Reach accident spot quickly. This will help to save life of the casualty.
  • Shout for help. Organize labour or onlookers or bystanders to help in any possible way. Make sure there are enough people to help you.  
  • Be calm, methodical and quick. By doing so, you can minimize the pain and the effect of the injuries, which may save life. Handling casualty clumsily will make the final recovery difficult.
  • Remove the casualty from danger or danger from casualty.
  • Look for the following:
  • Is there failure of breathing?
  • Is there severe bleeding?
  • Is the shock high or severe? Is there any signs/ symptoms of shock?
  • Attend to these and then treat easily observable injuries.
  • Start artificial respiration, if the casualty is not breathing, it must begin at once, as every second gained is helpful.
  • Stop bleeding by pressing on the pressure point, press firmly on the bleeding area for at least a few minutes (minimum 3 minutes) by watch – take help if available.
  • Treat shock
  • Avoid handling casualty unnecessarily.

Note: Never give anything by mouth to the patient who is unconscious.

  • Use the first aid articles if available (All trains, railway stations, Lorries and buses keep first aid box). Make use of material so obtained. In case, first aid box is not available, improvise and make use of available resources.
  • Assess the situation sensibly in regard to medical aid treatment which may be needed.
  • Make a written note on the general condition and your findings about the casualty.
  • Inspect the area: Take the casualty away from live wire, fallen walls, beams, fire, broken gas chamber, moving machinery, etc. to safer place.
  • Clear the crowd with polite words. Do not allow people to crowd around the casualty as the casualty needs fresh air. If a doctor is present, he will guide you. Any other first aider should be asked to help, otherwise take the assistance of by standers by giving them correct instructions.
  • Note the weather: If it is not raining, too hot or cold, treat in open, otherwise move the casualty into an airy room. If no suitable house or shelter is available nearby, it’s best to protect the casualty with an umbrella or a sheet of cloth or even a newspaper.
  • Reassure the casualty by soft words and encourage talking. This will help the casualty to take things lightly and lie quietly. This will help in recovery.
  • Arrange for dispatch of the casualty to the care of a doctor or to a nearby hospital. At the same time inform relatives as to where the casualty is being taken to. 
  • Do not attempt too much. You are only a first aider, give minimum assistance so that condition does not become worse and life can be saved.

DO’S AND DON’T’S 

  • Do not forget that you are not a doctor hence, do not attempt to overdo things.
  • Do not handle the victim unnecessarily as that condition may worsen.
  • Do not expose the casualty unnecessarily
  • Do not open any wounds / dressing, if bandaged previously by anybody.
  • Do not move any fracture case without putting proper splints.
  • Do not tie tourniquet at bleeding site and forget about it.
  • Attend to casualty as per priority.
  • Attend to children and women first.
  • Ensure self – safety and security before jumping into heroic attempts to save casualty
  • Follow precautions in handling communicable / infectious cases.
  • Never declare any casualty dead, it is that doctor’s job.

THE MANAGEMENT OF THE CASE

The first aider must always:

  • Respond quickly to calls for assistance, the saving of a life may depend on promptness of action.
  • Adopt a calm and methodical approach to the casualty, quick and confident examination and treatment will relieve pain and distress, lessen the effect of injury and may save life. Time spent on long and elaborate examination of a casualty may be time lost in his ultimate recovery.
  • Treat obvious injuries and conditions endangering life such as failure of breathing, severe shock, before making a complete diagnosis.
  • Take first aid material. If this is immediately available. If standard equipment is not available the first aider must depend on material to hand which will have to be provided as required.
  • Study the surroundings carefully. These may influence the action to be taken and therefore require careful consideration for example:
  • Danger: From falling building, moving machinery, electric current, fire, poisonous gases and similar hazards.
  • Weather: If the accident occurs out of doors, the casualty may be treated in the open if the weather is fine, if the weather is bad, he must be removed to shelter as soon as is reasonably possible.
  • Shelter: Note houses and buildings near at hand, whether occupied or unoccupied and whether likely to be particularly useful, such as a chemist’s shop, otherwise, temporary shelter may be provided by means of umbrellas, rugs and the like.
  • Assistance: Crowds must be tactfully controlled. If a doctor is present, work under his direction. If not, ask if anyone with knowledge of first aid is present. If neither is available make use of bystanders to the best advantage.
  • Reassure the casualty by speaking encouragingly to him. Warm him to be still and tell him that he is in trained hands.  

STEP BY STEP ACTION TO BE TAKEN BY THE FIRST AIDER

  1. Examination and Diagnosis: This is taking account of the casualty‘s history and that of incident, symptoms, signs and level of responsiveness.
  2. History: This is the full story of how the incident occurred or the illness began, and should be taken directly from the casualty and a responsible bystander wherever possible.
  3. Never hurry the casualty and remember to pass on all information you have obtained when skilled help arrives.
  4. Symptoms: These are sensations that the casualty feels and describes to you the most useful of these is pain. If the casualty is unconscious or unreliable because dazed (confused) or in shock, their diagnosis cannot be based on symptoms but has to be based on information obtained from bystanders and signs.
  5. Sign:  These are details ascertained by you using your senses – sight, touch, hearing and smell. These may be signs of injury such as: bleeding, swelling, deformity, or signs of illness such as raised temperature and rapid or regular pulse.
  • Cardiopulmonary resuscitation (every second).
  • Control bleeding.
  • Treat shock and special care of unconscious cases. 
  • Fracture immobilization 
  • Burn cover, with clean washed or dressing and treat shock.
  • Eye, nose and ear injuries.
  • Multiple superficial injuries.
  • Transportation

RESPONSIBILITIES OF A FIRST AIDER IN THE MANAGEMENT OF CASUALTIES:

  • Gain access to the patient in easiest and safest way.
  • Observe the accidents scene and assess the situation.
  • If necessary, direct others to direct traffic keep bystanders at a safe distance and make essential telephone calls. Turn off all engines that may be still running.
  • To find out whether is unconscious, conscious alive dead. 
  • Identify the disease or condition from which the casualty is suffering.
  • Give immediate, appropriate and treatment considering priority of the first aid measures. Such as first priority will be of restoration of breathing and circulation, while second will be stopping the bleeding.
  • Should bear in mind that a casualty may have more than one injury and that some casualties will require more urgent attention than others. 
  • Arranging without delay for shifting of the casualty to a doctor, hospital or home according to the condition in such a manner that injury is not complicated or the victim is not subjected to unnecessary discomfort.
  • Keeping the record of the patient and of the patient and of incidence, addresses and witness.
  • Once a first aider has voluntarily started care, he should not leave the scene, or stop the care until a qualified and responsible person relieves him.
  • To report your observations to those taking over care of the casualty and to give further assistance if required.
  •  To prevent cross infection between yourself and casualty as much as possible.

LIMITATIONS OF THE FIRST AIDER

  1. The first aider should be observant with the rules or objectives of first aid and act quickly and vigilantly.
  2. He should inspire confidence in the patient and others closely related to the patient.
  3. To save lives, there are three conditions that call for first aid: – stoppage of breathing, severe bleeding and shock.
  4. If breathing movements are not proper, the lips, tongue and finger nails become blue, in such a situation, artificial respiration should be started immediately.
  5. If there is heavy bleeding: It may be from wounds through one or more large vessels. In this condition, pressure should be applied directly over the wound. For this, a clean handkerchief or a pad may be kept on the wound and pressed firmly with one or both hands, then apply affirm bandage.
  6. The important factor to be attended immediately is shock. Shock accompanies severe injury or emotional disturbance. Cold and clammy skin, beads of perspiration on the fore head and palms. Pale face, nausea and vomiting are the common symptoms of shock.

SKILLS REQUIRED FOR THE FIRST AIDER:

  • Control the scene of accident.
  • Gain access to the patient.
  • Evaluate the scene in terms of safety and possible cause of accident.
  • Gather information from patient and bystanders.
  • Determine vital signs (pulse, breathing, skin, temperature)
  • Determine diagnostic signs and relate those to possible injuries or sudden illnesses that require emergency care.
  • Perform the necessary ABC’S of emergency care:
  1. Open air way.
  2. Breathing (breathlessness- provide artificial ventilation).
  3. Circulation (pulseless- provide one and two rescuer cardiopulmonary resuscitation).
  4. Bleeding control (haemorrhage controlled by direct pressure and elevation, pressure points and tourniquets).
  • Diagnosis and care for shock.
  • Diagnosis and care for open and closed fractures, sprains (tearing of ligaments), strains (muscle injured by overstretching) and dislocations, including cold treatment and basic splinting techniques.
  • Diagnosis and care for soft tissue and internal injuries including basic dressing and bandaging techniques.
  • Detect and care for poisoning including alcohol and drug abuse.
  • Diagnosis and care for heart attack, stroke, diabetes, coma, insulin shock, and epileptic or other seizures. 
  • Diagnosis and care for facial injuries, head injuries, neck and spinal injuries and chest injuries including fracture ribs and penetrating chest wounds
  • Diagnosis and care for burns and smoke inhalation.
  • Diagnosis and care for exposure to heat and cold, which includes heat exhaustion, heat cramps, heat stroke, hypothermia and frostbite.
  • Assist in child birth and care of the new born.
  • Psychological and proper emergency care to victims of crisis and disasters.
  • Perform proper transformation techniques.  

First Aid Read More »

Gout

Gout

Gout Lecture Notes
Gout Lecture Notes
Learning Objectives:
  1. Define Gout and differentiate it from other forms of arthritis.
  2. Explain the Pathophysiology of Gout, specifically focusing on uric acid metabolism and crystal formation.
  3. Identify the Risk Factors and triggers associated with developing gout and gout flares.
  4. Describe the Clinical Presentation of acute gouty arthritis, chronic tophaceous gout, and intercritical gout.
  5. Discuss the Diagnostic Criteria and key laboratory/imaging findings used to confirm a diagnosis of gout.
  6. Explain the Pharmacological Management Strategies for both acute gout flares and long-term uric acid-lowering therapy (ULT).
  7. Identify Non-Pharmacological Management Strategies and lifestyle modifications crucial for preventing gout flares.
  8. Describe Potential Complications associated with chronic gout.
Definition and Characteristics

Gout is a metabolic disorder characterized by elevated serum uric acid levels and deposits of urate crystals in synovial fluids and surrounding tissues.

It is derived from the Latin word “Gutta” meaning a “drop” (of liquid).

Gout also is a kind of arthritis that occurs when uric acid builds up in blood and causes joint inflammation, it can be acute or chronic.

  • Acute: The affected joints often appear reddened and swollen and are sensitive to touch. The pain is described as a burning sensation. The development of acute gout is typically triggered by trauma, alcohol use, surgery, and systemic infection.
  • Chronic: This is characterized by visible deposits of urate crystals (tophi) that form nodules and may be painful during gout attacks.

Unlike Osteoarthritis (OA), which is primarily a "wear and tear" condition affecting cartilage, gout is characterized by sudden, severe attacks of pain, swelling, redness, and tenderness in the joints. It is fundamentally a metabolic disorder related to the body's handling of uric acid.

Gout is a type of inflammatory arthritis caused by the deposition of monosodium urate (MSU) crystals in the joints, tendons, and surrounding tissues. These crystals form when there are persistently high levels of uric acid (a waste product from the breakdown of purines) in the blood, a condition known as hyperuricemia.

When MSU crystals precipitate and accumulate in a joint, they trigger a potent inflammatory response, leading to the characteristic symptoms of a "gout flare" or "gouty attack." Over time, if left untreated, chronic hyperuricemia can lead to recurrent flares, joint damage, and the formation of visible chalky deposits called tophi.

Differentiation from other forms of Arthritis
Condition Underlying Cause Key Features & Diagnostics
Osteoarthritis (OA) Primarily mechanical wear-and-tear and age-related degeneration of joint cartilage.
  • Pathology: Cartilage breakdown, osteophyte formation, subchondral sclerosis. No crystal deposition.
  • Onset: Gradual, progressive over years.
  • Symptoms: Pain worse with activity, relieved by rest; morning stiffness typically brief (<30 mins); bony enlargement; crepitus.
  • Affected Joints: Weight-bearing joints (knees, hips), hands (DIPs, PIPs, CMC of thumb).
  • Key Diagnostic: X-ray changes. No specific blood test.
Rheumatoid Arthritis (RA) Autoimmune disease where the body's immune system mistakenly attacks the synovium.
  • Pathology: Synovial inflammation, pannus formation, cartilage/bone erosion. Systemic inflammation.
  • Onset: Gradual over weeks to months, but can be acute.
  • Symptoms: Symmetrical joint involvement; prolonged morning stiffness (>30-60 mins); fatigue, low-grade fever; warm, swollen, tender joints.
  • Affected Joints: Symmetrical, small joints (MCPs, PIPs, MTPs), wrists, knees.
  • Key Diagnostic: Positive RF, Anti-CCP, elevated ESR/CRP.
In summary, the defining features of Gout are:
  • Hyperuricemia: Elevated serum uric acid levels.
  • Monosodium Urate (MSU) Crystal Deposition: These are the specific crystals that cause the inflammation.
  • Acute Inflammatory Arthritis: Characterized by sudden, severe, often monoarticular (affecting one joint) attacks.
  • Classic "Podagra": Most commonly affects the metatarsophalangeal (MTP) joint of the big toe.
Cause

Gout is associated with the presence of hyperuricemia (high blood levels of urate, or serum urate levels greater than ~6.8 mg/dl).

  • Hyperuricemia: Gout occurs when urate crystals accumulate in your joint, causing the inflammation and intense pain of a gout attack. Urate crystals can form when you have high levels of uric acid in your blood.
NOTE: Not everyone with hyperuricemia develops gout as this condition requires two essential processes to develop – crystallization and inflammation. When uric acid levels become elevated, crystals will form in the joints, which will then trigger the inflammatory process.
Pathophysiology of Gout

Gout is fundamentally a disease of uric acid dysregulation. Its pathophysiology revolves around the production, breakdown, and excretion of uric acid, leading to hyperuricemia and subsequent crystal formation and inflammation.

I. Uric Acid Metabolism:
  1. Origin of Uric Acid:
    • Uric acid is the final end-product of purine metabolism in humans.
    • Purines are naturally occurring compounds found in all body cells and in virtually all foods. They are building blocks of DNA and RNA.
    • Sources of purines:
      • Endogenous (internal): About two-thirds of the body's uric acid comes from the normal breakdown of cells and tissues.
      • Exogenous (dietary): About one-third comes from purine-rich foods and beverages (e.g., red meat, seafood, alcohol).
  2. Breakdown Process: Purines are metabolized through a series of enzymatic reactions, with xanthine oxidase being a key enzyme in the final steps, converting hypoxanthine to xanthine, and then xanthine to uric acid.
  3. Excretion of Uric Acid:
    • Uric acid is primarily excreted by the kidneys (about two-thirds) and to a lesser extent by the gastrointestinal tract (about one-third).
    • Renal excretion involves complex processes of filtration, reabsorption, and secretion in the renal tubules.
II. Hyperuricemia (Elevated Uric Acid Levels):

Hyperuricemia is the prerequisite for gout, defined as a serum uric acid level generally above 6.8 mg/dL (400 µmol/L). This is the saturation point at physiological temperature and pH at which monosodium urate (MSU) crystals can begin to form in tissues.

Hyperuricemia typically results from one of two main mechanisms, or a combination of both:

  1. Uric Acid Underexcretion (Most Common - ~90% of cases):
    • The kidneys do not efficiently excrete uric acid. This can be due to:
      • Genetic predisposition affecting renal transporters (e.g., URAT1, OATs).
      • Medical conditions (e.g., chronic kidney disease, hypertension, hypothyroidism).
      • Medications (e.g., diuretics like thiazides, low-dose aspirin, cyclosporine, niacin).
      • Alcohol consumption (interferes with renal uric acid handling).
  2. Uric Acid Overproduction (Less Common - ~10% of cases):
    • The body produces too much uric acid. This can be due to:
      • High dietary intake of purines.
      • Genetic enzyme defects (e.g., Lesch-Nyhan syndrome, glucose-6-phosphatase deficiency).
      • Conditions with high cell turnover (e.g., myeloproliferative disorders, chemotherapy-induced tumor lysis syndrome, psoriasis).
      • High fructose consumption (fructose metabolism increases purine breakdown).
III. Monosodium Urate (MSU) Crystal Formation and Deposition:
  • When serum uric acid levels consistently exceed the saturation point (6.8 mg/dL), MSU crystals can precipitate out of solution.
  • These crystals prefer to deposit in:
    • Cooler body temperatures: This explains why gout often affects peripheral joints like the big toe (MTP joint), ankles, knees, wrists, and fingers.
    • Avascular or relatively avascular tissues: Cartilage, tendons, ligaments.
    • Damaged joints: Pre-existing joint damage (e.g., from OA or trauma) can provide nucleation sites for crystal formation.
  • Over time, these crystals accumulate in the joint synovium, cartilage, subchondral bone, and other soft tissues (leading to tophi).
IV. The Acute Gout Flare (Inflammatory Response):

The presence of MSU crystals alone does not always cause symptoms. An acute gout flare is triggered when these crystals are suddenly released from the synovial lining or when new crystals form, provoking a powerful inflammatory cascade:

  1. Crystal Recognition: Inflammatory cells, particularly macrophages and neutrophils, recognize the MSU crystals as foreign bodies.
  2. Phagocytosis: These cells attempt to engulf (phagocytose) the crystals.
  3. Inflammasome Activation: The engulfed MSU crystals activate the NLRP3 inflammasome within the macrophages.
  4. Cytokine Release: Activation of the inflammasome leads to the production and release of potent pro-inflammatory cytokines, especially interleukin-1 beta (IL-1β).
  5. Inflammatory Cascade: IL-1β then amplifies the inflammatory response, recruiting more neutrophils and other inflammatory cells to the joint. This leads to the classic signs of inflammation:
    • Pain: Due to nerve stimulation and pressure from swelling.
    • Redness (Erythema): Due to vasodilation.
    • Swelling (Edema): Due to increased vascular permeability and fluid accumulation.
    • Heat: Due to increased blood flow.
    • Loss of Function: Due to pain and swelling.
  6. Resolution: Eventually, the inflammatory process subsides, often through mechanisms involving anti-inflammatory cytokines, clearance of crystals, and neutrophil apoptosis. This natural resolution can take days to weeks if untreated.
V. Chronic Gout and Tophus Formation:

If hyperuricemia persists and gout flares are left untreated, chronic accumulation of MSU crystals can lead to:

  • Tophi: These are visible or palpable chalky deposits of MSU crystals, typically surrounded by chronic inflammatory cells. They commonly form in soft tissues (e.g., ear helix, elbows, fingers, Achilles tendon, around joints). Tophi can cause chronic pain, joint damage, and functional impairment.
  • Chronic Gouty Arthritis: Persistent inflammation and joint destruction.
  • Renal Complications: Urate nephropathy (kidney damage from crystal deposition in the renal interstitium) and uric acid kidney stones.
Risk Factors and Triggers associated with developing gout and gout flares.

This helps us identify individuals predisposed to gout, while recognizing triggers allows patients to manage their lifestyle to prevent acute flares.

I. Risk Factors for Developing Gout (Chronic Hyperuricemia):

These factors primarily contribute to sustained elevated uric acid levels, which is the prerequisite for gout.

  1. Genetics/Family History: A strong family history of gout significantly increases an individual's risk. This is often due to inherited predispositions that affect uric acid production or, more commonly, its renal excretion.
  2. Gender and Age:
    • Men are significantly more likely to develop gout than women, especially before menopause. This is partly due to men typically having higher uric acid levels and women having estrogen, which promotes renal uric acid excretion.
    • Risk increases with age for both sexes. After menopause, women's risk approaches that of men due to declining estrogen levels.
  3. Obesity/Overweight: Obesity is strongly linked to hyperuricemia and gout. Adipose tissue is metabolically active and can contribute to increased uric acid production, and obesity is also associated with reduced renal uric acid excretion.
  4. Metabolic Syndrome and Related Conditions:
    • Insulin Resistance/Type 2 Diabetes: Associated with reduced renal uric acid excretion.
    • Hypertension (High Blood Pressure): Often co-occurs with hyperuricemia.
    • Dyslipidemia: Part of the metabolic syndrome cluster.
    • Kidney Disease (CKD): Impaired renal function leads to reduced uric acid excretion.
  5. Dietary Factors (Chronic High Intake):
    • High Purine Foods: Regular consumption of large quantities of red meat (especially organ meats like liver, kidney), certain seafood (shellfish, sardines, anchovies, herring, mackerel).
    • High Fructose Corn Syrup/Sugar-Sweetened Beverages: Fructose metabolism directly increases purine turnover and uric acid production.
    • Alcohol Consumption: Particularly beer and spirits. Alcohol increases uric acid production and impairs its renal excretion. Wine appears to have a lesser effect.
  6. Medications:
    • Diuretics: Thiazide diuretics (e.g., hydrochlorothiazide) and loop diuretics (e.g., furosemide) decrease renal uric acid excretion.
    • Low-dose Aspirin: Can also impair uric acid excretion.
    • Immunosuppressants: Cyclosporine and tacrolimus.
    • Anti-tuberculosis drugs: Pyrazinamide, ethambutol.
    • Levodopa.
  7. Medical Conditions/Other Causes of High Cell Turnover: Psoriasis, Myeloproliferative disorders, Hemolytic Anemia, Tumor Lysis Syndrome.
II. Triggers for Acute Gout Flares:

These factors can cause a sudden change in uric acid levels or dislodge pre-existing crystals, provoking an acute inflammatory attack.

  1. Sudden Changes in Serum Uric Acid Levels:
    • Rapid increase: Heavy consumption of purine-rich foods/beverages, Dehydration.
    • Initiation of Uric Acid Lowering Therapy (ULT): Ironically, when starting allopurinol or febuxostat, uric acid levels drop rapidly, which can cause existing crystals to destabilize and shed, triggering a flare. This is why ULT is usually started with flare prophylaxis.
    • Rapid decrease: Aggressive dieting/fasting.
  2. Alcohol Consumption: Even moderate alcohol intake can trigger a flare.
  3. Dehydration: Increases the concentration of uric acid.
  4. Trauma/Injury to a Joint: A minor injury, surgery, or prolonged pressure.
  5. Acute Illness/Stress: Surgery, infection, heart attack.
  6. Medications (especially initial stages): Diuretics, Low-dose Aspirin, Starting ULT.
  7. Certain Medications (less common): Contrast dye.
Clinical Presentation of Gouty Arthritis.

Gout progresses through several stages if left untreated, each with clinical characteristics.

I. Asymptomatic Hyperuricemia:
  • Description: This is the initial stage where a person has elevated serum uric acid levels (hyperuricemia) but experiences no symptoms of gout, no crystal deposition-related pain, and no history of gout flares.
  • Clinical Significance: While not considered "gout" at this stage, it is a precursor. Not everyone with asymptomatic hyperuricemia will develop gout (estimates vary, but it's often around 10-20% over a lifetime). Treatment is generally not recommended unless specific co-morbidities exist or uric acid levels are extremely high (>13 mg/dL).
II. Acute Gouty Arthritis (The Gout Flare):

This is the most common and recognizable presentation of gout. It's characterized by a sudden, exquisitely painful inflammatory attack.

  • Onset: Typically very sudden, often waking the patient from sleep.
  • Location:
    • Monoarticular: Usually affects a single joint in about 80-90% of initial attacks.
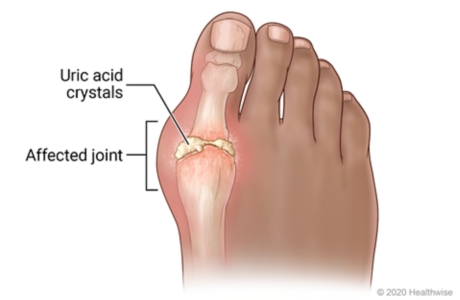
    • Podagra: The classic presentation involves the first metatarsophalangeal (MTP) joint of the big toe. This occurs in about 50% of first attacks and up to 90% of affected individuals at some point.
    • Other Joints: Ankle, knee, midfoot, wrists, fingers, elbows. Rarely affects axial joints in initial attacks.
  • Symptoms (Classic Signs of Inflammation): Severe Pain (throbbing, crushing, burning), Swelling, Erythema (shiny, bright red/purplish), Warmth, Tenderness (extreme sensitivity).
  • Systemic Symptoms: Low-grade fever, chills, malaise.
  • Duration: If untreated, typically resolves spontaneously within 3-10 days. Desquamation (peeling) of skin may occur.
III. Intercritical Gout (Intermittent Gout):
  • Description: This refers to the symptom-free periods between acute gout flares. During this phase, the patient has no symptoms, and the affected joints may appear normal. However, MSU crystals are still present.
  • Clinical Significance: Hyperuricemia usually persists, and ongoing crystal deposition can occur. Without ULT, subsequent attacks become more frequent, severe, and polyarticular.
IV. Chronic Tophaceous Gout:

This stage develops in individuals with long-standing, uncontrolled hyperuricemia and recurrent acute attacks. It typically takes 10-20 years to develop if gout is left untreated.

  • Description: Characterized by the formation of tophi – visible or palpable deposits of monosodium urate crystals. These appear as firm, chalky, painless (unless inflamed or infected) nodules.
  • Location of Tophi: Soft tissues around joints, Helix of the ear, Olecranon bursa, Prepatellar bursa, Achilles tendons. Can also develop in organs like kidneys.
  • Clinical Manifestations: Joint Damage (chronic pain, stiffness, deformity), Skin Ulceration (drainage of chalky material), Nerve Compression, Kidney Issues.
Diagnostic Criteria of Gout

The gold standard for diagnosis remains the identification of MSU crystals.

I. Gold Standard for Diagnosis: Synovial Fluid Analysis

The most definitive way to diagnose gout is by identifying monosodium urate (MSU) crystals in the synovial fluid (joint fluid) aspirated from an affected joint.

  • Procedure: Arthrocentesis (joint aspiration).
  • Microscopic Examination: Polarized light microscope.
  • Key Findings: MSU crystals are typically:
    • Needle-shaped: Long and slender.
    • Negatively birefringent: When viewed under polarized light with a red compensator, they appear yellow when parallel to the compensator axis and blue when perpendicular to it.
  • Presence of Leukocytes: High white blood cell count (neutrophils). Also rule out septic arthritis.
II. Clinical Diagnostic Criteria
  1. Clinical Presentation: Rapid onset, podagra, tophi.
  2. Laboratory Findings:
    • Serum Uric Acid: While hyperuricemia (> 6.8 mg/dL) is a prerequisite, a normal uric acid level does NOT rule out gout during an acute flare. Levels can transiently drop during an attack.
    • Inflammatory Markers: Elevated ESR and CRP (non-specific).
  3. Imaging Findings:
    • X-rays: Early gout may be normal. Chronic gout shows "Punched-out" erosions with sclerotic borders ("overhanging edge" sign).
    • Ultrasound: Can visualize MSU crystals as a "double contour sign".
    • Dual-Energy CT (DECT): Can definitively identify MSU crystals.
III. Differential Diagnosis:
  • Septic Arthritis (Crucial to rule out).
  • Pseudogout (CPPD).
  • Rheumatoid Arthritis.
  • Psoriatic Arthritis.
  • Cellulitis.
  • Osteoarthritis.
Pharmacological Management Strategies

The pharmacological management of gout has two distinct goals:

  1. Rapidly alleviate the pain and inflammation of an acute gout flare.
  2. Prevent future flares, joint damage, and tophus formation by lowering and maintaining serum uric acid levels below the saturation point.
I. Management of Acute Gout Flares:

The primary aim during an acute flare is to reduce pain and inflammation quickly. Treatment should be initiated as early as possible after symptom onset.

First-line Agents:
  1. Non-Steroidal Anti-Inflammatory Drugs (NSAIDs):
    • Mechanism: Inhibit cyclooxygenase (COX) enzymes, reducing prostaglandin production, thereby decreasing inflammation and pain.
    • Examples: Indomethacin, naproxen, celecoxib.
    • Dosing: Typically prescribed at high doses initially, then tapered over several days.
    • Considerations: Effective and generally well-tolerated. Contraindications include peptic ulcer disease, significant renal impairment, cardiovascular disease, and anticoagulant use.
  2. Colchicine:
    • Mechanism: Disrupts neutrophil function and reduces the inflammatory response to MSU crystals by inhibiting microtubule assembly. Most effective when started within 24-36 hours of symptom onset.
    • Dosing: Low-dose colchicine (e.g., 0.6 mg once or twice daily) is often preferred for acute flares due to better tolerability compared to older high-dose regimens. Initial dose followed by a lower dose an hour later, then maintenance until flare resolves or for several days.
    • Considerations: Side effects include diarrhea, nausea, vomiting, abdominal pain. Dosing must be adjusted in patients with renal or hepatic impairment. Drug interactions are common (e.g., with CYP3A4 inhibitors like clarithromycin, diltiazem, verapamil, and P-glycoprotein inhibitors).
  3. Corticosteroids:
    • Mechanism: Potent anti-inflammatory and immunosuppressive effects.
    • Administration: Can be given orally (e.g., prednisone), intramuscularly, or via intra-articular injection (directly into the affected joint).
    • Considerations: Useful when NSAIDs or colchicine are contraindicated or ineffective, or for polyarticular attacks. Intra-articular injections are particularly useful for monoarticular flares. Side effects include hyperglycemia, increased blood pressure, fluid retention, and mood changes.
Second-line/Alternative Agents (for refractory cases or specific contraindications):
  • IL-1 Inhibitors (e.g., Anakinra, Canakinumab):
    • Mechanism: Block the action of interleukin-1 (IL-1), a key cytokine in the inflammatory cascade of gout.
    • Considerations: Used in severe, refractory cases or when other agents are contraindicated. Administered via injection. Very expensive.
II. Long-Term Uric Acid-Lowering Therapy (ULT):

The goal of ULT is to reduce the body's uric acid burden, dissolve existing MSU crystals, prevent new crystal formation, and ultimately eliminate gout flares and tophi. The target serum uric acid level is generally < 6 mg/dL (360 µmol/L), and often < 5 mg/dL (300 µmol/L) in patients with severe disease, frequent flares, or tophi.

When to Initiate ULT: ULT is typically recommended for patients with:

  • Recurrent gout flares (two or more per year).
  • Presence of tophi (clinical or radiographic).
  • Gouty arthritis with evidence of joint damage on imaging.
  • Gout with chronic kidney disease (CKD stage 2 or higher).
  • History of uric acid kidney stones.
  • First gout flare if very severe or with extremely high serum uric acid (>9 mg/dL).
Important Considerations for Initiating ULT:
  • Prophylaxis: An acute flare can be triggered when starting ULT due to the rapid change in serum uric acid levels causing crystal shedding. Therefore, flare prophylaxis with low-dose colchicine or low-dose NSAIDs is usually recommended for the first 3-6 months (or longer if indicated) after initiating ULT.
  • Do NOT start ULT during an acute flare. Wait until the acute flare has subsided. If a patient is already on ULT, they should continue it during a flare.
Main Classes of ULT Agents:
  1. Xanthine Oxidase Inhibitors (XOIs): These are the first-line agents for most patients.
    • Mechanism: Inhibit the enzyme xanthine oxidase, thereby blocking the final steps in uric acid production.
    • Examples:
      • Allopurinol:
        • Dosing: Start low (e.g., 50-100 mg daily) and titrate up gradually (e.g., by 50-100 mg every 2-4 weeks) to achieve the target uric acid level. Max dose often 800 mg/day, but depends on renal function.
        • Considerations: Generally well-tolerated. Side effects include rash, gastrointestinal upset. Allopurinol Hypersensitivity Syndrome (severe, potentially fatal reaction with rash, fever, eosinophilia, liver/kidney dysfunction) is rare but serious, especially in patients with HLA-B*5801 allele (more common in certain Asian populations) and those with renal impairment or starting on high doses. Renal dosing is crucial.
      • Febuxostat:
        • Dosing: Start at 40 mg daily, can increase to 80 mg daily if target not met.
        • Considerations: Can be used in patients with mild-to-moderate renal impairment without dose adjustment. Was previously associated with a higher risk of cardiovascular death compared to allopurinol in some studies, leading to a black box warning, but recent data suggests this risk may be less pronounced or restricted to specific populations.
  2. Uricosuric Agents:
    • Mechanism: Increase the excretion of uric acid by the kidneys by inhibiting its reabsorption in the renal tubules.
    • Examples:
      • Probenecid:
        • Dosing: Start low and gradually titrate.
        • Considerations: Requires good renal function (creatinine clearance > 50 mL/min). Not effective in overproducers of uric acid. Side effects include gastrointestinal upset, rash. Patients must maintain good hydration to prevent kidney stone formation. Contraindicated in patients with a history of uric acid kidney stones.
      • Lesinurad: (often used in combination with an XOI, usually allopurinol, in refractory cases)
        • Mechanism: Selective uric acid reabsorption inhibitor (SURI).
        • Considerations: Used to boost the efficacy of XOIs when target UA not achieved. Renal safety concerns.
  3. Uricase (Pegloticase):
    • Mechanism: An enzyme that converts uric acid into allantoin, a more soluble and easily excreted substance.
    • Example: Pegloticase (IV infusion).
    • Considerations: Reserved for severe, refractory chronic gout, especially with large tophi, where other ULTs have failed or are contraindicated. High risk of infusion reactions and anti-drug antibodies, requiring careful monitoring.
Non-Pharmacological Management

Non-pharmacological management aims to reduce serum uric acid levels, minimize triggers for acute flares, and promote general well-being. These strategies should be discussed with every patient with gout.

I. Dietary Modifications:

The goal is not to eliminate purines entirely, as many healthy foods contain them, but to reduce intake of high-purine foods and those that increase uric acid production or impair its excretion.

  1. Limit or Avoid High-Purine Foods:
    • Organ Meats: Liver, kidney, sweetbreads.
    • Certain Seafood: Anchovies, sardines, herring, mussels, scallops, trout, tuna, haddock. (Note: other fish and seafood in moderation are generally acceptable and beneficial for health).
    • Red Meats: Limit consumption (e.g., beef, lamb, pork) to moderate portions.
  2. Reduce Fructose Intake:
    • Sugar-Sweetened Beverages: Avoid sodas, fruit juices (especially high-fructose corn syrup), and other sugary drinks. Fructose metabolism significantly increases uric acid production.
    • Processed Foods: Be mindful of hidden sugars (fructose) in many processed snacks and foods.
    • Fruits: While fruit contains natural fructose, whole fruits also provide fiber and other nutrients and are generally considered acceptable in moderation. The concern is with concentrated fructose from drinks.
  3. Moderate Alcohol Consumption (or Avoid):
    • Beer and Spirits: Strongest association with gout flares due to increased purine load and impaired uric acid excretion. Best to avoid or severely limit.
    • Wine: Generally considered to have a weaker association with flares, but moderation is still advised.
    • Overall: Total alcohol intake should be limited, especially during periods of high risk or frequent flares.
  4. Embrace Healthy Dietary Patterns:
    • Low-Fat Dairy Products: Studies suggest that dairy products (especially skim milk, yogurt) may actually help lower uric acid levels and reduce gout risk.
    • Complex Carbohydrates: Whole grains, vegetables, and fruits are encouraged.
    • Vegetables: Almost all vegetables (including purine-rich ones like spinach, mushrooms, asparagus, cauliflower) have not been shown to increase gout risk and are part of a healthy diet.
    • Hydration: Drink plenty of water throughout the day (at least 8-10 glasses) to help the kidneys flush out uric acid.
II. Weight Management:
  • Achieve and Maintain a Healthy Weight: Obesity is a significant risk factor for hyperuricemia and gout. Gradual weight loss can lower uric acid levels and reduce the frequency and severity of flares.
  • Avoid Crash Diets or Rapid Weight Loss: Fasting or very rapid weight loss can paradoxically increase uric acid levels and trigger flares. Gradual and sustained weight loss is preferred.
III. Regular Exercise:
  • Moderate Physical Activity: Regular exercise, combined with a healthy diet, helps with weight management and overall metabolic health, which can indirectly benefit gout.
  • Avoid Overexertion or Joint Trauma: While exercise is good, activities that cause excessive joint stress or trauma could potentially trigger a flare in a susceptible joint.
IV. Hydration:
  • Adequate Fluid Intake: Drinking plenty of water helps to dilute uric acid in the urine and promotes its excretion, reducing the risk of crystal formation and kidney stones.
V. Review Medications with a Physician:
  • Diuretics and Low-Dose Aspirin: If a patient is taking medications known to raise uric acid levels (e.g., thiazide diuretics, low-dose aspirin), their physician should evaluate if alternative medications are suitable or if the benefits outweigh the risks.
  • Start ULT with Prophylaxis: As discussed in Objective 6, patients initiating uric acid-lowering therapy should always be on concurrent anti-inflammatory prophylaxis to prevent initial flares.
VI. Identify and Avoid Personal Triggers:
  • Patients should be encouraged to keep a diary to identify their individual triggers, which can vary from person to person (e.g., specific foods, stress, minor trauma, dehydration).
  • Avoiding these identified personal triggers can significantly reduce flare frequency.
VII. Lifestyle Modifications during an Acute Flare:
  • Rest: Rest and elevate the affected joint.
  • Ice: Apply ice packs to the inflamed joint for short periods (e.g., 20 minutes at a time) to help reduce swelling and pain.
  • Avoid Trauma: Protect the joint from any pressure or impact.
Prognosis of gout and potential complications.

For emphasizing the importance of consistent management and patient adherence to treatment plans.

I. Prognosis with Effective Treatment:

With modern pharmacological and non-pharmacological management, the prognosis for gout is generally very good.

  • Symptom Control: Consistent adherence to uric acid-lowering therapy (ULT) can effectively lower serum uric acid levels below the target threshold (<6 mg/dL, or <5 mg/dL for severe cases).
  • Flare Prevention: Maintaining target uric acid levels will prevent the formation of new MSU crystals and facilitate the dissolution of pre-existing crystals, thereby dramatically reducing the frequency and severity of acute gout flares. Many patients can achieve a flare-free state.
  • Tophus Resolution: Existing tophi can shrink and even completely disappear over time with sustained low uric acid levels. This can reverse joint damage and restore function in some cases.
  • Prevention of Joint Damage: By preventing crystal deposition and inflammation, ULT can halt or reverse progressive joint destruction and deformity.
  • Improved Quality of Life: Patients experience less pain, better joint function, and a significant improvement in their overall quality of life.
  • Reduced Comorbidities: While gout itself doesn't cause some comorbidities, effective management can indirectly improve outcomes for associated conditions like kidney disease and cardiovascular health, especially by addressing systemic inflammation and metabolic issues.
II. Potential Complications:

Without proper management, gout progresses through its natural history, leading to significant and often irreversible complications.

  1. Recurrent and More Severe Acute Flares:
    • Flares become more frequent, often polyarticular (affecting multiple joints), more severe, and of longer duration.
    • The intercritical periods (between flares) may shorten, or patients may experience continuous low-grade inflammation.
  2. Chronic Tophaceous Gout:
    • This is a hallmark of untreated, long-standing gout. Tophi are crystal deposits that can form in:
      • Joints and surrounding soft tissues: Leading to chronic pain, stiffness, persistent swelling, and ultimately, irreversible joint damage, deformity, and significant functional disability.
      • Bursae: (e.g., olecranon, prepatellar) causing inflammation and swelling.
      • Ear helix: Characteristic deposits that can disfigure.
      • Tendons: (e.g., Achilles tendon) leading to pain, dysfunction, and potential rupture.
      • Internal organs: Although less common and often only detected on advanced imaging, tophi can deposit in kidneys or heart valves, contributing to organ dysfunction.
  3. Joint Destruction and Deformity:
    • The persistent presence of MSU crystals and chronic inflammation leads to erosion of cartilage and bone, resulting in a severe form of arthritis that can mimic other inflammatory arthropathies. This can lead to permanent loss of joint function.
  4. Kidney Complications:
    • Uric Acid Nephrolithiasis (Kidney Stones): Elevated uric acid levels increase the risk of forming uric acid kidney stones, which can cause severe pain, urinary tract obstruction, infection, and kidney damage.
    • Urate Nephropathy (Gouty Nephropathy): Chronic deposition of MSU crystals in the renal interstitium can lead to chronic inflammation, fibrosis, and progressive decline in kidney function. This can contribute to end-stage renal disease.
  5. Psychosocial Impact:
    • Chronic pain, disability, and the unpredictable nature of flares can lead to depression, anxiety, social isolation, and impaired quality of life.
    • Difficulty performing daily activities, working, and engaging in hobbies.
  6. Association with Cardiovascular and Metabolic Diseases:
    • While hyperuricemia and gout are often associated with cardiovascular disease, hypertension, diabetes, and metabolic syndrome, the exact causal relationship is complex and actively researched. However, it is clear that untreated gout exists within a cluster of metabolic disturbances that collectively increase morbidity and mortality risks. Effective gout management, particularly by addressing underlying metabolic issues, may contribute to better overall health outcomes.
Nursing Diagnoses and Interventions for a Patient with Gout.
  1. Acute Pain related to inflammation in the affected joint(s) secondary to uric acid crystal deposition, as evidenced by patient's report of severe pain, guarding behavior, grimacing, and joint redness/swelling.
  2. Impaired Physical Mobility related to pain and inflammation in the affected joint(s), as evidenced by reluctance to move the affected limb, limited range of motion, and difficulty with ambulation.
  3. Inadequate health Knowledge related to disease process, dietary restrictions, medication regimen, and prevention strategies, as evidenced by patient's questions about gout, stated misconceptions, or observed non-adherence.
  4. Risk for Ineffective Health Maintenance related to potential for non-adherence to long-term uric acid-lowering therapy, dietary modifications, and lifestyle changes.
  5. Risk for Impaired Skin Integrity related to presence of tophi and chronic inflammation (for chronic tophaceous gout).
  6. Excessive Anxiety related to unpredictable nature of gout flares, chronic pain, and impact on daily life, as evidenced by patient's verbalization of worry, restlessness, or irritability.
Nursing Interventions for Each Diagnosis:
1. Nursing Diagnosis: Acute Pain
Interventions:
Action Rationale
Assess Pain Characteristics: Regularly assess pain level using a standardized scale (e.g., 0-10), location, quality (throbbing, crushing), and aggravating/alleviating factors. Provides baseline data, monitors effectiveness of interventions, and helps identify triggers.
Administer Prescribed Medications: Administer NSAIDs, colchicine, or corticosteroids as ordered by the physician, ensuring correct dosage and timing. Educate on potential side effects. These are the primary pharmacological interventions to reduce inflammation and pain during an acute flare.
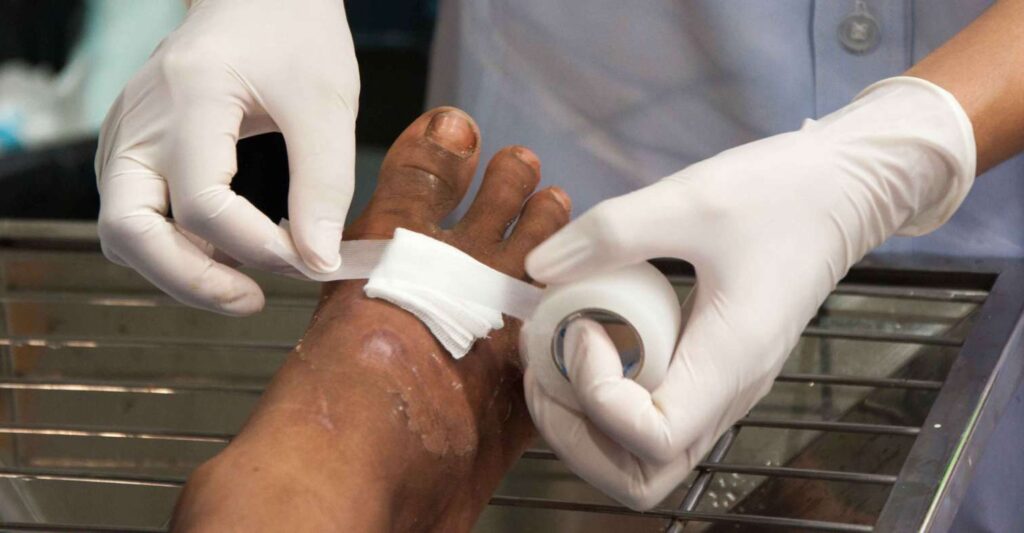
Apply Non-Pharmacological Pain Relief Measures: Apply cold compresses/ice packs to the affected joint for 15-20 minutes at a time, several times a day. Cold therapy helps reduce inflammation, swelling, and pain by vasoconstriction.
Position for Comfort and Joint Protection: Elevate the affected limb. Encourage resting the joint; avoid placing weight or pressure on the affected area (e.g., use a bed cradle to keep sheets off the big toe). Elevation reduces swelling. Rest minimizes mechanical stress and irritation to the inflamed joint, reducing pain.
Provide a Quiet and Calm Environment: Ensure the patient's room is conducive to rest and sleep. Reduces sensory overload, promoting relaxation and pain tolerance.
Educate on Pain Management at Home: Teach patient how to recognize early signs of a flare and initiate prescribed abortive therapies (e.g., colchicine) promptly. Early intervention is key to minimizing the duration and severity of a flare.
2. Nursing Diagnosis: Impaired Physical Mobility
Interventions:
Action Rationale
Assess Mobility Status: Evaluate the patient's current functional abilities, range of motion, gait, and need for assistive devices. Establishes baseline and guides appropriate interventions.
Encourage Rest During Acute Flares: Advise the patient to avoid weight-bearing on the affected joint during the acute inflammatory phase. Prevents further irritation and potential damage to the inflamed joint, allowing it to heal.
Assist with ADLs as Needed: Provide assistance with activities of daily living (ADLs) such as hygiene, dressing, and toileting to conserve energy and minimize pain. Supports patient independence within pain limits and prevents undue strain on affected joints.
Provide Assistive Devices: Provide crutches, a cane, or a walker as appropriate and teach correct usage. Enhances safe ambulation and reduces stress on affected joints.
Gradual Mobilization: Once the acute pain subsides, encourage gentle, progressive range-of-motion exercises within pain limits. Refer to physical therapy as indicated. Prevents joint stiffness, strengthens surrounding muscles, and promotes return to normal function.
Educate on Joint Protection Techniques: Teach principles of joint protection, such as using the strongest joints for tasks and avoiding prolonged static positions. Minimizes stress on joints and helps prevent long-term damage.
3. Nursing Diagnosis: Inadequate health Knowledge
Interventions:
Action Rationale
Assess Current Knowledge Level: Ask open-ended questions about the patient's understanding of gout, its causes, triggers, and treatment. Identifies gaps, misconceptions, and learning needs.
Educate on the Disease Process: Explain gout in simple terms, including the role of uric acid, crystal formation, and the inflammatory response. Use visual aids if available. A clear understanding of the disease promotes acceptance and adherence to the treatment plan.
Review Medication Regimen: Explain the purpose, dosage, schedule, potential side effects, and importance of adherence for all prescribed medications (acute flare meds, ULT, and flare prophylaxis). Emphasize that ULT must be taken long-term, even when feeling well. Prevents medication errors, enhances adherence, and ensures patient safety. Highlight the importance of prophylactic therapy when starting ULT.
Provide Detailed Dietary Education: Review specific dietary recommendations (limit high-purine foods, fructose, alcohol; encourage low-fat dairy, plenty of water, healthy whole foods). Provide written materials. Dietary modifications are crucial for managing uric acid levels and preventing flares.
Discuss Lifestyle Modifications: Educate on the importance of weight management, adequate hydration, and moderate exercise. These factors significantly impact uric acid levels and overall health.
Emphasize Flare Prevention Strategies: Teach patient to identify and avoid personal triggers. Explain the importance of early intervention for flares. Empowering the patient to take an active role in preventing attacks.
Provide Resources: Offer contact information for support groups, reputable websites (e.g., Arthritis Foundation), or dietitians. Provides ongoing support and reliable information.
Verify Understanding: Ask the patient to "teach back" the information in their own words. Confirms comprehension and retention of learned material.
4. Nursing Diagnosis: Risk for Ineffective Health Maintenance
Interventions:
Action Rationale
Individualize the Care Plan: Involve the patient in setting realistic goals and choosing interventions that fit their lifestyle and preferences. Increases patient ownership and likelihood of adherence.
Reinforce Long-Term Nature of Gout: Educate that gout is a chronic condition requiring ongoing management, even during symptom-free periods. Emphasize that stopping ULT often leads to recurrence. Addresses common misconception that treatment can stop once symptoms resolve.
Address Barriers to Adherence: Explore potential barriers such as cost of medications, side effects, forgetfulness, cultural beliefs, or lack of social support. Collaborate with the healthcare team (e.g., social work, pharmacy) to address these. Proactive identification and mitigation of barriers improve adherence.
Provide Tools for Adherence: Suggest medication reminders (alarms, pill boxes), food diaries, or tracking apps. Practical tools can help patients maintain complex regimens.
Encourage Regular Follow-up: Stress the importance of regular appointments with the healthcare provider for monitoring uric acid levels, assessing joint health, and adjusting treatment as needed. Ongoing medical supervision is essential for effective long-term management and early detection of complications.
Promote Self-Efficacy: Acknowledge and praise patient efforts in managing their condition. Focus on successes and empower them to problem-solve challenges. Builds confidence and motivates continued adherence.
5. Nursing Diagnosis: Risk for Impaired Skin Integrity (for chronic tophaceous gout)
Interventions:
Action Rationale
Assess Skin Regularly: Inspect skin over tophi for redness, warmth, swelling, breaks in integrity, or signs of infection. Early detection of skin compromise or infection allows for prompt intervention.
Maintain Skin Hygiene: Gently clean affected areas with mild soap and water, ensuring thorough drying. Reduces bacterial load and prevents skin breakdown.
Protect Affected Areas: Advise patient to wear loose-fitting clothing and footwear to avoid friction or pressure on tophi. Use padding as needed. Prevents mechanical injury and ulceration.
Monitor for Signs of Infection: Educate patient and family about signs of infection (increased pain, purulent drainage, fever, spreading redness) and when to seek medical attention. Early recognition and treatment of infection are crucial.
Reinforce ULT Adherence: Emphasize that effective ULT can shrink tophi, thereby reducing pressure and the risk of skin breakdown. ULT is the primary long-term strategy for managing tophi.
6. Nursing Diagnosis: Excessive Anxiety
Interventions:
Action Rationale
Assess Level of Anxiety: Observe for signs of anxiety (restlessness, irritability, worry, rapid speech) and ask the patient to describe their feelings. Allows for appropriate tailoring of interventions.
Provide Clear and Consistent Information: Reiterate information about gout management, emphasizing that it is treatable and flares can be prevented with adherence. Knowledge reduces fear of the unknown and provides a sense of control.
Encourage Expression of Feelings: Create a supportive environment where the patient feels comfortable discussing their fears, concerns, and frustrations. Allows for emotional release and helps identify specific sources of anxiety.
Teach Relaxation Techniques: Instruct the patient in deep breathing exercises, guided imagery, or progressive muscle relaxation. Helps manage physical symptoms of anxiety and promotes a sense of calm.
Promote Effective Coping Strategies: Discuss past successful coping mechanisms and help the patient adapt them to their current situation. Builds on existing strengths and promotes self-management.
Encourage Support Systems: Involve family or significant others in education and care, or suggest support groups. A strong support system can buffer stress and provide emotional comfort.
Collaborate with Healthcare Team: Refer to social work, psychology, or spiritual care as needed for severe or persistent anxiety. Provides specialized support for complex emotional needs.

Gout Read More »

pharmacolgy and mental nursing quiz

Pharmacology & Mental health Quiz

This quiz is for logged in users only.


Pharmacology & Mental health Quiz Read More »

wound_dressing

Wound Dressing

WOUND DRESSING

Wound dressing is a method of carrying out surgical dressing and operative treatment with an aim to prevent the entry of Microorganisms into the wound.

Indications for wound dressing

  • To protect the wound from further injury or infection
  • To absorb exudates such as pus or serum.
  • To immobilize and support the injured part.
  • To apply pressure on the wound to control bleeding or approximate the wound
  • To provide psychological and physical comfort for the patient.

Wound : A cut or break in the normal continuity of the skin or body structure internally or externally.

 
Classification of Wounds

Classification of Wounds

Wounds can be classified based on manner of production, bacterial content, extent, and time. Below is a detailed breakdown of each classification:

1. Classification by Manner of Production

Abraded Wound (Abrasion)

  • Caused by friction that removes the superficial layer of the skin.
  • Commonly occurs due to falls on rough surfaces, such as sand, concrete, or gravel.

Incised Wound

  • Resulting from a sharp cutting instrument that produces a clean and well-defined separation of tissue.
  • Example: Surgical incisions or cuts made by a sharp knife.

Contused Wound

  • Caused by a blunt object, leading to significant injury to the soft tissue.
  • Characterized by bruising (hemorrhage) and swelling due to damaged blood vessels.
  • Example: Injuries from a blow, impact from a falling object, or trauma from a blunt force.

Lacerated Wound

  • Involves tearing of tissue, resulting in irregular and ragged wound edges.
  • Commonly caused by injuries from glass, metal, machinery accidents, or animal bites.

Penetrating Wound

  • A wound that pierces through deep tissues and may enter a body cavity or organ.
  • Example: Stab wounds caused by knives, long nails, or gunshot injuries.

Punctured Wound

  • Made by a sharp, narrow, and pointed object.
  • Usually deep with a small entry point, increasing the risk of infection.
  • Example: Injuries caused by nails, splinters, or glass fragments.

2. Classification by Bacterial Content

Clean Wound

  • Contains no pathogenic organisms and is made under sterile conditions.
  • Example: Surgical wounds created with aseptic techniques.
  • While surgical wounds are clean, the skin cannot be completely sterilized, making some microbial presence inevitable. However, the body’s immune system prevents infection.

Contaminated Wound

  • A wound that contains a significant number of microorganisms.
  • All accidental wounds fall into this category since they occur in an uncontrolled environment where aseptic precautions are absent.

Septic (Infected) Wound

  • A wound infected by pathogenic microorganisms that lead to tissue destruction and pus formation.
  • Even a previously clean or contaminated wound can become septic if unsterile techniques are used during dressing or if the body’s immune response fails.

3. Classification by Extent

Open Wound

  • There is a break in the skin or mucous membrane, exposing the underlying tissue to external contaminants.
  • Open wounds pose a higher risk of infection due to potential entry of microorganisms and foreign objects.
  • Example: Incisions, abrasions, lacerations, and puncture wounds.

Closed Wound

  • The skin remains intact, but underlying tissue is damaged.
  • Internal bleeding, swelling, or bruising (hematoma) may occur.
  • Example: Contusions (bruises) caused by blunt trauma.

4. Classification by Time

Acute Wound

  • A wound that heals within four weeks.
  • Includes surgical wounds, minor cuts, and abrasions that heal without complications.

Chronic Wound

  • A wound that fails to heal within four weeks and remains in the inflammatory phase of healing.
  • Chronic wounds may be associated with conditions such as diabetes, poor circulation, or infection.
  • Example: Pressure ulcers, diabetic foot ulcers, and venous leg ulcers.
wound dressing Phases-of-the-wound-healing-process

WOUND HEALING

Wound healing refers to the body’s natural process of replacing destroyed tissue with new, living tissue

This complex biological process involves multiple phases and can be influenced by various internal and external factors.

Factors Affecting Wound Healing

Several factors determine the rate and effectiveness of wound healing:

1. Age

  • Younger individuals tend to heal faster due to higher cellular activity and collagen production.
  • Elderly individuals may experience delayed healing due to reduced skin elasticity, lower immune response, and slower cell regeneration.

2. Nutritional Status

  • Proper nutrition is essential for wound healing. Deficiencies in proteins, carbohydrates, lipids, vitamins (especially A, C, and E), and minerals (such as zinc and iron) can delay the process.
  • Proteins are crucial for cell growth and tissue repair.
  • Vitamin C is essential for collagen formation, while Vitamin A aids in immune function and epithelial cell formation.

3. Type of Wound

  • Clean surgical wounds heal faster than contaminated or infected wounds.
  • Deep wounds with tissue loss take longer to heal than superficial wounds.

4. Blood Supply to the Affected Area

  • Adequate blood circulation ensures oxygen and nutrient delivery to the wound, promoting faster healing.
  • Conditions like diabetes, peripheral artery disease, and smoking can impair circulation and slow healing.

5. Presence of Foreign Bodies

  • Dirt, debris, sutures, or other foreign materials in the wound can delay healing and increase infection risk.

6. Infection and Foreign Bodies in the Wound

  • Infections introduce bacteria into the wound, causing inflammation, pus formation, and delayed healing.
  • The presence of bacteria prevents new tissue from forming properly.

7. Lack of Rest of the Affected Part

  • Continuous movement or strain on a wound can prevent proper tissue formation and delay healing.
  • Immobilization and rest allow new cells to regenerate effectively.

8. Hemorrhage (Excessive Bleeding)

  • Uncontrolled bleeding can prevent clot formation, delaying the healing process.
  • Blood loss reduces oxygen supply to the wound, which is crucial for tissue repair.

9. Presence of Dead Space in the Wound

  • Dead space refers to empty spaces between tissues where fluid can accumulate, increasing infection risk.
  • Proper wound closure techniques (suturing or packing) help eliminate dead spaces.

10. Malnutrition

  • An inadequate supply of proteins, carbohydrates, lipids, vitamins, and trace elements can slow down all phases of wound healing.

11. Medications

Certain medications can impair the healing process, such as:

  • NSAIDs (Non-Steroidal Anti-Inflammatory Drugs): May interfere with inflammation, which is crucial for wound healing.
  • Chemotherapy and Immunosuppressive Drugs: Reduce cell proliferation, slowing tissue repair.
  • Corticosteroids: Suppress the immune response and delay new tissue formation.

12. Stress, Anxiety, and Depression

  • Emotional and psychological stress can negatively affect immune function and hormone balance, leading to slower wound healing.

13. Underlying Diseases

  • Conditions such as diabetes, autoimmune disorders, anemia, and cancer can impair wound healing by reducing immune function, circulation, and tissue regeneration.

14. Infection

  • A wound that becomes infected requires additional time to heal due to the presence of bacteria that compete with new tissue growth.
  • Infections can lead to chronic wounds if left untreated.

Types of Wound Healing (Wound Closure)

1. Healing by Primary Intention (First Intention)

  • The wound edges are brought together (approximated) using sutures, staples, or adhesive strips.
  • Occurs in clean, minimal tissue loss wounds such as surgical incisions.
  • Healing is quick with minimal scarring.

2. Healing by Secondary Intention (Granulation Healing)

  • Happens when there is significant tissue damage or infection, preventing the wound edges from being approximated.
  • The wound heals from the bottom up, filling with granulation tissue (new connective tissue and blood vessels).
  • Requires daily wound dressing as the open wound is at risk of infection.
  • Healing time is longer, and scarring is more prominent.

Phases of Wound Healing

The wound healing process consists of four overlapping phases, commonly referred to as the “cascade of healing.”

1. Hemostasis Phase (Bleeding Control Phase): The immediate response to physical injury, ensuring that bleeding is controlled.

Includes:

  • Vasoconstriction (narrowing of blood vessels to reduce bleeding).
  • Platelet response (platelets form a clot at the injury site).
  • Biochemical response (release of clotting factors to stabilize the wound).

2. Inflammatory Phase: Damaged cells release cytokines that attract white blood cells to fight infection.

Key events:

  • Histamine, serotonin, and kinins cause temporary blood vessel constriction, followed by dilation to allow immune cells to reach the wound.
  • Neutrophils arrive within 24 hours to remove bacteria and dead tissue.

3. Proliferative Phase: Begins once neutrophils have cleared cellular debris.

Key processes:

  • Fibroblasts migrate to the wound and produce collagen (Type III initially) to provide structural support.
  • Angiogenesis (formation of new blood vessels) starts within 48 hours.
  • Wound strength increases significantly during this phase.

This phase lasts up to 3 weeks.

4. Maturation (Remodeling) Phase: Begins around week 3 and continues for 9 to 12 months.

  • Collagen Type III is replaced with Collagen Type I, increasing tensile strength up to 80% of normal skin.
  • The wound contracts, and scar tissue forms.

Care of Wounds

Dressing Methods

  1. Dressing Method – Covers the wound to promote healing.
  2. Non-Dressing Method – Leaves the wound open to air for healing.

Advantages of Dressing

  • Absorbs wound drainage.
  • Protects from contamination (feces, urine, vomit, etc.).
  • Provides immobilization and prevents mechanical injuries.
  • Helps with hemostasis (prevents bleeding).
  • Provides psychological and physical comfort for the patient.

Advantages of Non-Dressing Method

  • Prevents bacterial growth by eliminating warmth and moisture.
  • Allows better observation of the wound.
  • Facilitates bathing without disrupting healing.
  • Avoids allergic reactions from adhesive tapes.
  • More economical and comfortable for the patient.

Disadvantages of Non-Dressing Method

  • Exposure of large wounds may cause anxiety for some patients.
  • Increased risk of contamination in an unclean environment.

Qualities of a Good Dressing

  • Sterile – Free from microorganisms.
  • Lightweight – Comfortable and non-bulky.
  • Porous – Allows air circulation to prevent moisture buildup.

Types of Dressings

Dry Dressing

  • Used for clean wounds.
  • Typically made of 4 to 8 layers of gauze, applied after antiseptic treatment.

Wet Dressing

  • Used for infected wounds with pus, softening discharge and promoting drainage.
  • Made of moistened antiseptic gauze with multiple layers.

Pressure Dressing

  • Applied with firm bandages to control bleeding and reduce oozing.
  • Commonly used for trauma or post-surgical wounds.

General Rules for Wound Dressing

Wound infections occur when microorganisms contaminate the wound, often originating from the ward environment. The primary sources of contamination include:

Sources of Wound Infection in the Ward

  1. Airborne Contaminants – Dust particles or infected droplets from the nose and mouth of patients, visitors, and medical staff.
  2. Hands of Healthcare Providers – Bacteria and pathogens from nurses, doctors, and other staff may transfer to wounds if proper hand hygiene is not followed.
  3. Improper Dressing Techniques – Inadequate sterilization and incorrect handling of wounds can introduce infections.
  4. Use of Unsterile Instruments – Dressing materials and instruments that are not properly sterilized can be a source of infection.

To prevent these risks and minimize wound infections, the following essential rules must be followed:

General Rules for Wound Dressing

No.

Rules

Rationale

1.

All bed making, mopping of the floor and dusting must be finished at least one hour before the dressing round is started.

To prevent spread of infections.

2.

Before the dressing round, wash the trolley with soap and water and dry it.


3.

Before each dressing, wipe the trolley shelves with a disinfectant using a mopper.


4.

Sterile articles are placed on the top shelf, un-sterile articles on the bottom shelf.


5.

Clean wounds are always dressed first


6.

Limit movements in the ward and windows near to the patient  being dressed must be closed.

To prevent cross infection.

7.

Do not carry out dressing when having a focal wound or droplet infection.


8.

If possible 2 nurses should be available to carry out dressing.

To prevent contamination and save time.

9.

Apply universal infection prevention and control before and after each procedure.

To prevent spread of infections.

10.

Nails must be short, watches and rings should be removed.


11.

Masks are worn if required and once in position they must not be handled. 

• When removing the mask, handle only the tapes and dispose off immediately. 

• Never put a used mask in the uniform pocket.

To prevent spread of infections

12.

Lotions: The dressing assistant should pour only enough lotion for one dressing. Unused lotion must be disposed off when clearing the trolley.

To avoid wastage and cross infection.

13.

The trolley is reset for each dressing.


14.

All used equipment must be decontaminated, washed with soap water, brushed, dried and sterilisation.

To be ready for next dressing

15.

The trolley is cleaned with disinfectant.


Wound Dressing Procedures

Dressing a Clean Wound

A clean wound is a superficial wound caused by uncontaminated sharp objects

It may occur electively (e.g., surgical incision) or accidentally (e.g., cuts from broken glass or sharp metal).

Purpose of Dressing a Clean Wound

  1. To keep the wound clean and free from infection.
  2. To prevent the wound from further injury and contamination.
  3. To hold medications applied locally in place.
  4. To immobilize the wound edges, promoting faster healing.
  5. To apply pressure, minimizing bleeding and swelling.

Requirements for Clean Wounds

Top Shelf

Bottom Shelf

Bed Side

Sterile dressing pack containing: 

– 2 dressing towels 

– 2 non-toothed dissecting forceps 

– 2 dressing forceps 

– 3 gallipots 

– 1 for swabs 

– 1 for the lotion 

– 1 for gauze dressing

– A pair of stitch scissor or a clip remover if required

– A dressing mackintosh and towel 

– Receiver for soiled dressing 

– Receiver for used instruments 

– A bottle of antiseptic lotions 

– A drum for dressing

– A drum for swabs 

– A tray with bandages, scissors, safety pins, strapping 

– A container of Cheatle forceps 

– A pair of gloves and a pair of clean glove 

– A bowl

– Hand washing equipment

Extra Requirements For Dirty Wound

– Probe 

– Sinus forceps

– Hydrogen peroxide 

– Pus swab 

– Laboratory form 

– Hypotonic saline

– Pedal bin

Bed-Side Requirements

  • Hand washing equipment
  • Screen for patient privacy
  • Safety box for disposal of sharps
  • A good source of ligh

Procedure

Steps

Action

Rationale

1.

Refer to general rules.

2.

Dressing assistant positions the patient.

To maintain sterility.

3.

Place a mackintosh and towel under the part to be dressed.

Provides comfort and prevents soiling of bed linen.

4.

Dressing assistant puts on clean gloves, removes the bandage, and loosens the strapping.

For easy removal of the old dressing.

5.

Dressing assistant removes gloves, washes hands, opens the dressing pack, and adds any additional sterile equipment using Cheatle forceps.

To arrange materials for easy use and maintain sterility.

6.

Adds sterile cleaning solution required.

To prevent the spread of infections.

7.

Dressing assistant puts on clean gloves, removes the dressing, and discards it in the receiver.

To prevent the spread of infections.

8.

Dressing nurse washes hands thoroughly with soap and water and dries with a sterile towel.

To reduce the spread of infections.

9.

Puts on sterile gloves.

To maintain surgical asepsis.

10.

Drapes the wound with a dressing towel.

To provide a sterile environment.

11.

Using forceps, swabs the wound, discarding each swab after use (first the center, then each side of the wound, working from the middle outwards).

To minimize the spread of infection.

12.

For a dirty wound, perform necessary toileting as prescribed, which may involve the removal of stitches or clips, probing the wound, or packing the wound.

To promote healing.

13.

Applies dressing to cover the wound and puts additional dressing if oozing or discharge is anticipated.

To protect the wound and prevent soiling of the linen.

14.

Places used instruments in a receiver.

To avoid cross infections.

15.

Removes gloves, applies strapping or a bandage on the wound as required.

16.

Washes hands, clears away, and leaves the patient comfortable.

To maintain hygiene and sterility.

17.

Documents the procedure and reports accordingly.

For continuity of care and follow-up.

Dressing of Septic Wound

Septic wound is characterized by the presence of pus, dead skin and offensive odour in the wound.

Purpose of Dressing a Septic Wound

  1. To absorb discharge from the wound.
  2. To apply pressure and prevent excessive fluid buildup.
  3. To apply local medications for infection control.
  4. To reduce pain, swelling, and further tissue injury.

Need irrigation: As for clean wounds and dirty wounds which may not need irrigation, however with addition of the following, on the top shelf.

Additional Items (Top Shelf)

Bowl containing irrigation lotion (e.g., hydrogen peroxide)

Saline 0.9% solution

Receiver containing large syringe and fine catheter

Receiver for used lotion

Procedure

Step

Action

Rationale 

1

Explain procedure to the patient

To gain patient cooperation and reduce anxiety.

2

Clean trolley or tray and assemble sterile equipment on one side and surgically clean items on the other side. Make sure the tray or trolley is covered.

To maintain asepsis and prevent contamination of sterile supplies.

3

Drape patient and position comfortably.

To provide privacy and comfort for the patient during the procedure.

4

Place the rubber sheet and its cover under the affected part.

To protect the bed linen from becoming soiled.

5

First remove the outer layer of the dressing.

To expose the inner dressing and wound site.

6

Wear gloves if necessary. Use forceps to remove the inner layer of the dressing smoothly and discard therefore caps.

To prevent contamination of the wound and protect healthcare worker from exposure to infectious materials.

7

Observe the wound and check if there is drainage rubber or tube.

To assess the wound’s condition and identify any complications.

8

Take specimens for culture or slide if ordered (Do not cleanse wounds with antiseptic before you obtain the specimen.)

To accurately identify any infectious organisms present in the wound.

9

Start cleaning the wound from the cleanest part of the wound to the most contaminated part using antiseptic solution. (Hydrogen peroxide 3%) is commonly used for septic wounds). Discard the cotton ball used for cleaning after each stroke over the wound.

To prevent the spread of contamination from the dirtier areas to the cleaner areas.

10

Cleanse the skin around the wound to remove the plaster gum with benzene or ether.

To ensure proper adhesion of the new dressing.

11

Use cotton balls for drying the skin around the wound properly.

To create a clean, dry surface for the new dressing.

12

Dress the wound and make sure that the wound is covered completely.

To protect the wound from infection and promote healing.

13

Fix dressing in place with adhesive tape or bandages.

To secure the dressing and prevent it from dislodging.

14

Leave the patient comfortable and tidy.

To promote patient well-being and satisfaction.

15

Cleanse and return equipment to its proper places.

To maintain a clean and organized work environment.

16

Discard soiled dressings properly to prevent cross infection in the ward.

To prevent the spread of infection to other patients and healthcare workers.

NB:

  • If sterile forceps are not available, use sterile gloves. 
  • Immerse used forceps, scissors and other instruments in strong antiseptic solution before cleansing and discard soiled dressing properly. 
  • In a big ward it is best to give priorities to clean wounds and then to septic wounds, when changing dressings, as this might lessen the risk of cross infection.
  • Consideration should be given to provide privacy for the patient while dressing the wound. 
  • Wounds should not be too tightly packed in effort to absorb discharge as this may delay healing.

Wound Irrigation

Wound irrigation is the process of removing foreign materials, reducing bacterial contamination, and clearing cellular debris or exudate from the wound surface

It is a critical step in wound management, helping to maintain a clean environment that promotes optimal healing.

The procedure must be vigorous enough to achieve effective cleansing but gentle enough to prevent additional tissue trauma or the unintentional spread of bacteria and foreign particles deeper into the wound.

Since wound irrigation involves bodily fluids, splashing and spraying can occur due to the use of pressure. To ensure the safety of healthcare providers, proper personal protective equipment (PPE) such as gloves, masks, eye protection, and gowns must be worn.


Essential Steps of Wound Irrigation

  1. Assessing the Wound – Evaluate the wound’s size, depth, level of contamination, and presence of infection.
  2. Wound Anesthesia – If necessary, provide local anesthesia to minimize patient discomfort during irrigation.
  3. Wound Periphery Cleansing – Clean the skin around the wound using antiseptic solutions to prevent external contamination.
  4. Irrigation with Solution Under Pressure – Flush the wound using an appropriate solution with controlled pressure to remove debris and bacteria effectively.

Indications for Wound Irrigation

Wound irrigation is recommended for both acute and chronic wounds, especially when:

  • The wound is contaminated with debris or foreign materials.
  • The wound will undergo suturing, surgical repair, or debridement.
  • The wound has exudate buildup, which may delay healing.

Contraindications for Wound Irrigation

Wound irrigation may not be necessary or should be carefully performed in the following situations:

Contraindication

Reason

Highly vascular areas (e.g., scalp wounds)

Excessive irrigation may not be required due to the scalp’s rich blood supply, which naturally aids in cleansing.

Wounds with fistulas or sinuses of unknown depth

Irrigation could push bacteria and debris deeper into the wound or surrounding body spaces, leading to complications.

Extensive tissue damage or fragile wounds

Excessive irrigation pressure can worsen tissue injury.


Wound Cleansing Agents

Various wound cleansing agents are available, each with different bactericidal properties:

Cleansing Agent

Bactericidal Action

Effect on Healthy Tissue

Povidone-Iodine Solution

Strong against both gram-positive and gram-negative bacteria

Mildly toxic to healthy cells and granulation tissues

Chlorhexidine

Strongly bactericidal against gram-positive bacteria, less effective against gram-negative bacteria

Generally safe but may cause irritation

Hydrogen Peroxide

Strong against gram-positive bacteria, less effective against gram-negative bacteria

Can damage healthy tissue and delay healing


Irrigation Solutions for Wound Cleansing

Different irrigation solutions can be used based on wound type and availability:

Irrigation Solution

Properties

Usage Considerations

Normal Saline (0.9%)

Non-toxic, similar in tonicity to body fluids

Most commonly used due to safety and effectiveness

Sterile Water

Non-toxic but hypotonic, may cause cell lysis

Suitable when saline is unavailable but should be used cautiously

Potable Water

Readily available, no significant difference from sterile water in infection rates

Used when sterile water or saline is unavailable

Requirements 

  • 2 Receivers
  • Rubber sheet and its cover
  • Solutions (Hydrogen Peroxide or Normal Saline)
  • Adhesive tape or bandage
  • Bandage scissors
  • Sterile Syringe (with desired amount of solution) and Catheter
  • Sterile Forceps (2)

Procedure

Step

Action

Rationale

1

Explain the procedure to the patient and organize the needed items.

To gain patient cooperation and ensure efficiency.

2

Drape and position patient.

To provide privacy and comfort.

3

Put a rubber sheet and its cover under the part to be irrigated.

To protect the bed linen from becoming soiled.

4

Remove the outer layer of the dressing.

To expose the inner dressing.

5

Remove the inner layer of the dressing using the first sterile forceps.

To maintain sterility during dressing removal.

6

Put the receiver under the patient to receive the outflow.

To collect the irrigation fluid and prevent mess.

7

Use a syringe with the desired amount of solution fitted with the catheter.

To deliver a controlled amount of irrigation fluid.

8

Use forceps to direct the catheter into the wound.

To ensure the catheter reaches the desired area of the wound.

9

First inject the solution such as hydrogen peroxide at body temperature gently and wait for the flow. This must be followed by normal saline for rinsing.

Hydrogen peroxide helps to loosen debris, while normal saline rinses away the debris and remaining peroxide.

10

Make sure the wound is cleaned and dried properly.

To prepare the wound for dressing and prevent maceration.

11

Dress the wound and check if it is covered completely.

To protect the wound from infection.

12

Secure dressing in place with adhesive tape or bandage.

To keep the dressing in place.

13

Leave the patient comfortable and tidy.

To promote patient well-being.

14

Record the state of the wound.

To monitor healing progress.

15

Clean and return equipment to its proper place.

To maintain a clean and organized environment.

NB:

Keep patient in a convenient position. According to the need so that solution will flow from wound down to the receiver.


Complications

Wound irrigation should be avoided if the wound is actively bleeding, as it can disrupt clot formation and exacerbate hemorrhage. Incomplete or inadequate wound irrigation can lead to several complications:

  • Persistent Debris: Failure to thoroughly remove debris, foreign bodies, or necrotic tissue increases the risk of infection and delayed healing.
  • Sinus Formation: In abscesses, inadequate irrigation can result in the persistence of purulent discharge, potentially leading to chronic sinus tract formation.
  • Infection: Retained bacteria and contaminants can promote local or systemic infection.
  • Cytotoxicity: While povidone-iodine is a common antiseptic, excessive use or direct instillation into deep wounds can be cytotoxic, impairing wound healing. It should be used carefully, primarily on wound edges, and avoided in large quantities within the wound.
Wound Assessment

Wound Assessment

Wound assessment is a critical process in wound management that allows healthcare professionals to determine the appropriate treatment plan and monitor healing progression

It involves evaluating the type, severity, and condition of the wound, along with assessing for signs of infection, complications, or delayed healing.

Both initial and ongoing wound assessments should be conducted systematically in collaboration with the treating team to ensure optimal patient care.


Key Factors in Wound Assessment

The following considerations are essential for a comprehensive wound assessment:

  1. Type of Wound – Categorized as acute or chronic based on duration and healing progression.
  2. Aetiology (Cause of Wound) – Includes surgical wounds, lacerations, ulcers, burns, abrasions, traumatic injuries, pressure injuries, and neoplastic wounds.
  3. Wound Location & Surrounding Skin – Important for understanding healing potential and the impact on mobility or function.
  4. Tissue Loss – Determines whether the wound is superficial, partial-thickness, or full-thickness.
  5. Clinical Appearance of Wound Bed – Indicates the stage of healing and tissue viability.
  6. Measurement & Dimensions – Includes both two-dimensional and three-dimensional wound assessments.
  7. Wound Edges – Assessed for color, contraction, elevation, and rolling, all of which impact healing.
  8. Exudate (Wound Drainage) – Evaluated for quantity, color, consistency, and odor to detect infection or complications.
  9. Presence of Infection – Identified by local or systemic indicators of bacterial overgrowth.
  10. Pain – Helps assess wound progression and potential underlying complications.
  11. Previous Wound Management – Important for evaluating treatment effectiveness and necessary modifications.

1. Type of Wound

Wounds can be classified based on terminology related to their cause and general healing characteristics.

Wound Type

Description

Surgical Wound

Incision made during a medical procedure under sterile conditions.

Burn

Caused by heat, chemicals, electricity, or radiation.

Laceration

A deep cut or tear in the skin due to trauma.

Ulcer

A wound caused by prolonged pressure, infection, or vascular insufficiency.

Abrasion

Superficial wound caused by friction removing the skin’s surface.

Traumatic Wound

Resulting from external force, such as accidents, falls, or injuries.

Pressure Injury (Bedsore)

Skin and tissue damage due to prolonged pressure, especially in bedridden patients.

Neoplastic Wound

Caused by malignant tumors breaking down skin tissue.


2. Tissue Loss

The depth of a wound determines the level of tissue loss:

Tissue Loss Classification

Description

Superficial Wound

Involves only the epidermis (outer layer of the skin).

Partial-Thickness Wound

Affects both the epidermis and dermis.

Full-Thickness Wound

Extends beyond the dermis into subcutaneous tissue, possibly reaching muscles, bones, or tendons.


3. Clinical Appearance of the Wound Bed

The wound bed provides insight into the healing process. Different tissue types indicate the stage of healing and whether intervention is required.

Wound Bed Appearance

Description

Granulating

Healthy red/pink moist tissue, indicating active healing. Contains newly formed collagen, elastin, and capillary networks. Bleeds easily.

Epithelializing

Thin, pink or whitish layer forming over the wound. Signifies new skin formation over granulation tissue.

Sloughy

Yellow or whitish tissue, made up of dead cells and fibrin. Must not be confused with pus.

Necrotic

Black, dry, or grey dead tissue. Prevents healing and may require debridement.

Hypergranulating

Excess granulation tissue, extending beyond the wound margins. Often caused by infection, irritants, or bacterial imbalance.


4. Wound Measurement

A proper wound assessment requires accurate measurement of its size and depth.

Measurement Method

Description

Two-Dimensional Assessment

Uses a paper tape measure to record the length and width (in mm). Commonly used for chronic wounds.

Three-Dimensional Assessment

Depth is measured using a dampened cotton tip applicator. Helps assess cavity wounds or tracking (tunneling wounds).


5. Wound Edges

The edges of the wound give valuable insight into healing progress.

Wound Edge Feature

Indication

Pink edges

Indicate new tissue growth and healing.

Dusky edges

Suggest hypoxia (lack of oxygen) in the wound.

Erythema (redness)

May indicate inflammation or cellulitis.

Contracting wound edges

Show wound contraction, a normal part of healing.

Raised wound edges

Suggest hypergranulation, which may need intervention.

Rolled edges

Edges rolling inward may delay healing and require corrective action.

Changes in sensation

Increased pain or numbness should be investigated.


6. Exudate (Wound Drainage)

Exudate plays a critical role in healing but requires careful monitoring.

Functions of Exudate in Healing

  • Provides nutrients and growth factors for cell metabolism.
  • Contains white blood cells to fight infection.
  • Cleanses the wound by flushing out bacteria and debris.
  • Maintains moisture balance, preventing wound desiccation.
  • Promotes epithelialization, aiding tissue regeneration.

Complications Related to Exudate

  • Excess exudate → Causes maceration (breakdown of surrounding skin).
  • Insufficient exudate → Leads to wound dryness, slowing healing.
  • Odorous, thick exudate → Indicates infection or necrosis.

7. Surrounding Skin Condition

The surrounding skin should be examined for:

  • Signs of maceration (excess moisture causing soft, broken skin).
  • Erythema (redness indicating inflammation or infection).
  • Dryness or cracking, which may slow healing.
  • Skin integrity changes, requiring protection measures.

8. Presence of Infection

A wound infection occurs when bacteria multiply beyond the body’s ability to control them

This can lead to delayed healing, tissue destruction, or systemic illness.

Local Signs of Infection

  • Redness (Erythema or Cellulitis) – Surrounding skin appears inflamed.
  • Exudate Changes – Purulent (pus-like) or increased drainage.
  • Foul Odor – A strong smell may indicate bacterial growth.
  • Localized Pain – Increased pain in or around the wound.
  • Localized Heat – Warmer than surrounding tissue.
  • Swelling (Oedema) – Fluid accumulation around the wound.

Systemic Signs of Infection (Indicating worsening condition)

  • Fever or chills
  • Increased heart rate
  • Fatigue or malaise
  • Spreading redness beyond the wound area

Wound Dressing Read More »

Panic attacks/disorders

Panic Attacks and Disorders

Panic Attacks and Disorders

Lets first differentiate them.

I. Panic Attack

A Panic Attack is an abrupt surge of intense fear or intense discomfort that reaches a peak within minutes, and during which time, four or more of the following symptoms occur:

  1. Palpitations, pounding heart, or accelerated heart rate.
  2. Sweating.
  3. Trembling or shaking.
  4. Sensations of shortness of breath or smothering.
  5. Feelings of choking.
  6. Chest pain or discomfort.
  7. Nausea or abdominal distress.
  8. Feeling dizzy, unsteady, light-headed, or faint.
  9. Chills or heat sensations.
  10. Paresthesias (numbness or tingling sensations).
  11. Derealization (feelings of unreality) or depersonalization (being detached from oneself).
  12. Fear of losing control or "going crazy."
  13. Fear of dying.
Key Characteristics of a Panic Attack:
  • Abrupt onset: Symptoms appear suddenly, not gradually.
  • Peak intensity: Reach their peak within 10 minutes (though they can be shorter or longer).
  • Intense fear/discomfort: The emotional experience is overwhelming.
  • Multiple physical and cognitive symptoms: Not just one or two symptoms, but a cluster.
  • Can be expected or unexpected:
    • Expected Panic Attack: Occurs in anticipation of a feared situation (e.g., someone with social anxiety having a panic attack before a public speaking event).
    • Unexpected Panic Attack: Occurs "out of the blue" without an obvious trigger. These are particularly central to Panic Disorder.
  • Panic Disorder

    Panic Disorder is a type of anxiety disorder characterized by recurrent, unexpected panic attacks. The diagnosis is made when an individual experiences:

    1. Recurrent, unexpected panic attacks.
    2. At least one of the attacks has been followed by 1 month (or more) of one or both of the following:
      • Persistent concern or worry about additional panic attacks or their consequences (e.g., losing control, having a heart attack, "going crazy"). This is often referred to as anticipatory anxiety.
      • A significant maladaptive change in behavior related to the attacks (e.g., behaviors designed to avoid having panic attacks, such as avoidance of exercise or unfamiliar situations, or avoidance of places where previous panic attacks occurred). This often leads to the development of agoraphobia.
    Key Characteristics of Panic Disorder:
    • Core Feature: The unexpected nature of the panic attacks. It's not just about having panic attacks, but having them without an obvious trigger, leading to a fear of having more panic attacks.
    • Anticipatory Anxiety: A constant state of worry about when and where the next attack will strike, leading to hypervigilance for bodily sensations.
    • Behavioral Change/Avoidance: People start to avoid situations, places, or even physical sensations (like increased heart rate from exercise) that they associate with previous panic attacks or fear might trigger one. This avoidance can become very pervasive.
    Differentiation from Other Anxiety Disorders

    It's crucial to distinguish Panic Disorder from other anxiety disorders, as treatment approaches can vary.

    1. Generalized Anxiety Disorder (GAD):
      • Panic Disorder: Characterized by acute, intense, episodic panic attacks, often unexpected, followed by worry about future attacks. The anxiety is typically episodic and focused on the panic attacks themselves.
      • GAD: Characterized by chronic, excessive, pervasive, and difficult-to-control worry about a variety of everyday life events (e.g., work, finances, family health). The anxiety is more diffuse and persistent, though individuals with GAD can also experience panic attacks, they are not the central focus of the disorder.
    2. Social Anxiety Disorder (Social Phobia):
      • Panic Disorder: Attacks are often unexpected, and the primary fear is of the panic attack itself or its consequences.
      • Social Anxiety Disorder: Panic attacks, if they occur, are expected and always triggered by specific social or performance situations where the individual fears scrutiny or embarrassment (e.g., public speaking, eating in public). The core fear is negative evaluation by others, not the panic attack itself.
    3. Specific Phobia:
      • Panic Disorder: Attacks are often unexpected, and the primary fear is of the panic attack itself.
      • Specific Phobia: Panic attacks, if they occur, are expected and consistently triggered by exposure to a specific object or situation (e.g., heights, spiders, flying). The core fear is of the specific object/situation.
    4. Post-Traumatic Stress Disorder (PTSD):
      • Panic Disorder: Focus on unexpected panic attacks and anticipatory anxiety.
      • PTSD: Panic attacks can occur, but they are typically expected and triggered by trauma-related reminders or flashbacks. The core features are re-experiencing the trauma, avoidance, negative alterations in cognitions and mood, and alterations in arousal and reactivity.
    5. Obsessive-Compulsive Disorder (OCD):
      • Panic Disorder: Anxiety is related to the recurrence of panic attacks.
      • OCD: Anxiety is triggered by obsessions (intrusive thoughts) and relieved by compulsions (repetitive behaviors). While panic can occur due to extreme anxiety from obsessions, it's not the central feature.
    Signs and Symptoms of a Panic Attack

    A panic attack is an abrupt surge of intense fear or discomfort accompanied by a cluster of specific symptoms. These can be categorized as follows:

    1. Physical/Somatic Symptoms:

    These are often the most prominent and distressing, leading many individuals to believe they are having a medical emergency (e.g., heart attack, stroke).

    • Cardiovascular: Palpitations, pounding heart, accelerated heart rate, chest pain or discomfort.
    • Respiratory: Sensations of shortness of breath, smothering, feelings of choking.
    • Gastrointestinal: Nausea or abdominal distress.
    • Neurological/Vestibular: Dizziness, unsteadiness, light-headedness, faintness, paresthesias (numbness or tingling), trembling or shaking.
    • Thermoregulation: Chills or heat sensations, sweating.
    2. Cognitive Symptoms:

    These involve distorted thoughts and misinterpretations that fuel the fear.

    • Fear of losing control or "going crazy."
    • Fear of dying.
    • Derealization: Feelings of unreality (e.g., feeling detached from one's surroundings, world seems dreamlike).
    • Depersonalization: Being detached from oneself (e.g., feeling like an observer of one's body, feeling unreal).
    3. Emotional Symptoms:

    The core emotional experience is intense fear.

    • Intense fear: Overwhelming and often unprovoked terror.
    • Apprehension: A sense of impending doom or danger.
    Diagnostic Criteria for Panic Disorder (based on DSM-5-TR)

    For a diagnosis of Panic Disorder, the following criteria must be met:

    A. Recurrent Unexpected Panic Attacks:

    The individual must experience recurrent, unexpected panic attacks.

    • "Unexpected" means the attack occurs without an obvious trigger or cue. This is a critical distinction from panic attacks that are always tied to a specific situation (e.g., a phobic situation).
    • A Panic Attack itself is defined by the abrupt surge of intense fear or intense discomfort that reaches a peak within minutes, during which four or more of the following 13 physical and cognitive symptoms occur: 1. Palpitations, pounding heart, or accelerated heart rate. 2. Sweating. 3. Trembling or shaking. 4. Sensations of shortness of breath or smothering. 5. Feelings of choking. 6. Chest pain or discomfort. 7. Nausea or abdominal distress. 8. Feeling dizzy, unsteady, light-headed, or faint. 9. Derealization (feelings of unreality) or depersonalization (being detached from oneself). 10. Fear of losing control or "going crazy." 11. Fear of dying. 12. Paresthesias (numbness or tingling sensations). 13. Chills or heat sensations.
    B. Subsequent Persistent Concern or Behavioral Change:

    At least one of the panic attacks has been followed by 1 month or more of one or both of the following:

    1. Persistent concern or worry about additional panic attacks or their consequences. This includes worries about potential implications like losing control, having a heart attack, or "going crazy." (This is often called anticipatory anxiety).
    2. A significant maladaptive change in behavior related to the attacks. This involves behaviors adopted to avoid having future panic attacks (e.g., avoidance of exercise, avoidance of unfamiliar situations, social withdrawal, not leaving home).
    C. Exclusion of Substance/Medical Condition:

    The disturbance is not attributable to the physiological effects of a substance (e.g., a drug of abuse, a medication) or another medical condition (e.g., hyperthyroidism, cardiopulmonary disorders). This emphasizes the importance of a thorough medical workup.

    D. Exclusion of Other Mental Disorder:

    The disturbance is not better explained by another mental disorder. For example, the panic attacks are not exclusively due to:

    • Social Anxiety Disorder (e.g., panic in response to social situations only).
    • Specific Phobia (e.g., panic in response to specific phobic objects/situations only).
    • Obsessive-Compulsive Disorder (e.g., panic in response to obsessions only).
    • Posttraumatic Stress Disorder (e.g., panic in response to trauma reminders only).
    • Separation Anxiety Disorder (e.g., panic in response to separation from attachment figures only).
    Development of Agoraphobia (often co-occurs with Panic Disorder):
    • While Agoraphobia can be diagnosed independently, it frequently develops as a direct consequence of Panic Disorder.
    • The fear of having a panic attack in situations where escape is difficult or help is unavailable leads to avoidance of these situations (e.g., public transportation, open spaces, enclosed places, standing in line, being outside the home alone).
    • In severe cases, individuals with agoraphobia may become housebound.
    Cause of panic attacks

    The cause of panic attack is unknown (idiopathic) but the following are thought to trigger panic attacks;

    I. Biological Factors
    1. Genetic Predisposition:
      • Panic Disorder often runs in families. First-degree biological relatives of individuals with Panic Disorder are at a higher risk (up to 4-8 times higher) of developing the disorder themselves.
      • Twin studies also support a genetic component, with higher concordance rates in monozygotic (identical) twins compared to dizygotic (fraternal) twins. However, genetics alone do not fully explain the disorder, indicating other factors are at play.
    2. Neurochemical Imbalances:
      • Several neurotransmitter systems are implicated in anxiety and panic:
        • Norepinephrine: Overactivity in the locus coeruleus (a brain region rich in norepinephrine neurons) is thought to contribute to the physiological arousal and "fight-or-flight" response seen in panic attacks.
        • Serotonin: Dysregulation in serotonergic systems is well-established in many anxiety disorders, including panic. Selective Serotonin Reuptake Inhibitors (SSRIs) are a primary treatment, suggesting serotonin's role.
        • GABA (Gamma-aminobutyric acid): GABA is an inhibitory neurotransmitter. Reduced GABAergic activity or fewer GABA receptors can lead to increased neuronal excitability and anxiety. Benzodiazepines, which enhance GABA's effects, are effective in acute panic.
      • Brain Structures: Abnormalities in brain circuits involving the amygdala (involved in fear processing), hippocampus (memory of fearful events), and prefrontal cortex (emotional regulation) are also being investigated.
    3. Interoceptive Sensitivity and False Suffocation Alarm Theory:
      • Interoception: Refers to the perception of internal bodily sensations (e.g., heart rate, respiration, stomach discomfort). Individuals with Panic Disorder often have heightened sensitivity to these normal bodily sensations.
      • False Suffocation Alarm Theory: Proposed by Donald Klein, this theory suggests that a subset of individuals with Panic Disorder have a hypersensitive "suffocation alarm" system in the brainstem. This system is normally triggered by changes in CO2 levels (indicating a need for more oxygen), but in these individuals, it may be overly sensitive and fire even when there's no actual threat, leading to feelings of breathlessness and triggering a panic attack.
    II. Psychological Factors
    1. Cognitive Misinterpretation of Bodily Sensations:
      • This is a cornerstone of the Cognitive-Behavioral Model of Panic. Individuals with Panic Disorder tend to catastrophically misinterpret normal or slightly elevated bodily sensations as signs of impending catastrophe.
      • Example: A slight increase in heart rate (e.g., from climbing stairs or drinking coffee) might be interpreted as "I'm having a heart attack," leading to increased anxiety, which further exacerbates physical symptoms, creating a vicious cycle of fear.
      • This misinterpretation amplifies benign physiological changes into full-blown panic.
    2. Anxiety Sensitivity:
      • Defined as the fear of anxiety-related sensations due to beliefs that these sensations have harmful consequences (e.g., "When I feel dizzy, I think I might faint and be embarrassed").
      • Individuals with high anxiety sensitivity are more likely to develop Panic Disorder. They are not just anxious, but they are afraid of being anxious.
    3. Conditioning and Learning Theories:
      • Classical Conditioning: A neutral stimulus (e.g., a specific location like a crowded mall) can become associated with the intense fear of a panic attack. Subsequently, just being in that location can trigger anxiety or even a panic attack.
      • Operant Conditioning (Negative Reinforcement): Avoiding situations that might trigger panic (e.g., agoraphobia) provides immediate relief from anxiety. This relief negatively reinforces the avoidance behavior, making it more likely that the person will continue to avoid those situations, thus maintaining the disorder.
    III. Environmental/Social Factors
    1. Stressful Life Events:
      • Panic attacks often first occur during periods of significant stress, such as job loss, relationship breakups, deaths of loved ones, or major life transitions. Stress can tax an individual's coping resources and increase physiological arousal, making them more vulnerable.
      • Childhood trauma: A history of childhood physical or sexual abuse, or other forms of trauma, is a significant risk factor for developing Panic Disorder.
    2. Substance Use and Withdrawal:
      • Stimulants: Caffeine, nicotine, and illicit stimulants (e.g., cocaine, amphetamines) can induce anxiety and panic-like symptoms due to their impact on the sympathetic nervous system.
      • Alcohol/Sedative-Hypnotic Withdrawal: Withdrawal from substances like alcohol or benzodiazepines can lead to severe anxiety, tremors, and even panic attacks, as the nervous system becomes overactive.
    3. Parenting Styles/Attachment:
      • Some research suggests that certain parenting styles (e.g., overprotective, critical) or insecure attachment styles may contribute to a child's vulnerability to anxiety disorders, including panic, by affecting emotional regulation and perceived self-efficacy.
    Nursing Concerns/Impact and Complications
    I. Impairment in Daily Functioning

    The constant threat of unexpected panic attacks and the associated anticipatory anxiety and avoidance behaviors can severely disrupt nearly every aspect of an individual's life:

    1. Occupational/Academic:
      • Difficulty concentrating due to persistent worry about attacks.
      • Avoidance of work/school due to fear of having an attack in public or in demanding situations.
      • Absence from work/school, leading to job loss, academic failure, or underemployment.
      • Reduced productivity and performance.
    2. Social Life:
      • Withdrawal from social activities and friends, especially if those activities involve feared situations (e.g., crowded places, driving, public transport).
      • Fear of embarrassment if a panic attack occurs in public.
      • Significant reduction in social support networks, leading to isolation.
    3. Relationships:
      • Strain on family and romantic relationships as partners or family members may struggle to understand or cope with the individual's avoidance and anxiety.
      • Dependence on others (e.g., relying on a partner to drive everywhere), which can create resentment or strain.
      • Communication difficulties surrounding the illness.
    4. Leisure and Hobbies:
      • Inability to participate in previously enjoyed activities, particularly those requiring travel or public interaction.
      • Overall reduction in pleasurable activities due to fear and avoidance.
    5. Independence:
      • In severe cases, particularly with co-occurring agoraphobia, individuals may become housebound, losing all independence and relying entirely on others.
    II. Comorbidity with Other Mental Health Disorders

    Panic Disorder rarely occurs in isolation. High rates of comorbidity are a significant challenge, complicating diagnosis and treatment, and often leading to worse outcomes.

    1. Major Depressive Disorder:
      • As noted previously, 50-65% of individuals with Panic Disorder will experience a major depressive episode in their lifetime. The chronic stress, impairment, and isolation often contribute to the development of depression.
      • The combination of Panic Disorder and depression typically leads to more severe symptoms, greater functional impairment, and a poorer prognosis.
    2. Other Anxiety Disorders:
      • Generalized Anxiety Disorder (GAD): Chronic, excessive worry can co-exist with episodic panic.
      • Social Anxiety Disorder: Fear of social situations and potential panic within them.
      • Specific Phobias: Co-occurring fears of specific objects or situations.
      • Post-Traumatic Stress Disorder (PTSD): Panic attacks can be a symptom of PTSD, or Panic Disorder can develop after a traumatic event.
    3. Substance Use Disorders:
      • Individuals with Panic Disorder have a significantly increased risk of developing alcohol or other substance use disorders (e.g., benzodiazepine abuse, cannabis).
      • Substances are often used as a form of "self-medication" to cope with anxiety and panic, though this ultimately exacerbates the problem and leads to dependence.
    4. Personality Disorders:
      • Certain personality disorders, particularly Cluster C (anxious/fearful cluster, e.g., dependent or avoidant personality disorder), can co-occur, making treatment more complex.
    III. Physical Health Consequences

    The chronic stress and physiological arousal associated with Panic Disorder can have long-term physical health implications, and the constant worry often leads to increased healthcare utilization.

    1. Cardiovascular Risk:
      • Chronic activation of the sympathetic nervous system, elevated heart rate, and blood pressure during panic attacks may contribute to an increased risk of cardiovascular disease over time.
      • However, it's more accurate to say that chronic stress and lifestyle factors associated with anxiety disorders (e.g., reduced exercise, poor diet, smoking) contribute to cardiovascular risk.
    2. Gastrointestinal Issues:
      • Chronic anxiety and stress can exacerbate or contribute to conditions like Irritable Bowel Syndrome (IBS) or functional dyspepsia.
    3. Sleep Disturbances:
      • Difficulty falling asleep or staying asleep due to worry, nightmares, or nocturnal panic attacks.
    4. Increased Healthcare Utilization:
      • Individuals with Panic Disorder frequently visit emergency rooms and general practitioners due to physical symptoms, fearing they have a serious medical condition. This leads to numerous diagnostic tests, often with negative results, incurring significant healthcare costs and reinforcing health anxiety if not properly managed.
    5. Headaches and Chronic Pain:
      • Increased muscle tension from chronic anxiety can lead to tension headaches and exacerbate other chronic pain conditions.
    IV. Impact on Quality of Life

    Ultimately, the cumulative effect of functional impairment, comorbidity, and physical health issues leads to a significantly reduced quality of life for individuals with Panic Disorder.

    • Reduced overall life satisfaction.
    • Feelings of helplessness, hopelessness, and demoralization.
    • Increased disability and unemployment rates.
    • Higher risk of suicidal ideation and attempts (especially when co-occurring with depression).
    Comprehensive Management of Panic Disorder

    This is a psychiatric emergency. Managing Panic Disorder (PD) is a process that requires a holistic approach, often involving a multidisciplinary team.

    Aims/ Goals of Management

    The primary objectives of Panic Disorder management are:

    1. Decrease Frequency of Attacks: Reduce the number of panic attacks experienced.
    2. Decrease Intensity of Attacks: Lessen the severity of symptoms during an attack.
    3. Decrease Anticipatory Anxiety: Alleviate the constant worry about future attacks.
    4. Decrease Phobic Avoidance: Reduce and eventually eliminate avoidance behaviors, including agoraphobia.
    5. Treat Co-occurring Psychiatric Disorders: Address common comorbidities such as depression, other anxiety disorders, or substance use disorders.
    6. Achieve Full Symptomatic Remission: Restore full functioning and quality of life.
    I. Initial Presentation and Immediate Management of a Panic Attack (Psychiatric Emergency)

    A panic attack, especially the first one, can be terrifying and often presents as a medical emergency due to the intensity of physical symptoms.

    1. Prioritize Medical Rule-Out:
      • Urgent Assessment: Any patient presenting with acute chest pain, dyspnea, palpitations, or near syncope requires immediate medical evaluation to rule out life-threatening physical conditions (e.g., myocardial infarction, pulmonary embolism, severe arrhythmias).
      • Medical Interventions: Place the patient on oxygen, position them appropriately (supine or Fowler's), and monitor vital signs, pulse oximetry, and perform electrocardiography (ECG). Address any abnormal findings (e.g., ventricular dysrhythmias) immediately.
      • Referral: If initial medical workup reveals cardiac or other significant medical abnormalities, the patient must be referred to the appropriate specialist (e.g., cardiologist).
    2. Ensure Patient Safety:
      • Suicide Risk Assessment: Always assess for potential suicide risk at all appointments, especially during acute anxiety crises, or if the patient reports suicidal or homicidal ideation. Inpatient care is warranted if there is evidence of dangerous behavior, severe suicidal ideation with a plan, or significant withdrawal symptoms from substances.
      • Calm Environment & Reassurance (Nursing Care): Approach the patient in a calm and quiet manner. For tensed, trembling, or sweating patients, a calm presence helps de-escalate their distress. Provide frequent reassurance and explanation, emphasizing that their symptoms are neither from a serious medical condition nor a psychotic disorder, but rather from a treatable chemical imbalance related to the fight-or-flight response. This psychoeducation is crucial.
    3. Acute Symptom Relief (Pharmacological - Short-Term):
      • In the acute crisis, a few doses of a fast-acting benzodiazepine (e.g., Lorazepam 1-2 mg orally or IM, Diazepam 10-20 mg IV, Clonazepam 0.5-2mg once daily) can be used to quickly alleviate severe anxiety and panic symptoms.
      • Caution: Emphasize that benzodiazepines are for short-term, as-needed use, and not for long-term monotherapy, due to the high risk of dependence, withdrawal, and the potential to mask symptoms or interfere with full engagement in psychotherapy. Avoid in patients with a history of substance misuse.
    III. Comprehensive Long-Term Management (Psychiatric and Collaborative Care)

    All patients with PD should be monitored by a psychiatrist, psychologist, or other mental health professional. Psychiatric care is highly effective and cost-efficient due to the potential for reducing emergency department visits and overall healthcare costs.

    A. Psychoeducation and Initial Supportive Measures:
    1. Patient and Family Education:
      • Explain the nature of Panic Disorder, clarifying that symptoms are not indicative of a serious physical illness or psychosis, but a treatable psychological condition.
      • Reassure the patient that many people experience similar problems and that the condition is treatable and often short-lived with proper intervention.
      • Educate on the "fight-or-flight" response and how it relates to panic symptoms.
    2. Monitoring:
      • Patients should self-monitor their symptoms by keeping a daily diary of panic symptoms and anxiety levels. Rating scales can also be used during sessions.
    3. Social Services Intervention:
      • Provide supportive discussions and explore resources for outpatient care and assistance.
    B. Psychological Therapies (First-Line Treatment)

    Cognitive Behavioral Therapy (CBT) is considered the most effective and low-cost approach for Panic Disorder, often leading to higher efficacy and lower relapse rates than medication alone, particularly when implemented early.

    1. Key Components of CBT:
      • Psychoeducation: As mentioned, understanding the benign nature of their physical sensations is crucial.
      • Cognitive Restructuring: Help patients identify and challenge automatic, catastrophic thoughts and false beliefs/distortions that lead to exaggerated emotional responses during a panic attack. Teach them to recognize that an increased heart rate, for example, is a normal physiological response, not a sign of impending doom.
      • Behavioral Therapy / Exposure Therapy:
        • Interoceptive Exposure: Gradually expose the patient to anxiety-provoking physical sensations (e.g., spinning in a chair for dizziness, hyperventilating for dyspnea, running in place for increased heart rate). The goal is to desensitize the patient to these sensations, allowing them to learn that these sensations are not dangerous and will pass.
        • In Vivo Exposure: Encourage and support the patient in sequentially and gradually confronting situations they have been avoiding (e.g., crowded places, driving, public transport) due to fear of panic. This helps extinguish avoidance behaviors and rebuilds confidence.
      • Relaxation Techniques: Teach patients relaxation techniques (e.g., diaphragmatic breathing) to help control hyperventilation during panic and manage overall anxiety levels.
    C. Pharmacological Treatments (Often Combined with Psychotherapy)

    Pharmacological therapy, particularly with SSRIs, is highly effective and often combined with psychotherapy, especially for more severe cases or when psychotherapy alone is insufficient. Patients should be informed about potential adverse reactions, realistic timelines for results, and the likely duration of treatment.

    1. Selective Serotonin Reuptake Inhibitors (SSRIs):
      • First Choice: SSRIs are the first-choice pharmacological treatment for PD.
      • Examples: Fluoxetine (10 mg starting, up to 60 mg maintenance), Paroxetine, Sertraline (50 mg starting, up to 200 mg maintenance), Fluvoxamine, Citalopram, Escitalopram.
      • Mechanism: Primarily antagonize the 5-HT2 receptor and inhibit the reuptake of 5-HT, increasing serotonin levels in the brain. They have negligible affinity for cholinergic and histaminergic receptors.
      • Onset: Initial follow-up care should occur within a week, as SSRIs can cause initial anxiety (jitteriness syndrome) or gastrointestinal issues. Start with the lowest dose and titrate slowly, with full therapeutic effects usually seen in 4-6 weeks.
      • Long-Term Management: Educate the patient about the importance of longer-term management with SSRI medication.
    2. Serotonin-Norepinephrine Reuptake Inhibitors (SNRIs):
      • Examples: Venlafaxine (often extended-release), Duloxetine. Trazodone (which is primarily an antidepressant and often used for sleep, though it affects serotonin) is mentioned in your slides as used for PD with or without agoraphobia.
      • Mechanism (Venlafaxine/Duloxetine): Inhibit the reuptake of both serotonin and norepinephrine.
      • Mechanism (Trazodone): Primarily an antagonist at the 5-HT2 receptor and inhibits the reuptake of 5-HT.
      • Use: Effective alternatives if SSRIs are not tolerated or ineffective.
    3. Benzodiazepines:
      • Intermediate to Strong Potency: (e.g., Alprazolam, Clonazepam, Lorazepam, Diazepam).
      • Mechanism: Potentiate GABA by binding to specific GABA receptors, leading to rapid anxiolytic effects.
      • Role: Primarily for acute symptom control or for short-term use (e.g., to bridge the gap while SSRIs take effect). They should not be used as monotherapy for long-term management of PD due to risks of dependence and abuse.
      • Prescription Caution: Dispensing should be limited to ensure patients understand it's a temporary or emergency option. Avoid in patients with a known history of substance misuse or alcoholism. Clonazepam is often preferred for its longer half-life compared to Alprazolam, which has a higher abuse potential.
    4. Tricyclic Antidepressants (TCAs):
      • Examples: Imipramine (25 mg nocte), Amitriptyline (25-50 mg once daily), Desipramine, Clomipramine.
      • Mechanism: Serotonin and Noradrenaline reuptake inhibitors.
      • Use: Effective, but often discontinued in 35% of cases due to a higher side-effect burden (e.g., blurred vision, dry mouth, dizziness, weight gain, GI disturbances, agitation, headache, insomnia, decreased libido) compared to SSRIs/SNRIs. Start at low doses and titrate gradually to manage side effects.
    5. Monoamine Oxidase Inhibitors (MAOIs):
      • Examples: Phenelzine, Tranylcypromine.
      • Mechanism: Nonselective monoamine oxidase inhibitors, increasing endogenous concentrations of dopamine, serotonin, epinephrine, and norepinephrine.
      • Use: Highly effective for PD and associated phobias, but typically reserved for refractory cases due to dietary restrictions (tyramine-free diet) and significant drug-drug interaction risks.
    D. Lifestyle Modifications and Adjunctive Strategies:
    1. Avoidance of Stimulants: Advise patients to reduce or eliminate caffeine, nicotine (cigarettes), and sympathomimetics (e.g., nasal decongestants), as these can be anxiety-producing agents and interfere with pharmacological therapy.
    2. Alcohol Reduction: Advise patients to reduce or eliminate alcohol intake, as it can exacerbate anxiety and interfere with treatment.
    3. Exercise: Encourage regular physical activity, which can reduce overall anxiety and improve mood.
    4. Relaxation Techniques: Reiterate the importance of techniques like controlled breathing and mindfulness to manage anxiety levels.
    E. Follow-up Care and Management of Relapses:
    1. Regular Follow-up: Initial follow-up for SSRI initiation should occur within a week. Continuous monitoring is essential, particularly for the emergence or worsening of depression, which can increase suicide risk.
    2. Referrals: Refer to chemical dependence treatment specialists if substance use issues are identified.
    3. Relapse Management:
      • Triggers: Patients may experience relapses after successful treatment, especially following significant stressful life events (e.g., loss of a loved one, discovery of a severe illness).
      • Strategy: If a relapse occurs, adopt the prior successful treatment plan (CBT, SSRIs, or SNRIs). If the previous approach is no longer effective, consider maintaining CBT and changing the class of pharmacological agents (e.g., switching from an SSRI to a TCA or SNRI).
    IV. Nursing Care Considerations

    Nursing staff play a vital role in the management of patients with Panic Disorder.

    1. Patient Comfort and Safety: These are paramount, particularly during acute episodes.
    2. Therapeutic Relationship: Approach patients calmly and quietly. Avoid allowing the patient to become overly dependent, as this can interfere with the therapeutic relationship and the patient's progress toward independence. The goal is to empower the patient, not foster dependence.
    3. Psychoeducation: Educate the patient to accept the reality of their condition and the effectiveness of treatment.
    4. Encouragement for Exposure: Actively encourage the patient to return to or remain in places or situations that trigger anxiety as part of exposure therapy.
    V. Prognosis

    The long-term prognosis for Panic Disorder is generally good.

    • Remission Rates: Almost 65% of patients achieve remission, typically within 6 months, with appropriate treatment.
    • Effectiveness: Appropriate pharmacologic therapy (especially SSRIs/SNRIs) and cognitive-behavioral therapy, individually or in combination, are effective in more than 85% of cases.
    • Cardiovascular Risk: While panic itself can induce myocardial ischemia in patients with existing coronary disease, and increase the risk of sudden death due to reduced heart rate variability and increased QT interval variability, it's also true that patients with PD have nearly double the risk of coronary artery disease. This highlights the importance of managing both the psychiatric and any co-occurring physical health conditions.

    Panic Attacks and Disorders Read More »

    Want notes in PDF? Join our classes!!

    Send us a message on WhatsApp
    0726113908

    Scroll to Top
    Enable Notifications OK No thanks