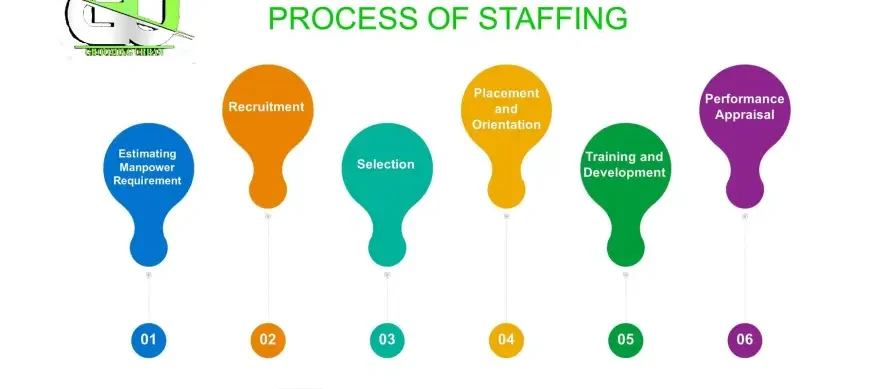
nursesrevision@gmail.com

SCHEME OF WORK

SCHEME OF WORK

SCHEME OF WORK

Scheme(teacher’s scheme) of work is, therefore, their plan of action, which should enable them to organize teaching activities ahead of time.

 It is a summarized forecast of work that the teacher considers adequate and appropriate for the class to cover within a given period from those topics already set in the syllabus.

A scheme of work can be made to cover one week, one month, one term, or even one year, depending on the duration of a given program. Ideally, schemes of work should be prepared before classes begin.

COMPONENTS OF A SCHEME OF WORK

  1. Name of Organization/Institution: Refers to where one is working or training.
  2. Tutor’s Name: The person owning/designing the scheme of work.
  3. Trainees Level: Refers to the grade level in training, e.g., diploma in midwifery.
  4. Subject/Course Unit: This refers to the subject being schemed, which may be theory or practical, e.g., teaching methodology.
  5. Duration/Period of Preparation: Refers to the time frame the scheme of work will be completed. It includes the year of study and semester of that particular group of learners.
The table is then drawn with 10 columns containing the following:
  1. Week: Most institutions are specific in time allocation, and each week should be spelled out in the week column. Weeks should be separated by a line running across the page, especially when the same scheme of work form contains more than one week.

  2. Number of Periods: The subject may have one, two, or more periods in one week. Some periods may be single, double, or triple. When two spaced periods are indicated on the timetable in the same week, then there should be two distinct rows for two periods. The numbering process should be repeated for the other weeks.

  3. Topic/Sub-topic: The topics in the syllabus need to be rearranged in the order in which they are supposed to be taught, e.g., teaching-learning process. This should be clear and definite. The instructor should single out all the sub-topics/lesson titles in a particular syllabus topic.

  4. Objectives: Each sub-topic/lesson title should be followed by an objective(s), which is meant to pinpoint the anticipated learning behavior of the learners.

  5. Content: What subject matter will be covered in that period. It includes all the important headings based on the objectives.

  6. Methods/Techniques: Teaching methods and techniques to be used. This depends on the set objectives of that period.

  7. Teaching Aids: Resource materials for specific content coverage used in scheming are necessary and should be noted down with their relevant pages for ease in reference during lesson planning. References include chalkboards, books, handouts, reports, etc.

  8. Teacher’s References: The various sources of reference that the teacher used to gather the content of that lesson.

  9. Students’ References: What references does the teacher recommend students to use for further reading and when doing assignments? These need to be part of the teacher’s references that are accessible to learners, simpler to understand, and rich in content.

  10. Remarks/Comment: Remarks in the scheme of work should be made immediately the lesson is over. The teacher is supposed to indicate whether what was planned for the period has been covered, whether there was overplanning or a failure of the lesson and reasons for either case.

                               SCHEME OF WORK

SCHOOL: NURSES REVISION SCHOOL OF  HEALTH SCIENCES
TUTOR’S NAME: NASES REVIJONI
COURSE: DIPLOMA IN NURSING
COURSE UNIT: MEDICAL NURSING II
YEAR OF STUDY: YEAR TWO, SEMESTER ONE
NO. OF PERIODS PER WEEK: 3 (1 HOUR EACH)

WeekNumber of PeriodsTopicSub-topicObjectivesContentMethods/TechniquesTeaching AidsTeacher’s ReferencesStudents’ ReferencesRemarks/Comment
11MEDICAL CONDITIONS OF THE ENDOCRINE SYSTEMDiabetes mellitus (DM)By the end of the week, students should be able to:
  1. Define DM
  2. State the 3 causes of DM
  3. Describe the 2 types of DM
  4. List five predisposing factors to DM
  • – Definition of DM
  • – Causes of DM
  • – Types of DM
  • -Predisposing factors
Interactive lecture, Brainstorming technique, Question and answer techniqueWhiteboard illustrations, Flip chart containing lesson objectives & pointerWorkman and Donna. 2006, Berkow and Beers. 1999, Stephen. 2009, UCG. 2016Workman and Donna. 2006, Stephen. 2009, Signs and symptoms of DM, Brainstorming technique, Whiteboard illustrations, 2 Flip charts containing Workman and Donna. 2006, Workman and Donna. 2006Remarks should be made immediately after the lesson. The teacher should indicate whether what was planned for the period has been covered, whether there was overplanning or a failure of the lesson and reasons for either case.
 2MEDICAL CONDITIONS OF THE ENDOCRINE SYSTEMSigns and symptoms of DMBy the end of the week, students should be able to:
  1. State 5 signs and symptoms of DM
  2. Describe the pathophysiology
  • Signs and symptoms of DM
  • Pathophysiology of DM
  • Diagnostic investigation
Interactive lecture, Brainstorming technique, Question and answer techniqueWhiteboard illustrations, Flip chart containing lesson objectives & pointerWorkman and Donna. 2006, Berkow and Beers. 1999, Stephen. 2009, UCG. 2016Workman and Donna. 2006, Stephen. 2009, Signs and symptoms of DM, Brainstorming technique, Whiteboard illustrations, 2 Flip charts containing Workman and Donna. 2006, Workman and Donna. 2006Remarks should be made immediately after the lesson. The teacher should indicate whether what was planned for the period has been covered, whether there was overplanning or a failure of the lesson and reasons for either case.

REFERENCES:

  1. Berkow, R., & Beers, M. H. (1999). The Merck Manual of Medical Information. West Point, USA: Merck Research Laboratories.

  2. David, K. M. (2018). General Principles of Insulin Therapy in Diabetes Mellitus. UpToDate. Retrieved from https://www.uptodate.com/contents/general-principles-of-insulin-therapy-in-diabetes-mellitus.

  3. Stephen R. Bloom (Ed.). (2009). Toohey’s Medicine, a Textbook for Students in the Healthcare Professions (15th ed.). London, USA: Churchill Livingstone.

  4. Uganda Catholic Medical Bureau (2015). Nursing and Midwifery Procedure Manual (2nd ed). Kampala, Uganda: Print Innovations & Publishers, pp. 166-168.

  5. Uganda Clinical Guidelines (2016). National Guidelines for the Management of Common Conditions. Kampala, Uganda: Ministry of Health.

  6. Workman, L. M., & Donna, D. I. (2006). Medical-Surgical: Critical Thinking for Collaborative Care (5th ed, Volumes 1 & 2). PA, USA: Elsevier Saunders.


That’s for week 1, you can add week 2, and follow the above guide! Ref: Also note that references are part of the scheme of work!

LESSON PLAN

Click here

SCHEME OF WORK Read More »

Planning teaching

Planning Teaching

PLANNING TEACHING

Teaching plan is a document that outlines the structure and details of a single session. 

A good teaching plan is a comprehensive write-up of the step-by-step teaching methods, the estimated duration of each segment of teaching, and the materials and resources needed for the session.

Importance of Drawing a Teaching Plan/Lesson Plan

Teaching planning is essential as it provides a guide for the day’s lessons and gives the teacher a clear direction for the day’s activities. Here are some key reasons for its importance:

  • It organizes the subject matter effectively.
  • It prevents thoughtless teaching.
  • It fosters the proper atmosphere for the learning process.
  • It ensures that the learning objectives (integral components of the lesson plan) are central to all classroom activities.
  • It allows the teacher to design an assessment plan to evaluate whether the class has met its targets.
  • It provides clarity on when to start the evaluation and when to proceed to the next lesson.
  • Lesson plans promote organized teaching and save time.
  • They enable the teacher to select appropriate teaching strategies.
  • They make the teacher more prepared and confident while teaching the lesson.

Note: FAIL TO PLAN = PLAN TO FAIL

Factors to Consider When Planning Teaching

  1. Needs, Capabilities, and Interests of the Learner: It’s important to understand the individual needs, capabilities, and interests of your students. This knowledge guides your teaching approach and ensures that your lessons are engaging and relevant to your learners.

  2. Psychological Knowledge of the Learner: Familiarize yourself with what your students already know or have learned from their previous teachers. This knowledge is crucial for effective instruction and helps you build upon their existing knowledge.

  3. Learning Experience: Define the learning experiences you want your students to gain. This will help you determine the most suitable method for delivering the content and engaging your students effectively.

  4. Social and Physical Environment of the Learner: Create a conducive environment for learning the subject matter. Ensure that the classroom environment supports the learning objectives, making it easier for students to focus and participate.

  5. Lesson Plan Materials/Tools: Utilize a variety of resources and materials to enhance your lesson plan’s success. Consider using audio/visual aids, the latest technologies, and library resources to support your teaching materials.

  6. Goals and Results (Learning Objectives): Clearly outline the goals and expected results for your lesson plan and your students. This provides a clear direction for both you and your learners.

  7. The Content/Subject Matter: Possess a thorough understanding of the content you’ll be teaching. Study the topic, and ensure you have mastery of the subject matter to effectively convey it to your students.

  8. Evaluation and Feedback: Continuously evaluate and correct your lessons. Use methods like questions, quizzes, and feedback from both teachers and students to ensure that learning is taking place and that you have achieved your goals.

CURRICULUM

Curriculum refers to the subjects comprising a course of study in a school or college. A curriculum is also a plan or program of all experiences which the learner encounters under the direction of a school.

TYPES OF CURRICULA

  1. Official curriculum/Intended curriculum: This is the curriculum as written down on paper in syllabuses.

  2. Actual curriculum/Operational curriculum: This is what is implemented in practice in schools.

  3. Assessed/examined curriculum: This is that part of the taught curriculum that is actually assessed.

  4. Null curriculum: This is curriculum that we do not teach, thus giving students the message that these elements are not important in their educational experiences or in our society, such as critical thinking, inquiry, and intellectual development.

DETERMINANTS OF CURRICULUM:

Curriculum determinants are the factors influencing a particular type of curriculum design.

  1. Educational philosophy: Educational philosophy is a crucial determinant of the curriculum development process by helping clarify our thought and mind process. The purpose of nursing education is to bring about desirable behavioral changes in nursing students to enable them to render comprehensive nursing.

  2. Educational psychology: This enables us to follow the psychological development of learners and helps us know whether the children have developed adequately to be able to understand certain concepts. For example, in the first year, nurses start with microbiology, anatomy, and physiology, and then advance to medical and surgical content in the second year.

  3. Society: There are many aspects of society that need consideration in curriculum making, such as culture, health needs, socioeconomic issues e.t.c Therefore there is need to include what is applicable and relevant to the society.

  4. Student: Since modern curriculum is student-centered, nursing education must address the needs of the students without neglecting patient’s rights. Additionally, it should prepare students for the future by enabling them to fulfill other roles in addition to those of a professional nurse.

  5. Knowledge: Knowledge that students need to acquire. Increased specialization has led to individuals focusing on specific segments of knowledge. For example, midwives may not study surgical nursing and medical nursing because they specialize in midwifery. This has led to an explosion of knowledge and specialization. Therefore, specific criteria should be established for selecting the knowledge to be included in a particular curriculum.

  6. Resources: The development of a viable curriculum depends on the availability of tangible and intangible resources. Tangible resources include teachers, textbooks, and physical facilities, while intangible resources encompass motivation, interest, and intelligence.

ELEMENTS/COMPONENTS OF THE CURRICULUM

The most commonly used model, known as Wheeler’s model, comprises five components:

  1. AIMS, GOALS, AND OBJECTIVES: Aims, goals, and objectives pertain to a terminal point towards which we are working or heading.

    • Aims: Aims are the broadest statements that convey the values held for an educational program. For example, the aim of universal primary education in Uganda today is to enhance socio-economic development.

    • Goals: Goals are a more specific form of aims. They describe the purposes of a course and provide curriculum planners with a foundation for selecting curriculum content. For instance, the goal of universal primary education is to ensure that all school-age children attend school to acquire basic education.

    • Objectives: Objectives are specific statements outlining what learners should be capable of doing after experiencing the curriculum or a portion of it. Objectives are categorized at two levels: Curriculum and instructional objectives.

  2. CONTENT: Content refers to subject matter or what knowledge, concepts, principles, generalizations, theories, techniques, and procedures are to be used in a particular subject. In curriculum, the criteria for selection of content are:

    1. Validity: Content is valid if it promotes the outcomes it is supposed to promote. This is the extent to which selected content is true.

    2. Significance: Refers to the suitability of the material chosen to meet certain needs and ability levels of the learners.

    3. Needs and interests of the learner: Learnability; It must also be consistent with social realities.


  3. LEARNING EXPERIENCES: Learning experiences are the interactions between the learner and the environment within the school setting, determining what the learners will be able to do by the end of the course. Criteria for selecting learning experiences consider the following:

    • Conformity with objective: The experiences must align with the curriculum objectives to give students the opportunity to practice the desired behaviors.
    • Learnability: Learning experiences should be adjusted to the learners’ abilities and differences, starting from where the student knows.
    • Interest: Students are likely to interact with stimulating situations.
    • Relevance to life: Learners must see the purpose of education in their everyday lives.
    • Consistency with social reality: Learning experiences must align with the actual situation at home or in society.
    • Variety: Creativity in choosing from a range of educational experiences aiming at the same objectives.
    • Satisfaction: Learning experiences should provide satisfaction from carrying out the desired behavior implied by the objectives.


  4. EVALUATION: Evaluation is the process of determining how far or to what extent the learning experiences developed, organized, and exposed are actually producing the desired outcomes. It enables comparison of actual outcomes with expected outcomes (or objectives) and leads to conclusions for further action.

SYLLABUS

A syllabus is a document that communicates information about a specific course unit and defines expectations and responsibilities. It provides relevant qualifications for teaching the class.

Elements of syllabus:

  1. General course information, That tells students what the course is about, why the course is important, and generally what they can expect from the course. This section will include;
  • the course title,
  • course description, 
  • course learning outcomes or objectives.

        2. Specific course information, That tells students exactly what will be           required of them throughout the course , when in the term they will be         required to do what and how their work in the course will be                             evaluated.   This section will include;  

  • content to be covered in specified time,
  • detailing required assignments,
  • assignment descriptions, required 
  • recommended texts,
  • required examinations,
  • course calendar, and
  • grading overview and criteria.

Planning Teaching Read More »

Study Population & Sampling

Study Population & Sampling

Study Population & Sampling

Study population and sampling are helpful to the researcher in that it helps to  classify the population that you expect to study. You are supposed to create a state that take population and provide a brief justification for this population and why you think it is the best population for this study

DEFNITIONS:

A sample: Is a subset (a part) of a population. Ideally, a researcher should use the whole population to collect data but resources may not be enough. Hence one has to resort to using a sample.

A study sample: Is a subset of the accessible population that participates in the study.

Sampling: is an act of selecting a small number of subjects upon which a study is conducted to represent the population. The result of the sample is assumed to represent the whole population. Sampling is not necessary if the population is small.

In normal circumstances, the bigger the sample size, the higher the level of accuracy.

Sample size: these are the number of respondents to get involved in the study, For example, a sample size of 150 people.

Population: Is the total of items or subjects in a set; with relevant characteristics that a researcher needs. It is the total number of potential respondents for the study.

Target population: The large set of the population to which the results will be generalized – all teenagers with asthma, for example.

Accessible population: Is the subset of the target population that is available for study – teenagers with asthma living in the investigator’s town this year, for example.

Homogeneous population: consists of subjects with specific characteristics in common.

Heterogeneous population: consists of subjects differentiated by specific identifiable features, for example, age, sex, educational background.

Sample study considers a subset of the population while census study considers/examines all members of a population.

Why (Importance of) sampling?

  • To manage effectively large and dispersed populations.
  • To minimize the cost of conducting the study.
  • To save time.
  • To improve on the accuracy of findings.
  • To carry out a less demanding study.
  • To reduce the level of destruction in case where sampling involves destroying items sampled.
  • Common in medical research.
Methods-of-Sampling-Random-and-Non-Random-Sampling

Methods of sampling/Sampling Methods.

Sampling methods: A sampling method is a procedure for selecting sample elements from a population.
  1.   Random or Probability Sampling Methods
  2.  Non-random or Non-probability sampling methods.

The choice of a sampling method depends on a number of factors. Some factors are the following:

  • The type of population one is to sample from.
  • The degree of accuracy one wants.
  • The resources available, especially time and money.
  • The homogeneity of the population.
  • The urgency of the findings.

Random sampling method

 Every element in the population has the same probability (equal chances) of selection.

Advantages of Random methods:

  • Offers equal chances to all members in the set to be selected.
  • Eliminates bias.
  • Improves the validity of the study.
  • Easy to administer.
  • Provides statistical means of manipulating data.

Disadvantages of Random methods:

  • They require a sample frame of all members of a finite population (a list of members).
  • There may be a possibility of un-proportional representation of strata in heterogeneous populations (over-representing or under-representing).

Random sampling methods include:

  • Simple random sampling.
  • Stratified random sampling.
  • Systematic sampling.
  • Multistage sampling.
  • Territorial sampling.
  • Cluster sampling.
Simple random sampling: 

The principle of simple random sampling is that every object has the same probability of being chosen (purely random).

There are many ways to obtain a simple random sample. One way would be the use of a lottery method.

Procedure of the lottery:

  • Each member of the population is assigned a unique number or name. The numbers are written on similar pieces of paper, which are folded, placed in a bowl, and thoroughly mixed.
  • Then, a blindfolded researcher selects one at a time without replacement until he/she has the required number of subjects in the sample.

Summary of Simple random sampling technique:

  • Determine the population of interest by specific characteristics.
  • Decide on the sample size.
  • Create a sample frame (list all subjects).
  • Select subjects randomly from the sample frame (using the lottery or a random number table).

Advantages of simple random sampling: See those for random sampling above.

Disadvantages of simple random sampling: In case of a heterogeneous population, one subgroup may be under or over-represented leading to bias.

Stratified random sampling
Stratified random sampling: 

A population may have subgroups in which a researcher is interested. For example, one may want to ensure that both girls and boys are represented in the sample.

The population is thus divided into subgroups or layers (strata) to represent the subgroups before the sample is drawn.

What is important is that the percentage of the subgroups in the sample must be the same as that in the population. For example, if the percentage of boys and girls in the population are 70% and 30% respectively, then the sample must also have 60% boys and 30% girls.

NB. This method uses stratifying techniques to overcome the weakness of simple random.

Stratified random sampling technique:

  • Decide on a sample size,
  • Create strata based on sound criteria (e.g., tribe),
  • Decide on the number of representatives to pick from each stratum, and
  • Randomly carry out the sampling.

Example: Consider a school with a total of 1000 students, where 600 are boys and 400 are girls, and suppose that a researcher wants to select 100 of them for a research study.

  • The population has 600/1000 x 100 = 60% boys.
  • The population has 400/1000 x 100 = 40% girls.

The sample of 100 must, therefore, have 60% boys = 60/100 x 100 = 60 boys.

Similarly, the subgroup of girls will have 40% girls in the sample = 40 girls.

Randomly carry out 60 boys from the strata of boys and 40 girls from the girls’ strata to make a sample size of 100 needed by the researcher.

Systematic sampling: 

This method relies on arranging the target population according to some ordering scheme and then selecting elements at regular intervals through that ordered list. However, to avoid bias, the starting element has to be randomly chosen.

The number in the population is divided by the required sample to get the interval.

Example: Suppose you want to sample 8 houses (sample size) from a street of 120 houses (population).

120/8 = 15 (interval), so every 15th house is chosen after a random starting point between 1 and 15. If the random starting point is 11, then the houses selected are; 11, 26, 41, 56, 71, 86, 101, and 116.

NB. This method is not purely random because some elements have more chances of being chosen than others. For example, in the above example, houses 1-15 have more chances of being selected than houses 16-120.

Systematic sampling is the best method for a big homogeneous population. It is easy to administer.

Summary of Systematic sampling process:

  • Define the population.
  • List the sample frame of all members in a certain order.
  • Determine the interval (population/sample size).
  • Systematically sample the population using the interval beginning with a random starting element.
Cluster sampling
Cluster sampling:

Cluster sampling is a type of sampling that involves dividing the population into groups (clusters). Then, one or more clusters are chosen at random (from all clusters, a random sample is made) and everyone within the chosen cluster is sampled.

NB

  • The clusters are the ones that are randomly chosen.
  • All subjects in the random clusters are used for the study.

This method is useful when it is impossible to make a list of subjects scattered over a large area. Instead of making a list, a map of the area showing political, geographical, or other types of sub-division can be used in what we call cluster or area sampling.

Multi-stage sampling or multi-stage cluster sampling
Multi-stage sampling or multi-stage cluster sampling: 

Using all the sample elements in all the selected clusters, as seen in cluster sampling above, may be prohibitively expensive or unnecessary. Under these circumstances, multi-stage cluster sampling becomes useful.

Instead of using all the selected clusters, the researcher randomly selects elements from each cluster; however, several levels of cluster selection are applied before the final sample elements are reached.

For example, household surveys begin by dividing metropolitan regions into ‘districts’ (first stage). The selected districts into blocks, and the blocks are chosen from each selected district (second stage).

 Next, dwellings are listed within each selected block, and some of these dwellings are selected (third stage). This method makes it unnecessary to create a list of every dwelling in the region and necessary for only selected blocks.

Non-Random Sampling Methods:

These are sampling methods where some elements of the population have no chance of selection; or where the probability of selection can’t be accurately determined. They are mainly used in qualitative studies.

Advantages of Non-random sampling methods:

  • They are cheap.
  • They have a less complicated approach to sampling.
  • They offer faster results.
  • They usually do not need to have a list of all members of the population.

Disadvantages of Non-random sampling:

  • These methods are not random, thus prone to human error and bias.
  • They are better applied when research findings are not generalized beyond the sample.
  • Statistical analysis of sample results is not appropriate when non-random sampling methods are used. For example, a researcher cannot use statistical methods to define a confidence interval around the sample mean.
Types of non-sampling methods:
Convenient Sampling:
Sampling depends on the convenience of the researcher. The sample is selected on the basis of how accessible, convenient, and cooperative a subject may be. For example, if there are ten parishes, one can choose two parishes that are nearest to one.
 
Purposive/Judgmental Sampling:
The sampling depends entirely on the researcher’s interest and judgment. For example, one can choose to select only nurses on duty.
 
Snowball Sampling Method:
The respondents to be included in the study are recommended by colleagues who know they can offer good data. Each person interviewed suggests the next respondent to interview.
 
Quota Sampling:
Is a non-probability version of stratified sampling. In quota sampling, a population is first segmented into mutually exclusive sub-groups, just as in stratified sampling. Then judgment is used to select the subjects from each segment based on a specified proportion.
 
Accidental Sampling:
The respondents included in the study are not deliberately selected, but the sample is incidental to prevailing circumstances. For example, if you stand in front of the university gate and interview every student who passes by.

NB

i) Sampling errors arise from drawing wrong conclusions or generalizing issues based on findings drawn from a small sample. The errors are normally less when the sample size is big, and sampling is random.

ii) Non-probability sampling does not allow the estimation of sampling error.

Sampling Errors:

The two main errors in sampling are; random error and systemic error.

  • Random Error: A wrong result due to chance. This can be overcome by increasing the sample size.
  • Systemic Error: A wrong result due to bias.

Study Population & Sampling Read More »

Research Designs/Study Design

Research Designs/Study Design

RESEARCH DESIGNS/STUDY DESIGN

Study or Research design defines the approaches, methods and the rationale of picking that appropriate research design
  •  Eg descriptive cross sectional design
  •  Approaches can be Quantitative/qualitative or both
  •  Note that it is advisable to use one of these at our level.

Research design acts as a blueprint for conducting a research study, outlining how variables will be operationalized for measurement, the selection of the sample of interest, data collection methods, and the intended means of data analysis.

 Zikmund (1988) defines research design as a master plan that specifies the methods and procedures for measuring, collecting, and analyzing data.

At the core of a research design are answers to crucial questions:

  •  How will the study be conducted?
  • What procedures will be adopted to obtain answers to research questions?
  • What kind of data needs to be collected?
  • How will the tasks required to complete the various research components be carried out?

🏗 Importance of Research Design 📊

  1.  Foundation for Research: 🏠 Acts as the solid base upon which the entire
    research stands. Acts as a firm foundation for the research.
  2.  Smooth Research Operations: ⚙️ Ensures all research activities run smoothly and efficiently. Because you know what next!
  3. Efficiency Maximization: 💪Provides maximum information with minimal effort, time, and cost. It makes research as efficient as possible by giving maximum information with minimum expenditure of effort, time and energy.
  4. Blueprint for Research: 📐 Just as an architect needs a blueprint for building a house, research needs a proper design for conducting a study.
  5.  Simplifies work: 😍This is by ensuring that limitations are predetermined and solutions are already at hand, so you overcome them.

A well-planned research design is like a strong foundation for your study,
making the research process efficient and effective. 🌟🧱📈

🧐 FACTORS THAT INFLUENCE CHOOSING A RESEARCH DESIGN 📝

  1. Researcher’s Knowledge 🧠: The researcher’s familiarity with a particular design.

    • Example: If a researcher is well-versed in qualitative research methods, they may choose to conduct an ethnographic study to gain an in-depth understanding of a specific community.
  2. Resource Availability ⏳💼: Availability of time, human resources, and willing respondents.

    • Example: In a time-sensitive study, a researcher might opt for a cross sectional design due to its efficiency in data collection and analysis.
  3. Ethical Considerations 🤝📜: Ethical aspects, including the ethical treatment of respondents.

    • Example: In a study involving vulnerable populations, such as children, ethical considerations may lead the researcher to choose a design that prioritizes the protection of participants, like an experimental design.
  4. Feasibility and Relevance 🎯📊: The practicality and relevance of the design to the study.

    • Example: A large-scale public health survey may require a design that is both feasible and relevant, such as a cross-sectional study that provides a snapshot of health trends in a population.
  5. Geographical Scope 🌍🗺: The extent of the geographical area to be covered.

    • Example: A study investigating regional variations in climate change impacts might choose a design that covers multiple countries and regions to capture a broad geographical scope, such as a comparative case study.
  6. Equipment Availability 🛠💻: Access to necessary research equipment and tools.

    • Example: Research requiring advanced scientific equipment, like electron microscopes, would naturally be influenced to adopt experimental research designs.
  7. Research Type 🔍📈: The specific type of research, e.g., cross-sectional or longitudinal.

    • Example: If a researcher aims to understand changes over time, they may select a longitudinal design to follow the same group of participants at multiple points in time.
  8. Control 🎮🔒: The level of control the researcher can maintain over the study.

    • Example: In a medical study testing a new drug’s effectiveness, a randomized controlled trial (RCT) design would provide a high level of control over the research conditions and variables.
  9. Population Type 👥🌐: The characteristics of the population under study.

    • Example: Research on consumer preferences might employ a certain design to ensure the population’s characteristics are accurately represented in the study.

Types of research designs

There are three main overall methodologies (or designs): Qualitative , quantitative and Mixed.

  1. Qualitative Research Designs:

    • Qualitative research designs are primarily exploratory and descriptive in nature.
    • They aim to understand and interpret the underlying meaning of phenomena.
    • Qualitative studies often involve collecting non-numerical data such as text, images, or observations.
    • Common qualitative research designs include phenomenology, ethnography, grounded theory, and case studies.
  2. Quantitative Research Designs:

    • Quantitative research designs focus on collecting and analyzing numerical data.
    • They are structured, objective, and use statistics to establish relationships between variables.
    • The primary goal of quantitative research is to measure, describe, and explain phenomena through numerical data.
    • Common quantitative research designs include descriptive, analytical, experimental, and correlational studies.
  3. Mixed Research Designs:

    • Mixed research designs combine elements of both qualitative and quantitative research within a single study.
    • These designs aim to provide a comprehensive understanding of complex research questions.
    • Researchers typically collect and analyze both numerical and non-numerical data, often in two distinct phases, with one method informing the other.
    • The choice of mixed design depends on the research objectives and the need for a holistic approach to the research question.
Below are some Research designs under each design
There are many types of research designs, very many, we are going to explain the most commonly used/ examined research designs.
MethodologyResearch Design
QuantitativeExperimental
 Analytical
 Descriptive
 Correlational
 Quasi & Comparative
QualitativePhenomenology
 Ethnography
 Grounded Theory
 Case Study
Mixed/OtherCross-Sectional Study
 Longitudinal Study
 Retrospective Study
 Cohort Study
 Randomized Controlled Trial
 Comparative Study

Qualitative vs. Quantitative Research Designs

Qualitative research deals with phenomena that are difficult or impossible to quantify mathematically, such as beliefs, meanings, attributes, and symbols. 

Quantitative research deals with phenomena that are possible to be quantified mathematically. For example, experimental studies are quantitative in nature.

AspectQualitativeQuantitative
Nature of DataNon-numerical (text, words)Numerical (numbers, measurements)
Number of RespondentsFewer respondentsLarger number of respondents
Research AimFormulation of hypothesesTesting formulated hypotheses
Researcher’s KnowledgeLimited knowledge on the topicMore knowledgeable about the topic
Nature of Data CollectionSubjective (relies on respondents)Objective (researcher gathers data)
Conclusiveness of ResultsInductive (results inconclusive)Deductive (results are conclusive)
Questioning ApproachGeneral and broad questionsSpecific and narrow questions
Bias in ResearchHighly biasedLess biased (researcher in control)

Experimental Study Design:

Experimental study design involves introducing an intervention assumed to be the ’cause’ of change and waiting until it has produced or has been given sufficient time to create that change. Some essential experimental study designs include the following:

i) After-only design: In this approach, the researcher knows that the population has been exposed to an intervention. They aim to study its impact on the population. Information about the baseline is usually gathered from respondents’ recall of the situation before the intervention or from existing records. This design is commonly used in impact assessment studies.

ii) Before-and-after design: This design addresses the issue of retrospectively constructing the ‘before’ observation by establishing it before introducing the intervention to the study population. Subsequently, when the program is fully implemented or assumed to have its effect on the population, an ‘after’ observation is conducted to determine the intervention’s impact.

iii) Control group design: In the control group design, the researcher selects two population groups – a control group and an experimental group. These groups are expected to be as comparable as possible in every respect except for the intervention. The experimental group receives or is exposed to the intervention, while the control group is not. Initially, the ‘before’ observation is made on both groups simultaneously. Subsequently, the experimental group is exposed to the intervention. When it is assumed that the intervention has had an impact, an ‘after’ observation is conducted on both groups. Any difference in the ‘before’ observation between the groups concerning the dependent variable(s) is attributed to the intervention.

General Characteristics of Experimental Designs:
  • Direct manipulation of independent variables in a controlled environment.
  • Examination of the effect of independent variable(s) on one or more dependent variables.
  • Focus on testing hypotheses.
  • Total control of extraneous variables.
  • Generation of empirical findings with internal and external validity.
  • Some experimental designs use control and experimental groups (pure experimental design).
Advantages of Experimental Design:
  • i) It enables the researcher to control the situation, helping answer the question, “What causes something to occur?”
  • ii) It allows identification of cause-and-effect relationships between variables and distinguishes placebo effects from treatment effects.
  • iii) Experimental research designs support the ability to limit alternative explanations and infer direct causal relationships in the study.
  • iv) This approach provides the highest level of evidence for single studies.
Disadvantages of Experimental Design:
  • i) Experimental design can be artificial, and results may not generalize well to the real world.
  • ii) The artificial settings of experiments may alter participants’ behaviors or responses.
  • iii) Experimental designs can be costly if they require special equipment or facilities.
  • iv) Some research problems cannot be studied using experiments due to ethical or technical reasons.
  • v) It can be challenging to apply ethnographic and other qualitative methods to experimentally designed studies.

Cross-Sectional Study Design

Cross-sectional study design is a research approach that involves different groups of people who vary in the variable of interest but share other characteristics, such as socioeconomic status, educational background, and ethnicity. For instance, researchers may select groups of people who are quite similar in most aspects but differ only in age. This allows any observed differences between groups to be attributed to age rather than other variables.

Cross-sectional studies are typically observational and are commonly used in descriptive research.

Characteristics of Cross-Sectional Studies:
  • Researchers record existing information within a population without manipulating variables.
  • Data collection occurs at a single point in time.
  • This research design describes characteristics within a population but does not establish cause-and-effect relationships between different variables.
  • It enables researchers to investigate multiple aspects simultaneously, such as age, income, and gender.
What Cross-Sectional Studies Can Reveal:
  1. Cross-sectional studies provide a snapshot of outcomes and associated characteristics at a specific point in time.
  2. Unlike experimental designs that involve active intervention to induce and measure change or create differences, cross-sectional studies focus on studying and drawing inferences from existing differences among people, subjects, or phenomena.
  3. Data is collected at a particular moment in time.
  4. While longitudinal studies require multiple measurements over an extended period, cross-sectional research aims to identify relationships between variables at a single moment.
  5. Groups chosen for study are deliberately selected based on existing differences in the sample rather than random sampling.
  6. This method can estimate the prevalence of an outcome of interest because the sample typically represents the entire population.
  7. Cross-sectional designs often use survey techniques for data collection, making them relatively cost-effective and efficient.
Disadvantages and Challenges of Cross-Sectional Design:
  1. Finding individuals, subjects, or phenomena that are very similar except for a specific variable can be challenging.
  2. Results are static and time-bound, offering no insights into the sequence of events or historical contexts.
  3. Cross-sectional studies cannot establish cause-and-effect relationships.
  4. This design provides only a single snapshot of analysis, which may yield different results if conducted at another time.
  5. There is no follow-up to the findings.
Characteristics of Cross-Sectional Research Design:
  • No time dimension.
  • Focuses on existing differences rather than changes following intervention.
  • Groups are selected based on existing differences rather than random allocation.

Note: Cross-sectional research design differs from longitudinal research, which involves taking multiple measurements over an extended period of time.

Longitudinal Research Design: 

This is a study design that involves a series of sample measurements taken over a period of time. The study focuses on specific respondents or a sample over a specified period, examining changes in behavior.

Examples:

  1. A study of a specific group of children’s academic performance over time.
  2. A study of the stages of human development by following a child from birth to adulthood.

Longitudinal studies provide deeper insights into issues. However, they can be expensive in terms of both time and money. Such studies may face setbacks if a respondent dies or transfers.

Longitudinal studies are further subdivided into Panel and Trend studies.

Panel Study: Involves using the same group or individual throughout the study period. One sample is studied continuously.

Trend Study: Involves different homogenous groups or samples in phases over the study. The results obtained from the study are then analyzed and compared to investigate trends of change. For example, one can observe the trend of change in the behavior of 1st-year students admitted in 2001 and 1st-year students admitted in 2002 using a trend longitudinal study.

What Longitudinal Studies Tell You:
  1. Longitudinal data help analyze the duration of a specific phenomenon.
  2. Enables researchers to approach causal explanations usually achievable only through experiments.
  3. Permits the measurement of differences or changes in a variable from one period to another, describing patterns of change over time.
  4. Facilitates predicting future outcomes based on earlier factors.
What Longitudinal Studies Don’t Tell You:
  1. The data collection method may change over time.
  2. Maintaining the integrity of the original sample can be difficult over an extended period.
  3. It can be challenging to show more than one variable at a time.
  4. This design often requires qualitative research data to explain fluctuations in the results.
  5. A longitudinal research design assumes that present trends will continue unchanged.
  6. It can take a long time to gather results.
  7. A large sample size and accurate sampling are needed to reach representativeness.

Case Study/Case Report Designs: 

A case study is an in-depth examination of the behavior of a specific phenomenon, such as a person, a group of people, an object, or a situation within a limited environment. The findings from a case study can be generalized to represent other cases within a population of interest. For instance, one can study the behavior of a child or a group of children from birth to adulthood and then generalize the results to other children.

What Case Studies Don’t Tell You (Disadvantages):
  1. A single or a small number of cases offer limited grounds for establishing reliability or for generalizing the findings to a broader population of people, places, or things.
  2. Intensive exposure to the study of a case can bias a researcher’s interpretation of the findings.
  3. This design does not facilitate the assessment of cause-and-effect relationships.
  4. Vital information may be missing, making the case challenging to interpret.
  5. The case may not be representative or typical of the larger problem under investigation.
  6. If a case is selected because it represents a very unusual or unique phenomenon or problem for study, then the interpretation of the findings can only apply to that specific case.

Retrospective and Prospective Study: 

A retrospective study is a longitudinal study that examines data from the past. For example, a researcher may review medical records from previous years to identify trends. In essence, retrospective studies “look back” in time. On the other hand, prospective studies “look forward” by collecting data as events unfold.

Retrospective Study Example in Health: A retrospective study in health might involve examining historical medical records of cancer patients to determine the effectiveness of a particular treatment protocol used in the past. Researchers can analyze the outcomes of these patients based on the treatment they received and other variables to gain insights into the treatment’s success rates.

Prospective Study Example in Health: A prospective study in health could involve tracking a group of pregnant women from early pregnancy through childbirth and beyond. Researchers would collect data on factors like prenatal care, diet, and lifestyle, and follow the women to monitor pregnancy outcomes, birth complications, and the health of their babies after birth. This type of study helps in understanding the factors that influence maternal and child health during and after pregnancy.

Cohort Study Design:

A cohort is a group of individuals who share a common characteristic or experience. For instance, a group of people born on the same day or during a specific period, like 1981, can form a birth cohort. The cohort design is a type of observational study in which one or more groups (cohorts) are followed over time, and subsequent assessments are made to determine the association between the initial characteristics or risk factors of the participants and specific outcomes or diseases. As the study progresses, the outcomes of participants in each cohort are measured, and researchers analyze the relationships with particular characteristics.

Example of a Cohort Study:

To investigate whether tobacco exposure is associated with the development of lung cancer, an investigator forms two groups (cohorts) of adolescents. One group consists of individuals who have never smoked tobacco and continue to refrain from smoking (unexposed), while the other group comprises tobacco smokers (exposed). The investigator then follows both groups for a specified period and observes how many individuals in each cohort develop the disease and how many do not. Below is a table illustrating the outcomes:

CohortDevelop DiseaseDo Not Develop DiseaseTotalIncidence of Disease
Smoke tobacco84291630000.028
Do not smoke tobacco87491350000.0174
Advantages of Cohort Studies:
  • Subjects in cohorts can be matched to limit the influence of confounding variables.
  • Cohort studies can demonstrate that potential causes precede the outcomes.
  • Original or secondary data can be used in this design.
  • Cohort studies are often less expensive and easier to conduct than randomized controlled trials.
Disadvantages of Cohort Studies:
  • Identifying cohorts can be challenging due to confounding variables.
  • Lack of randomization may lead to imbalances in patient characteristics.
  • Blinding or masking is difficult in cohort studies.
  • Outcomes of interest may take time to occur.

Additionally, they might take a long time to complete, potentially impacting the validity of findings. The lack of randomization in cohort studies also reduces their external validity compared to randomized studies.

Randomized Controlled Trial (RCT):

The primary difference between a Randomized Controlled Trial (RCT) and a cohort study is the random selection of samples. RCTs involve the random allocation of participants to different clinical interventions, including a control group. These trials seek to measure and compare the outcomes following the interventions. RCTs are purely experimental and quantitative in nature.

Example: In a study to determine whether painkillers are necessary for males who have just undergone circumcision, 200 eligible men were randomly assigned to two groups. One group received Panadol tablets as pain relief immediately after surgery, while the other group received a placebo. The results showed that a majority (90%) of patients given Panadol reported no pain, whereas over 90% of patients on the placebo reported significant pain.

Advantages of RCT:
  • RCTs are considered the most reliable form of scientific evidence.
  • They reduce spurious causality.
  • RCTs influence healthcare policy and practice.
Limitations of RCT:
  • The external validity of RCT results may be limited.
  • Ethical concerns may arise in some situations.
  • The time required to observe outcomes can be extensive.

Case Series/Clinical Series:

A case series is a descriptive study that follows a group of patients or subjects with known exposure, such as individuals who have received similar treatments or whose medical records are examined for exposure and outcomes. Case series can generate hypotheses for further studies but cannot establish causal relationships.

Internal validity in case series studies is generally low because they lack a comparator group exposed to the same intervening variables.

Correlation Study Design:

A correlation study investigates whether two variables are correlated, meaning an increase or decrease in one variable corresponds to a change in the other. However, correlation does not imply causation. Three types of correlation exist: positive, negative, and no correlation.

A correlation coefficient, which ranges from +1 to -1, is typically used to quantify the strength and direction of the correlation between variables.

There are three primary types of correlation:

  1. Positive Correlation: This type of correlation occurs when an increase in one variable is associated with an increase in another, and a decrease in one variable is linked to a decrease in the other. For example, an individual’s wealth may exhibit a positive correlation with the number of rental houses they own. This suggests that as wealth increases, so does property ownership.

  2. Negative Correlation: Negative correlation is observed when an increase in one variable is connected to a decrease in another, and vice versa. For instance, there might be a negative correlation between the level of education in a country and its crime rate. If education levels improve in a country, the crime rate tends to decrease. However, it’s essential to note that this does not mean that a lack of education directly causes crime. Both factors might share a common underlying cause, such as poverty.

  3. No Correlation (Uncorrelated): In cases of no correlation, changes in one variable do not correspond to changes in the other, and vice versa. For example, among millionaires, there may be no correlation between their level of wealth and their level of happiness. This indicates that an increase in wealth does not necessarily lead to an increase in happiness.

Comparative Study Design:

Comparative studies involve examining two or more cases, specimens, or events that share similarities in some aspects but differ in others. The goal is to determine the reasons for these differences and to generalize findings to larger groups from which the cases originated. The plausibility of generalization increases when several cases from the same group are considered.

Ethnographical Research Design:

Ethnographical research, often referred to as ethnography, involves the in-depth study of naturally occurring behavior within a particular culture or social group. Its primary aim is to understand the relationship between culture and behavior. Culture in this context refers to the beliefs, values, and attitudes of a specific group of people. Ethnographic research methods were developed by anthropologists to study and describe human cultures.

Characteristics of good ethnography, as described by Spindler & Hammond (2000), include:

  1. Extended Participant Observation: Researchers immerse themselves in the culture or social group they are studying and observe behavior over an extended period.

  2. Long Time at Site: Researchers spend a significant amount of time within the community or culture being studied to gain a deep understanding of their way of life.

  3. Collection of Large Volume of Materials: This includes detailed notes, audio recordings, video tapes, and other data, often without having specific hypotheses or predefined categories at the outset of the study.

Phenomenological Research Design:

Phenomenological research is the study of phenomena, which can be events, situations, experiences, or concepts as they are perceived by individuals. This approach aims to understand and describe the essence of lived experiences from the perspective of the participants. Phenomenology begins with the acknowledgment that there is a gap in our understanding and that clarification will be beneficial.

In phenomenological research, researchers seek to explore the essence and meaning of experiences as they are lived. It often involves in-depth interviews and analysis to uncover the common themes and structures that underlie these experiences. This research design is valuable in understanding how individuals make sense of the world and their experiences.

Grounded Theory Research Design:

Grounded theory is a systematic research methodology that aims to develop theories or concepts that are grounded in data. It was developed by sociologists Barney Glaser and Anselm Strauss in the 1960s. The primary goal of grounded theory is to generate new, abstract theories based on empirical observations, rather than testing existing theories.

Key features of grounded theory research include:

  • Data-Driven Approach: Grounded theory starts with data collection and analysis. Researchers gather and analyze data without preconceived notions or hypotheses.

  • Constant Comparison: Data is constantly compared to previously collected data, allowing researchers to identify patterns and categories.

  • Theory Development: Through iterative data analysis, researchers develop theories or concepts that explain the phenomenon under investigation.

  • Sampling: Researchers use purposeful sampling to select participants and gather data that is relevant to the research question.

Grounded theory is widely used in the social sciences, particularly in fields like sociology and psychology, to develop new theories and understand complex social phenomena.

Research Designs/Study Design Read More »

immunization schedule

Uganda National Immunization Schedule

Immunization in Uganda - A Comprehensive Guide for Health Workers

The Uganda National Expanded Programme on Immunization (UNEPI)

The Uganda National Expanded Programme on Immunization (UNEPI), officially launched in October 1993, was established to address critical challenges in immunization services. These included low immunization coverage, the use of non-potent vaccines, inadequate skills among health workers, limited community participation, and a lack of regular monitoring and evaluation. The re-launch of the program in 1997 marked a significant turning point, leading to great improvements in routine immunization coverage and a reduction in the incidence of Vaccine Preventable Diseases (VPDs) like measles.

UNEPI Strategic Objectives

The core objectives that guide UNEPI's work are:

  • To formulate and update national immunization policy, standards, and guidelines.
  • To ensure a consistent and reliable supply of potent and effective vaccines.
  • To increase both access to and demand for immunization services from the community.
  • To build technical and management capacity for the immunization program at all levels of the health system.
  • To continuously monitor disease trends and program performance to guide actions.

UNEPI Strategies

To achieve its objectives, UNEPI employs a multi-faceted approach:

  1. Service Delivery: Providing routine immunization through the national health delivery system, including static (at the facility) and outreach services.
  2. Logistics: Providing and maintaining an effective cold chain and logistics system at all levels.
  3. Communication: Improving the communication skills of health workers to effectively engage with parents, leaders, and communities.
  4. Supervision: Strengthening technical and administrative support supervision to ensure quality.
  5. Training: Providing technical guidance for both pre-service training of health workers and continuous on-the-job training.
  6. Partnerships: Strengthening partnerships with other child health programs, NGOs, civil society, religious organizations, and the private sector.
  7. Advocacy & Social Mobilization: Enhancing public education and community involvement to increase vaccine uptake.
  8. Injection Safety: Promoting and ensuring safe injection practices and proper waste management.
  9. Surveillance: Maintaining a robust surveillance system for vaccine-preventable diseases using the Integrated Disease Surveillance and Response (IDSR) approach.
  10. AEFI Management: Promoting the monitoring, investigation, and management of Adverse Events Following Immunization (AEFI).
  11. Supplemental Activities: Carrying out mass vaccination campaigns (Supplemental Immunization Activities - SIAs) against targeted diseases as needed.
  12. Innovation: Adopting internationally recommended approaches like Reaching Every District/Reaching Every Child (RED/REC) and developing strategies to reach hard-to-reach populations.
  13. Disease Control Goals: Strengthening specific disease control measures, including for measles, maternal and neonatal tetanus elimination, and polio eradication.

Roles and Responsibilities in Immunization Service Delivery

Central Level (UNEPI and National Medical Stores)

  • UNEPI: Policy and guideline formulation, strategic planning, resource mobilization, technical support and supervision, capacity building, and national monitoring and evaluation.
  • National Medical Stores (NMS): Procurement, storage, and distribution of vaccines, injection materials, and other logistics to the district level.

District Level

  • Implementation of national policies and plans.
  • Forecasting, ordering, and storing vaccines and logistics.
  • Distribution of supplies to lower-level health facilities.
  • Cold chain maintenance and repair.
  • Support supervision and on-the-job training for health facility staff.
  • Monitoring performance data (e.g., coverage, dropout rates, vaccine wastage) for action.
  • Conducting active surveillance for diseases like Acute Flaccid Paralysis (AFP), Neonatal Tetanus (NNT), and measles.

Health Facility Level (The Frontline)

This is where nurses and midwives play their most direct role.

  • Providing daily immunization services (static and outreach).
  • Counseling and health-educating parents/caretakers.
  • Screening every child visiting the facility for their immunization status to reduce missed opportunities.
  • Estimating vaccine needs, ordering, and storing them correctly.
  • Maintaining the vaccine refrigerator temperature between +2°C and +8°C and recording it twice daily.
  • Monitoring and reporting performance data (coverage, wastage, dropouts).
  • Tracking defaulters through home visiting and community engagement.
  • Working with community mobilizers like Village Health Teams (VHTs).
  • Ensuring safe injection practices and proper disposal of sharps in a safety box.

Community Level (VHTs, Parents/Caregivers)

  • Taking children for all scheduled immunizations and ensuring completion.
  • Participating in planning for outreach services.
  • Mobilizing other parents and community members for immunization.
  • Keeping the child's health card safe and presenting it at every health facility visit.

The Uganda National Immunization Schedule

The immunization schedule is the standard plan that guides all health workers in the country. It details the vaccines, doses, intervals, and administration sites. This schedule can change over time based on epidemiological data and new scientific discoveries.

Visit/Contact When it is Given (Age) Vaccine Given & Dose Disease(s) Prevented How it is Given (Route and Site)
1st AT BIRTH
(Within 24 hours is best)
Oral Polio Vaccine 0 (OPV0) Polio 2 Drops in the mouth (Oral)
BCG Tuberculosis (severe forms like TB meningitis) 0.05ml Injection on right upper arm (Intradermal)
Hepatitis B (Birth Dose) Hepatitis B (prevents mother-to-child transmission) Injection on left upper thigh (Intramuscular)
Injectable Polio Vaccine (IPV1) Polio Injection on right upper thigh (Intramuscular)
2nd AT 6 WEEKS
(One and a half months)
Pentavalent 1 (DPT-HepB-Hib 1) Diphtheria, Pertussis (Whooping cough), Tetanus, Hepatitis B, Haemophilus influenzae type B Injection on left upper thigh (Intramuscular)
Pneumococcal Conjugate Vaccine (PCV1) Meningitis and Pneumonia (caused by S. pneumoniae) Injection on right upper thigh (Intramuscular)
Rotavirus vaccine 1 Diarrhoea caused by Rotavirus Slow release into the mouth (Oral)
Oral Polio Vaccine 2 (OPV2) Polio 2 Drops in the mouth (Oral)
3rd AT 10 WEEKS
(Two and a half months)
Pentavalent 2 (DPT-HepB-Hib 2) Diphtheria, Pertussis, Tetanus, Hepatitis B, Haemophilus influenzae type B Injection on left upper thigh (Intramuscular)
Pneumococcal Conjugate Vaccine (PCV2) Meningitis and Pneumonia Injection on right upper thigh (Intramuscular)
Rotavirus vaccine 2 Diarrhoea caused by Rotavirus Slow release into the mouth (Oral)
Injectable Polio Vaccine (IPV2) Polio Injection on right upper thigh (Intramuscular)
4th AT 14 WEEKS
(Three and a half months)
Pentavalent 3 (DPT-HepB-Hib 3) Diphtheria, Pertussis, Tetanus, Hepatitis B, Haemophilus influenzae type B Injection on left upper thigh (Intramuscular)
Pneumococcal Conjugate Vaccine (PCV3) Meningitis and Pneumonia Injection on right upper thigh (Intramuscular)
Rotavirus vaccine 3 Diarrhoea caused by Rotavirus Slow release into the mouth (Oral)
5th At 6 months Malaria Vaccine 1 Malaria Injection on right upper arm (Intramuscular)
6th At 7 months Malaria Vaccine 2 Malaria Injection on right upper arm (Intramuscular)
7th At 8 months Malaria Vaccine 3 Malaria Injection on right upper arm (Intramuscular)
8th AT 9 MONTHS Measles-Rubella vaccine 1 Measles, Rubella Injection on left upper arm (Subcutaneous)
Yellow Fever vaccine Yellow Fever Injection on right upper arm (Subcutaneous)
9th AT 18 MONTHS Measles-Rubella vaccine 2 Measles, Rubella Injection on left upper arm (Subcutaneous)
Malaria Vaccine 4 Malaria Injection on right upper arm (Intramuscular)
Single dose 10 Year old girls Human Papilloma Virus (HPV) Vaccine Cancer of the cervix Injection on the upper arm (Intramuscular)
TETANUS-DIPHTHERIA (Td) FOR WOMEN OF CHILDBEARING AGE (15-49 years)
Td1 At first contact or as early as possible in pregnancy Tetanus Diphtheria (Td) Vaccine Tetanus, Diphtheria in the mother;
Prevents Neonatal Tetanus in the baby
Injection on the upper arm (Intramuscular)
Td2 At least 1 month after Td1
Td3 At least 6 months after Td2
Td4 At least 1 year after Td3
Td5 At least 1 year after Td4

Vaccines and Practical Administration

Vaccines Used in the Immunization Schedule

BCG (Bacillus Calmette-Guérin) Vaccine

This is a live attenuated (weakened) bacterial vaccine. It is used in the immunization program to protect the child against tuberculosis. BCG is given in a single dose at birth or first contact. The vaccine is very sensitive to light and loses much of its potency when exposed to light. It is given by injecting the child in the skin (intradermally) at the right upper arm. The amount of 0.05 ml is recommended for children up to eleven (11) months of age, and 0.1 ml for children after eleven years.

Polio Vaccine

Polio vaccine is a live attenuated virus vaccine used in the immunization program to protect the child against poliomyelitis. The Sabin type is given orally (by mouth) in Uganda. Some countries use another type called Salk vaccine, which is given by injection.

Oral polio vaccine is given four times beginning:

  • at birth (polio 0);
  • at 6 weeks polio 1;
  • at 10 weeks polio 2, and
  • at 14 weeks polio 3 respectively.

2 drops in the mouth are recommended for each dose. It should be noted that booster doses are sometimes given to all children below five years of age in the entire country regardless of immunization status. This is done during national immunization days (NIDs), whose primary objective is to eradicate poliomyelitis. It is nice to remember that polio vaccine is made up of three polio viruses, and the oral polio vaccine is given four times to enable each of three viruses to stimulate the production of antibodies.

Pentavalent Vaccine

Pentavalent vaccine has 5 vaccines which include DPT and Hep.b & Hib. The DPT vaccine is commonly referred to as a triple vaccine because it is used to prevent three diseases, namely diphtheria, pertussis, and tetanus. The diphtheria and tetanus parts of the vaccine are made from the respective toxins, while the pertussis vaccine is made of killed bacterial antigen. It has become necessary to add hepatitis B and haemophylus influenza type b vaccines to DPT to form what is now known as the Pentavalent vaccine (five vaccines).

These are given three times because they do not stimulate the body to produce antibodies as well as the live attenuated vaccines. When the second and the third dose are given, the body’s memory of the earlier dose quickly leads to the production of more antibodies. The Pentavalent vaccine is given by injecting the child intramuscularly (in the muscle) at the left upper thigh.

It is given three times beginning:

  • at 6 weeks,
  • at 10 weeks, and
  • at 14 weeks, respectively.

A dose of 0.5 ml is recommended each time given.

Tetanus Toxoid Vaccine

This is a toxoid vaccine used in the immunization program to prevent children against neonatal tetanus. UNEPI targets all women of childbearing age (15-49 years) and pregnant mothers for tetanus toxoid (TT) vaccination. It is better and safe to give two doses of TT vaccine to any pregnant woman if you are not sure she has had TT in a previous pregnancy. The aim is to use the TT vaccine to provide passive immunity for unborn babies, through the transfer of the mother’s antibodies. This type of immunity reduces with time and is normally boosted by giving the child Pentavalent vaccines at 6 weeks after birth.

Pneumococcal Conjugate Vaccine (PCV 10)

PCV 10 consists of sugars (polysaccharides) from the capsule of the bacterium streptococcus pneumonia, which are conjugated to a carrier protein.

The PCV 10 contains serotypes 1, 4, 5, 6B, 7F, 9V, 14, 18C, 19F, and 23F. It is highly effective and protects children younger than 2 years of age against severe forms of pneumococcal disease, such as meningitis, pneumonia, and bacteremia. It will not protect against these conditions if they are caused by agents other than pneumococcus or pneumococcal serotypes not present in the vaccine.

The World Health Organization and Ministry of Health recommend that infants be given three doses of PCV vaccine, at 6 weeks, 10 weeks, and 14 weeks. PCV should be integrated with DPT-HepB-Hib vaccination.

Rotavirus Vaccine

Rotavirus vaccine is a vaccine used to protect against rotavirus infections. These viruses are the leading cause of severe diarrhea among young children. The vaccines are safe. This includes their use in people with HIV/AIDS. The vaccines are made from weakened rotavirus.

The World Health Organization recommends the first dose of vaccine be given right after 6 weeks of age. Two or three doses more than a month apart should be given, depending on the vaccine administered. The vaccine is not recommended for use in children over two years of age.

Malaria Vaccine (RTS,S/AS01)

The malaria vaccine, known by its brand name Mosquirix™, is a landmark achievement in public health. It is a recombinant protein-based vaccine that targets the Plasmodium falciparum parasite, the most deadly species causing malaria in Africa. It works by preventing the parasite from infecting the liver and maturing, thus stopping the disease before it can cause symptoms. It is given in a four-dose schedule starting at 6 months of age, with subsequent doses at 7, 8, and 18 months. It is administered as an intramuscular injection in the upper arm.

Human Papillomavirus (HPV) Vaccine

The HPV vaccine is a crucial tool for cancer prevention. It is a recombinant vaccine that protects against specific high-risk types of HPV that are responsible for the vast majority of cervical cancer cases. In Uganda, it is targeted at 10-year-old girls before they are likely to be exposed to the virus through sexual activity. Providing the vaccine at this age ensures the strongest possible immune response. It is administered as an injection in the upper arm.

Administration of Vaccines: General Principles

Immunization coverage should be high to reduce disease transmission. As health workers, we should aim to achieve immunization coverage of over 80%. All children should be immunized at every opportunity. There is no contraindication for immunization. If immunization is done daily, this improves immunization coverage. Children with minor illnesses should be immunized. The misconception that sick children should not be immunized should be discarded. Very sick children admitted to the hospital should be immunized on discharge. Malnourished children should also be immunized. The danger of vaccine of any given type to the malnourished child is much less than the infection itself. For children with HIV/AIDS, BCG can spread rapidly and thus should be treated as an opportunistic infection.

Administering Vaccines: Practical Steps

Preparing Vaccines

Vaccines used in the immunization program are in different forms. Some vaccines are in powder form and must be dissolved in the diluent supplied with them, while others come in liquid form and will not need a diluent. There is a need to prepare the vaccine before immunization.

  • Preparing Polio Vaccine: To prepare this vaccine the following should be done: If a dropper is separate, attach it securely to the vial (bottle). Keep polio vaccine shaded from sunlight during the immunization session. Place the vial on a frozen icepack or place it in the sponge hole placed at the mouth of the vaccine carrier, which is provided for this purpose to maintain the temperature.
  • Preparing BCG and Measles Vaccines: The following should be done: Use the diluent provided for each vaccine. The diluent should be cold, +4°C – +8°C. Use different 9 ml syringes for mixing measles and BCG vaccines. Draw up the full required amount of the diluent provided as per instruction on the vial. Draw and expel mixture back into the bottle three times or until the vaccine is mixed. Do not shake the vial. BCG and measles vaccines should be placed on a frozen icepack or use the sponge in the vaccine carrier for maintaining the correct temperature. Draw 0.5 ml of measles vaccine (recommended dosage). Draw 0.05 ml of BCG vaccine for babies up to 11 months old and 0.1 ml for babies above 11 months of age (recommended dose).
  • Preparing DPT and TT: DPT and TT come in liquid form. You will not need to dissolve or mix them. Remove the metal top from the vial. Draw 0.5 ml into the sterile syringe. Remove bubbles. Keep the vaccine shaded from the light.
  • Preparing PCV 10: Ensure availability of a clean vaccine carrier and a sponge. The vaccine carrier should be able to close tightly. Condition icepacks prior to packing vaccines in a vaccine carrier to prevent freezing of PCV, TT, and DPT-Hep B-Hib. On a table with a plastic sheet: – Vaccines, diluent, and droppers – Thermometer – Cotton swab in a clean container – Clean water in a clean container for cleaning injection sites – A tin of vitamin A and a pair of scissors – AD syringe and needles – Child health cards – Child register.

Important Points to Remember Before Administering

  • Never take two vials of the same vaccine out of the vaccine carrier at the same time.
  • Do not mix vaccines until mothers and children are present.
  • Mix one vial of a particular vaccine at a time.
  • Keep opened vials of polio, measles, and BCG vaccines on a frozen icepack or use the sponge in the vaccine carrier. Their temperature must be carefully maintained.
  • Do not keep vials of DPT and TT vaccines directly on the frozen icepack.
  • Open the vaccine carrier when necessary.
  • NEVER SHAKE VACCINE VIALS!!!

After preparing vaccines, the next step is to administer them. Before administering vaccines, you should always remember the following important points:

  • Use one sterile syringe and needle per vaccine (antigen) per child or mother.
  • Avoid holding loaded syringes in your hand for long to avoid exposing the vaccine to heat or direct sunlight.
  • Inform each parent what type of vaccine you are giving the child, the possible reactions to it, what to do about the reactions, and when to bring the child back for more immunization.
  • Listen to parents and encourage questions.
  • Remove any child’s clothes that are in your way when vaccinating.
  • During immunization, ask the mother to hold the child firmly to restrict their movement during immunization.
  • Administer the vaccine.
  • Give specific health information about each vaccine.

Administration Techniques

  • Administering BCG:

    1. Clean the skin with cotton wool soaked in clean water and let it dry.
    2. Hold the middle of the child’s upper right arm firmly with your left hand.
    3. Hold the syringe by the barrel with the millimeter scale upward and the needle pointing in the direction of the child’s shoulder. Do not touch the plunger.
    4. Point the needle against the skin, barrel turned up about 3 cm above the thumb. Gently insert its tip into the upper layer of the skin (intradermally).
    5. Make sure that the needle is in the skin (intradermally) and not under the skin. If the needle goes under the skin, take it out and insert it again. If you bend the needle, replace it with another sterile one.
    6. Holding the barrel with your index and middle finger, put your thumb on the plunger.
    7. Holding the syringe flat (parallel to the surface of the skin), inject the vaccine intradermally.
    8. If the vaccine is injected correctly into the skin, a wheal, with the surface pitted like an orange peel, will appear at the injection site. An indication that the vaccine has been injected incorrectly is that the plunger will move much more easily when the needle is injected under the skin than when it is injected in the skin. If there is no local reaction, re-immunize the child.
    9. Give the mother health information about BCG, i.e., in 7-9 days, a small sore will appear at the site where the injection was given. The sore might ooze a bit and will last for 6-8 weeks. Keep the baby’s arm clean with soap and water. Do not put dressing or medicine on the sore. The sore will not hurt and it will heal by itself.
    10. Change the syringe and needle after each vaccine and each child.
    11. Fill in the immunization tally sheet in the BCG section.
    12. Administer the next vaccine.
  • Administering DPT Vaccine:

    1. Ask the mother to hold the child across her laps so that the front of the child’s thigh is facing upwards. Then ask her to hold the child’s legs from moving.
    2. Clean the site to be injected with a cotton swab moistened in clean water and let it dry.
    3. Place your thumb and index finger on each side of the place you intend to inject. Stretch the skin slightly.
    4. Quickly push the needle deeply into the muscle (intramuscular). Pull the plunger back; if there is blood in the syringe, withdraw the needle and discard the vaccine. Obtain a sterile syringe with a needle and new vaccine.
    5. If no blood appears in the syringe, inject 0.5 ml of vaccine.
    6. Withdraw the needle.
    7. Rub the injection spot quickly with a clean piece of cotton swab.
    8. Give health advice about DPT. Tell the mother that: DPT may cause some tenderness at the site which will go away after a few days, and may cause fever but it will subside in 24 hours.
    9. Fill the immunization tally sheet appropriately.
    10. Use another needle and syringe to vaccinate another child.
  • Administering PCV Vaccine:

    1. Explain to the mother that the child is going to be given two types of vaccines in the form of injections. One will be given in the right and the other in the left thigh.
    2. Explain to the parent the disease prevented by the vaccine, the number of doses in order to achieve the protection, and reassure her that there is no danger in giving two injections in one visit.
    3. Explain to the mother the likely side effects and how to manage them, then wash hands with soap and water, drip dry.
    4. Open the vaccine carrier and pick one vial of PCV and quickly check the expiry date and status of the vial.
    5. Observe the vial content for unusual appearance and particles. If either is observed, the vial must be discarded.
    6. Shake the vaccine vial gently to obtain a uniform solution.
    7. Draw 0.5 ml of the vaccine from the vial using an AD syringe and return the partially used vial in a sponge in a vaccine carrier.
    8. Instruct the mother on how to hold the child for vaccine administration.
    9. Clean the right upper outer thigh with a swab soaked in water and administer the vaccine intramuscularly.
    10. Press the injection site firmly for a few seconds. Do not massage.
    11. Dispose of the used syringe and needle immediately into the safety box. Do not put swabs in the safety box. Do not recap the needle.
    12. If a vial is opened for one child and another child is not immediately available to be vaccinated with the remaining vaccine dose in the vial, write on the vial the time it was opened and ensure that the vial is kept cool in the sponge pad and away from any potential contamination for 6 hours.
  • Administering Oral Polio:

    1. Ask the child’s mother whether the child has diarrhea. If yes, note this on the child’s card and tell the mother that this dose of polio needs to be repeated after one month. This child with diarrhea should have a total of 4-9 doses of polio vaccine depending on whether the child got polio 0 or not.
    2. Use the dropper or device supplied with the vaccine.
    3. If the child will not open the mouth, gently squeeze his/her cheeks to open his mouth.
    4. Put 2 drops of vaccine on the child’s tongue.
    5. Fill in the immunization tally sheet appropriately.
    6. Note that every child below 5 years of age should receive an extra 2 doses of oral polio vaccine (OPV) each year during national immunization days (NIDs), whether she/he was immunized before or not.
  • Administering Measles:

    1. Use a sterile syringe and needle for each injection. Draw 0.5 ml dose of mixed measles vaccine.
    2. Ask the mother to expose the child’s left outer upper arm and hold the child firmly to restrict their movement.
    3. Clean the injection site with a cotton swab soaked in clean water and let it dry.
    4. With the fingers of one hand, pinch the skin on the outer side of the upper arm.
    5. Hold the syringe at an acute angle to the child’s arm. Inject the vaccine subcutaneously.
    6. To avoid injecting the vaccine into a vein, withdraw the plunger slightly before injecting the vaccine. Never give the vaccine if blood is seen in the syringe.
    7. Press the plunger gently, inject 0.5 ml of vaccine.
    8. Withdraw the needle. If a drop of blood appears at the injection site, ask the mother to wipe it away with a piece of cotton wool.
    9. If blood is drawn back in the syringe, the vaccine should not be given. Use another needle and syringe to obtain new vaccine.
    10. Record the immunization in the immunization tally sheet.
  • Administering TT Vaccine:

    1. Pregnant mothers should be given two doses of TT vaccine (0.5 ml) a month apart. However, if it is not possible to establish whether the mother had previously been immunized with TT or whether the mother was a default from a previous dose, two doses should be given a month apart.
    2. Use a sterile syringe and needle for each injection.
    3. Clean the thigh with cotton wool moistened in clean water.
    4. Hold the thigh muscle between your thumb and forefinger.
    5. With your other hand, inject the vaccine intramuscularly.
    6. Withdraw the needle.
    7. Discard the needle and syringe into a safety box. Ensure you do not put swabs in the safety box. Safety boxes are collected and burned.
    8. Fill the immunization tally sheet.
  • Equipment/Logistics Needed for Safe Vaccination

    A well-prepared immunization session requires specific equipment to ensure vaccines are kept potent and administered safely.

    • Vaccine Carrier with Conditioned Ice Packs: A portable, insulated container to maintain the cold chain during an immunization session.
    • Foam Pad/Sponge: A slotted sponge placed in the top of the vaccine carrier to hold opened multi-dose vials and protect them from heat and direct sunlight.
    • Vaccines and their specific Diluents: The correct vaccines and diluents for the session.
    • Syringes and Needles: Including single-use Auto-Disable (AD) syringes and separate mixing syringes.
    • Safety Box (Sharps Container): A puncture-proof container for the immediate and safe disposal of used needles and syringes.
    • Cleaning Supplies: Cotton swabs and a bottle of clean water for cleaning injection sites.
    • Documentation Tools: Child health cards, immunization register, and tally sheets.
    • Supplemental Supplies: Vitamin A capsules and a pair of scissors to open the blister packs.
    • Cold Boxes and Ice Packs: Larger insulated containers used for transporting vaccines from a district store to a health facility.

    Post-Vaccination Counselling and Health Education

    Communication with the parent or caregiver after vaccination is a critical nursing role. It builds trust and ensures proper follow-up care.

    • Reassure parents of the vaccine's safety and explain the common, minor side effects, such as swelling and redness at the injection site, slight fever, or soreness.
    • Advise parents on how to manage these side effects (e.g., giving paracetamol for fever).
    • Offer integrated health education on topics like nutrition, hygiene, and the importance of breastfeeding.
    • Always ask mothers if they have any concerns and take the time to answer their questions respectfully.
    • Clearly inform the mother about the date of the next visit required for immunization.
    • Administer Vitamin A supplementation to children according to the national schedule (e.g., at 6 months and 12-59 months). If a child receives their first measles dose at 6 months, inform the mother the second dose is due at 18 months.

    Record Keeping: The Foundation of Program Monitoring

    Accurate record keeping is mandatory for the immunization program. All vaccines administered must be recorded in tally sheets and registers to monitor performance, check a child's immunization status, calculate coverage rates, and plan for future needs.

    The Immunization Register

    • The register must be clearly labeled with the name of the health facility.
    • It should include the names of the children (not parents), their date of birth, and their medical file/card number.
    • For each vaccine (BCG, Polio, Pentavalent, Measles, etc.), enter the date the dose was given. If a dose was missed or not given, it should be clearly indicated, often with a zero (0).
    • Note: Supplemental doses like extra OPV or Vitamin A given during campaigns are typically recorded on the child's health card, not in the main immunization register.

    Health Cards

    • Each child must have their own health card.
    • The card must contain essential identifying information: child’s name, mother’s name, date of birth, village, and the primary health unit.
    • It serves as the child's personal record of all vaccines received, including dates. Other health information, like Vitamin A administration, is also recorded here.
    • Always ensure the child’s card is up-to-date before administering any vaccine.

    The Refrigerator and Cold Chain Management

    The Vaccine Refrigerator

    The refrigerator is the most critical piece of equipment for storing vaccines at the health facility. It must be properly maintained and kept in good working condition at all times. All refrigerators must be maintained at a temperature between +2°C and +8°C.

    Types of Refrigerators Used in Immunization:
    • Solar direct drive (SDD) vaccine refrigerator.
    • Gas refrigerators (using Kerosene or paraffin).
    • Electric vaccine refrigerator.

    The refrigerator should also be able to freeze ice packs. These ice packs are used to keep vaccines cool in vaccine carriers during outreach sessions. Ice packs inside a vaccine carrier are referred to as Conditioned Icepacks.

    Preventive Maintenance and Repair

    All refrigerators should be serviced and maintained regularly (e.g., every 3 months). During maintenance, the following activities are done:

    • The refrigerator is cleaned thoroughly.
    • The thermostat setting is checked for accuracy.
    • The defrosting system is checked.
    • The cooling system and compressor are checked and cleaned.
    • The electrical connection or gas/kerosene system is checked.

    Managing Adverse Events Following Immunization (AEFI)

    An AEFI is any untoward medical occurrence which follows immunization and does not necessarily have a causal relationship with the use of the vaccine. It is important to respond appropriately to any AEFI.

    • Fever: Advise parents to give the child paracetamol (acetaminophen) in the correct dose for their weight. Do not give aspirin to children. Encourage plenty of fluids.
    • Swelling or Redness at the Site of Injection: This is usually a normal, mild reaction. Reassure the parent it will go away on its own. Do not give any drug or apply any substance to the site.
    • Swelling of the Limbs or Face, or Difficulty in Breathing: This is a sign of a potential severe allergic reaction and is a medical emergency. Do not give any drug. Advise the parent to seek medical attention at the nearest health facility immediately.
    • Loss of Weight, Generalized Body Swelling, Poor Feeding, or Coughing: These are unlikely to be side effects of vaccination and are more likely symptoms of an underlying condition like malnutrition or another illness. Refer the child to the health facility for assessment and treatment.
    • Diarrhea: This is most likely not related to vaccination. Ensure the child receives oral rehydration solution (ORS) or other appropriate fluids to prevent dehydration.

    Conducting Mass Vaccination Campaigns

    Mass vaccination campaigns, such as National Immunization Days (NIDs) or outbreak responses, require careful planning and execution.

    1. Planning and Training: Plan the campaign, identify target populations, and train healthcare workers on all procedures.
    2. Community Mobilization: Inform communities well in advance about the campaign's purpose, date, and location.
    3. Logistics: Ensure all necessary equipment (vaccines, syringes, safety boxes, cold chain equipment) is in place.
    4. Safety Measures: Implement infection control, safe waste disposal, and crowd control measures at vaccination sites.
    5. Vaccination Site Setup: Organize sites for an efficient flow of people from registration to vaccination to a post-vaccination observation area.
    6. Vaccine Administration: Follow standard procedures, ensuring one sterile syringe and needle per injection.
    7. Monitoring and Reporting: Monitor the campaign’s progress, track doses administered, and ensure AEFIs are reported and managed promptly.
    8. Documentation: Maintain detailed records of all vaccines administered, including tallies and vaccine wastage.
    9. Post-Campaign Evaluation: Evaluate the campaign’s success and identify areas for improvement.
    10. Follow-Up: After the campaign, ensure routine immunization services continue and that children receive follow-up doses as needed.

    Uganda National Immunization Schedule Read More »

    Asphyxia neonatorum

    Asphyxia neonatorum

    Asphyxia neonatorum

    Asphyxia neonatorum is one of the pediatric emergencies and is the leading cause of neonatal mortality and morbidity. It is also an important cause of developmental delay and neurological problems in both term and preterm infants. It is crucial for midwives and nurses to have the knowledge and skills to care for babies with this condition.

    Definition of asphyxia neonatorum

    This is a failure of the baby to initiate and sustain normal respiration at birth. 

    A normal baby has good muscle tone at birth and moves their arms and legs actively, while asphyxia neonatorum infants are completely limp and unable to move their limbs. 

    This condition is a neonatal emergency as it may lead to hypoxia (lowering of oxygen supply to the brain and tissues), and possible brain damage or death if not correctly managed.

    Types of Asphyxia

    1. Asphyxia livida (Blue asphyxia) or stage of cyanosis:

      • Primarily due to respiratory failure with Apgar score 4-6.
      • The most common cause is the blockage of the airway.
    2. Asphyxia pallida or stage of shock:

      • This is due to combined respiratory and vasomotor failure with Apgar score 0-3.
      • Depending on the Apgar scoring system, a score of 0-3 indicates severe depression, 4-6 indicates moderate depression, and 7-10 indicates no depression.

    Pathophysiology of asphyxia

    Birth asphyxia is related to a reduction in arterial oxygen tension, accumulation of carbon dioxide, and a fall in pH. Acidosis occurs due to the anaerobic utilization of glucose, production of lactic acid, and accumulation of carbon dioxide. 

    These biochemical changes result in constriction of muscular pulmonary arterioles and raised pulmonary arterial pressure, leading to reduced filling of the left heart. 

    Hypoglycemia occurs due to glucose utilization and depletion of glycogen stores. Petechial hemorrhage occurs due to anorexic capillary changes. Cerebral edema develops due to the intracellular collection of sodium and inappropriate release of ADH.

     In prolonged asphyxia, myocardial function and cardiac output deteriorate. Blood flow to all organs is reduced, and progressive organ damage results.

    Initial deprivation of oxygen results in rapid breathing. If asphyxia continues, respiratory movements stop, and the heart rate begins to fall with the gradual diminution of neuromuscular tone. Then, the baby enters a period of apnea known as primary apnea. In this stage, stimulation and exposure to oxygen may induce respiration. 

    But if asphyxia continues, the neonate develops deep gasping respiration, blood pressure falls, the baby becomes flaccid, respiration becomes weaker, and weaker until the neonate takes a last gasp and enters a period of secondary apnea. 

    The baby becomes unresponsive to stimulation and will not spontaneously resume respiratory efforts unless resuscitation with assisted ventilation and oxygenation is initiated promptly.

     Primary and secondary apnea are difficult to distinguish, and all apnea at birth should be considered as secondary apnea, requiring immediate resuscitation to prevent brain damage and multi-organ system dysfunction.

    Signs & Symptoms

    • The baby does not breathe but may make an attempt to breathe or gasp.
    • The period of apnea is usually short (less than 30 seconds) but cries vigorously.
    • The color is blue.
    • Muscle tone is good.
    • The cord is pulsating strongly and feels firm.
    • The heartbeat is strong but rather slow.
    • Apgar score is 4 – 6.

    Aetiology

    Approximately 90% of asphyxia events occur as a result of placental insufficiency due to ante partum and intra partum factors. Postnatal factors account for the remaining.

    Ante partum factors include:

    • Placental insufficiency due to conditions like pre-eclampsia, hypertension, anemia, diabetes mellitus, and post-maturity.

    Other factors like; 

    • Antepartum hemorrhage, 
    • Malpresentation, 
    • Multiple pregnancies, 
    • Poor fetal growth, 
    • Rhesus immunization, bad obstetrical history, maternal systemic diseases (e.g., asthma, heart disease), 
    • Polyhydramnios or oligohydramnios, 
    • Maternal drug therapy (e.g., lithium) or maternal drug abuse, 
    • Vascular anomalies of the cord, and congenital anomalies of the fetus.

    Intrapartum factors include:

    • Fetal distress, 
    • Preterm labor, 
    • Antepartum hemorrhage (placenta previa, abruptio placentae), 
    • Cord prolapse, tight umbilical cord around the fetal neck, 
    • Prolonged labor exceeding 24 hours, prolonged second stage lasting more than 2 hours, maternal distress (dehydration, hypotension, and acidosis), 
    • The use of anesthesia and narcotics during labor, 
    • Birth trauma resulting in increased intracranial pressure due to hemorrhage, and difficult deliveries in malpresentation.

    Postnatal factors include;

    • They are mainly related to pulmonary, cardiovascular, and neurological abnormalities of the neonate, 
    • Including aspiration causing airway obstruction, 
    • Circulatory collapse due to blood loss and shock, preterm birth resulting in weak respiratory muscles, 
    • Poor pulmonary expansion, low alveolar surfactant, and an inefficient respiratory center.

    Management

    Maternity center:
    • A baby of this type of Asphyxia responds to treatment promptly.
    • As soon as the baby’s head is delivered, clear the airway and suck out the mucus from the nose with a mucus extractor.
    • When a baby is completely delivered, put it over the mother’s abdomen and continue sucking out mucus.
    • Clamp and cut the cord and separate the baby from the mother. Apgar score is assessed within one minute.
    • In the absence of any respiratory effort, resuscitation measures are commenced.
    • Put the baby on the resuscitation table, position the baby with the head slightly extended and the baby lying flat (NEUTRAL position), continue to clear the airway.
    • Maintain warmth throughout the procedure.
    • Give 0₂, 1 liter per minute (PRN).
    In hospital management:
    • The management is the same as that in a maternity center, except in the hospital, the doctor has to be informed, and oxygen must be administered.
    • If necessary, place the baby in a cot with the head turned to one side.
    • In summary:
      • Put the baby in a neutral position.
      • Clear the airway.
      • Give oxygen.

    Severe Asphyxia

    This is one of the neonatal emergencies, and it’s a serious condition in a newborn. The baby is lacking oxygen and is deeply shocked at birth.

    Signs of severe asphyxia:

    • Slow, feeble heart rate.
    • Baby not breathing, later shallow breathing with occasional gasps occurs.
    • Poor muscle tone.
    • Pale, grey.
    • Cord pulsates feebly and slowly.
    • Feels flabby if the cord pulsates below 100 and is weak. Immediate resuscitation is necessary.
    • Apgar score less than 4.

    Management of severe asphyxia

    Management in a maternity center:

    Aims:

    • To establish and maintain respiration as soon as possible.
    • To clear the airway.
    • Provision of 0₂.
    • Prevention of the condition from getting worse.

    This is one of the neonatal emergencies, and no time should be wasted as it’s a matter of life and death. This condition should never be allowed to be treated in a maternity center unless the mother comes in the second stage.

    In summary, we consider the following:

    • Position: Baby’s shoulders may be elevated on a small towel, causing slight extension of the head and straightening the trachea.
    • Ventilation: Clear the airway, insert a neonatal airway.
    • External cardiac massage: Chest compression should be performed if the heart rate is less than 60-100 b/m and falling despite adequate ventilation. Chest is compressed at a rate of 100-120 times per minute at a ratio of 3 compressions to one ventilation
    • Resuscitation: The components of neonatal resuscitation procedure are described as the acronym TABCD’s of resuscitation..

    Aims of resuscitation:

    • Establish and maintain a clear airway by oxygenation.
    • Ensure effective circulation.
    • Correct acidosis.
    • Prevent hypothermia.
    • Hypoglycemia and hemorrhage.

    T – Maintenance of temperature:

    • Provision of a radiant heat source.
    • Dry the baby.
    • Remove wet linen.

    A – Establishment of open airway:

    • Position the infant.
    • Suction the mouth, nose, and, in some instances, the trachea (in meconium-stained liquor).
    • If necessary, insert an ET tube to ensure an open airway.

    B – Initiation of breathing:

    • Tactile stimulation to initiate respirations.
    • Positive pressure ventilation (PPU) using either a bag and mask or a bag and ET tube.

    C – Maintenance of circulation:

    • Stimulate and maintain blood circulation by chest compressions.

    D – Drugs:

    • Dexamethasone (dose will depend on the general condition of the baby).
    • 25% dextrose.

    Prevention of asphyxia:

    Prevention includes;

    • Good antenatal care and early detection of predisposing factors, 
    • Screening mothers early and referring them to the hospital, 
    • Health education to mothers about nutrition and prevention of infections, 
    • Early treatment of infections that could lead to placental insufficiency (e.g., syphilis), 
    • Examination of blood to rule out conditions like rhesus incompatibility, 
    • Good intranatal care, prevention of prolonged labor, and proper observation during labor for maternal and fetal conditions.

    Complications:

    Complications of asphyxia neonatorum may include;

    •  Brain damage due to a lack of oxygen, 
    • Intracranial hemorrhage, 
    • Mental retardation, 
    • Hypothermia due to damage to the heat-regulating center, and 
    • Respiratory complications such as pneumonia.

    Asphyxia neonatorum Read More »

    Theories of Growth and Development

    Theories of Growth and Development

    Nursing Notes - Child Growth and Development

    Theories of Growth and Development

    Growth involves physical changes in height and weight and appearance of the body, while development refers to a change in functional ability, such as cognitive, motor, and psychological aspects of the client.

    Growth and development start from the time of conception and progress until a person dies. Growth and development theories provide a framework to understand this wide array of changes, and they help healthcare providers plan individualized care for clients based on their stage of development, and to provide anticipatory guidance for parents and caregivers.

    Major growth and development theories include biophysical developmental theory by Gesell, psychosocial development theory by Erikson; cognitive development theory by Piaget; moral development theory by Kohlberg; and finally, the psychoanalytic development theory by Freud.

    Erikson's Theory of Psychosocial Development

    Erikson described development as a series of psychosocial crises that must be resolved at each stage for healthy personality development. The theory describes the major developmental issues or problems Erikson identified for each of the stages of development.

    Infancy (Birth-1 year): Basic Trust vs. Mistrust

    The central task is to establish a sense of basic trust in predominance to mistrust. Infants who find that their needs for food and comfort are constantly and effectively met, learn that the world is a safe and predictable place and that they can trust others. In contrast, a sense of mistrust may predominate in infants who do not receive constant care and those who experience long spells of discomfort. Mistrust creates formation barriers to interpersonal bond and interferes with the development of confidence, security, and assertiveness.

    Example: A baby who is consistently fed when hungry and comforted when crying learns to trust their caregivers and the world around them. Conversely, a baby whose needs are inconsistently met may develop a sense of mistrust, becoming anxious or withdrawn, and hesitant to form secure attachments.

    Toddlerhood (1-3 years): Autonomy vs. Shame and Doubt

    A child must establish a sense of autonomy in this phase rather than shame & doubt. Autonomy is a kind of self-trust, a growing awareness that their behavior is under their control. This is the desired outcome, usually resulting in feelings like “I can do it”. Shame manifests as "I can do it but that is not nice," while doubt signifies "I cannot do it." It is hazardous when self-mistrust is carried on from infancy onwards, hindering their willingness to try new things.

    Example: A toddler who is encouraged to choose their own clothes and pour their own juice (even if some spills) develops a sense of autonomy and pride in their growing independence. If caregivers are overly critical or controlling, the toddler might feel shame and doubt about their abilities, becoming hesitant to try new things or asserting their will.

    Preschool (3-6 years): Initiative vs. Guilt

    The central task is to develop a sense of initiative in predominance to the sense of guilt. Children explore what they can create and do with their developing motor, language, interpersonal, and social skills. Behavior is characterized by intrusiveness manifested in endless questions, noise, physical and intellectual exploration. Guilt is a major developmental hazard because what they try to do is difficult or unacceptable to people they wish to please, leading to feelings of unworthiness or inhibition.

    Example: A preschooler who enthusiastically proposes a game of "hide-and-seek" and organizes their friends to play is demonstrating initiative and a growing sense of purpose. If their attempts to initiate play or ask questions are constantly dismissed, criticized, or punished, they might develop guilt over their desires and become less proactive or curious.

    School Age (6-12 years): Industry vs. Inferiority

    The central task is a sense of industry in predominance to a sense of inferiority. Industry means the child uses physical, cognitive (intellectual), and social skills and turns his attention to learning what he must know in preparation for success in the adult world. They learn self-worth as workers and producers. Inferiority is a negative self-concept that comes when children have difficulty in school, interpersonal relationships, or other expectations. They get discouraged and consider themselves inadequate, leading to a lack of motivation and self-esteem.

    Example: A school-aged child who diligently works on a science project and feels proud of their completed work is developing industry and a sense of competence. If they consistently struggle in school despite effort, face constant criticism from peers or adults, or are told they are "not good enough," they may develop feelings of inferiority, leading to withdrawal or a reluctance to engage in new challenges.

    Adolescence (12-19 years): Identity vs. Role Confusion

    The central task is developing a sense of identity with the undesirable alternative being role confusion. Attachment of identity is a process of young people coming to feel that they are consistent with others, in terms of views (own views in relation to other people’s views). The major hazard is role confusion, which arises from rapid changes in the experience of self and from sometimes overwhelming numbers of possible ways to behave and roles to select, leading to an unstable self-concept.

    Example: An adolescent who tries out for various sports teams, joins different clubs, and explores different academic subjects to discover their interests and values is forming their identity. Conversely, an adolescent who struggles to find their place, drifts between different social groups without a strong sense of belonging, or adopts an identity without personal reflection (e.g., simply conforming to peer pressure) may experience role confusion, feeling uncertain about who they are or where they are headed.

    Freud's Theory of Psychosexual Development

    Freud's theory revolves around sexual pleasure and has five stages: oral, anal, phallic, latency, and genital. It centers on the idea that personality develops through a series of stages where pleasure-seeking energies (libido) are focused on different erogenous zones.

    Oral Stage (Birth-1 year)

    This starts from birth until 1 year. During this stage, the primary source of pleasure and gratification is through the mouth, such as sucking and feeding. Freud believed that unresolved conflicts during this stage, such as weaning issues or oral fixation, could lead to oral-related behaviors in adulthood, such as overeating, smoking, excessive talking, or nail-biting, as an unconscious attempt to seek oral gratification.

    Example: A baby putting everything in their mouth to explore their environment and soothe themselves is typical of the oral stage. An adult who constantly chews on pens, struggles with overeating when stressed, or smokes excessively might be experiencing an oral fixation due to unresolved issues from this stage.

    Anal Stage (1-3 years)

    The anal stage occurs between the ages of 1 and 3 years. This stage focuses on the child's pleasure and control over their bowel movements. It's associated with toilet training, where the child learns control. Freud believed that conflicts related to toilet training during this stage (e.g., overly strict or lenient approaches) could lead to fixation, resulting in anal-retentive behaviors (being overly neat, organized, punctual, and controlling) or anal-expulsive behaviors (being messy, disorganized, rebellious, and defiant).

    Example: A toddler who insists on using the potty themselves and is very proud of their ability to control their bladder and bowels is demonstrating control related to the anal stage. An adult with an anal-retentive personality might be excessively neat, punctual, and controlling in their daily life, while an anal-expulsive person might be notoriously messy and disorganized, reflecting unresolved control issues.

    Phallic Stage (3-6 years)

    The phallic stage takes place between the ages of 3 and 6. During this stage, children develop a strong attachment to their opposite-sex parent (Oedipus complex for boys and Electra complex for girls) and become aware of gender differences. Freud believed that unresolved conflicts during this stage could lead to sexual and gender identity issues, difficulties with intimate relationships in adulthood, or issues like vanity and exhibitionism.

    Example: A young boy expressing a strong attachment to his mother and showing some jealousy towards his father, characteristic of the Oedipus complex. Fixation from this stage could manifest in adulthood as vanity, exhibitionism, or difficulty forming stable, intimate relationships due to unresolved conflicts around gender roles and sexuality.

    Latency Stage (6 years-Puberty)

    The latent stage occurs from around 6 years old until the onset of puberty. During this stage, sexual desires and impulses are repressed, and the focus of the child's energy is channeled into developing social and intellectual pursuits like school, sports, and friendships with same-sex peers. Freud believed that this stage is relatively calm and that there are no significant conflicts or fixations, allowing for crucial skill development.

    Example: A child focusing on developing friendships, excelling in school, and participating in extracurricular activities, with little overt interest in romantic relationships. This period allows for the development of social skills, learning, and the strengthening of non-sexual bonds.

    Genital Stage (Puberty Onward)

    The genital stage begins at the onset of puberty and continues into adulthood. This stage marks the reawakening of sexual desires and the development of mature sexual relationships. The focus of pleasure is on sexual intercourse and forming intimate relationships. Freud believed that successful resolution of previous stages' conflicts leads to healthy sexual development and the ability to form intimate, loving, and productive relationships.

    Example: An adolescent beginning to explore romantic relationships and developing a sense of attraction towards others, leading to the formation of mature, loving relationships based on mutual respect and intimacy, rather than solely on self-gratification.

    Piaget's Theory of Cognitive Development

    Piaget's theory focuses on cognitive development and stages, including sensorimotor, preoperational thought, concrete operational, and formal operational. It explains how a child's thinking and intelligence progress through distinct stages, building on previous learning.

    Sensorimotor Period (Birth-2 years)

    The sensorimotor stage occurs from birth to around 2 years of age. During this stage, infants primarily learn about the world through their senses and motor actions. They develop object permanence, the understanding that objects continue to exist even when they are out of sight. Infants also engage in trial-and-error experimentation and begin to demonstrate intentional actions, moving from reflexive behaviors to goal-directed activities. Thinking is initially egocentric, focused on their own immediate perceptions.

    Example: A baby crying when a toy is hidden under a blanket, then pulling the blanket away to find it, demonstrates developing object permanence. Prior to this, if the toy is out of sight, it's out of mind. They might also repeatedly drop a toy to see where it lands (trial-and-error experimentation).

    Preoperational Period (2-7 years)

    The preoperational stage typically occurs between the ages of 2 and 7. During this stage, children become more adept at using symbols, such as words and images, to represent objects and events. They engage in pretend play and develop language skills. However, children in this stage often struggle with logical reasoning, exhibiting egocentrism (difficulty understanding other people's perspectives), magical thinking (believing their thoughts can cause events), and animism (attributing life to inanimate objects). They also cannot yet grasp the concept of conservation (e.g., that a quantity of liquid remains the same in a differently shaped glass).

    Example: A child believing their doll feels sad when it falls (animism), or insisting that a tall, narrow glass has more juice than a short, wide one, even if both contain the same amount (lack of conservation). They might also cover their eyes and think if they can't see you, you can't see them (egocentrism), demonstrating their inability to decenter their thinking.

    Concrete Operational Period (7-11 years)

    The concrete operational stage takes place between the ages of 7 and 11. During this stage, children become capable of concrete, logical thinking. They can understand conservation, the idea that certain properties of objects remain the same despite changes in appearance. Children also develop the ability to classify objects into different categories, understand reversibility (actions can be undone), and engage in more systematic problem-solving, but their reasoning is still tied to concrete, tangible objects and events. They struggle with abstract concepts.

    Example: A child understanding that if you pour water from a tall, thin glass into a short, wide glass, the amount of water remains the same (conservation). They can also sort objects by multiple features (e.g., color and size) and solve simple math problems mentally, but might struggle with hypothetical questions like "What if humans had wings and could fly?"

    Formal Operational Period (11 years Onward)

    The formal operational stage begins around the age of 11 and extends into adulthood. During this stage, individuals develop abstract thinking and can reason hypothetically. They can engage in deductive reasoning (drawing specific conclusions from general principles), logical thinking, and hypothetical-deductive reasoning (forming hypotheses and testing them systematically). They can also think about multiple possibilities, engage in more complex problem-solving, and consider moral, philosophical, and social issues in depth.

    Example: A teenager debating complex social issues like climate change or justice, considering different perspectives and hypothetical scenarios, or planning a multi-step science experiment by thinking through all possible variables and outcomes. They can also understand metaphors and abstract mathematical concepts.

    Piaget believed that individuals progress through these stages in a fixed sequence, with each stage building upon the previous one. He proposed that cognitive development occurs through a process of assimilation (integrating new information into existing mental structures or schemas) and accommodation (modifying existing schemas to fit new information or creating new ones).

    Kohlberg's Theory of Moral Development

    Kohlberg's theory explores moral development through stages of moral reasoning, focusing on how people think about right and wrong and the justifications they use for their moral decisions.

    Level 1: Preconventional Morality (Toddler to School Age)

    Morality is externally controlled. Rules are obeyed to avoid punishment or receive rewards. This level is characteristic of young children, but adults can also exhibit this type of reasoning.

    • Stage 1: Obedience and Punishment Orientation: At this stage, individuals focus on avoiding punishment and obeying authority figures. They make moral decisions based on the direct consequences of their actions and the fear of being punished. Morality is about "might makes right."
    • Example: A child not stealing a cookie because they know they will get a time-out if caught, or a child refraining from hitting another child solely to avoid being punished by a parent, regardless of whether hitting is inherently wrong.

    • Stage 2: Individualism and Exchange: In this stage, individuals start to consider their own interests and begin to understand that others have their own needs and desires. Moral decisions are driven by self-interest and the expectation of receiving something in return, often characterized as "you scratch my back, I'll scratch yours."
    • Example: A child sharing their toy with another child because they expect the other child to share their toy in return, or a child offering to help with chores only if they get paid, viewing morality as a transaction.

    Level 2: Conventional Morality (School Age to Adolescence)

    Conformity to social rules is important, but not for self-interest. The focus is on maintaining social order, fulfilling duties, and fostering positive relationships within a group or society. Most adolescents and adults reason at this level.

    • Stage 3: Good Interpersonal Relationships: The "good boy/good girl" orientation. At this stage, individuals value social harmony and seek approval from others. They make moral decisions based on the desire to be seen as a good person by their family, friends, or community, and to maintain positive relationships.
    • Example: A student following classroom rules because they want to be seen as a "good student" by their teacher and peers, or a teenager refraining from cheating because they want their friends to see them as honest and trustworthy, valuing social approval.

    • Stage 4: Maintaining the Social Order: In this stage, individuals focus on following rules and maintaining social order. They make moral decisions based on a sense of duty, respect for authority, and the need to uphold societal norms and laws for the greater good of society. Laws are seen as fixed and necessary for stability.
    • Example: A citizen paying their taxes because they understand it is their duty to uphold the laws of their country and maintain societal order, or a driver obeying traffic laws because it is the rule and necessary for public safety, even if no one is watching.

    Level 3: Postconventional Morality (Adolescence and Adulthood)

    Morality is defined in terms of abstract principles and values that apply to all situations and societies. Individuals at this level think beyond societal conventions and consider universal ethical principles. Not everyone reaches this level of moral reasoning.

    • Stage 5: Social Contract and Individual Rights: At this stage, individuals recognize that different societies may have different moral standards, and they begin to question and evaluate these standards based on democratic principles. Moral decisions are based on principles of fairness, justice, and the protection of individual rights, understanding that laws are social contracts that can be changed if they no longer serve the common good.
    • Example: An individual advocating for changes to a law they believe is unfair, even if it is currently legal, because it violates fundamental human rights and the societal contract for justice, such as participating in peaceful protests against discriminatory policies or advocating for legal reform.

    • Stage 6: Universal Principles: In this final stage, individuals develop their own set of moral principles that are based on universal ethical principles, such as justice, equality, and respect for human dignity. Moral decisions are guided by these principles, which are considered valid for all humanity, even if they conflict with societal norms or laws, and even if it means personal risk.
    • Example: An activist dedicating their life to fighting for human rights globally, even in the face of personal risk or legal consequences, because they believe in the universal principle of justice for all, like a civil rights leader who non-violently resists unjust laws based on deep moral convictions and a commitment to equality.

    Theories of Growth and Development Read More »

    Growth and Development of a Child

    Growth and Development of a Child

    Nursing Notes - Child Growth and Development

    Child Growth and Development

    Growth is the process of physical increase in size, such as height and weight. It is a quantitative measure that also includes the maturation of body systems.

    Development is the progressive increase in skill and capacity to function. It is a qualitative measure that results from the maturation and myelination of the nervous system, allowing for more complex body structures and functions.

    Patterns of Growth and Development

    Growth and development are orderly, predictable, and follow directional patterns.

  • Cephalo-caudal Pattern: This means development proceeds from head to tail (or feet). Structures and functions originating in the head region develop before those in the lower parts of the body.
    • In fetal development, the head grows fastest initially, followed by the trunk, and then the legs.
    • At birth, the head is proportionately larger than the rest of the body. As the child matures, the legs grow significantly, increasing from about 38% to 50% of total body length by adulthood.
    • An infant gains control of their head before they can sit, and can sit before they can walk.
  • Proximo-distal Pattern: This means development proceeds from the center of the body outwards to the extremities.
    • In the respiratory system, the trachea develops first, followed by the branching of bronchi, bronchioles, and finally the alveoli.
    • Motor control of the arms develops before control of the hands, and hand control is established before fine finger control (pincer grasp).
  • Critical or Sensitive Periods

    These are specific times during development when a child is most receptive to learning a particular skill or behavior, such as walking or language acquisition. Environmental influences, whether positive or negative, have the greatest impact during these periods. Factors like injury, illness, or malnutrition can interfere with development during these critical times.

    Factors Influencing Growth and Development

  • Genetics (Heredity): Genetic makeup determines physical traits, intellectual potential, and the presence of certain inherited conditions that can facilitate or hinder development.
  • Environment (Prenatal and Postnatal):
    • Prenatal: The mother's health during pregnancy is crucial. Factors like maternal nutrition, smoking, alcohol use, drug exposure, and infections (e.g., rubella) can lead to congenital abnormalities and developmental delays.
    • Postnatal: After birth, factors like socioeconomic status, family relationships, housing, access to healthcare, and exposure to environmental hazards influence the child's development.
  • Culture: Cultural beliefs, values, and child-rearing practices can shape a child's social and emotional development.
  • Nutrition: Adequate nutrition is essential for physical growth, especially for brain development both prenatally and during the first year of life. Malnutrition can cause irreversible delays.
  • Health Status: Chronic or acute illnesses can impede growth by affecting the delivery of nutrients, hormones, and oxygen to tissues and organs.
  • Play: Play is the "work" of childhood. It is essential for motor, cognitive, language, and social development, allowing children to explore, learn, and practice new skills.
  • Factors Contributing to Effective vs. Poor Growth

    Factors for Effective Growth (Thriving)
    1. Exclusive breastfeeding for the first 6 months, continuing for up to 2 years or more: Breast milk provides optimal nutrition, antibodies for immunity, and promotes healthy bonding. Continued breastfeeding alongside solids extends these benefits.
    2. Timely introduction of appropriate complementary foods (quality and quantity) at 6 months: Around 6 months, breast milk alone isn't sufficient. Introducing nutrient-dense, varied complementary foods in adequate amounts supports increasing energy and nutrient needs.
    3. A regular, balanced diet containing all essential nutrients: Ensuring consistent access to a diverse diet rich in carbohydrates, proteins, fats, vitamins, and minerals is fundamental for sustained physical and cognitive development.
    4. Prevention of childhood illnesses through full immunization and proper sanitation: Vaccinations protect against debilitating diseases, while good hygiene and sanitation reduce exposure to infections that can hinder growth by increasing nutrient demands or reducing appetite.
    5. Early diagnosis and effective treatment of common illnesses like malaria, diarrhea, and respiratory infections: Prompt and correct medical intervention prevents illnesses from becoming chronic or severe, which can significantly deplete a child's nutritional reserves and impair growth.
    6. Adequate birth spacing through family planning services: Longer intervals between births allow the mother's body to recover nutritionally and emotionally, enabling her to dedicate more resources and attention to each child's care and development.
    7. Parental involvement in growth monitoring and health education: Active participation in regular growth monitoring helps identify deviations early, and parental education on nutrition, hygiene, and developmental milestones empowers them to make informed decisions for their child's well-being.
    8. Responsive feeding practices: Parents or caregivers respond to a child's hunger and fullness cues, offering food in an encouraging and supportive manner without force-feeding or restricting. This builds a healthy relationship with food.
    9. Secure attachment and stimulating environment: Emotional security from consistent, loving care fosters psychological well-being, which indirectly supports physical health. A stimulating environment (play, interaction, learning) supports cognitive development that is intertwined with physical growth.
    10. Access to clean water: Essential for hydration and preventing waterborne diseases, which can significantly impact a child's health and ability to absorb nutrients.
    Factors for Poor Growth (Failure to Thrive)
    1. Low birth weight or prematurity: Infants born too small or too early often start life at a disadvantage, with underdeveloped organs and lower nutrient reserves, making them more susceptible to growth faltering.
    2. Unsuccessful breastfeeding (e.g., poor positioning or attachment): Ineffective breastfeeding leads to inadequate milk intake, poor weight gain, and can discourage mothers, leading to early cessation.
    3. Early introduction of complementary feeds (before 6 months) or early cessation of breastfeeding: Introducing solids too early can displace nutrient-dense breast milk, increase infection risk, and overwhelm an immature digestive system. Stopping breastfeeding too soon removes a vital source of nutrition and immunity.
    4. Frequent or chronic illness (e.g., diarrhea, worm infestations, malaria, URTI): Repeated infections increase metabolic demands, reduce appetite, impair nutrient absorption, and lead to nutrient loss, creating a vicious cycle of illness and malnutrition.
    5. Late introduction of solid foods: Delaying the introduction of complementary foods beyond 6 months means a child's increasing nutritional needs are not met, leading to energy and nutrient deficiencies.
    6. Poor socioeconomic status leading to food insecurity: Limited financial resources often translate to insufficient access to diverse, nutritious foods, safe water, and adequate healthcare, directly impacting a child's growth.
    7. Parental ignorance or lack of education about proper nutrition and feeding practices: Lack of knowledge regarding appropriate food choices, preparation, and feeding techniques can lead to inadequate dietary intake and malnourishment, even if food is available.
    8. Poor maternal health or death of a parent: A mother's ill health (physical or mental) or the absence of a primary caregiver can severely compromise the quality of care, feeding, and emotional support a child receives, impacting their growth.
    9. Unresponsive feeding practices: Caregivers who ignore a child's hunger cues, force-feed, or provide limited food choices can create negative associations with eating, leading to reduced intake and poor growth.
    10. Unsanitary living conditions and lack of access to clean water: Exposure to pathogens due to poor hygiene and contaminated water sources increases the risk of recurrent infections, particularly diarrheal diseases, which are major contributors to growth faltering.
    11. Child neglect or abuse: In severe cases, a lack of adequate physical care, nutritional provision, and emotional support due to neglect or abuse can directly result in severe growth failure and developmental delays.

    Stages of Growth and Development

    1. Neonatal Period (Birth to 1 Month)
    • Weight: Average birth weight is 2.5 to 4.3 kg. A newborn typically loses 5-10% of their birth weight in the first 3-4 days, which should be regained by 10-14 days of age.
    • Head: The anterior fontanelle is diamond-shaped, and the posterior is triangular; both are palpable. The head is large, and neck muscles are weak, requiring head support.
    • Reflexes: Primitive reflexes like sucking, rooting, grasping, and the startle (Moro) reflex are present and are key indicators of neurological function.
    • Physical Characteristics: Skin color varies with ethnicity; blood vessels may be visible. Mongolian spots (bluish discolorations on the lower back/buttocks) are common in dark-skinned infants and fade over time. Breast engorgement or vaginal discharge/bleeding can occur in both sexes due to maternal hormones. Testes should be descended into the scrotum in males.
    • Behavior: Sleeps 18-20 hours a day. Can lift head briefly when in a prone position.
    • Vital Signs:
      • Pulse: 120-160 bpm
      • Respirations: 30-50 breaths/min
      • Blood Pressure: 50-100 / 20-60 mmHg
      • Temperature: 36.5 - 37.5°C
    2. Infancy (1 Month to 1 Year)
    • Growth: Rapid growth period. Weight doubles by 5-6 months and triples by 1 year.
    • Social Development: Exhibits a real social smile by 2 months. Begins to interact and gurgle by 3 months. Stranger anxiety often develops around 8 months.
    • Motor Skills: Persistence of neonatal reflexes beyond 4 months may indicate an abnormality. Rolls from back to side by 4 months. Bears weight on legs by 6-7 months. Sits alone by 7 months. Pulls to a stand by 9-10 months. Walks with assistance or alone by 12 months. Grasp reflex is replaced by voluntary pincer grasp by 9-11 months.
    • Dentition & Diet: First teeth typically erupt around 6 months; should have 6-8 teeth by 1 year. Solid foods are introduced around 6 months.
    • Vital Signs:
      • Pulse: 80-180 bpm
      • Respirations: 30 breaths/min
      • Blood Pressure: 74-100 / 50-70 mmHg
      • Temperature: 36.5 - 37.2°C
    3. Toddlerhood (1 to 3 Years)
    • Behavior: Characterized by exploration, autonomy, and negativism ("no"). Has the strength and will to resist. Suspect hearing impairment if speech is not clear by age 2.
    • Growth: Growth rate slows. Gains a "pot-bellied" appearance. Head circumference increases about 1 inch between ages 1 and 2. Brain growth reaches about 80% of adult size by age 3.
    • Dentition: Primary dentition (20 teeth) is complete by 30 months.
    • Motor Skills: Improved coordination and equilibrium. Develops sphincter control, making toilet training possible (usually between 18-24 months).
    • Cognitive: Rapid increase in language skills.
    • Vital Signs:
      • Pulse: 80-140 bpm
      • Respirations: 25 breaths/min
      • Blood Pressure: 80-112 / 50-80 mmHg
      • Temperature: 36.0 - 37.2°C
    4. Preschool (3 to 6 Years)
    • Behavior: Generally cooperative and likes to please; responds well to praise. Engages in interactive and imaginative play.
    • Growth: Physical growth continues to slow. The pot-bellied appearance diminishes by age 5.
    • Motor Skills: Skills become more refined; can ride a tricycle, hop, and draw simple shapes.
    • Health: Prone to skin infections and lice due to close interactive play. Dental visits should begin.
    • Vital Signs:
      • Pulse: 80-120 bpm
      • Respirations: 23-30 breaths/min
      • Blood Pressure: 80-110 / 50-70 mmHg
      • Temperature: 36.3 - 37.0°C
    5. Middle Childhood / School Age (6 to 12 Years)
    • Behavior: Capable of following instructions and using age-appropriate language. Privacy becomes important.
    • Growth & Physical Changes: First permanent teeth (molars) appear at age 6. Respirations become thoracic by age 7. In girls, breast budding may begin around 9 years.
    • Cognitive: Thinking becomes more logical. Articulation should be correct by age 7.
    • Vital Signs:
      • Pulse: 70-115 bpm
      • Respirations: 17-20 breaths/min
      • Blood Pressure: 84-120 / 54-80 mmHg
      • Temperature: 36.5 - 36.8°C
    6. Adolescence (13 to 19 Years)
    • Behavior: Seeks independence; may not want caregivers present during examinations. Direct questions to the adolescent. Peer group is highly influential.
    • Physical Changes (Puberty): Development of secondary sexual characteristics. In girls, breasts enlarge and menstruation begins. In boys, testes enlarge and voice deepens. Pubic and axillary hair develops in both sexes.
    • Vital Signs:
      • Pulse: 50-100 bpm
      • Respirations: 16-18 breaths/min
      • Blood Pressure: 94-140 / 62-88 mmHg
      • Temperature: 36.6°C

    Theories of Growth and Development

    Theories provide frameworks for understanding human behavior. Key theorists in child development include Erikson (psychosocial), Freud (psychosexual), Piaget (cognitive), and Kohlberg (moral).

    Erikson's Theory of Psychosocial Development

    Erikson described development as a series of psychosocial crises that must be resolved at each stage for healthy personality development.

    Infancy (Birth-1 year): Basic Trust vs. Mistrust

    The central task is to establish trust. When caregivers consistently meet the infant's needs for food, comfort, and affection, the infant learns to trust the world as a safe place. Failure to do so leads to mistrust, which can hinder future relationships.

    Example: A baby who is consistently fed when hungry and comforted when crying learns to trust their caregivers and the world around them. Conversely, a baby whose needs are inconsistently met may develop a sense of mistrust, becoming anxious or withdrawn.

    Toddlerhood (1-3 years): Autonomy vs. Shame and Doubt

    The child must establish a sense of autonomy (self-governance). As they learn to walk, talk, and do things for themselves, they develop self-confidence. If they are overly criticized or controlled, they may develop a sense of shame and doubt in their own abilities.

    Example: A toddler who is encouraged to choose their own clothes and pour their own juice (even if some spills) develops a sense of autonomy. If caregivers are overly critical or controlling, the toddler might feel shame and doubt about their abilities, becoming hesitant to try new things.

    Preschool (3-6 years): Initiative vs. Guilt

    The central task is to develop a sense of initiative. Children begin to plan activities, make up games, and initiate activities with others. If this initiative is encouraged, they develop a sense of purpose. If it is discouraged or seen as a nuisance, they may develop a sense of guilt.

    Example: A preschooler who enthusiastically proposes a game of "hide-and-seek" and organizes their friends to play is demonstrating initiative. If their attempts to initiate play are constantly dismissed or criticized, they might develop guilt over their desires and become less proactive.

    School Age (6-12 years): Industry vs. Inferiority

    The focus is on developing a sense of industry. Children learn to be productive and master new skills in school and social settings. Success leads to a sense of competence, while repeated failure can lead to feelings of inferiority and inadequacy.

    Example: A school-aged child who diligently works on a science project and feels proud of their completed work is developing industry. If they consistently struggle in school despite effort or are told they are "not good enough," they may develop feelings of inferiority.

    Adolescence (12-19 years): Identity vs. Role Confusion

    The central task is to develop a stable sense of identity (who they are and where they are going). Adolescents explore different roles, values, and beliefs. Success leads to a consistent sense of self. Failure results in role confusion and a weak sense of self.

    Example: An adolescent who tries out for various sports teams, joins different clubs, and explores different academic subjects to discover their interests is forming their identity. Conversely, an adolescent who struggles to find their place, drifts between different social groups without a strong sense of belonging, or adopts an identity without personal reflection, may experience role confusion.

    Freud's Theory of Psychosexual Development

    Freud's theory centers on the idea that personality develops through a series of stages where pleasure-seeking energies (libido) are focused on different erogenous zones.

    Oral Stage (Birth-18 months)

    The focus of pleasure is the mouth (sucking, biting, chewing). This provides not only nourishment but also psychological comfort. Fixation at this stage could lead to behaviors like nail-biting, smoking, or overeating in adulthood.

    Example: A baby putting everything in their mouth to explore their environment and soothe themselves is typical of the oral stage. An adult who constantly chews on pens or overeats when stressed might be experiencing an oral fixation.

    Anal Stage (18 months-3 years)

    The focus of pleasure shifts to the anus and the processes of elimination. This stage is associated with toilet training, where the child learns control. Fixation can lead to personalities that are overly orderly (anal-retentive) or messy (anal-expulsive).

    Example: A toddler who insists on using the potty themselves and is very proud of their ability to control their bladder and bowels is demonstrating control related to the anal stage. An adult with an anal-retentive personality might be excessively neat, punctual, and controlling, while an anal-expulsive person might be messy and disorganized.

    Phallic Stage (3-6 years)

    The focus of pleasure is the genitalia. During this stage, children become aware of gender differences and may develop complexes (Oedipus/Electra). Fixation can lead to issues with sexuality and gender identity.

    Example: A young boy expressing a strong attachment to his mother and showing some jealousy towards his father, characteristic of the Oedipus complex. Fixation could manifest in adulthood as vanity, exhibitionism, or difficulty with intimate relationships.

    Latency Stage (6 years-Puberty)

    Sexual urges are repressed, and energy is channeled into social and intellectual pursuits like school, sports, and friendships with same-sex peers.

    Example: A child focusing on developing friendships, excelling in school, and participating in extracurricular activities, with little overt interest in romantic relationships. This period allows for the development of social skills and learning.

    Genital Stage (Puberty Onward)

    Sexual energy reawakens and is directed towards mature, heterosexual relationships. The focus of pleasure is on sexual intercourse and forming intimate relationships.

    Example: An adolescent beginning to explore romantic relationships and developing a sense of attraction towards others, leading to the formation of mature, loving relationships.

    Piaget's Theory of Cognitive Development

    Piaget's theory explains how a child's thinking and intelligence progress through distinct stages.

    Sensorimotor Period (Birth-2 years)

    Infants learn about the world through their senses and motor actions. A key achievement is object permanence—the understanding that objects continue to exist even when they cannot be seen. Thinking is egocentric.

    Example: A baby crying when a toy is hidden under a blanket, then pulling the blanket away to find it, demonstrates developing object permanence. Prior to this, if the toy is out of sight, it's out of mind.

    Preoperational Period (2-7 years)

    Children use language and symbols, but thinking is illogical and still egocentric. They engage in magical thinking (believing their thoughts can cause events) and animism (attributing life to inanimate objects). They cannot yet grasp the concept of conservation (e.g., that a quantity of liquid remains the same in a differently shaped glass).

    Example: A child believing their doll feels sad when it falls (animism), or insisting that a tall, narrow glass has more juice than a short, wide one, even if both contain the same amount (lack of conservation). They might also cover their eyes and think if they can't see you, you can't see them (egocentrism).

    Concrete Operational Period (7-11 years)

    Thinking becomes more logical and organized, but it is still concrete (tied to physical reality). They can understand conservation, reversibility, and can see things from another's point of view. They can reason about concrete events but struggle with abstract concepts.

    Example: A child understanding that if you pour water from a tall, thin glass into a short, wide glass, the amount of water remains the same (conservation). They can also sort objects by multiple features, but might struggle with hypothetical questions like "What if humans had wings?"

    Formal Operational Period (11 years Onward)

    Adolescents develop the ability to think abstractly, reason hypothetically, and use deductive logic. They can consider multiple possibilities and think about moral, philosophical, and social issues.

    Example: A teenager debating complex social issues like climate change or justice, considering different perspectives and hypothetical scenarios, or planning a multi-step project by thinking through all possible outcomes.

    Kohlberg's Theory of Moral Development

    Kohlberg's theory focuses on the development of moral reasoning, or how people think about right and wrong.

    Level 1: Preconventional Morality (Toddler to School Age)

    Morality is externally controlled. Rules are obeyed to avoid punishment or receive rewards.

    • Stage 1: Obedience and Punishment Orientation. Behavior is judged as wrong if it is punished.
    • Example: A child not stealing a cookie because they know they will get a time-out if caught, or a child refraining from hitting another child solely to avoid being punished by a parent.

    • Stage 2: Individualism and Exchange. "What's in it for me?" orientation. Right behavior is what is in one's own best interest.
    • Example: A child sharing their toy with another child because they expect the other child to share their toy in return, or a child offering to help with chores only if they get paid.

    Level 2: Conventional Morality (School Age to Adolescence)

    Conformity to social rules is important, but not for self-interest. The focus is on maintaining social order and positive relationships.

    • Stage 3: Good Interpersonal Relationships. The "good boy/good girl" orientation. Right behavior is what pleases or is approved of by others.
    • Example: A student following classroom rules because they want to be seen as a "good student" by their teacher and peers, or a teenager refraining from cheating because they want their friends to see them as honest.

    • Stage 4: Maintaining the Social Order. Right behavior consists of doing one's duty, showing respect for authority, and maintaining the given social order.
    • Example: A citizen paying their taxes because they understand it is their duty to uphold the laws of their country and maintain societal order, or a driver obeying traffic laws because it is the rule and necessary for public safety.

    Level 3: Postconventional Morality (Adolescence and Adulthood)

    Morality is defined in terms of abstract principles and values that apply to all situations and societies.

    • Stage 5: Social Contract and Individual Rights. Right is determined by socially agreed-upon standards of individual rights.
    • Example: An individual advocating for changes to a law they believe is unfair, even if it is currently legal, because it violates fundamental human rights and the societal contract for justice, such as protesting against discriminatory policies.

    • Stage 6: Universal Principles. Right is determined by self-chosen ethical principles of conscience, which are abstract and universal (e.g., justice, equality).
    • Example: An activist dedicating their life to fighting for human rights globally, even in the face of personal risk or legal consequences, because they believe in the universal principle of justice for all, like a civil rights leader who non-violently resists unjust laws based on deep moral convictions.

    Growth and Development of a Child Read More »

    Immediate Care of the Newborn

    Immediate Care of the Newborn

    Paediatric Nursing I - Page 3: Care of the Newborn

    Learning Outcomes

    By the end of this section, the learner shall be able to:

    • Describe the step-by-step procedure for immediate care of the newborn at birth.
    • Accurately assess a newborn using the Apgar scoring system.
    • Detail the essential components of daily care for a healthy newborn.
    • Explain the principles of thermoregulation, feeding, hygiene, and infection prevention in neonates.
    • Outline the key observations and assessments required to monitor a newborn's progress.
    • Summarize the essential health education points for the new mother before discharge.

    Introduction

    The care a baby receives immediately after birth and during the first few days of life is critical for their survival, growth, and long-term health. As midwives and nurses, providing expert, timely, and compassionate care can prevent life-threatening complications and support the crucial bonding process between the mother and her new baby.

    Immediate Care of the Newborn (The First Hour)

    This period requires prompt, skilled, and sequential actions focused on establishing breathing, maintaining warmth, and preventing infection.

    Care of the Baby at Birth

    Ensure Infection Prevention and Control.

    As soon as the head is born:

    • Clean the eyes.
    • Wipe the face.
    • Clear the airway – clear mucus from the nose and mouth.
    • Feel for the cord around the neck.
    • Safely deliver the rest of the baby.
    • Note the time of delivery.
    • Dry and keep the baby warm.
    • Establish respirations and maintain it.
    • Apgar score and record.
    • Clean the eyes.
    • Instill tetracycline eye ointment.
    • Cut the cord and tie it securely.
    • Show the baby to the mother to identify sex and key features.
    • Maintain warmth (use kangaroo method if the mother and baby are in good condition).
    • Promote bonding.
    • Initiate breastfeeding.
    • Assess the baby’s condition at 1 and 5 minutes using APGAR.

    Procedure at Birth

    1. Prepare the Environment: Ensure a clean, warm, and draft-free delivery area with all necessary equipment ready. Practice strict hand hygiene.
    2. Clear the Airway: As soon as the baby's head is born, gently wipe the face and eyes with a soft cloth. Use a bulb syringe or suction catheter to clear mucus from the mouth first, then the nose. Check if the umbilical cord is around the neck and manage it appropriately.
    3. Deliver and Note the Time: Safely deliver the rest of the baby's body and note the exact time of birth.
    4. DRY AND STIMULATE: This is the most critical step. Immediately place the baby on the mother's abdomen and dry them thoroughly with a warm, clean towel. The act of drying also provides stimulation that encourages the baby to breathe. Remove the wet towel and cover the baby with a dry one.
    5. Assess Respirations: Observe the baby's chest for respiratory effort. A healthy baby should be crying vigorously.
    6. Perform Apgar Score: Assess the baby's condition at 1 minute and again at 5 minutes after birth.

    The Apgar Score

    The Apgar score is a rapid method to assess the physical condition of a newborn and determine the need for resuscitation. It evaluates five signs, each scored from 0 to 2.

    Feature Score 0 Score 1 Score 2
    Appearance (Skin Color) Blue or Pale All Over Body Pink, Extremities Blue (Acrocyanosis) Completely Pink
    Pulse (Heart Rate) Absent Below 100 bpm Above 100 bpm
    Grimace (Reflex Irritability) No Response Grimace or Weak Cry Cries or Pulls Away
    Activity (Muscle Tone) Limp Some Flexion of Extremities Active Motion
    Respiration (Breathing Effort) Absent Slow, Irregular, Weak Cry Good, Strong Cry
    Interpretation of Apgar Scores
    • Score 7-10: Good condition. Routine care is needed.
    • Score 4-6: Moderately depressed. Some assistance, such as stimulation and oxygen, may be required.
    • Score 0-3: Severely depressed. This indicates a need for immediate and active resuscitation.

    Further Care within the First Hour

    • Warmth: Maintain warmth by placing the baby skin-to-skin with the mother (Kangaroo Mother Care) and covering both with a warm blanket. A hat should be placed on the baby's head.
    • Cord Care: Securely clamp and cut the umbilical cord using sterile technique. Check for any bleeding from the cord stump.
    • Eye Care: Administer prophylactic eye ointment (e.g., 1% Tetracycline) to prevent ophthalmia neonatorum (gonococcal infection).
    • Identification: Show the baby to the mother, confirming the sex and noting any identifying features. Apply identification bands as per facility protocol.
    • Bonding and Breastfeeding: Encourage early initiation of breastfeeding, ideally within the first hour of life. This promotes bonding, provides vital nutrients (colostrum), and helps maintain the baby's temperature and blood sugar.
    • Physical Assessment: Perform a quick head-to-toe examination to identify any obvious congenital abnormalities.

    Care After 1 Hour

    • Examine the baby’s head to toe for maturity, abnormalities, etc.
    • Re-ligature and shorten the cord.
    • Ascertain the passage of meconium and urine.
    • Weigh the baby.
    • Ensure warmth.
    • Ensure no bleeding from the cord.
    • Ensure bonding.
    • Ensure the comfort of the mother and the baby.
    • Communicate to the mother all the findings.
    • Report to the ward in-charge and document.

    Examination of a Newborn

    Aims/Reasons of Examination

    • To detect certain malformations or abnormalities that may be a threat to the life of the baby and may need urgent intervention.
    • To detect illness or injury that has arisen before or during delivery.
    • To take body measurements and record them.

    Important Points to Observe:

    • Room should be warm and draught-free.
    • Adequate light.
    • Equipment prepared.
    • Parent or caretaker should be around.
    • Explain the procedure to the parent or caretaker.
    • Baby should be in good condition.

    Equipment

    • Overhead warmer if required.
    • Stethoscope.
    • Ophthalmoscope.
    • Tape measure.
    • Infant scales.
    • Documentation – infant personal health record and hospital medical record.

    Procedure

    • Use a systematic approach to examine the baby – ‘head to toe’ and ‘front to back.’
    • Observe infection prevention measures, i.e., wash hands, put on gloves.
    • Ensure hands are warm.
    • Undress the baby and wrap in a warm towel. Expose the part you are to examine.

    General Appearance

    • The newborn assumes a flexion posture.
    • While the baby is settled, observe skin color. It should be pink.
    • Observe the state of alertness and activity.
    • Observe the range of spontaneous movement, posture, and muscle tone.

    Head

    • Assess size, shape, and symmetry; rule out excessive molding which may suggest the possibility of intracranial injury.
    • Scalp (vault) for swelling e.g. cephalohematoma, caput succedaneum, meningocele, etc.
    • Fontanelles: anterior and posterior fontanels should be flat, soft, and firm, but abnormalities may be a bulge or swelling.
    • Sutures; if separate or wide, it is suggestive of prematurity.
    • Head circumference 33-35cm (use a tape measure). Encircle occipital protuberance and frontal eminences.

    Face

    • Assess the symmetry of structures, features, and movement.
    • Inspect the eyes: setting, rule out Down’s syndrome – upward slanting of the eyes and the upper lip is shorter.
    • Check for cataracts, subconjunctival, nystagmus, strabismus hemorrhage, discharge.
    • Position in relation to the nasal bridge.
    • Palpate the eye to confirm the presence of normal eyeballs. Do this gently.
    • Hold the baby upright – eyes will open spontaneously.
    • Note the space between the eyes (should be 3cm apart).

    Nose

    • Located in the middle of the eye.
    • Check position, patency, and symmetry of the nares and septum. Nares should be equal in size and shape. Lack of patency may indicate choanal atresia (a congenital disorder where the back of the nasal passage (choana) is blocked, usually by abnormal bony or soft tissue).

    Mouth

    • Located in the midline.
    • Size, shape, symmetry, and movement.
    • Press the angle of the jaw to open the baby’s mouth.
    • Check the tongue for tongue tie (ankyloglossia). The tongue should be pink.
    • Lips and gums should be intact, pink, and moist.
    • Inspect tongue, gum, and palate: Pass a little finger in the baby’s mouth and feel for the palate for abnormalities like cleft palate or cleft lip.
    • Note the protrusion reflex of the tongue. The baby will suckle the finger.
    • Excessive salivation may be indicative of tracheoesophageal fistula (TEF).
    • Macroglossia, a protruding tongue that appears too large for the mouth, is indicative of a congenital disorder, e.g., Down’s syndrome or endocrine disorder like hypothyroidism.

    Ears

    • Assess for shape and cartilage development.
    • Observe the tympanic membrane.
    • Assess hearing acuity by evaluating the blink or startle reflex.

    Neck

    • The newborn’s neck is short.
    • Note symmetry.
    • The neck should be soft and free from masses.
    • The thyroid is non-palpable, palpable in hyperthyroidism.
    • Observe a web neck (extra and redundant skin).
    • Flex the neck gently. A web neck is associated with genetic disorders, e.g., Down’s syndrome or Turner’s syndrome.

    Clavicles, Arms, and Hands

    • Assess length, proportions, structure.
    • Count fingers and separate them.
    • Check for extra digits.
    • Rotate the wrists.

    Chest

    • Assess chest size, shape, and symmetry. Chest circumference is 30-36cm, approximately 2cm lower than the head circumference.
    • Observe respiratory movement.
    • Take respiration rate.
    • Observe the location of the nipples. Note size and shape. Nipples should be equally spaced from the middle.
    • Breast engorgement may be due to maternal hormones in both sexes.

    Abnormalities (Chest)

    • If the sternum is protruding, it indicates pectus carinatum, or pigeon chest, or sunken-pectus excavatum or funnel chest.
    • Widely spaced nipples are commonly seen in genetic disorders like Turner’s syndrome.
    • Supernumerary nipples 5-6cm below true nipples are often associated with congenital abnormalities.

    Lungs

    • Newborns are diaphragmatic breathers.
    • They may have paradoxical breathing: the thorax pulls inwards and the abdomen bulges.
    • Periods of apnea may exist lasting less than 15 minutes.
    • On auscultation, breath sounds should be equally distributed and clear.
    • Abnormal sounds may be; crackles, stridor, and wheeze. These should be reported.

    Heart

    • Assessment of the cardiovascular system begins with the assessment of color. Skin should be pink, including the mucous membrane.
    • Palpate chest point of maximum intensity.
    • Auscultate for heart rate, rhythm, and quality of heart sounds.
    • Assess peripheral pulses for rate, character, and quality. Pulses should be strong in the limbs.

    Abnormalities (Heart)

    • Bounding pulses are associated with patent ductus arteriosus.
    • Weakened or absent femoral pulses are associated with aortic lesions, e.g., coarctation of the aorta or low cardiac output.

    Abdomen

    • The abdomen should be round and soft.
    • Assess for visible peristalsis.
    • Check for major organs.
    • The umbilical cord should be located in the midline.
    • Two arteries and one vein should be visible on the umbilical cord. Absence of one of the arteries is associated with cardiovascular or renal anomalies.
    • Type of the cord.
    • Auscultate bowel sounds before palpation. They are audible within 15 minutes after birth.
    • Note the position of the liver, 1-2 cm below the right costal margin.
    • The spleen is felt 1-2 cm below the left costal margin.
    • The lower portion of the kidney is found 1-2 cm above the umbilicus on deep palpation.

    Genitalia

    Female Baby
    • At birth, the female genitalia are edematous, especially in breech deliveries. Labia majora is enlarged in full-term babies.
    • Inspect vulva for normal formation of: presence of labia, vaginal orifice, urethral orifice, and clitoris.
    • White mucoid discharge is common in the first week. Blood-tinged discharge may be noted as a result of withdrawn hormones.
    Male Baby
    • The foreskin completely covers the glans penis.
    • Abnormalities may include:
      • Hypospadias, epispadias.
      • Foreskin, check for phimosis.
    • Testes are present in the scrotum.
    • Scrotum: examine for undescended testes. The scrotum may be edematous at birth.
    • If testes have not descended by age 18 months, surgical intervention is required.

    Anus

    • Inspect for patency and masses.
    • Take the temperature, normal – 36.5-37°C.
    • Abnormalities: Anorectal malformations (imperforate anus).

    Musculoskeletal System

    • Examine the back when a child is in a prone position.
    • The back is gently rounded. Skin along the spine should be intact.
    • Any depression or openings along the spine may indicate a neural tube defect e.g. spina bifida.
    • Full range of motion should be easy in the newborn. When legs or arms are extended, they should return to the flexion position.
    Hips, legs, and feet:
    • Assess hips for stability.
    • Assess legs and feet for length, proportions, and symmetry.
    • Assess the structure and number of digits. Toes and fingers should be straight.
    Abnormalities Hands and Feet
    • Extra digits (polydactyly).
    • Absence of a digit (syndactyly).
    • Webbing of fingers or presence of a simian crease – a single long crease that crosses the entire palm is indicative of Down’s syndrome.
    • Macrodactyly (enlarged fingers or toes): indicative of neurofibromatosis, and overlapping 2nd and 3rd fingers, seen in infants with trisomy 18.
    • Clubfoot.

    Neurologic

    • Assess behavior.
    • Posture: position the baby adopts. In normal full-term, a baby lies with limbs flexed while in a supine position. In preterm babies, limbs are stretched out along the side of the trunk.
    • Muscle tone.
    • Cry: it should be lusty and full cry.
    • Reflexes: Moro, suck, rooting, grasp.

    Gastrointestinal Tract

    • Examine for rooting and swallowing reflexes.
    • An immature cardiac sphincter often leads to regurgitation.
    • Meconium is passed in the first 2 days after birth.

    Renal System

    • Expected urine output of a newborn is 250ml in 24hrs. The bladder capacity is 15mls full.
    • Because the urinary system is immature, urine is not concentrated. Urine is colorless or clear yellow; odorless with a specific gravity of approximately 1.020.

    Immune System

    • Infants are born with passive immunity from the mother, IgG through the placenta, IgA through breast milk. The immunity lasts 3-6 months.

    Thermoregulation

    • Newborns have a limited capacity to regulate heat loss and pain. The child’s ability to produce heat is immature and ineffective, thus prone to hypothermia. Infants lose heat because:
      • The metabolic rate is higher.
      • The surface area for heat loss is large.
      • Infants cannot shiver to generate heat.
      • Infants metabolize brown fat to generate heat.
      • Subcutaneous tissue is small.
    • Newborns lose heat by or through conduction, evaporation, convection, and radiation.

    Hemopoietic System

    • The blood volume of a newborn is 80-110ml/kg.
    • The lifespan of RBCs is 50-90 days.

    Hepatic System

    • There is unconjugated bilirubin in the 1st week of birth, and this is due to:
      • Increased bilirubin load on hepatocytes.
      • The lifespan of fetal RBCs is short.
      • Increased enterohepatic bilirubin circulation.
      • Defective bilirubin conjugation and excretion.
    • Physiological jaundice occurs after 1st day. This is due to the increased number and short lifespan of RBCs, and an immature liver to conjugate bilirubin.

    When the examination is completed, make the baby comfortable and warm.

    Record findings

    Report abnormalities detected to the in-charge of the ward pediatrician for appropriate action.

    Danger Signs in a Newborn

    • Breathing Difficulty: This includes rapid, labored, or irregular breathing patterns. If a newborn is struggling to breathe, it’s a serious concern.
    • Convulsions, Spasms, Loss of Consciousness, or Arching of the Back: These signs may indicate neurological issues or seizures.
    • Cyanosis (Blueness): Bluish discoloration of the skin or lips can be a sign of inadequate oxygenation and requires immediate attention.
    • Hot to Touch (Fever) or Cold to Touch: Abnormal body temperature, whether too high (fever) or too low, is a concern.
    • Bleeding: Any unexplained bleeding, especially from the umbilicus, eyes, or skin, is a danger sign.
    • Jaundice: While some level of jaundice is common in newborns, excessive or rapidly progressing jaundice may indicate a problem.
    • Pallor: An unusually pale complexion can signal anemia or other issues.
    • Diarrhea: Persistent diarrhea in a newborn is a cause for concern and can lead to dehydration.
    • Persistent Vomiting or Abdominal Distention: Frequent or forceful vomiting and abdominal swelling can indicate various medical conditions.
    • Poor Sucking or Not Feeding: If the baby is not feeding properly or is experiencing difficulty in sucking, it may not be getting adequate nutrition.
    • Pus or Redness of Umbilicus, Eyes, or Skin: Any sign of infection, such as pus or redness in these areas, should be addressed.
    • Swollen Limb: Unexplained swelling of a limb is a sign that requires immediate attention.
    • Lethargy: If the newborn is unusually tired, unresponsive, or lacks energy, it can indicate a medical issue.

    Daily Care of the Baby

    After one hour in the labor ward, the baby should be transferred with its mother in her arms to avoid heat loss and promote mother-baby attachment. The following are the main points considered during the care of the baby to prevent neonatal complications:

    1. Maintenance of Respiration

    • A baby with mucus should be observed and the airway cleared frequently using a suction catheter or bulb syringe.

    2. Provision of Warmth

    • The baby should be kept at a comfortable temperature between 21 – 25 degrees Celsius.
    • Overdressing and overheating should be avoided.
    • Baby’s temperature is maintained by proper monitoring of the incubator for those admitted in the nursery or skin-to-skin contact with the mother for babies who are sick.

    3. Provision of Food

    • A normal baby should be put onto the breast immediately after delivery or within the first 30 minutes.
    • Exclusive breastfeeding is up to 6 months. Mother should breastfeed the baby on demand.

    4. Protection from Injury and Infection

    • Midwives as well as mothers should not keep long nails, and even those for babies should be cut short to avoid injuring themselves.
    • Prevention of infection is important to minimize the risk of cross-infection to both midwives and mothers.
    • Infected babies should be isolated.
    • Installation of tetracycline eye drops as prophylaxis against gonococcal infection.

    5. Hygiene

    • The baby should be bathed daily and twice if the weather is not cold.
    • Special care is paid where two skin folds meet, and this is important.
    • The first and other non-urgent procedures may be deferred in order to minimize heat loss.

    6. Umbilical Cord

    • The cord is a source of infection in the neonatal period.
    • The midwives should aim at preventing hemorrhage and getting the cord dried up and separate cord cleaned with normal saline 0.9% at least 3 times in 24 hours.

    7. Prevention of Hemorrhage

    • Prophylactic vitamin K (1 mg) is given intramuscularly or orally to promote prothrombin formation.

    8. Observations

    • Temperature, respiration, and heart rate are checked every four hours.
    • The child is weighed twice weekly.
    • The condition of the cord is observed.
    • The color of the skin is monitored.
    • Urine and stool color and amount passed are noted.

    9. Assessment of Baby’s Progress

    • A thriving baby is a baby who is growing well. A baby who is growing well has bright eyes.
    • It is active and kicks rigorously.
    • It is free from infection.
    • Feeds well and is always eager to eat.
    • Fontanelles are not depressed.
    • Has a pink color with firm muscles.
    • Baby sleeps well, and when it wakes up, it stretches and yawns.
    • Passes normal quality of urine, stools are semi-solid and yellow.
    • In order to assess the above, it is necessary to examine the baby thoroughly at least once daily.

    10. Education of the Mother

    • Education of the mother should start from the antenatal period.
    • After delivery, the mother should be educated about the care of the baby and herself.
    • As the baby and mother’s condition is good, discharge is considered.
    • Every procedure that is carried out on the baby should be done when the mother is observing so that after discharge, she is able to carry it out, for example, dressing the baby, baby bathing, and care of the cord.

    11. Immunization

    • All neonates should be immunized with BCG vaccine and ‘OPV’ at birth.
    • Mother should be given vitamin A so that the baby can get it through breast milk.
    • The mother should be informed about the recommended national immunization schedules and the importance of completing immunization.

    Follow-up

    • Each infant should be followed up at least once every month for the first 3 months and subsequently at 3-month intervals until one year of age.
    • Follow-up is necessary for assessment of growth and development, early detection and management of health problems, and health education for prevention of childhood illnesses.

    Essential Elements of Daily Care

    1. Maintenance of Respiration: Continue to observe for signs of respiratory distress (grunting, nasal flaring, retractions). Keep the baby's nose and mouth clear of mucus.
    2. Provision of Warmth: Keep the room temperature comfortable (21-25°C). Avoid overdressing. Skin-to-skin contact remains an excellent method for temperature regulation.
    3. Provision of Food (Nutrition): Encourage exclusive breastfeeding on demand (typically every 2-3 hours). A breastfed baby is getting enough milk if they are passing urine 6-8 times a day and are gaining weight.
    4. Protection from Injury and Infection: Strict handwashing is the most important measure. Isolate any infected babies. Keep the baby's fingernails short.
    5. Hygiene:
      • Bathing: Daily bathing is not always necessary and can cause heat loss. "Top and tail" washing (cleaning the face, neck, hands, and bottom) with warm water is sufficient. The first full bath should be delayed until the baby's temperature is stable.
      • Skin Folds: Pay special attention to cleaning and drying skin folds (neck, armpits, groin) to prevent irritation.
    6. Umbilical Cord Care: The goal is to keep the cord clean and dry to prevent infection and promote separation. Clean the base of the cord with normal saline or sterile water if it becomes soiled with urine or stool. Fold the diaper down to expose the cord to air. Do not apply any traditional substances.
    7. Prevention of Haemorrhage: Administer Vitamin K (1mg) intramuscularly at birth to promote prothrombin formation and prevent bleeding.
    8. Observation and Assessment:
      • Vital Signs: Monitor temperature, respiration, and heart rate regularly as per facility protocol.
      • Weight: Weigh the baby at birth and then daily or twice weekly to monitor for appropriate weight gain (after the initial physiological weight loss).
      • Elimination: Record the passage of urine and stool, noting frequency, color, and consistency.
      • Overall Condition: Assess for skin color (jaundice), activity level, muscle tone, and feeding behaviour. A thriving baby is active, feeds eagerly, has a strong cry, and appears content after feeds.
    9. Education of the Mother: This is a continuous process. Teach the mother about feeding, bathing, cord care, signs of illness (e.g., fever, poor feeding, lethargy), and the importance of immunization. Ensure she is confident in caring for her baby before discharge.
    10. Immunization: Before discharge, ensure the baby receives the birth doses of vaccines according to the national schedule (BCG and Oral Polio Vaccine - OPV 0).
    11. Follow-up: Advise the mother on the schedule for postnatal and child welfare clinic visits for continued assessment of growth, development, and immunizations.

    Revision Questions

    1. What is the very first and most important action a nurse should take immediately after a baby is born to stimulate breathing and prevent heat loss?
    2. A newborn at 1 minute of life has a pink body and blue extremities, a heart rate of 90 bpm, makes a weak grimace when suctioned, has some flexion in the arms, and a slow, irregular cry. Calculate the Apgar score.
    3. Why is breastfeeding within the first hour of life so important for both the mother and the newborn? List three reasons.
    4. Describe the correct procedure for daily umbilical cord care. What should you advise the mother NOT to do?
    5. List five signs that indicate a newborn baby is "thriving."
    6. A mother asks why her healthy baby needs an injection (Vitamin K) right after birth. How would you explain the reason to her in simple terms?

    Immediate Care of the Newborn Read More »

    Changes in the newborn at birth

    Changes in the newborn at birth

    Paediatric Nursing I - Page 2: Physiology of the Newborn

    Learning Outcomes

    By the end of this section, the learner shall be able to:

    • Explain the major physiological changes a newborn undergoes at birth.
    • Describe the transition from fetal to pulmonary respiration.
    • Detail the changes in the cardiovascular system, including the closure of fetal shunts.
    • Discuss the immaturities of the newborn's digestive, hepatic, and renal systems.
    • Explain the mechanism of temperature regulation in a neonate.
    • Describe the status of the newborn's immune and haematopoietic systems at birth.

    Introduction to Newborn Physiology

    The moment of birth marks the most dramatic physiological transition in a person's life. The newborn must rapidly adapt from a dependent, fluid-filled intrauterine environment, where the placenta performed all vital functions, to an independent, air-breathing existence. This transition involves profound and immediate changes in nearly every organ system, most critically the respiratory and cardiovascular systems.

    Changes in the Newborn at Birth

    Changes in the newborn at birth are a number of changes that an infant’s body undergoes to allow it to survive outside the womb and adapt to life in a new environment.

    During intrauterine life, the fetus receives oxygen and nutrients by absorption through the placenta. It does not use its lungs or the digestive organs. Similarly, it excretes carbon dioxide and other waste products through placental structures into the mother’s blood.

    It is protected from many harmful factors/organisms by the placenta, and it is kept in a warm environment.

    Size and Growth:

    • The term infant weighs about 3000g. Boys weigh approximately 250g more than girls.
    • Infants of less than 2500g are classified as ‘low birth.’
    • During the first 3–5 days, up to 10% of birth weight is lost. This is regained by 7–10 days.
    • In the first month, average weight gain per week is 200g.

    Skin:

    • The newborn skin is immature, with a thin epithelial layer and incompletely developed sweat and sebaceous glands.
    • Combined with the high surface area to body mass ratio, this renders the baby prone to heat and water losses.
    • Numerous benign skin lesions occur, e.g. a greasy protective layer, the vernix caseosa.

    Temperature Regulation:

    • The neonate has a low metabolic activity resulting in a poor ability to produce heat.
    • The infant enters a much cooler environment than to which it is used. Its body is wet and thus liable to lose heat through evaporation.
    • Receptors on the baby’s skin send messages to the brain that the baby’s body is cold.
    • The baby’s body then creates heat by shivering and by burning stores of brown fat, a type of fat found only in fetuses and newborns.

    Head:

    • The average occipito-frontal head circumference is 35 cm.
    • Two soft spots or fontanels are present.
    • The anterior fontanel closes at 18 months of age, and the posterior closes by 6–8 weeks.

    Respiratory System:

    The initiation of respiration is the most crucial event in the newborn's adaptation. In the womb, the lungs are filled with fluid and are not used for gas exchange.

    • Changes that occur at birth allow the newborn to convert from dependence on the placenta to breathing air for the exchange of respiratory gases.
    • In utero, the airways and lungs are filled with fluid that contains surfactant.
    • The lung fluid is removed by the squeezing of the thorax during vaginal delivery and by reduced secretion and increased absorption mediated by fetal catecholamine during labor and after birth.
    • Surfactant lines the air–fluid interface of the alveoli and reduces the surface tension, thereby facilitating lung expansion. This is associated with a fall in pulmonary vascular resistance.
    • The rate is variable and normally ranges between 30 and 60 breaths/min. Brief self-limiting apnoeic spells might occur during sleep.

    Factors That Stimulate the First Breath

    The first breath is not a single event but a response to a combination of powerful stimuli:

    • Chemical Stimuli: During labor, placental blood flow is temporarily reduced, causing a slight decrease in oxygen (hypoxia) and an increase in carbon dioxide (hypercapnia) in the baby's blood. This change in blood chemistry directly stimulates the respiratory center in the brain.
    • Mechanical Stimuli: The passage through the birth canal squeezes the baby's chest (thoracic squeeze), forcing approximately one-third of the fluid out of the lungs. As the chest recoils after birth, air is drawn in for the first time. Crying also helps to expand the lungs.
    • Thermal Stimuli: The sudden change from the warm intrauterine environment (approx. 37°C) to the cooler delivery room stimulates sensory receptors in the skin, which in turn stimulate the respiratory center.
    • Sensory Stimuli: The new experiences of being touched, dried, and exposed to light and sound all provide stimulation that encourages breathing.
    Normal Breathing Patterns

    A newborn's respiratory rate is 30-60 breaths per minute. Their breathing is often irregular, with short pauses of 5-15 seconds (periodic breathing), which is normal. They are also obligatory nose breathers and use their abdominal muscles to breathe.

    Cardiovascular System

    With the first breath and the clamping of the umbilical cord, the entire circulatory system must reroute itself. Fetal circulation, which bypasses the lungs, must switch to newborn circulation, where blood is sent to the lungs for oxygenation.

    • Major changes in the lungs and circulation allow adaptation to extra-uterine life.
    • In the fetal circulation, the right-sided (pulmonary) pressure exceeds the left-sided (systemic) pressure. Blood flows from right to left through the foramen ovale and ductus arteriosus.
    • At birth, these relationships reverse: Left-sided (systemic) pressure rises with clamping of umbilical vessels. Right-sided (pulmonary) pressure falls as the lungs expand, and the rising pressure triggers a prostaglandin-mediated vasodilatation.
    • The foramen ovale and ductus arteriosus close functionally shortly after birth. The ductus closes due to muscular contraction in response to rising oxygen tension.

    Closure of Fetal Shunts

    This rerouting is accomplished by the closure of three fetal shunts:

    1. Foramen Ovale: A flap-like opening between the right and left atria. Increased blood flow from the newly functioning lungs raises the pressure in the left atrium, pushing this flap closed.
    2. Ductus Arteriosus: A blood vessel connecting the pulmonary artery to the aorta, which shunted blood away from the fetal lungs. It constricts and closes in response to higher oxygen levels in the blood and other hormonal changes.
    3. Ductus Venosus: A vessel that shunted oxygenated blood from the placenta away from the liver and directly to the heart. When the umbilical cord is clamped, blood flow ceases, and this shunt closes.

    A newborn's heart rate is typically 110-160 beats per minute and can fluctuate with activity and sleep.

    Thermoregulation

    Newborns are at a high risk for heat loss (hypothermia) due to several factors: a large body surface area to mass ratio, thin skin with less subcutaneous fat, and an inability to shiver effectively.

    How Newborns Lose Heat

    • Evaporation: Loss of heat as amniotic fluid dries from the skin after birth. (Action: Dry the baby thoroughly).
    • Conduction: Loss of heat through direct contact with a cooler surface, like a cold scale or stethoscope. (Action: Place the baby on warm surfaces; use skin-to-skin contact).
    • Convection: Loss of heat to cooler air currents, like drafts from windows or air conditioners. (Action: Keep the baby wrapped and away from drafts).
    • Radiation: Loss of heat to a nearby cooler object without direct contact, like a cold windowpane. (Action: Keep cribs away from cold outer walls).

    How Newborns Produce Heat

    The primary method of heat production in newborns is non-shivering thermogenesis. This is the metabolism of a special type of fat called brown adipose tissue (BAT), or "brown fat," which is uniquely located around the newborn's neck, back, and major organs. Burning this fat produces heat and warms the blood passing through it.

    Haematopoietic and Immune Systems

    Haematopoietic System (Blood)

    • Hemoglobin: Newborns have a high concentration of red blood cells and hemoglobin, specifically fetal hemoglobin (HbF), which is very efficient at carrying oxygen.
    • Physiological Jaundice: After birth, the excess red blood cells are broken down. This process releases bilirubin. The newborn's immature liver cannot process this bilirubin quickly, causing it to build up in the blood and lead to a temporary yellowing of the skin and eyes (physiological jaundice), typically appearing on the 2nd or 3rd day of life.
    • Vitamin K: The newborn's gut is sterile and cannot yet produce Vitamin K, which is essential for blood clotting. To prevent hemorrhagic disease of the newborn, all babies are given a prophylactic injection of Vitamin K at birth.

    Immune System

    The newborn's immune system is immature and inexperienced, making them vulnerable to infections. They receive temporary protection through passive immunity:

    • IgG: These antibodies cross the placenta from the mother during the third trimester, providing protection against diseases to which the mother is immune.
    • IgA: These antibodies are found in high concentrations in colostrum and breast milk, providing protection to the gastrointestinal and respiratory tracts.
    • The neonatal immune system is incomplete compared to older children and adults:
      • Impaired neutrophil reserves.
      • Diminished phagocytosis and intracellular killing capacity.
      • Decreased complement components.
      • Low IgG2, leading to infections with organisms.
    • The presence of maternal antibody in babies born greater than 30 weeks’ gestational age provides some protection against infection.

    Gastrointestinal and Renal Systems

    • At term, the secretory and absorbing surfaces are well developed, as are digestive enzymes, with the exception of pancreatic amylase.
    • Meconium is usually passed within 6 hrs, and delay beyond 24 hrs is considered abnormal.
    • Normally, meconium is replaced by yellow stool by day 3-4.

    Gastrointestinal (Digestive) System

  • Stomach: The stomach capacity is very small at birth (about 15-30 ml) and empties rapidly, which is why newborns need to feed frequently.
  • Gut: The gut is sterile at birth but is quickly colonized by bacteria from the environment and feeding. These bacteria are essential for digestion and Vitamin K production.
  • Stools: The stools change in a predictable pattern:
    1. Meconium: The first stool, passed within 24-48 hours. It is sticky, thick, dark green/black, and odorless.
    2. Transitional Stool: Appears by day 3-4. It is thin, slimy, and greenish-brown to yellowish-brown.
    3. Milk Stool: By day 4-5. If breastfed, the stool is loose, seedy, and mustard-yellow. If formula-fed, it is paler, firmer, and has a more noticeable odor.
  • Liver:

    • In the fetus, the liver acts as a storage site for sugar (glycogen) and iron.
    • When the baby is born, the liver has various functions: It produces substances that help the blood to clot. It begins breaking down waste products such as excess red blood cells. It produces a protein that helps break down bilirubin.
    • Immaturity of the liver enzymes responsible for conjugation of bilirubin is responsible for the ‘physiological jaundice’ which can occur from the second day of life.

    Genitourinary System:

    • The infant should void within the first 24 hours of life.

    The kidneys are able to produce urine, but their ability to concentrate it is limited. This makes newborns susceptible to dehydration if fluid intake is insufficient. A newborn should pass their first urine within 24 hours of birth, though it can take up to 48 hours.

    Central Nervous System:

    • The central nervous system (CNS) is relatively immature at birth.
    • Newborn infants sleep for a total of 16–20 hours each day.
    • The touch of a nipple on the baby’s face initiates the sequence of rooting and the complex coordination of lip, tongue, palate, and pharynx required for sucking and swallowing.
    • Crying (without tears) is the main means of communication.

    Revision Questions

    1. What are the four main stimuli that trigger the first breath in a newborn?
    2. Explain the function of the ductus arteriosus in the fetus and describe what causes it to close after birth.
    3. A newborn is placed on a cold weighing scale. Which mechanism of heat loss is this, and what is one nursing action to prevent it?
    4. What is physiological jaundice, and what two factors in the newborn's liver and blood system contribute to its development?
    5. Describe the normal progression of a newborn's stools, from meconium to milk stool. Why do these changes occur?
    6. Why is Vitamin K administered to all newborns at birth?

    Changes in the newborn at birth Read More »

    Want notes in PDF? Join our classes!!

    Send us a message on WhatsApp
    0726113908

    Scroll to Top
    Enable Notifications OK No thanks