


Gynaecology Full Revision Papers
Gynecology Question for Revision - Topic 1
This section covers congenital/acquired anomalies, uterine fibroids, and uterine prolapse.
SECTION A: Multiple Choice Questions (40 Marks)
1. Which of the following is a congenital abnormality of the female genital tract?
2. Imperforate hymen is classified as a:
3. Which of the following is NOT a complication of uterine fibroids?
4. Uterine prolapse is most commonly due to:
5. A transverse vaginal septum results from:
6. Which imaging technique is most useful for diagnosing uterine anomalies?
7. Mullerian agenesis results in:
8. Uterine fibroids are also known as:
9. Which condition is characterized by uterus divided into two horns?
10. A major symptom of vaginal atresia is:
SECTION B: Fill in the Blanks (10 Marks)
1. A ________ uterus is one where the uterine cavity is divided by a fibrous or muscular septum.
2. The absence of menstruation due to congenital absence of the uterus is called ________.
3. The congenital anomaly characterized by one uterine horn is known as ________ uterus.
4. The instrument used to visualize the inside of the uterus is called a ________.
5. ________ is the protrusion of the uterus through the vaginal canal.
6. A complete fusion failure of the Mullerian ducts results in a ________ uterus.
7. ________ is a benign tumor made of smooth muscle cells in the uterus.
8. A ________ is a transverse membrane within the vaginal canal, which may obstruct menstrual flow.
9. Vaginal agenesis is commonly associated with ________ syndrome.
10. ________ imaging is the first-line modality in evaluating uterine anomalies.
SECTION C: Short Essay Questions (10 Marks)
1. Define uterine fibroids and mention two symptoms.
Definition:
- Uterine fibroids, also called leiomyomas or myomas, are non-cancerous (benign) growths.
- They develop from the smooth muscle tissue in the wall of the uterus.
- They can vary in size from very small to quite large and can grow inside the uterine wall, just under the lining, or on the outer surface.
Two symptoms:
- Heavy Menstrual Bleeding (Menorrhagia): Periods that are much heavier or last much longer than usual, sometimes leading to anemia.
- Pelvic Pain or Pressure: A feeling of fullness, heaviness, or aching in the lower abdomen or pelvis, or pain during periods or sexual intercourse.
2. Explain the difference between bicornuate and septate uterus.
Bicornuate Uterus:
- This happens due to *incomplete fusion* of the Mullerian ducts.
- The uterus is shaped like a heart, with two distinct "horns" at the top, often seen externally.
- There may be a partial division *inside* the cavity, but the main problem is the external shape.
Septate Uterus:
- This happens due to *incomplete resorption* of the wall (septum) after the Mullerian ducts have fused.
- The external shape of the uterus is usually normal.
- There is a fibromuscular wall (septum) *inside* the uterine cavity that divides it, which can extend partly or completely down to the cervix.
3. Outline three causes of uterine prolapse.
- Vaginal Childbirth: The process of pushing a baby through the birth canal can stretch and weaken the muscles and ligaments that support the uterus. The risk increases with multiple vaginal deliveries or difficult births.
- Aging and Menopause: As women get older, the pelvic floor muscles naturally lose some strength. After menopause, the decrease in estrogen levels can make the pelvic tissues thinner and weaker.
- Increased Abdominal Pressure: Activities or conditions that constantly strain the muscles of the abdomen and pelvis can push down on the pelvic organs. Examples include chronic coughing, long-term constipation with straining, and regularly lifting heavy objects.
4. List three congenital structural abnormalities of the vagina.
- Vaginal Agenesis: This is when the vagina is either completely absent or much shorter than normal from birth.
- Transverse Vaginal Septum: A horizontal wall of tissue located within the vagina that can block the canal, sometimes completely.
- Imperforate Hymen: The hymen, which is supposed to have an opening, completely covers the vaginal opening from birth.
5. Describe how imperforate hymen presents clinically.
An imperforate hymen typically becomes noticeable when a girl reaches puberty and is expected to start menstruating (around age 12-15). The main way it presents is:
- Primary Amenorrhea: She does not have her first menstrual period.
- Cyclic Pelvic Pain: She experiences monthly pain in her lower abdomen or pelvis, similar to menstrual cramps, because menstrual blood is being produced but cannot escape.
- Abdominal Swelling/Mass: Over time, the trapped menstrual blood can build up in the vagina (hematocolpos) and sometimes the uterus, causing the lower abdomen to swell or a mass to be felt during examination.
6. State three complications of uterine anomalies during pregnancy.
- Recurrent Pregnancy Loss (Miscarriage): Some uterine shapes, particularly a septate uterus, can make it difficult for a pregnancy to continue because the blood supply to the septum is poor, or the space is restricted, leading to repeated miscarriages.
- Preterm Birth: An abnormally shaped uterus might not expand properly as the baby grows, leading to the baby being born too early (before 37 weeks of pregnancy).
- Fetal Malposition: The irregular shape of the uterus can prevent the baby from turning into the head-down position for delivery, increasing the chances of needing a Cesarean section or leading to breech presentation.
7. What is the role of ultrasound in diagnosing female genital abnormalities?
Ultrasound is the primary imaging method used to check for abnormalities in the female reproductive organs because it is:
- Visualisation: It provides clear images of the uterus, ovaries, and often the vagina. Transvaginal ultrasound (where a probe is inserted into the vagina) gives the best views of the uterus and ovaries.
- Structure Assessment: It helps doctors see the size, shape, and internal structure of the uterus, which is crucial for identifying anomalies like septums, horns, or absence of the uterus. 3D ultrasound is particularly good for mapping the uterine cavity and external shape.
- Identifying Blockages: In cases like imperforate hymen or vaginal septum, ultrasound can show the buildup of menstrual blood behind the blockage.
- Initial Screening: It is often the first test done when a congenital anomaly or condition like fibroids is suspected because it is widely available, safe, and relatively inexpensive.
8. Differentiate between congenital and acquired genital abnormalities.
- Congenital Abnormalities:
- These are problems that are present from birth.
- They happen because the reproductive organs did not form or develop correctly while the baby was in the womb.
- Examples: Bicornuate uterus, septate uterus, vaginal agenesis, imperforate hymen.
- Acquired Abnormalities:
- These are problems that a person develops *after* birth, during their life.
- They are caused by factors like infections, injuries, surgeries, or changes related to age or hormones.
- Examples: Uterine fibroids, pelvic inflammatory disease (PID), uterine prolapse, vaginal fistulas.
9. Briefly describe the management of a uterine prolapse in a multiparous woman.
Management for uterine prolapse in a woman who has had multiple children depends on how severe the prolapse is and her symptoms:
- Conservative Management (Mild Prolapse): For slight dropping with minimal symptoms, management includes advising on weight loss if overweight, avoiding heavy lifting, and teaching pelvic floor exercises (Kegel exercises) to strengthen the supporting muscles.
- Pessaries (Moderate to Severe Prolapse): These are removable devices inserted into the vagina to hold the uterus in place. They are a good option if the woman does not want surgery or has other health issues that make surgery risky.
- Surgical Management (More Severe/Symptomatic Prolapse): If conservative methods fail or the prolapse is significant, surgery can be done. This might involve stitching the pelvic floor tissues to provide support, or removing the uterus (hysterectomy) along with repairing the vaginal support.
10. List three complications of untreated vaginal septum.
- Accumulation of Menstrual Blood (Hematocolpos): If a transverse septum completely blocks the vagina and there is a functioning uterus, menstrual blood will collect above the septum, leading to severe pain, a noticeable mass in the abdomen, and potentially affecting kidney function over time due to pressure.
- Painful Intercourse (Dyspareunia): A rigid or thick septum can make sexual activity difficult and painful.
- Complications during Childbirth: If a vaginal septum is not identified and removed before pregnancy, it can cause problems during labor by blocking the baby's passage through the birth canal, potentially requiring a Cesarean section.
SECTION D: Long Essay Questions (10 Marks Each)
1. Discuss the causes, signs and symptoms, diagnosis, and management of uterine fibroids.
Causes of Uterine Fibroids:
- Hormones: Estrogen and progesterone, the main female hormones, seem to fuel the growth of fibroids. Fibroids tend to grow during the reproductive years when hormone levels are high and shrink after menopause when levels drop.
- Genetics: Fibroids often run in families, suggesting a genetic link.
- Other Growth Factors: Substances in the body that help cells grow also seem to play a role in fibroid development.
- Origin: They start from a single muscle cell in the uterus that multiplies repeatedly.
Signs and Symptoms:
- Heavy or Prolonged Menstrual Bleeding (Menorrhagia): This is the most common symptom, leading to anemia in some women.
- Pelvic Pressure or Pain: Large fibroids can press on the bladder (causing frequent urination), rectum (causing constipation), or cause a feeling of heaviness or fullness in the lower abdomen. Pain may occur during periods or sexual intercourse.
- Enlarged Abdomen: Very large fibroids can make the abdomen look swollen, similar to pregnancy.
- Infertility or Pregnancy Problems: Fibroids, especially those inside the uterine cavity, can make it hard to get pregnant, cause miscarriages, or lead to preterm labor.
- Lower Back Ache: Fibroids pressing on nerves or muscles in the pelvis can cause back pain.
Diagnosis:
- Pelvic Examination: The doctor may feel an enlarged or irregularly shaped uterus during a routine exam.
- Ultrasound: This is the main tool for confirming fibroids, showing their size, location, and number. Transvaginal ultrasound gives better detail.
- MRI: Used for more complex cases, large fibroids, or when planning surgery, providing detailed images.
- Hysteroscopy: A small camera is inserted into the uterus to visualize fibroids growing inside the cavity.
- Laparoscopy: A minimally invasive surgical procedure where a camera is inserted through a small cut in the abdomen to view fibroids on the outside of the uterus.
Management:
- Watchful Waiting: For small, asymptomatic fibroids, no treatment is needed, and they are monitored over time.
- Medications:
- Pain relievers (like ibuprofen) for mild pain.
- Hormonal medications (like birth control pills, progesterone, GnRH agonists) to reduce bleeding and shrink fibroids temporarily by lowering estrogen levels.
- Non-Surgical Procedures:
- Uterine Artery Embolization (UAE): Blocking the blood vessels that supply the fibroids to shrink them.
- Focused Ultrasound Surgery (FUS): Using ultrasound waves to destroy fibroid tissue.
- Surgical Treatment:
- Myomectomy: Surgical removal of the fibroids while leaving the uterus intact, often chosen by women who want to have children in the future. Can be done through open surgery, laparoscopy, or hysteroscopy depending on fibroid location.
- Hysterectomy: Removal of the entire uterus. This is a permanent solution, usually chosen by women who have severe symptoms and do not plan to have more children.
2. Explain congenital malformations of the uterus, highlighting types, clinical features, and management.
What are Congenital Malformations of the Uterus?
- These are birth defects where the uterus doesn't form in the typical way while a female baby is developing in the womb.
- They happen due to problems with how the Mullerian ducts form and fuse together.
- These malformations can affect the shape, size, or presence of the uterus, fallopian tubes, cervix, and upper vagina.
Types of Uterine Anomalies:
- Septate Uterus: The most common type. A wall (septum) divides the inside of the uterus, usually impacting the uterine cavity shape more than the external shape.
- Bicornuate Uterus: The uterus has two distinct horns, often giving it a heart shape externally, due to partial fusion failure.
- Unicornuate Uterus: Only one side of the uterus develops fully, resulting in a smaller uterus with a single horn.
- Didelphys Uterus: Complete failure of fusion results in two separate uteri, each with its own cervix, and sometimes a double vagina.
- Arcuate Uterus: A mild indentation at the top of the uterine cavity; often considered a normal variant.
- Uterine Agenesis/Hypoplasia: Complete absence (agenesis) or underdevelopment (hypoplasia) of the uterus.
Clinical Features:
- Many women with uterine anomalies have no symptoms and may only discover the condition incidentally during imaging for other reasons.
- Reproductive Problems: The most common issues are difficulty getting pregnant (infertility), recurrent miscarriages, and preterm birth. Septate uterus is strongly linked to recurrent pregnancy loss.
- Menstrual Issues: Some anomalies, especially those with associated vaginal blockages (like a transverse septum in the vagina), can cause absence of menstruation (amenorrhea) with cyclic pain.
- Pelvic Pain: Less commonly, some anomalies might cause pelvic pain.
Management:
- Observation: If the anomaly is not causing symptoms or reproductive problems (like an arcuate uterus or some bicornuate uteri), no treatment may be needed.
- Surgical Correction: Surgery is typically offered when the anomaly is causing recurrent miscarriages or infertility.
- Hysteroscopic Septum Resection: Surgery done through the vagina using a camera to remove a uterine septum. This is a common procedure with good success rates for improving pregnancy outcomes in women with septate uteri and recurrent loss.
- Metroplasty: More complex surgeries to reconstruct the uterus (e.g., joining the two horns of a bicornuate uterus), less commonly performed now compared to septum resection.
- Vaginoplasty: Creating a vagina if it is absent or underdeveloped (as in vaginal agenesis).
- Counseling: Providing information and support regarding the potential impact on fertility and pregnancy.
3. Discuss the types, causes, and management of vaginal agenesis.
What is Vaginal Agenesis?
- Vaginal agenesis is a congenital condition where the vagina is absent or significantly shorter than normal.
- It often occurs as part of a syndrome called Mayer-von Rokitansky-Küster-Hauser (MRKH) syndrome, where the uterus is also typically absent or very underdeveloped, while the ovaries are usually normal.
- Isolated vaginal agenesis (vagina is absent, but uterus is present and functional) is less common but possible.
Causes:
- Vaginal agenesis is a birth defect resulting from problems during the early development of the reproductive system in the womb.
- It is primarily due to the failure of the Mullerian ducts to develop properly, which are supposed to form the uterus, fallopian tubes, cervix, and upper vagina.
- The exact reasons why this happens are often unclear, but it is sometimes associated with genetic factors.
Management:
- The main goal of management is to create a functional vagina for sexual intercourse if desired by the individual.
- Non-Surgical Dilation: This is often the first approach. It involves using a series of progressively larger dilators (smooth, rod-like instruments) to stretch the existing vaginal dimple or pouch over time, creating a functional vaginal canal. This requires commitment and consistency.
- Surgical Creation of a Vagina (Vaginoplasty): If dilation is unsuccessful or not suitable, surgery can be performed. Different surgical techniques exist, including using skin grafts, portions of the bowel, or other tissues to create a new vaginal canal.
- Timing of Intervention: Treatment is typically delayed until the individual is old enough to understand her condition, is emotionally mature, and desires to be sexually active.
- Psychological Support: Counseling is very important to help individuals and their families understand the condition and cope with the emotional and psychological impact, especially concerns about body image, identity, and relationships.
- Addressing Associated Anomalies: In MRKH syndrome, the ovaries are functional, so hormonal development and secondary sexual characteristics (like breast growth) occur. However, because the uterus is absent, pregnancy is not possible directly, though having genetic children via surrogacy is an option if ovaries are present. Other associated abnormalities, like kidney or skeletal problems, also need to be evaluated and managed.
4. Describe uterine prolapse under the following: causes, degrees, clinical features, and treatment options.
What is Uterine Prolapse?
- Uterine prolapse occurs when the uterus drops down into or out of the vagina.
- It happens because the pelvic floor muscles, ligaments, and connective tissues that support the uterus weaken and can no longer hold it in its normal position.
- It is a type of pelvic organ prolapse, which can also involve the bladder (cystocele), rectum (rectocele), or vagina itself.
Causes:
- Vaginal Childbirth: The most common cause. The stress and stretching of the pelvic floor during labor and delivery, especially with multiple births, large babies, or assisted deliveries (like forceps), can damage the support structures.
- Aging: As women age, muscles naturally lose tone and strength, including the pelvic floor muscles.
- Menopause: The decrease in estrogen after menopause causes tissues to become thinner and less elastic, weakening the pelvic support.
- Increased Abdominal Pressure: Chronic conditions that put pressure on the abdomen and pelvis, such as:
- Chronic cough (e.g., from smoking or asthma)
- Chronic constipation and straining during bowel movements
- Heavy lifting (occupation or exercise)
- Obesity
- Genetics: Some women may have a genetic predisposition to weaker connective tissues.
Degrees (Staging): The severity is classified based on how far the uterus has descended:
- Stage 1: The uterus drops into the upper part of the vagina.
- Stage 2: The uterus has dropped further and reaches the opening of the vagina.
- Stage 3: The cervix (the lower part of the uterus) is outside the vaginal opening.
- Stage 4: Most or all of the uterus is outside the vagina.
Clinical Features (Signs and Symptoms):
- Symptoms vary depending on the stage; mild prolapse may have no symptoms.
- Feeling of Heaviness or Pressure: A dragging sensation in the pelvis or lower abdomen.
- Vaginal Bulge: The sensation of a lump or "something falling out" in the vagina.
- Difficulty with Urination: Frequent urination, feeling of incomplete bladder emptying, or stress incontinence (leaking urine with cough, sneeze, or exercise). In severe cases, difficulty passing urine.
- Difficulty with Bowel Movements: Constipation or the need to press on the vagina to help empty the bowels (in cases of associated rectocele).
- Lower Back Pain: May be associated with the dragging sensation.
- Pain or Discomfort during Intercourse: Can be affected by the presence of prolapse.
Treatment Options:
- Conservative (Non-Surgical):
- Lifestyle Changes: Weight loss, managing constipation, avoiding heavy lifting, stopping smoking (to reduce cough).
- Pelvic Floor Exercises (Kegels): Strengthening the muscles to improve support. Most effective for mild prolapse or prevention.
- Vaginal Pessaries: Removable devices made of silicone or rubber inserted into the vagina to hold the uterus and other organs in place. A good option for symptomatic relief, especially if surgery is not desired or possible.
- Surgical:
- Surgery aims to repair the weakened pelvic floor tissues and return the organs to their correct position.
- Hysterectomy (Uterus Removal): Often part of surgical repair for uterine prolapse, followed by stitching the top of the vagina to stable ligaments to prevent vaginal vault prolapse.
- Uterine Suspension: Techniques to reattach the uterus to other pelvic structures, preserving the uterus (for women who still want to have children).
- Repair of other associated prolapses (cystocele, rectocele) is often done at the same time.
- The choice of treatment depends on the severity of the prolapse, the woman's age and overall health, her symptoms, desire for future pregnancies, and personal preference.
5. Explain Mullerian anomalies with examples and their implications on fertility.
Mullerian Anomalies Explained:
- Mullerian anomalies are birth defects of the female reproductive tract.
- They happen very early in development (in the first few months of pregnancy) when two structures called Mullerian ducts do not form, fuse, or clear out properly.
- These ducts are supposed to develop into the uterus, fallopian tubes, cervix, and the upper part of the vagina.
- Problems with this process lead to abnormal shapes or absence of these organs.
Examples of Mullerian Anomalies:
- Septate Uterus: A wall inside the uterine cavity.
- Bicornuate Uterus: A heart-shaped uterus with two horns.
- Unicornuate Uterus: A uterus with only one fully formed side.
- Didelphys Uterus: Two separate uteri.
- Vaginal Agenesis: Absence of the vagina.
- Transverse Vaginal Septum: A blocking wall in the vagina.
Implications on Fertility and Pregnancy:
- Infertility: Some anomalies can make it harder to get pregnant. For instance, a severe septum or very abnormal uterine shape might make it difficult for an embryo to implant or grow. Anomalies affecting the fallopian tubes (though less common as a primary Mullerian issue) can also cause infertility.
- Recurrent Miscarriage: This is a major problem with certain anomalies, particularly the septate uterus. The poor blood supply in the septum can prevent a pregnancy from developing correctly, leading to repeated losses early in pregnancy.
- Preterm Birth: An irregularly shaped uterus may not stretch properly as the pregnancy progresses, increasing the risk of the baby being born too early.
- Fetal Malposition: The baby might not be able to get into the head-down position easily in an abnormally shaped uterus, leading to breech presentation or other positions requiring a Cesarean section.
- Obstructed Labor: If there are associated cervical or vaginal anomalies (like a rigid septum), they can block the baby's passage during delivery.
- Vaginal Agenesis (MRKH Syndrome): While ovaries are usually functional (meaning eggs are produced), pregnancy is not possible because the uterus is absent. Genetic children can be had through assisted reproductive technologies like IVF and surrogacy.
6. Discuss the causes and management of imperforate hymen in adolescent girls.
Causes of Imperforate Hymen:
- This is a congenital condition, meaning it is present at birth.
- During the development of the female reproductive organs in the womb, the hymen is supposed to have an opening.
- An imperforate hymen occurs when this opening doesn't form completely, leaving the hymen as a solid membrane covering the vaginal entrance.
- It's a developmental issue, not caused by infection or injury.
Management in Adolescent Girls:
- Imperforate hymen is usually diagnosed in adolescence when a girl does not start menstruating and develops monthly pelvic pain.
- The main treatment is a simple surgical procedure called a **hymenotomy** or **hymenectomy**.
- This involves making a small cut or removing a portion of the hymen to create an opening for menstrual blood to escape.
- The procedure is usually minor and done under anesthesia.
- It is important to perform this relatively soon after diagnosis to relieve pain and prevent long-term complications from the buildup of menstrual blood, such as pressure on the urinary tract or potential effects on fertility (though less common).
- After the procedure, normal menstruation can begin, and sexual function is usually possible once healed.
7. Write an essay on pelvic organ prolapse: types, risk factors, signs and management.
Pelvic organ prolapse is a condition where organs in the pelvis, such as the uterus, bladder, rectum, or vagina, drop down from their normal positions and bulge into or outside the vagina. This happens when the pelvic floor, a strong set of muscles and tissues that support these organs, becomes weak or damaged.
Types of Pelvic Organ Prolapse:
- Cystocele: The bladder bulges into the front wall of the vagina.
- Rectocele: The rectum bulges into the back wall of the vagina.
- Uterine Prolapse: The uterus descends into the vagina.
- Enterocele: The small intestine bulges into the upper part of the vagina.
- Vaginal Vault Prolapse: The top of the vagina collapses after a hysterectomy (removal of the uterus).
Risk Factors:
- Vaginal Childbirth: The stretching and strain during vaginal delivery, especially difficult births, large babies, or multiple pregnancies, significantly weaken the pelvic floor.
- Aging: The natural process of getting older leads to loss of muscle strength and tissue elasticity.
- Menopause: Decreased estrogen levels after menopause contribute to weakening of pelvic tissues.
- Increased Abdominal Pressure:
- Chronic cough (e.g., from smoking or respiratory conditions).
- Chronic constipation and straining during bowel movements.
- Heavy lifting.
- Obesity.
- Surgery: Previous pelvic surgeries can sometimes weaken support structures.
- Genetics: Some women may have weaker connective tissues from birth.
Signs and Symptoms:
- Symptoms vary from mild to severe and may worsen throughout the day or after physical activity.
- Vaginal Bulge or Lump: A feeling of something coming down or out of the vagina.
- Pelvic Pressure/Heaviness: A feeling of fullness, aching, or dragging in the lower abdomen or pelvis.
- Urinary Symptoms: Difficulty emptying the bladder, frequent urination, urgent need to urinate, or leakage of urine (stress incontinence).
- Bowel Symptoms: Difficulty passing stool, needing to push on the vagina to empty the rectum (splinting), or feeling of incomplete emptying.
- Pain or Discomfort: Lower back ache or pain during sexual intercourse.
Management:
- Treatment options depend on the type and severity of prolapse, the woman's symptoms, age, health, desire for future pregnancies, and personal choice.
- Conservative (Non-Surgical) Management:
- Lifestyle Changes: Losing weight, managing constipation, treating chronic cough, avoiding heavy lifting.
- Pelvic Floor Muscle Training (Kegel Exercises): Strengthening the muscles to provide better support. Most helpful for mild prolapse or preventing progression.
- Vaginal Pessaries: Removable devices inserted into the vagina to physically support the prolapsed organs. Need to be fitted and cleaned regularly.
- Surgical Management:
- Surgery aims to restore the normal anatomy and function of the pelvic organs.
- The type of surgery depends on the specific organs prolapsed. It may involve repairing the weakened tissues using stitches, or sometimes using surgical mesh for reinforcement.
- For uterine prolapse, surgery might involve removing the uterus (hysterectomy) and providing support for the top of the vagina, or suspending the uterus to ligaments to keep it in place (uterus preservation).
- Cystocele and rectocele repairs involve tightening the tissues supporting the bladder and rectum, respectively.
- Patients should discuss the risks, benefits, and success rates of different options with their doctor.
8. Describe uterine inversion: causes, diagnosis, emergency management, and prevention.
Uterine inversion is a rare but very serious complication that can happen immediately after childbirth. It means the uterus turns partially or completely inside out, pulling the top part down through the cervix. It requires urgent medical attention.
Causes:
- Uterine inversion usually happens during the third stage of labor (after the baby is born but before the placenta is delivered).
- Excessive Cord Traction: The most common cause is pulling too hard on the umbilical cord before the placenta has separated properly from the uterine wall, especially if the uterus is relaxed.
- Uterine Atony: A uterus that is not contracting well after delivery is more prone to inversion.
- Placenta Implantation: If the placenta is attached to the top part of the uterus (fundus), this area may be pulled down when the placenta is delivered.
- Other Factors: Short umbilical cord, rapid labor, use of certain medications that relax the uterus, or a history of previous inversion can increase the risk.
Diagnosis:
- Diagnosis is usually made quickly based on signs observed immediately after delivery.
- Severe Pain: The woman experiences sudden, severe pain in the lower abdomen.
- Postpartum Hemorrhage: There is often significant and sudden heavy bleeding.
- Fundus Not Palpable: When the doctor or midwife feels the abdomen, they cannot feel the top of the uterus in its normal position.
- Visual Inspection: The inverted uterus or cervix may be seen coming through the vagina or even outside the body.
- Shock: Due to severe pain and blood loss, the woman can quickly develop signs of shock (low blood pressure, fast heart rate, pale skin).
Emergency Management:
- This is a life-threatening emergency needing immediate action.
- Call for Help: Quickly alert senior medical staff, including obstetricians and anesthesiologists.
- Resuscitation: Give intravenous fluids immediately to treat shock and control bleeding. Blood transfusion is often needed.
- Manual Replacement: The most important and urgent step is to manually push the inverted uterus back into its normal position using a gloved hand inserted into the vagina. This must be done as soon as possible.
- Uterine Relaxants: Medications (like terbutaline or magnesium sulfate) may be given temporarily to relax the uterus and make manual replacement easier.
- Uterotonics: Once the uterus is back in place, medications (like oxytocin) are given to make the uterus contract and stay in place, and to control bleeding.
- Surgical Management: If manual replacement fails, surgery is required to reposition the uterus.
Prevention:
- Proper management of the third stage of labor is key.
- Controlled Cord Traction: Only apply gentle traction to the umbilical cord to deliver the placenta *after* confirming signs that the placenta has separated and while applying counter-pressure above the pubic bone.
- Avoid Excessive Cord Pulling: Do not pull hard on the cord, especially if the uterus is relaxed.
- Check Uterine Tone: Ensure the uterus is contracting well after delivery before attempting placental removal.
- Be vigilant for signs of inversion, especially in women with risk factors.
9. Discuss the surgical interventions available for correcting structural abnormalities of the female genital tract.
Surgery is often used to correct congenital structural problems of the female genital tract, particularly when they cause symptoms like blocked menstruation, pain, difficulty with sex, or affect the ability to have a successful pregnancy. The type of surgery depends on the specific abnormality:
Surgical Interventions:
- Hymenotomy/Hymenectomy:
- Purpose: To open up an imperforate or abnormally thick hymen.
- Procedure: A small incision or removal of the obstructing hymen tissue.
- Used For: Imperforate hymen causing blocked menstrual flow.
- Vaginal Septum Resection:
- Purpose: To remove a transverse or longitudinal vaginal septum.
- Procedure: Surgical cutting and removal of the septum tissue.
- Used For: Vaginal septums causing blocked menstrual flow, painful intercourse, or potential problems during childbirth.
- Hysteroscopic Septum Resection:
- Purpose: To remove a septum that divides the inside of the uterus.
- Procedure: Done using a hysteroscope (camera) inserted through the cervix. The septum is cut and removed from inside the uterus. Minimally invasive.
- Used For: Septate uterus causing recurrent miscarriages or infertility.
- Uterine Reconstruction (Metroplasty):
- Purpose: To reshape or unify an abnormally formed uterus.
- Procedure: Various techniques, often open abdominal surgery, to reshape a bicornuate or other complex uterine anomaly. Less common now than hysteroscopic septum resection.
- Used For: Selected complex uterine anomalies impacting pregnancy, though benefits can vary.
- Vaginoplasty:
- Purpose: To create a functional vagina.
- Procedure: Surgical creation of a vaginal canal using methods like skin grafts, bowel segments, or other tissues.
- Used For: Vaginal agenesis (absence of the vagina), often as part of MRKH syndrome.
- Laparoscopy:
- Role: Often used for diagnosis and sometimes for surgical correction (e.g., accessing a rudimentary horn of a unicornuate uterus or assisting with complex vaginal/uterine reconstruction). It allows visualization of the pelvic organs through small incisions.
The choice of surgery depends on the specific anomaly, its severity, the symptoms it causes, and the patient's future reproductive goals.
10. Explain the impact of structural abnormalities of the female genital tract on reproduction and psychosocial wellbeing.
Structural abnormalities of the female genital tract, whether present from birth or developed later, can have significant effects on both a woman's ability to have children and her emotional and social health.
Impact on Reproduction:
- Infertility: Some anomalies can make it difficult or impossible to conceive naturally. For example, a complete vaginal blockage prevents intercourse, and severe uterine malformations may hinder implantation or development.
- Recurrent Miscarriage: Certain uterine shapes, especially a septate uterus, are strongly linked to repeated early pregnancy losses.
- Preterm Birth: Abnormal uterine shapes can lead to the baby being born too early because the uterus cannot expand normally.
- Complications during Pregnancy and Birth: Anomalies can increase risks like poor fetal growth, placental problems, or require a Cesarean section due to difficult labor or the baby's position.
- Primary Amenorrhea: Conditions like absent uterus or complete vaginal blockage cause a girl not to start menstruating, which is a clear sign of a reproductive system issue.
Impact on Psychosocial Wellbeing:
- Emotional Distress: Discovering a structural abnormality can lead to feelings of shock, sadness, anger, and confusion.
- Anxiety and Depression: Coping with infertility, recurrent pregnancy loss, the need for multiple medical appointments and procedures, and the uncertainty of outcomes can significantly impact mental health.
- Body Image Issues: Anomalies, especially those affecting the vagina or external appearance, can affect a woman's self-esteem and how she feels about her body.
- Impact on Relationships: Difficulties with sexual intimacy due to pain or structural issues can strain relationships with partners. Infertility can also put stress on a couple.
- Social Isolation: Some women may feel different or isolated from peers who do not face similar challenges, particularly regarding menstruation, sexual activity, or childbearing.
- Identity Concerns: For young women diagnosed around puberty, understanding their condition and its implications for their future can affect their developing identity and sense of womanhood.
Gynecology Question for Revision - Topic 2
This section covers Menstrual Disorders like amenorrhea, dysmenorrhea, menorrhagia, and PMS.
SECTION A: Multiple Choice Questions (40 Marks)
1. Which of the following is a type of menstrual disorder?
2. Primary amenorrhea is defined as:
3. Menorrhagia refers to:
4. Dysmenorrhea is best described as:
5. Oligomenorrhea refers to:
6. A common cause of secondary amenorrhea is:
7. Which hormone is primarily responsible for regulating menstruation?
8. Premenstrual syndrome (PMS) includes all EXCEPT:
9. Polycystic Ovary Syndrome (PCOS) commonly causes:
10. The most appropriate test for confirming amenorrhea is:
SECTION B: Fill in the Blanks (10 Marks)
1. ________ is defined as the absence of menstrual periods.
2. Painful menstruation is medically termed as ________.
3. Menstrual flow that lasts longer than 7 days is called ________.
4. ________ is the hormone responsible for the proliferation of the endometrium.
5. A woman who has never menstruated is said to have ________ amenorrhea.
6. ________ syndrome is a common endocrine disorder causing menstrual irregularities.
7. The average menstrual cycle length is about ________ days.
8. Hormonal imbalance is a common cause of ________ dysfunction.
9. Premenstrual syndrome occurs in the ________ phase of the menstrual cycle.
10. ________ is used to describe menstruation occurring less frequently than every 35 days.
SECTION C: Short Essay Questions (10 Marks)
1. Define dysmenorrhea and list two types.
Definition:
- Dysmenorrhea is the medical term for painful menstrual periods, characterized by cramping pain in the lower abdomen that may spread to the back or thighs.
- The pain usually begins just before or at the start of menstruation and lasts for 1 to 3 days.
Two Types:
- Primary Dysmenorrhea: Painful periods that are not caused by an underlying medical condition of the reproductive organs. It's thought to be caused by chemicals called prostaglandins in the uterus that cause muscle contractions.
- Secondary Dysmenorrhea: Painful periods that are caused by an underlying medical condition of the reproductive organs, such as endometriosis, uterine fibroids, adenomyosis, or pelvic inflammatory disease (PID). The pain often starts earlier in the cycle and lasts longer than typical menstrual cramps.
2. Describe three common causes of secondary amenorrhea.
Secondary amenorrhea is when periods stop after they have already started regularly. Common causes include:
- Pregnancy: This is the most frequent cause. When a woman becomes pregnant, her menstrual cycle stops as the body supports the developing fetus.
- Breastfeeding (Lactational Amenorrhea): Hormones produced during breastfeeding can suppress ovulation and menstruation, causing periods to stop or become irregular.
- Significant Weight Loss or Excessive Exercise: Extreme dieting, very low body weight, or intense physical training can disrupt the hormonal signals needed for menstruation to occur.
- Stress: High levels of physical or emotional stress can affect the part of the brain that controls the menstrual cycle, leading to missed periods.
- Certain Medical Conditions: Hormonal disorders like Polycystic Ovary Syndrome (PCOS), thyroid problems, or problems with the pituitary gland can disrupt menstruation.
3. Outline the symptoms of premenstrual syndrome (PMS).
Premenstrual syndrome (PMS) involves a range of physical and emotional symptoms that happen in the week or two before menstruation. Symptoms vary among women but commonly include:
- Emotional Symptoms: Mood swings, irritability, anxiety, depression, feeling tearful, difficulty concentrating, feeling overwhelmed.
- Physical Symptoms: Bloating, breast tenderness or swelling, headache, fatigue, changes in appetite (cravings), joint or muscle pain, acne flares, and digestive issues (constipation or diarrhea).
4. List three complications of untreated menorrhagia.
Untreated heavy menstrual bleeding (menorrhagia) can lead to several health problems:
- Anemia: Significant blood loss over time can lead to iron deficiency anemia, causing fatigue, weakness, paleness, and shortness of breath.
- Severe Pain: Menorrhagia can sometimes be associated with severe cramping or pelvic pain.
- Disruption to Quality of Life: Heavy bleeding can interfere with daily activities, work, social events, and exercise due to discomfort, fear of accidents, and fatigue.
- Increased Risk of Other Conditions: The underlying cause of menorrhagia (like fibroids or polyps) can potentially lead to other complications if not treated.
5. Explain the difference between oligomenorrhea and polymenorrhea.
- Oligomenorrhea: This refers to menstrual periods that occur *infrequently*. The time between periods is longer than a normal cycle, usually defined as cycles lasting more than 35 days but less than 6 months.
- Polymenorrhea: This refers to menstrual periods that occur *frequently*. The time between periods is shorter than a normal cycle, usually defined as cycles lasting less than 21 days.
6. State three diagnostic tests used to evaluate amenorrhea.
When investigating the cause of amenorrhea (absent periods), doctors may use several tests:
- Pregnancy Test: This is always the first test for secondary amenorrhea in women of reproductive age to rule out pregnancy.
- Hormone Blood Tests: Measuring levels of hormones like FSH, LH, estrogen, prolactin, thyroid hormones, and androgens can help identify hormonal imbalances or problems with the ovaries, pituitary gland, or hypothalamus.
- Imaging Tests:
- **Ultrasound:** To check for abnormalities in the uterus and ovaries, such as absence of the uterus, structural problems, or polycystic ovaries.
- **MRI:** May be used for more detailed images of the brain (pituitary gland) or pelvic organs if needed.
- Genetic Testing: May be done in cases of primary amenorrhea with abnormal development of reproductive organs.
7. Describe how PCOS can lead to menstrual disorders.
Polycystic Ovary Syndrome (PCOS) is a hormonal disorder that commonly causes menstrual problems:
- Anovulation or Irregular Ovulation: PCOS disrupts the normal process of ovulation (release of an egg from the ovary). Instead of ovulating regularly, women with PCOS may ovulate infrequently or not at all.
- Hormonal Imbalance: PCOS involves higher-than-normal levels of male hormones (androgens) and often insulin resistance. These hormonal imbalances interfere with the signals from the brain to the ovaries that control the menstrual cycle.
- Effect on Uterine Lining: Without regular ovulation and progesterone production, the uterine lining may not develop and shed normally, leading to irregular, infrequent, or absent periods.
8. What are three possible side effects of hormonal therapy for menstrual disorders?
Hormonal therapies, such as birth control pills, progesterone, or GnRH agonists, are often used to treat menstrual disorders. Possible side effects can include:
- Nausea and Vomiting: Especially when starting treatment.
- Headache: Can be a common side effect.
- Mood Changes: Some women may experience mood swings, irritability, or depression.
- Breast Tenderness: Feeling of soreness or swelling in the breasts.
- Weight Changes: Some women may experience slight weight gain or fluid retention.
- Spotting or Breakthrough Bleeding: Bleeding between expected periods can occur, especially with hormonal contraceptives.
- More Serious Risks (Less Common): Increased risk of blood clots, stroke, or heart attack, particularly with estrogen-containing therapies in certain individuals.
9. Mention two lifestyle changes that can improve symptoms of PMS.
Lifestyle changes can be very effective in managing PMS symptoms:
- Regular Exercise: Engaging in regular physical activity (like walking, jogging, swimming) can help reduce stress, improve mood, and alleviate physical symptoms like bloating and fatigue.
- Dietary Modifications:
- Eating a balanced diet rich in fruits, vegetables, and whole grains.
- Reducing intake of salt (to decrease bloating), sugar, caffeine, and alcohol, especially in the week or two before periods.
- Ensuring adequate intake of calcium and vitamin D, and potentially magnesium and vitamin B6, which may help reduce some symptoms.
- Stress Management Techniques: Practicing relaxation techniques like yoga, meditation, deep breathing exercises, or getting enough sleep can help reduce the emotional symptoms of PMS.
10. Briefly outline the nursing care for a patient with dysmenorrhea.
Nursing care for a patient with dysmenorrhea (painful periods) focuses on pain management, education, and support:
- Pain Assessment and Management: Assess the severity, location, and timing of pain. Administer prescribed pain relief medications (like NSAIDs) as ordered and evaluate their effectiveness.
- Education: Teach the patient about the causes of dysmenorrhea (especially primary vs. secondary), the importance of medication adherence, and non-pharmacological pain relief methods.
- Non-Pharmacological Relief: Advise and assist with comfort measures like applying heat (hot water bottle or heating pad) to the abdomen, rest, gentle exercise, and relaxation techniques.
- Lifestyle Advice: Provide education on lifestyle changes that may help, such as dietary adjustments and regular exercise.
- Emotional Support: Listen to the patient's concerns and provide reassurance. Acknowledge the impact pain has on her life.
- Referral: Recognize signs of secondary dysmenorrhea and ensure the patient is referred for further medical evaluation if needed.
SECTION D: Long Essay Questions (10 Marks Each)
1. Discuss the causes, clinical features, investigations, and management of menorrhagia.
What is Menorrhagia?
- Menorrhagia is abnormally heavy or prolonged menstrual bleeding.
- It means having periods that are heavy enough to interfere with daily activities or last longer than 7 days.
- It is a common menstrual disorder that can significantly impact a woman's health and quality of life.
Causes of Menorrhagia:
- Uterine Fibroids: Non-cancerous growths in the uterus, especially those that bulge into the uterine cavity, are a very common cause of heavy bleeding.
- Uterine Polyps: Small growths in the lining of the uterus (endometrium) can also cause heavy or prolonged bleeding.
- Adenomyosis: A condition where the tissue that normally lines the uterus grows into the muscular wall of the uterus, causing thickening and heavy, painful periods.
- Hormonal Imbalances: Problems with the balance of estrogen and progesterone, often due to conditions like PCOS or problems with ovulation, can lead to the uterine lining becoming too thick and shedding heavily.
- Bleeding Disorders: Rare inherited conditions that affect blood clotting can cause excessive bleeding, including heavy periods.
- Intrauterine Devices (IUDs): Especially non-hormonal copper IUDs, can sometimes cause heavier menstrual bleeding.
- Pregnancy Complications: Miscarriage or ectopic pregnancy can sometimes present with abnormal bleeding.
- Cancer: Although less common, uterine or cervical cancer can cause abnormal and heavy bleeding, particularly in older women.
Clinical Features (Signs and Symptoms):
- Soaking through one or more sanitary pads or tampons every hour for several consecutive hours.
- Needing to use double sanitary protection (e.g., two pads) to control menstrual flow.
- Needing to change sanitary protection during the night.
- Bleeding for longer than 7 days.
- Passing large blood clots.
- Symptoms of anemia, such as fatigue, weakness, paleness, dizziness, and shortness of breath.
- Severe cramping or pelvic pain associated with the heavy bleeding.
Investigations:
- Medical History and Physical Exam: The doctor will ask about the bleeding pattern and other symptoms and perform a pelvic exam.
- Blood Tests: To check for anemia (complete blood count) and assess hormone levels or blood clotting disorders.
- Pelvic Ultrasound: This is a common imaging test to look for structural causes like fibroids or polyps in the uterus and ovaries.
- Endometrial Biopsy: A small sample of the uterine lining is taken to check for abnormal cells or cancer, especially in women over 40 or those with risk factors.
- Hysteroscopy: A procedure where a small camera is inserted into the uterus to visualize the inside of the cavity and identify polyps, fibroids, or other abnormalities.
- Sonohysterography: Saline is instilled into the uterus during ultrasound to get a clearer view of the uterine cavity.
Management:
- Management depends on the cause, severity, the woman's age, desire for future pregnancies, and overall health.
- Medical Management:
- NSAIDs (Nonsteroidal Anti-inflammatory Drugs): Like ibuprofen, can reduce bleeding and pain.
- Tranexamic Acid: A medication that helps blood clot and reduces menstrual flow.
- Hormonal Therapy:
- Combined Oral Contraceptives (Birth Control Pills): Regulate cycles and reduce bleeding.
- Progesterone Therapy: Can help regulate bleeding, especially in cases of hormonal imbalance.
- Hormonal IUD (Levonorgestrel-releasing IUD): Very effective at reducing menstrual bleeding.
- GnRH Agonists: Medications that temporarily stop menstruation and shrink fibroids, used for a limited time due to side effects.
- Surgical Management: Used when medical treatment fails or for specific causes like large fibroids or polyps.
- Polypectomy: Surgical removal of polyps (often done during hysteroscopy).
- Myomectomy: Surgical removal of fibroids (preserving the uterus).
- Endometrial Ablation: A procedure to destroy the lining of the uterus to reduce or stop bleeding (not suitable for women who wish to have future pregnancies).
- Hysterectomy: Surgical removal of the uterus. This is a permanent solution for severe menorrhagia when other treatments are ineffective or not desired.
- Iron Supplementation: To treat or prevent iron deficiency anemia caused by heavy bleeding.
2. Define amenorrhea. Distinguish between primary and secondary amenorrhea and outline their causes and treatment.
Definition of Amenorrhea:
- Amenorrhea is the absence of menstruation.
- It means a woman or girl is not having menstrual periods.
- It is a symptom, not a disease itself, and requires investigation to find the underlying cause.
Primary vs. Secondary Amenorrhea:
- Primary Amenorrhea:
- Definition: When a girl has not started having her menstrual periods by the age of 16, or by 14 if she hasn't shown any signs of puberty (like breast development).
- Cause: Usually due to problems with the development of the reproductive organs or genetic or chromosomal abnormalities.
- Secondary Amenorrhea:
- Definition: When a woman who has previously had regular menstrual periods stops having them for 3 months or more, or stops having irregular periods for 6 months or more.
- Cause: Usually due to acquired conditions like pregnancy, hormonal imbalances, medical conditions, or lifestyle factors.
Causes:
- Causes of Primary Amenorrhea:
- Genetic or Chromosomal Abnormalities: Conditions like Turner syndrome (missing an X chromosome).
- Problems with Ovarian Development: Ovaries not forming correctly or not containing eggs.
- Problems with the Brain (Hypothalamus or Pituitary): Issues affecting the release of hormones (FSH, LH) that stimulate the ovaries.
- Structural Problems: Absence of the uterus or vagina (Mullerian agenesis), or a blockage like an imperforate hymen or vaginal septum.
- Delayed Puberty: Sometimes puberty is just delayed, and periods will start later naturally.
- Causes of Secondary Amenorrhea:
- Pregnancy: The most common cause.
- Breastfeeding.
- Menopause or Perimenopause: The natural end of menstruation.
- Hormonal Contraceptives: Some types can stop periods.
- Stress.
- Significant Weight Loss, Low Body Weight, or Excessive Exercise.
- Hormonal Imbalances:
- Polycystic Ovary Syndrome (PCOS).
- Thyroid problems (overactive or underactive thyroid).
- High levels of prolactin (hormone related to milk production).
- Problems with the adrenal glands.
- Chronic Illnesses.
- Certain Medications.
- Uterine Scarring: Sometimes caused by procedures like D&C (dilation and curettage).
Treatment:
- Treatment depends entirely on the underlying cause.
- Treating the Cause: This is the primary focus.
- For pregnancy, no treatment for amenorrhea is needed.
- For hormonal imbalances (like PCOS, thyroid problems), medications are given to correct the hormone levels.
- For structural problems, surgery may be needed to open blockages or reconstruct organs.
- For stress or weight-related causes, lifestyle changes and support are provided.
- Hormone Replacement Therapy (HRT): May be used if amenorrhea is due to ovarian failure or absence of ovaries, to provide necessary hormones.
- Ovulation Induction: If the cause is lack of ovulation and pregnancy is desired, medications can be given to stimulate ovulation.
- Addressing Underlying Conditions: Treating any chronic illness contributing to amenorrhea.
- Counseling and Support: Essential for helping individuals cope with the diagnosis and its implications.
3. Explain dysmenorrhea in detail, including types, causes, signs and symptoms, and nursing interventions.
What is Dysmenorrhea?
- Dysmenorrhea is painful menstruation.
- It is one of the most common gynecological complaints among women of reproductive age.
- The pain is typically cramping and located in the lower abdomen, but can also be a dull, continuous ache.
Types:
- Primary Dysmenorrhea:
- Painful periods that start within 6-12 months of first menstruation (menarche).
- There is no underlying problem with the reproductive organs.
- Caused by the uterus producing too much of chemicals called prostaglandins, which cause the uterine muscles to contract forcefully and reduce blood flow, leading to pain.
- Pain typically starts just before or with the onset of bleeding and lasts 1-3 days.
- Secondary Dysmenorrhea:
- Painful periods that develop later in life, usually after years of painless or less painful periods.
- Caused by an identifiable problem with the reproductive organs.
- Underlying causes include endometriosis, uterine fibroids, adenomyosis, pelvic inflammatory disease (PID), ovarian cysts, or structural abnormalities.
- Pain may start earlier in the menstrual cycle (days or weeks before bleeding) and last longer, sometimes throughout the period and even after it ends. It may also worsen over time.
Signs and Symptoms:
- Lower Abdominal Cramps: Pain that is often described as cramping or aching in the lower belly, just above the pubic bone.
- Pain Radiating: Pain may spread to the lower back and inner thighs.
- Other Associated Symptoms:
- Nausea and vomiting.
- Diarrhea or constipation.
- Headache.
- Fatigue.
- Bloating.
- Dizziness or lightheadedness.
- In primary dysmenorrhea, symptoms are typically limited to the time of menstruation. In secondary dysmenorrhea, associated symptoms of the underlying cause (e.g., heavy bleeding with fibroids, painful intercourse with endometriosis) may also be present, and the pain pattern is often different.
Nursing Interventions:
- Assess Pain: Evaluate the severity, characteristics (cramping, aching), location, duration, and timing of the pain, and how it affects daily activities.
- Administer Pain Relief: Give prescribed medications (like NSAIDs such as ibuprofen or naproxen, or hormonal contraceptives) as ordered and monitor their effectiveness. Educate on taking NSAIDs just before pain starts or at the onset of bleeding for best results.
- Provide Comfort Measures:
- Encourage rest in a comfortable position.
- Apply heat to the abdomen (heating pad or hot water bottle) as heat helps relax uterine muscles.
- Suggest warm baths.
- Education:
- Explain the difference between primary and secondary dysmenorrhea and when further medical evaluation is needed.
- Educate on the importance of regular exercise and a healthy diet (reducing caffeine, salt, and sugar intake during the premenstrual phase).
- Teach relaxation techniques (deep breathing, meditation) to help cope with pain.
- Support: Listen to the patient's experiences and validate her pain. Provide emotional support and reassurance.
- Documentation: Record pain levels, interventions, and the patient's response.
- Referral: If symptoms are severe, unresponsive to simple measures, or suggest secondary dysmenorrhea, ensure the patient is referred back to the doctor for further investigation and management.
4. Discuss the pathophysiology, diagnosis, and treatment of Polycystic Ovary Syndrome (PCOS) as a cause of menstrual disorders.
What is Polycystic Ovary Syndrome (PCOS)?
- PCOS is a common hormonal disorder affecting women of reproductive age.
- It is characterized by an imbalance of reproductive hormones.
- It often leads to irregular or absent periods, development of small cysts on the ovaries, and increased levels of male hormones (androgens).
- PCOS is a significant cause of menstrual disorders and infertility.
Pathophysiology (How it Causes Problems):
- Hormonal Imbalance: Women with PCOS often have:
- Higher than normal levels of androgens (male hormones like testosterone).
- Irregular levels of LH (luteinizing hormone) compared to FSH (follicle-stimulating hormone).
- High levels of insulin (insulin resistance), which can further increase androgen production.
- Ovulatory Dysfunction: The hormonal imbalance disrupts the normal process of follicle development and ovulation. Follicles may start to grow but do not mature and release an egg. Instead, they accumulate in the ovaries as small cysts. The lack of regular ovulation leads to irregular or absent periods.
- Increased Androgens: High androgen levels contribute to symptoms like excess body hair (hirsutism), acne, and sometimes hair loss on the scalp.
Diagnosis:
- Diagnosis is based on meeting at least two out of three main criteria (Rotterdam criteria):
- Irregular or Absent Ovulation: Leading to irregular or absent menstrual periods.
- High Androgen Levels: Shown by blood tests or clinical signs like severe acne or excess hair growth.
- Polycystic Ovaries on Ultrasound: Ovaries that are larger than normal and contain multiple small follicles (cysts) around the edge. (Note: Having polycystic ovaries on ultrasound alone does not mean a woman has PCOS).
- Other tests may include blood tests to check for other hormone problems (like thyroid issues or high prolactin) and sometimes blood sugar tests to check for diabetes.
Treatment for Menstrual Disorders in PCOS:
- Treatment focuses on managing symptoms and reducing long-term health risks (like diabetes and heart disease).
- Lifestyle Changes:
- Weight Loss: Even a modest weight loss can significantly improve hormonal balance and menstrual regularity in overweight women with PCOS.
- Healthy Diet and Exercise: To manage weight and improve insulin sensitivity.
- Medical Management:
- Combined Oral Contraceptives (Birth Control Pills): These are a common treatment to regulate menstrual cycles, reduce androgen levels (improving acne and hair growth), and protect the uterine lining from becoming too thick (reducing risk of uterine cancer).
- Progesterone Therapy: Taking progesterone for a few days each month can help induce regular withdrawal bleeding and protect the uterine lining if pregnancy is not desired.
- Metformin: A medication typically used for diabetes, but it can help improve insulin sensitivity and, in some women with PCOS, can help restore regular periods.
- Medications to Reduce Androgens: Such as spironolactone, can help with excess hair growth and acne.
- Ovulation Induction Medications: If pregnancy is desired, medications like Clomiphene citrate or Letrozole are used to stimulate ovulation.
5. Describe premenstrual syndrome (PMS) under the following headings: causes, symptoms, diagnosis, and nursing care.
What is Premenstrual Syndrome (PMS)?
- PMS is a common condition affecting many women during their reproductive years.
- It involves a predictable pattern of physical, emotional, and behavioral symptoms.
- Symptoms typically occur in the luteal phase (after ovulation) of the menstrual cycle and resolve shortly after menstruation begins.
Causes:
- The exact cause of PMS is not fully understood, but it is believed to be related to the fluctuating levels of hormones, specifically estrogen and progesterone, during the menstrual cycle.
- Sensitivity to these hormonal changes is thought to play a role.
- Brain chemicals (neurotransmitters) like serotonin, which affects mood, may also be involved.
- Other factors like stress, diet (high sugar, caffeine, salt), lack of exercise, and vitamin/mineral deficiencies might contribute or worsen symptoms.
Symptoms:
- Symptoms are wide-ranging and vary from woman to woman. They can be physical or emotional.
- Emotional/Behavioral: Irritability, anxiety, tension, sadness, crying spells, mood swings, difficulty concentrating, feeling overwhelmed, changes in appetite (cravings), sleep problems (insomnia or increased sleep).
- Physical: Bloating, weight gain, breast tenderness or swelling, headache, fatigue, joint or muscle pain, acne flare-ups, abdominal cramps, digestive upset (constipation or diarrhea).
For a diagnosis of PMS, these symptoms must:
- Occur in the week or two before menstruation.
- Improve significantly or disappear within a few days after menstruation starts.
- Be present for at least two consecutive menstrual cycles.
- Cause noticeable distress or interfere with daily life.
Diagnosis:
- There is no single laboratory test to diagnose PMS.
- Diagnosis is primarily based on a detailed medical history and tracking symptoms.
- The woman is usually asked to keep a diary or calendar of her symptoms for 2-3 menstrual cycles, noting the type, severity, and when they occur in relation to her period.
- This helps confirm the cyclical pattern of symptoms necessary for diagnosis.
- The doctor will also rule out other conditions that might cause similar symptoms (like depression, anxiety disorders, thyroid problems, or chronic fatigue syndrome).
Nursing Care:
- Assessment: Ask about the nature, timing, and severity of PMS symptoms and how they impact the woman's life.
- Education:
- Explain what PMS is and that it is a real and common condition.
- Discuss the possible role of hormonal fluctuations.
- Teach symptom tracking as a diagnostic tool and for monitoring treatment effectiveness.
- Lifestyle Counseling:
- Advise on lifestyle modifications that can help manage symptoms, such as regular exercise, stress reduction techniques (yoga, meditation, deep breathing), getting adequate sleep, and dietary changes (reducing salt, sugar, caffeine, alcohol; increasing complex carbohydrates, calcium, magnesium).
- Encourage a healthy and balanced diet.
- Medication Education: If medications are prescribed (e.g., pain relievers, hormonal contraceptives, antidepressants for severe PMS/PMDD), explain how to take them, potential side effects, and what to expect.
- Emotional Support: Provide a supportive environment for the woman to discuss her symptoms and feelings. Validate her experiences.
- Referral: If symptoms are severe or unresponsive to initial measures, refer the patient back to the doctor for consideration of further medical management or counseling.
6. Explain the role of hormonal imbalance in menstrual disorders. Include hormonal feedback mechanisms.
Role of Hormonal Imbalance in Menstrual Disorders:
- The menstrual cycle is tightly controlled by a complex interplay of hormones produced by the hypothalamus, pituitary gland in the brain, and the ovaries.
- When the levels or timing of these hormones are disrupted (hormonal imbalance), it can lead to various menstrual disorders.
- Specific imbalances can cause periods to be irregular, absent, heavy, or painful, and contribute to conditions like PCOS or amenorrhea.
Key Hormones Involved:
- GnRH (Gonadotropin-Releasing Hormone): Released by the hypothalamus, signals the pituitary gland.
- FSH (Follicle-Stimulating Hormone): Released by the pituitary, stimulates follicle growth in the ovaries.
- LH (Luteinizing Hormone): Released by the pituitary, triggers ovulation and formation of the corpus luteum.
- Estrogen: Produced by growing follicles in the ovaries, causes uterine lining (endometrium) to thicken.
- Progesterone: Produced by the corpus luteum after ovulation, prepares the uterine lining for pregnancy and maintains it.
- Androgens: (e.g., testosterone) Produced in small amounts by ovaries and adrenal glands; elevated levels can disrupt ovulation (as in PCOS).
- Prolactin: Produced by the pituitary; high levels can inhibit ovulation.
- Thyroid Hormones: Produced by the thyroid gland; imbalances (hypothyroidism or hyperthyroidism) can affect menstrual regularity.
Hormonal Feedback Mechanisms:
- The menstrual cycle relies on a feedback loop between the brain and the ovaries.
- Positive Feedback: Rising levels of estrogen from developing follicles signal the pituitary to release a surge of LH. This LH surge triggers ovulation. (Estrogen positively feeds back to the pituitary).
- Negative Feedback:
- Estrogen and progesterone produced by the ovaries also signal the hypothalamus and pituitary to reduce the release of GnRH, FSH, and LH.
- High levels of estrogen and progesterone after ovulation suppress FSH and LH production, preventing further follicle development.
- If pregnancy doesn't occur, estrogen and progesterone levels drop, which then removes the negative feedback and allows FSH and LH to rise again, starting the next cycle.
How Imbalances Cause Disorders:
- If the hypothalamus or pituitary doesn't release hormones correctly (e.g., due to stress, weight extremes, or tumors), the ovaries won't be stimulated, leading to amenorrhea.
- If the ovaries produce too much or too little estrogen or progesterone, the uterine lining won't develop or shed normally, causing irregular or heavy bleeding (menorrhagia, metrorrhagia).
- High androgen levels (like in PCOS) disrupt the delicate balance required for follicle maturation and ovulation, leading to irregular periods or amenorrhea.
- Problems with thyroid hormones or prolactin can interfere with the brain-ovary signals, causing menstrual irregularities.
7. Discuss the impact of nutritional status on menstruation and reproductive health.
Nutritional status plays a vital role in regulating menstruation and overall reproductive health. Both insufficient and excessive body weight, as well as specific nutrient deficiencies, can disrupt the delicate hormonal balance required for normal menstrual cycles.
Impact of Low Body Weight/Under-nutrition:
- Amenorrhea: Being significantly underweight or experiencing rapid, severe weight loss can lead to functional hypothalamic amenorrhea. The body senses it doesn't have enough energy reserves for reproduction, so the hypothalamus reduces the release of GnRH, which in turn lowers FSH and LH. This lack of stimulation causes the ovaries to produce less estrogen, leading to the cessation of menstruation.
- Irregular Periods: Even without complete absence of periods, low body weight can cause irregular or infrequent cycles (oligomenorrhea) due to disrupted ovulation.
- Infertility: Lack of regular ovulation makes it difficult or impossible to conceive.
- Poor Pregnancy Outcomes: If conception does occur, being underweight can increase risks during pregnancy.
- Nutrient Deficiencies: Under-nutrition often means deficiencies in essential vitamins and minerals (like iron, calcium), impacting overall health and potentially affecting hormonal pathways.
Impact of High Body Weight/Obesity:
- Menstrual Irregularities: Obesity is strongly linked to conditions like Polycystic Ovary Syndrome (PCOS), which is a major cause of irregular or absent periods due to ovulatory dysfunction. Fat tissue can produce estrogen, and excess fat can lead to insulin resistance, both of which disrupt hormonal balance.
- Heavy Bleeding: Hormonal imbalances in overweight women can sometimes lead to the uterine lining becoming too thick, resulting in heavy or prolonged bleeding (menorrhagia).
- Infertility: Irregular or absent ovulation in obese women can cause infertility.
- Increased Pregnancy Risks: Obesity during pregnancy is associated with higher risks of gestational diabetes, high blood pressure, preterm birth, and other complications.
- Increased Risk of Endometrial Cancer: Long-term exposure to higher estrogen levels from fat tissue can increase the risk of developing cancer of the uterine lining, especially if periods are infrequent.
Impact of Specific Nutrients:
- Iron: Deficiency leads to anemia, often worsened by heavy periods (menorrhagia). Adequate iron intake is crucial.
- Calcium and Vitamin D: Important for bone health, especially if hormonal imbalances lead to low estrogen levels over time, which can affect bone density.
- Other Vitamins and Minerals: B vitamins, magnesium, and omega-3 fatty acids have been studied for their potential role in managing PMS symptoms and supporting hormonal balance.
8. Outline the nursing management of a patient with severe menstrual pain.
Nursing management for a patient experiencing severe menstrual pain (dysmenorrhea) focuses on providing pain relief, offering support, and identifying potential underlying causes:
Nursing Management:
- Pain Assessment:
- Assess the severity, location, character (cramping, sharp, dull), timing (when it starts and stops in relation to bleeding), and duration of the pain using a pain scale.
- Ask about associated symptoms like nausea, vomiting, headache, or back pain.
- Determine how the pain interferes with her daily activities (work, school, sleep, social life).
- Administer Pain Medications:
- Administer prescribed analgesics (painkillers) promptly, usually NSAIDs (like ibuprofen, naproxen) or sometimes stronger medications if ordered.
- Educate the patient on the best way to take NSAIDs – often most effective when started just before or at the very beginning of menstruation.
- Monitor the effectiveness of the medication and for any side effects.
- Implement Non-Pharmacological Pain Relief:
- Encourage rest in a comfortable position.
- Apply heat to the lower abdomen or back using a heating pad or hot water bottle. Heat helps relax the uterine muscles and reduce cramps.
- Suggest warm baths.
- Teach or encourage relaxation techniques such as deep breathing exercises, meditation, or guided imagery.
- Advise gentle exercise if tolerated, as physical activity can sometimes help.
- Provide Education and Counseling:
- Explain the difference between primary and secondary dysmenorrhea and the possible causes of her pain.
- Discuss the importance of a healthy lifestyle, including regular exercise, a balanced diet, and adequate hydration.
- Talk about stress management techniques.
- Educate about the menstrual cycle and why pain occurs.
- Identify Potential Secondary Causes: Be alert for signs and symptoms that might suggest secondary dysmenorrhea (e.g., pain starting later in life, worsening pain, pain present throughout the cycle, association with heavy bleeding or painful intercourse).
- Emotional Support: Severe pain can be distressing. Provide a listening ear, validate her experience of pain, and offer reassurance.
- Documentation: Record the patient's pain level, assessment findings, interventions provided, and her response to treatment.
- Referral: Ensure that patients with severe, persistent, or worsening pain, or those with signs suggestive of secondary dysmenorrhea, are referred back to the doctor for further investigation (e.g., ultrasound) to rule out underlying conditions.
9. Describe the psychosocial effects of menstrual disorders on adolescent girls and appropriate interventions.
Menstrual disorders like severe pain (dysmenorrhea), heavy bleeding (menorrhagia), or irregular/absent periods (amenorrhea) can significantly impact the psychosocial wellbeing of adolescent girls, affecting their emotional health, social life, and performance at school.
Psychosocial Effects:
- Academic Impact: Severe pain or heavy bleeding can cause girls to miss school frequently or find it difficult to concentrate in class, leading to poor academic performance.
- Social Isolation: Pain, fatigue, or fear of accidents due to heavy bleeding can make girls withdraw from social activities, sports, or spending time with friends during their periods.
- Emotional Distress: Chronic pain, unpredictable bleeding, or the inability to participate in activities can lead to frustration, anxiety, irritability, and even depression. Menstrual irregularities can also cause worry about fertility or overall health.
- Poor Self-Esteem and Body Image: Conditions like PCOS with symptoms like acne and excess hair, or the challenges of managing heavy bleeding, can negatively impact a girl's self-image and confidence during a crucial time of development.
- Sleep Disturbances: Pain or the need to frequently change sanitary products can disrupt sleep, leading to fatigue and worsening mood and concentration.
- Family Strain: Managing symptoms and the impact on daily life can sometimes create tension or worry within the family.
Appropriate Interventions:
- Education and Information:
- Provide clear, age-appropriate information about normal menstruation and common disorders.
- Explain the causes of their specific disorder in a way they can understand.
- Reduce fear and stigma by normalizing discussions about menstruation.
- Effective Symptom Management: Ensure pain and bleeding are adequately controlled through medical treatment (medications) and lifestyle changes. Effective physical symptom management is crucial for improving psychosocial outcomes.
- Counseling and Support: Offer or refer for counseling to help girls cope with the emotional impact, anxiety, or depression related to their menstrual disorder. Support groups can also be beneficial.
- School Support: Work with parents and school staff to create a supportive environment. This might include getting accommodations for missed classes, access to restrooms, or support from school nurses.
- Promote Healthy Coping Strategies: Encourage healthy lifestyle habits (exercise, diet, sleep) and stress reduction techniques.
- Open Communication: Encourage open communication between the girl, her parents, and healthcare providers about her symptoms and how she is feeling.
- Address Underlying Causes: Ensure that any underlying medical condition contributing to the menstrual disorder is properly diagnosed and treated.
10. Explain the medical and surgical treatment options available for abnormal uterine bleeding.
Abnormal uterine bleeding (AUB) refers to any bleeding from the uterus that is different from normal menstruation (in terms of frequency, regularity, duration, or volume). Treatment options depend on the cause of the AUB, the woman's age, overall health, and desire for future fertility.
Medical Treatment Options:
- NSAIDs (Nonsteroidal Anti-inflammatory Drugs): Like ibuprofen or naproxen. They can reduce blood loss and pain during periods.
- Tranexamic Acid: A non-hormonal medication that helps blood to clot and significantly reduces menstrual flow.
- Hormonal Therapy: These treatments help regulate the menstrual cycle and reduce bleeding by affecting hormone levels or the uterine lining.
- Combined Oral Contraceptives (Birth Control Pills): Regulate cycles, reduce bleeding, and can help with pain.
- Progestin-Only Therapy: Progesterone can be given in various forms (pills, injection, implant) to thin the uterine lining and reduce bleeding.
- Levonorgestrel-Releasing Intrauterine System (LNG-IUS), e.g., Mirena: A hormonal IUD inserted into the uterus that releases progestin locally. It is highly effective at reducing menstrual bleeding, often leading to very light periods or amenorrhea.
- GnRH Agonists: Medications that temporarily stop the menstrual cycle and shrink fibroids or reduce the uterine lining. Used for short periods due to side effects and bone density concerns.
- Other Medications: Depending on the cause, other medications like those for thyroid problems or bleeding disorders may be used.
Surgical Treatment Options:
- Surgery is considered when medical treatment is ineffective, when there are structural causes like large fibroids or polyps, or for women who do not desire future pregnancy.
- Polypectomy: Surgical removal of uterine polyps, often done using hysteroscopy (a camera and instruments inserted through the cervix).
- Myomectomy: Surgical removal of uterine fibroids while preserving the uterus. Can be done via hysteroscopy (for fibroids inside the cavity), laparoscopy (minimally invasive through small cuts), or open abdominal surgery (for larger or multiple fibroids).
- Endometrial Ablation: A procedure that destroys or removes the lining of the uterus. This significantly reduces or stops menstrual bleeding but is not suitable for women who want to get pregnant in the future as it makes pregnancy difficult or impossible. Various methods exist (e.g., heat, freezing, radiofrequency).
- Hysterectomy: Surgical removal of the entire uterus. This is a definitive treatment for abnormal uterine bleeding, eliminating menstruation permanently. It is usually considered for women with severe symptoms that haven't responded to other treatments or who have significant structural problems and don't desire future pregnancy. Can be done abdominally, vaginally, or laparoscopically.
- Dilation and Curettage (D&C): A procedure to scrape the lining of the uterus. Can be used to stop acute heavy bleeding or obtain tissue for diagnosis, but it's often a temporary solution for heavy bleeding.
Gynecology Question for Revision - Topic 3
This section covers Dysfunctional Uterine Bleeding (DUB).
SECTION A: Multiple Choice Questions (40 Marks)
1. Dysfunctional uterine bleeding (DUB) is defined as:
2. The most common cause of DUB is:
3. Anovulatory DUB is most commonly seen in:
4. The hormone most often associated with anovulatory cycles is:
5. Which of the following is a symptom of DUB?
6. Diagnosis of DUB is primarily:
7. Which investigation is commonly used to rule out organic causes of uterine bleeding?
8. All are possible treatments for DUB EXCEPT:
9. DUB is best described as a diagnosis of:
10. In perimenopausal women, DUB may be an early sign of:
SECTION B: Fill in the Blanks (10 Marks)
1. Dysfunctional uterine bleeding occurs in the absence of ________ pathology.
2. Anovulation in DUB leads to unopposed secretion of the hormone ________.
3. The first-line imaging investigation in DUB is ________.
4. One surgical option for treating chronic DUB is ________.
5. ________ therapy is often used to regulate the menstrual cycle in DUB.
6. Adolescents and perimenopausal women often experience ________ DUB.
7. DUB is a diagnosis of ________ made after excluding other causes.
8. ________ levels may be tested to assess hormonal causes of DUB.
9. Irregular shedding of the endometrium causes ________ bleeding.
10. Chronic DUB can lead to ________ due to prolonged blood loss.
SECTION C: Short Essay Questions (10 Marks)
1. Define dysfunctional uterine bleeding and mention two causes.
Definition:
- Dysfunctional uterine bleeding (DUB) is abnormal bleeding from the uterus that is not caused by pregnancy, infection, structural problems (like fibroids, polyps), bleeding disorders, or cancer.
- It is a diagnosis made when other causes of abnormal bleeding have been ruled out.
Two Causes:
- Anovulation: The most common cause, where the ovary does not release an egg regularly. This leads to hormonal imbalance, particularly lack of progesterone.
- Ovulatory Dysfunction: Less common than anovulation, this involves abnormal timing or amount of hormone production even when ovulation occurs, leading to irregular or heavy bleeding.
2. Differentiate between ovulatory and anovulatory DUB.
- Anovulatory DUB:
- Cause: Occurs when ovulation (release of an egg) does not happen regularly.
- Hormonal Pattern: Estrogen is produced, causing the uterine lining to grow, but because there is no ovulation, a corpus luteum doesn't form, and progesterone is not produced. This leads to unopposed estrogen effect.
- Bleeding Pattern: Bleeding is often irregular, unpredictable in timing, amount, and duration. It can be heavy or prolonged as the thickened lining sheds unevenly.
- Who it Affects: Most common in adolescents and perimenopausal women.
- Ovulatory DUB:
- Cause: Occurs when ovulation does happen, but there is a problem with the timing or amount of hormone release during the cycle.
- Hormonal Pattern: Both estrogen and progesterone are produced, but the levels or the response of the uterine lining to them is abnormal.
- Bleeding Pattern: Bleeding is often regular in timing but may be excessively heavy (menorrhagia) or prolonged.
- Who it Affects: Less common than anovulatory DUB, can occur at any reproductive age.
3. Describe the hormonal imbalance involved in DUB.
The hormonal imbalance in DUB primarily involves the relationship between estrogen and progesterone:
- Anovulatory DUB:
- The main problem is the *absence* of regular progesterone production.
- This happens because ovulation does not occur, and thus the corpus luteum (which produces progesterone after ovulation) does not form.
- The uterine lining (endometrium) is continuously exposed to estrogen, causing it to become abnormally thick.
- Without the stabilizing effect of progesterone and the organized shedding that follows a progesterone drop, the thickened lining sheds unpredictably and often heavily.
- Ovulatory DUB:
- Even though ovulation occurs and progesterone is produced, there might be subtle abnormalities in the levels or timing of estrogen and progesterone production during the cycle.
- Or, the uterine lining might have an abnormal response to normal hormone levels, leading to excessive bleeding.
4. List four clinical signs and symptoms of DUB.
DUB presents as abnormal uterine bleeding with various patterns:
- Heavy Menstrual Bleeding (Menorrhagia): Periods that are much heavier than normal, requiring frequent changes of pads or tampons, or lasting longer than 7 days.
- Irregular Menstrual Bleeding: Periods that are unpredictable in their timing (too frequent, too infrequent, or random).
- Prolonged Menstrual Bleeding: Bleeding that lasts for more days than a normal period.
- Bleeding Between Periods (Intermenstrual Bleeding): Spotting or heavier bleeding that occurs unexpectedly between menstrual cycles.
- Spotting: Very light bleeding that occurs irregularly.
5. Mention three investigations done in the assessment of DUB.
Investigating abnormal uterine bleeding suspected to be DUB involves ruling out other causes:
- Pregnancy Test: Essential first step in women of reproductive age to exclude pregnancy as the cause of missed or abnormal bleeding.
- Pelvic Ultrasound: To visualize the uterus and ovaries and check for structural abnormalities like fibroids, polyps, ovarian cysts, or adenomyosis.
- Blood Tests:
- Complete Blood Count (CBC) to check for anemia due to blood loss.
- Hormone levels (FSH, LH, estrogen, progesterone, thyroid hormones, prolactin, androgens) to assess hormonal balance and ovulation.
- Blood clotting studies if a bleeding disorder is suspected.
- Endometrial Biopsy: Taking a small sample of the uterine lining to examine under a microscope for abnormal cells, hyperplasia, or cancer, especially in women over 40 or with risk factors.
- Hysteroscopy: Using a camera to directly visualize the inside of the uterus to identify polyps, fibroids, or other structural issues.
6. State three complications of untreated DUB.
If left untreated, DUB can lead to several complications:
- Anemia: Chronic heavy or prolonged bleeding can cause significant iron loss, leading to iron-deficiency anemia, resulting in fatigue, weakness, dizziness, and paleness.
- Disruption to Quality of Life: Unpredictable and heavy bleeding can severely impact a woman's daily activities, work, school, social life, and emotional wellbeing due to discomfort, embarrassment, and stress.
- Increased Risk of Endometrial Hyperplasia/Cancer: In anovulatory DUB, the continuous, unopposed estrogen stimulation of the uterine lining can cause it to become excessively thick (hyperplasia), which is a risk factor for developing uterine cancer, especially over time and in certain age groups.
- Severe Blood Loss Requiring Emergency Treatment: In some cases, DUB can cause very heavy bleeding that requires urgent medical intervention, such as a D&C or even blood transfusion.
7. Outline non-hormonal treatment options for DUB.
Non-hormonal treatments for DUB are options that do not involve using hormone medications. They aim to reduce bleeding or address related issues:
- NSAIDs (Nonsteroidal Anti-inflammatory Drugs): Such as ibuprofen or naproxen. They can significantly reduce menstrual blood flow by reducing prostaglandin production and also help with pain.
- Tranexamic Acid: A medication that helps the blood clot, reducing heavy bleeding. It is taken only during the days of heaviest bleeding.
- Iron Supplementation: To treat or prevent iron deficiency anemia caused by heavy bleeding. This doesn't stop the bleeding but manages a major complication.
- Lifestyle Modifications: While not directly stopping the bleeding, managing stress, maintaining a healthy weight, and regular exercise can support overall hormonal balance and health, which might indirectly help some cases of DUB.
- Dilation and Curettage (D&C): A surgical procedure to scrape the uterine lining. While not a long-term solution for chronic DUB, it can temporarily stop acute heavy bleeding and provides tissue for diagnosis.
8. Describe the role of the nurse in the care of a patient with DUB.
The nurse plays a crucial role in the care of a patient with DUB, providing assessment, education, support, and symptom management:
- Assessment: Ask about the detailed history of bleeding (frequency, duration, amount), associated symptoms (pain, fatigue), impact on quality of life, and rule out possible causes like missed pills or other medications.
- Education:
- Explain what DUB is in simple terms, emphasizing that it is abnormal bleeding without other clear causes.
- Educate the patient about the prescribed treatment plan, whether it's medical (how to take medications, potential side effects) or preparation for a procedure.
- Teach about the importance of tracking bleeding episodes and symptoms.
- Symptom Management: Help the patient manage heavy bleeding and associated symptoms like pain or fatigue (due to anemia). This includes advising on proper use of sanitary products and energy conservation if anemic.
- Emotional Support: Abnormal and unpredictable bleeding can be very distressing. Offer emotional support, listen to her concerns, and validate her feelings about the impact on her life.
- Monitoring: Monitor bleeding patterns, assess for signs and symptoms of anemia (fatigue, paleness), and monitor for side effects of medications.
- Prepare for Investigations/Procedures: Educate the patient on what to expect during diagnostic tests (like ultrasound or biopsy) or surgical procedures (like D&C or endometrial ablation).
- Follow-up Care: Discuss the importance of follow-up appointments to monitor treatment effectiveness and address any ongoing issues.
9. Mention two indications for surgical management in DUB.
Surgical management for DUB is usually considered when other less invasive treatments have not been successful or for specific reasons:
- Severe, Life-Threatening Bleeding: In cases of acute, very heavy bleeding that doesn't respond to medical treatment, a Dilation and Curettage (D&C) may be performed emergently to stop the bleeding by removing the uterine lining.
- Chronic, Severe Bleeding Unresponsive to Medical Therapy: If a woman has ongoing, heavy DUB that significantly impacts her life and has not improved with various medical treatments (like hormonal therapy or tranexamic acid), surgical options like endometrial ablation or hysterectomy may be considered, especially if she doesn't plan future pregnancies.
- Presence of Concurrent Structural Pathology Requiring Surgery: Although DUB is by definition bleeding *without* organic cause, sometimes the initial workup might reveal treatable structural issues like polyps or fibroids that were not initially the suspected primary cause but require surgical removal and contribute to the abnormal bleeding.
10. Explain the psychological impact of DUB on women.
Dysfunctional uterine bleeding can have a significant negative impact on a woman's psychological and emotional wellbeing, beyond just the physical symptoms:
- Anxiety and Stress: The unpredictability and heaviness of the bleeding can cause significant anxiety about when bleeding will occur, whether it will be manageable, and the fear of accidents in public. This constant worry adds to daily stress levels.
- Embarrassment and Shame: Managing heavy bleeding can be embarrassing, leading to feelings of shame or self-consciousness, especially in social or professional settings.
- Restriction of Activities: Fear of bleeding accidents or fatigue from blood loss can limit participation in work, school, social events, exercise, and sexual activity, leading to feelings of isolation and frustration.
- Fatigue and Low Mood: Chronic blood loss can lead to anemia, causing severe fatigue which can worsen mood and contribute to feelings of depression or irritability.
- Impact on Relationships: Unpredictable or heavy bleeding can affect sexual intimacy, potentially causing strain in romantic relationships.
- Feeling Out of Control: The inability to predict or control one's menstrual cycle can lead to a feeling of being out of control of one's own body.
- Worry about Health: Although DUB is a diagnosis of exclusion (meaning no serious cause like cancer is found), the experience of abnormal bleeding can still cause significant worry about underlying health problems.
SECTION D: Long Essay Questions (10 Marks Each)
1. Discuss the causes, signs and symptoms, diagnosis, and management of dysfunctional uterine bleeding.
What is Dysfunctional Uterine Bleeding (DUB)?
- DUB is abnormal uterine bleeding that occurs without any identifiable structural problems in the uterus (like fibroids, polyps, infection, or cancer) or other medical conditions that could explain the bleeding.
- It is typically related to problems with the hormonal regulation of the menstrual cycle, most often affecting ovulation.
Causes:
- Anovulation: The most common cause, especially in adolescents and perimenopausal women. Lack of regular ovulation leads to continuous estrogen stimulation of the uterine lining without progesterone, causing it to become unstable and shed irregularly.
- Ovulatory Dysfunction: Less common; involves abnormalities in the timing or amount of hormone production even when ovulation occurs, leading to heavy or prolonged bleeding.
- Immaturity of the Hypothalamic-Pituitary-Ovarian (HPO) Axis: Common in adolescents as the brain and ovaries are still establishing regular communication.
- Perimenopause: Hormonal fluctuations and irregular ovulation are common as women approach menopause.
- Factors Affecting Hormonal Balance: Significant stress, rapid weight changes (loss or gain), excessive exercise, or certain medical conditions like PCOS or thyroid disorders can disrupt the hormonal signals.
Signs and Symptoms:
- Abnormal bleeding patterns are the main symptom and can vary widely.
- Menorrhagia: Abnormally heavy or prolonged menstrual periods.
- Metrorrhagia: Bleeding between periods.
- Menometrorrhagia: Heavy and irregular bleeding.
- Oligomenorrhea: Infrequent periods (cycle length > 35 days).
- Polymenorrhea: Frequent periods (cycle length < 21 days).
- Bleeding can be unpredictable in timing, duration, and amount.
- Associated symptoms may include fatigue and paleness due to anemia from chronic blood loss.
Diagnosis:
- DUB is a diagnosis of *exclusion*. This means other potential causes of abnormal bleeding must be ruled out first.
- Medical History and Physical Exam: Detailed information on bleeding pattern, symptoms, and gynecological history is taken. A pelvic exam is performed.
- Rule out Pregnancy: A pregnancy test is essential in women of reproductive age.
- Blood Tests:
- Complete Blood Count (CBC) to check for anemia.
- Hormone tests (FSH, LH, estrogen, progesterone, thyroid function, prolactin) to assess hormonal status and ovulation.
- Coagulation studies if a bleeding disorder is suspected.
- Imaging Studies:
- Pelvic Ultrasound: Primary tool to check for structural problems like fibroids, polyps, ovarian cysts, or adenomyosis.
- Endometrial Evaluation:
- Endometrial Biopsy: Taking a tissue sample from the uterine lining to check for hyperplasia or cancer, especially in women over 40 or with risk factors.
- Hysteroscopy: Direct visualization of the uterine cavity.
Management:
- Treatment is tailored to the individual, considering age, severity of bleeding, impact on life, desire for future fertility, and underlying cause (if identifiable as anovulatory vs. ovulatory).
- Medical Management (Most Common):
- Hormonal Therapy:
- Combined Oral Contraceptives (COCs): Regulate cycles, reduce bleeding.
- Progestins: Used cyclically or continuously to regulate shedding of the uterine lining.
- Levonorgestrel-Releasing IUD (LNG-IUS): Highly effective in reducing bleeding.
- Non-Hormonal Medications: NSAIDs, Tranexamic Acid to reduce blood loss.
- GnRH Agonists: Used temporarily to suppress ovarian function and stop bleeding in severe cases.
- Hormonal Therapy:
- Surgical Management: Considered when medical therapy fails or is not suitable.
- Dilation and Curettage (D&C): For acute heavy bleeding or diagnosis.
- Endometrial Ablation: Destroys uterine lining to reduce/stop bleeding (not for future pregnancy).
- Hysterectomy: Removal of the uterus for severe, refractory DUB when fertility is not desired.
- Iron Supplementation: To treat or prevent anemia.
2. Describe in detail the hormonal changes that lead to anovulatory DUB.
Anovulatory DUB occurs because the normal process of ovulation does not happen, leading to a specific pattern of hormonal imbalance that affects the uterine lining. Here's a detailed breakdown:
Normal Ovulatory Cycle vs. Anovulatory Cycle:
- Normal Cycle: Involves a coordinated release of hormones from the hypothalamus (GnRH), pituitary (FSH, LH), and ovaries (estrogen, progesterone). Rising FSH stimulates follicle growth, which produces estrogen. High estrogen triggers an LH surge, leading to ovulation. After ovulation, the ruptured follicle becomes the corpus luteum, which produces progesterone and estrogen. This progesterone matures and stabilizes the uterine lining. If no pregnancy occurs, the corpus luteum breaks down, progesterone and estrogen levels drop, causing the organized shedding of the uterine lining (menstruation).
- Anovulatory Cycle: Ovulation does not occur.
Hormonal Changes in Anovulatory DUB:
- Lack of LH Surge: The normal LH surge, which is triggered by high estrogen and needed for ovulation, does not happen. This can be due to problems in the hypothalamus or pituitary, or the ovaries not responding correctly.
- Absence of Corpus Luteum: Since ovulation doesn't occur, the corpus luteum is not formed from the ruptured follicle.
- Lack of Progesterone Production: The corpus luteum is the primary producer of progesterone in the second half of the cycle. Without a corpus luteum, there is little or no progesterone produced during this phase.
- Continuous Estrogen Stimulation: Follicles may still develop to varying degrees and produce estrogen. However, because there is no ovulation and therefore no progesterone, the uterine lining (endometrium) is continuously exposed to estrogen without the balancing effect of progesterone.
- Endometrial Proliferation and Instability: Estrogen causes the endometrium to grow and thicken (proliferation). Without progesterone to mature and stabilize it, the lining becomes excessively thick and fragile.
- Irregular Shedding: The thickened, unstable endometrium cannot be maintained. Parts of it break down and shed at irregular times and in an uncoordinated manner due to patchy areas of blood vessel breakdown. This leads to unpredictable, prolonged, and often heavy bleeding episodes.
- No Organized Menstruation: The characteristic drop in both estrogen and progesterone that triggers a normal, organized menstrual period doesn't occur. Bleeding is instead due to random breakdown of the fragile lining.
3. Explain the diagnostic work-up of a woman presenting with abnormal uterine bleeding.
When a woman presents with abnormal uterine bleeding (AUB), the diagnostic work-up is a step-by-step process to identify the cause, which could be structural, hormonal, related to pregnancy, systemic medical conditions, or dysfunctional (DUB). The aim is to rule out serious causes first.
Diagnostic Work-up Steps:
- Detailed History:
- Ask about the specific bleeding pattern (frequency, duration, amount, regularity, timing in relation to cycle).
- Inquire about associated symptoms (pain, fatigue, bloating).
- Gather information on medical history (medications, chronic illnesses, bleeding disorders), gynecological history (pregnancies, deliveries, contraception, STIs, previous surgeries), and family history.
- Assess impact on quality of life.
- Physical Examination:
- General examination to look for signs of anemia, hormonal imbalances (e.g., excess hair growth), or thyroid problems.
- Pelvic Examination: To check the external genitalia, vagina, cervix, uterus, and ovaries for any visible lesions, infections, structural abnormalities, tenderness, or masses.
- Pregnancy Test: Essential in all women of reproductive age to rule out pregnancy or pregnancy-related complications (like miscarriage or ectopic pregnancy) as the cause of bleeding.
- Cervical Screening Test (Pap smear): If due, to check for cervical cell abnormalities or cancer, which can cause bleeding.
- Tests for Infection: Swabs from the cervix or vagina to check for sexually transmitted infections (STIs) or pelvic infections, which can cause bleeding.
- Blood Tests:
- Complete Blood Count (CBC): To check for anemia due to blood loss.
- Hormone Levels: FSH, LH, estrogen, progesterone (depending on cycle phase), thyroid hormones, prolactin, androgens (if PCOS suspected) to assess hormonal function and ovulation.
- Coagulation Studies: If a bleeding disorder is suspected (e.g., heavy bleeding since menarche, family history of bleeding problems).
- Imaging Studies:
- Pelvic Ultrasound: The primary imaging test. It visualizes the uterus, ovaries, and endometrium to check for structural abnormalities like fibroids, polyps, ovarian cysts, or adenomyosis. Transvaginal ultrasound provides the best detail.
- Sonohysterography (Saline Infusion Sonography): Saline is put into the uterus during ultrasound to get a clearer view of the uterine cavity, helpful for finding polyps or fibroids inside the cavity.
- Endometrial Evaluation:
- Endometrial Biopsy: A sample of the uterine lining is taken, usually with a small tube, to examine under a microscope. This is important to rule out endometrial hyperplasia or cancer, especially in women over 40, those with risk factors (like obesity, PCOS), or those with persistent abnormal bleeding.
- Hysteroscopy: A procedure using a camera inserted through the cervix to visually inspect the inside of the uterus and perform targeted biopsies or remove polyps/fibroids.
- Further Investigations: Rarely, MRI or other tests may be needed for complex cases or if initial findings are inconclusive.
4. Discuss the pharmacologic and non-pharmacologic management of DUB.
Managing DUB aims to control the abnormal bleeding, address any associated symptoms like pain or anemia, and improve the woman's quality of life. Treatment options include both medical (pharmacologic) and non-medical (non-pharmacologic) approaches.
Pharmacologic (Medical) Management:
- NSAIDs (Nonsteroidal Anti-inflammatory Drugs):
- Examples: Ibuprofen, Naproxen.
- How they work: Reduce the production of prostaglandins in the uterus, which helps decrease bleeding and pain.
- Use: Taken during menstruation, often starting just before or at the onset of bleeding.
- Tranexamic Acid:
- How it works: Helps blood to clot, reducing blood loss.
- Use: Taken only during the days of heavy bleeding. Does not affect hormones or prevent pregnancy.
- Hormonal Therapy: These medications regulate the menstrual cycle and uterine lining.
- Combined Oral Contraceptives (COCs - Birth Control Pills): Contain estrogen and progestin. They regulate hormone levels, lead to predictable withdrawal bleeding, and reduce overall blood loss.
- Progestins: Can be taken orally (e.g., Norethisterone), by injection (e.g., Depo-Provera), or as an intrauterine device (LNG-IUS). Progestins thin the uterine lining, reducing bleeding. LNG-IUS is highly effective for reducing heavy bleeding long-term.
- GnRH Agonists: Medications that temporarily suppress ovarian hormone production, inducing a menopause-like state with no bleeding. Used for short periods (e.g., 3-6 months) before surgery or as a bridge to menopause due to side effects (hot flashes, bone loss).
- Etonogestrel Implant or Medroxyprogesterone Acetate Injection: Progestin-only methods that can also reduce or stop menstrual bleeding.
Non-Pharmacologic Management:
- Lifestyle Modifications:
- Weight Management: Losing weight if overweight or obese can help restore hormonal balance and improve menstrual regularity in some women, particularly with PCOS-related DUB.
- Stress Reduction: Managing stress through techniques like yoga, meditation, or counseling can help if stress is contributing to hormonal disruption.
- Regular Exercise: Can contribute to overall health and hormonal balance.
- Balanced Diet: Ensuring adequate nutrition, especially iron intake to prevent or treat anemia caused by chronic blood loss.
- Iron Supplementation: Taking iron tablets or other forms of iron to treat or prevent iron deficiency anemia.
- Observation: For mild DUB that is not significantly impacting quality of life, watchful waiting may be an option, especially in adolescents whose cycles may regulate over time.
- Addressing Underlying Factors: If lifestyle factors like extreme exercise or severe dieting are contributing, addressing these through counseling and support is crucial.
- Patient Education and Counseling: Providing clear information about DUB, its causes, and management options empowers the woman and helps her cope with the condition.
5. Outline the surgical options for DUB and their indications.
Surgical options for DUB are usually considered when medical treatments have failed to control bleeding, when bleeding is very severe, or for women who do not desire future pregnancy. Since DUB is defined as bleeding without structural cause, surgery is typically aimed at reducing or eliminating the uterine lining.
Surgical Options and Indications:
- Dilation and Curettage (D&C):
- Procedure: Dilating the cervix and gently scraping or suctioning the lining of the uterus.
- Indications:
- To stop acute, very heavy bleeding that is not controlled by medical treatment (emergency setting).
- To obtain a tissue sample (endometrial biopsy) from the entire uterine lining for diagnosis, especially if office biopsy was insufficient or for certain risk factors.
- Note: D&C is often a temporary solution for chronic DUB as the lining grows back.
- Endometrial Ablation:
- Procedure: A procedure that destroys or removes the lining of the uterus using various techniques like heat (thermal balloon, radiofrequency), freezing (cryoablation), or microwave energy.
- Indications:
- Severe, chronic DUB that does not respond to medical treatment.
- Heavy bleeding significantly impacting quality of life.
- When the woman has completed childbearing and does not desire future pregnancy, as pregnancy after ablation is difficult and risky.
- As an alternative to hysterectomy for women who want to avoid major surgery.
- Hysterectomy:
- Procedure: Surgical removal of the entire uterus.
- Indications:
- Severe, chronic DUB that is unresponsive to all other medical and less invasive surgical treatments.
- When heavy bleeding is causing severe anemia or significantly impacting quality of life.
- When the woman has completed childbearing and desires a permanent solution to bleeding.
- May also be indicated if DUB occurs alongside other uterine problems requiring hysterectomy (e.g., large fibroids not treatable with myomectomy, adenomyosis).
6. Describe the nursing care plan for a woman admitted with DUB.
A nursing care plan for a woman admitted to the hospital with DUB, often due to acute, severe bleeding, would focus on managing the bleeding, assessing and managing complications like anemia, providing comfort and support, and educating the patient.
Nursing Care Plan Components:
- Assessment:
- Monitor vital signs frequently (blood pressure, pulse, respiration) to assess for signs of hypovolemia or shock due to blood loss.
- Assess the amount and characteristics of vaginal bleeding (e.g., number of pads soaked, presence of clots).
- Assess for signs and symptoms of anemia (fatigue, dizziness, paleness, shortness of breath, fast heart rate).
- Assess pain level using a pain scale.
- Assess hydration status and urinary output.
- Assess emotional state and anxiety level related to the bleeding.
- Nursing Diagnoses (Examples):
- Risk for Fluid Volume Deficit related to excessive blood loss.
- Fatigue related to anemia from chronic blood loss.
- Acute Pain related to uterine cramping.
- Anxiety related to unpredictable bleeding and hospitalization.
- Deficient Knowledge regarding DUB and management.
- Goals:
- Patient will maintain stable vital signs and adequate hydration.
- Patient's bleeding will be reduced or controlled.
- Patient's pain will be managed effectively.
- Patient will verbalize reduced anxiety and feel supported.
- Patient will understand her condition and treatment plan upon discharge.
- Nursing Interventions:
- Manage Bleeding:
- Monitor bleeding amount using standardized measures (e.g., weighing pads).
- Administer prescribed medications (e.g., hormonal therapy, tranexamic acid) to reduce bleeding.
- Prepare the patient for potential procedures like D&C if needed.
- Ensure easy access to restroom facilities and sanitary products.
- Manage Anemia:
- Administer prescribed iron supplements or blood transfusion if ordered for severe anemia.
- Advise rest and energy conservation.
- Educate on dietary sources of iron.
- Pain Management:
- Administer prescribed pain medication.
- Provide comfort measures (heat application, comfortable positioning).
- Emotional Support:
- Create a calm and private environment.
- Listen to the patient's concerns and provide reassurance.
- Explain procedures and treatments clearly.
- Education:
- Explain DUB, its likely cause (if known), and why she is experiencing the bleeding.
- Educate about the medications she is receiving and their side effects.
- Provide information about the long-term management plan after discharge.
- Discuss potential lifestyle modifications.
- Collaboration: Work closely with the doctor, laboratory (for blood tests), and potentially social work or counseling services.
- Manage Bleeding:
- Evaluation:
- Monitor if bleeding has decreased.
- Assess if vital signs are stable and hydration is adequate.
- Evaluate pain levels and the patient's comfort.
- Assess the patient's understanding of her condition and treatment.
7. Explain the complications of untreated DUB and how they can be prevented.
Untreated Dysfunctional Uterine Bleeding can lead to several health problems and significantly impact a woman's life. Recognizing and managing DUB is crucial to prevent these complications.
Complications of Untreated DUB:
- Iron Deficiency Anemia:
- Explanation: Chronic heavy or prolonged bleeding causes excessive loss of iron from the body. Over time, the body's iron stores are depleted, leading to iron deficiency anemia.
- Symptoms: Fatigue, weakness, dizziness, paleness, shortness of breath, fast heartbeat.
- Severe Acute Blood Loss and Hypovolemia:
- Explanation: Sometimes, DUB can result in sudden, very heavy bleeding that leads to significant blood loss.
- Symptoms: Dizziness, lightheadedness, feeling faint, rapid heart rate, low blood pressure, shock (in severe cases). This can be a medical emergency.
- Endometrial Hyperplasia and Increased Risk of Endometrial Cancer:
- Explanation: In anovulatory DUB, the uterine lining is exposed to continuous estrogen stimulation without adequate progesterone. This causes the lining to become abnormally thick (hyperplasia). Certain types of hyperplasia are considered pre-cancerous and increase the risk of developing cancer of the uterine lining (endometrial cancer) over time. This is a particular concern in perimenopausal and postmenopausal women.
- Significant Impairment of Quality of Life:
- Explanation: Unpredictable and heavy bleeding can severely disrupt a woman's daily activities, work, social life, exercise, and sexual function, leading to stress, anxiety, embarrassment, and social isolation.
Prevention of Complications:
- Early Diagnosis and Treatment: Seeking medical attention for abnormal bleeding as soon as it occurs allows for timely diagnosis and management of DUB or its underlying cause, preventing complications.
- Effective Medical Management: Using appropriate medications (hormonal therapy, tranexamic acid, NSAIDs) to control bleeding and regulate the menstrual cycle is the primary way to prevent chronic blood loss and reduce the risk of hyperplasia.
- Regular Follow-up: Attending scheduled follow-up appointments to monitor the effectiveness of treatment and check for recurrence or new symptoms is important.
- Screening for Hyperplasia/Cancer: In women at higher risk (e.g., over 40, with risk factors for unopposed estrogen exposure), endometrial biopsy should be performed as part of the work-up for abnormal bleeding to detect hyperplasia or cancer early.
- Iron Supplementation: Prophylactic or therapeutic iron supplementation can prevent or treat anemia in women with ongoing heavy bleeding.
- Lifestyle Modifications: Managing weight, stress, and exercising regularly can help support hormonal balance and overall health, potentially reducing the severity of DUB in some cases.
- Patient Education: Educating women about normal menstrual cycles, signs of abnormal bleeding, and the importance of seeking medical advice empowers them to get help early.
8. Discuss the differences in presentation and management of DUB in adolescents versus perimenopausal women.
Dysfunctional uterine bleeding is common at the beginning (adolescence) and end (perimenopause) of a woman's reproductive years, primarily due to the hormonal fluctuations and irregular ovulation characteristic of these stages. However, the specific presentation and management approaches differ between these two groups.
DUB in Adolescents:
- Presentation:
- Most common cause is immaturity of the Hypothalamic-Pituitary-Ovarian (HPO) axis, leading to frequent anovulatory cycles.
- Bleeding is often irregular, unpredictable, and can sometimes be prolonged or heavy.
- Primary amenorrhea (failure to start periods) due to structural or genetic causes must be ruled out.
- Symptoms are usually related to the irregular/heavy bleeding itself (e.g., anemia, disruption to school/social life).
- Management:
- Focus is on regulating cycles and preventing anemia while preserving future fertility.
- Education and Reassurance: Explaining that irregular cycles are common initially and often improve with time.
- Medical Management:
- NSAIDs or Tranexamic acid for heavy bleeding during episodes.
- Hormonal therapy, typically combined oral contraceptives (COCs), to regulate cycles and reduce bleeding. Progestins may also be used.
- Iron supplementation for anemia.
- Less Frequent Surgical Intervention: Surgery is rarely needed and is typically limited to D&C for acute, severe bleeding that doesn't respond to medical treatment. Procedures like endometrial ablation or hysterectomy are avoided due to the desire for future fertility.
- Addressing Underlying Factors: If stress or weight issues are contributing, counseling and support are important.
DUB in Perimenopausal Women:
- Presentation:
- Common cause is declining ovarian function leading to irregular ovulation and fluctuating estrogen levels, often with periods of unopposed estrogen.
- Bleeding is often irregular (more or less frequent periods), lighter or heavier than usual, and can be unpredictable.
- The pattern may change over time as menopause approaches.
- It is crucial to rule out serious causes like endometrial hyperplasia or cancer, which are more common in this age group due to prolonged unopposed estrogen exposure.
- Management:
- Focus is on controlling bleeding, preventing hyperplasia/cancer, and managing perimenopausal symptoms while considering proximity to menopause and fertility desires (which are often lower).
- Investigation is Key: Endometrial biopsy is often required to rule out hyperplasia or cancer.
- Medical Management:
- Hormonal therapy, such as low-dose COCs (if suitable), cyclic progestins, or LNG-IUS, to regulate cycles and protect the endometrium from hyperplasia.
- Tranexamic acid or NSAIDs for heavy bleeding.
- Surgical Options More Commonly Considered:
- Endometrial Ablation: A good option for severe bleeding when fertility is not desired.
- Hysterectomy: May be considered for severe, refractory bleeding or if concurrent issues (like fibroids) are present, offering a definitive solution.
- Management of Associated Symptoms: Addressing hot flashes, mood changes, etc.
9. Outline a health education plan for a woman with recurrent DUB.
A health education plan for a woman with recurrent DUB should empower her with knowledge about her condition, its management, and strategies for coping and self-care. This plan should be individualized based on her specific situation, treatment, and learning needs.
Health Education Plan Components:
- Understanding DUB:
- Explain what DUB is in simple terms – abnormal bleeding without other identifiable causes, usually due to hormonal fluctuations.
- Discuss the likely cause in her specific case (e.g., anovulatory DUB, hormonal imbalance).
- Reassure her that while it's disruptive, it's often manageable and not usually a sign of cancer (unless investigations showed otherwise).
- Medication Education:
- If prescribed, explain the name, purpose, dosage, and schedule of all medications (e.g., hormonal pills, tranexamic acid, iron tablets).
- Discuss potential side effects and what to do if they occur.
- Emphasize the importance of taking medications exactly as prescribed, even if bleeding improves.
- Discuss how the medication will affect her bleeding pattern and menstrual cycle.
- Symptom Monitoring:
- Teach her how to track her bleeding episodes (dates, duration, heaviness – e.g., using a calendar, app, or diary).
- Explain the importance of noting associated symptoms like pain or fatigue.
- Instruct her on signs that require immediate medical attention (e.g., very heavy bleeding that doesn't stop, severe dizziness, signs of shock).
- Managing Anemia:
- Explain the link between heavy bleeding and iron deficiency anemia.
- Educate on the importance of taking iron supplements if prescribed and common side effects (e.g., constipation).
- Discuss dietary sources of iron (e.g., meat, beans, leafy greens) and foods that enhance iron absorption (e.g., vitamin C).
- Lifestyle Modifications:
- Discuss the role of weight management (if overweight), stress reduction techniques, and regular exercise in overall health and potentially in influencing hormonal balance.
- Advise on healthy dietary choices and limiting caffeine, alcohol, and excessive sugar if they seem to worsen symptoms.
- Coping Strategies and Support:
- Acknowledge the psychological impact of DUB.
- Suggest strategies for coping with anxiety and embarrassment (e.g., using appropriate sanitary products, planning activities).
- Inform her about available support groups or counseling services if she is struggling emotionally.
- When to Seek Further Care: Clearly outline when she should contact the doctor (e.g., bleeding not controlled by medication, new or worsening symptoms, severe pain, signs of severe anemia or acute blood loss).
- Importance of Follow-up: Emphasize the need for scheduled follow-up appointments to assess treatment effectiveness and address any ongoing concerns.
10. Describe how dysfunctional uterine bleeding affects fertility and reproductive health.
Dysfunctional uterine bleeding (DUB) is closely linked to irregular ovulation (anovulation) or other hormonal imbalances. These hormonal issues are also fundamental to fertility and reproductive health, so DUB can definitely have an impact.
How DUB Affects Fertility:
- Anovulation and Irregular Ovulation: The most common cause of DUB is anovulation. If a woman is not ovulating regularly (or at all), she is not releasing an egg each month, which makes it difficult or impossible to conceive naturally. Infertility is a direct consequence of chronic anovulation associated with DUB.
- Unpredictable Timing: Even if ovulation sometimes occurs, the irregular bleeding pattern makes it hard to predict when it happens, making timed intercourse difficult.
- Uterine Lining Issues: The abnormal hormonal environment in DUB can affect the development of the uterine lining, making it less receptive to embryo implantation even if ovulation occurs.
- Underlying Causes: DUB is often a symptom of an underlying condition that affects fertility, such as Polycystic Ovary Syndrome (PCOS) or thyroid disorders, which themselves impair ovulation and reproductive function.
Impact on Reproductive Health (Beyond Fertility):
- Anemia: Chronic heavy bleeding can lead to iron deficiency anemia, which impacts a woman's overall health and energy levels, potentially affecting her ability to carry a pregnancy if conception occurs, and overall wellbeing.
- Increased Risk of Endometrial Hyperplasia: As discussed, the unopposed estrogen in anovulatory DUB can cause the uterine lining to become excessively thick (hyperplasia), which is a risk factor for uterine cancer, a serious reproductive health concern.
- Pregnancy Complications: While DUB is defined by the absence of structural cause, the underlying ovulatory dysfunction and hormonal issues can potentially increase the risk of certain pregnancy complications if conception occurs (e.g., early pregnancy loss, though DUB itself is not the direct cause of miscarriage like a structural anomaly might be).
- Psychological Impact: The stress, anxiety, and emotional distress associated with irregular bleeding and potential fertility issues can impact a woman's overall reproductive and sexual health and wellbeing.
- Need for Medical Intervention: Managing DUB often requires hormonal medications or procedures, which are part of reproductive healthcare but highlight the deviation from normal healthy function.
Gynecology Question for Revision - Topic 4
This section covers Menopause.
SECTION A: Multiple Choice Questions (40 Marks)
1. Menopause is defined as:
2. The average age for natural menopause is:
3. Which hormone declines significantly during menopause?
4. One of the earliest symptoms of menopause is:
5. The period leading to menopause is called:
6. Which of the following is a long-term effect of menopause?
7. Hormone Replacement Therapy (HRT) is used to:
8. Common psychological symptoms of menopause include:
9. Which of the following investigations may be used to confirm menopause?
10. Which dietary supplement is recommended to prevent bone loss in menopausal women?
SECTION B: Fill in the Blanks (10 Marks)
1. Menopause is confirmed after ________ consecutive months without menstruation.
2. The hormone ________ decreases significantly during menopause.
3. ________ flashes are a common vasomotor symptom of menopause.
4. A woman is said to be in the ________ phase when she transitions into menopause.
5. Hormone therapy used to relieve symptoms of menopause is called ________.
6. Menopausal women are at increased risk of developing ________ due to reduced bone density.
7. Vaginal ________ is a common genitourinary symptom of menopause.
8. One psychological effect of menopause is ________.
9. The hormone ________ rises during menopause due to decreased ovarian function.
10. ________ and weight-bearing exercises are encouraged to maintain bone health post-menopause.
SECTION C: Short Essay Questions (10 Marks)
1. Define menopause and state the average age it occurs.
Definition:
- Menopause is the natural and permanent end of a woman's menstrual cycles.
- It is diagnosed when a woman has gone without a menstrual period for 12 consecutive months, without any other medical reason.
- It marks the cessation of ovarian function and the end of reproductive capacity.
Average Age:
- The average age for natural menopause globally is around 51 years.
- However, the typical range for natural menopause is between 45 and 55 years.
2. List four common physical symptoms of menopause.
Common physical symptoms experienced during perimenopause and menopause due to declining hormone levels include:
- Hot Flashes and Night Sweats: Sudden feelings of intense heat that spread through the body, often causing sweating (hot flashes during the day, night sweats during sleep).
- Vaginal Dryness: The vaginal tissues become thinner, drier, and less elastic, leading to discomfort, itching, and painful intercourse.
- Sleep Disturbances: Difficulty falling or staying asleep, often related to night sweats or anxiety.
- Changes in Menstrual Pattern: Periods may become irregular (lighter, heavier, longer, shorter, more or less frequent) before stopping entirely.
- Weight Gain and Changes in Fat Distribution: Tendency to gain weight, particularly around the abdomen.
- Joint and Muscle Aches: Generalized pain or stiffness.
3. Describe two psychological effects of menopause.
The hormonal changes during menopause can affect a woman's mood and mental state:
- Mood Swings and Irritability: Fluctuating hormone levels can lead to unpredictable shifts in mood, feeling easily annoyed or angered.
- Anxiety: Some women experience increased feelings of worry, nervousness, or restlessness.
- Difficulty Concentrating and Memory Problems ("Brain Fog"): Some women report challenges with focus, concentration, and recalling information during the menopausal transition.
- Low Mood or Depression: The hormonal changes can contribute to feelings of sadness, loss of interest, or symptoms of depression in some women.
4. Outline three risk factors for early menopause.
Early menopause occurs before the age of 45. Risk factors include:
- Smoking: Women who smoke tend to experience menopause about 1-2 years earlier than non-smokers.
- Family History: A history of early menopause in a mother or sisters increases a woman's risk.
- Autoimmune Diseases: Conditions where the body's immune system attacks its own tissues (e.g., thyroid disease, rheumatoid arthritis) can sometimes affect ovarian function.
- Certain Medical Treatments: Chemotherapy or radiation therapy to the pelvic area for cancer treatment can damage the ovaries and cause premature ovarian failure or early menopause.
- Surgery: Removal of both ovaries (bilateral oophorectomy) causes immediate surgical menopause. Hysterectomy (removal of the uterus) without removing the ovaries does not cause menopause, but it can sometimes affect ovarian blood supply and potentially lead to earlier menopause.
5. Mention three investigations used in evaluating menopausal status.
Evaluating menopausal status is primarily clinical, based on a woman's age and menstrual history. However, some investigations can be helpful:
- Detailed Medical History: Asking about menstrual cycle changes (irregularity, frequency, cessation), age, and menopausal symptoms (hot flashes, vaginal dryness). This is the most important part of the evaluation.
- FSH (Follicle-Stimulating Hormone) Blood Test: FSH levels typically rise significantly after menopause because the pituitary gland is trying to stimulate the ovaries, which are no longer responding. Elevated FSH levels can support the diagnosis of menopause.
- LH (Luteinizing Hormone) Blood Test: LH levels also rise after menopause, often in parallel with FSH.
- Estrogen (Estradiol) Blood Test: Estrogen levels are typically low after menopause.
- Rule out Other Causes: Investigations to exclude other reasons for missed periods, such as pregnancy (pregnancy test), thyroid problems (thyroid function tests), or high prolactin levels.
6. State three benefits and two risks of Hormone Replacement Therapy.
Hormone Replacement Therapy (HRT) can offer benefits but also carries some risks:
Benefits:
- Relief of Vasomotor Symptoms: Highly effective at reducing or eliminating hot flashes and night sweats.
- Improvement of Genitourinary Symptoms: Alleviates vaginal dryness, itching, and discomfort, improving sexual function and reducing urinary symptoms.
- Prevention of Osteoporosis: HRT helps maintain bone density and significantly reduces the risk of fractures.
- May improve mood and sleep quality in some women.
Risks:
- Increased Risk of Blood Clots: Particularly in the legs (DVT) and lungs (PE), especially with oral estrogen.
- Increased Risk of Stroke: Slightly increased risk, particularly with oral estrogen in some women.
- Increased Risk of Breast Cancer: Combined estrogen-progestin HRT is associated with a small increased risk of breast cancer with long-term use (generally after 3-5 years). Estrogen-only HRT (in women without a uterus) does not appear to increase this risk and may even decrease it.
- Increased Risk of Endometrial Cancer: Estrogen-only HRT in women *with* a uterus increases the risk of endometrial cancer; this risk is reduced by also taking progesterone.
- May increase the risk of gallbladder disease.
7. Describe two dietary recommendations for a menopausal woman.
Diet plays an important role in supporting health during and after menopause:
- Ensure Adequate Calcium and Vitamin D Intake: Crucial for bone health to help prevent osteoporosis. Include calcium-rich foods like dairy products, leafy green vegetables, and fortified foods. Get enough vitamin D through sunlight exposure and foods like fatty fish or fortified milk; supplements may be needed.
- Eat a Balanced Diet Rich in Fruits, Vegetables, and Whole Grains: This provides essential vitamins, minerals, and fiber, which support overall health, help manage weight, and may reduce the risk of heart disease.
- Limit Saturated and Trans Fats, Cholesterol, and Sodium: To reduce the risk of heart disease, which increases after menopause.
- Consider Phytoestrogens: Foods like soy, flaxseeds, and chickpeas contain compounds that may have weak estrogen-like effects and could potentially help with some menopausal symptoms like hot flashes, though evidence varies.
- Maintain a Healthy Weight: A balanced diet helps manage weight, which is important for reducing risks of heart disease, diabetes, and some cancers that increase after menopause.
8. State the nurse's role in educating women about menopause.
Nurses play a key role in educating women about menopause, helping them understand the changes they are experiencing and empowering them to manage their health:
- Provide Accurate Information: Explain what menopause is, the typical age it occurs, and the physiological changes happening in the body, particularly the decline in estrogen.
- Discuss Common Symptoms: Describe common physical (hot flashes, vaginal dryness) and psychological (mood changes) symptoms they might experience.
- Explain Health Risks: Educate about the increased long-term health risks after menopause, such as osteoporosis and heart disease.
- Discuss Management Options: Explain lifestyle strategies (diet, exercise, stress management), non-hormonal therapies, and Hormone Replacement Therapy (HRT), including the benefits and risks of each.
- Encourage Healthy Lifestyle: Provide guidance on nutrition (calcium, vitamin D), exercise (weight-bearing), and avoiding smoking and excessive alcohol for long-term health.
- Promote Screening: Advise on the importance of regular health check-ups and screenings (e.g., bone density tests, cardiovascular screening) after menopause.
- Offer Support: Create a safe space for women to ask questions and express concerns. Address any myths or misconceptions about menopause.
9. Mention three complications associated with menopause.
Beyond the immediate symptoms, the hormonal changes of menopause increase the risk of certain long-term health complications:
- Osteoporosis: The decrease in estrogen leads to accelerated bone loss, making bones fragile and increasing the risk of fractures, especially of the hip, spine, and wrist.
- Cardiovascular Disease: Estrogen has protective effects on the heart and blood vessels. After menopause, the risk of heart disease and stroke increases and becomes similar to that of men.
- Genitourinary Syndrome of Menopause (GSM): This is a collection of symptoms affecting the vagina, vulva, and urinary tract due to estrogen deficiency. It includes vaginal dryness, itching, painful intercourse, and increased risk of urinary tract infections and urgency.
- Weight Gain: Menopausal transition is often associated with weight gain and a shift in fat distribution to the abdomen, increasing the risk of metabolic issues.
- Mood Disorders: While not everyone experiences this, some women may develop or see a worsening of depression or anxiety after menopause.
10. Describe two non-hormonal ways of managing menopausal symptoms.
For women who cannot or prefer not to use Hormone Replacement Therapy (HRT), several non-hormonal approaches can help manage menopausal symptoms:
- Lifestyle Modifications:
- Managing Hot Flashes: Identifying and avoiding triggers (like hot drinks, spicy foods, stress, alcohol), dressing in layers, keeping the environment cool, using fans, and cool showers.
- Exercise: Regular physical activity can help improve mood, sleep, and overall well-being, and may reduce hot flashes in some women. Weight-bearing exercise is also crucial for bone health.
- Stress Reduction: Techniques like deep breathing, meditation, and yoga can help manage hot flashes and psychological symptoms.
- Healthy Diet: Eating a balanced diet, maintaining a healthy weight, and potentially including foods rich in phytoestrogens may offer some relief.
- Over-the-Counter and Prescription Non-Hormonal Medications:
- Vaginal Moisturizers and Lubricants: For vaginal dryness and painful intercourse. Lubricants are used during sex, while moisturizers provide longer-lasting relief.
- Certain Antidepressants (e.g., SSRIs, SNRIs): Some non-hormonal medications originally developed for depression can be effective in reducing hot flashes in some women.
- Gabapentin: A medication primarily used for nerve pain and seizures, can also be effective for hot flashes.
- Clonidine: A blood pressure medication that can sometimes help with hot flashes.
- Complementary and Alternative Therapies: Some women explore options like black cohosh, evening primrose oil, or acupuncture, though scientific evidence for their effectiveness varies.
SECTION D: Long Essay Questions (10 Marks Each)
1. Discuss the causes, clinical features, and management of menopause.
Causes of Menopause:
- Menopause is a natural biological process caused by the aging of the ovaries.
- Over time, the ovaries run out of functional follicles (the structures that contain eggs and produce estrogen and progesterone).
- As the number of follicles decreases, ovarian hormone production, particularly estrogen and progesterone, declines significantly.
- This decline in hormone levels is what leads to the cessation of menstruation and the symptoms of menopause.
- Menopause can also be induced surgically (removal of ovaries) or medically (e.g., chemotherapy or radiation).
Clinical Features (Signs and Symptoms):
- Symptoms can begin during perimenopause and continue into postmenopause. They vary greatly in type and severity among women.
- Vasomotor Symptoms: Hot flashes, night sweats, flushing.
- Menstrual Changes: Irregular periods, changes in flow before cessation.
- Genitourinary Symptoms: Vaginal dryness, itching, burning, painful intercourse (dyspareunia), increased urinary frequency or urgency, increased risk of UTIs.
- Sleep Disturbances: Insomnia, difficulty staying asleep (often related to night sweats).
- Psychological Symptoms: Mood swings, irritability, anxiety, depression, difficulty concentrating, memory problems.
- Physical Changes: Weight gain (especially around the abdomen), thinning hair, dry skin, joint and muscle aches, reduced breast fullness.
Management:
- Management aims to alleviate bothersome symptoms, prevent long-term complications, and promote healthy aging.
- Lifestyle Modifications:
- Healthy diet (rich in calcium, vitamin D), regular exercise (weight-bearing for bones, cardiovascular for heart), maintaining a healthy weight.
- Avoiding triggers for hot flashes (spicy food, hot drinks, stress, alcohol).
- Stress reduction techniques (yoga, meditation).
- Quitting smoking and limiting alcohol intake.
- Medical Management:
- Hormone Replacement Therapy (HRT): Most effective treatment for hot flashes, night sweats, and vaginal dryness. Also prevents bone loss. Available in various forms (pills, patches, gels, vaginal creams/rings/tablets). Requires careful assessment of benefits and risks for each individual.
- Non-Hormonal Medications: Certain antidepressants (SSRIs, SNRIs), Gabapentin, Clonidine can help manage hot flashes. Vaginal moisturizers and lubricants for dryness.
- Other Medications: Bisphosphonates or other medications for osteoporosis prevention/treatment if HRT is not used or insufficient.
- Counseling and Support: Providing information, addressing concerns, and offering emotional support.
- Regular Health Screenings: Bone density tests, lipid profiles, blood pressure monitoring, and cancer screenings become even more important.
2. Describe in detail the hormonal changes that occur during menopause.
The menopausal transition and menopause are characterized by significant and complex hormonal changes, primarily driven by the decline in ovarian function.
Hormonal Changes:
- Decline in Ovarian Follicles: Women are born with a finite number of ovarian follicles. Throughout life, follicles are lost through a process called atresia. This loss accelerates in the years leading up to menopause. By the time menopause is reached, there are very few remaining functional follicles.
- Decreased Estrogen Production: The main function of ovarian follicles is to produce estrogen. As the number of follicles declines, the ovaries produce less and less estrogen. This decrease begins gradually in perimenopause, leading to fluctuating levels, and drops significantly after menopause. The major form of estrogen produced by the ovaries is estradiol; after menopause, the primary circulating estrogen is estrone, converted in fat tissue from adrenal hormones, but its levels are much lower than premenopausal estradiol.
- Decreased Progesterone Production: Progesterone is produced primarily by the corpus luteum after ovulation. As ovulation becomes irregular and eventually stops in perimenopause and menopause, progesterone production declines significantly and becomes negligible. This lack of cyclical progesterone is what initially leads to irregular periods before estrogen levels drop enough for periods to stop completely.
- Increased FSH and LH Levels: The hypothalamus and pituitary gland in the brain release Gonadotropin-Releasing Hormone (GnRH), Follicle-Stimulating Hormone (FSH), and Luteinizing Hormone (LH) to stimulate the ovaries. As the aging ovaries become less responsive to FSH and LH due to the lack of follicles, the pituitary gland increases its production of FSH and LH in an attempt to stimulate the ovaries. Therefore, blood levels of FSH (and usually LH) rise significantly during perimenopause and remain high after menopause. Elevated FSH is often used to confirm menopausal status.
- Changes in Androgen Levels: The ovaries and adrenal glands also produce androgens (male hormones like testosterone). While androgen production also declines with age, the drop is often less significant or slower than the drop in estrogen. This can sometimes lead to a relative increase in the ratio of androgens to estrogen, contributing to symptoms like facial hair growth in some women.
3. Explain the nursing management and health education for a woman experiencing menopausal symptoms.
Nursing management and health education for a woman with menopausal symptoms are crucial for providing support, managing symptoms, and promoting long-term health.
Nursing Management:
- Assessment:
- Assess the type, frequency, and severity of menopausal symptoms (hot flashes, night sweats, vaginal dryness, mood changes, sleep problems).
- Ask about how symptoms are impacting her quality of life.
- Gather information about her medical history, lifestyle (diet, exercise, smoking, alcohol), and any current medications.
- Assess her understanding of menopause and her concerns or fears.
- Symptom Management Support:
- Assist with comfort measures for hot flashes (e.g., recommending loose clothing, cooler environment).
- Provide information and support for managing sleep disturbances.
- Offer suggestions or provide resources for managing vaginal dryness.
- Monitor for signs of anxiety or depression and refer for further evaluation/support if needed.
- Medication Management:
- If HRT or other medications are prescribed, educate the patient on how to take them correctly, potential side effects, and the importance of adherence.
- Discuss when and why follow-up appointments are needed to review medication effectiveness and safety.
- Promote Healthy Lifestyle:
- Encourage and provide resources on healthy eating, regular exercise (including weight-bearing), and weight management.
- Advise on avoiding smoking and limiting alcohol.
- Suggest stress management techniques.
- Psychosocial Support: Listen actively to her concerns, validate her experiences, and provide emotional support. Connect her with support groups if desired.
- Prepare for Investigations: Explain the purpose of any recommended tests (e.g., bone density scan).
Health Education:
- Understanding Menopause: Explain the natural process of menopause, the hormonal changes, and that symptoms are a normal part of this transition.
- Managing Symptoms: Provide detailed information on lifestyle changes (as listed above) and the various medical and non-medical treatment options available for specific symptoms, discussing the pros and cons of each.
- Long-Term Health Risks: Educate about the increased risk of osteoporosis and cardiovascular disease after menopause and the importance of preventive measures and screenings.
- Bone Health: Emphasize the importance of calcium and vitamin D intake and weight-bearing exercise for maintaining strong bones.
- Heart Health: Advise on maintaining healthy blood pressure, cholesterol, and blood sugar levels through diet, exercise, and regular medical check-ups.
- Genitourinary Health: Educate about vaginal dryness and urinary changes and available treatments (e.g., vaginal estrogen, lubricants).
- Importance of Regular Check-ups: Stress the need for ongoing health surveillance, including pelvic exams, breast exams/mammograms, and other age-appropriate screenings.
- Self-Care Strategies: Empower her to be actively involved in her own health management.
4. Discuss the complications associated with menopause and preventive measures.
While menopause is a natural life stage, the associated decline in estrogen increases the risk of certain long-term health complications. Implementing preventive measures can significantly reduce these risks.
Complications Associated with Menopause:
- Osteoporosis:
- Explanation: Estrogen plays a key role in bone maintenance. Its decline leads to accelerated bone loss, making bones brittle and prone to fractures (especially hip, spine, wrist). This is a major cause of disability in older women.
- Preventive Measures:
- Adequate intake of Calcium and Vitamin D through diet and/or supplements.
- Regular weight-bearing exercise (walking, jogging, dancing) to help build and maintain bone density.
- Avoiding smoking and excessive alcohol consumption.
- Bone Density Testing (DEXA scan) to screen for osteoporosis.
- Hormone Replacement Therapy (HRT) is highly effective in preventing bone loss.
- Other medications (e.g., bisphosphonates) for preventing/treating osteoporosis.
- Cardiovascular Disease (Heart Disease and Stroke):
- Explanation: Before menopause, estrogen offers some protection against heart disease. After menopause, the risk increases. Risk factors like high blood pressure, high cholesterol, diabetes, and obesity also become more prevalent with age.
- Preventive Measures:
- Maintaining a healthy diet (low in saturated/trans fats, cholesterol, sodium; rich in fruits, vegetables, whole grains).
- Regular cardiovascular exercise (brisk walking, swimming, cycling).
- Maintaining a healthy weight.
- Managing blood pressure, cholesterol, and blood sugar through lifestyle and medication if needed.
- Not smoking.
- Regular medical check-ups to monitor cardiovascular risk factors.
- Genitourinary Syndrome of Menopause (GSM):
- Explanation: Atrophy (thinning and drying) of the vaginal, vulvar, and lower urinary tract tissues due to estrogen deficiency, leading to dryness, pain, itching, painful intercourse, and increased risk of UTIs and urgency.
- Preventive/Management Measures:
- Regular sexual activity can help maintain tissue health.
- Over-the-counter vaginal moisturizers and lubricants.
- Low-dose vaginal estrogen therapy (creams, rings, tablets) is very effective and has minimal systemic absorption.
5. Outline the role of diet and exercise in managing postmenopausal health.
Diet and exercise are fundamental pillars of health management for women after menopause, playing a crucial role in preventing long-term complications and promoting overall well-being.
Role of Diet:
- Bone Health: Adequate intake of calcium and vitamin D is critical to counter bone loss and reduce the risk of osteoporosis. Diet should include dairy, leafy greens, fortified foods.
- Cardiovascular Health: A heart-healthy diet low in saturated/trans fats, cholesterol, and sodium, and rich in fruits, vegetables, whole grains, and lean protein helps manage blood pressure, cholesterol, and blood sugar, reducing the risk of heart disease and stroke.
- Weight Management: Metabolism changes after menopause, making weight gain easier, especially around the abdomen. A balanced diet helps maintain a healthy weight, reducing risks associated with obesity.
- Managing Symptoms: Some dietary adjustments (e.g., avoiding hot/spicy foods for hot flashes, ensuring adequate fiber for bowel regularity) can help manage specific symptoms.
- Overall Nutrient Intake: Provides essential vitamins and minerals to support all bodily functions and energy levels.
Role of Exercise:
- Bone Health: Weight-bearing exercises (walking, jogging, dancing, strength training) are essential for maintaining bone density and reducing osteoporosis risk by putting stress on bones, stimulating them to rebuild.
- Cardiovascular Health: Regular aerobic exercise (brisk walking, swimming, cycling) strengthens the heart, improves circulation, helps manage blood pressure and cholesterol, and reduces the risk of heart disease and stroke.
- Weight Management: Exercise helps burn calories, maintain muscle mass, and manage weight, which is important for reducing overall health risks.
- Mood and Mental Health: Physical activity is a powerful tool for reducing stress, anxiety, and symptoms of depression, which can be relevant during and after menopause.
- Improved Sleep: Regular exercise can help improve sleep quality.
- Muscle Strength and Balance: Helps prevent falls and maintain independence as women age.
- Managing Hot Flashes: Some studies suggest regular exercise may help reduce the frequency or severity of hot flashes.
6. Explain the indications, benefits, and risks of Hormone Replacement Therapy (HRT).
Hormone Replacement Therapy (HRT), or Menopausal Hormone Therapy (MHT), involves taking estrogen, and often progesterone, to replace the hormones the ovaries stop producing after menopause. The decision to use HRT is complex and should be made in consultation with a doctor, considering individual circumstances.
Indications for HRT:
- Management of Moderate to Severe Menopausal Symptoms: The primary indication is to relieve bothersome symptoms like hot flashes, night sweats, sleep disturbances, and genitourinary symptoms (vaginal dryness, painful intercourse).
- Prevention of Osteoporosis: HRT is effective in preventing bone loss and reducing fracture risk in women at high risk for osteoporosis, especially when started early after menopause.
- Early Menopause or Premature Ovarian Insufficiency: HRT is often recommended for women who go through menopause before age 45 to alleviate symptoms and prevent long-term health consequences like osteoporosis and potentially cardiovascular disease, until the average age of natural menopause.
Benefits of HRT:
- Effective Symptom Relief: Significantly reduces the frequency and severity of hot flashes and night sweats.
- Improves Vaginal and Urinary Symptoms: Alleviates dryness, itching, and discomfort, and can reduce urinary urgency and UTIs.
- Protects Against Bone Loss: Prevents osteoporosis and reduces the risk of fractures.
- May improve mood and sleep quality.
- When started in younger postmenopausal women, some studies suggest a reduced risk of heart disease, but this is complex and depends on age and time since menopause.
Risks of HRT:
- Increased Risk of Blood Clots: Particularly with oral estrogen, the risk of deep vein thrombosis (DVT) and pulmonary embolism (PE) is increased.
- Increased Risk of Stroke: A small increased risk, especially with oral estrogen.
- Increased Risk of Breast Cancer: Combined estrogen-progestin HRT is associated with a small increased risk of breast cancer with longer duration of use (typically after 3-5 years). This risk appears to decrease after stopping HRT. Estrogen-only HRT does not seem to increase breast cancer risk.
- Increased Risk of Endometrial Cancer: Using estrogen alone in women who still have a uterus increases the risk of endometrial cancer. This risk is significantly reduced by adding progesterone.
- Increased risk of gallbladder disease.
7. Describe the psychosocial impact of menopause and strategies to support affected women.
The menopausal transition can have a significant psychosocial impact on women, affecting their emotional well-being, self-perception, relationships, and quality of life. While it's a natural process, the physical and hormonal changes can contribute to various psychological and social challenges.
Psychosocial Impact:
- Emotional Changes: Increased irritability, mood swings, anxiety, sadness, or symptoms of depression are common. These can be influenced by hormonal fluctuations, sleep deprivation (due to night sweats), and the stress of coping with other physical symptoms.
- Stress and Feeling Overwhelmed: Juggling menopausal symptoms with work, family responsibilities, and caring for aging parents can lead to increased stress levels.
- Body Image and Self-Esteem: Physical changes like weight gain, changes in skin and hair, and potential changes in sexual function can affect a woman's body image and self-esteem. The end of fertility can also be emotionally significant for some women.
- Impact on Relationships: Mood changes, decreased libido, or painful intercourse due to vaginal dryness can sometimes create tension or distance in intimate relationships.
- Sleep Deprivation: Chronic sleep problems due to night sweats or insomnia can worsen mood, concentration, and overall coping ability.
- Difficulty Concentrating: The cognitive symptoms ("brain fog") can be frustrating and impact confidence at work or in daily tasks.
- Social Impact: Severe symptoms like unpredictable hot flashes can cause embarrassment or make women avoid social situations.
- Sense of Loss: For some women, the end of menstruation and fertility can bring a sense of loss or a reminder of aging.
Strategies to Support Affected Women:
- Education and Information: Provide accurate information about menopause as a normal transition and its potential physical and emotional effects. This helps women understand what is happening and reduces fear and anxiety.
- Validate Experiences: Listen empathetically to their concerns and validate that their symptoms and feelings are real and common during this time.
- Encourage Open Communication: Facilitate discussions with partners and family members about the changes and how they can offer support.
- Promote Healthy Lifestyle: Encourage lifestyle changes known to improve both physical and mental health, such as regular exercise, a balanced diet, adequate sleep, and stress management techniques (mindfulness, yoga, meditation).
- Discuss Symptom Management: Ensure physical symptoms like hot flashes and vaginal dryness are effectively managed, as alleviating these can significantly improve psychological well-being. Discuss both hormonal and non-hormonal options.
- Counseling and Therapy: Refer women to counselors or therapists if they are experiencing significant anxiety, depression, or relationship difficulties. Cognitive Behavioral Therapy (CBT) has shown effectiveness in managing some menopausal symptoms and associated distress.
- Support Groups: Suggest connecting with other women going through menopause for shared experiences and support.
- Focus on Positive Aspects: Help women focus on the positive aspects of this life stage, such as freedom from menstruation and contraception (if desired), and the opportunity to focus on their own health and well-being.
8. Discuss osteoporosis in relation to menopause: causes, prevention, and nursing care.
Osteoporosis, a condition characterized by weakened and brittle bones, is a significant health concern for women after menopause due to the dramatic decline in estrogen, a hormone crucial for maintaining bone density.
Causes of Osteoporosis in Relation to Menopause:
- Estrogen Deficiency: The primary cause. Estrogen helps regulate bone turnover, a continuous process where old bone is removed (resorption) and new bone is built (formation). Estrogen deficiency after menopause leads to increased bone resorption and decreased bone formation, resulting in a net loss of bone mass. This bone loss is most rapid in the first few years after menopause.
- Age: Bone density naturally declines with age in both men and women, but the accelerated bone loss due to estrogen deficiency makes women more susceptible, especially after menopause.
Prevention of Osteoporosis:
- Adequate Calcium Intake: Ensure sufficient dietary calcium through milk, yogurt, cheese, leafy greens, fortified foods, or supplements if needed.
- Adequate Vitamin D Intake: Vitamin D is essential for calcium absorption. Get enough from sun exposure (with caution for skin safety), fatty fish, fortified foods, or supplements.
- Regular Weight-Bearing and Muscle-Strengthening Exercise: Activities like walking, jogging, dancing, lifting weights, and resistance training put stress on bones, stimulating them to become stronger.
- Avoiding Smoking and Excessive Alcohol: Both negatively impact bone health.
- Bone Density Testing (DEXA Scan): Recommended for women aged 65 and older, or earlier if they have risk factors for osteoporosis, to assess bone health and diagnose osteoporosis early.
- Hormone Replacement Therapy (HRT): HRT is very effective in preventing bone loss and reducing fracture risk, especially when started close to menopause.
- Medications: Other medications, such as bisphosphonates, selective estrogen receptor modulators (SERMs), and others, are available for preventing and treating osteoporosis in women at high risk or who have been diagnosed.
Nursing Care for Women at Risk or with Osteoporosis:
- Education: Teach women about the link between menopause and osteoporosis, risk factors, and the importance of prevention.
- Nutrition Counseling: Educate on dietary sources of calcium and vitamin D and the need for supplementation if intake is insufficient.
- Exercise Promotion: Advise and encourage safe weight-bearing and muscle-strengthening exercises. Refer to a physical therapist if needed.
- Medication Education and Adherence: If medications for osteoporosis are prescribed, explain how to take them correctly, potential side effects, and the importance of sticking to the treatment plan.
- Fall Prevention:
- Assess for fall risks in the home environment (e.g., throw rugs, poor lighting).
- Advise on maintaining good balance and strength through exercise.
- Recommend vision checks and appropriate footwear.
- Discuss the importance of reviewing medications that may cause dizziness.
- Bone Density Testing: Explain the purpose of DEXA scans and encourage recommended screening.
- Pain Management: If fractures occur, provide appropriate pain management and support during recovery.
- Emotional Support: Acknowledge the fear of fractures and impact on independence; provide reassurance and support.
9. Write an essay on the genitourinary changes during menopause and how to manage them.
The decline in estrogen during menopause has significant effects on the tissues of the lower urinary tract (bladder, urethra) and the genital tract (vagina, vulva). These changes are collectively known as the Genitourinary Syndrome of Menopause (GSM), previously called vulvovaginal atrophy or atrophic vaginitis. Unlike hot flashes which often improve over time, genitourinary symptoms tend to be chronic and progressive without treatment.
Genitourinary Changes During Menopause:
- Vaginal Changes:
- The vaginal lining becomes thinner (atrophy), drier, and less elastic.
- Reduced blood flow to the tissues.
- Loss of the normal acidity (pH increases), making the vagina more susceptible to infection.
- The vaginal canal may shorten and narrow.
- Vulvar Changes:
- The vulvar skin can become thin, dry, and itchy.
- The labia minora may shrink.
- Urinary Tract Changes:
- The lining of the urethra (the tube that carries urine from the bladder out of the body) becomes thinner and less elastic.
- The bladder and pelvic floor muscles may lose tone.
Consequences and Symptoms:
- Vaginal Symptoms: Dryness, burning, itching, irritation, discomfort.
- Painful Intercourse (Dyspareunia): Due to dryness, loss of elasticity, and thinning tissues.
- Bleeding After Intercourse: Due to fragility of the tissues.
- Urinary Symptoms: Increased frequency and urgency of urination, painful urination (dysuria), increased susceptibility to urinary tract infections (UTIs).
- Recurrent UTIs: A common problem due to changes in the urethra and bladder.
Management of Genitourinary Symptoms:
- Lifestyle and Self-Care:
- Regular Sexual Activity: Can help maintain blood flow and elasticity of vaginal tissues.
- Avoid Irritants: Avoid perfumed soaps, douches, and harsh detergents.
- Lubricants: Water-based or silicone-based lubricants used during sexual activity to reduce friction and pain.
- Vaginal Moisturizers: Non-hormonal products used regularly (e.g., every few days) to hydrate the vaginal tissues and provide longer-lasting relief from dryness.
- Low-Dose Vaginal Estrogen Therapy:
- This is the most effective treatment for GSM.
- Available as creams, vaginal tablets, or a vaginal ring.
- It delivers estrogen directly to the vaginal and urinary tissues with very little absorption into the bloodstream compared to oral HRT.
- It helps restore the thickness, elasticity, and moisture of the tissues and normalizes vaginal pH.
- Considered safe for most women, even those who cannot use systemic HRT, but should be discussed with a doctor.
- Ospemifene: An oral medication that acts like estrogen on vaginal tissues, approved for treating painful intercourse due to GSM.
- DHEA (Dehydroepiandrosterone) Vaginal Suppository: A steroid that is converted to estrogen and androgens in vaginal cells, used for treating painful intercourse.
- Pelvic Floor Physical Therapy: Can help with associated urinary symptoms or pelvic pain.
10. Explain how menopause affects cardiovascular health and its implications in nursing care.
Menopause marks a significant transition in a woman's life, and alongside the cessation of menstruation and onset of symptoms, it also leads to changes that increase the risk of cardiovascular disease (CVD), including heart disease and stroke. Before menopause, women typically have a lower risk of CVD than men of the same age, partly due to the protective effects of estrogen. After menopause, this protection is lost, and the risk increases and eventually surpasses that of men.
How Menopause Affects Cardiovascular Health:
- Loss of Estrogen's Protective Effects: Estrogen has several beneficial effects on the cardiovascular system:
- It helps keep blood vessels flexible and open.
- It has a positive effect on cholesterol levels, increasing "good" HDL cholesterol and decreasing "bad" LDL cholesterol.
- It may help regulate blood pressure.
- Stiffening of blood vessels.
- Unfavorable changes in cholesterol levels (LDL increases, HDL may decrease).
- Increased tendency for blood pressure to rise.
- Increased risk of plaque buildup in arteries (atherosclerosis).
- Weight Gain and Fat Redistribution: Menopause is often associated with weight gain and a shift in fat distribution towards the abdomen (visceral fat). Abdominal obesity is strongly linked to increased risk of heart disease, diabetes, and metabolic syndrome.
- Increased Risk of Metabolic Syndrome and Type 2 Diabetes: The hormonal changes and weight gain can increase insulin resistance, raising the risk of developing metabolic syndrome and type 2 diabetes, both major risk factors for CVD.
Implications in Nursing Care:
- Risk Assessment: Nurses should be aware that postmenopausal women are at increased risk for CVD and routinely assess for risk factors such as high blood pressure, high cholesterol, diabetes, obesity, smoking history, and family history of heart disease.
- Education on CVD Risk: Educate women about the increased risk of heart disease after menopause and that it is a leading cause of death in women. Counter the misconception that CVD is primarily a "man's disease."
- Promote Healthy Lifestyle: Provide comprehensive health education and counseling on lifestyle modifications crucial for preventing CVD:
- Heart-Healthy Diet: Emphasize a diet low in unhealthy fats, cholesterol, and sodium, and rich in fruits, vegetables, whole grains, and lean protein.
- Regular Exercise: Encourage regular aerobic activity (at least 150 minutes of moderate intensity or 75 minutes of vigorous intensity per week) to improve cardiovascular fitness, manage weight, and improve lipid profiles and blood pressure.
- Weight Management: Support women in achieving and maintaining a healthy weight.
- Smoking Cessation: Strongly advise against smoking and provide resources for quitting.
- Limiting Alcohol: Advise moderation in alcohol consumption.
- Blood Pressure and Cholesterol Monitoring: Encourage regular check-ups to monitor blood pressure and cholesterol levels and adhere to prescribed medications if needed.
- Diabetes Screening and Management: Advocate for screening for type 2 diabetes and provide education and support for managing blood sugar levels if diagnosed.
- Stress Management: Address stress, as chronic stress can negatively impact cardiovascular health.
- Symptom Awareness: Educate women about the symptoms of heart attack and stroke, which can sometimes differ in women compared to men, and the importance of seeking immediate medical help.
Gynecology Question for Revision - Topic 5
This section covers Abortion.
SECTION A: Multiple Choice Questions (40 Marks)
1. Abortion is defined as the termination of pregnancy before:
2. Which of the following is a type of abortion?
3. An abortion where parts of the products of conception remain in the uterus is called:
4. What is the commonest cause of spontaneous abortion in the first trimester?
5. Threatened abortion is characterized by:
6. A missed abortion is best diagnosed using:
7. Septic abortion is associated with:
8. One of the most common complications of unsafe abortion is:
9. Manual Vacuum Aspiration (MVA) is mainly used to:
10. Which hormone is tested to confirm pregnancy before diagnosis of abortion?
SECTION B: Fill in the Blanks (10 Marks)
1. ________ abortion involves intentional termination of pregnancy.
2. Incomplete abortion requires ________ to remove retained products.
3. A fever and offensive vaginal discharge in abortion suggests ________.
4. Abortion before 12 weeks is termed as ________ trimester abortion.
5. The hormone used to confirm pregnancy is ________.
6. In ________ abortion, the fetus dies but is retained in the uterus.
7. A ________ uterus on ultrasound may suggest complete abortion.
8. Septic abortion may lead to ________ shock.
9. Induced abortion done under unsafe conditions is called ________ abortion.
10. Excessive bleeding following abortion may result in ________ shock.
SECTION C: Short Essay Questions (10 Marks)
1. Define abortion and state its classification.
Definition:
- Abortion is the termination of a pregnancy before the fetus is capable of surviving independently outside the uterus.
- Medically, this is often defined as occurring before 28 weeks of gestation or when the fetus weighs less than 1000 grams, although viability definitions can vary.
Classification:
- Spontaneous Abortion (Miscarriage): Termination of pregnancy that occurs naturally without medical or mechanical intervention.
- Induced Abortion: The deliberate termination of a pregnancy by medical or surgical means.
- May be for medical reasons (Therapeutic Abortion) or elective.
2. List four causes of spontaneous abortion.
Spontaneous abortion (miscarriage) can be caused by various factors:
- Chromosomal Abnormalities: This is the most common cause in the first trimester (over 50% of cases). Problems with the number or structure of the baby's chromosomes.
- Uterine Abnormalities: Structural problems with the uterus, like a septate uterus or fibroids inside the cavity, can prevent proper implantation or development.
- Infections: Certain infections in the mother (e.g., some viruses, bacteria) can increase the risk of miscarriage.
- Hormonal Problems: Conditions like uncontrolled diabetes, thyroid problems, or problems with progesterone production can affect pregnancy viability.
- Maternal Health Conditions: Severe chronic illnesses in the mother, such as uncontrolled high blood pressure or kidney disease.
- Immunological Factors: Problems with the mother's immune system that cause it to reject the pregnancy (less common and complex).
- Lifestyle Factors: Smoking, excessive alcohol or drug use, significant stress, and exposure to certain environmental toxins can increase the risk.
3. Describe the clinical features of incomplete abortion.
An incomplete abortion occurs when the pregnancy is lost, some tissues have been expelled, but parts remain inside the uterus. Clinical features include:
- Vaginal Bleeding: Usually heavy and prolonged bleeding, often heavier than a normal period, sometimes with passage of blood clots.
- Abdominal Pain: Cramping pain in the lower abdomen, often more severe than menstrual cramps, as the uterus tries to expel the remaining tissues.
- Passage of Tissue: The woman may report passing some grayish or pinkish tissue through the vagina.
- Dilated Cervix: On pelvic examination, the cervix is typically open (dilated).
- Retained Products of Conception: Ultrasound examination will show that some pregnancy tissues are still present inside the uterine cavity.
- Symptoms of Pregnancy May Decrease: Symptoms like nausea or breast tenderness may lessen or disappear.
4. State three methods of managing missed abortion.
A missed abortion is when the fetus has died in the uterus but is not expelled. Management options include:
- Expectant Management: Waiting for the body to naturally expel the pregnancy tissues. This may take days or weeks and requires close monitoring. It is suitable for some women, but there is a risk of heavy bleeding, infection, or incomplete expulsion requiring further intervention.
- Medical Management: Using medications to help the uterus expel the tissues. Medications like misoprostol are often given orally or vaginally to cause uterine contractions and cervical ripening, leading to expulsion. This is a common and effective method, often preferred over surgery.
- Surgical Management (Evacuation): Removing the pregnancy tissues from the uterus surgically. This is typically done using vacuum aspiration (Manual Vacuum Aspiration - MVA or electric vacuum aspiration) or Dilation and Curettage (D&C). This method is faster and preferred in cases of heavy bleeding, infection, or when medical management is not suitable or fails.
5. Outline the nursing care for a woman with threatened abortion.
Nursing care for a woman with threatened abortion (vaginal bleeding with a closed cervix in early pregnancy) focuses on monitoring, support, and education:
- Monitor Vital Signs: Assess blood pressure, pulse, and respiration regularly to detect signs of significant blood loss or instability.
- Assess Bleeding: Monitor the amount, color, and presence of clots in vaginal bleeding. Note the frequency of pad changes.
- Assess Pain: Evaluate lower abdominal or back pain using a pain scale. Administer prescribed pain relief if needed.
- Monitor Fetal Status: If possible and appropriate for gestation, monitor for fetal heartbeat (e.g., using Doppler).
- Promote Rest: Advise the woman to rest, avoiding strenuous activity or heavy lifting, as sometimes recommended (though evidence for strict bed rest is limited).
- Education:
- Explain what threatened abortion means – that bleeding is occurring, but the pregnancy may continue.
- Advise against sexual intercourse.
- Instruct on monitoring bleeding and pain at home.
- Educate on signs that the condition is worsening (e.g., increased bleeding, severe pain, passage of tissue) and when to seek immediate medical help.
- Emotional Support: This can be a very stressful time. Listen to her fears and anxieties, provide reassurance, and offer emotional support to the woman and her partner.
- Prepare for Further Investigations: Explain the purpose of tests like ultrasound or blood tests if ordered.
6. What are three complications of unsafe abortion?
Unsafe abortions, performed outside of legal, safe medical settings, are a major cause of serious injury and death for women. Common complications include:
- Severe Bleeding (Hemorrhage): Incomplete removal of pregnancy tissue or injury to the uterus or blood vessels can lead to excessive and life-threatening blood loss.
- Infection (Sepsis): Unsterile instruments or retained tissue can lead to severe infection of the uterus and pelvic organs (septic abortion), which can spread throughout the body and cause septic shock and death.
- Uterine Perforation: Puncture or tearing of the uterine wall by instruments used during the procedure, which can damage nearby organs (bowel, bladder) and cause severe internal bleeding and infection.
- Damage to the Cervix or Vagina: Injury to the birth canal.
- Incomplete Abortion: Failure to remove all pregnancy tissue, leading to ongoing bleeding and risk of infection.
- Chronic Pain and Infertility: Pelvic infections resulting from unsafe abortion can cause long-term pelvic pain and blockages in the fallopian tubes, leading to infertility.
7. Mention two diagnostic investigations for abortion and their purpose.
Two key diagnostic investigations used when evaluating a potential abortion include:
- Pelvic Ultrasound Scan:
- Purpose: To visualize the uterus, ovaries, and surrounding structures. It confirms whether a pregnancy is present in the uterus, checks for fetal heartbeat (if gestational age is sufficient), determines the size of the gestational sac or fetus, and assesses whether there is any retained pregnancy tissue inside the uterus. This helps classify the type of abortion (e.g., threatened, missed, incomplete, complete).
- Quantitative hCG Blood Test:
- Purpose: To measure the exact amount of human chorionic gonadotropin (hCG) hormone in the blood. In a healthy early pregnancy, hCG levels typically rise rapidly. Monitoring hCG levels over a few days (serial measurements) can help determine if the pregnancy is progressing normally, failing, or if there is retained tissue. A pregnancy test confirms pregnancy, but a quantitative test gives more detail.
8. List any four signs of septic abortion.
Septic abortion is an infected abortion, characterized by signs of infection:
- Fever: Elevated body temperature is a primary sign of infection.
- Chills: Shaking or shivering often accompanies fever in infections.
- Lower Abdominal Pain: Pain and tenderness in the lower belly due to inflammation and infection in the uterus and surrounding areas.
- Foul-Smelling Vaginal Discharge: Discharge that has an unpleasant or offensive odor, often abnormal in color or consistency, indicating bacterial infection.
- Rapid Heart Rate (Tachycardia): The body's response to infection and sometimes blood loss.
- Signs of Shock: In severe cases (septic shock), low blood pressure, rapid breathing, cool and clammy skin.
9. Explain the nurse's role in post-abortion counseling.
The nurse plays a crucial role in providing counseling and support to women after an abortion, whether it was spontaneous or induced:
- Emotional Support: Create a safe and non-judgmental space for the woman to express her feelings, which can range from sadness and grief (after miscarriage) to relief, guilt, or anxiety (after induced abortion). Listen actively and offer empathy.
- Information and Education:
- Explain what she can expect physically after the abortion (bleeding, cramping, when periods might return).
- Educate on signs of complications to watch out for (heavy bleeding, fever, severe pain, foul discharge) and when to seek medical help.
- Discuss the importance of follow-up appointments.
- Family Planning/Contraception Counseling: Discuss future pregnancy plans and provide information on various contraception methods. Assist her in choosing a suitable method and ensure she knows how to use it.
- Grief and Loss Support (especially after spontaneous abortion): Acknowledge the loss experienced after a miscarriage and provide resources for grief counseling or support groups if needed.
- Psychosocial Assessment: Assess her emotional state and identify if she needs further psychological support.
- Sexual Health: Advise on when it is safe to resume sexual activity and the importance of using contraception if she wishes to avoid immediate pregnancy.
10. Differentiate between complete and incomplete abortion.
Both complete and incomplete abortion are types of spontaneous abortion (miscarriage), distinguished by whether all pregnancy tissues have been expelled from the uterus.
- Complete Abortion:
- What happens: All products of conception (fetus, placenta, membranes) are expelled from the uterus.
- Bleeding and Pain: Bleeding and cramping typically lessen and resolve relatively quickly after the expulsion of tissue.
- Cervix: The cervix is usually closed after the expulsion.
- Ultrasound: Shows an empty or clear uterine cavity.
- Management: Usually no further intervention is needed, although follow-up is important to ensure bleeding stops and hormones return to normal.
- Incomplete Abortion:
- What happens: Some, but not all, products of conception are expelled from the uterus. Some tissue remains inside.
- Bleeding and Pain: Bleeding is often heavy and prolonged, and cramping usually continues as the uterus tries to expel the remaining tissue.
- Cervix: The cervix is typically open (dilated).
- Ultrasound: Shows retained pregnancy tissue inside the uterine cavity.
- Management: Requires evacuation of the remaining tissue, usually by medical management (medication) or surgical management (MVA or D&C), to stop bleeding and prevent infection.
SECTION D: Long Essay Questions (10 Marks Each)
1. Discuss the causes, types, clinical features, and management of spontaneous abortion.
What is Spontaneous Abortion?
- Spontaneous abortion, commonly known as miscarriage, is the natural loss of a pregnancy before the fetus is viable (usually before 28 weeks gestation).
- It is a common occurrence, with most miscarriages happening in the first trimester.
Causes:
- Chromosomal Abnormalities (Most Common): Errors in the number or structure of chromosomes in the embryo or fetus.
- Uterine Factors: Structural abnormalities of the uterus (e.g., septate uterus, fibroids) or problems with the uterine lining.
- Hormonal Imbalances: Uncontrolled diabetes, thyroid disorders, or low progesterone levels.
- Infections: Certain maternal infections (e.g., rubella, toxoplasmosis, some bacterial infections).
- Immunological Factors: Conditions where the mother's immune system affects the pregnancy.
- Maternal Health Conditions: Severe chronic diseases, blood clotting disorders.
- Lifestyle and Environmental Factors: Smoking, excessive alcohol or drug use, exposure to toxins, advanced maternal age.
- Unknown Causes: In many cases, the exact cause of a single miscarriage is not identified.
Types of Spontaneous Abortion and Clinical Features:
- Threatened Abortion:
- Features: Vaginal bleeding in early pregnancy, abdominal cramps may or may not be present.
- Cervix: Closed.
- Prognosis: Pregnancy may continue.
- Inevitable Abortion:
- Features: Vaginal bleeding and abdominal cramps.
- Cervix: Open (dilated).
- Prognosis: Pregnancy loss will occur.
- Incomplete Abortion:
- Features: Heavy vaginal bleeding, severe cramping. Passage of some tissue.
- Cervix: Open.
- Contents: Some pregnancy tissue remains in the uterus.
- Complete Abortion:
- Features: Vaginal bleeding and cramping that lessen after passage of tissue.
- Cervix: Usually closed after expulsion.
- Contents: All pregnancy tissue is expelled.
- Missed Abortion:
- Features: Fetus has died, but no bleeding or cramping occurs. Pregnancy symptoms may decrease.
- Cervix: Closed.
- Contents: Retained in the uterus.
- Septic Abortion:
- Features: Signs of infection (fever, chills, foul-smelling discharge, severe pain), may occur with any type of abortion, especially incomplete or unsafe.
- Recurrent Pregnancy Loss: Two or more consecutive spontaneous abortions.
Management:
- Management depends on the type of abortion, gestational age, and the woman's condition.
- Threatened Abortion: Rest, avoiding strenuous activity, education, emotional support, monitoring for worsening signs.
- Inevitable, Incomplete, or Missed Abortion:
- Expectant Management: Waiting for natural expulsion (suitable for some stable cases).
- Medical Management: Using medications (like misoprostol) to help expel tissues.
- Surgical Management: Evacuation of the uterus using Manual Vacuum Aspiration (MVA) or Dilation and Curettage (D&C). Often preferred for heavy bleeding, infection, or when medical management fails or is unsuitable.
2. Describe septic abortion in detail: causes, signs and symptoms, investigations, treatment, and nursing care.
What is Septic Abortion?
- Septic abortion is an abortion (spontaneous or induced) that is complicated by infection of the uterus and potentially spreading to the bloodstream and other organs.
- It is a severe and potentially life-threatening condition.
Causes:
- Septic abortion is most commonly caused by infection associated with **unsafe abortions**, which are performed in unhygienic conditions by untrained individuals, leading to introduction of bacteria into the uterus.
- It can also occur following a spontaneous abortion, particularly if there is **incomplete expulsion** of pregnancy tissues, which can then become infected.
- Use of unsterile instruments or techniques.
- Delay in seeking medical care for an incomplete or threatened abortion.
Signs and Symptoms:
- Fever and Chills: Often high fever and uncontrollable shivering.
- Severe Lower Abdominal Pain: Intense pain and tenderness in the pelvic area.
- Foul-Smelling Vaginal Discharge: Discharge with a very unpleasant odor, often pus-like or bloody.
- Excessive or Persistent Vaginal Bleeding: Bleeding may be heavy, irregular, or continue for a prolonged period.
- Rapid Heart Rate (Tachycardia).
- Low Blood Pressure (Hypotension): As infection progresses, especially in septic shock.
- Rapid Breathing.
- Signs of Shock: Pale, cool, clammy skin, confusion, decreased urine output.
- Painful pelvic examination.
Investigations:
- History and Physical Examination: Assessing symptoms and signs of infection.
- Vital Signs Monitoring: Crucial for detecting instability (fever, tachycardia, hypotension).
- Blood Tests:
- Complete Blood Count (CBC): Will show elevated white blood cell count (sign of infection).
- Blood Cultures: To identify the specific bacteria causing the infection.
- Tests for organ function (kidney function tests, liver function tests) if sepsis is suspected.
- Blood group and cross-match in case blood transfusion is needed.
- Cervical/Vaginal Swabs: To identify the bacteria causing the local infection.
- Pelvic Ultrasound: To check for retained products of conception in the uterus.
- Urine Culture: To rule out urinary tract infection.
Treatment:
- Septic abortion is a medical emergency requiring aggressive treatment.
- Broad-Spectrum Antibiotics: Started immediately to cover a wide range of possible bacteria. Antibiotics may be adjusted once culture results are available.
- Fluid Resuscitation: Giving intravenous fluids to maintain blood pressure and hydration, especially if in shock.
- Evacuation of Retained Products of Conception: Prompt surgical removal of any infected tissue remaining in the uterus, usually by Dilation and Curettage (D&C) or Manual Vacuum Aspiration (MVA). This is crucial to remove the source of infection.
- Pain Management: Administering pain relief.
- Monitoring: Close monitoring of vital signs and patient condition in a hospital setting.
- Supportive Care: Managing any organ dysfunction if sepsis has led to complications.
Nursing Care:
- Frequent Vital Signs Monitoring: Assess temperature, pulse, blood pressure, respiratory rate, and oxygen saturation regularly.
- Administer Medications: Give prescribed antibiotics on time and monitor for effectiveness and side effects. Administer pain relief and fluids as ordered.
- Monitor Bleeding and Discharge: Assess amount and characteristics (odor, color) of vaginal discharge and bleeding.
- Monitor Fluid Balance: Record intake and output.
- Prepare for Procedures: Prepare the patient for D&C or MVA, explaining the procedure and providing emotional support.
- Maintain Hygiene: Ensure proper perineal care to prevent further infection.
- Emotional Support: Provide reassurance and support to the patient, who is likely very ill and distressed.
- Patient and Family Education: Educate about the condition, treatment plan, and signs of worsening infection.
- Documentation: Accurately record all observations, interventions, and patient responses.
3. Explain the medical and surgical methods of induced abortion, including nursing considerations.
Induced abortion is the intentional termination of a pregnancy before viability. Medical and surgical methods are used, depending on the gestational age and other factors. Nurses play a vital role in providing care and support throughout the process.
Medical Methods of Induced Abortion:
- How it works: Uses medications to end the pregnancy. It can be used in early pregnancy (usually up to 10-12 weeks, sometimes later).
- Medications Used:
- Mifepristone: Blocks the hormone progesterone, which is necessary for the pregnancy to continue.
- Misoprostol: Causes the uterus to contract and expel the pregnancy tissues. Misoprostol is usually taken 24-48 hours after mifepristone.
- Process: The woman takes mifepristone, usually at the clinic. She then takes misoprostol at home a day or two later. This causes cramping and bleeding similar to a heavy miscarriage, expelling the pregnancy. Follow-up is needed to ensure the abortion is complete.
- Nursing Considerations:
- Provide clear instructions on how and when to take the medications.
- Educate on expected side effects (cramping, bleeding, nausea, diarrhea) and how to manage them (e.g., pain relief).
- Advise on signs of complications (very heavy bleeding, fever, severe pain) and when to seek immediate medical help.
- Provide emotional support and ensure the woman has a support person at home.
- Schedule and explain the importance of the follow-up appointment to confirm complete abortion.
Surgical Methods of Induced Abortion:
- How it works: Uses instruments to remove the pregnancy tissues from the uterus. Can be used in early or later pregnancy.
- Types:
- Manual Vacuum Aspiration (MVA) or Electric Vacuum Aspiration (EVA): Used in early pregnancy. The cervix is gently dilated, and suction is used to remove the pregnancy tissue.
- Dilation and Curettage (D&C) or Dilation and Evacuation (D&E): Used in later first trimester or second trimester. The cervix is dilated, and instruments (curette and/or forceps) and suction are used to remove the pregnancy tissue.
- Process: Performed in a clinic or hospital setting, usually under local anesthesia with sedation, or sometimes general anesthesia for later procedures.
- Nursing Considerations:
- Prepare the patient physically and emotionally for the procedure.
- Ensure she understands the procedure and has signed consent.
- Provide pain management before, during (e.g., local anesthetic), and after the procedure.
- Monitor vital signs before, during, and after.
- Assess post-procedure bleeding, pain, and recovery.
- Educate on expected post-procedure bleeding and cramping, when to resume normal activities, and signs of complications.
- Provide counseling on contraception before discharge.
- Offer emotional support throughout, acknowledging the sensitive nature of the procedure.
4. Discuss the complications of unsafe abortion and their prevention.
Unsafe abortions are a major global health problem and a leading cause of preventable maternal death and disability. They occur when pregnancy termination is carried out by individuals lacking the necessary skills or in unhygienic environments.
Complications of Unsafe Abortion:
- Severe Bleeding (Hemorrhage): Caused by incomplete abortion, injury to the uterus or blood vessels, or retained tissue. Can lead to life-threatening blood loss and shock.
- Infection (Sepsis): Due to unsterile instruments, retained products, or introduction of bacteria. Can lead to septic abortion, pelvic inflammatory disease (PID), widespread infection (septicemia), and septic shock, often fatal.
- Uterine Perforation: Puncture of the uterine wall by sharp instruments, potentially damaging surrounding organs (bowel, bladder) and causing severe internal bleeding and peritonitis (infection of the abdominal lining).
- Damage to the Cervix or Vagina: Tears, lacerations, or long-term scarring of the birth canal.
- Incomplete Abortion: Failure to remove all pregnancy tissues, leading to continued bleeding, pain, and risk of infection.
- Chronic Pelvic Pain: Often a result of pelvic infections (PID) following unsafe abortion.
- Infertility: PID caused by unsafe abortion can severely damage the fallopian tubes, leading to blockages and making it difficult or impossible to get pregnant later.
- Asherman's Syndrome: Severe scarring inside the uterus, sometimes caused by aggressive scraping during unsafe procedures, which can lead to very light or absent periods and infertility.
- Psychological Trauma: The experience of an unsafe abortion can cause severe psychological distress, anxiety, depression, and post-traumatic stress.
- Death: Tragically, unsafe abortion is a major cause of maternal mortality worldwide.
Prevention of Unsafe Abortions:
- Comprehensive Sexuality Education: Providing accurate information about sexual health, contraception, and pregnancy prevention to adolescents and young people.
- Access to Effective Contraception: Ensuring that women and couples have access to a wide range of affordable and accessible family planning methods and counseling to prevent unintended pregnancies.
- Legal and Safe Abortion Services: Where abortion is legal, ensuring access to safe, timely, and affordable abortion services performed by trained healthcare professionals in appropriate medical settings. This is the most direct way to prevent unsafe abortions.
- Post-Abortion Care: Providing immediate and follow-up medical care to women who have undergone unsafe abortions to treat complications like bleeding, infection, and injury, and to offer counseling and family planning services.
- Addressing Root Causes: Tackling social, economic, and cultural factors that contribute to unintended pregnancies and barriers to safe abortion access.
- Training of Healthcare Providers: Ensuring that healthcare professionals are trained in providing safe abortion care and post-abortion care.
5. Outline the psychological effects of abortion and the role of a nurse in emotional support.
Abortion, whether spontaneous (miscarriage) or induced, can have significant psychological and emotional effects on a woman. The experience is highly individual and influenced by various factors like the circumstances of the pregnancy, support systems, cultural beliefs, and previous mental health.
Psychological Effects of Abortion:
- After Spontaneous Abortion (Miscarriage):
- Grief and Sadness: Feeling profound sadness, loss, and grief over the lost pregnancy and the hopes for the future.
- Anxiety and Depression: Increased risk of experiencing anxiety or depression symptoms.
- Guilt and Self-Blame: Questioning what they might have done wrong to cause the miscarriage.
- Anger and Frustration: Feeling angry or frustrated about the loss and the lack of control.
- Difficulty Coping: Struggling to process the emotional impact and return to normal life.
- After Induced Abortion:
- Relief: Many women feel a primary sense of relief, especially if the decision was difficult but felt necessary.
- Guilt and Regret: Some women may experience feelings of guilt, regret, or sadness.
- Anxiety and Depression: Risk of anxiety or depression, particularly if there were pre-existing mental health issues or lack of support.
- Anger or Resentment: May feel angry about the circumstances leading to the pregnancy or the need for abortion.
- Stigma and Isolation: Fear of judgment or lack of support can lead to feelings of isolation.
- Factors Influencing Psychological Outcome: Pre-existing mental health conditions, lack of social support, difficulty making the decision, feeling pressured, experience of the healthcare setting, and the meaning of the pregnancy can all influence how a woman copes.
Role of a Nurse in Emotional Support:
- Provide a Safe and Non-Judgmental Environment: Create a space where the woman feels safe to express her emotions without fear of being judged.
- Listen Actively and Empathetically: Pay attention to what she is saying and express understanding and compassion for her experience.
- Acknowledge and Validate Feelings: Let her know that her feelings are valid and that it's okay to feel sad, relieved, guilty, or any other emotion she is experiencing.
- Offer Reassurance: Reassure her that she is not alone and that help is available.
- Provide Information: Explain what to expect emotionally after abortion and that emotional recovery is a process that takes time.
- Assess Emotional State: Monitor for signs of severe distress, anxiety, or depression and assess her coping mechanisms and support system.
- Provide Resources: Offer information about counseling services, support groups (especially for miscarriage), and mental health professionals who can provide further support if needed.
- Include Partner/Family Support: Recognize that partners and family members may also be affected and involve them in support and education as appropriate and desired by the woman.
- Follow-up: Ensure she knows how to access help after she leaves the healthcare setting.
6. Describe post-abortion care and follow-up, including family planning.
Post-abortion care is essential for a woman's physical and emotional recovery and to ensure her future reproductive health. It involves immediate care after the procedure or expulsion of tissue and planned follow-up.
Immediate Post-Abortion Care:
- Monitoring: Closely monitor vital signs (blood pressure, pulse, temperature) to check for stability.
- Assess Bleeding and Pain: Monitor the amount of vaginal bleeding and assess pain level. Administer pain relief as needed.
- Recovery: Provide a comfortable place to rest and recover until stable before discharge.
- Initial Education: Give instructions on expected bleeding, cramping, when to seek immediate medical attention (heavy bleeding, fever, severe pain, foul discharge).
Post-Abortion Follow-up:
- Scheduled Appointment: A follow-up appointment is typically scheduled, usually within 2-4 weeks after the abortion.
- Physical Examination: Assess vital signs, check the abdomen, and perform a pelvic exam to ensure the uterus is involuting (returning to normal size), bleeding is stopping, and there are no signs of infection or retained tissue.
- Assessment of Recovery: Ask about her physical recovery, including bleeding, cramping, return of normal activities, and how she is feeling emotionally.
- Confirmation of Complete Abortion: In some cases, an ultrasound or hCG blood test may be done at follow-up to confirm that all pregnancy tissue has been expelled, especially after medical abortion or if there were concerns about incomplete abortion.
- Addressing Concerns: Provide an opportunity for the woman to ask questions and discuss any ongoing symptoms or emotional struggles.
Family Planning and Contraception:
- This is a crucial component of post-abortion care to prevent unintended pregnancies and repeat abortions.
- Counseling: Discuss her future pregnancy intentions and provide comprehensive counseling on available contraception methods (pills, injections, implants, IUDs, condoms, natural methods).
- Initiation of Contraception: Most contraceptive methods can be started immediately or very soon after an abortion. The nurse should help the woman choose a suitable method based on her needs, preferences, and health status and, if desired, provide the chosen method before she leaves the clinic or hospital.
- Education on Use: Provide clear instructions on how to use the chosen method correctly and consistently.
7. Explain the legal and ethical considerations of abortion in Uganda.
Understanding the legal and ethical aspects of abortion is complex and varies significantly between countries. In Uganda, the law on abortion is restrictive, and there are important ethical considerations for healthcare providers.
Legal Considerations in Uganda:
- Restrictive Law: The primary law governing abortion in Uganda is found in the Penal Code Act. It generally prohibits abortion and criminalizes both the person performing the abortion and the woman undergoing it.
- Permitted Circumstances: Abortion is legally permitted in very limited circumstances, primarily when it is performed to save the life of the pregnant woman. Some interpretations also allow for abortion when the woman's physical or mental health is at serious risk.
- Unsafe Abortion and its Consequences: The restrictive law contributes to the high incidence of unsafe abortions in Uganda, which lead to significant maternal morbidity and mortality. Women who seek abortions often resort to untrained providers, risking their lives and health.
- Advocacy for Reform: There is ongoing advocacy by health and human rights organizations for the law to be clarified or reformed to allow for broader access to safe abortion services, particularly in cases of rape, incest, or severe fetal abnormalities, to reduce the burden of unsafe abortion.
- Role of Healthcare Providers: Healthcare providers are legally obligated to adhere to the existing law. However, they also have an ethical duty to provide care to women suffering from complications of unsafe abortion (post-abortion care) and to offer family planning counseling.
Ethical Considerations for Healthcare Providers:
- Conscience Clause: Healthcare providers may have personal beliefs that prevent them from participating in abortion procedures. In many contexts, there is a concept of a "conscience clause" that allows providers to refuse to participate, but they still have an ethical obligation to refer the patient to a colleague or facility where the service can be provided, especially in cases where the woman's life or health is at risk.
- Duty to Provide Care for Complications: Regardless of personal beliefs or the legality of the abortion, healthcare providers have a fundamental ethical duty to provide emergency medical care to any woman suffering from complications of an unsafe or spontaneous abortion. Denying or delaying this care is unethical and can lead to preventable death.
- Patient Autonomy vs. Legal Restrictions: Healthcare providers may face an ethical conflict between respecting a woman's autonomy and decision-making regarding her body and the legal restrictions on abortion.
- Confidentiality: Maintaining patient confidentiality is an ethical principle, although in cases of unsafe abortion, there may be legal reporting requirements that can create ethical dilemmas.
- Advocacy: Healthcare professionals may feel an ethical responsibility to advocate for policies and laws that protect women's health and reduce the harm caused by unsafe abortion.
- Non-Judgmental Care: Providing compassionate and non-judgmental care to all women, regardless of the circumstances of their abortion, is an ethical imperative.
8. Discuss the nurse's role in the management of a patient undergoing Manual Vacuum Aspiration.
Manual Vacuum Aspiration (MVA) is a procedure used to empty the uterus, often for early induced abortion or management of incomplete/missed abortion. The nurse plays a crucial role in providing comprehensive care before, during, and after the procedure.
Nurse's Role in MVA Management:
- Pre-Procedure Care:
- Assessment: Assess the patient's vital signs, medical history, and understanding of the procedure. Confirm the diagnosis and gestational age.
- Education and Counseling: Explain the MVA procedure in simple terms, including what she can expect (e.g., cramping, noise from the equipment). Discuss pain management options. Ensure she understands the risks and benefits and has given informed consent. Address any fears or anxieties.
- Preparation: Ensure the patient has followed any pre-procedure instructions (e.g., fasting if sedation is planned). Assist her in preparing physically (e.g., emptying bladder).
- Emotional Support: Provide a supportive and calming presence. Acknowledge her feelings about the situation and the procedure.
- During the Procedure:
- Monitoring: Monitor vital signs throughout the procedure, especially if sedation is used.
- Pain Management: Assist with administering local anesthetic or sedation as directed. Provide comfort measures and support the patient through cramping or discomfort.
- Support and Reassurance: Stay with the patient, offer words of encouragement, and help her relax as much as possible.
- Assist the Provider: Hand instruments and supplies to the doctor as needed.
- Post-Procedure Care:
- Monitoring: Continue to monitor vital signs, assess vaginal bleeding (amount and characteristics), and assess pain.
- Recovery: Ensure the patient recovers comfortably until stable before discharge. Offer a warm drink and light snack if allowed.
- Pain Management: Administer post-procedure pain relief as prescribed.
- Education: Provide clear verbal and written instructions on:
- Expected bleeding and cramping.
- Signs of complications to watch for (heavy bleeding, fever, severe pain, foul discharge) and when to seek immediate medical help.
- When to resume normal activities, work, and sexual activity.
- Importance of the follow-up appointment.
- Family Planning Counseling: Discuss contraception options and assist her in choosing a method before discharge, providing the method if possible.
- Emotional Support: Continue to provide emotional support and check on her emotional well-being.
9. Write an essay on the impact of unsafe abortion on reproductive health.
Unsafe abortion is a major public health tragedy with devastating consequences for women's reproductive health. While it tragically leads to preventable deaths, for those who survive, it often results in severe and long-lasting damage to their reproductive system, significantly impacting their ability to have children in the future and their overall well-being.
The most common and serious impact of unsafe abortion on reproductive health stems from **infection**. Unsterile conditions and retained tissue create a fertile ground for bacteria to grow, leading to severe infections in the uterus and pelvic organs (septic abortion and pelvic inflammatory disease - PID). PID can cause widespread inflammation and scarring in the pelvic area, particularly affecting the fallopian tubes. The delicate tubes, essential for the egg to travel from the ovary to the uterus, can become blocked or damaged by this scarring. This blockage is a major cause of **infertility**. Women who have had unsafe abortions are at significantly higher risk of being unable to conceive later in life due to damaged fallopian tubes. Even if they do conceive, the risk of **ectopic pregnancy** (where the fertilized egg implants outside the uterus, usually in the fallopian tube) is much higher due to partially blocked tubes. Ectopic pregnancy is a life-threatening condition requiring emergency medical care.
Beyond infection, unsafe abortion can cause direct physical **injury to the reproductive organs**. Instruments used by untrained providers can perforate (puncture) the uterus, causing severe internal bleeding and damage to the uterus itself, potentially necessitating its removal (hysterectomy), which results in permanent infertility. The cervix and vagina can also suffer severe tears and scarring, which can lead to complications in future pregnancies, such as cervical incompetence (where the cervix opens too early) or obstructed labor if a woman manages to become pregnant and carry to term.
Incomplete abortion, a frequent outcome of unsafe procedures, means that not all pregnancy tissue is removed. Retained products of conception cause continued **heavy bleeding** and increase the risk of severe infection. If the infection becomes chronic, it can lead to long-term **chronic pelvic pain**, impacting a woman's quality of life and sexual health. In rare but severe cases, aggressive scraping during unsafe abortions can cause severe scarring inside the uterus (Asherman's Syndrome), leading to absent or very light periods and **infertility**.
The psychological impact also affects reproductive health indirectly. The trauma of an unsafe abortion experience can lead to long-term psychological distress, anxiety, and depression, which can affect sexual health, relationships, and decisions about future childbearing. Fear and stigma surrounding unsafe abortion can also prevent women from seeking timely and safe healthcare for reproductive health issues.
In conclusion, unsafe abortion is a preventable tragedy with profound and lasting negative consequences for women's reproductive health. It is a leading cause of infection, infertility, chronic pain, and puts women at high risk during future pregnancies. Addressing the root causes through comprehensive reproductive health services, including access to contraception and safe abortion care where legally permitted, is essential to protect women's lives and their ability to have healthy pregnancies in the future.
10. Explain health education messages given to adolescents on prevention of unsafe abortions.
Educating adolescents about preventing unsafe abortions is crucial for protecting their health and lives. Messages should be clear, age-appropriate, non-judgmental, and delivered in a way that empowers them to make informed decisions about their sexual and reproductive health.
Key Health Education Messages:
- Information about Sexual Health and Risks:
- Provide accurate information about how pregnancy occurs.
- Explain the risks associated with unprotected sexual activity, including unintended pregnancy and sexually transmitted infections (STIs).
- Emphasize that engaging in sexual activity carries responsibilities and potential consequences.
- Importance of Preventing Unintended Pregnancy:
- Explain that preventing pregnancy is the best way to avoid needing an abortion.
- Emphasize the importance of open communication with partners.
- Comprehensive Contraception Information:
- Provide clear, unbiased information about the range of available contraception methods (e.g., condoms, pills, injections, implants, IUDs).
- Explain how each method works, its effectiveness, how to use it correctly, and where to access it confidentially and affordably.
- Emphasize that condoms also protect against STIs.
- Address myths and misconceptions about contraception.
- Understanding the Dangers of Unsafe Abortion:
- Explain what unsafe abortion is (performed by untrained people or in unhygienic places).
- Clearly explain the severe health risks and complications of unsafe abortion, including heavy bleeding, infection, injury to organs, infertility, and death. Use simple language and perhaps relatable examples without being overly frightening.
- Emphasize that these complications can have lifelong impacts.
- Knowledge of Legal and Safe Services (if applicable):
- Inform them about the legal status of abortion in their country in a factual manner.
- If safe abortion services are legally available under certain circumstances, inform them where and how to access these services and that they are performed by trained healthcare professionals.
- Highlight that safe services are crucial for protecting health.
- Importance of Seeking Healthcare:
- Encourage them to seek help from trusted healthcare providers (doctors, nurses) if they have questions about sexual health, need contraception, or are facing an unintended pregnancy.
- Emphasize that healthcare providers can offer confidential and supportive care.
- Inform them about where to get post-abortion care if they have had an abortion (spontaneous or unsafe) and are experiencing complications.
- Building Decision-Making Skills: Help adolescents develop critical thinking and decision-making skills regarding their sexual health choices.
- Promoting Support Systems: Encourage them to identify trusted adults (parents, teachers, counselors, healthcare providers) they can talk to.
Gynecology Question for Revision - Topic 5
This section covers Ectopic Pregnancy.
SECTION A: Multiple Choice Questions (40 Marks)
1. An ectopic pregnancy is defined as a pregnancy that occurs:
2. The most common site of ectopic pregnancy is:
3. A key symptom of a ruptured ectopic pregnancy is:
4. Risk factors for ectopic pregnancy include:
5. A common clinical sign of ectopic pregnancy is:
6. Diagnosis of ectopic pregnancy is confirmed by:
7. A ruptured ectopic pregnancy can lead to:
8. The drug commonly used in medical management of ectopic pregnancy is:
9. Emergency surgery for ectopic pregnancy is called:
10. The earliest sign of ectopic pregnancy may include:
SECTION B: Fill in the Blanks (10 Marks)
1. Ectopic pregnancy most commonly occurs in the ________ tube.
2. A life-threatening complication of ruptured ectopic pregnancy is ________ shock.
3. The medical treatment of ectopic pregnancy includes administration of ________.
4. An ectopic pregnancy is typically diagnosed with ________ and beta-hCG levels.
5. Pain in the shoulder tip is a sign of ________ irritation.
6. ________ pregnancy refers to simultaneous intrauterine and ectopic pregnancy.
7. A previous ________ pregnancy increases the risk of another ectopic pregnancy.
8. Vaginal bleeding in ectopic pregnancy is usually ________ than in miscarriage.
9. ________ is the surgical removal of the affected fallopian tube.
10. Severe anemia may occur due to ________ from a ruptured ectopic pregnancy.
SECTION C: Short Essay Questions (10 Marks)
1. Define ectopic pregnancy.
Definition:
- An ectopic pregnancy is a pregnancy that implants and grows outside the main cavity of the uterus.
- It is also known as an extrauterine pregnancy.
- The most common location for an ectopic pregnancy is in the fallopian tube (tubal pregnancy), but it can also occur in the ovary, abdomen, or cervix.
- Ectopic pregnancies are not viable and cannot develop into a baby.
2. List any four predisposing factors to ectopic pregnancy.
Factors that increase a woman's risk of having an ectopic pregnancy include:
- Previous Ectopic Pregnancy: Having had an ectopic pregnancy before is the strongest risk factor.
- Pelvic Inflammatory Disease (PID): Infections in the pelvic organs, often caused by STIs, can damage the fallopian tubes.
- Previous Pelvic or Abdominal Surgery: Surgery in the pelvic area, especially on the fallopian tubes, can increase the risk.
- Smoking: Smoking is associated with an increased risk.
- Use of Assisted Reproductive Technology (ART): IVF, for example, can have a slightly increased risk.
- Use of IUDs (Intrauterine Devices) or Progestin-Only Pills: While these methods are very effective at preventing pregnancy *in the uterus*, if a pregnancy does occur while using them, it is more likely to be ectopic (though the overall risk of *any* pregnancy, including ectopic, is much lower than not using contraception).
3. Mention four clinical signs and symptoms of ectopic pregnancy.
Signs and symptoms of an ectopic pregnancy can vary and may appear in early pregnancy, usually within the first 6-8 weeks:
- Abnormal Vaginal Bleeding: Often light spotting or brownish discharge, different from a normal period.
- Lower Abdominal Pain: Pain, often described as cramping or sharp, usually on one side of the lower abdomen.
- Missed Menstrual Period: The woman will usually have a positive pregnancy test.
- Shoulder Tip Pain: A symptom of internal bleeding irritating the diaphragm (sign of rupture).
- Dizziness or Fainting: Due to blood loss, especially if the ectopic pregnancy has ruptured.
- Pain with Bowel Movements or Urination.
4. State three investigations used to confirm ectopic pregnancy.
Confirming an ectopic pregnancy typically involves a combination of investigations:
- Pregnancy Test: A positive urine or blood pregnancy test confirms that a pregnancy exists.
- Pelvic Ultrasound Scan: This is essential to see if the pregnancy sac is located inside the uterus or if there is a mass suspicious for an ectopic pregnancy outside the uterus (e.g., in the fallopian tube).
- Serial Quantitative Beta-hCG Blood Tests: Measuring the level of the pregnancy hormone (beta-hCG) in the blood over a few days. In a normal early pregnancy, hCG levels typically double about every 48 hours. In an ectopic pregnancy, the levels often rise more slowly or abnormally.
- Serum Progesterone Levels: Low progesterone levels can sometimes suggest a non-viable pregnancy, which could be ectopic or a miscarriage.
5. Outline the medical management of early unruptured ectopic pregnancy.
For carefully selected cases of early, unruptured ectopic pregnancies that are stable and meet certain criteria, medical management using medication may be an option:
- Medication Used: The drug used is **Methotrexate**.
- How it Works: Methotrexate is a medication that stops the growth of rapidly dividing cells, including the cells of the pregnancy tissue.
- Administration: It is typically given as a single injection into a muscle.
- Criteria for Medical Management: Usually considered if the ectopic pregnancy is small, unruptured, there is no fetal heartbeat on ultrasound, the woman is medically stable, beta-hCG levels are below a certain level, and she is able to attend follow-up appointments.
- Follow-up: Close follow-up with serial beta-hCG blood tests is necessary to ensure that the treatment is working and that hCG levels are falling.
- Monitoring for Symptoms: The woman must be monitored for worsening pain or bleeding, which could indicate rupture, requiring immediate surgery.
6. List three complications of ruptured ectopic pregnancy.
Rupture of an ectopic pregnancy is a medical emergency with severe complications:
- Severe Internal Bleeding (Hemorrhage): The rupture of the fallopian tube causes significant and rapid bleeding into the abdominal cavity.
- Hypovolemic Shock: The rapid loss of a large amount of blood leads to a dangerous drop in blood pressure and insufficient blood supply to the body's organs. This is a life-threatening type of shock.
- Death: If not diagnosed and treated quickly, the severe bleeding and shock from a ruptured ectopic pregnancy can be fatal.
- Damage to the Fallopian Tube: The rupture often severely damages the fallopian tube, usually requiring its removal (salpingectomy), which can affect future fertility.
- Need for Emergency Surgery: Rupture almost always requires immediate surgical intervention (often open laparotomy) to stop the bleeding and remove the ectopic pregnancy.
7. Explain the nursing responsibilities in managing a patient with suspected ectopic pregnancy.
Nurses play a vital role in the management of a patient with suspected ectopic pregnancy, focusing on assessment, monitoring, support, and preparation for potential treatment:
- Prompt Recognition: Be aware of the signs and symptoms (abdominal pain, abnormal bleeding in early pregnancy) and recognize that ectopic pregnancy is a possibility.
- Vital Signs Monitoring: Frequently assess blood pressure, pulse, and other vital signs, especially if the patient reports severe pain or signs of dizziness, as these can indicate rupture and shock.
- Pain Assessment: Assess the location, severity, and characteristics of the abdominal pain.
- Assess Bleeding: Monitor the amount and type of vaginal bleeding.
- Emotional Support: This is a stressful and uncertain time. Provide emotional support, listen to the patient's concerns, and offer reassurance. The potential loss of a desired pregnancy or the fear of a life-threatening condition can be overwhelming.
- Prepare for Investigations: Explain the purpose of blood tests (hCG) and ultrasound scans and prepare the patient for these procedures.
- Prepare for Treatment: Be prepared for potential medical management (e.g., explaining Methotrexate) or surgical intervention. If surgery is likely, ensure the patient is prepared (e.g., NPO status, consent).
- Administer Medications: Give prescribed pain relief or other medications as ordered.
- Education: Provide clear information about ectopic pregnancy, the diagnostic process, and potential treatment options.
- Advocate: Advocate for timely investigations and management if ectopic pregnancy is suspected.
8. What first aid measures should be taken if a patient presents with signs of rupture?
If a woman presents with signs suggestive of a ruptured ectopic pregnancy (sudden severe abdominal pain, dizziness, fainting, signs of shock), this is a medical emergency requiring immediate first aid and transfer to a hospital:
- Call for Emergency Medical Services: Immediately call for an ambulance or arrange for urgent transportation to the nearest hospital with surgical facilities.
- Keep the Patient Lying Down: Lay the patient flat on her back. Elevating her legs slightly (if tolerated) can help improve blood flow to vital organs.
- Keep the Patient Warm: Cover the patient with a blanket to prevent hypothermia, which can worsen shock.
- Monitor Vital Signs (if possible): If trained and equipment is available, monitor pulse and blood pressure frequently while waiting for transport.
- Do NOT Give Anything by Mouth: Do not give the patient food or drink as she may require emergency surgery under anesthesia.
- Provide Reassurance: Keep the patient calm and provide reassurance while waiting for help.
- Prepare for Transport: Gather any available medical information or documents to send with the patient.
9. Mention two psychological effects of ectopic pregnancy.
Experiencing an ectopic pregnancy can have significant emotional and psychological effects on a woman and her partner:
- Grief and Loss: Even though the pregnancy was not viable, the diagnosis of ectopic pregnancy means the loss of a desired pregnancy and the hopes associated with it, leading to feelings of grief, sadness, and disappointment.
- Anxiety and Fear: The medical uncertainty, potential for rupture, need for urgent treatment (medication or surgery), and the life-threatening nature of a ruptured ectopic pregnancy can cause intense anxiety and fear.
- Shock and Trauma: A sudden diagnosis, especially if it involves rupture and emergency surgery, can be a traumatic experience.
- Concerns about Future Fertility: Worry about whether the ectopic pregnancy and its treatment (especially if the tube is removed) will affect the ability to get pregnant in the future.
- Depression: Some women may experience symptoms of depression after an ectopic pregnancy.
10. Describe health education given to a woman after surgical treatment of ectopic pregnancy.
After surgical treatment for an ectopic pregnancy, health education is important for recovery, recognizing complications, and planning for the future:
- Post-Operative Care:
- Explain expected discomfort, pain at the incision sites (for laparoscopy) or abdomen (for laparotomy), and how to manage pain with prescribed medications.
- Advise on wound care and signs of wound infection.
- Explain expected vaginal bleeding (usually light spotting) and cramping.
- Discuss when to resume normal activities, exercise, and work, usually gradually.
- Advise on when it is safe to resume sexual activity (usually after bleeding has stopped and incisions have healed, typically 2-4 weeks).
- Signs of Complications:
- Educate on warning signs that require immediate medical attention: heavy vaginal bleeding (soaking more than one pad per hour), fever or chills, increasing abdominal pain, foul-smelling vaginal discharge, signs of wound infection (redness, swelling, pus).
- Follow-up Care:
- Explain the importance of attending the scheduled follow-up appointment.
- Discuss any remaining blood tests (e.g., hCG to ensure levels drop to zero) or scans needed.
- Emotional Recovery: Acknowledge the emotional impact of the ectopic pregnancy and surgery. Encourage her to talk about her feelings. Provide information about support groups or counseling if needed.
- Future Fertility and Family Planning:
- Discuss the implications for future fertility, including the risk of another ectopic pregnancy.
- Advise on waiting a certain period before trying to conceive again (often 2-3 menstrual cycles).
- Provide comprehensive counseling on contraception options and assist her in choosing a method.
SECTION D: Long Essay Questions (10 Marks Each)
1. Discuss the causes, clinical features, investigations, and management of ectopic pregnancy.
What is Ectopic Pregnancy?
- An ectopic pregnancy is a pregnancy that implants and grows outside the uterine cavity.
- It is a serious and potentially life-threatening condition because the site of implantation cannot support the growing pregnancy, which can lead to rupture and severe bleeding.
- The vast majority occur in the fallopian tube.
Causes and Risk Factors:
- Ectopic pregnancy occurs when the transport of the fertilized egg from the fallopian tube to the uterus is hindered or delayed.
- **Damage to Fallopian Tubes:** This is the most common underlying problem. Causes of tube damage include:
- Pelvic Inflammatory Disease (PID): Often caused by sexually transmitted infections (STIs) like chlamydia and gonorrhea, which can cause inflammation and scarring in the tubes.
- Previous Pelvic or Tubal Surgery: Procedures like tubal ligation (tying the tubes), tubal reconstruction, or surgery for conditions like endometriosis.
- Previous Ectopic Pregnancy: The strongest risk factor, suggesting existing tubal dysfunction.
- Assisted Reproductive Technology (ART): While intended to help pregnancy, IVF can have a slightly higher risk of ectopic pregnancy compared to natural conception in some cases.
- Smoking: Nicotine can affect the function of the cilia (tiny hairs) that help move the egg through the tube.
- Intrauterine Devices (IUDs) and Progestin-Only Pills: These are highly effective at preventing uterine pregnancies. If a pregnancy does occur while using them, it is more likely to be ectopic than if no contraception was used.
- Advanced Maternal Age.
Clinical Features (Signs and Symptoms):
- Symptoms typically appear in early pregnancy, around 6-8 weeks from the last menstrual period.
- Missed Menstrual Period / Positive Pregnancy Test: The woman is pregnant.
- Abnormal Vaginal Bleeding: Often light, intermittent spotting or brownish discharge, may be different from a normal period.
- Lower Abdominal Pain: Usually the earliest and most common symptom. It can be cramping or sharp, constant or intermittent, and often felt on one side of the lower abdomen.
- Signs of Rupture (Medical Emergency): Sudden, severe, sharp abdominal pain, dizziness, fainting, shoulder tip pain (due to internal bleeding irritating the diaphragm), signs of shock (low blood pressure, rapid heart rate, pale skin).
- Other symptoms: Pain with bowel movements or urination.
Investigations:
- Pregnancy Test: To confirm pregnancy (usually positive).
- Pelvic Ultrasound Scan: Transvaginal ultrasound is the key imaging test. It helps to see if a gestational sac is in the uterus, and to look for a mass or fluid in the fallopian tubes or elsewhere outside the uterus.
- Serial Quantitative Beta-hCG Blood Tests: Measuring hCG levels over 48 hours. Abnormal rise (slower doubling time) is suggestive of ectopic pregnancy or miscarriage.
- Serum Progesterone Levels: Low levels can suggest a non-viable pregnancy (either ectopic or miscarriage).
- Culdocentesis (less common now): Drawing fluid from behind the uterus through the vagina to check for blood (suggests internal bleeding).
Management:
- Management depends on whether the ectopic pregnancy is ruptured or unruptured, the gestational age, the patient's clinical condition, hCG levels, and future fertility desires.
- Expectant Management: In very rare, selected cases of very early ectopic pregnancy with low and falling hCG levels and no symptoms, the body may resolve the pregnancy on its own under close monitoring.
- Medical Management:
- Medication: Methotrexate is used for early, unruptured ectopic pregnancies that are stable and meet specific criteria. It stops the growth of the pregnancy tissue. Requires close follow-up with hCG monitoring.
- Surgical Management:
- Laparoscopy (Minimally Invasive): The preferred method for most unruptured and stable ruptured ectopic pregnancies. Small incisions are made, and a camera and instruments are used to remove the ectopic pregnancy. Can involve removing the entire tube (salpingectomy) or just the pregnancy from the tube (salpingostomy - if preserving fertility is a priority and the tube is not too damaged).
- Laparotomy (Open Surgery): May be necessary in emergency situations like ruptured ectopic pregnancy with severe bleeding, or if laparoscopic surgery is not possible or safe. Involves a larger abdominal incision.
- Management of Shock: In ruptured cases, immediate focus is on stabilizing the patient with intravenous fluids and blood transfusion.
- Emotional Support and Counseling: Essential throughout diagnosis and treatment.
- Family Planning: Counseling on contraception and future fertility after treatment.
2. Describe in detail the differences between ruptured and unruptured ectopic pregnancy.
The distinction between an unruptured and a ruptured ectopic pregnancy is crucial because it dictates the urgency and type of management required. An unruptured ectopic pregnancy is still contained, while a ruptured one has broken open, leading to potentially life-threatening internal bleeding.
Unruptured Ectopic Pregnancy:
- Condition: The fertilized egg has implanted outside the uterus (most commonly in the fallopian tube) and is growing, but the surrounding tissue (the fallopian tube wall) has not yet burst open.
- Symptoms: Symptoms may be mild or non-specific in the early stages. The woman may have a missed period, positive pregnancy test, and some lower abdominal pain (often dull or cramping, possibly on one side) and/or abnormal vaginal bleeding (spotting or light bleeding). Pain is usually not sudden or severe initially.
- Clinical Signs: On examination, there might be tenderness in the lower abdomen, possibly more on one side. A tender adnexal mass might be felt in some cases. Signs of shock are absent.
- Investigations: Ultrasound may show a gestational sac or mass outside the uterus. Serial beta-hCG levels may rise abnormally (slower than expected). The woman is medically stable.
- Management: Management is often less urgent and may involve medical treatment with Methotrexate (if criteria are met) or planned surgical removal (often laparoscopically) of the ectopic pregnancy or the affected tube. The goal is to remove the pregnancy before rupture occurs.
- Prognosis: With timely diagnosis and treatment, the prognosis is generally good, and severe complications are usually avoided.
Ruptured Ectopic Pregnancy:
- Condition: The tissue surrounding the ectopic pregnancy (most commonly the fallopian tube wall) has burst open. This is often caused by the growing pregnancy expanding and weakening the wall.
- Symptoms: Characterized by sudden onset of **severe**, sharp abdominal pain. This pain is often generalized throughout the abdomen. Other symptoms include significant dizziness, weakness, feeling faint, and a classic symptom of **shoulder tip pain** (due to blood irritating the diaphragm). Vaginal bleeding may or may not be heavy externally, but there is significant internal bleeding.
- Clinical Signs: The patient will likely show signs of **hypovolemic shock** due to rapid internal blood loss: low blood pressure, rapid and weak pulse, fast breathing, pale and clammy skin, and possibly altered mental status. Abdominal examination will reveal tenderness, guarding, and possibly distension.
- Investigations: Ultrasound may show a complex mass or gestational sac outside the uterus and significant free fluid (blood) in the abdomen. Beta-hCG levels may be elevated but the clinical presentation is paramount. The patient is medically unstable.
- Management: This is a **medical emergency** requiring immediate and aggressive treatment. The priority is stabilization with intravenous fluids and blood transfusion, followed by urgent surgical intervention (often open laparotomy for quick access and control of bleeding, although laparoscopy may be possible in some stable ruptured cases) to stop the bleeding and remove the ectopic pregnancy and usually the damaged tube.
- Prognosis: The prognosis is serious and depends on the speed of diagnosis and intervention. It is a leading cause of maternal death in early pregnancy worldwide.
3. Explain the nursing care of a patient with ectopic pregnancy before and after surgery.
Nursing care for a woman undergoing surgery for ectopic pregnancy requires vigilant monitoring, emotional support, and comprehensive education throughout the process.
Nursing Care Before Surgery:
- Assessment and Monitoring:
- Assess vital signs frequently, especially blood pressure and pulse, to detect signs of instability or shock (if rupture is suspected or confirmed).
- Monitor the amount and characteristics of vaginal bleeding.
- Assess the severity and location of abdominal pain using a pain scale.
- Assess for signs of dizziness, weakness, or pallor.
- Preparation for Surgery:
- Ensure the patient is NPO (nothing by mouth) as per hospital policy for surgery.
- Start intravenous fluids as ordered, especially if there are signs of blood loss or instability.
- Prepare the patient physically (e.g., skin prep) and emotionally.
- Ensure all necessary investigations are completed and results are available (e.g., blood tests, ultrasound).
- Verify informed consent for the surgical procedure has been obtained by the doctor.
- Emotional Support:
- Provide a calm and supportive environment.
- Acknowledge the emotional distress associated with the diagnosis, potential loss of a pregnancy, and fear of surgery.
- Listen to her concerns and answer questions simply and honestly.
- Administer Medications: Give pre-operative medications (e.g., pain relief, antibiotics) as ordered.
Nursing Care After Surgery:
- Post-Operative Monitoring:
- Monitor vital signs closely until stable, particularly watching for signs of bleeding or infection.
- Assess post-operative pain using a pain scale and administer prescribed analgesics (pain relief).
- Monitor vaginal bleeding and surgical incision sites for bleeding, swelling, redness, or drainage.
- Monitor urine output.
- Recovery and Comfort:
- Position the patient comfortably.
- Encourage deep breathing and coughing exercises to prevent respiratory complications.
- Assist with early ambulation (getting out of bed and walking) as soon as appropriate to prevent blood clots.
- Offer clear fluids initially and progress diet as tolerated.
- Education:
- Explain expected post-operative recovery, including normal pain, bleeding, and activity restrictions.
- Provide instructions on wound care (if applicable).
- Educate on warning signs of complications to watch for after discharge (e.g., fever, increasing pain, heavy bleeding, foul discharge) and when to seek immediate medical attention.
- Discuss when to resume normal activities and sexual intercourse.
- Explain the importance of attending the follow-up appointment.
- Emotional Support: Continue to provide emotional support, recognizing that the emotional recovery may take time. Discuss grief and loss if appropriate.
- Family Planning Counseling: Provide counseling on contraception options before discharge and discuss the risk of future ectopic pregnancy.
4. Discuss the complications of ectopic pregnancy and their prevention.
Ectopic pregnancy is a serious condition primarily due to the complications that can arise from the pregnancy growing outside the uterus. Understanding these complications and their prevention is vital.
Complications of Ectopic Pregnancy:
- Rupture: This is the most feared complication. As the pregnancy grows, it can cause the fallopian tube (or other site) to burst. This leads to:
- Severe Internal Bleeding (Hemorrhage): Rapid and significant blood loss into the abdominal cavity.
- Hypovolemic Shock: A life-threatening condition caused by inadequate blood volume.
- Death: Ruptured ectopic pregnancy is a leading cause of maternal mortality in early pregnancy.
- Damage to the Fallopian Tube: Even if the ectopic pregnancy is removed without rupture (e.g., during salpingostomy), the tube may still be damaged, increasing the risk of future ectopic pregnancies. Often, the damaged tube must be removed (salpingectomy).
- Infertility: Damage or removal of one or both fallopian tubes significantly impacts a woman's ability to conceive naturally in the future.
- Recurrent Ectopic Pregnancy: Women who have had one ectopic pregnancy are at significantly higher risk of having another one in the future.
- Chronic Pelvic Pain: Scarring and adhesions resulting from the ectopic pregnancy or surgery can sometimes lead to long-term pelvic pain.
- Psychological Distress: The experience can be emotionally traumatic, leading to grief, anxiety, depression, and fear regarding future pregnancies.
Prevention of Ectopic Pregnancy and its Complications:
- Preventing Sexually Transmitted Infections (STIs): STIs like chlamydia and gonorrhea are a major cause of Pelvic Inflammatory Disease (PID), which damages fallopian tubes. Practicing safe sex (e.g., using condoms), regular STI screening (especially for sexually active young people), and prompt treatment of STIs are crucial preventive measures.
- Avoiding Pelvic Infections: Good hygiene and prompt treatment of any vaginal or pelvic infections can help reduce the risk of PID.
- Smoking Cessation: Quitting smoking reduces the risk.
- Early Diagnosis of Pregnancy: Encouraging women to confirm pregnancy early and seek antenatal care helps in early identification if something is wrong.
- Awareness of Risk Factors and Early Symptoms: Educating women about the risk factors for ectopic pregnancy and the importance of seeking medical attention if they experience early symptoms like abdominal pain and abnormal bleeding in early pregnancy.
- Prompt Diagnosis and Management: For women with suspected ectopic pregnancy, timely investigation (ultrasound, hCG tests) and prompt medical or surgical treatment are essential to prevent rupture and its life-threatening consequences.
- Counseling and Contraception after Ectopic Pregnancy: Providing counseling on the increased risk of recurrence and discussing effective contraception options to prevent future unintended pregnancies, especially since future pregnancies carry a higher risk of being ectopic.
5. Describe the role of ultrasound and beta-hCG in the diagnosis of ectopic pregnancy.
Pelvic ultrasound and blood tests for beta-hCG (human chorionic gonadotropin) are the two main diagnostic tools used together to confirm or rule out an ectopic pregnancy in early pregnancy.
Role of Pelvic Ultrasound:
- Visualization of Uterine Cavity: Ultrasound, especially transvaginal ultrasound (where the probe is inserted into the vagina), allows doctors to see if a gestational sac (the fluid-filled sac surrounding the early pregnancy) is located inside the uterine cavity. Seeing a definite intrauterine pregnancy on ultrasound generally rules out an ectopic pregnancy (unless it's a very rare heterotopic pregnancy).
- Identification of Extrauterine Mass: Ultrasound helps to visualize the fallopian tubes, ovaries, and surrounding areas. It can detect a mass, complex cyst, or even a gestational sac containing a yolk sac or embryo outside the uterus, which is highly suggestive of an ectopic pregnancy.
- Presence of Free Fluid: Ultrasound can detect the presence of free fluid (which could be blood) in the abdominal or pelvic cavity, especially if rupture has occurred.
- Assessing Fetal Heartbeat: If a gestational sac is seen, ultrasound can check for a fetal heartbeat, which, if present outside the uterus, confirms an ectopic pregnancy with a live embryo. However, a heartbeat is often not seen in early ectopic pregnancies.
Role of Quantitative Beta-hCG Blood Tests:
- Confirming Pregnancy: The presence of beta-hCG in the blood confirms that a pregnancy exists.
- Assessing Pregnancy Viability and Location (in conjunction with ultrasound):
- In a normal early pregnancy, beta-hCG levels typically double approximately every 48 hours.
- In an ectopic pregnancy, the placenta is not developing normally, so the beta-hCG levels often rise more slowly than expected, may plateau, or even fall.
- Comparing the beta-hCG level with ultrasound findings is crucial. If the hCG level is above a certain "discriminatory zone" (a level at which a gestational sac *should* be visible inside the uterus on ultrasound in a normal pregnancy), but no intrauterine sac is seen, an ectopic pregnancy is highly suspected.
- Monitoring Treatment Effectiveness: After medical treatment with Methotrexate or surgical removal, serial beta-hCG levels are monitored to ensure they are falling towards zero, indicating that the pregnancy tissue is gone.
6. Explain the medical management of ectopic pregnancy with Methotrexate, including indications and precautions.
Medical management using Methotrexate is an alternative to surgery for treating certain early, unruptured ectopic pregnancies. It avoids the risks of surgery but requires careful selection of patients and close monitoring.
How Methotrexate Works:
- Methotrexate is a medication that interferes with the process of cell division and growth.
- It targets rapidly dividing cells, such as the cells of the developing pregnancy tissue (trophoblast).
- By stopping cell growth, it causes the ectopic pregnancy to stop developing and be gradually absorbed by the body.
Indications for Medical Management with Methotrexate:
- Unruptured Ectopic Pregnancy: The fallopian tube or other implantation site must not have burst.
- Hemodynamically Stable Patient: The woman's vital signs (blood pressure, pulse) must be stable, with no signs of active bleeding or shock.
- Gestational Age: Usually used for early ectopic pregnancies, typically less than 6-8 weeks.
- Beta-hCG Level: Beta-hCG levels are usually below a certain threshold (the specific level may vary slightly depending on guidelines, but often below 5000 mIU/mL). Higher levels are less likely to respond to Methotrexate.
- No Fetal Heartbeat: On ultrasound, there should be no evidence of a fetal heartbeat.
- Size of Ectopic Mass: The size of the ectopic pregnancy on ultrasound is usually limited (e.g., less than 3-4 cm).
- Patient Compliance: The woman must be able and willing to attend all necessary follow-up appointments and understand the importance of monitoring.
- No Contraindications: No medical conditions that would prevent the use of Methotrexate (e.g., liver or kidney problems, active infection, blood disorders, breastfeeding).
Precautions and Monitoring:
- Side Effects: Educate the patient about potential side effects, which can include nausea, vomiting, diarrhea, stomach pain, fatigue, and sometimes mouth sores. Folic acid supplements are often stopped before and during treatment as Methotrexate works by blocking folate.
- Activity Restrictions: Advise avoiding strenuous activity, sexual intercourse, and potentially sun exposure while undergoing treatment.
- Follow-up Beta-hCG Monitoring: This is crucial. Blood hCG levels are checked regularly (e.g., on day 4 and day 7 after the injection, and then weekly) to ensure they are falling consistently, indicating that the treatment is working. A rise or plateau in hCG may indicate treatment failure.
- Monitoring for Rupture: The woman must be educated on the signs of ectopic pregnancy rupture (sudden severe pain, dizziness) and instructed to seek immediate medical attention if these occur. Even with medical management, there is still a small risk of rupture before the pregnancy is fully resolved.
- Need for Second Dose or Surgery: If hCG levels do not fall as expected, a second dose of Methotrexate may be given, or surgical management may become necessary.
- Contraception: Advise the woman to avoid pregnancy for a certain period (usually 3-6 months) after treatment with Methotrexate to allow the drug to clear from her system.
7. Discuss the psychosocial and emotional effects of ectopic pregnancy and the role of a nurse.
An ectopic pregnancy is not just a medical event; it is a significant emotional and psychological experience for the woman and her partner. Nurses play a vital role in providing support and addressing these effects.
Psychosocial and Emotional Effects:
- Shock and Disbelief: The diagnosis often comes as a shock, especially if the woman was experiencing early pregnancy symptoms and had a positive pregnancy test.
- Grief and Loss: For women who desired the pregnancy, an ectopic pregnancy represents the loss of that pregnancy and the future they envisioned. This can lead to feelings of sadness, grief, and mourning, similar to a miscarriage.
- Anxiety and Fear: The medical seriousness of the condition, the potential for rupture and severe complications, and the need for urgent treatment can cause intense anxiety and fear for her life and health.
- Trauma: Experiencing severe pain, emergency treatment, or surgery, especially if unexpected, can be traumatic.
- Anger, Frustration, Guilt: Women may feel angry about why this happened to them, frustrated by the situation, or even feel guilty, questioning if they did something wrong.
- Concerns about Future Fertility: Worry about whether the ectopic pregnancy and its treatment will affect their ability to have children in the future, especially if a fallopian tube is removed.
- Impact on Partner: Partners also experience emotional distress, fear, and grief. They may also feel helpless.
- Isolation: The unique nature of ectopic pregnancy (not a normal pregnancy or a typical miscarriage) can sometimes make women feel isolated or that others don't fully understand their experience.
- Impact on Relationships: The stress and emotional burden can sometimes strain relationships.
Role of a Nurse:
- Provide Clear Information: Explain the diagnosis, what it means, and the treatment plan in simple, understandable terms. Address any misconceptions or fears about the condition.
- Listen and Validate: Create a safe space for the woman (and her partner) to express their feelings. Listen actively and validate that their emotional reactions are normal responses to a difficult situation.
- Offer Emotional Support: Provide compassionate presence and reassurance. Acknowledge the loss of the pregnancy if it was desired.
- Manage Physical Symptoms: Effective pain management and addressing physical discomfort help reduce overall distress.
- Facilitate Communication: Encourage communication between the patient, her partner, and the medical team.
- Address Future Fertility Concerns: Provide information about the impact on future fertility in an honest but sensitive manner. Discuss the risk of recurrence and available options for future conception (including assisted reproductive technologies if needed).
- Provide Resources: Offer information about counseling services, support groups for ectopic pregnancy or pregnancy loss, and mental health professionals.
- Involve Partner: Offer support and information to the partner as well, as they are also affected.
- Follow-up Support: Ensure the woman knows how to access emotional support and healthcare after discharge.
8. Outline emergency care for a patient with a suspected ruptured ectopic pregnancy.
A suspected ruptured ectopic pregnancy is a life-threatening emergency requiring immediate action to stabilize the patient and prepare for surgery. Emergency care follows these steps:
Emergency Care Steps:
- Immediate Assessment: Rapidly assess the patient's condition, focusing on vital signs (blood pressure, pulse, respiratory rate, oxygen saturation) to determine the severity of shock. Assess level of consciousness.
- Call for Help: Immediately alert the medical team, including senior doctors (obstetrician, surgeon), anesthesiologist, and nursing staff. Announce a medical emergency.
- Establish IV Access: Insert one or preferably two large-bore intravenous lines quickly to allow for rapid administration of fluids and blood.
- Fluid Resuscitation: Begin rapid intravenous infusion of crystalloid fluids (e.g., normal saline) to improve blood pressure and circulation, treating hypovolemic shock.
- Blood Transfusion: Send blood for urgent grouping and cross-matching. Be prepared to administer blood transfusion promptly if the patient shows signs of significant blood loss or shock that doesn't respond to fluids.
- Oxygen Administration: Provide oxygen via a face mask or nasal cannula to improve oxygen delivery to tissues.
- Pain Management: Administer strong pain relief intravenously as ordered to manage severe abdominal pain.
- Preparation for Surgery: This is the definitive treatment.
- Keep the patient NPO (nothing by mouth).
- Insert a urinary catheter to monitor urine output (an indicator of kidney perfusion and response to resuscitation).
- Ensure necessary blood tests are sent urgently (e.g., CBC, coagulation studies).
- Prepare the skin for surgery.
- Ensure informed consent is obtained for emergency surgery (often a verbal consent is obtained and documented in an emergency).
- Transport the patient to the operating theatre immediately once stabilized for surgery.
- Monitoring: Continuously monitor vital signs, level of consciousness, pain level, and response to resuscitation efforts.
- Emotional Support: Despite the urgency, provide brief, calm reassurance to the patient and keep her informed of what is happening.
9. Explain the importance of early antenatal care in preventing and detecting ectopic pregnancy.
Early and regular antenatal care (ANC) plays a significant role in the prevention of ectopic pregnancy and, more importantly, in its early detection and timely management, which prevents severe complications.
Importance in Prevention:
- Health Education: Early ANC visits provide an opportunity for healthcare providers to educate women about risk factors for ectopic pregnancy (like STIs, PID, smoking) and counsel them on preventive measures, particularly encouraging safe sexual practices and prompt treatment of infections.
- Identification of Risk Factors: During initial ANC visits, healthcare providers can identify women who have known risk factors for ectopic pregnancy (e.g., previous ectopic, PID history, pelvic surgery) and be more vigilant in their assessment.
Importance in Early Detection and Management:
- Confirmation of Pregnancy: Early ANC involves confirming pregnancy, typically with a urine or blood test.
- Assessment of Early Symptoms: Healthcare providers will inquire about early pregnancy symptoms, including any abdominal pain or vaginal bleeding, which are key warning signs of ectopic pregnancy.
- Physical Examination: Pelvic examination during early ANC can sometimes detect pelvic tenderness or an adnexal mass, raising suspicion.
- Timely Investigations: If symptoms are present or risk factors are high, early ANC allows for prompt ordering of investigations like quantitative hCG blood tests and pelvic ultrasound.
- Ultrasound in Early Pregnancy: Ultrasound performed in early ANC (especially transvaginal) is crucial for determining the location of the pregnancy (whether it's inside the uterus). Seeing an intrauterine pregnancy rules out most ectopic pregnancies. If no intrauterine pregnancy is seen with a positive pregnancy test, or if a suspicious mass is noted outside the uterus, further investigation for ectopic pregnancy is initiated.
- Early Diagnosis: Access to early ANC facilitates early diagnosis of ectopic pregnancy while it is still unruptured and the woman is stable.
- Timely Treatment: Early diagnosis allows for prompt medical treatment (Methotrexate) or planned surgical removal, preventing rupture and severe complications like hemorrhage, shock, and death.
- Reduced Morbidity and Mortality: Early detection and management through ANC significantly reduce the risk of severe morbidity (illness and injury) and mortality associated with ruptured ectopic pregnancy.
10. Write an essay on health education and follow-up care for women post-ectopic pregnancy.
Experiencing an ectopic pregnancy is a significant medical and emotional event. Comprehensive health education and careful follow-up care are vital for a woman's physical recovery, psychological healing, and future reproductive health after an ectopic pregnancy.
Health Education Post-Ectopic Pregnancy:
- Understanding What Happened: Provide clear and simple explanation of what an ectopic pregnancy is, why it happened (if the cause was identified), and why it could not continue. Address any misconceptions or self-blame.
- Explanation of Treatment Received: Describe the medical treatment (Methotrexate) or surgical procedure (laparoscopy/laparotomy, salpingectomy/salpingostomy) that was performed, explaining its purpose and what was done.
- Expected Physical Recovery:
- Discuss expected post-treatment symptoms, such as vaginal bleeding (amount and duration), abdominal pain/cramping, and fatigue.
- Provide guidance on incision care (if surgery was performed) and signs of infection.
- Advise on when to resume normal activities, including work, exercise, and sexual activity (usually when physically comfortable and bleeding has stopped).
- Signs of Complications: Crucially, educate on warning signs that require immediate medical attention: heavy vaginal bleeding, increasing or severe abdominal pain, fever or chills, foul-smelling vaginal discharge, signs of infection at surgical sites, or symptoms of dizziness/fainting.
- Hormone Level Monitoring (if applicable): If treated medically or sometimes after surgery, explain the need for follow-up blood tests to monitor hCG levels until they return to zero, confirming that all pregnancy tissue is gone.
- Future Fertility: Discuss the impact on future fertility honestly. Explain the risk of recurrence (having another ectopic pregnancy) and that while getting pregnant is still possible (even with one tube), the risk is higher. Discuss options for assessing remaining tube health if appropriate.
- Family Planning and Contraception: This is a critical discussion. Provide comprehensive counseling on a range of contraception methods. Advise on waiting a recommended period before attempting another pregnancy (often 2-3 menstrual cycles after medical treatment or surgery) to allow for physical and emotional recovery. Ensure she chooses and understands how to use a method she is comfortable with if she wants to prevent immediate or future pregnancy.
- Emotional Recovery: Acknowledge the emotional impact and grief. Validate her feelings. Provide information on counseling services, support groups, or online resources for women who have experienced ectopic pregnancy or pregnancy loss. Reassure her that emotional healing takes time.
Follow-up Care Post-Ectopic Pregnancy:
- Scheduled Appointment: A follow-up appointment is essential to monitor physical recovery, check incision sites (if applicable), assess emotional well-being, and review test results.
- Monitoring hCG: Ensure hCG levels continue to fall to zero if not already confirmed, particularly after medical management.
- Physical Examination: Assess uterine involution, check for tenderness or masses in the pelvic area.
- Discussion of Future Pregnancy: Review plans for future conception, discuss the increased risk of recurrence, and potentially recommend early ultrasound in any future pregnancy to confirm intrauterine location.
- Contraception Review: Ensure she is comfortable with and correctly using her chosen contraception method.
- Emotional Support Referral: If emotional distress persists, facilitate referral to mental health professionals.
- Addressing Long-Term Concerns: Discuss any ongoing pain or concerns about fertility and plan for further evaluation or management if needed.
Gynecology Question for Revision - Topic 6
This section covers Hydatidiform Mole (Molar Pregnancy).
SECTION A: Multiple Choice Questions (40 Marks)
1. A hydatidiform mole is best described as:
2. The most common type of hydatidiform mole is:
3. A hallmark symptom of molar pregnancy is:
4. Which hormone is excessively elevated in hydatidiform mole?
5. The classic ultrasound appearance of a complete molar pregnancy is:
6. Which of the following is a risk factor for molar pregnancy?
7. One potential complication of untreated hydatidiform mole is:
8. Hydatidiform mole is managed primarily by:
9. The definitive diagnosis of molar pregnancy is made by:
10. During follow-up of a molar pregnancy, what test is monitored?
SECTION B: Fill in the Blanks (10 Marks)
1. A molar pregnancy is classified as ________ or partial.
2. The hormone significantly elevated in molar pregnancy is ________.
3. A common sign of hydatidiform mole is painless ________ bleeding.
4. The ultrasound finding in a complete mole is described as a ________ pattern.
5. Evacuation of the uterus is usually done using ________.
6. Follow-up of a patient with a molar pregnancy includes weekly monitoring of ________ levels.
7. Failure of hCG levels to fall may indicate development of ________.
8. Excessive uterine size for gestational age suggests ________ pregnancy.
9. The definitive diagnosis of molar tissue is confirmed through ________.
10. Contraception is recommended for ________ months following molar evacuation.
SECTION C: Short Essay Questions (10 Marks)
1. Define hydatidiform mole.
Definition:
- A hydatidiform mole, also known as a molar pregnancy, is a rare complication of pregnancy.
- It is a type of gestational trophoblastic disease (GTD).
- It involves the abnormal growth of the tissue that would normally develop into the placenta (trophoblast).
- This abnormal tissue forms clusters of fluid-filled sacs (like grapes) and does not result in a viable pregnancy.
2. List four clinical features of molar pregnancy.
Clinical features that may suggest a molar pregnancy in early pregnancy include:
- Abnormal Vaginal Bleeding: The most common symptom, often painless, varying from spotting to heavy bleeding, sometimes passing grape-like vesicles.
- Uterine Size Larger Than Expected: The uterus may grow faster and measure larger than expected for the duration of the pregnancy due to the rapid growth of abnormal tissue.
- Severe Nausea and Vomiting (Hyperemesis Gravidarum): More severe than typical morning sickness, possibly due to very high hCG levels.
- Symptoms of Hyperthyroidism: Rapid heartbeat, sweating, nervousness, due to high hCG mimicking thyroid-stimulating hormone.
- Early Onset of Preeclampsia: High blood pressure, protein in urine, and swelling occurring unusually early in pregnancy (before 20 weeks), which is rare in normal pregnancy.
- Absence of Fetal Movement or Heartbeat: As it's not a viable pregnancy, fetal activity is absent.
3. Differentiate between complete and partial hydatidiform mole.
- Complete Hydatidiform Mole:
- Cause: Results from fertilization of an empty egg by one or two sperm. All genetic material is from the father.
- Fetal Tissue: No fetal parts or amniotic sac are present.
- Placental Tissue: All placental tissue is abnormal and swollen into grape-like vesicles.
- hCG Levels: Typically very high.
- Risk of Malignancy: Higher risk of developing persistent GTD or choriocarcinoma.
- Partial Hydatidiform Mole:
- Cause: Results from fertilization of a normal egg by two sperm. There is abnormal genetic material (usually 69 chromosomes instead of 46).
- Fetal Tissue: Some fetal tissue and an amniotic sac may be present, but the fetus is usually severely malformed and not viable.
- Placental Tissue: Some placental tissue is abnormal with vesicles, mixed with some normal-looking tissue.
- hCG Levels: May be elevated but usually lower than in complete moles.
- Risk of Malignancy: Lower risk of developing persistent GTD or choriocarcinoma compared to complete moles.
4. State three diagnostic investigations for molar pregnancy.
Diagnosing a molar pregnancy involves several steps:
- Quantitative Serum Beta-hCG: Measuring the level of pregnancy hormone in the blood. Very high levels (often much higher than expected for gestational age) are highly suggestive of a molar pregnancy.
- Pelvic Ultrasound Scan: Ultrasound is crucial for visualizing the uterine contents. In a complete mole, the classic "snowstorm" pattern of abnormal placental tissue is seen, with no fetus. In a partial mole, there may be some abnormal tissue mixed with fetal tissue.
- Histological Examination: Microscopic examination of the tissue removed from the uterus after evacuation provides the definitive diagnosis of a complete or partial hydatidiform mole.
5. Outline three complications of untreated molar pregnancy.
If a molar pregnancy is not treated (evacuated) or if monitoring is inadequate, complications can arise:
- Persistent Gestational Trophoblastic Disease (GTD): Abnormal trophoblast tissue continues to grow in the uterus after evacuation, leading to persistently high or rising hCG levels. This requires further treatment, usually chemotherapy.
- Choriocarcinoma: In a small percentage of cases, particularly after a complete mole, the abnormal tissue can develop into a highly malignant and aggressive form of cancer that can spread quickly to other parts of the body.
- Excessive Vaginal Bleeding: The mole can cause severe and prolonged bleeding, potentially leading to anemia or requiring blood transfusion.
- Risk of Pulmonary Embolism of Trophoblast: In rare cases, molar tissue can travel to the lungs, causing respiratory problems.
- Development of Preeclampsia: Although seen as a symptom, severe preeclampsia can develop unusually early in pregnancy with a large mole.
6. Mention the medical management of hydatidiform mole.
The primary medical management of hydatidiform mole involves procedures and medications:
- Uterine Evacuation: The main treatment is surgical removal of the abnormal tissue from the uterus, typically by suction curettage (Manual Vacuum Aspiration or electric suction). This is usually performed soon after diagnosis.
- Medical Induction (less common): In some cases, particularly for later gestation partial moles that are larger, medical induction using medications to cause uterine contractions might be considered, but surgical evacuation is generally preferred due to the risk of embolization and retained tissue.
- Follow-up with hCG Monitoring: After evacuation, medical management includes regular monitoring of serum hCG levels (usually weekly initially) to ensure they fall to normal and remain normal, indicating that the abnormal tissue has been successfully removed.
- Chemotherapy: If hCG levels plateau or rise after evacuation (indicating persistent GTD) or if choriocarcinoma develops, chemotherapy is the medical treatment used to destroy the remaining abnormal cells.
- Contraception: Advising and providing effective contraception during the monitoring period is crucial medical management to prevent pregnancy, which would interfere with hCG monitoring.
7. Describe the nursing responsibilities during evacuation of a molar pregnancy.
Nursing care during the uterine evacuation of a molar pregnancy is essential for the patient's safety, comfort, and emotional support:
- Pre-Procedure Care:
- Assess vital signs, hydration status, and amount of bleeding.
- Prepare the patient physically (e.g., NPO status if anesthesia is used).
- Provide clear explanation of the procedure (suction curettage), what to expect (cramping), and pain management options.
- Ensure informed consent is obtained.
- Provide emotional support, addressing her fears and anxiety about the diagnosis and procedure.
- During the Procedure:
- Monitor vital signs continuously.
- Administer pain relief and/or sedation as ordered.
- Assist the doctor by providing instruments and monitoring the patient's response.
- Provide continuous emotional support and reassurance to the patient.
- Monitor bleeding and the amount of tissue removed.
- Post-Procedure Care:
- Monitor vital signs closely until stable.
- Assess post-procedure bleeding and pain. Administer analgesics as needed.
- Monitor for signs of complications like heavy bleeding, fever, or increasing pain.
- Ensure the removed tissue is sent to the laboratory for histological examination.
- Begin discussing the importance of follow-up and hCG monitoring.
- Provide emotional support and acknowledge the loss.
- Offer fluids and light food when appropriate.
8. List three health education messages to a patient after treatment for hydatidiform mole.
Health education is critical for a woman after treatment for a molar pregnancy:
- Importance of Follow-up and hCG Monitoring: Explain that regular blood tests (usually weekly initially) to measure the pregnancy hormone (hCG) are essential to ensure all the abnormal tissue is gone and to detect any problems early. Emphasize that consistent follow-up is crucial for her health.
- Need for Reliable Contraception: Explain that it is very important to avoid getting pregnant during the follow-up period (usually 6-12 months) because a new pregnancy would make it impossible to accurately monitor hCG levels. Discuss and provide effective contraception methods.
- Signs of Complications: Educate her on warning signs that require immediate medical attention after leaving the hospital, such as heavy vaginal bleeding, fever, severe abdominal pain, or symptoms that return after her hCG levels were normal.
- Emotional Recovery: Acknowledge that experiencing a molar pregnancy and loss can be emotionally difficult. Encourage her to talk about her feelings and seek counseling or support if needed.
- Future Pregnancies: Reassure her that in most cases, women can have healthy pregnancies in the future after successful treatment and follow-up for a molar pregnancy, but advise discussing future pregnancy plans with her doctor.
9. What are the warning signs of choriocarcinoma?
Choriocarcinoma is a rare but aggressive cancer that can develop after a molar pregnancy (or sometimes a normal pregnancy or miscarriage). Warning signs that may suggest its development include:
- Persistently Elevated or Rising hCG Levels: This is the most important indicator, detected during the regular monitoring after a molar pregnancy. If hCG levels plateau or rise instead of falling to normal, it is a strong sign of persistent GTD or choriocarcinoma.
- Abnormal Vaginal Bleeding: Irregular or heavy bleeding that continues or starts again after treatment of a mole.
- Symptoms Related to Metastasis (Spread): Choriocarcinoma can spread quickly. Symptoms depend on where it spreads:
- Cough or Difficulty Breathing: If it spreads to the lungs (common site).
- Neurological Symptoms: Headaches, dizziness, seizures, or weakness if it spreads to the brain.
- Vaginal Lumps or Bleeding: If it spreads to the vagina.
- Abdominal Pain or Swelling: If it spreads to the liver or other abdominal organs.
- Other Symptoms: Fever, weight loss, fatigue (though less specific).
10. Explain the purpose of hCG monitoring after molar pregnancy treatment.
Monitoring serum hCG levels after the evacuation of a molar pregnancy is the most important part of follow-up care. The purpose is:
- To Confirm Complete Removal: After the abnormal tissue is removed, hCG levels should start to fall because the source of the hormone is gone. Monitoring shows if the levels are dropping as expected.
- To Detect Persistent Gestational Trophoblastic Disease (GTD): If some abnormal trophoblast cells remain in the uterus or have invaded deeper tissue, they will continue to produce hCG. If hCG levels plateau or rise instead of falling to normal, it indicates that persistent GTD is present and requires further treatment.
- To Detect Choriocarcinoma: hCG is a tumor marker for gestational trophoblastic diseases, including choriocarcinoma. Rising hCG levels can be an early sign that the abnormal tissue has developed into this malignant form of GTD, allowing for prompt diagnosis and treatment.
- To Guide Further Treatment: The pattern of hCG decline dictates whether further treatment (like chemotherapy) is needed and when the monitoring period can end.
- To Determine When Future Pregnancy is Safe: hCG monitoring confirms when the condition has resolved, making it safe to attempt another pregnancy.
SECTION D: Long Essay Questions (10 Marks Each)
1. Define hydatidiform mole and discuss its types, causes, clinical features, diagnosis, and management.
Definition of Hydatidiform Mole:
- A hydatidiform mole, also called a molar pregnancy, is an abnormal form of pregnancy where the tissue that normally becomes the placenta grows in an unusual way, forming grape-like clusters.
- It is a type of gestational trophoblastic disease (GTD) that is not a viable pregnancy and cannot develop into a fetus.
Types:
- Complete Hydatidiform Mole:
- No fetal tissue present.
- Genetic material is solely paternal (from the father).
- All placental tissue is abnormal and forms vesicles.
- Higher risk of developing persistent GTD or choriocarcinoma.
- Partial Hydatidiform Mole:
- Some abnormal fetal tissue may be present, but it is not viable.
- Genetic material is triploid (three sets of chromosomes, usually from two sperm and one egg).
- Both abnormal and some normal-appearing placental tissue are present.
- Lower risk of developing persistent GTD or choriocarcinoma.
Causes:
- Molar pregnancies result from errors during fertilization.
- Complete Mole: An egg with no genetic material is fertilized by one or two sperm. The sperm's genetic material duplicates.
- Partial Mole: A normal egg is fertilized by two sperm.
- Risk Factors: Extremes of maternal age (teenage or over 35, especially over 40), previous molar pregnancy, history of miscarriage, and possibly nutritional factors.
Clinical Features (Signs and Symptoms):
- Abnormal vaginal bleeding in the first trimester (most common, often painless).
- Uterine size larger than expected for gestational age.
- Severe nausea and vomiting (hyperemesis gravidarum).
- High blood pressure developing early in pregnancy (before 20 weeks).
- Symptoms of hyperthyroidism.
- Absence of fetal movement or heartbeat.
- Passage of grape-like vesicles from the vagina (less common).
Diagnosis:
- Medical History and Physical Exam: Assessing symptoms and uterine size.
- Quantitative Serum Beta-hCG: Measuring blood hCG levels (typically very high).
- Pelvic Ultrasound: Classic "snowstorm" appearance for complete mole, mixed appearance for partial mole; absence of viable fetus.
- Histological Examination: Microscopic examination of evacuated tissue is the definitive diagnostic method.
Management:
- Uterine Evacuation: The primary treatment is surgical removal of the abnormal tissue, usually by suction curettage (MVA or electric suction).
- Histological Examination: The removed tissue is always sent for pathology to confirm the diagnosis and type of mole.
- Post-Evacuation Follow-up: This is crucial.
- hCG Monitoring: Regular (usually weekly) blood tests to measure hCG levels until they fall to normal and remain normal for a specified period (usually 6-12 months).
- Contraception: Reliable contraception is essential during the follow-up period to prevent pregnancy, which would interfere with hCG monitoring.
- Management of Complications:
- Persistent GTD: Detected by plateauing or rising hCG. Treated with chemotherapy.
- Choriocarcinoma: Treated with chemotherapy, sometimes surgery.
- Emotional Support: Counseling for the emotional impact and loss.
2. Explain the complications of hydatidiform mole and the nurse's role in their prevention.
While the immediate removal of a molar pregnancy is the primary treatment, several complications can arise, both acutely and in the long term. Nurses play a vital role in preventing these complications through monitoring, education, and supportive care.
Complications of Hydatidiform Mole:
- Immediate Complications (During/Immediately After Evacuation):
- Hemorrhage: Excessive bleeding can occur during or after the evacuation procedure.
- Uterine Perforation: Risk of puncturing the uterine wall during the procedure.
- Pulmonary Embolism of Trophoblast: Rare but serious complication where molar tissue travels to the lungs, causing respiratory distress.
- Early Complications (Weeks After Evacuation):
- Infection: Risk of infection in the uterus (endometritis) if any tissue is retained.
- Retained Products of Conception: Incomplete removal of the mole requiring repeat evacuation.
- Late Complications (Months/Years After Evacuation):
- Persistent Gestational Trophoblastic Disease (GTD): Continued growth of abnormal trophoblast tissue, diagnosed by plateauing or rising hCG levels. Requires chemotherapy.
- Choriocarcinoma: Development of a malignant form of GTD, which can spread widely and requires aggressive treatment.
- Recurrence: Small risk of having another molar pregnancy in the future.
Nurse's Role in Prevention of Complications:
- Pre-Procedure Care: Assess patient's readiness for evacuation, monitor vital signs, and ensure necessary blood work is done to minimize risks during the procedure.
- During Evacuation: Assist the doctor, monitor the patient's vital signs and blood loss closely, and ensure safe administration of anesthesia/sedation.
- Post-Procedure Care:
- Monitor for Bleeding: Assess the amount of vaginal bleeding regularly to detect hemorrhage early.
- Monitor for Infection: Monitor vital signs (especially temperature) and assess for signs of infection like fever, increased pain, or foul-smelling discharge.
- Monitor for Respiratory Distress: Be alert for signs of pulmonary embolism (shortness of breath, chest pain).
- Ensure Tissue is Sent to Lab: Verify that the evacuated tissue is sent for histological examination for definitive diagnosis.
- Education on Follow-up: Crucially, educate the patient and her family about the absolute necessity of regular hCG monitoring follow-up appointments to detect persistent GTD or choriocarcinoma early. Explain *why* this is important.
- Contraception Counseling: Provide thorough education on reliable contraception and emphasize the need to avoid pregnancy during the monitoring period to ensure accurate hCG results. Assist her in choosing and accessing a method.
- Education on Warning Signs: Teach the patient the signs and symptoms of persistent GTD or complications (recurrent bleeding, symptoms of spread) and when to seek immediate medical help.
- Emotional Support: Provide ongoing emotional support, as the fear of malignancy and the required lengthy follow-up can be stressful.
3. Discuss in detail the surgical and medical management of a patient diagnosed with molar pregnancy.
Management of molar pregnancy involves both surgical and medical approaches, with the primary goal being the complete removal of the abnormal trophoblast tissue and subsequent monitoring for persistent disease.
Surgical Management:
- Uterine Evacuation (Suction Curettage):
- Description: This is the standard and preferred method for removing a molar pregnancy regardless of type (complete or partial). It is a surgical procedure performed to empty the contents of the uterus.
- Procedure: The cervix is gently dilated, and a suction device (Manual Vacuum Aspirator or electric suction machine) is used to create vacuum pressure to remove the molar tissue from the uterine cavity. Sometimes, a gentle curettage (scraping) with a sharp instrument is done afterwards, but suction is the main method.
- Timing: Usually performed as soon as the diagnosis is confirmed.
- Advantages: Quick, effective in removing the tissue, and helps prevent immediate complications like hemorrhage.
- Considerations: Requires anesthesia (local, regional, or general). Risk of uterine perforation or incomplete evacuation.
- Hysterectomy (less common):
- Description: Surgical removal of the entire uterus.
- Indications: May be considered in older women who have completed childbearing and do not wish to preserve their uterus, particularly if they have a complete mole and are at higher risk for persistent GTD or find the prolonged monitoring burdensome. It removes the site where persistent disease or choriocarcinoma would arise.
Medical Management (Following Surgical Evacuation):
- Histological Examination: The tissue removed during evacuation is sent to pathology for microscopic examination to confirm the diagnosis of a molar pregnancy and determine if it is a complete or partial mole. This is a crucial medical step for classification and risk assessment.
- Post-Evacuation hCG Monitoring: This is the cornerstone of post-molar pregnancy management.
- Method: Regular quantitative blood tests to measure beta-hCG levels.
- Frequency: Typically done weekly until hCG levels are undetectable (zero) for three consecutive weeks, and then monthly for a specified period (usually 6-12 months depending on the type of mole and risk factors).
- Purpose: To detect persistent GTD or choriocarcinoma early, indicated by plateauing or rising hCG levels.
4. Describe the post-evacuation care and follow-up of a patient with molar pregnancy.
Post-evacuation care and follow-up are essential for ensuring the physical recovery of a woman after removal of a molar pregnancy and, critically, for monitoring to detect and treat any persistent gestational trophoblastic disease (GTD).
Post-Evacuation Care (Immediate):
- Monitoring: Monitor vital signs (blood pressure, pulse, temperature) to check for stability and signs of complications like hemorrhage or infection.
- Assess Bleeding: Monitor vaginal bleeding (amount, color, presence of clots) and report any excessive bleeding.
- Assess Pain: Assess abdominal pain and administer prescribed pain relief. Cramping is expected as the uterus contracts.
- Uterine Assessment: Check the size and firmness of the uterus.
- Monitor for Complications: Be alert for signs of hemorrhage, infection (fever, foul discharge), or respiratory distress (possible pulmonary embolism).
- Emotional Support: Provide support and a safe space for the woman to express her feelings about the loss and the experience.
- Education: Provide initial instructions on expected bleeding, cramping, when to seek urgent medical help, and the importance of follow-up.
Follow-up of Molar Pregnancy:
- Histological Confirmation: Ensure the tissue removed is sent for microscopic examination to confirm the diagnosis of a complete or partial mole.
- hCG Monitoring: This is the cornerstone of follow-up.
- Frequency: Quantitative serum beta-hCG levels are measured regularly, typically weekly until they are undetectable for three consecutive weeks, then monthly for a set period (duration depends on the type of mole, but often 6-12 months).
- Purpose: To ensure the abnormal tissue is cleared and to detect persistent GTD or choriocarcinoma early if hCG levels plateau or rise.
- Contraception: Reliable contraception is mandatory during the entire hCG monitoring period. Provide comprehensive counseling on options and ensure she chooses and uses an effective method. Explain *why* pregnancy must be avoided (interferes with monitoring).
- Physical Examination: Follow-up appointments may include pelvic exams to assess uterine involution and check for any abnormal masses.
- Imaging (if needed): A chest X-ray is often done after evacuation. Further imaging may be needed if hCG levels are abnormal or metastasis is suspected.
- Emotional Support: Provide ongoing support throughout the follow-up period, which can be stressful. Refer to counseling or support groups if needed.
- Education on Signs of Recurrence/Complication: Reinforce teaching about the warning signs of persistent GTD (abnormal bleeding, symptoms of spread) and the importance of adhering to the follow-up schedule.
- When Monitoring Ends: Explain when the monitoring period is successfully completed (hCG remains undetectable for the required time).
- Future Pregnancy Planning: Discuss when it is safe to attempt another pregnancy (after the monitoring period is complete and the doctor advises it) and the likelihood of future healthy pregnancies (high for most women).
5. Explain the psychological effects of molar pregnancy and the nursing interventions.
A molar pregnancy is a complex experience that can have significant psychological effects on a woman, often involving feelings related to the diagnosis, the loss of the pregnancy, and the required lengthy follow-up.
Psychological Effects of Molar Pregnancy:
- Shock and Confusion: The diagnosis of a molar pregnancy is often unexpected and can be confusing, as it is not a typical miscarriage. Understanding what it means can be difficult.
- Grief and Loss: Even though it was not a viable pregnancy, women often experience grief and sadness over the loss of the anticipated pregnancy and the future plans associated with it. This grief can be complicated by the abnormal nature of the pregnancy.
- Anxiety and Fear: Significant anxiety is common, particularly related to the risk of developing persistent GTD or choriocarcinoma and the need for prolonged hCG monitoring. There is fear about the possibility of cancer and its treatment.
- Frustration and Uncertainty: The lengthy follow-up period with hCG monitoring can be frustrating, and the uncertainty about future health and the ability to have healthy pregnancies can be stressful.
- Difficulty Processing: It can be hard to process the experience, which is neither a normal pregnancy nor a straightforward miscarriage.
- Body Image Concerns: Physical symptoms like severe nausea or abdominal swelling (if present) and the subsequent treatment can affect body image.
- Impact on Relationships: The stress and emotional burden can affect the woman's relationship with her partner and family.
Nursing Interventions for Psychological Support:
- Provide Clear and Simple Information: Explain the diagnosis, treatment, and the importance of follow-up in language the woman can understand. Address her questions and fears directly.
- Validate Feelings: Create a safe space for her to express her emotions. Validate her feelings of grief, confusion, anxiety, and fear, letting her know that these are normal responses.
- Listen Actively: Spend time listening to her story and her concerns without judgment.
- Offer Emotional Support: Provide compassionate care and reassurance. Be present and supportive throughout the treatment and follow-up process.
- Address Anxiety about Malignancy: Explain that while there is a risk of persistent GTD/choriocarcinoma, it is relatively low (especially after a partial mole), and the monitoring is designed to detect it early when it is highly treatable. Emphasize the high cure rates.
- Support through Monitoring: Acknowledge the stress of the follow-up period. Encourage her to keep appointments and discuss any difficulties she is facing.
- Discuss Future Pregnancies: Provide reassurance about the likelihood of future healthy pregnancies in most cases, addressing concerns about recurrence and fertility in a sensitive manner.
- Provide Resources: Offer information about counseling services, support groups for molar pregnancy or pregnancy loss, and mental health professionals who can provide specialized support.
- Involve Partner/Family: Offer support and information to the partner and family, as they are also affected.
6. Outline the nursing care plan for a patient undergoing evacuation for molar pregnancy.
A nursing care plan for a patient undergoing uterine evacuation for a molar pregnancy focuses on physical preparation, monitoring during the procedure, post-procedure recovery, and initial education for follow-up.
Nursing Care Plan Components:
- Pre-Procedure Phase:
- Assessment: Assess vital signs, level of bleeding, pain, hydration status, and anxiety level. Review medical history and confirm NPO status if required for anesthesia.
- Nursing Diagnosis (Example): Anxiety related to diagnosis, procedure, and unknown outcome.
- Goal: Patient will express reduced anxiety and understanding of the procedure.
- Interventions: Provide clear education about the suction curettage procedure, expected sensations (cramping), and pain management. Listen to her concerns and fears, offer reassurance. Ensure informed consent is signed. Administer pre-operative medications as ordered.
- Intra-Procedure Phase:
- Assessment: Continuous monitoring of vital signs (BP, pulse, oxygen saturation, heart rhythm) during anesthesia/sedation and the procedure.
- Nursing Diagnosis (Example): Risk for Hemorrhage related to uterine evacuation.
- Goal: Patient will maintain stable vital signs and minimal bleeding.
- Interventions: Assist the medical team during the procedure. Monitor bleeding amount and characteristics. Provide comfort and support to the patient. Ensure sterile technique is maintained. Prepare and label the tissue specimen correctly for histology.
- Post-Procedure Phase:
- Assessment: Monitor vital signs, pain level, vaginal bleeding (amount, color, clots), uterine firmness, and level of consciousness until fully recovered from anesthesia. Assess for signs of complications (heavy bleeding, fever, severe pain, respiratory distress).
- Nursing Diagnosis (Example): Acute Pain related to uterine cramping after evacuation.
- Goal: Patient will report manageable pain levels.
- Interventions: Administer prescribed analgesics and assess effectiveness. Offer comfort measures (heat to abdomen, comfortable positioning). Educate on expected pain and bleeding. Begin discussion about follow-up care.
- Discharge Planning and Education:
- Assessment: Assess patient's understanding of home care instructions.
- Nursing Diagnosis (Example): Deficient Knowledge regarding post-molar pregnancy follow-up and contraception.
- Goal: Patient will verbalize understanding of follow-up requirements and contraception use.
- Interventions: Provide detailed verbal and written instructions on warning signs of complications, importance of rest, activity restrictions, and follow-up appointment scheduling. Begin comprehensive education on hCG monitoring and the critical need for reliable contraception, explaining why it's necessary and discussing methods. Offer resources for emotional support.
7. Describe health education and counseling given to a woman after molar pregnancy.
Health education and counseling after a molar pregnancy are crucial for the woman's physical and emotional recovery, understanding her condition, and ensuring proper follow-up to prevent complications.
Key Areas for Health Education and Counseling:
- Explanation of Molar Pregnancy:
- Explain in simple terms what a molar pregnancy is – an abnormal pregnancy that could not develop into a baby.
- Clarify that it's not a normal pregnancy and not a typical miscarriage, but a specific condition.
- Address any misconceptions or feelings of guilt, explaining that it's usually due to an error at fertilization.
- Explanation of Treatment:
- Describe the evacuation procedure that was done (suction curettage) and its purpose – to remove the abnormal tissue.
- Explain that the tissue is sent to the lab for examination (histology) to confirm the type of mole.
- Post-Procedure Care and Recovery:
- Explain expected post-evacuation symptoms (bleeding, cramping) and how long they might last.
- Advise on rest, activity restrictions, and when it is safe to resume normal activities and sexual intercourse.
- Educate on signs of infection or other complications requiring urgent medical attention (fever, heavy bleeding, severe pain, foul discharge).
- Importance of Follow-up and hCG Monitoring:
- This is the most critical part of education. Explain *why* regular follow-up and blood tests for hCG are necessary – to make sure all abnormal tissue is gone and to check for persistent GTD or cancer.
- Explain the schedule for hCG testing (e.g., weekly then monthly).
- Emphasize that consistent follow-up is vital for her health and highly effective in detecting problems early.
- Contraception Counseling:
- Explain clearly that she must avoid getting pregnant during the entire hCG monitoring period.
- Discuss various reliable contraception methods (pills, injections, implants, IUDs, condoms) and help her choose a suitable method.
- Ensure she understands how to use the chosen method correctly. Reiterate that pregnancy would interfere with hCG monitoring results.
- Emotional Support and Grief:
- Acknowledge the emotional impact and the grief associated with the loss, even if it was not a viable pregnancy.
- Validate her feelings. Encourage her to talk about them.
- Offer information about counseling services or support groups for women who have experienced molar pregnancy or pregnancy loss.
- Future Pregnancies:
- Provide reassurance that for most women, future pregnancies are possible and usually healthy after successful treatment and completion of the follow-up period.
- Advise on when it is safe to attempt another pregnancy (after completing the monitoring period and with doctor's clearance).
8. Explain the importance of family planning following a molar pregnancy.
Family planning, specifically the use of effective contraception, is critically important for women following a molar pregnancy for several key reasons:
- Accurate Monitoring of hCG Levels: The most crucial reason. Monitoring the level of hCG in the blood is how doctors track whether all the abnormal trophoblast tissue from the mole is gone or if there is any persistent growth (persistent GTD) or development of cancer (choriocarcinoma). hCG is also the pregnancy hormone. If a woman becomes pregnant during the follow-up period, her hCG levels will rise due to the new pregnancy, making it impossible to know if the elevated hCG is from a new pregnancy or from residual or recurrent molar tissue. This interferes with the essential monitoring process.
- Early Detection of Persistent GTD/Choriocarcinoma: By preventing pregnancy, the accurate hCG monitoring allows for the early detection of any persistent abnormal tissue growth. If hCG levels plateau or rise when they should be falling, it is caught early, enabling prompt diagnosis and treatment of persistent GTD or choriocarcinoma at a stage where it is highly curable.
- Preventing Misdiagnosis: A rising hCG level in a woman who is not using contraception could be interpreted as a new pregnancy or persistent GTD. Avoiding pregnancy eliminates this confusion and ensures correct diagnosis.
- Allowing for Physical and Emotional Recovery: The experience of a molar pregnancy, its treatment, and the initial follow-up can be physically and emotionally demanding. Avoiding immediate pregnancy allows the woman's body to recover and provides time for emotional healing before embarking on another pregnancy.
- Reducing Risk of Complications in Future Pregnancies: While rare, there is a small increased risk of having another molar pregnancy. Allowing a period for the condition to fully resolve reduces the risk of complications in subsequent pregnancies.
9. Discuss choriocarcinoma: causes, symptoms, diagnosis, and management.
What is Choriocarcinoma?
- Choriocarcinoma is a rare but aggressive type of cancer that arises from the trophoblast tissue, the cells that normally form the placenta.
- It is a form of gestational trophoblastic neoplasia (GTN), which is a malignant form of gestational trophoblastic disease (GTD).
- It can develop after a molar pregnancy, but also occasionally after a normal pregnancy, miscarriage, or ectopic pregnancy.
Causes and Risk Factors:
- Choriocarcinoma arises from abnormal trophoblast cells.
- The most significant risk factor is a preceding **complete hydatidiform mole**. A smaller percentage of partial moles, normal pregnancies, miscarriages, or ectopic pregnancies can also lead to choriocarcinoma.
- Lack of adequate follow-up after a molar pregnancy increases the risk of delayed diagnosis.
Signs and Symptoms:
- Symptoms can occur months or even years after the preceding pregnancy.
- Persistent Abnormal Vaginal Bleeding: Irregular bleeding that continues after pregnancy termination or starts again.
- Elevated or Rising hCG Levels: The key indicator, detected during or after the follow-up period.
- Symptoms of Metastasis (Spread): Choriocarcinoma spreads quickly through the bloodstream. Symptoms depend on where it spreads:
- **Lungs:** Cough, shortness of breath, chest pain, coughing up blood (hemoptysis). This is the most common site of spread.
- **Vagina:** Vaginal bleeding, masses, or lesions.
- **Brain:** Headaches, dizziness, seizures, weakness, neurological deficits.
- **Liver:** Abdominal pain, jaundice (yellowing of skin/eyes).
- **Other Sites:** Bleeding in other organs.
- Other Symptoms: Fatigue, weight loss, loss of appetite.
Diagnosis:
- Quantitative Serum Beta-hCG: Persistently high, plateauing, or rising hCG levels in a woman who has had a recent pregnancy (especially a mole) are highly suspicious.
- Histological Examination: If a biopsy of a suspected lesion (e.g., in the vagina) is taken, microscopic examination confirms the diagnosis. However, often the diagnosis is made based on rising hCG and imaging findings without a biopsy.
- Imaging Studies:
- Pelvic Ultrasound: To check the uterus for persistent tissue or masses.
- Chest X-ray or CT Scan: To check for spread to the lungs.
- CT Scan or MRI of Brain, Abdomen, Pelvis: To look for spread to other sites.
- Staging: Once diagnosed, imaging is done to determine the stage of the disease (how far it has spread), which guides treatment.
Management:
- Choriocarcinoma is highly curable, even when it has spread, primarily through chemotherapy.
- Chemotherapy: This is the mainstay of treatment.
- **Low-Risk Choriocarcinoma:** Often treated effectively with single-agent chemotherapy (e.g., Methotrexate or Actinomycin D).
- **High-Risk Choriocarcinoma:** Treated with multi-agent chemotherapy regimens.
- Surgery: May be needed in some cases, such as to remove a resistant tumor in the uterus (hysterectomy) or to remove isolated metastatic lesions.
- Radiation Therapy: Can be used to treat metastasis in specific sites, like the brain.
- hCG Monitoring: Continuous monitoring of hCG levels during and after treatment is essential to track the response to therapy and detect any recurrence. Treatment continues until hCG is undetectable for a specified period.
- Follow-up: Long-term follow-up with regular hCG tests is necessary after treatment is completed.
- Emotional Support: Providing comprehensive support to cope with a cancer diagnosis and chemotherapy.
10. Write an essay on how a nurse can support a patient and her family emotionally and physically after a diagnosis of hydatidiform mole.
A diagnosis of hydatidiform mole is a challenging experience for a woman and her family. It involves the loss of a pregnancy, the confusion surrounding an abnormal condition, the need for procedures, and the anxiety of potential malignancy and prolonged follow-up. Nurses play a vital role in providing comprehensive emotional and physical support throughout this journey.
Emotional Support:
- Acknowledge the Loss: Recognize that even though it wasn't a viable pregnancy, the woman is experiencing a loss. Validate her feelings of grief, sadness, and disappointment. Do not minimize her experience.
- Provide Clear Information: Reduce anxiety and confusion by explaining the diagnosis of molar pregnancy in simple, understandable terms. Use clear language, avoid jargon, and answer questions honestly. Address any misconceptions or self-blame she might have.
- Listen Actively: Create a safe and supportive space for her to express her emotions without judgment. Listen empathetically to her fears, anxieties, and concerns about her health, future fertility, and the follow-up process.
- Address Fears about Cancer: Acknowledge her fear of developing persistent GTD or choriocarcinoma. Provide accurate information about the risks (often low, especially for partial moles) and, importantly, emphasize the high success rates of treatment if it does occur, especially when detected early through monitoring. Reassure her that the follow-up is designed to catch any problems early.
- Support through Follow-up: The prolonged period of hCG monitoring can be stressful. Support her adherence to the follow-up schedule, acknowledge the burden of frequent tests, and offer encouragement.
- Involve the Family: Recognize that the partner and family are also affected. Provide them with information and support, involving them in care and discussions as appropriate and desired by the patient.
- Provide Resources: Offer information about counseling services, support groups for women who have experienced molar pregnancy or pregnancy loss, and mental health professionals who can provide specialized support.
- Encourage Open Communication: Facilitate open communication between the patient, her family, and the medical team.
Physical Support:
- Manage Physical Symptoms: Provide excellent care during and after the evacuation procedure, managing pain, monitoring bleeding, and preventing immediate complications like hemorrhage and infection.
- Educate on Recovery: Provide clear instructions on post-procedure care, expected physical recovery, activity restrictions, and wound care (if applicable).
- Support through Investigations: Explain the purpose of all diagnostic tests (ultrasound, blood tests) and follow-up monitoring (hCG tests). Prepare her for procedures like blood draws or imaging.
- Manage Treatment Side Effects (if needed): If persistent GTD or choriocarcinoma requires chemotherapy, provide comprehensive nursing care to manage side effects of treatment, monitor for complications, and support her through the treatment regimen.
- Promote Healthy Behaviors: Encourage rest, good nutrition (especially iron-rich foods if anemic), and gradual return to normal activities during recovery.
- Family Planning Support: Provide clear and sensitive counseling on the critical need for effective contraception during the monitoring period, discussing options and helping her choose a suitable method.
- Follow-up Care: Ensure she understands the importance of and attends all follow-up appointments.
Gynecology Question for Revision - Topic 7
This section covers Pelvic Inflammatory Disease (PID).
SECTION A: Multiple Choice Questions (40 Marks)
1. Pelvic Inflammatory Disease (PID) is primarily an infection of:
2. The most common cause of PID is:
3. One of the early symptoms of PID is:
4. The long-term complication of untreated PID is:
5. A woman with PID may complain of:
6. Diagnosis of PID may include:
7. A common causative organism of PID is:
8. Treatment of PID includes:
9. One preventive measure against PID is:
10. The ________ is the primary site affected in early stages of PID.
SECTION B: Fill in the Blanks (10 Marks)
1. Pelvic Inflammatory Disease is often caused by ascending ________ infections.
2. A key symptom of PID is lower ________ pain.
3. One major complication of PID is ________.
4. The most common pathogens associated with PID are gonorrhea and ________.
5. A positive ________ motion tenderness on pelvic exam suggests PID.
6. ________ antibiotics are the main treatment for PID.
7. Repeated PID episodes increase the risk of female ________.
8. PID may cause adhesions and ________ in the fallopian tubes.
9. Health education on ________ sex is essential in PID prevention.
10. The ________ is the primary site affected in early stages of PID.
SECTION C: Short Essay Questions (10 Marks)
1. Define Pelvic Inflammatory Disease.
Definition:
- Pelvic Inflammatory Disease (PID) is an infection of a woman's reproductive organs.
- It occurs when bacteria travel upwards from the vagina or cervix into the uterus, fallopian tubes, or ovaries.
- It is most often caused by sexually transmitted infections (STIs), particularly chlamydia and gonorrhea.
- PID is a serious condition that can lead to long-term health problems if not treated promptly and effectively.
2. List four common causes of PID.
PID is typically caused by bacterial infection ascending from the lower genital tract:
- Sexually Transmitted Infections (STIs): Primarily Chlamydia trachomatis and Neisseria gonorrhoeae are the most common causes.
- Other Bacteria: Bacteria from the vagina that are not sexually transmitted can also sometimes cause PID.
- Procedures that Breach the Cervical Barrier: Procedures like IUD insertion, endometrial biopsy, D&C (dilation and curettage), or childbirth/miscarriage can potentially introduce bacteria into the upper genital tract (though the risk is low with proper sterile technique).
- Unsafe Abortion or Delivery: Procedures performed in unhygienic conditions can lead to severe pelvic infections.
3. Mention four signs and symptoms of PID.
Symptoms of PID can vary from mild to severe, and some women may have no symptoms at all. Common signs and symptoms include:
- Lower Abdominal Pain: Pain in the lower belly, which can be mild aching or severe cramping.
- Abnormal Vaginal Discharge: May have an unusual color, consistency, or odor, often increased in amount.
- Fever and Chills: May indicate a more serious infection.
- Pain During Sexual Intercourse (Dyspareunia): Deep pain during sex.
- Painful or Frequent Urination (Dysuria).
- Irregular Menstrual Bleeding: Bleeding between periods or heavier periods.
4. State three diagnostic tests used to confirm PID.
Diagnosing PID is primarily based on clinical findings, but investigations help confirm the diagnosis and identify the cause:
- Pelvic Examination: Assessment for cervical motion tenderness (pain when moving the cervix), uterine tenderness, or adnexal tenderness (tenderness of tubes/ovaries).
- Cervical Swabs: Samples taken from the cervix to test for Chlamydia and Gonorrhea, the most common bacterial causes.
- Laboratory Tests:
- **White Blood Cell Count:** Elevated white blood cells in a blood test can indicate infection.
- **ESR (Erythrocyte Sedimentation Rate) or CRP (C-reactive protein):** These are inflammatory markers that may be elevated in PID.
- Pelvic Ultrasound: Imaging can help visualize the pelvic organs and detect signs of inflammation, fluid in the tubes, or abscesses.
- Endometrial Biopsy: Taking a sample of the uterine lining to check for inflammation (endometritis).
- Laparoscopy (less common): A surgical procedure where a small camera is inserted into the abdomen to directly visualize the pelvic organs and confirm the diagnosis, usually done in uncertain or severe cases.
5. Outline three complications of untreated PID.
If PID is not treated promptly and effectively, it can lead to serious long-term complications:
- Infertility: Scarring and blockage of the fallopian tubes are the most common cause of infertility after PID. The tubes may be partially or completely blocked, preventing the egg from reaching the uterus.
- Ectopic Pregnancy: Damage to the fallopian tubes increases the risk of a fertilized egg implanting outside the uterus, usually in the tube. Ectopic pregnancy is a life-threatening condition.
- Chronic Pelvic Pain: Ongoing pain in the lower abdomen and pelvis that can last for months or years, often caused by scarring and adhesions (tissues sticking together) in the pelvic organs.
- Tubo-ovarian Abscess (TOA): A collection of pus involving the fallopian tube and ovary, which can be a serious and difficult-to-treat complication requiring hospitalization and sometimes surgery.
- Fitz-Hugh-Curtis Syndrome: Perihepatitis (inflammation of the lining of the liver) which can occur as a complication of PID, causing right upper abdominal pain.
6. Describe the medical treatment options for PID.
The primary medical treatment for PID is antibiotics to clear the bacterial infection. Treatment should be started as soon as PID is suspected to prevent long-term complications.
- Antibiotics:
- Broad-spectrum antibiotics are used, often a combination of different antibiotics, to cover the range of bacteria that can cause PID, including Chlamydia, Gonorrhea, and other vaginal bacteria.
- Treatment regimens usually involve a course of antibiotics taken orally or given by injection, sometimes starting with intravenous antibiotics in a hospital setting for severe cases.
- It is crucial to complete the entire course of antibiotics, even if symptoms improve, to ensure the infection is fully cleared.
- Pain Management: Pain relievers may be prescribed to manage lower abdominal pain and cramping.
- Partner Treatment: It is essential that all sexual partners from the last 60 days are also tested and treated for STIs, even if they don't have symptoms. This prevents re-infection of the woman and stops the spread of infection.
- Hospitalization: May be required for severe cases, those with tubo-ovarian abscesses, pregnant women with PID, those who cannot tolerate oral antibiotics, or those who are not responding to outpatient treatment. Intravenous antibiotics are given in the hospital.
- Follow-up: A follow-up appointment is important after completing treatment to ensure the infection has cleared and to monitor for any persistent symptoms.
7. Explain the nurse's role in managing a patient with PID.
Nurses play a vital role in the care and management of patients with PID, from assessment and treatment to education and support:
- Assessment: Take a detailed history of symptoms (pain, discharge, fever), sexual history, and risk factors. Assess vital signs and pain level.
- Physical Examination Support: Assist the doctor during the pelvic examination, ensuring patient comfort and privacy. Prepare equipment for cervical swabs.
- Administer Medications: Administer prescribed antibiotics (oral or intravenous) and pain relief. Monitor for side effects and allergic reactions.
- Education: Provide comprehensive education about PID, including:
- What PID is and how it is caused (especially the link to STIs).
- The importance of completing the full course of antibiotics.
- Symptoms of complications to watch out for (worsening pain, fever, heavy bleeding).
- The importance of partner testing and treatment.
- Risk reduction strategies (safe sex practices).
- Emotional Support: PID can be a frightening diagnosis with implications for fertility. Provide emotional support, listen to the patient's concerns, and offer reassurance. Address any shame or guilt related to STIs.
- Monitoring: Monitor the patient's response to treatment, assessing for improvement in symptoms (pain, fever, discharge). Monitor vital signs, especially if hospitalized.
- Contact Tracing and Partner Referral: Assist with contact tracing and emphasize the importance of notifying sexual partners so they can be tested and treated.
- Promote Rest and Comfort: Advise rest and suggest comfort measures like heat application to the lower abdomen if helpful.
- Follow-up: Educate on the importance of follow-up appointments to ensure complete recovery.
8. List any three preventive measures against PID.
Preventing PID primarily involves preventing the STIs that commonly cause it:
- Practicing Safe Sex: Using barrier methods like condoms consistently and correctly during sexual activity significantly reduces the risk of transmitting STIs. Reducing the number of sexual partners also lowers the risk.
- Regular STI Testing and Treatment: Getting tested regularly for STIs, especially if sexually active with new or multiple partners, and promptly treating any detected infections in both partners prevents the infection from ascending and causing PID.
- Seeking Prompt Treatment for Vaginal Infections: Although less common causes than STIs, treating vaginal infections promptly can sometimes prevent them from spreading upwards.
- Ensuring Safe Medical Procedures: If undergoing gynecological procedures like IUD insertion, D&C, or childbirth, ensuring these are performed by trained healthcare professionals using sterile techniques reduces the risk of infection.
- Avoiding Unsafe Abortions: Access to safe and legal abortion services where needed prevents the high risk of severe pelvic infection associated with unsafe procedures.
9. Describe the impact of PID on a woman's reproductive health.
Pelvic Inflammatory Disease (PID) can have severe and lasting consequences for a woman's reproductive health, even after the infection has been treated and cleared.
- Infertility: The most significant impact. Inflammation caused by PID, especially in the fallopian tubes (salpingitis), leads to scarring and adhesions. This scarring can block or severely damage the tubes, making it difficult or impossible for the egg to travel from the ovary to the uterus, resulting in infertility. The risk of infertility increases with each episode of PID.
- Ectopic Pregnancy: Even if the fallopian tubes are not completely blocked, scarring and damage from PID can interfere with the normal movement of the fertilized egg through the tube. This increases the risk of the egg implanting outside the uterus, most commonly in the damaged fallopian tube, leading to a life-threatening ectopic pregnancy.
- Chronic Pelvic Pain: Scar tissue and adhesions formed in the pelvic organs after PID can cause persistent, long-term pain in the lower abdomen and pelvis, impacting quality of life and sexual function.
- Recurrent PID: Having had PID once increases the risk of having it again, further increasing the likelihood of long-term reproductive complications.
- Impact on Future Pregnancies: Even if a woman with a history of PID is able to conceive and carry a pregnancy in the uterus, she may be at higher risk for complications like preterm labor due to the damage to her reproductive organs.
10. Explain the importance of partner treatment in PID management.
Partner treatment is a critical and essential component of effectively managing PID and preventing re-infection and spread of the infection.
- Treating the Source of Infection: PID is usually caused by STIs like chlamydia and gonorrhea. If the woman's sexual partner(s) are infected, they are the source of the bacteria. Treating only the woman will not eliminate the bacteria from her partner(s).
- Preventing Re-infection: If the partner is not treated, they will remain infected. When the woman resumes sexual activity with the untreated partner, she is very likely to be re-infected with the same bacteria. This cycle of re-infection makes it difficult to clear the infection completely and increases the risk of recurrent PID episodes.
- Stopping the Spread of Infection: Treating all infected partners helps to stop the transmission of the bacteria to other individuals in the community, contributing to public health efforts to control STIs.
- Preventing Complications in Partners: While PID specifically affects women, the underlying STIs in male partners (like chlamydia and gonorrhea) can also cause health problems in men, although they may be asymptomatic or have milder symptoms. Treating partners prevents these potential complications in men.
- Breaking the Chain of Transmission: Treating all partners is crucial for breaking the chain of transmission and preventing further spread of STIs.
SECTION D: Long Essay Questions (10 Marks Each)
1. Discuss the causes, risk factors, signs and symptoms, and diagnosis of PID.
What is Pelvic Inflammatory Disease (PID)?
- PID is an infection and inflammation of the upper female reproductive organs (uterus, fallopian tubes, ovaries).
- It is a common and potentially serious complication, usually of sexually transmitted infections.
Causes:
- PID is primarily caused by bacteria that ascend from the vagina and cervix into the upper genital tract.
- The most common cause is Sexually Transmitted Infections (STIs):
- Chlamydia trachomatis: A very common bacterial STI that often causes PID.
- Neisseria gonorrhoeae: The bacterium causing gonorrhea, another major cause of PID.
- Other bacteria from the vagina that are not sexually transmitted can also contribute to PID, often alongside STI bacteria.
- Less commonly, PID can occur after gynecological procedures (like IUD insertion, D&C) or childbirth/miscarriage if bacteria are introduced.
- Unsafe abortion is a significant cause of severe PID, often polymicrobial (caused by multiple types of bacteria).
Risk Factors:
- Having a Sexually Transmitted Infection (STI): The strongest risk factor, particularly untreated Chlamydia or Gonorrhea.
- Being Sexually Active and Under 25 Years Old: Younger women's cervices may be less mature and more susceptible to infection.
- Having Multiple Sexual Partners.
- Having a New Sexual Partner.
- History of PID: Previous PID increases the risk of recurrence.
- Douching: Douching can push bacteria from the vagina up into the uterus and tubes.
- Previous Gynecological Procedures: Procedures that open the cervix (like IUD insertion, D&C, hysteroscopy) have a small risk of introducing bacteria, although this risk is low with proper technique.
- Using Certain Contraceptives: While barrier methods and hormonal contraception reduce PID risk by preventing STIs, some older types of IUDs were associated with a slightly higher risk; modern IUDs have a very low risk after the first few weeks.
- Unsafe Abortion or Delivery: As mentioned under causes.
Signs and Symptoms:
- Symptoms of PID can vary widely and may be mild, making diagnosis challenging. Some women may have no symptoms (asymptomatic). When symptoms are present, the most common include:
- Lower Abdominal Pain: The hallmark symptom. It can range from mild to severe, often described as cramping or aching in the lower belly. It may worsen during sexual intercourse or with movement.
- Abnormal Vaginal Discharge: Increased amount of discharge with an unusual color (yellow, green) or odor.
- Fever and Chills: Indicates a more widespread or severe infection.
- Pain During Sexual Intercourse (Dyspareunia): Often deep pain in the pelvis.
- Painful Urination (Dysuria) or Frequent Urination.
- Irregular Menstrual Bleeding: Spotting between periods or heavier/longer periods.
- Nausea and Vomiting.
Diagnosis:
- Diagnosing PID is often based on clinical findings because a single definitive test does not exist. Diagnosis relies on a combination of a woman's symptoms, physical examination findings, and laboratory tests. It's important to start treatment quickly if PID is suspected to prevent complications.
- Clinical Criteria: A doctor will usually suspect PID if a woman has lower abdominal pain and one or more of the following on pelvic examination:
- Tenderness when moving the cervix (cervical motion tenderness).
- Tenderness of the uterus.
- Tenderness of the adnexa (fallopian tubes and ovaries).
- Laboratory Tests: Help support the clinical diagnosis and identify the cause:
- Cervical Swabs: To test for Chlamydia trachomatis and Neisseria gonorrhoeae, which are the most common causes.
- Blood Tests: Looking for elevated white blood cell count (suggests infection) or elevated inflammatory markers like ESR or CRP.
- Imaging Studies: Used to support the diagnosis or rule out other conditions:
- Pelvic Ultrasound: Can show signs of inflammation, fluid in the fallopian tubes, or tubo-ovarian abscesses. It also helps rule out other causes of pelvic pain like ovarian cysts or appendicitis.
- Other Tests:
- Endometrial biopsy (taking a sample of the uterine lining) can confirm endometritis (inflammation of the uterus lining), a component of PID.
- Laparoscopy (a surgical procedure with a camera) can visualize the pelvic organs directly but is usually reserved for cases where the diagnosis is uncertain or for complicated PID.
2. Explain the management of PID including medical treatment, nursing care, and follow-up.
Management of PID aims to eliminate the infection, alleviate symptoms, prevent long-term complications, and prevent re-infection. It involves medical treatment, supportive nursing care, and planned follow-up.
Medical Treatment:
- Antibiotics: The cornerstone of treatment.
- **Broad-Spectrum Coverage:** Antibiotics are chosen to be effective against the common bacteria that cause PID, especially Chlamydia and Gonorrhea, as well as other potential bacteria. A combination of antibiotics is often used.
- **Route of Administration:** Antibiotics may be given orally, by injection, or intravenously. Intravenous antibiotics are often used for severe cases or when hospitalization is required. The course of antibiotics must be completed entirely, even if symptoms improve quickly, to ensure the infection is fully cleared.
- Pain Management: Pain relievers (analgesics) are prescribed to help manage lower abdominal pain and cramping.
- Partner Treatment: All sexual partners from the last 60 days must be evaluated, tested, and treated for STIs to prevent re-infection of the woman and further spread of the infection.
- Hospitalization: May be necessary for certain patients, including those with severe symptoms, suspected tubo-ovarian abscess, pregnant women, those who cannot take oral antibiotics, or those not responding to outpatient treatment.
Nursing Care:
- Assessment: Monitor vital signs, pain level, vaginal discharge, and overall response to treatment. Assess for signs of worsening infection or complications.
- Administer Medications: Give antibiotics and pain relief as prescribed and monitor for effectiveness and side effects. Educate the patient about their medications.
- Education: Provide comprehensive health education:
- Explain the diagnosis of PID, its causes, and how it is treated.
- Emphasize the importance of completing the full course of antibiotics.
- Educate about potential complications of untreated PID.
- Explain the critical need for partner testing and treatment.
- Discuss prevention strategies (safe sex, condom use).
- Symptom Relief: Offer comfort measures for pain, such as rest and gentle heat application to the lower abdomen (unless contraindicated).
- Emotional Support: Provide a supportive and non-judgmental environment. Address concerns about fertility, STIs, and partner notification.
- Promote Rest: Encourage rest during the acute phase of illness.
- Hydration and Nutrition: Ensure adequate fluid intake and nutrition, especially if the patient has fever or nausea.
Follow-up:
- Scheduled Appointment: A follow-up visit with a healthcare provider is important after completing the course of antibiotics, usually within 72 hours for hospitalized patients and within 1-2 weeks for outpatient treatment.
- Assess Treatment Response: At the follow-up, the provider will assess if symptoms have improved and if the infection has cleared.
- STI Re-testing: May be recommended to ensure the STI has been successfully treated.
- Counseling: Reiterate education on risk reduction, partner treatment, and the importance of preventing recurrent infections to protect future fertility.
- Assess for Long-Term Complications: Inquire about any persistent pain or concerns about fertility and discuss options for further evaluation if needed.
3. Describe the complications of PID and the nurse's role in prevention.
Pelvic Inflammatory Disease (PID) can lead to serious long-term complications that significantly affect a woman's reproductive health and quality of life. Nurses play a key role in preventing these complications through education and early intervention.
Complications of PID:
- Infertility: The most common serious complication. Inflammation and scarring caused by PID, particularly in the fallopian tubes, can block the tubes, preventing eggs from reaching the uterus and sperm from reaching the egg. The risk of infertility increases with each episode of PID.
- Ectopic Pregnancy: Damage to the fallopian tubes can also interfere with the normal movement of a fertilized egg. If the tube is partially blocked or scarred, the egg may implant in the tube instead of reaching the uterus, leading to a life-threatening ectopic pregnancy.
- Chronic Pelvic Pain: Scarring and adhesions (bands of tissue that can cause organs to stick together) in the pelvic area after PID can cause persistent, long-term pain in the lower abdomen and pelvis.
- Tubo-ovarian Abscess (TOA): A collection of pus involving the fallopian tube and ovary, which is a serious complication that can require hospitalization, intravenous antibiotics, and sometimes surgery.
- Recurrent PID: Having had PID once increases the risk of getting it again, further increasing the likelihood of long-term complications.
Nurse's Role in Prevention of Complications:
- Primary Prevention (Preventing PID from Happening):
- Health Education: Educate young women and those at risk about STIs, how they are transmitted, and how to prevent them through safe sex practices (consistent and correct condom use, reducing number of sexual partners).
- Promote STI Screening: Encourage regular STI testing, especially for sexually active individuals under 25 or those with new or multiple partners.
- Advocate for Prompt STI Treatment: Emphasize the importance of seeking medical care and completing treatment for any suspected or diagnosed STI immediately.
- Secondary Prevention (Preventing Complications After PID):
- Early Recognition of Symptoms: Educate women about the signs and symptoms of PID (lower abdominal pain, abnormal discharge) and encourage them to seek medical attention promptly if they experience these. Early diagnosis and treatment are crucial to minimize damage.
- Emphasize Adherence to Treatment: Stress the importance of completing the full course of prescribed antibiotics, even if symptoms improve.
- Educate on Partner Treatment: Explain the vital role of partner testing and treatment in preventing re-infection, which increases the risk of complications.
- Counseling on Risk Reduction: After treatment, reinforce education on preventing future STIs and recurrent PID episodes.
- Follow-up Care: Educate on the importance of follow-up appointments to ensure the infection has cleared and to assess for any signs of ongoing issues.
- Tertiary Prevention (Managing Existing Complications): While the focus is prevention, nurses also support women who have developed complications by providing education on managing chronic pain or connecting them with fertility services if needed.
4. Outline a comprehensive nursing care plan for a patient admitted with PID.
A comprehensive nursing care plan for a patient admitted to the hospital with PID (often for severe infection, suspected abscess, or inability to tolerate oral antibiotics) focuses on managing infection, pain, hydration, emotional support, and education.
Nursing Care Plan Components:
- Assessment:
- Vital Signs: Monitor regularly (temperature, pulse, BP, respiratory rate) to assess for fever, signs of sepsis, or instability.
- Pain Assessment: Assess severity, location, and characteristics of abdominal/pelvic pain using a pain scale.
- Abdominal Assessment: Palpate abdomen for tenderness, guarding, or rebound tenderness.
- Vaginal Discharge: Assess amount, color, consistency, and odor.
- Fluid Balance: Monitor intake and output (I&O) to assess hydration.
- Emotional State: Assess anxiety level and coping mechanisms.
- Knowledge Level: Assess understanding of PID and treatment plan.
- Nursing Diagnoses (Examples):
- Acute Pain related to pelvic inflammation.
- Risk for Infection Spread related to untreated or partially treated pelvic infection.
- Deficient Fluid Volume related to fever, nausea, or inadequate intake.
- Anxiety related to hospitalization, diagnosis, and potential complications.
- Deficient Knowledge regarding PID, treatment, and prevention.
- Goals:
- Patient will report reduced pain.
- Patient will show signs of infection resolution (normal temperature, decreasing WBC).
- Patient will maintain adequate hydration.
- Patient will verbalize reduced anxiety.
- Patient will understand PID and its management before discharge.
- Nursing Interventions:
- Manage Infection:
- Administer prescribed intravenous antibiotics on schedule and monitor for effectiveness and side effects.
- Monitor laboratory results (WBC, ESR, CRP) to track infection response.
- Manage Pain:
- Administer prescribed analgesics and assess effectiveness.
- Provide comfort measures like rest in a semi-Fowler's position (head of bed raised) to help drain pelvic fluid.
- Apply heat to the lower abdomen (if allowed and appropriate).
- Maintain Hydration:
- Administer intravenous fluids as ordered.
- Encourage oral fluid intake as tolerated.
- Monitor I&O.
- Provide Emotional Support:
- Create a supportive environment.
- Listen to concerns and answer questions.
- Explain procedures and treatment rationale.
- Education:
- Educate about PID, the importance of completing antibiotics, and the need for partner treatment.
- Discuss prevention strategies (safe sex).
- Teach signs of complications and importance of follow-up.
- Monitor for Complications: Watch closely for signs of worsening pain, abdominal distension, increasing fever, or signs of abscess formation.
- Activity: Encourage rest during acute phase, then gradual increase in activity as tolerated.
- Manage Infection:
- Evaluation:
- Assess if pain is reduced.
- Monitor for resolution of fever and other signs of infection.
- Check hydration status.
- Assess patient's understanding of education provided.
5. Discuss health education messages for a woman diagnosed with PID.
Providing clear and comprehensive health education to a woman diagnosed with PID is essential for her recovery, preventing complications, and protecting her future health.
Key Health Education Messages:
- Understanding PID:
- Explain what PID is – an infection of the reproductive organs – and its common causes, especially the link to STIs.
- Clarify that it needs prompt treatment to prevent serious long-term problems.
- Importance of Treatment Adherence:
- Emphasize the absolute necessity of completing the entire course of prescribed antibiotics, even if symptoms improve before the medication is finished. Explain that stopping early can lead to the infection returning or becoming harder to treat.
- Explain how to take the medication (e.g., with or without food) and potential side effects.
- Partner Testing and Treatment:
- This is critical. Explain that her sexual partner(s) are likely infected and need to be tested and treated, even if they have no symptoms.
- Explain that this prevents her from getting re-infected and stops the spread of STIs.
- Provide guidance or resources on how to notify partners.
- Prevention of Future Infections:
- Discuss risk reduction strategies for STIs and recurrent PID.
- Educate on consistent and correct condom use during sexual activity.
- Discuss reducing the number of sexual partners.
- Advise on regular STI screening, especially after changing partners.
- Recognizing Symptoms of Recurrence or Complication:
- Teach her the warning signs to watch out for that might indicate the infection is not cleared, is worsening, or a complication is developing. This includes returning or increasing lower abdominal pain, fever, unusual or foul-smelling vaginal discharge.
- Instruct her on when and where to seek immediate medical attention if these symptoms occur.
- Potential Long-Term Complications:
- Discuss the potential long-term effects of PID, particularly chronic pelvic pain, infertility, and increased risk of ectopic pregnancy, and emphasize that prompt treatment aims to minimize these risks.
- Follow-up Care: Explain the importance of attending follow-up appointments to ensure the infection has cleared and to discuss any ongoing concerns or long-term risks.
- Emotional Support: Offer support and create a space for her to ask questions about STIs, relationships, or the diagnosis.
6. Describe how PID affects female fertility and possible interventions.
Pelvic Inflammatory Disease (PID) is a major preventable cause of female infertility. It damages the delicate structures of the upper reproductive tract, particularly the fallopian tubes, which are essential for conception.
How PID Affects Fertility:
- Fallopian Tube Damage: When the infection reaches the fallopian tubes (salpingitis), it causes inflammation and scarring. The tubes can become blocked, either partially or completely.
- Interference with Egg/Sperm Transport: Healthy fallopian tubes have tiny hair-like structures (cilia) that help move the egg from the ovary towards the uterus and sperm towards the egg. Scarring and inflammation damage these cilia, disrupting the transport process.
- Blocked Tubes: If the tubes are completely blocked by scar tissue, sperm cannot reach the egg, or the fertilized egg cannot reach the uterus, making natural conception impossible.
- Hydrosalpinx: Severe damage can lead to the fallopian tube filling with fluid (hydrosalpinx), which can also prevent pregnancy and may negatively impact IVF success.
- Ectopic Pregnancy Risk: Even if the tubes are only partially damaged, the increased risk of the fertilized egg getting stuck in the tube leads to a higher chance of ectopic pregnancy, a non-viable and dangerous situation that can further damage the tubes.
- Adhesions: Scarring can cause the fallopian tubes, ovaries, and uterus to stick to nearby tissues, distorting their anatomy and function.
- Severity and Recurrence: The more severe the PID infection, and the more times a woman has had PID, the higher her risk of infertility.
Possible Interventions for PID-Related Infertility:
- Early and Adequate Treatment of PID: The most important intervention for preventing infertility is prompt and complete treatment of PID with appropriate antibiotics as soon as it is diagnosed.
- Partner Treatment: Treating sexual partners prevents re-infection, which worsens tube damage.
- Assisted Reproductive Technology (ART): For women with blocked or severely damaged fallopian tubes due to PID, In Vitro Fertilization (IVF) is often the most effective treatment for infertility. In IVF, eggs are retrieved from the ovaries, fertilized with sperm in a laboratory, and the resulting embryo is transferred directly into the uterus, bypassing the fallopian tubes.
- Tubal Surgery (less common): In some cases of minor tubal damage, surgical procedures (like salpingostomy to open a blocked tube or fimbrioplasty to repair the end of the tube) may be attempted, but success rates vary and there is a continued risk of ectopic pregnancy. Often, damaged tubes are removed before IVF.
- Management of Chronic Pelvic Pain: While not directly treating infertility, addressing chronic pain improves quality of life.
7. Explain the psychosocial impact of PID on reproductive-aged women.
Pelvic Inflammatory Disease (PID) can have significant psychosocial effects on women in their reproductive years, beyond the physical symptoms, impacting their emotional well-being, self-esteem, relationships, and future plans.
Psychosocial Impact:
- Anxiety and Stress: Worry about the diagnosis, the severity of the infection, potential complications, and the impact on health and fertility can cause significant anxiety and stress.
- Fear of Infertility: Concerns about the possibility of being unable to have children in the future is a major source of distress for many women, especially in societies where childbearing is highly valued.
- Guilt and Shame: If PID is caused by an STI, women may experience feelings of guilt, shame, and embarrassment, potentially impacting their self-esteem and willingness to seek care or notify partners.
- Impact on Relationships: PID can affect sexual health due to pain during intercourse, which can strain intimate relationships. Disclosing an STI or PID diagnosis can also be difficult and impact trust.
- Chronic Pain: If PID leads to chronic pelvic pain, this can be debilitating, affecting daily activities, work, mood, and overall quality of life. Living with chronic pain can also lead to isolation and depression.
- Stigma: Although not always STI-related, PID can carry a stigma, leading to feelings of isolation or being judged.
- Difficulty Discussing Sexual Health: PID is a reminder of sexual health risks and can make it challenging for women to discuss sexual history, STIs, or safe sex practices with partners or healthcare providers.
Strategies for Support:
- Provide Comprehensive Education: Clear, non-judgmental information about PID, its causes (including STIs), treatment, and potential outcomes empowers women and reduces anxiety.
- Offer Emotional Support: Create a safe space for women to talk about their feelings. Listen actively and validate their experiences and concerns without judgment.
- Counseling on STIs: Provide sensitive counseling regarding STIs, partner notification, and prevention in a way that minimizes shame.
- Address Fertility Concerns: Discuss the link between PID and infertility openly and provide information about fertility testing and treatment options if needed in the future.
- Manage Pain Effectively: Adequate pain management is crucial for improving physical comfort and reducing the psychological burden of chronic pain.
- Referral for Counseling: If women are experiencing significant anxiety, depression, or difficulty coping, refer them to mental health professionals or counselors.
- Support Groups: Connecting women with support groups for PID or fertility issues can provide a sense of community and shared experience.
8. Describe community-based strategies to prevent PID among adolescents.
Adolescents are particularly vulnerable to STIs and subsequent PID due to biological factors and behavioral patterns. Community-based strategies are essential to reach adolescents with prevention messages and services effectively.
Community-Based Prevention Strategies:
- Comprehensive Sexuality Education in Schools:
- Content: Providing accurate, age-appropriate information about sexual development, healthy relationships, STIs (including PID), and contraception.
- Skills Building: Teaching negotiation skills, communication skills, and decision-making skills related to sexual health.
- Youth-Friendly Health Services:
- Accessibility: Making health services easily accessible to adolescents (e.g., convenient locations, flexible hours).
- Confidentiality: Ensuring confidentiality of services to encourage adolescents to seek help without fear of judgment or disclosure.
- Approach: Training healthcare providers to be non-judgmental, welcoming, and skilled in communicating with adolescents about sensitive topics.
- Community Awareness Campaigns:
- Messaging: Using various platforms (community centers, youth groups, radio, social media) to raise awareness about STIs, PID, their symptoms, and prevention.
- Target Audience: Tailoring messages to resonate with adolescents and address local cultural contexts.
- Peer Education Programs:
- Training young people to become peer educators to share information about sexual health, STIs, and prevention with their peers in relatable ways.
- Access to Condoms and Contraception:
- Making condoms and other contraception methods readily available and affordable in community settings.
- Providing counseling on correct and consistent use of condoms for dual protection (against pregnancy and STIs).
- Linkage to STI Testing and Treatment:
- Facilitating access to confidential and free or affordable STI testing in community settings.
- Ensuring prompt and complete treatment for STIs in both adolescents and their partners.
- Parent and Community Engagement:
- Engaging parents and community leaders in discussions about adolescent sexual health to create a supportive environment and reduce stigma.
9. Write an essay on the importance of early diagnosis and prompt treatment of PID.
Early diagnosis and prompt, effective treatment of Pelvic Inflammatory Disease (PID) are critically important for preventing severe and irreversible damage to a woman's reproductive system and protecting her overall health. Delays in diagnosis or inadequate treatment significantly increase the risk of long-term complications.
PID is an ascending infection, meaning it starts in the lower genital tract (vagina and cervix) and spreads upwards into the uterus, fallopian tubes, and ovaries. This upward spread can happen relatively quickly. The longer the infection is present and untreated, the more inflammation it causes in the pelvic organs. This inflammation leads to scarring, particularly in the delicate fallopian tubes. These tubes are essential for picking up the egg released from the ovary, transporting it to the uterus, and being the usual site where fertilization occurs. Damage to the tubes, even if not completely blocked, can disrupt these functions.
The most significant consequences of this damage are **infertility** and **ectopic pregnancy**. Scarring can partially or completely block the fallopian tubes, making natural conception difficult or impossible. Furthermore, damage to the cilia within the tubes can impair the movement of the fertilized egg, increasing the risk of it implanting in the tube instead of reaching the uterus, leading to a life-threatening ectopic pregnancy. Research shows that the risk of infertility and ectopic pregnancy increases with each episode of PID and with delays in receiving treatment. Treating PID early, before significant scarring has occurred, greatly reduces the likelihood of these devastating outcomes.
Prompt treatment also helps to **alleviate acute symptoms**, such as lower abdominal pain, fever, and abnormal discharge, improving the woman's immediate comfort and quality of life. It prevents the infection from becoming more widespread and severe, potentially leading to **tubo-ovarian abscesses** (collections of pus) or even **sepsis** (infection in the bloodstream), which are serious medical emergencies requiring hospitalization and potentially complex surgical intervention. Early treatment is also crucial for preventing the development of **chronic pelvic pain**, which can be a debilitating consequence of long-term inflammation and scarring.
Furthermore, prompt diagnosis and treatment of PID, which is often caused by STIs, contribute to **public health** by identifying and treating individuals with STIs, thereby preventing further transmission of these infections to sexual partners and reducing the burden of STIs in the community. The requirement for partner treatment is a key component of managing PID and preventing re-infection, which is facilitated by an early diagnosis in the initial partner.
In conclusion, the window of opportunity to prevent irreversible damage from PID is in its early stages. Healthcare providers must have a low threshold for suspecting PID in women presenting with lower abdominal pain and other suggestive symptoms. Prompt clinical assessment, appropriate testing (especially for Chlamydia and Gonorrhea), and immediate initiation of antibiotic treatment are paramount. Educating women about early symptoms and encouraging them to seek care without delay empowers them to protect their reproductive health and avoid the severe, long-term complications associated with untreated or delayed treatment of PID.
10. Discuss the legal and ethical considerations in managing STIs and PID in adolescents.
Managing STIs and PID in adolescents presents unique legal and ethical considerations related to consent, confidentiality, mandatory reporting (in some cases), and the vulnerability of this population. Healthcare providers must navigate these complexities carefully to ensure the well-being and rights of the adolescent patient.
Legal Considerations:
- Minor Consent Laws: In many jurisdictions, laws address whether minors (individuals under the legal age of majority, often 18) can consent to receive healthcare, particularly for sensitive issues like sexual health services, STIs, and contraception, without parental consent. Healthcare providers must be aware of and adhere to the specific consent laws in their area regarding STI testing and treatment for adolescents.
- Confidentiality: Adolescents are more likely to seek help for STIs and PID if they are assured of confidentiality. Ethically and often legally, healthcare providers have a duty to protect patient confidentiality. However, state laws may have exceptions, such as mandatory reporting of certain STIs to public health authorities for contact tracing. Providers must be transparent with adolescents about the limits of confidentiality and when information might need to be shared (e.g., legally required reporting, risk of serious harm to self or others).
- Mandatory Reporting: Public health laws often require healthcare providers to report cases of certain STIs (like Gonorrhea and Chlamydia, common causes of PID) to the local or national health department. This is for public health surveillance and contact tracing purposes. Providers must comply with these reporting requirements while maintaining patient privacy as much as possible within the legal framework.
- Partner Notification Laws: Some jurisdictions have laws regarding the notification of sexual partners of individuals diagnosed with certain STIs. Providers should understand these laws and counsel adolescents on the importance of notifying their partners, while respecting their autonomy as much as legally permissible.
Ethical Considerations:
- Confidentiality vs. Parental Involvement: Ethically, providers aim to build trust with adolescent patients through confidentiality. However, they may also face ethical dilemmas regarding whether and how to involve parents, especially if the adolescent is very young, if parental support is beneficial, or if there are concerns about the adolescent's safety. The ethical principle of acting in the best interest of the adolescent is paramount.
- Patient Autonomy: Respecting the adolescent's evolving autonomy and involving them in decision-making about their healthcare is an ethical principle. Providers should provide clear information in an age-appropriate manner to enable the adolescent to make informed choices.
- Non-Judgmental Care: Providing care that is free from judgment about the adolescent's sexual activity or circumstances is an ethical imperative. Creating a safe and welcoming environment encourages adolescents to seek necessary care.
- Duty to Warn/Protect (in some cases): While maintaining confidentiality, providers may face an ethical dilemma if an adolescent's behavior puts a partner at serious risk of harm (e.g., knowingly transmitting HIV). Legal requirements and ethical guidelines on duty to warn or protect vary.
- Addressing Vulnerability: Adolescents may be vulnerable due to age, power imbalances in relationships, or lack of knowledge. Providers have an ethical responsibility to be sensitive to this vulnerability and ensure the adolescent is not being coerced or exploited.
- Counseling and Education: Ethically, providers should offer comprehensive counseling on STI prevention, safe sex, contraception, and the importance of partner treatment.
Gynecology Question for Revision - Topic 8
This section covers Uterine Fibroids.
SECTION A: Multiple Choice Questions (40 Marks)
1. Uterine fibroids are:
2. The most common site of fibroid growth is:
3. A common symptom of uterine fibroids is:
4. The hormone that promotes fibroid growth is:
5. One of the major complications of fibroids is:
6. Diagnosis of fibroids is best confirmed using:
7. A woman with fibroids may present with:
8. Fibroids commonly affect women in the age range of:
9. The definitive treatment for symptomatic fibroids in women not desiring fertility is:
10. Submucosal fibroids are located:
SECTION B: Fill in the Blanks (10 Marks)
1. Fibroids are also known as ________ or leiomyomas.
2. The growth of fibroids is stimulated by the hormone ________.
3. A fibroid that protrudes into the uterine cavity is called a ________ fibroid.
4. One major complication of fibroids during pregnancy is ________.
5. Fibroids can cause ________ menstruation, medically called menorrhagia.
6. Fibroids located on the outer surface of the uterus are called ________.
7. The surgical removal of fibroids while preserving the uterus is called ________.
8. Fibroids are more common in women of ________ age.
9. Uterine fibroids are usually ________ (non-cancerous) tumors.
10. A diagnostic tool commonly used to detect fibroids is ________.
SECTION C: Short Essay Questions (10 Marks)
1. Define uterine fibroids.
Definition:
- Uterine fibroids, also known as leiomyomas or myomas, are common non-cancerous (benign) growths.
- They develop from the smooth muscle tissue of the uterus (myometrium).
- They can vary greatly in size, from tiny seed-like growths to large masses, and can be single or multiple.
- Their growth is influenced by hormones, especially estrogen.
2. List four common types of fibroids.
Fibroids are classified based on their location in or on the uterus:
- Intramural Fibroids: The most common type, growing within the muscular wall of the uterus.
- Submucosal Fibroids: Located just beneath the uterine lining (endometrium) and bulging into the uterine cavity. These often cause heavy bleeding and fertility problems.
- Subserosal Fibroids: Located on the outer surface of the uterus, under the serosa (outer covering). They can sometimes grow on a stalk (pedunculated).
- Pedunculated Fibroids: Fibroids (subserosal or submucosal) that grow on a stalk. These can sometimes twist, causing acute pain.
- Less common types include cervical fibroids (in the cervix) and intraligamentous fibroids (between uterine ligaments).
3. Mention four clinical features of uterine fibroids.
Many women with fibroids have no symptoms. When symptoms occur, they depend on the size, number, and location of the fibroids. Common features include:
- Heavy or Prolonged Menstrual Bleeding (Menorrhagia): The most frequent symptom, sometimes leading to anemia.
- Pelvic Pressure and Pain: A feeling of fullness, heaviness, or pressure in the lower abdomen, or pelvic pain which can be dull or sharp.
- Increased Urinary Frequency or Difficulty Emptying Bladder: If large fibroids press on the bladder.
- Constipation or Difficulty with Bowel Movements: If fibroids press on the rectum.
- Abdominal Swelling or Enlargement: With large fibroids, the abdomen may appear larger.
- Pain During Sexual Intercourse (Dyspareunia).
- Backache or Leg Pain: If fibroids press on nerves.
4. Outline three complications of fibroids in pregnancy.
While many women with fibroids have normal pregnancies, fibroids can sometimes cause complications:
- Increased Risk of Miscarriage: Particularly with submucosal fibroids that distort the uterine cavity, making implantation difficult.
- Preterm Birth: Fibroids can increase uterine irritability or occupy space, potentially leading to labor starting too early (before 37 weeks).
- Placental Abruption: Premature separation of the placenta from the uterine wall, a serious complication, may be slightly more common with fibroids.
- Fetal Growth Restriction: Large fibroids can potentially reduce the space available for the baby to grow, although this is less common.
- Fetal Malposition: Fibroids may interfere with the baby positioning correctly for birth (e.g., increasing risk of breech presentation).
- Increased Risk of Cesarean Section: Due to fetal malposition, failure of labor to progress, or fibroids blocking the birth canal.
- Postpartum Hemorrhage: Larger fibroids can interfere with the uterus's ability to contract effectively after delivery, increasing the risk of heavy bleeding.
- Red Degeneration: A type of painful degeneration that can occur in fibroids during pregnancy due to reduced blood supply.
5. State three diagnostic methods used for fibroids.
Diagnosing uterine fibroids involves a combination of physical examination and imaging:
- Pelvic Examination: During a routine pelvic exam, the doctor may feel an enlarged, irregularly shaped, or lumpy uterus, which can suggest the presence of fibroids.
- Pelvic Ultrasound: This is the most common and usually the first imaging test used. Ultrasound uses sound waves to create images of the uterus and ovaries, clearly showing the presence, size, number, and location of fibroids.
- MRI (Magnetic Resonance Imaging): May be used for more detailed imaging in complex cases, very large uteri, or when planning surgical procedures like myomectomy or uterine artery embolization. It provides excellent images of the uterus and fibroids.
- Hysteroscopy: A procedure where a thin, lighted camera is inserted through the cervix into the uterus. This allows direct visualization of the inside of the uterine cavity to identify submucosal fibroids that bulge into the cavity.
6. List any three treatment options for uterine fibroids.
Treatment for uterine fibroids depends on the woman's symptoms, age, desire for future pregnancy, and the size and location of the fibroids:
- Watchful Waiting: For small, asymptomatic fibroids, no treatment may be needed, and they are simply monitored over time.
- Medical Management: Medications to control symptoms, especially heavy bleeding and pain. Examples include:
- NSAIDs (for pain).
- Tranexamic acid (to reduce bleeding).
- Hormonal therapies (like birth control pills, progesterone, or GnRH agonists) to regulate cycles, reduce bleeding, or temporarily shrink fibroids.
- Levonorgestrel-releasing IUD (LNG-IUS) for heavy bleeding.
- Minimally Invasive Procedures:
- Uterine Artery Embolization (UAE): Blocks blood supply to fibroids.
- Focused Ultrasound Surgery (FUS): Uses ultrasound waves to destroy fibroid tissue.
- Hysteroscopic Myomectomy: Removal of submucosal fibroids through hysteroscopy.
- Surgical Management:
- Myomectomy: Surgical removal of fibroids while preserving the uterus (laparoscopic, robotic, or open abdominal).
- Hysterectomy: Removal of the entire uterus (abdominal, vaginal, or laparoscopic). This is a definitive cure for symptoms and prevents recurrence.
7. Describe the nurse's role in preoperative care of a woman undergoing myomectomy.
The nurse plays a key role in preparing a woman for myomectomy, ensuring her physical and emotional readiness for surgery.
- Assessment:
- Assess vital signs, general health status, and any existing medical conditions.
- Assess the woman's understanding of the myomectomy procedure, including the type of surgery planned (e.g., laparoscopic, abdominal).
- Assess her emotional state, fears, and expectations regarding the surgery and future fertility.
- Review laboratory results and other pre-operative tests.
- Education:
- Explain the pre-operative instructions (e.g., fasting requirements, bowel preparation if needed).
- Teach post-operative exercises, such as deep breathing and coughing exercises, and leg exercises to prevent complications.
- Explain the expected recovery process and pain management plan after surgery.
- Provide information about what to expect in the hospital setting.
- Physical Preparation:
- Ensure necessary consents are signed.
- Administer prescribed pre-operative medications (e.g., antibiotics, pain relief).
- Assist with skin preparation (e.g., surgical scrub).
- Ensure the patient is NPO.
- Emotional Support:
- Provide reassurance and listen to her concerns.
- Address any anxieties about anesthesia, surgery, or the impact on future fertility.
- Prepare for Post-Operative Period: Explain the location of incisions, drains, or tubes she might have after surgery.
8. Outline three possible effects of fibroids on fertility.
Uterine fibroids can sometimes affect a woman's ability to get pregnant or carry a pregnancy to term, depending on their location and size:
- Interference with Implantation: Submucosal fibroids (those bulging into the uterine cavity) can distort the shape of the cavity and affect the lining, making it difficult for an embryo to implant successfully.
- Blockage of Fallopian Tubes: Fibroids that grow near where the fallopian tubes enter the uterus can potentially block the tubes, preventing sperm from reaching the egg or the fertilized egg from reaching the uterus.
- Distortion of Uterine Cavity Shape: Large intramural or subserosal fibroids can sometimes distort the overall shape of the uterus, which may affect implantation or the ability of the uterus to support a growing pregnancy.
- Reduced Blood Flow to the Endometrium: Fibroids might affect blood flow to the uterine lining, potentially impacting implantation.
- Increased Risk of Miscarriage: Submucosal fibroids are particularly associated with an increased risk of early pregnancy loss.
9. Mention three health education points for a woman diagnosed with fibroids.
Health education for a woman diagnosed with fibroids should provide clear information and empower her regarding her condition and management options:
- What Fibroids Are: Explain that fibroids are common, non-cancerous growths in the uterus and that they are not cancer.
- Symptoms and Monitoring: Discuss the typical symptoms (heavy bleeding, pain, pressure) and advise her to monitor her symptoms and report any changes or worsening bleeding. Explain that many fibroids don't cause symptoms and may not need treatment but require monitoring.
- Treatment Options: Explain the various treatment options available, from watchful waiting and medical management to minimally invasive procedures and surgery (myomectomy or hysterectomy), discussing the pros and cons of each based on her individual situation and goals (e.g., desire for future pregnancy).
- Impact on Fertility and Pregnancy (if applicable): Discuss how fibroids might affect fertility or pregnancy if this is a concern for her.
- When to Seek Medical Attention: Instruct her on warning signs to report, such as very heavy bleeding, severe pain, or symptoms of anemia (fatigue, dizziness).
10. Explain two nursing diagnoses relevant to a woman with symptomatic fibroids.
Two relevant nursing diagnoses for a woman with symptomatic uterine fibroids could be:
- Excessive Fluid Volume Deficit (Risk or Actual) related to Heavy Menstrual Bleeding (Menorrhagia):
- Explanation: Symptomatic fibroids, especially submucosal ones, often cause heavy and prolonged menstrual bleeding. This excessive blood loss can lead to a depletion of body fluids (blood volume) and, more commonly, to iron deficiency anemia due to chronic blood loss.
- Nursing Interventions: Monitor bleeding amount, assess for signs of hypovolemia or anemia (fatigue, paleness), administer IV fluids or blood transfusion if needed, administer iron supplements, and educate on managing heavy bleeding.
- Acute or Chronic Pain related to Uterine Enlargement and Pressure from Fibroids:
- Explanation: Large fibroids can cause pressure on pelvic organs, leading to discomfort or pain. Fibroids can also cause painful menstrual cramps (dysmenorrhea) or acute pain if they undergo degeneration.
- Nursing Interventions: Assess pain level, administer prescribed analgesics, provide comfort measures (heat application), and educate on non-pharmacological pain relief methods.
- Body Image Disturbance related to Abdominal Swelling or Excessive Bleeding:
- Explanation: Large fibroids can cause visible abdominal swelling, and heavy bleeding can be embarrassing and restrictive, impacting a woman's self-perception and body image.
- Nursing Interventions: Provide a supportive environment, listen to her feelings, offer education and management options that can alleviate physical symptoms impacting body image, and refer for counseling if needed.
- Urinary Elimination, Impaired related to Pressure on the Bladder:
- Explanation: Fibroids located near the bladder can compress it, leading to symptoms like increased urinary frequency, urgency, or incomplete bladder emptying.
- Nursing Interventions: Assess urinary symptoms, encourage regular voiding, monitor for signs of urinary tract infection, and educate on strategies to manage urinary symptoms.
- Constipation related to Pressure on the Rectum:
- Explanation: Fibroids located near the rectum can cause pressure, leading to difficulty with bowel movements.
- Nursing Interventions: Assess bowel habits, encourage increased fluid and fiber intake, educate on the importance of regular exercise, and administer stool softeners or laxatives as prescribed.
- Fatigue related to Anemia from Chronic Blood Loss:
- Explanation: Heavy menstrual bleeding associated with fibroids can lead to iron deficiency anemia, which in turn causes fatigue.
- Nursing Interventions: Assess fatigue level, monitor hemoglobin and hematocrit, administer iron supplements as ordered, encourage rest, and educate on dietary sources of iron.
- Anxiety/Fear related to Diagnosis, Symptoms, and Treatment Options:
- Explanation: A diagnosis of fibroids and the need to consider treatment options (which may include surgery) can cause anxiety and fear.
- Nursing Interventions: Provide clear and accurate information about fibroids and treatment options, answer questions, encourage expression of feelings, provide emotional support, and refer to support groups or counseling if appropriate.
- Deficient Knowledge regarding Fibroids, Treatment Options, and Self-Care:
- Explanation: Women may have limited understanding of what fibroids are, why they cause symptoms, the available treatment options, and how to manage their symptoms.
- Nursing Interventions: Assess current knowledge, provide comprehensive education on fibroids (what they are, symptoms, growth patterns), discuss various treatment options (medical, surgical, interventional radiology) including risks and benefits, teach self-care strategies for managing symptoms (e.g., pain relief, managing bleeding), and provide written or online resources.
SECTION D: Long Essay Questions (10 Marks Each)
1. Define uterine fibroids and discuss their types, causes, and risk factors.
Definition of Uterine Fibroids:
- Uterine fibroids, also known as leiomyomas or myomas, are non-cancerous growths that originate from the smooth muscle tissue of the uterus (myometrium).
- They are the most common type of tumor in the female reproductive system.
- They can vary in size from microscopic to several centimeters in diameter and may be single or multiple.
Types of Fibroids (based on location):
- Intramural Fibroids: Located within the muscular wall of the uterus. They are the most common type.
- Submucosal Fibroids: Located just beneath the endometrium (uterine lining) and bulge into the uterine cavity. These are strongly associated with heavy bleeding and fertility issues. Can be sessile (broad base) or pedunculated (on a stalk).
- Subserosal Fibroids: Located on the outer surface of the uterus, under the serosa (outer covering). These can also be sessile or pedunculated. Large subserosal fibroids can cause pressure on nearby organs.
- Pedunculated Fibroids: A type of subserosal or submucosal fibroid growing on a stalk. These can sometimes twist, causing acute pain.
- Cervical Fibroids: Located in the wall of the cervix (lower part of the uterus), less common.
Causes:
- The exact cause of uterine fibroids is not fully understood, but research points to several factors:
- Hormones: Estrogen and progesterone appear to promote the growth of fibroids. Fibroids have more estrogen and progesterone receptors than normal uterine muscle cells. They tend to grow during reproductive years when these hormone levels are high and shrink after menopause when they decline.
- Genetics: Fibroids often run in families, suggesting a genetic predisposition. Specific gene changes have been identified in fibroid tissue.
- Growth Factors: Substances in the body that stimulate cell growth (like insulin-like growth factors) may also play a role.
- Origin: Fibroids are believed to develop from a single abnormal smooth muscle cell in the uterus.
Risk Factors:
- Age: Fibroids are most common in women aged 30s and 40s, during their reproductive years.
- Race: African-American women have a higher incidence of fibroids, often developing them at a younger age, having larger and more numerous fibroids, and experiencing more severe symptoms compared to other racial groups.
- Family History: Having a mother or sister with fibroids increases a woman's risk.
- Obesity: Women who are overweight or obese have a higher risk.
- Diet: A diet high in red meat may be associated with an increased risk, while a diet rich in green vegetables may be protective.
- Reproductive History: Women who have not had children appear to have a higher risk.
- Early Menarche (first period): Starting periods at a younger age may be associated with a slightly increased risk.
- Vitamin D Deficiency: Some studies suggest a link between low vitamin D levels and increased fibroid risk.
2. Explain the signs, symptoms, and complications of uterine fibroids.
Uterine fibroids can present with a variety of signs and symptoms, depending on their size, number, and location. Many women, however, have fibroids and experience no symptoms at all. When symptoms do occur, they can significantly impact a woman's quality of life.
Signs and Symptoms:
- Menstrual Changes:
- Heavy Menstrual Bleeding (Menorrhagia): The most common symptom. Periods are much heavier than usual and may last longer than 7 days. This can lead to anemia.
- Prolonged Menstrual Periods: Periods lasting longer than a week.
- Bleeding Between Periods (Intermenstrual Bleeding): Spotting or bleeding between cycles, although less common than heavy periods.
- Pelvic Pressure and Pain:
- Feeling of Heaviness or Fullness: A sensation of pressure in the lower abdomen or pelvis due to the size and weight of the fibroids.
- Pelvic Pain: Can be dull, aching, or sharp. May be related to menstrual cramps, pressure on nerves, or fibroid degeneration.
- Urinary Symptoms:
- Increased Urinary Frequency: If fibroids press on the bladder.
- Difficulty Emptying Bladder: Fibroids compressing the bladder or urethra.
- Bowel Symptoms:
- Constipation: If fibroids press on the rectum.
- Difficulty with Bowel Movements.
- Abdominal Swelling or Enlargement: Large fibroids can cause the abdomen to appear distended, mimicking pregnancy in appearance.
- Pain During Sexual Intercourse (Dyspareunia): Depending on the size and location of fibroids, especially those near the cervix or in the lower uterus.
- Lower Back Pain or Leg Pain: If fibroids press on nerves in the pelvis.
Complications:
- Anemia: Chronic heavy menstrual bleeding can lead to iron deficiency anemia, causing fatigue, weakness, paleness, dizziness, and shortness of breath.
- Infertility: Certain fibroids, particularly submucosal ones, can interfere with conception by affecting implantation or blocking fallopian tubes.
- Pregnancy Complications: As discussed in a previous short essay, fibroids can increase the risk of miscarriage, preterm birth, placental abruption, fetal malposition, and C-section.
- Acute Pain: Can occur if a fibroid undergoes degeneration (e.g., red degeneration during pregnancy) or if a pedunculated fibroid twists on its stalk.
- Pressure on Other Organs: Large fibroids can cause significant pressure symptoms on the bladder, bowel, or ureters (tubes from kidneys), potentially leading to kidney problems (hydronephrosis) in rare cases if the ureter is compressed.
- Impact on Quality of Life: The symptoms of fibroids, particularly heavy bleeding and pain, can severely disrupt a woman's daily life, work, social activities, and emotional well-being.
- Rare Transformation to Malignancy (Leiomyosarcoma): While fibroids are almost always benign, there is a rare possibility (less than 1 in 1000) that a suspected fibroid could be a leiomyosarcoma, a type of uterine cancer. Rapid growth of a presumed fibroid after menopause should raise suspicion.
3. Discuss the diagnostic investigations and differential diagnosis of uterine fibroids.
Diagnosing uterine fibroids involves identifying their presence and location, and importantly, distinguishing them from other conditions that can cause similar symptoms or pelvic masses (differential diagnosis).
Diagnostic Investigations:
- Pelvic Examination: Often the first step where a doctor feels an enlarged, firm, or irregularly shaped uterus during a manual examination.
- Pelvic Ultrasound: The most common and cost-effective imaging technique.
- Transabdominal Ultrasound: Performed over the abdomen.
- Transvaginal Ultrasound: A probe is inserted into the vagina, providing clearer, more detailed images of the uterus and allowing for better visualization of fibroids, their size, number, and location (intramural, submucosal, subserosal).
- Saline Infusion Sonography (SIS) or Sonohysterography: Saline is instilled into the uterine cavity during a transvaginal ultrasound. This distends the cavity and provides excellent visualization of submucosal fibroids that bulge into the cavity.
- MRI (Magnetic Resonance Imaging): Provides more detailed images than ultrasound and is particularly useful for:
- Confirming the diagnosis in complex cases where ultrasound is inconclusive.
- Mapping large or numerous fibroids before surgery (myomectomy or hysterectomy).
- Distinguishing fibroids from other masses (like adenomyosis or rare sarcomas).
- Planning non-surgical treatments like Uterine Artery Embolization (UAE) or Focused Ultrasound Surgery (FUS).
- Hysteroscopy: A procedure where a thin, lighted camera is inserted through the cervix into the uterine cavity. It's used to:
- Directly visualize and diagnose submucosal fibroids that are inside the cavity.
- Can also be used for simultaneous removal of some submucosal fibroids (hysteroscopic myomectomy).
- Laparoscopy: A minimally invasive surgical procedure where a camera is inserted through a small incision in the abdomen. It can be used to:
- Visualize fibroids on the outer surface of the uterus (subserosal).
- Help differentiate fibroids from other masses outside the uterus.
- Can be used for laparoscopic myomectomy (removal of fibroids).
- Blood Tests: While not for diagnosing fibroids directly, blood tests may be done to assess for complications, such as a Complete Blood Count (CBC) to check for anemia due to heavy bleeding.
Differential Diagnosis (Conditions that can mimic fibroids):
- Pregnancy: Can cause uterine enlargement and missed periods. A pregnancy test is essential.
- Ovarian Masses: Ovarian cysts or tumors can cause pelvic pain or pressure. Ultrasound helps distinguish ovarian masses from uterine fibroids.
- Adenomyosis: A condition where the uterine lining grows into the muscular wall of the uterus, causing uterine enlargement, heavy bleeding, and painful periods. Can sometimes be difficult to distinguish from fibroids on ultrasound, but MRI can be helpful.
- Endometrial Polyps: Growths in the uterine lining that can cause abnormal bleeding. Hysteroscopy or saline infusion sonography are better for visualizing polyps than basic ultrasound.
- Uterine or Ovarian Cancer: Malignant tumors of the uterus (e.g., leiomyosarcoma, endometrial cancer) or ovaries. While rare, rapid growth of a mass, especially after menopause, warrants investigation (e.g., endometrial biopsy, MRI, tumor markers).
- Other Pelvic Masses: Conditions affecting the bowel, bladder, or other pelvic structures can sometimes present with similar symptoms.
4. Describe in detail the medical and surgical management of uterine fibroids.
Management of uterine fibroids depends on the presence and severity of symptoms, the size and location of the fibroids, the woman's age, overall health, and her desire for future fertility. Treatment options range from observation to medication and surgery.
Medical Management (primarily for symptom control):
- Watchful Waiting: For small, asymptomatic fibroids, no active treatment is needed. Regular check-ups are done to monitor for growth or symptom development.
- Pain Management:
- NSAIDs (Nonsteroidal Anti-inflammatory Drugs): Like ibuprofen or naproxen, can help reduce pain associated with fibroids and may slightly reduce menstrual bleeding.
- Management of Heavy Bleeding:
- Tranexamic Acid: A non-hormonal medication taken during menstruation that reduces blood loss by promoting clotting.
- Oral Contraceptives (Birth Control Pills): Can regulate menstrual cycles, reduce menstrual flow, and help with pain.
- Progestins: Can be given orally, by injection, or as an IUD. Progestins thin the uterine lining, reducing bleeding. The Levonorgestrel-releasing IUD (LNG-IUS) is very effective at reducing heavy menstrual bleeding associated with fibroids.
- GnRH Agonists (e.g., Leuprolide): These medications temporarily block the production of estrogen and progesterone, leading to a temporary menopause-like state. They shrink fibroids and stop menstruation, which can help with severe anemia. However, they have significant side effects (hot flashes, bone loss) and are typically used for a limited time (e.g., 3-6 months), often before surgery to shrink fibroids.
- Selective Progesterone Receptor Modulators (SPRMs) (e.g., Ulipristal Acetate): Medications that can reduce fibroid size and control bleeding, used for short-term treatment.
- Iron Supplementation: To treat or prevent iron deficiency anemia caused by chronic heavy bleeding.
Surgical and Minimally Invasive Management:
- Myomectomy:
- Description: Surgical removal of the fibroids while leaving the uterus intact. This is the preferred option for women with symptomatic fibroids who wish to preserve their fertility.
- Approaches: Can be performed through:
- Abdominal Myomectomy: Open surgery through an abdominal incision, used for large or numerous fibroids.
- Laparoscopic Myomectomy: Minimally invasive surgery using small incisions and a camera.
- Robotic Myomectomy: Similar to laparoscopic surgery but uses a robotic system.
- Hysteroscopic Myomectomy: Removal of submucosal fibroids that are inside the uterine cavity using a hysteroscope inserted through the cervix (no abdominal incisions). Suitable for fibroids primarily within the cavity.
- Considerations: Risk of bleeding, infection, damage to the uterus, potential for fibroid recurrence over time. Pregnancy after myomectomy may require a Cesarean section depending on the extent of uterine incision.
- Hysterectomy:
- Description: Surgical removal of the entire uterus. This is a definitive treatment for symptomatic fibroids as it removes the source of the problem and prevents recurrence. Chosen by women who have completed childbearing or do not wish to preserve their uterus.
- Approaches: Can be performed through abdominal incision, vaginally, or laparoscopically/robotically.
- Considerations: Permanent cessation of menstruation and fertility.
- Uterine Artery Embolization (UAE):
- Description: A radiologist inserts a catheter into an artery in the leg and guides it to the uterine arteries that supply the fibroids. Small particles are injected to block the blood flow to the fibroids, causing them to shrink.
- Indications: Symptomatic fibroids. Less likely to be recommended for women who strongly desire future fertility compared to myomectomy, although pregnancy can occur after UAE.
- Focused Ultrasound Surgery (FUS) / MRI-guided FUS:
- Description: Uses focused ultrasound waves guided by MRI to heat and destroy fibroid tissue.
- Indications: Selected symptomatic fibroids. Non-invasive.
- Considerations: Not suitable for all fibroids (e.g., too many, too large, poorly located). Effects on future fertility are still being studied, but generally considered less impactful than major surgery.
5. Outline the nursing care for a patient undergoing hysterectomy due to fibroids.
Nursing care for a patient undergoing hysterectomy (removal of the uterus), often due to symptomatic uterine fibroids unresponsive to other treatments, involves comprehensive care before, during, and after surgery.
Nursing Care Plan Components:
- Pre-Operative Phase:
- Assessment: Assess vital signs, general health status, review medical history (including reason for hysterectomy, symptoms related to fibroids, any anemia). Assess understanding of the procedure and recovery. Assess emotional state (anxiety, sadness about loss of fertility/menstruation if applicable).
- Education: Explain pre-operative instructions (fasting, bowel prep if needed, stopping certain medications). Teach post-operative exercises (deep breathing, coughing, leg exercises). Discuss pain management plan. Explain what to expect immediately after surgery (e.g., IV lines, catheter, pain).
- Physical Preparation: Ensure consents are signed. Administer pre-operative medications. Prepare skin. Ensure NPO status.
- Emotional Support: Provide reassurance, listen to fears, address concerns about the surgery and its impact.
- Intra-Operative Phase:
- Assessment: Monitor vital signs, fluid balance, and patient status throughout the procedure.
- Interventions: Assist the surgical team. Maintain sterile field. Ensure patient safety and positioning.
- Post-Operative Phase:
- Assessment: Monitor vital signs regularly. Assess pain level frequently and administer analgesics. Assess surgical incision site (abdominal approach) or vaginal bleeding/discharge (vaginal approach) for amount and characteristics. Monitor urine output (check Foley catheter if present). Assess bowel sounds and return of bowel function. Assess for signs of complications (bleeding, infection, blood clots, respiratory issues).
- Nursing Diagnosis (Example): Acute Pain related to surgical incision and tissue manipulation.
- Goal: Patient will report reduced pain and use pain scale effectively.
- Interventions: Administer prescribed pain medication (IV, oral, PCA). Encourage and assist with deep breathing, coughing, and use of incentive spirometer. Encourage early ambulation to prevent blood clots and aid bowel function. Monitor I&O. Provide wound care. Assist with hygiene and comfort.
- Discharge Planning and Education:
- Assessment: Assess patient's readiness for discharge, support system at home, and understanding of self-care.
- Nursing Diagnosis (Example): Deficient Knowledge regarding post-hysterectomy care and recovery.
- Goal: Patient will verbalize understanding of home care instructions and follow-up plan.
- Interventions: Educate on:
- Wound care (if applicable).
- Expected vaginal discharge/bleeding.
- Activity restrictions (avoiding heavy lifting, strenuous exercise) and gradual increase in activity.
- When to resume driving and sexual activity.
- Signs of complications to report (fever, severe pain, heavy bleeding, wound issues, leg swelling/pain).
- Importance of follow-up appointments.
- Discuss the cessation of menstruation and inability to become pregnant. Address any emotional response to this.
- Discuss potential menopausal symptoms if ovaries were also removed (surgical menopause).
6. Discuss the effect of fibroids on pregnancy and the nurse's role in antenatal care.
While many women with uterine fibroids have uncomplicated pregnancies, fibroids can sometimes pose risks to both the mother and the developing fetus. The nurse in antenatal care plays a crucial role in identifying these risks, educating the patient, and providing appropriate monitoring and support.
Effect of Fibroids on Pregnancy:
- Increased Risk of Miscarriage: Particularly submucosal fibroids can interfere with implantation and early pregnancy development.
- Preterm Birth: Fibroids can irritate the uterus and lead to contractions, increasing the risk of labor starting too early.
- Placental Problems: May increase the risk of placental abruption (placenta separating from the uterine wall early) or placenta previa (placenta covering the cervix).
- Fetal Growth Restriction: Large fibroids can potentially compete for space and blood supply, although this is less common.
- Fetal Malposition: Fibroids can occupy space and prevent the baby from getting into the optimal head-down position for birth, increasing the likelihood of breech presentation or other abnormal positions.
- Red Degeneration: Fibroids can outgrow their blood supply during pregnancy, causing them to degenerate and become acutely painful.
- Increased Need for Cesarean Section: Due to fetal malposition, failure of labor to progress, or large fibroids blocking the birth canal.
- Postpartum Hemorrhage: Large fibroids can interfere with the uterus's ability to contract effectively after delivery, increasing the risk of excessive bleeding.
Nurse's Role in Antenatal Care for Women with Fibroids:
- Identification: Note the presence, size, and location of fibroids based on medical history and ultrasound reports.
- Education: Educate the pregnant woman about her fibroids, explaining that many women with fibroids have healthy pregnancies but also discussing the potential risks in a calm and reassuring manner. Explain symptoms to watch out for.
- Monitoring: Monitor for symptoms that may be related to fibroids, such as increased pain, bleeding, or signs of preterm labor. Monitor fetal growth and position.
- Pain Management: Advise on safe pain relief options during pregnancy (e.g., rest, heat application, prescribed medications safe for pregnancy) if she experiences fibroid-related pain.
- Recognizing Complications: Be vigilant for signs of complications like heavy bleeding (placental abruption), increasing severe pain (degeneration), or signs of preterm labor. Promptly report these to the doctor.
- Counseling on Birth Plan: Discuss how the fibroids might influence the birth plan, including the potential for Cesarean section.
- Postpartum Education: Prepare her for the possibility of increased bleeding after delivery.
- Emotional Support: Provide emotional support, as having fibroids during pregnancy can cause anxiety. Reassure her that most pregnancies with fibroids are successful.
- Collaboration: Work closely with the obstetrician to ensure appropriate monitoring and management throughout the pregnancy and delivery.
7. Explain the psychosocial impact of fibroids on women and the nurse's role in support.
Beyond the physical symptoms, uterine fibroids can have a significant impact on a woman's psychosocial well-being, affecting her emotional health, self-esteem, social life, and relationships. Nurses play a vital role in providing supportive care to address these impacts.
Psychosocial Impact:
- Impact of Symptoms:
- Heavy Bleeding: Can cause significant stress, anxiety, and embarrassment due to fear of accidents in public. It can disrupt daily activities, work, and social life.
- Pain and Pressure: Chronic pelvic pain or pressure can be debilitating and affect mood, sleep, and energy levels.
- Body Image: Large fibroids causing abdominal swelling can affect a woman's body image and self-esteem.
- Impact on Relationships: Painful intercourse caused by fibroids can affect intimate relationships. The impact of heavy bleeding can also affect sexual activity and spontaneity.
- Anxiety about Health: Worry about the symptoms, the potential for growth, the need for surgery, and although rare, the fear of cancer can cause significant anxiety.
- Impact on Fertility and Pregnancy: For women who desire children, the potential impact of fibroids on fertility and pregnancy can cause significant emotional distress, anxiety, and grief if they experience difficulty conceiving or miscarriages.
- Decision-Making Stress: Choosing among various treatment options, weighing risks and benefits, and considering future fertility can be stressful.
- Fatigue: Anemia caused by heavy bleeding leads to severe fatigue, impacting mood and ability to participate in life.
Nurse's Role in Support:
- Listen and Validate: Provide a safe and empathetic space for the woman to talk about how fibroids are affecting her life. Listen actively to her concerns, frustrations, and fears. Validate that her symptoms and their impact are real.
- Provide Clear Information: Educate her about fibroids in simple terms, explaining that they are common and usually benign. Provide information about her specific diagnosis and how it relates to her symptoms.
- Discuss Management Options: Explain the various treatment options available, including their potential benefits and impacts on symptoms and quality of life. Help her understand the choices in the context of her own priorities (e.g., symptom relief, fertility preservation).
- Address Fertility Concerns: If fertility is a concern, discuss the potential impact of fibroids and available treatments (like myomectomy) and provide information about fertility specialists if needed.
- Support Symptom Management: Provide education and support on managing physical symptoms like heavy bleeding and pain, as improving these symptoms can significantly alleviate psychological distress.
- Encourage Communication: Encourage her to communicate openly with her partner and family about what she is experiencing and how they can support her.
- Provide Resources: Offer information about counseling services, support groups for women with fibroids, or resources for coping with chronic conditions or fertility issues.
- Empower Decision-Making: Support her in making informed decisions about her treatment, respecting her autonomy and preferences.
8. Describe the health education and counseling given to a woman with fibroids.
Health education and counseling are crucial for empowering women diagnosed with uterine fibroids, helping them understand their condition, manage symptoms, and make informed decisions about treatment and future health.
Key Areas for Health Education and Counseling:
- What Fibroids Are:
- Explain in simple, non-medical terms that fibroids are common, non-cancerous (benign) growths in the uterus.
- Clarify that they do not turn into cancer.
- Briefly mention what causes them (influenced by hormones).
- Types and Location:
- Explain the different types (intramural, submucosal, subserosal) based on their location and how location can affect symptoms and treatment options.
- Show or describe the location of her specific fibroids if known.
- Symptoms:
- Discuss the common symptoms of fibroids (heavy bleeding, pain, pressure, urinary/bowel issues).
- Explain which of her symptoms are likely related to her fibroids.
- Emphasize that many women have fibroids with no symptoms.
- Diagnosis:
- Explain how fibroids were diagnosed (e.g., ultrasound).
- Management Options:
- Discuss all available management options based on her symptoms, age, desire for future pregnancy, and the characteristics of her fibroids.
- Explain each option clearly, including watchful waiting, medical treatments (medications to control bleeding/pain), minimally invasive procedures (UAE, FUS, hysteroscopic myomectomy), and surgical options (myomectomy, hysterectomy).
- Discuss the benefits, risks, expected outcomes, and recovery time for each option.
- Empower her to participate in the decision-making process.
- Impact on Fertility and Pregnancy (if applicable):
- If she plans future pregnancies, explain how fibroids might affect fertility or pregnancy outcomes and discuss treatments that preserve fertility (myomectomy).
- Monitoring:
- If watchful waiting is chosen, explain the importance of regular check-ups to monitor for symptom changes or fibroid growth.
- Advise on tracking symptoms (e.g., using a calendar).
- Anemia:
- Explain the link between heavy bleeding and iron deficiency anemia.
- Educate on symptoms of anemia and the importance of iron supplementation if needed.
- When to Seek Medical Attention:
- Provide clear instructions on warning signs that require immediate medical attention (e.g., very heavy bleeding, severe acute pain, signs of infection).
- Emotional Support:
- Acknowledge the potential emotional impact of symptoms and diagnosis. Offer support and resources for counseling if needed.
9. Discuss the role of ultrasound and other imaging in diagnosis and follow-up of fibroids.
Imaging techniques, particularly ultrasound, are essential tools in the diagnosis and ongoing management (follow-up) of uterine fibroids.
Role of Ultrasound:
- Primary Diagnostic Tool: Ultrasound is the first-line and most commonly used imaging method for diagnosing uterine fibroids. It is readily available, relatively inexpensive, and non-invasive.
- Visualization: It uses sound waves to create images of the uterus, allowing for clear visualization of fibroids within the muscular wall (intramural), on the outer surface (subserosal), or bulging into the cavity (submucosal).
- Assessment of Size, Number, and Location: Ultrasound provides crucial information about the size of individual fibroids, how many are present, and their precise location, which is vital for assessing symptoms and planning treatment.
- Transvaginal vs. Transabdominal: Transvaginal ultrasound provides higher-resolution images of the uterus and is often preferred for better detail of fibroids within the uterus. Transabdominal ultrasound is useful for larger fibroids or a very large uterus.
- Saline Infusion Sonography (SIS): A specialized ultrasound technique where saline is injected into the uterine cavity. This distends the cavity and significantly improves the visualization of submucosal fibroids and endometrial polyps.
Role of Other Imaging (for diagnosis and further evaluation):
- MRI (Magnetic Resonance Imaging): Provides excellent, detailed images of the uterus and fibroids. It is used:
- In complex cases where ultrasound is inconclusive.
- To distinguish fibroids from other types of masses (like adenomyosis or sarcomas).
- For precise mapping of fibroids before complex surgery (myomectomy) or non-surgical procedures (UAE, FUS).
- Hysteroscopy: While also a diagnostic tool, it allows direct visualization of the inside of the uterine cavity and is specifically used to diagnose and evaluate submucosal fibroids.
- Laparoscopy: Primarily a surgical procedure, but can be used diagnostically to visualize fibroids on the outer surface of the uterus and assess other pelvic organs if needed.
Role of Imaging in Follow-up:
- Monitoring Growth: For women with asymptomatic fibroids managed by watchful waiting, ultrasound is used periodically (e.g., every 6-12 months) to monitor the size and growth rate of the fibroids.
- Assessing Treatment Response: After treatments like UAE or medical therapy aimed at shrinking fibroids, ultrasound or MRI may be used to assess the change in fibroid size over time.
- Detecting Recurrence: After myomectomy, imaging may be used in follow-up to detect the development of new fibroids, although recurrence is common.
10. Write an essay on the prevention, early detection, and management of complications related to fibroids.
Uterine fibroids are common, and while often asymptomatic, they can lead to various complications. Focusing on prevention of risk factors, early detection of fibroids and complications, and effective management is crucial for minimizing their impact on women's health.
Prevention of Fibroids and Complications:
- Primary Prevention (Preventing Fibroids): While definitive prevention is not always possible, some lifestyle factors may influence risk. Maintaining a healthy weight through diet and exercise, eating a diet rich in fruits and vegetables, and potentially ensuring adequate vitamin D intake may help reduce risk. Further research is needed in this area.
- Secondary Prevention (Preventing Complications Once Fibroids Exist):
- Early Diagnosis and Management: Identifying fibroids early allows for monitoring and intervention before complications become severe.
- Symptom Monitoring: Women with diagnosed fibroids should be educated to monitor their symptoms (heavy bleeding, pain) and report changes promptly.
- Managing Heavy Bleeding: Effective medical management of heavy menstrual bleeding with medications (e.g., hormonal therapy, tranexamic acid, LNG-IUS) can prevent the complication of iron deficiency anemia. Iron supplementation is also key.
- Controlling Pain: Using pain relievers and other comfort measures can manage fibroid-related pain.
- Pre-Conception Counseling: For women with fibroids planning pregnancy, counseling on potential risks and management options before conception (e.g., myomectomy for submucosal fibroids) can help prevent pregnancy complications.
Early Detection of Fibroids and Complications:
- Routine Pelvic Examinations: Regular check-ups can help detect uterine enlargement or irregularities suggestive of fibroids.
- Investigation of Symptoms: Any woman presenting with abnormal uterine bleeding, pelvic pain, or pressure should be investigated to determine the cause, including ultrasound to check for fibroids.
- Early Ultrasound in Pregnancy: For pregnant women, an early ultrasound can detect pre-existing fibroids and allow for monitoring throughout pregnancy.
- Monitoring for Anemia: Blood tests (CBC) should be done in women with heavy bleeding to detect iron deficiency anemia early.
- Recognizing Acute Symptoms: Educating women about warning signs of acute complications (e.g., severe sudden pain indicating degeneration or torsion, very heavy bleeding indicating hemorrhage) is vital for prompt medical attention.
Management of Complications:
- Management of Anemia: Treatment with iron supplements is crucial. In severe cases, blood transfusion may be needed.
- Management of Acute Pain: Requires pain medication and, depending on the cause (degeneration, torsion), may require hospitalization and sometimes surgery.
- Management of Heavy Bleeding Unresponsive to Medical Therapy: Surgical options like endometrial ablation or hysterectomy are considered for severe, refractory menorrhagia, preventing chronic anemia and impacting quality of life.
- Management of Fibroids Causing Infertility or Pregnancy Complications: Myomectomy (surgical removal of fibroids while preserving the uterus) is often performed before pregnancy or between pregnancies to improve outcomes. Management of complications during pregnancy requires careful monitoring and intervention as needed (e.g., bed rest, pain relief, potential C-section).
- Management of Pressure Symptoms: Treatment options aimed at reducing fibroid size (medical therapy, UAE, FUS) or surgical removal (myomectomy, hysterectomy) are used to alleviate pressure on bladder or bowel.
- Management during Pregnancy: If fibroids cause complications during pregnancy (e.g., pain, threatened preterm labor), management focuses on supportive care like rest, pain relief, and monitoring. Surgical removal of fibroids during pregnancy (myomectomy) is generally avoided due to risks, but may be necessary in very rare circumstances for severe, unresponsive symptoms. Delivery method will be planned considering the fibroids' size and location.
- Management of Pressure on Ureters: In the rare event that a fibroid compresses a ureter causing kidney issues, surgical removal of the fibroid is usually necessary to relieve the obstruction.
- Management of Suspected Malignancy: If there is suspicion that a rapid-growing mass or a mass after menopause might be a leiomyosarcoma rather than a benign fibroid, surgical removal and pathological examination are necessary.
- Addressing Psychosocial Impact: Providing emotional support and counseling is a crucial part of managing complications, as symptoms and their impact on life can be distressing.
Gynecology Question for Revision - Topic 9
This section covers Obstetric Fistulas (Vesico-Vaginal Fistula - VVF and Recto-Vaginal Fistula - RVF).
SECTION A: Multiple Choice Questions (40 Marks)
1. A vesico-vaginal fistula (VVF) is an abnormal connection between the:
2. A recto-vaginal fistula (RVF) is an abnormal opening between the:
3. The most common cause of VVF in low-resource settings is:
4. A major risk factor for RVF is:
5. A woman with VVF typically presents with:
6. A woman with RVF may present with:
7. The mainstay of VVF management is:
8. Which investigation is most useful in diagnosing VVF?
9. Psychological effects of VVF and RVF include:
10. The best prevention of obstetric fistula is:
SECTION B: Fill in the Blanks (10 Marks)
1. VVF stands for ________.
2. RVF is a condition where there is an abnormal communication between the rectum and the ________.
3. The most common cause of obstetric fistula in Uganda is ________ labour.
4. Continuous leakage of ________ through the vagina is a sign of VVF.
5. Passage of ________ through the vagina indicates RVF.
6. The definitive management of VVF and RVF is ________.
7. A dye test using ________ is commonly used to diagnose VVF.
8. Fistula repair surgery is ideally done after ________ weeks of injury.
9. One complication of prolonged VVF is ________.
10. Fistula patients are at risk of ________ and rejection.
SECTION C: Short Essay Questions (10 Marks)
1. Define vesico-vaginal fistula.
Definition:
- A vesico-vaginal fistula (VVF) is an abnormal opening or passageway that develops between the bladder and the vagina.
- This abnormal connection allows urine to leak continuously from the bladder into the vagina, bypassing the normal control of the urethra.
- It is a type of obstetric fistula when caused by childbirth injury.
2. Define recto-vaginal fistula.
Definition:
- A recto-vaginal fistula (RVF) is an abnormal opening or passageway that forms between the rectum (the lower part of the large intestine) and the vagina.
- This allows feces (stool) or gas from the rectum to pass into or through the vagina.
- It is also a type of obstetric fistula when caused by childbirth injury.
3. List any four causes of VVF.
Vesico-vaginal fistulas can be caused by various factors:
- Prolonged Obstructed Labor: The most common cause of obstetric VVF, due to pressure cutting off blood supply to tissues.
- Surgical Injury: Accidental injury to the bladder or vagina during pelvic surgery, such as hysterectomy or Cesarean section.
- Radiation Therapy: Treatment for pelvic cancers can damage tissues and lead to fistula formation months or years later.
- Pelvic Cancers: Cancers like cervical cancer or vaginal cancer can erode into the bladder or vagina, creating a fistula.
- Trauma: Severe injury to the pelvic area.
- Infection: Severe infections, although less common as a direct cause, can sometimes contribute to tissue breakdown.
4. State three signs and symptoms of RVF.
Signs and symptoms of a recto-vaginal fistula include:
- Passage of Feces or Gas from the Vagina: The most characteristic symptom, where stool or gas comes out through the vagina instead of the anus.
- Foul-Smelling Vaginal Discharge: Due to the presence of fecal matter and bacteria in the vagina.
- Irritation or Pain in the Vagina or Perineum.
- Recurrent Vaginal Infections.
- Depending on the size and location, symptoms can range from occasional passage of gas to continuous leakage of solid stool.
5. Mention three complications of untreated VVF.
If a VVF is not surgically repaired, it can lead to several complications:
- Skin Excoriation and Infection: Constant exposure to urine causes irritation, breakdown, and infection of the skin around the vagina and perineum.
- Ascending Urinary Tract Infections (UTIs): Bacteria can easily travel up from the vagina into the bladder and kidneys, leading to recurrent and potentially serious UTIs.
- Kidney Damage: Chronic ascending infections can lead to kidney infections and, over time, potentially irreversible kidney damage.
- Social Stigma and Isolation: The continuous leakage and odor lead to severe embarrassment, shame, and withdrawal from social activities, family life, and work.
- Psychological Distress: Chronic incontinence and isolation contribute to anxiety, depression, and loss of self-esteem.
6. Outline three nursing care interventions for a patient with a fresh fistula.
For a woman who has recently developed an obstetric fistula (a "fresh" fistula, often shortly after delivery), nursing care focuses on cleanliness, preventing infection, and supporting natural healing before potential surgery:
- Rigorous Hygiene: Frequent cleaning of the perineal area with soap and water to remove urine or feces and prevent skin breakdown and infection.
- Continuous Catheterization: Keeping a catheter in the bladder for several weeks (usually 4-6 weeks for VVF) to divert urine away from the fistula and allow for potential spontaneous closure of small fistulas.
- Preventing Infection: Administering antibiotics as prescribed to treat or prevent infection. Monitoring for signs of infection (fever, increased pain).
- Skin Care: Applying barrier creams or ointments to the skin around the vagina and perineum to protect it from irritation by urine or feces.
- Emotional Support: Providing immense emotional support, as the woman is likely to be in distress, dealing with pain, leakage, and potentially the loss of her baby.
- Nutrition and Hydration: Ensuring adequate nutrition and hydration to promote healing.
7. Describe two diagnostic methods for detecting fistulas.
Detecting pelvic fistulas usually involves clinical examination and specific tests:
- Physical Examination: A thorough pelvic examination is essential. The doctor or nurse can visually inspect the vagina and cervix, looking for abnormal openings. Asking the patient to cough or strain may sometimes reveal leakage. In RVF, a digital rectal exam or speculum exam of the vagina can sometimes identify the opening.
- Dye Tests:
- **For VVF:** A colored dye (like methylene blue) is instilled into the bladder. Tampons are placed in the vagina. If the tampons become stained with the colored dye, it indicates leakage from the bladder into the vagina, confirming a VVF.
- **For RVF:** Sometimes, a dye is instilled into the rectum, and tampons or gauze in the vagina are checked for staining.
- Fistulogram: An X-ray procedure where contrast dye is injected into the suspected fistula opening to visualize the tract and its connection to other organs. More often used for complex fistulas or recurrent cases.
- Cystoscopy (for VVF): Using a camera to look inside the bladder can help identify the location and size of the fistula opening in the bladder wall.
- Proctoscopy/Sigmoidoscopy (for RVF): Using a camera to look inside the rectum can help identify the fistula opening in the rectal wall.
8. What are three emotional or social impacts of fistulas on women?
Obstetric fistulas have devastating emotional and social consequences for affected women:
- Social Isolation and Ostracism: The continuous leakage of urine or feces and the associated odor lead to severe embarrassment, shame, and stigma. Women are often abandoned by their husbands, shunned by their families, and excluded from community life, becoming socially isolated.
- Psychological Distress: Living with chronic incontinence and isolation can lead to significant psychological problems, including depression, anxiety, loss of self-esteem, and sometimes suicidal thoughts.
- Loss of Dignity and Self-Worth: The inability to control bodily functions is deeply humiliating and can strip women of their dignity and sense of self-worth.
- Economic Hardship: Fistulas prevent women from working, farming, or participating in economic activities, leading to poverty and dependence.
- Impact on Relationships: Fistulas severely impact intimate relationships, often leading to divorce or abandonment.
9. Explain two health education messages for a patient after fistula surgery.
Health education after successful fistula repair surgery is crucial for recovery and preventing recurrence:
- Care for the Surgical Site and Catheter: Explain how to keep the surgical area clean and dry. If a urinary catheter is in place after VVF repair, explain its purpose (to divert urine and allow the repair to heal), how to care for it, and for how long it needs to stay in. Emphasize hygiene to prevent infection.
- Importance of Rest and Activity Restrictions: Advise on the need for rest and avoiding strenuous activities, heavy lifting, and sometimes sitting for prolonged periods for a specified time (usually several weeks to months) to allow the repair to heal properly and prevent stress on the repair site.
- Nutrition and Hydration: Encourage a healthy diet and adequate fluid intake to promote healing and prevent constipation (important after RVF repair).
- Avoiding Sexual Intercourse: Advise abstaining from sexual intercourse for a specific period (usually several months, as advised by the surgeon) to allow complete healing of the repair site.
- Monitoring for Complications: Educate on warning signs of complications such as fever, increasing pain, heavy bleeding, leakage of urine or feces from the vagina, or difficulty urinating/passing stool. Explain when to seek immediate medical help.
- Importance of Follow-up: Emphasize the need to attend follow-up appointments to check on the healing process and ensure the repair is successful.
- Future Pregnancies: Counsel on the importance of delivering any future pregnancies by Cesarean section to prevent repeat fistula formation due to labor. Discuss family planning options.
10. List any four preventive measures for VVF and RVF in maternal health.
Preventing obstetric fistulas (VVF and RVF) is primarily about preventing prolonged obstructed labor:
- Access to Skilled Birth Attendants: Ensuring that every woman gives birth with the assistance of trained healthcare professionals (doctors, midwives, nurses) who can monitor labor progress and recognize complications.
- Access to Emergency Obstetric Care (EmOC): Providing timely access to comprehensive EmOC services, including the ability to perform emergency Cesarean sections when labor is obstructed and vaginal delivery is not possible.
- Availability of Transportation and Referral Systems: Having functional systems to quickly transport women with complicated labor from rural areas to facilities with EmOC.
- Addressing Socioeconomic Factors: Improving women's status, access to education, reducing child marriage (early pregnancies can lead to obstructed labor in physically immature girls), and improving nutrition can indirectly contribute to preventing obstructed labor.
- Community Awareness: Educating communities about the dangers of prolonged labor and the importance of seeking skilled care and timely referral to a health facility.
SECTION D: Long Essay Questions (10 Marks Each)
1. Define VVF and RVF and describe their causes, clinical features, and complications.
Definition:
- Vesico-Vaginal Fistula (VVF): An abnormal opening between the bladder and the vagina, allowing continuous leakage of urine into the vagina.
- Recto-Vaginal Fistula (RVF): An abnormal opening between the rectum and the vagina, allowing passage of feces or gas into the vagina.
- Both are often types of obstetric fistulas when caused by childbirth injury.
Causes:
- Prolonged Obstructed Labor (Most Common Obstetric Cause): When labor lasts too long and the baby's head is stuck, it presses on the tissues between the bladder and vagina (for VVF) or rectum and vagina (for RVF), cutting off blood supply. The tissue dies and a hole forms. This is prevalent in settings with limited access to emergency obstetric care.
- Surgical Injury: Accidental damage to the bladder, vagina, or rectum during pelvic surgeries like hysterectomy, Cesarean section, or anal/rectal surgery.
- Radiation Therapy: Treatment for pelvic cancers can cause tissue damage and lead to fistula formation later.
- Pelvic Cancers: Cancers themselves can erode tissues and create fistulas.
- Trauma: Injuries to the pelvic area.
- Infections: Severe infections in the pelvic area, although less common as a primary cause.
- Inflammatory Bowel Disease: Conditions like Crohn's disease can sometimes lead to RVF.
Clinical Features (Signs and Symptoms):
- VVF:
- Continuous Incontinence: Involuntary and constant leakage of urine from the vagina.
- Odor of urine.
- Skin irritation around the vagina/perineum.
- RVF:
- Passage of gas or feces from the vagina.
- Foul-smelling vaginal discharge.
- Irritation or pain in the vagina/perineum.
- The severity of symptoms depends on the size and location of the fistula. Large fistulas cause more significant leakage.
Complications:
- Physical Complications:
- Skin excoriation, dermatitis, and chronic infections due to constant exposure to urine or feces.
- Ascending urinary tract infections and potential kidney damage (with VVF).
- Recurrent vaginal infections (with RVF).
- Pain and discomfort.
- Psychosocial Complications:
- Severe social isolation, abandonment, and ostracism due to stigma and odor.
- Profound psychological distress, including depression, anxiety, loss of self-esteem, and dignity.
- Economic hardship due to inability to work.
- Breakdown of relationships, especially marriage.
- Medical Complications:
- If untreated, can lead to chronic health problems related to infection and skin breakdown.
2. Discuss the medical and surgical management of patients with VVF and RVF.
Management of VVF and RVF involves preparing the patient for surgery, treating any associated issues, and the definitive surgical repair.
Medical Management (usually preparatory or supportive):
- Initial Assessment and Stabilization: For fresh fistulas or those with infection, initial management includes assessing the patient's overall health, hydration status, and nutritional status.
- Infection Control: Administering antibiotics to treat any existing infections (e.g., urinary tract infections, cellulitis of the skin, or infection around the fistula).
- Catheterization (for VVF): Continuous drainage of urine through a urinary catheter is used for several weeks (usually 4-6 weeks for fresh fistulas) to divert urine away from the fistula site. This can sometimes lead to spontaneous closure of very small fistulas and helps improve tissue health before surgery.
- Bowel Management (for RVF): Bowel rest or a low-residue diet may be initiated, and sometimes medications to reduce stool frequency or bulk, to keep the fistula area clean before surgery.
- Improve Tissue Health: Addressing malnutrition and anemia is important to optimize tissue health for surgical repair. This may involve nutritional support and iron supplementation.
- Delay of Surgery: Surgical repair is typically delayed until the tissues around the fistula are healthy, which may take several weeks to months after the injury (usually at least 3 months, ideally 6-12 months). Medical management supports this waiting period.
Surgical Management (Definitive Treatment):
- Fistula Repair Surgery: This is the primary and definitive treatment for VVF and RVF. The goal is to close the abnormal opening and restore the normal anatomy and function of the bladder, vagina, and rectum.
- Timing: Surgery is delayed until tissue inflammation has subsided and tissues are healthy, maximizing the chance of successful closure.
- Approaches:
- Vaginal Approach: Often preferred for many VVF and lower RVF, as it avoids an abdominal incision and has a shorter recovery. The fistula is accessed and repaired through the vagina.
- Abdominal Approach: May be necessary for complex fistulas, those higher up in the vagina, if there is associated severe pelvic scarring, or if previous vaginal repairs have failed. Involves an incision in the abdomen.
- Combined Approach: Sometimes both vaginal and abdominal approaches are used.
- Procedure: The edges of the fistula are cut and then stitched together in layers to close the opening without tension. Techniques vary depending on the fistula's location and complexity. Sometimes, a flap of healthy tissue is used to reinforce the repair.
- Post-Operative Care: Involves continued catheterization (for VVF repair) for a period to keep the repair site dry, bowel management (for RVF repair) to keep stool away from the repair, pain management, infection prevention, and gradual mobilization.
- Success Rates: Success rates for surgical repair are high when performed by experienced surgeons on well-prepared tissues, but complex fistulas or previous failed repairs can be more challenging.
3. Describe the nursing care of a woman undergoing repair for vesico-vaginal fistula.
Nursing care for a woman undergoing VVF repair is crucial throughout the process, from preparation before surgery to recovery and education afterwards.
Pre-Operative Nursing Care:
- Assessment: Assess vital signs, nutritional status, hydration, and presence of infection (UTI, skin). Assess the condition of the skin around the vagina and perineum due to urine leakage. Assess psychological state (anxiety, depression, social isolation).
- Improving Tissue Health: Assist with meticulous perineal hygiene and skin care using barrier creams to prepare tissues for surgery. Ensure adequate nutrition and hydration are maintained.
- Catheter Management: If a catheter was in place for pre-operative drainage, ensure it is functioning correctly and provide care.
- Education: Explain the surgical procedure (vaginal or abdominal approach), expected duration of catheterization after surgery, pain management plan, and importance of rest. Ensure informed consent has been obtained by the doctor.
- Emotional Support: Provide immense emotional support, acknowledging the long-suffering caused by the fistula and offering hope for successful repair. Address anxieties about the surgery and potential outcome.
- Physical Preparation: Ensure patient is NPO, administer pre-operative medications (including antibiotics if ordered), and assist with skin preparation.
Post-Operative Nursing Care:
- Vital Signs Monitoring: Monitor vital signs regularly to detect signs of bleeding, infection, or shock.
- Catheter Management: This is critical. Ensure the urinary catheter (usually kept in for several weeks) is draining freely, is secured properly, and is kept clean. Monitor urine output and characteristics. Meticulous catheter care is essential to prevent UTIs, which can jeopardize the repair. Educate the patient on catheter care.
- Pain Management: Assess pain and administer prescribed analgesics.
- Incision Care (if abdominal repair): Monitor and care for the abdominal incision.
- Perineal Care: Continue rigorous perineal hygiene and skin care.
- Fluid Management: Monitor I&O and ensure adequate fluid intake to keep urine dilute (less irritating to bladder/repair).
- Activity Restrictions: Educate and enforce prescribed activity restrictions (e.g., rest, avoiding sitting directly on the repair site for prolonged periods, no heavy lifting) to prevent stress on the repair. Encourage gentle mobilization as allowed.
- Monitor for Leakage: Monitor for any signs of urine leakage from the vagina. Report immediately if detected.
- Prevent Constipation: Encourage adequate fluid and fiber intake to prevent straining, which can put pressure on the repair.
- Emotional Support: Continue to provide emotional support throughout the recovery period. Celebrate small signs of healing.
- Education for Discharge: Provide detailed instructions on catheter care, activity restrictions, signs of complications (leakage, fever, severe pain), importance of avoiding sexual intercourse for the specified time, and follow-up appointments.
4. Explain the diagnostic methods used in confirming VVF and RVF.
Diagnosing and confirming pelvic fistulas requires a combination of careful examination and specific diagnostic tests to identify the abnormal opening and its connections.
Diagnostic Methods for VVF:
- History and Physical Examination: A detailed history of urine leakage from the vagina is key. Pelvic examination involves visual inspection of the vagina and cervix. A speculum is used to open the vagina, and the examiner looks for an opening in the vaginal wall. Asking the patient to cough or strain may reveal leakage.
- Dye Tests (Vaginal Dye Test / Tampon Test):
- A colored liquid (e.g., methylene blue or sterile milk) is instilled into the bladder through a catheter.
- Tampons are placed in the vagina.
- If the tampons become stained with the colored liquid, it confirms a connection between the bladder and vagina. The location of the staining on the tampons can give an idea of the fistula's location.
- Cystoscopy: A procedure using a thin, lighted tube with a camera (cystoscope) inserted into the urethra to visualize the inside of the bladder. The examiner can look for the fistula opening in the bladder wall and assess its size and location. This is often done in conjunction with the dye test.
- Intravenous Pyelogram (IVP) or CT Urography: Imaging tests where contrast dye is injected into a vein and X-rays or CT scans are taken as the dye passes through the kidneys, ureters, and bladder. Can sometimes show leakage from the urinary tract.
- Cystogram: An X-ray taken after the bladder is filled with contrast dye. Can sometimes visualize the fistula if dye leaks from the bladder.
Diagnostic Methods for RVF:
- History and Physical Examination: A detailed history of passing gas or feces from the vagina. Pelvic examination involves inspecting the vaginal wall for an opening, often looking at the posterior (back) wall. Digital rectal examination may also be performed.
- Dye Tests:
- A colored dye (e.g., methylene blue) or liquid (e.g., milk) is instilled into the rectum.
- Tampons or gauze placed in the vagina are checked for staining.
- Proctoscopy or Sigmoidoscopy: Using a thin, lighted tube with a camera inserted into the rectum to visualize the rectal wall and look for the fistula opening.
- Fistulogram: Injecting contrast dye into the vaginal opening of the fistula and taking X-rays to visualize the tract and its connection to the rectum.
- MRI: Can provide detailed images of the pelvic anatomy and help visualize the fistula tract, particularly for complex or recurrent fistulas.
- Colonoscopy: Can visualize the entire large intestine and may identify the fistula opening.
5. Discuss the psychosocial impact of fistulas and the nurse's role in rehabilitation.
Obstetric fistulas are not just physical injuries; they inflict profound psychological and social harm on affected women. The continuous leakage of urine or feces leads to severe distress and isolation. Nurses play a vital role in the rehabilitation process, addressing both the physical and psychosocial needs of these women.
Psychosocial Impact:
- Social Isolation and Stigma: The most devastating impact. The constant odor and wetness lead to severe embarrassment and shame. Women are often rejected by their husbands, families, and communities. They may be forced to live separately and are excluded from social gatherings, religious ceremonies, and economic activities. This leads to extreme loneliness and isolation.
- Psychological Distress: Living with chronic incontinence and social exclusion results in significant psychological suffering. Depression, anxiety, a sense of hopelessness, loss of dignity, low self-esteem, and even suicidal thoughts are common. Women may feel worthless and despair about their future.
- Economic Hardship: The inability to control bodily functions makes it difficult or impossible to work, farm, or participate in economic activities. This leads to poverty and dependence on others, further eroding their independence and self-worth.
- Breakdown of Relationships: Fistulas are a major cause of marital breakdown and abandonment, leaving women without the support of a partner.
- Loss of Identity: For women whose identity is closely tied to their roles as wives and mothers, the inability to fulfill these roles due to incontinence and potential infertility can be deeply distressing.
Nurse's Role in Rehabilitation:
- Building Trust and Rapport: Creating a safe, welcoming, and non-judgemental environment is the first step. Many women with fistulas have faced discrimination and may be hesitant to seek help. Building trust is crucial.
- Emotional Support and Counseling: Provide compassionate listening and counseling. Allow women to express their feelings of shame, grief, anger, and despair. Validate their experiences and reassure them that their condition is treatable.
- Education and Hope: Educate women about fistulas, their cause, and, importantly, that surgical repair is possible and often successful. Offering hope for healing and reintegration into society is vital.
- Addressing Stigma: Work to reduce the stigma associated with fistulas within the community and healthcare setting. Advocate for respectful and dignified care.
- Preparing for Surgery: Prepare women emotionally and physically for surgical repair, managing anxiety and building confidence.
- Post-Operative Support: Provide excellent post-operative care, managing pain and potential complications. Celebrate the achievement of successful repair.
- Counseling on Recovery and Reintegration: Educate women on expected physical recovery, when they can resume normal activities, sexual activity, and work. Discuss strategies for reintegration into their families and communities.
- Life Skills Training: In some fistula centers, nurses are involved in programs that provide vocational training and life skills education to help women regain economic independence and rebuild their lives after successful repair.
- Family Planning and Sexual Health Counseling: Discuss future reproductive health, the need for C-section in future pregnancies, and provide counseling on family planning and resuming sexual activity.
6. Describe how obstructed labour contributes to VVF and RVF and outline its prevention.
Prolonged and obstructed labor is the primary cause of obstetric fistulas (VVF and RVF) in many parts of the world, particularly where access to quality maternal healthcare is limited. It is a tragic consequence of a failure to provide timely and effective intervention during childbirth.
How Obstructed Labor Contributes to Fistulas:
- Definition of Obstructed Labor: This occurs when labor progresses normally at first, but the baby cannot descend through the birth canal despite strong uterine contractions. This can happen due to factors like a baby that is too large for the mother's pelvis (cephalopelvic disproportion), an abnormal fetal position, or sometimes inadequate uterine contractions.
- Prolonged Pressure: In obstructed labor, the baby's head (or another presenting part) becomes tightly wedged in the mother's pelvis. This causes continuous and intense pressure on the soft tissues trapped between the baby's head and the mother's pelvic bones.
- Reduced Blood Supply: The prolonged pressure cuts off the blood supply to these soft tissues, including parts of the bladder, vagina, rectum, and surrounding areas.
- Tissue Necrosis: Without adequate blood flow, the trapped tissues die (necrosis).
- Fistula Formation: After delivery (often after the baby is delivered stillborn or dies shortly after birth), the dead tissue sloughs off (falls away), leaving a hole or abnormal opening (fistula) between the bladder and vagina (VVF) or the rectum and vagina (RVF). Sometimes both can occur.
Prevention of Obstructed Labor and Fistulas:
- Skilled Birth Attendance: Ensuring that all women have access to skilled birth attendants (midwives, nurses, doctors) during labor. These professionals are trained to monitor the progress of labor using tools like partographs and to recognize signs of obstructed labor early.
- Access to Emergency Obstetric Care (EmOC): Availability of and access to comprehensive EmOC services, including the ability to perform emergency Cesarean sections, is critical. If obstructed labor is diagnosed, a Cesarean section can safely deliver the baby before tissue damage occurs.
- Functional Referral Systems: Having reliable transportation and communication systems to quickly transfer women experiencing complicated labor from lower-level health facilities or homes to facilities equipped to provide EmOC.
- Community Education and Awareness: Educating women, families, and communities about the importance of giving birth in a health facility with skilled attendants and seeking help early if labor is prolonged or difficult.
- Addressing Underlying Socioeconomic Factors: Improving girls' access to education, reducing child marriage (to prevent early pregnancies in physically immature girls), and improving nutrition contribute to overall maternal health and can indirectly reduce the risk of obstructed labor in some cases.
- Family Planning: Access to and use of family planning services can help women space their pregnancies and avoid pregnancies at very young or older ages, which may carry higher risks.
7. Explain the role of the midwife in preventing obstetric fistulas in rural settings.
Midwives in rural settings play a critical and often frontline role in preventing obstetric fistulas, particularly where access to doctors and advanced medical facilities is limited. Their skills and presence during labor can make the difference between a safe delivery and a devastating injury.
Role of the Midwife in Prevention:
- Skilled Birth Attendance: The primary role is to provide skilled care during labor and delivery. This includes monitoring the progress of labor using a partograph, assessing fetal well-being, and supporting the laboring woman.
- Early Recognition of Obstructed Labor: Midwives are trained to identify signs that labor is not progressing normally, such as prolonged labor (particularly prolonged second stage), failure of the baby's head to descend, or signs of fetal distress. Recognizing these signs early is the first crucial step.
- Timely Referral: When obstructed labor is identified, the midwife's role is to initiate prompt referral of the woman to a higher-level health facility equipped to perform emergency obstetric care, such as a Cesarean section. This requires good judgment and access to functional referral systems.
- Basic Emergency Obstetric Care: In some settings, midwives may be trained in basic emergency obstetric care skills that can help manage certain complications temporarily while preparing for referral.
- Health Education: Midwives educate women and families during antenatal care and in the community about the importance of skilled birth attendance, recognizing danger signs in pregnancy and labor, and planning for birth in a health facility.
- Community Liaison: Midwives often have strong connections within the community and can work to address cultural beliefs or practices that may delay seeking care during labor.
- Postnatal Care: In the postnatal period, midwives can identify early signs of fistula formation and ensure the woman receives timely medical attention.
8. Outline a comprehensive care plan for a patient admitted with RVF.
A comprehensive care plan for a patient admitted with a recto-vaginal fistula (RVF) involves preparing her for surgical repair, managing symptoms and potential infections, and providing significant emotional and social support.
Nursing Care Plan Components:
- Assessment:
- Assess vital signs, hydration, nutritional status, and overall health.
- Assess the amount and characteristics of fecal leakage and vaginal discharge.
- Assess the condition of the skin around the vagina and perineum due to irritation.
- Assess pain level.
- Assess psychological state (anxiety, depression, social isolation) and support system.
- Assess understanding of RVF and treatment plan.
- Nursing Diagnoses (Examples):
- Impaired Skin Integrity related to exposure to feces.
- Risk for Infection related to contamination by feces.
- Social Isolation related to embarrassing symptoms and stigma.
- Anxiety/Depression related to living with fistula and uncertainty of outcome.
- Deficient Knowledge regarding RVF and management.
- Goals:
- Patient will maintain intact and healthy perineal skin.
- Patient will remain free from infection.
- Patient will verbalize feelings and feel supported.
- Patient will understand RVF and its treatment.
- Nursing Interventions (Pre-Operative, if applicable):
- Rigorous Hygiene and Skin Care: Frequent cleaning of the perineal area with soap and water. Use barrier creams to protect the skin.
- Bowel Management: Initiate a low-residue diet or bowel rest as ordered to reduce stool volume. Administer laxatives or enemas cautiously if ordered to ensure soft stools, avoiding straining.
- Infection Control: Administer antibiotics as prescribed. Monitor for signs of infection.
- Improve Nutrition: Ensure adequate nutrition and hydration to optimize tissue health for surgery.
- Emotional Support: Provide a non-judgmental and supportive environment. Encourage expression of feelings. Connect with counselors or support groups if available.
- Education: Explain the need to delay surgery and the importance of pre-operative measures.
- Nursing Interventions (Post-Operative):
- Monitor Vital Signs: Regularly assess for signs of complications like bleeding or infection.
- Bowel Management: Maintain prescribed bowel rest or low-residue diet initially. Administer stool softeners or laxatives as ordered to ensure the first bowel movement is soft and does not strain the repair site. Monitor for return of bowel function.
- Perineal Hygiene and Wound Care: Keep the surgical area clean and dry. Monitor the repair site for signs of infection or breakdown.
- Pain Management: Assess pain and administer analgesics.
- Activity Restrictions: Educate and enforce activity restrictions to prevent tension on the repair site.
- Monitor for Leakage: Watch for any signs of fecal or gas leakage from the vagina, indicating potential repair breakdown.
- Emotional Support and Counseling: Continue to provide emotional support. Discuss recovery, potential challenges, and strategies for reintegration. Connect with counseling services.
- Education for Discharge: Provide detailed instructions on wound care, bowel management, activity restrictions, signs of complications, importance of avoiding sexual intercourse for the specified time, and follow-up appointments.
- Evaluation: Monitor improvement in symptoms, healing of the repair, skin condition, and emotional well-being.
9. Describe postoperative care and follow-up for a woman who has undergone fistula repair.
Postoperative care and follow-up after fistula repair surgery are crucial for ensuring successful healing, preventing complications, and supporting the woman's long-term recovery and reintegration.
Immediate Postoperative Care:
- Vital Signs Monitoring: Monitor frequently for signs of bleeding, infection, or shock.
- Pain Management: Assess and manage post-operative pain effectively with prescribed analgesics.
- Fluid Management: Monitor intravenous fluid administration and urine output (especially after VVF repair with catheter). Encourage oral fluid intake as tolerated.
- Bowel/Bladder Management:
- VVF Repair: Meticulous catheter care to ensure continuous urine drainage for several weeks to keep the repair site dry.
- RVF Repair: Strict bowel management (bowel rest, low-residue diet, stool softeners) to prevent stool from contaminating the repair site.
- Wound Care: Care for any abdominal or vaginal surgical sites, monitoring for signs of infection or breakdown.
- Activity: Encourage rest during the initial recovery period, followed by gradual increase in activity as tolerated, adhering to any prescribed restrictions.
- Preventing Complications: Monitor for signs of infection (fever, increased pain), bleeding, or thromboembolism (blood clots).
- Emotional Support: Provide initial emotional support and reassurance after surgery.
Intermediate and Long-Term Follow-up:
- Scheduled Follow-up Appointments: Regular appointments with the surgeon or healthcare team are essential to monitor the healing of the fistula repair. The first follow-up is often a few weeks after discharge.
- Assessment of Healing: The surgeon will assess the repair site to ensure it is healing well and that there is no leakage of urine (after VVF repair) or feces/gas (after RVF repair).
- Catheter Removal (for VVF repair): The urinary catheter will be removed after the prescribed period (usually several weeks), and the woman will be monitored to ensure she can urinate normally and that there is no leakage through the repair.
- Bowel Function (for RVF repair): Monitor the return of normal bowel function and continue bowel management strategies as needed.
- Activity Restrictions: Continue to adhere to restrictions on heavy lifting, strenuous exercise, and sexual intercourse for the period recommended by the surgeon (usually several months) to allow complete healing.
- Monitoring for Recurrence: Be aware of and report any signs of leakage returning.
- Sexual Health Counseling: Discuss when it is safe to resume sexual activity and address any concerns or difficulties.
- Family Planning and Future Pregnancy Counseling: Discuss the importance of family planning. Counsel women who have had obstetric fistulas on the necessity of delivering any future pregnancies by Cesarean section to prevent repeat injury.
- Psychosocial Support and Reintegration: Ongoing emotional support and counseling are vital as women transition back to their families and communities. Support reintegration efforts.
10. Write an essay on community strategies to reduce the incidence of obstetric fistulas.
Obstetric fistulas are largely preventable injuries, and while clinical interventions are crucial, effective strategies implemented at the community level are fundamental to reducing their incidence, particularly in low-resource settings. These strategies focus on empowering women and communities, improving access to care, and challenging harmful practices.
One of the most critical community strategies is **promoting facility-based childbirth with skilled birth attendants**. This involves educating communities about the importance of delivering in a health center or hospital with trained midwives or doctors rather than at home with traditional birth attendants, especially for primigravidas (first-time mothers) and those with risk factors. Community health workers and local leaders can play a key role in disseminating this information and encouraging pregnant women to attend antenatal care and plan for delivery in a facility. Addressing cultural beliefs or fears that prevent women from seeking facility-based care is essential.
Secondly, **strengthening referral systems** at the community level is vital. Even if labor starts at home, community members need to recognize danger signs in labor (e.g., labor lasting too long, severe pain, bleeding) and know how to access transportation and refer the woman to a higher-level facility with emergency obstetric care services (like Cesarean section). This requires functional communication systems and readily available, affordable transport options (e.g., community ambulances, transport funds). Community birth preparedness plans, which involve identifying a health facility, saving money for transport, and identifying a support person, can be encouraged.
Furthermore, **addressing the root socioeconomic factors** that contribute to obstructed labor is a community-level effort. This includes promoting **girls' education** and discouraging **child marriage**. Educated girls are more likely to delay pregnancy until they are physically mature and are often more empowered to make decisions about their health and seek skilled care. Ending child marriage prevents early pregnancies in physically immature girls who are at higher risk of obstructed labor due to underdeveloped pelvises. Community-based initiatives promoting girls' education and advocating against child marriage are important.
Community engagement in **family planning** is also a preventive strategy. Increasing awareness about and access to family planning services empowers women to space their pregnancies and avoid pregnancies at very young or older ages, which can be associated with higher risks of complications, including obstructed labor. Community health workers can provide family planning counseling and services or link women to clinics.
Finally, **raising awareness about obstetric fistulas themselves** within the community is important. Educating people about what fistulas are, how they are caused by prolonged labor, and that they are treatable conditions can help reduce the stigma associated with fistulas and encourage women living with the condition to seek care. Community discussions and campaigns can challenge myths and misconceptions and create a more supportive environment for women affected by fistulas, facilitating their reintegration after repair.
In summary, reducing the incidence of obstetric fistulas requires a multi-faceted approach that goes beyond the clinic walls. By empowering communities with knowledge, improving access to skilled care and emergency services, addressing underlying social determinants, and reducing stigma, communities can play a powerful role in ensuring that every woman experiences a safe delivery and is protected from this preventable tragedy.
Gynecology Question for Revision - Topic 10
This section covers Genital Cancers (Cervical, Ovarian, Vulvar, and Endometrial Cancers).
SECTION A: Multiple Choice Questions (40 Marks)
1. The most common type of genital cancer in women is:
2. The primary cause of cervical cancer is:
3. One of the major risk factors for ovarian cancer is:
4. The commonest symptom of early-stage cervical cancer is:
5. A common sign of ovarian cancer is:
6. Invasive vulvar cancer may present with:
7. The most common method used to diagnose cervical cancer is:
8. A high-risk factor for endometrial cancer is:
9. The definitive treatment for early-stage cervical cancer is usually:
10. A vaccine that helps prevent cervical cancer is targeted against:
SECTION B: Fill in the Blanks (10 Marks)
1. Cervical cancer is most commonly caused by ________ infection.
2. A key method for detecting abnormal cervical cells is ________ smear.
3. One of the most common symptoms of ovarian cancer is ________.
4. ________ cancer is characterized by malignant growth in the vulvar tissue.
5. The most common type of cancer of the uterus is ________ cancer.
6. ________ is a common risk factor for endometrial cancer.
7. The treatment option for localized cervical cancer includes ________.
8. Ovarian cancer is commonly diagnosed in women over the age of ________.
9. The HPV vaccine helps protect against cervical cancer caused by high-risk types of ________.
10. Radiation therapy is commonly used in the treatment of ________ cancer.
SECTION C: Short Essay Questions (10 Marks)
1. Define cervical cancer and state its main causes.
Definition:
- Cervical cancer is a type of cancer that develops in the cells of the cervix, the lower, narrow part of the uterus that connects to the vagina.
- It typically grows slowly over time, often starting as precancerous changes.
Main Causes:
- The primary cause of cervical cancer is persistent infection with high-risk types of the Human papillomavirus (HPV).
- HPV is a very common sexually transmitted infection. While most HPV infections clear on their own, persistent infection with certain types can lead to abnormal cell changes that, if untreated, can develop into cancer over many years.
2. List four risk factors for ovarian cancer.
Factors that increase a woman's risk of developing ovarian cancer include:
- Family History: Having a close relative (mother, sister, daughter) with ovarian, breast, or colorectal cancer increases the risk, often due to inherited gene mutations (e.g., BRCA1, BRCA2, Lynch syndrome).
- Inherited Gene Mutations: Having specific mutations in genes like BRCA1, BRCA2, or genes associated with Lynch syndrome significantly increases the risk.
- Age: The risk of ovarian cancer increases with age, with most cases diagnosed after menopause, particularly in women over 50.
- Nulliparity (Never Having Been Pregnant): Women who have never had children have a higher risk compared to those who have had pregnancies.
- Infertility or Use of Fertility Treatments: A history of infertility or the use of certain fertility drugs may be associated with an increased risk.
- Obesity.
- Endometriosis.
3. Describe three symptoms of vulvar cancer.
Symptoms of vulvar cancer, which occur on the external female genitalia, can include:
- Persistent Itching: Long-lasting itching in the vulvar area that does not go away.
- Lump, Mass, or Sore: A visible or palpable lump, growth, or an ulcer (sore) in the vulvar region that may not heal. These can vary in appearance.
- Pain, Tenderness, or Burning: Discomfort, pain, or a burning sensation in the vulvar area.
- Abnormal Bleeding or Discharge: Bleeding unrelated to menstruation, or unusual vaginal discharge.
- Changes in Skin Color or Appearance: Skin in the vulvar area may change in color (red, white, dark), thickness, or texture (wart-like or rough).
4. Outline the common signs and symptoms of endometrial cancer.
Endometrial cancer (cancer of the uterine lining) most commonly occurs after menopause. The most frequent symptom is abnormal vaginal bleeding:
- Postmenopausal Vaginal Bleeding: Any vaginal bleeding, spotting, or staining after menopause is the most common and important symptom and should always be investigated.
- Abnormal Vaginal Bleeding in Younger Women: Though less common, in women before menopause, symptoms can include heavy or prolonged bleeding, bleeding between periods, or irregular cycles.
- Pelvic Pain or Pressure: Pain or a feeling of pressure in the lower abdomen or pelvis (usually in more advanced stages).
- Abnormal Vaginal Discharge: May be watery, bloody, or foul-smelling.
- Change in Bowel or Bladder Habits: Less common, usually with advanced disease pressing on nearby organs.
5. Explain the role of the Pap smear in cervical cancer screening.
The Pap smear (Pap test or cervical cytology) is a crucial **screening test** for cervical cancer. Its role is:
- Detecting Abnormal Cells: The Pap smear involves collecting cells from the surface of the cervix. These cells are examined under a microscope to look for any abnormal changes that could be precancerous (dysplasia) or cancerous.
- Early Detection: By detecting these abnormal cell changes *before* they develop into invasive cancer, the Pap smear allows for timely intervention and treatment, which can prevent cervical cancer from developing.
- Reducing Incidence and Mortality: Widespread cervical cancer screening programs using Pap smears have significantly reduced the incidence and mortality rates of cervical cancer in many parts of the world.
- Guiding Further Investigation: If a Pap smear result is abnormal, it indicates the need for further investigation, such as colposcopy and biopsy, to determine the severity of the cell changes and make a definitive diagnosis.
6. Mention three diagnostic methods used for detecting genital cancers.
Diagnosing genital cancers requires various methods depending on the suspected location:
- Biopsy: Taking a small sample of suspicious tissue from the cervix, vagina, vulva, or endometrium (uterine lining). This tissue is then examined under a microscope (histology) to confirm the presence of cancer cells. This is the definitive method for diagnosing most cancers.
- Imaging Studies:
- Pelvic Ultrasound: Can help visualize the uterus and ovaries and detect masses or thickening of the uterine lining (endometrium) that might be cancerous. Used in the workup for endometrial and ovarian cancer.
- CT Scan (Computed Tomography) or MRI (Magnetic Resonance Imaging): Provide detailed images of the pelvic organs and surrounding areas. Used to assess the extent of the cancer (staging), check for spread to lymph nodes or other organs. Crucial for staging cervical, endometrial, ovarian, vaginal, and vulvar cancers.
- Colposcopy: A magnified visual examination of the cervix using a colposcope. Used to investigate abnormal Pap smear results or suspicious areas on the cervix and to guide biopsies for diagnosing cervical cancer.
- Endometrial Biopsy: Taking a sample of the uterine lining, typically done to investigate abnormal uterine bleeding and diagnose endometrial cancer.
- Blood Tests: While not for primary diagnosis, some blood tests (like CA-125 for ovarian cancer, although not definitive) or genetic tests (like BRCA mutations) can be used in the workup, monitoring, or risk assessment.
7. List three nursing interventions for a patient undergoing treatment for cervical cancer.
Nursing care for a patient undergoing cervical cancer treatment (which could be surgery, radiation, or chemotherapy) involves physical care, emotional support, and education:
- Pain Management: Assess and manage pain effectively, which may be related to surgery, radiation side effects, or the cancer itself. Administer prescribed analgesics and offer comfort measures.
- Managing Treatment Side Effects: Provide care and education for specific side effects of treatment (e.g., nausea and vomiting from chemotherapy, skin irritation or bowel/bladder changes from radiation, wound care after surgery).
- Emotional Support and Counseling: Provide a supportive environment for the woman to express her feelings about the cancer diagnosis and treatment. Listen to her concerns and fears. Refer to counseling services or support groups if needed.
- Education: Educate the patient about her specific treatment plan, what to expect, potential side effects, how to manage them, and the importance of completing the treatment.
- Maintaining Hygiene and Preventing Infection: Especially important during and after radiation therapy affecting the pelvic area or after surgery.
- Nutritional Support: Monitor nutritional intake and assist with maintaining adequate nutrition, especially if treatment causes nausea or changes in appetite.
- Monitoring for Complications: Be vigilant for signs of complications related to treatment or cancer progression.
8. State three complications of untreated genital cancers.
If genital cancers are not treated, they can progress and lead to severe complications:
- Spread of Cancer (Metastasis): Cancer cells can spread from the original site (cervix, uterus, ovary, vulva, vagina) to nearby tissues, lymph nodes, and distant organs (e.g., lungs, liver, bones), making the disease more difficult to treat and reducing the chances of survival.
- Obstruction of Organs: Growing tumors can press on or block nearby organs. For example, cervical or uterine cancer can block the ureters (tubes from the kidneys), leading to kidney damage. Pelvic masses from ovarian or uterine cancer can press on the bowel or bladder, causing obstruction or difficulty with urination/defecation.
- Bleeding: Untreated cancers, particularly of the cervix, uterus, vagina, or vulva, can cause significant and persistent abnormal bleeding, leading to severe anemia or hemorrhage.
- Pain: As the cancer grows and spreads, it can cause increasing pelvic pain, back pain, or pain in other areas where it has spread.
- Infection: Ulcerated tumors can become infected.
- Cachexia: Severe weight loss, muscle wasting, and weakness that can occur in advanced cancer.
- Death: Ultimately, untreated genital cancers are life-threatening.
9. What is the importance of HPV vaccination in cancer prevention?
HPV vaccination is a revolutionary public health tool with significant importance in cancer prevention, particularly cervical cancer prevention:
- Primary Prevention of HPV Infection: The HPV vaccine protects against infection by the high-risk types of Human papillomavirus that cause the vast majority of cervical cancers (and many vulvar, vaginal, anal, and oropharyngeal cancers).
- Preventing Precancerous Changes: By preventing HPV infection, the vaccine prevents the abnormal cell changes (precancers) on the cervix that can lead to cancer over time.
- Reducing Cervical Cancer Incidence: Studies have shown a significant reduction in both HPV infections and cervical precancers in populations with high HPV vaccination rates. It is expected to lead to a substantial decrease in the incidence of cervical cancer in the future.
- Preventing Other Cancers: The vaccine also protects against HPV types that cause other genital cancers (vulvar, vaginal) and non-genital cancers linked to HPV (anal, some head and neck cancers).
- Herd Immunity: High vaccination rates in a population can provide herd immunity, protecting even those who are not vaccinated.
- Safe and Effective: HPV vaccines are safe and highly effective when given before exposure to HPV (ideally before sexual activity).
10. Explain the impact of genital cancers on the patient's psychosocial well-being.
A diagnosis of genital cancer can have a profound and often devastating impact on a woman's psychosocial well-being, affecting her emotional health, body image, sexuality, relationships, and sense of identity.
- Emotional Distress: Receiving a cancer diagnosis is inherently frightening and can lead to intense fear, anxiety, shock, sadness, and anger. The specific location of genital cancers can add layers of distress related to privacy and intimacy.
- Anxiety and Depression: The uncertainty of the prognosis, the challenges of treatment, fear of recurrence, and coping with physical changes can contribute to significant anxiety and depression.
- Body Image and Self-Esteem: Surgery (e.g., hysterectomy, vulvectomy), radiation, or chemotherapy can lead to physical changes that affect a woman's body image and self-esteem. Scars, changes in genital appearance or function, hair loss, and weight changes can impact how she feels about herself.
- Impact on Sexuality: Treatment for genital cancers can affect sexual function, leading to vaginal dryness, narrowing (stenosis), pain during intercourse, or changes in sensation. This can significantly impact a woman's sexual health and intimate relationships. The fear of sexual activity or feeling less desirable can be challenging.
- Fertility Concerns: Treatment, particularly surgery involving the uterus or ovaries or radiation to the pelvic area, often results in infertility. For women of reproductive age, this can be a source of profound grief and loss.
- Impact on Relationships: The diagnosis, treatment, and their side effects can strain relationships with partners and family members due to emotional distress, changes in intimacy, and the need for support.
- Social Isolation: Feeling embarrassed about symptoms or physical changes, or coping with fatigue and treatment side effects, can sometimes lead to withdrawal from social activities and isolation.
- Fear of Stigma: Genital cancers can carry a degree of stigma, although this varies culturally, adding to the emotional burden.
- Loss of Control: The experience of cancer can lead to a feeling of losing control over one's body and future.
SECTION D: Long Essay Questions (10 Marks Each)
1. Explain the role of the midwife in preventing obstetric fistulas in rural settings.
Midwives in rural settings play a critical and often frontline role in preventing obstetric fistulas, particularly where access to doctors and advanced medical facilities is limited. Their skills and presence during labor can make the difference between a safe delivery and a devastating injury.
Role of the Midwife in Prevention:
- Skilled Birth Attendance: The primary role is to provide skilled care during labor and delivery. This includes monitoring the progress of labor using a partograph, assessing fetal well-being, and supporting the laboring woman.
- Early Recognition of Obstructed Labor: Midwives are trained to identify signs that labor is not progressing normally, such as prolonged labor (particularly prolonged second stage), failure of the baby's head to descend, or signs of fetal distress. Recognizing these signs early is the first crucial step.
- Timely Referral: When obstructed labor is identified, the midwife's role is to initiate prompt referral of the woman to a higher-level health facility equipped to perform emergency obstetric care, such as a Cesarean section. This requires good judgment and access to functional referral systems.
- Basic Emergency Obstetric Care: In some settings, midwives may be trained in basic emergency obstetric care skills that can help manage certain complications temporarily while preparing for referral.
- Health Education: Midwives educate women and families during antenatal care and in the community about the importance of skilled birth attendance, recognizing danger signs in pregnancy and labor, and planning for birth in a health facility.
- Community Liaison: Midwives often have strong connections within the community and can work to address cultural beliefs or practices that may delay seeking care during labor.
- Postnatal Care: In the postnatal period, midwives can identify early signs of fistula formation and ensure the woman receives timely medical attention.
2. Outline a comprehensive care plan for a patient admitted with RVF.
A comprehensive care plan for a patient admitted with a recto-vaginal fistula (RVF) involves preparing her for surgical repair, managing symptoms and potential infections, and providing significant emotional and social support.
Nursing Care Plan Components:
- Assessment:
- Assess vital signs, hydration, nutritional status, and overall health.
- Assess the amount and characteristics of fecal leakage and vaginal discharge.
- Assess the condition of the skin around the vagina and perineum due to irritation.
- Assess pain level.
- Assess psychological state (anxiety, depression, social isolation) and support system.
- Assess understanding of RVF and treatment plan.
- Nursing Diagnoses (Examples):
- Impaired Skin Integrity related to exposure to feces.
- Risk for Infection related to contamination by feces.
- Social Isolation related to embarrassing symptoms and stigma.
- Anxiety/Depression related to living with fistula and uncertainty of outcome.
- Deficient Knowledge regarding RVF and management.
- Goals:
- Patient will maintain intact and healthy perineal skin.
- Patient will remain free from infection.
- Patient will verbalize feelings and feel supported.
- Patient will understand RVF and its treatment.
- Nursing Interventions (Pre-Operative, if applicable):
- Rigorous Hygiene and Skin Care: Frequent cleaning of the perineal area with soap and water. Use barrier creams to protect the skin.
- Bowel Management: Initiate a low-residue diet or bowel rest as ordered to reduce stool volume. Administer laxatives or enemas cautiously if ordered to ensure soft stools, avoiding straining.
- Infection Control: Administer antibiotics as prescribed. Monitor for signs of infection.
- Improve Nutrition: Ensure adequate nutrition and hydration to optimize tissue health for surgery.
- Emotional Support: Provide a non-judgmental and supportive environment. Encourage expression of feelings. Connect with counselors or support groups if available.
- Education: Explain the need to delay surgery and the importance of pre-operative measures.
- Nursing Interventions (Post-Operative):
- Monitor Vital Signs: Regularly assess for signs of complications like bleeding or infection.
- Bowel Management: Maintain prescribed bowel rest or low-residue diet initially. Administer stool softeners or laxatives as ordered to ensure the first bowel movement is soft and does not strain the repair site. Monitor for return of bowel function.
- Perineal Hygiene and Wound Care: Keep the surgical area clean and dry. Monitor the repair site for signs of infection or breakdown.
- Pain Management: Assess pain and administer analgesics.
- Activity Restrictions: Educate and enforce activity restrictions to prevent tension on the repair site.
- Monitor for Leakage: Watch for any signs of fecal or gas leakage from the vagina, indicating potential repair breakdown.
- Emotional Support and Counseling: Continue to provide emotional support. Discuss recovery, potential challenges, and strategies for reintegration. Connect with counseling services.
- Education for Discharge: Provide detailed instructions on wound care, bowel management, activity restrictions, signs of complications, importance of avoiding sexual intercourse for the specified time, and follow-up appointments.
- Evaluation: Monitor improvement in symptoms, healing of the repair, skin condition, and emotional well-being.
3. Describe postoperative care and follow-up for a woman who has undergone fistula repair.
Postoperative care and follow-up after fistula repair surgery are crucial for ensuring successful healing, preventing complications, and supporting the woman's long-term recovery and reintegration.
Immediate Postoperative Care:
- Vital Signs Monitoring: Monitor frequently for signs of bleeding, infection, or shock.
- Pain Management: Assess and manage post-operative pain effectively with prescribed analgesics.
- Fluid Management: Monitor intravenous fluid administration and urine output (especially after VVF repair with catheter). Encourage oral fluid intake as tolerated.
- Bowel/Bladder Management:
- VVF Repair: Meticulous catheter care to ensure continuous urine drainage for several weeks to keep the repair site dry.
- RVF Repair: Strict bowel management (bowel rest, low-residue diet, stool softeners) to prevent stool from contaminating the repair site.
- Wound Care: Care for any abdominal or vaginal surgical sites, monitoring for signs of infection or breakdown.
- Activity: Encourage rest during the initial recovery period, followed by gradual increase in activity as tolerated, adhering to any prescribed restrictions.
- Preventing Complications: Monitor for signs of infection (fever, increased pain), bleeding, or thromboembolism (blood clots).
- Emotional Support: Provide initial emotional support and reassurance after surgery.
Intermediate and Long-Term Follow-up:
- Scheduled Follow-up Appointments: Regular appointments with the surgeon or healthcare team are essential to monitor the healing of the fistula repair. The first follow-up is often a few weeks after discharge.
- Assessment of Healing: The surgeon will assess the repair site to ensure it is healing well and that there is no leakage of urine (after VVF repair) or feces/gas (after RVF repair).
- Catheter Removal (for VVF repair): The urinary catheter will be removed after the prescribed period (usually several weeks), and the woman will be monitored to ensure she can urinate normally and that there is no leakage through the repair.
- Bowel Function (for RVF repair): Monitor the return of normal bowel function and continue bowel management strategies as needed.
- Activity Restrictions: Continue to adhere to restrictions on heavy lifting, strenuous exercise, and sexual intercourse for the period recommended by the surgeon (usually several months) to allow complete healing.
- Monitoring for Recurrence: Be aware of and report any signs of leakage returning.
- Sexual Health Counseling: Discuss when it is safe to resume sexual activity and address any concerns or difficulties.
- Family Planning and Future Pregnancy Counseling: Discuss the importance of family planning. Counsel women who have had obstetric fistulas on the necessity of delivering any future pregnancies by Cesarean section to prevent repeat injury.
- Psychosocial Support and Reintegration: Ongoing emotional support and counseling are vital as women transition back to their families and communities. Support reintegration efforts.
4. Describe the surgical, medical, and nursing management of ectopic pregnancy.
Ectopic pregnancy is a life-threatening condition where a fertilized egg implants outside the uterus, most commonly in the fallopian tube. Management focuses on timely diagnosis and termination of the pregnancy to prevent rupture and life-threatening hemorrhage.
Surgical Management:
- Surgical intervention is necessary when the ectopic pregnancy is large, rupturing, unstable, or when medical management is not appropriate or has failed.
- Laparoscopy (Minimally Invasive Surgery): This is the preferred surgical approach for most stable ectopic pregnancies.
- Salpingostomy: A small incision is made in the fallopian tube, and the ectopic pregnancy is removed, preserving the tube.
- Salpingectomy: The entire fallopian tube containing the ectopic pregnancy is removed. This may be necessary if the tube is severely damaged, there is significant bleeding, or if future ectopic pregnancy in the same tube is a high risk.
- Laparotomy (Open Abdominal Surgery): May be necessary in cases of ruptured ectopic pregnancy with significant bleeding, if the woman is unstable, or if the ectopic is in a location not accessible by laparoscopy. It involves a larger abdominal incision.
Medical Management:
- Medical management is an option for early, unruptured ectopic pregnancies under specific criteria (e.g., stable patient, small gestational sac, no fetal heartbeat).
- Methotrexate: This is the most common medication used. It's a chemotherapy drug that stops cell growth and dissolves the ectopic pregnancy.
- Administered as an injection (intramuscular).
- Requires close monitoring of hCG (human chorionic gonadotropin) levels to ensure the pregnancy is resolving. Follow-up appointments are crucial.
- Patients must avoid folic acid supplements (as methotrexate works by blocking folic acid) and sometimes strenuous activity or sexual intercourse during treatment.
Nursing Management:
- Assessment:
- Assess for signs and symptoms: abdominal or pelvic pain (often unilateral), abnormal vaginal bleeding or spotting, shoulder pain (referred pain from peritoneal irritation due to bleeding), dizziness, fainting, or signs of shock (tachycardia, hypotension) indicating rupture.
- Assess vital signs, level of consciousness, and pain.
- Assess emotional state and support system.
- Pain Management: Assess and manage pain effectively.
- Monitoring:
- Close monitoring of vital signs, especially in suspected or confirmed rupture.
- Monitor for increasing abdominal pain or signs of bleeding.
- Monitor hCG levels in medical management or post-operatively to confirm resolution.
- Fluid and Blood Transfusion: Prepare for and administer IV fluids and potentially blood products in cases of hemorrhage.
- Pre-operative and Post-operative Care (if surgical):
- Prepare the patient for surgery.
- Post-operatively: Monitor vital signs, pain, incision site (if laparotomy), vaginal bleeding, and signs of complications.
- Education:
- Explain the diagnosis and treatment options clearly and simply.
- Educate on signs of rupture or complications requiring immediate medical attention.
- Educate on medication side effects and the importance of follow-up in medical management.
- Educate on activity restrictions and recovery after surgery.
- Emotional and Psychosocial Support: Experiencing an ectopic pregnancy is emotionally distressing. Provide a supportive and empathetic environment. Acknowledge the loss of the pregnancy. Offer resources for grief counseling or support groups.
- Future Pregnancy Planning: Discuss future fertility concerns and the increased risk of recurrence. Encourage planning for future pregnancies and seeking early prenatal care.
5. Describe the causes, pathophysiology, clinical features, diagnosis, and management of puerperal sepsis.
Puerperal sepsis is an infection of the genital tract occurring at any time from the rupture of membranes or labor through the 42nd day postpartum. It remains a leading cause of maternal mortality worldwide.
Causes:
- The most common causes are bacterial infections, often polymicrobial.
- Common bacteria include:
- Streptococcus pyogenes (Group A Streptococcus): Particularly virulent and can cause rapid, severe infection.
- Escherichia coli (E. coli).
- Staphylococcus aureus.
- Anaerobic bacteria (e.g., Bacteroides).
- Other bacteria from the vaginal flora or external environment.
Pathophysiology:
- Bacteria typically enter the genital tract through breaks in the skin or mucous membranes during labor, delivery, or the postpartum period.
- Risk factors include:
- Prolonged rupture of membranes.
- Frequent vaginal examinations during labor.
- Retained placental fragments or membranes.
- Postpartum hemorrhage.
- Cesarean section (increased risk of wound infection).
- Episiotomy or vaginal lacerations.
- Poor hygiene during labor or postpartum.
- Underlying maternal conditions (e.g., anemia, malnutrition).
- Unsafe abortion.
- Once bacteria enter, they proliferate, leading to inflammation and infection of the uterus (endometritis), surrounding tissues (pelvic cellulitis), or spreading to the bloodstream (bacteremia/sepsis).
Clinical Features (Signs and Symptoms):
- Symptoms can range from mild to severe and can develop within hours or days after delivery.
- Fever: Often the first sign, temperature typically above 38°C (100.4°F).
- Pelvic or Abdominal Pain: Pain in the lower abdomen or pelvis, often tender to touch.
- Abnormal Vaginal Discharge: May be foul-smelling, purulent (pus-like), or excessive.
- Increased Heart Rate (Tachycardia).
- Chills or Rigors.
- Malaise: General feeling of being unwell.
- Delayed Uterine Involution: The uterus may not contract back to its normal size as expected.
- Severe Symptoms (indicating progression to sepsis or septic shock): Hypotension (low blood pressure), rapid breathing (tachypnea), altered mental status, decreased urine output, organ dysfunction.
Diagnosis:
- Diagnosis is primarily clinical based on the signs and symptoms, especially fever in the postpartum period.
- Physical Examination: Pelvic exam to assess the uterus, cervix, and vaginal discharge.
- Laboratory Tests:
- Complete Blood Count (CBC): May show elevated white blood cell count.
- Cultures: Swabs of vaginal or cervical discharge, blood cultures (especially in cases of suspected sepsis) to identify the causative bacteria.
- Urine culture: To rule out urinary tract infection.
- Imaging: Pelvic ultrasound may be used to rule out retained products of conception or pelvic abscess.
Management:
- Prompt and aggressive treatment is essential to prevent progression to severe sepsis and death.
- Antibiotic Therapy: The cornerstone of treatment. Broad-spectrum antibiotics are initiated immediately to cover common bacterial pathogens, followed by targeted therapy once culture results are available. Antibiotics are usually given intravenously initially.
- Fluid Resuscitation: Intravenous fluids to maintain hydration and blood pressure, especially in cases of sepsis.
- Uterine Evacuation (if indicated): If retained placental fragments or membranes are suspected, a D&C may be necessary to remove them and the source of infection.
- Drainage of Abscesses: If a pelvic abscess develops, it needs to be drained.
- Supportive Care: Pain relief, fever reduction (antipyretics), monitoring vital signs, monitoring urine output, and supporting organ function.
- Education: Educate the woman and her family on the importance of completing the full course of antibiotics and recognizing signs that require further medical attention.
6. Write an essay on the role of early detection in the prevention and management of cervical cancer.
Early detection plays a pivotal role in both the prevention and successful management of cervical cancer. Unlike many other cancers, cervical cancer has a long precancerous phase, offering a significant opportunity for intervention before invasive cancer develops. Screening programs are the cornerstone of this early detection.
The primary method of early detection for cervical cancer is cervical cancer screening, which involves tests like the Pap smear and HPV testing. A Pap smear is a cytology test that looks for abnormal cells on the cervix that could be precancerous or cancerous. HPV testing identifies the presence of high-risk types of the Human papillomavirus, the main cause of cervical cancer. Screening is recommended for women starting at a certain age (often 21 or 25) and continuing regularly.
The role of early detection in prevention is profound because cervical cancer typically develops slowly over many years from precancerous lesions called Cervical Intraepithelial Neoplasia (CIN) or squamous intraepithelial lesions (SIL). An abnormal Pap smear or positive high-risk HPV test indicates the need for further investigation, usually a colposcopy with directed biopsies. Colposcopy provides a magnified view of the cervix, allowing the healthcare provider to identify abnormal areas, and biopsies confirm the presence and severity of precancerous changes. These precancerous lesions can then be treated and removed (e.g., by LEEP - Loop Electrosurgical Excision Procedure, or cone biopsy) before they ever become invasive cancer. This ability to identify and treat precursors is what makes cervical cancer largely preventable through effective screening programs.
In cases where early-stage invasive cancer is detected through screening (before symptoms are apparent), the role of early detection shifts to management. When cervical cancer is diagnosed at an early stage (e.g., limited to the cervix), treatment is typically highly effective. Surgical removal of the cancer, often involving hysterectomy (removal of the uterus) with removal of surrounding tissues and lymph nodes, is the standard treatment for early invasive cancer. The cure rates for early-stage cervical cancer are very high. Early detection also allows for less extensive treatment in some cases, such as fertility-sparing surgery (like cone biopsy or trachelectomy) for very early cancers in women who wish to preserve their ability to have children.
Conversely, cervical cancer detected at later stages, when symptoms are present or the cancer has spread, is much more difficult to treat and has a lower chance of cure. Treatment for advanced cervical cancer often involves a combination of radiation therapy and chemotherapy, which are more intensive treatments with more significant side effects compared to treatment for precancers or early cancer. The prognosis worsens as the cancer spreads.
Therefore, investing in and implementing robust cervical cancer screening programs (including Pap smears and HPV testing), ensuring access to timely follow-up and treatment of precancerous lesions, and educating women about the importance of screening and recognizing early symptoms are critical public health strategies. Early detection not only prevents the development of cancer but also ensures that when invasive cancer does occur, it is diagnosed and treated at a stage where cure is most likely, significantly reducing morbidity and mortality from this preventable disease.
7. Discuss the psychosocial impact of genital cancers on women and the nursing interventions required to support these patients.
Genital cancers (cancers of the cervix, uterus, ovaries, vulva, and vagina) affect deeply personal and intimate parts of a woman's body, leading to significant psychosocial impacts alongside the physical challenges. Nurses play a crucial role in providing holistic care that addresses these sensitive issues.
Psychosocial Impact:
- Emotional Distress: Diagnosis of cancer is inherently frightening. Genital cancers can evoke additional fear, anxiety, shock, anger, sadness, and depression due to their location and potential impact on femininity and reproductive health.
- Body Image and Self-Esteem: Surgery (especially vulvectomy or extensive pelvic surgery), radiation, and chemotherapy can lead to physical changes, scarring, or alterations in appearance that significantly affect a woman's body image and self-esteem. Feeling less "whole" or altered can be challenging.
- Impact on Sexuality and Intimacy: Treatment often affects sexual function, causing vaginal dryness, stenosis (narrowing), pain during intercourse, changes in sensation, or changes in the appearance of the genitals. This can create fear and anxiety around sexual activity and strain intimate relationships. Women may feel less desirable or worry about their partner's reaction.
- Loss of Fertility: Treatment for many genital cancers, particularly cervical, uterine, and ovarian cancers, often involves removal of reproductive organs or radiation to the pelvis, resulting in infertility. For women who desired children, this is a profound loss leading to grief.
- Social Isolation: Embarrassment about symptoms, side effects of treatment, or physical changes can lead to withdrawal from social activities and feelings of isolation.
- Stigma: While varying across cultures, there can be stigma associated with genital cancers, which can add to the emotional burden and prevent women from seeking help or talking openly about their experiences.
- Fear of Recurrence and Uncertainty: Living with the possibility that the cancer might return creates ongoing anxiety and uncertainty about the future.
- Financial Burden: The cost of treatment and time off work can create financial stress for the woman and her family.
Nursing Interventions for Psychosocial Support:
- Create a Safe and Trusting Environment: Provide a private, confidential, and non-judgmental space where the woman feels comfortable discussing sensitive issues.
- Listen Actively and Empathetically: Allow the woman to express her feelings openly. Listen with compassion and validate her emotional responses.
- Provide Clear and Sensitive Information: Educate her about her diagnosis, treatment plan, expected side effects, and potential impacts on her body and function, using clear, simple language and addressing her concerns directly.
- Address Body Image Concerns: Encourage her to express her feelings about physical changes. Provide practical advice on managing side effects that affect appearance. Focus on her strengths and resilience.
- Discuss Sexual Health: Initiate conversations about potential changes in sexual function in a sensitive and non-judgmental way. Provide information and strategies for managing issues like vaginal dryness or pain (e.g., lubricants, dilators, vaginal estrogen if appropriate). Encourage communication with her partner and involve the partner in discussions if the patient wishes.
- Support Fertility Concerns: Acknowledge the grief related to infertility. Provide information about fertility preservation options if applicable before treatment, or options for building a family after treatment (e.g., adoption, surrogacy) if desired.
- Provide Resources: Connect her with counseling services, psychologists, support groups for cancer patients or those with specific gynecologic cancers, and relevant patient advocacy organizations.
- Involve Partners and Family: Offer support and information to partners and family members, as they are also affected and are crucial sources of support for the patient.
- Promote Self-Care and Coping: Encourage healthy coping mechanisms, stress reduction techniques, and maintaining social connections.
- Address Stigma: Work to reduce stigma through education and advocacy, promoting open discussion about women's health issues.
8. Explain the relationship between lifestyle factors (such as diet, exercise, and smoking) and the development of genital cancers.
Lifestyle factors play a role in the development of several genital cancers, either by directly influencing cancer development or by affecting risk factors or immune function. While some genital cancers are primarily linked to specific infections like HPV (cervical, some vulvar and vaginal), lifestyle choices can still modify the risk for these and other gynecologic malignancies.
Smoking:
- Smoking is a significant risk factor for cervical cancer, particularly in women with HPV infection. Chemicals in tobacco smoke are found in cervical mucus and are thought to damage cervical cells and interfere with the body's ability to clear HPV infection.
- Smoking is also linked to an increased risk of vulvar and vaginal cancers, many of which are also related to HPV.
- Smoking negatively impacts overall immune function, potentially making the body less able to fight off infections like HPV or detect early cancerous changes.
- Smoking is generally detrimental to overall health and increases the risk of many other cancers and diseases.
Diet:
- Obesity and Diet: Obesity is a major risk factor for endometrial cancer. Fat tissue produces estrogen, and excess body fat leads to higher levels of estrogen circulating in the body, which can stimulate the growth of the uterine lining and increase cancer risk. A diet high in saturated fats and refined carbohydrates can contribute to obesity.
- Some studies suggest that a diet high in fruits and vegetables, rich in antioxidants and fiber, may be associated with a reduced risk of certain cancers, including some gynecologic cancers.
- Specific dietary factors like high intake of red meat or processed meat may be linked to increased risk of some cancers, but the direct link to specific genital cancers is less clear compared to the link between obesity and endometrial cancer.
Exercise:
- Obesity and Exercise: Regular physical activity helps maintain a healthy weight and reduce obesity, thereby indirectly lowering the risk of endometrial cancer.
- Exercise can also help regulate hormone levels and improve insulin sensitivity, which may play a role in reducing the risk of some hormone-related cancers.
- Regular physical activity is generally beneficial for overall health and may strengthen the immune system, potentially helping the body fight off infections like HPV and detect early abnormal cells.
- Some studies suggest physical activity may be associated with a reduced risk of ovarian cancer, possibly by influencing hormone levels or reducing inflammation.
Other Lifestyle Factors:
- Sexual Behavior: Practices that increase the risk of HPV infection (multiple partners, early age of first intercourse) are major risk factors for cervical, vulvar, and vaginal cancers.
- Alcohol Consumption: Excessive alcohol intake may be associated with an increased risk of some cancers, but the direct link to genital cancers is less established compared to smoking or obesity.
- Managing Chronic Conditions: Effectively managing chronic conditions like diabetes and hypertension, which are linked to obesity and increased risk of endometrial cancer, is also a lifestyle-related prevention strategy.
9. Describe the nursing care plan for a woman with stage 1 cervical cancer undergoing surgery.
A nursing care plan for a woman with stage 1 cervical cancer undergoing surgery (often hysterectomy with lymph node dissection) focuses on preparing her physically and emotionally for surgery, managing post-operative pain and recovery, and providing education and support for her return home and ongoing health.
Nursing Care Plan Components:
- Pre-Operative Phase:
- Assessment: Assess vital signs, general health status, nutritional status, and any existing medical conditions. Assess her understanding of the diagnosis, the surgical procedure (type of hysterectomy, lymph node removal), and expected outcomes. Assess her emotional state (anxiety, fear, grief about potential loss of fertility/menstruation).
- Nursing Diagnosis (Example): Anxiety related to cancer diagnosis and surgical procedure.
- Goal: Patient will verbalize understanding of the procedure and express reduced anxiety.
- Interventions: Provide clear, age-appropriate explanation of the surgery, including preparing for anesthesia, expected recovery, and incision site (if abdominal). Teach post-operative exercises (deep breathing, coughing, leg exercises). Ensure pre-operative tests are completed and consents are signed. Administer pre-operative medications. Provide emotional support, listen to her fears, and offer reassurance. Discuss potential impact on fertility/menstruation if applicable.
- Intra-Operative Phase:
- Assessment: Monitor vital signs, fluid balance, and patient status continuously.
- Interventions: Assist the surgical team, maintain sterile technique, ensure patient safety and positioning.
- Post-Operative Phase:
- Assessment: Monitor vital signs regularly. Assess and manage pain effectively using a pain scale and administering prescribed analgesics (IV, PCA, oral). Assess surgical incision site (abdominal) or vaginal bleeding/discharge (vaginal/laparoscopic) for amount, characteristics, and signs of infection. Monitor urine output (catheter care if present). Assess bowel sounds and monitor for return of bowel function. Assess for signs of complications (bleeding, infection, blood clots, respiratory issues, nerve injury).
- Nursing Diagnosis (Example): Acute Pain related to surgical incision and tissue manipulation.
- Goal: Patient will report manageable pain levels and participate in recovery activities.
- Interventions: Administer pain medication on schedule. Encourage and assist with deep breathing, coughing, and use of incentive spirometer. Encourage early ambulation to prevent blood clots and aid bowel function. Monitor I&O. Provide wound care. Assist with hygiene and comfort. Monitor for signs of lymphedema (swelling) in the legs after lymph node removal.
- Discharge Planning and Education:
- Assessment: Assess patient's readiness for discharge, support system, and understanding of home care instructions.
- Nursing Diagnosis (Example): Deficient Knowledge regarding post-operative care, potential side effects, and follow-up.
- Goal: Patient will verbalize understanding of home care instructions and follow-up plan.
- Interventions: Provide detailed verbal and written instructions on wound care, expected bleeding/discharge, activity restrictions (avoiding heavy lifting, strenuous exercise), pain management at home, when to resume driving and sexual activity, and signs of complications to report. Explain the importance of follow-up appointments for surveillance for recurrence. Discuss potential long-term effects of treatment (e.g., changes in vaginal length, potential for lymphedema). Address emotional recovery and provide resources for counseling/support. Explain that she will no longer have periods or be able to get pregnant.
10. Discuss the importance of palliative care in advanced genital cancers and the nurse's role in providing comfort.
In advanced genital cancers (cancers that have spread extensively and are not curable), the focus of care shifts from curative treatment to palliative care. Palliative care is specialized medical care for people with serious illnesses. It focuses on providing relief from the symptoms and stress of a serious illness to improve quality of life for both the patient and the family. For women with advanced genital cancers, palliative care is of utmost importance.
Importance of Palliative Care:
- Symptom Management: Advanced genital cancers can cause significant symptoms like severe pain (due to tumor growth or nerve compression), bleeding, bowel or bladder obstruction, fatigue, loss of appetite, and lymphedema. Palliative care focuses on effectively managing these distressing symptoms to enhance comfort and dignity.
- Improved Quality of Life: By controlling symptoms and addressing physical and emotional needs, palliative care aims to improve the patient's quality of life throughout the course of the illness, allowing them to live as actively and comfortably as possible.
- Emotional and Psychosocial Support: Palliative care provides essential emotional, psychological, and spiritual support to the patient and their family as they cope with a life-limiting illness, fear, anxiety, and grief.
- Communication and Shared Decision-Making: Palliative care teams facilitate open and honest communication about the prognosis, treatment goals, and preferences for care, supporting shared decision-making aligned with the patient's values.
- Support for Families: Palliative care extends support to the patient's family and caregivers, helping them cope with the illness and providing bereavement support.
Nurse's Role in Providing Comfort in Palliative Care:
- Comprehensive Symptom Assessment and Management: Nurses are often at the forefront of assessing and managing symptoms. They regularly assess pain, bleeding, nausea, fatigue, bowel/bladder issues, and other discomforts. They administer prescribed medications (e.g., strong analgesics, anti-emetics) and utilize non-pharmacological comfort measures.
- Pain Management: Nurses are central to effective pain management. They assess pain characteristics, administer medications, evaluate effectiveness, and advocate for adjustments in pain regimens as needed. They also use comfort measures like positioning, massage, and relaxation techniques.
- Wound and Bleeding Care: Advanced genital cancers can cause bleeding or fungating wounds. Nurses provide meticulous wound care, manage bleeding episodes, and maintain hygiene to prevent infection and reduce odor, promoting dignity and comfort.
- Bowel and Bladder Management: Nurses manage issues like constipation or obstruction by administering medications, assisting with toileting, and providing care for catheters or stomas if present.
- Hygiene and Skin Care: Maintaining personal hygiene and providing meticulous skin care is crucial to prevent breakdown and maintain comfort, especially in the presence of discharge or incontinence.
- Emotional and Psychological Support: Nurses build trusting relationships with patients and families, providing a listening ear, emotional support, and reassurance. They help patients cope with fear, anxiety, and sadness.
- Communication Facilitation: Nurses facilitate communication between the patient, family, and the medical team, ensuring concerns are heard and information is shared clearly.
- Comfort Measures: Simple nursing interventions like repositioning, mouth care, ensuring a comfortable environment, and providing gentle touch can significantly enhance a patient's comfort.
- Supporting Families: Nurses provide information and support to families, educate them on how to provide comfort, and address their needs and concerns.
- Advocacy: Nurses advocate for the patient's wishes and preferences regarding their care and end-of-life decisions.
11. Explain the role of radiation and chemotherapy in the management of genital cancers, including potential side effects and nursing care.
Radiation therapy and chemotherapy are two main modalities used in the management of various genital cancers, often used alone or in combination with surgery, depending on the type, stage, and location of the cancer.
Radiation Therapy:
- Role: Uses high-energy rays (like X-rays or gamma rays) to kill cancer cells or stop their growth. Radiation can be delivered from outside the body (external beam radiation) or from radioactive sources placed inside the body (brachytherapy).
- Use in Genital Cancers: Commonly used for cervical cancer (especially locally advanced stages, often with chemotherapy), vaginal cancer, vulvar cancer, and sometimes endometrial cancer (adjuvant therapy). Can be used as primary treatment or after surgery.
- Potential Side Effects: Side effects depend on the area being treated and the dose. Common side effects of pelvic radiation include:
- Fatigue.
- Skin irritation or changes in the treated area.
- Bowel changes (diarrhea, cramping, urgency).
- Bladder changes (frequency, urgency, pain).
- Vaginal changes (dryness, narrowing/stenosis, painful intercourse).
- Blood count changes.
- Long-term effects can include chronic bowel/bladder issues or vaginal changes.
- Nursing Care:
- Education: Explain the treatment process, schedule, expected side effects, and how to manage them.
- Skin Care: Teach meticulous skin care in the treated area (e.g., gentle washing, avoiding harsh soaps, using prescribed creams).
- Symptom Management: Provide care and education for managing bowel/bladder symptoms (dietary adjustments, medications), fatigue (rest, gentle exercise), and vaginal changes (dilators, lubricants, vaginal estrogen if appropriate).
- Monitoring: Monitor for severity of side effects and signs of complications (infection).
- Nutritional Support: Advise on diet modifications to manage bowel side effects and ensure adequate nutrition.
- Emotional Support: Provide support as radiation can be a long process with difficult side effects.
Chemotherapy:
- Role: Uses drugs to kill cancer cells throughout the body. It is a systemic treatment.
- Use in Genital Cancers: Commonly used for ovarian cancer (adjuvant, neoadjuvant, and for recurrence), cervical cancer (often with radiation for locally advanced stages, and for metastatic disease), vulvar cancer (often with radiation), and endometrial cancer (for advanced or recurrent disease).
- Potential Side Effects: Side effects depend on the specific drugs used but can include:
- Nausea and vomiting.
- Fatigue.
- Hair loss.
- Weakened immune system (low white blood cell count), increasing risk of infection.
- Low red blood cell count (anemia), causing fatigue.
- Low platelet count, increasing risk of bleeding/bruising.
- Mouth sores.
- Neuropathy (nerve damage, causing tingling or numbness).
- Changes in appetite.
- Menopausal symptoms (temporary or permanent).
- Nursing Care:
- Education: Explain the chemotherapy regimen, schedule, expected side effects, and how to manage them.
- Symptom Management: Administer anti-nausea medications, advise on dietary strategies for nausea/appetite changes, and provide care for mouth sores.
- Monitoring: Monitor vital signs and laboratory results (CBC) closely to detect low blood counts. Monitor for signs of infection (fever).
- Infection Prevention: Educate on preventing infection due to low white blood cells (e.g., avoiding sick people, good hygiene).
- Bleeding Precautions: Advise on precautions for bleeding if platelet count is low.
- Fatigue Management: Advise on balancing rest and gentle activity.
- Emotional Support: Provide significant emotional support as chemotherapy can be a challenging experience. Address fears about side effects and prognosis.
- Nutritional Support: Monitor nutritional status and provide support or referrals to dieticians.
Radiation therapy and chemotherapy are often used in combination or sequence to maximize treatment effectiveness. Comprehensive nursing care is essential to manage the complex side effects of these treatments, provide education and support, and optimize the patient's quality of life throughout the treatment journey.
Gynecology Question for Revision - Topic 11
This section covers Breast Cancer.
SECTION A: Multiple Choice Questions (40 Marks)
1. The most common type of breast cancer is:
2. A risk factor for breast cancer that cannot be changed is:
3. The most common symptom of breast cancer is:
4. A common diagnostic method for breast cancer is:
5. A characteristic feature of invasive ductal carcinoma is:
6. The major risk factor for breast cancer is:
7. Breast cancer is most commonly diagnosed in women aged:
8. A lump in the breast is usually detected during:
9. The primary treatment for early-stage breast cancer is:
10. A breast cancer patient who is HER2-positive may be treated with:
SECTION B: Fill in the Blanks (10 Marks)
1. Breast cancer commonly starts in the ________ cells.
2. The hormone ________ is often involved in the development and growth of breast cancer.
3. A breast lump that is hard, irregular, and non-mobile could be indicative of ________ cancer.
4. The staging of breast cancer is done using the ________ system.
5. A mammogram is a type of ________ used to detect breast cancer.
6. ________ is a type of breast cancer that starts in the milk ducts and has not spread beyond them.
7. Breast cancer can spread to other parts of the body, including the ________ and liver.
8. ________ therapy may be used to block estrogen in hormone receptor-positive breast cancers.
9. The use of ________ (chemo) is common in the treatment of metastatic breast cancer.
10. A common side effect of chemotherapy is ________, which can affect a patient's ability to fight infections.
SECTION C: Short Essay Questions (10 Marks)
1. Define breast cancer and describe its most common type.
Definition:
- Breast cancer is a malignant tumor that develops from cells in the breast tissue.
- It occurs when breast cells grow and divide uncontrollably, forming a mass of tissue called a tumor.
- Cancerous tumors can invade nearby tissues and spread to other parts of the body (metastasize).
Most Common Type:
- The most common type of breast cancer is **Invasive Ductal Carcinoma (IDC)**.
- It starts in the cells that line the milk ducts (the tubes that carry milk from the lobules to the nipple) and then invades and grows into the surrounding breast tissue.
- IDC accounts for about 80% of all invasive breast cancers.
2. List three risk factors for breast cancer.
Several factors can increase a woman's risk of developing breast cancer:
- Gender: Being female is the biggest risk factor (men can also get breast cancer, but it's much less common).
- Age: The risk increases significantly with age, especially after 50.
- Family History: Having a close relative (mother, sister, daughter) with breast cancer, especially if diagnosed at a young age or if multiple family members are affected.
- Inherited Gene Mutations: Having mutations in certain genes, such as BRCA1 or BRCA2, significantly increases the risk.
- Personal History of Breast Cancer: Having had breast cancer before increases the risk of developing it again in the same or other breast.
- Certain Benign Breast Conditions: Some non-cancerous breast changes (like atypical hyperplasia) can increase risk.
- Early Menarche (first period before age 12) or Late Menopause (after age 55): Longer lifetime exposure to estrogen.
- Nulliparity (Never Having a Full-Term Pregnancy) or First Full-Term Pregnancy After Age 30: Longer uninterrupted menstrual cycles.
- Using Hormone Therapy (Combined Estrogen and Progestin) After Menopause: Increases risk with long-term use.
- Obesity After Menopause: Fat tissue produces estrogen.
- Alcohol Consumption: Increased risk with higher alcohol intake.
- Lack of Physical Exercise.
3. State three signs and symptoms of breast cancer.
Signs and symptoms of breast cancer can vary, and some women may have no symptoms, especially in the early stages when detected by mammography. Common signs and symptoms include:
- A Lump or Mass in the Breast: This is the most common symptom. It may be painless, hard, and have irregular edges, but it can also be soft, round, or tender.
- Changes in the Size or Shape of the Breast.
- Changes in the Appearance of the Skin on the Breast: Such as redness, dimpling (like an orange peel), thickening, or scaling.
- Nipple Changes: Such as the nipple turning inward (inversion), redness, scaling, itching, or discharge (other than breast milk).
- Pain in the Breast or Nipple: Although breast cancer is often painless, pain can be a symptom in some cases.
- Swelling of All or Part of the Breast (even if no distinct lump is felt).
- Swelling or a Lump in the Armpit (due to spread to lymph nodes).
4. Describe the role of mammography in breast cancer screening.
Mammography is a vital tool for **breast cancer screening**, playing a crucial role in detecting cancer early:
- Imaging Technique: Mammography uses low-dose X-rays to create images of the breast tissue.
- Detecting Abnormalities: It can detect lumps, masses, distortions, or tiny clusters of calcifications (small mineral deposits) in the breast that may be too small to be felt during a physical examination. Some calcification patterns can be an early sign of cancer, including ductal carcinoma in situ (DCIS).
- Screening Asymptomatic Women: Screening mammography is performed on women who have no symptoms of breast cancer to detect the disease at an early, more treatable stage.
- Reducing Mortality: Studies have shown that regular mammography screening significantly reduces the death rate from breast cancer in screened populations by detecting cancers earlier when treatment is more likely to be successful.
- Diagnostic Mammography: If a woman has symptoms or an abnormal finding on a screening mammogram or physical exam, a diagnostic mammogram may be done, which involves more detailed views.
5. Explain the importance of early detection in breast cancer prognosis.
Early detection is a crucial factor influencing the prognosis (outlook or chance of recovery) for breast cancer. Detecting breast cancer at an early stage significantly improves the chances of successful treatment and long-term survival.
- Smaller Tumor Size: Cancers detected early are typically smaller in size. Smaller tumors are generally less aggressive and easier to treat surgically.
- Less Likely to Have Spread: Early-stage cancers are less likely to have spread to the lymph nodes in the armpit or to distant parts of the body (metastasis). Cancer that is localized to the breast is much more treatable and has a higher cure rate than cancer that has spread.
- More Treatment Options: Early detection often means that a wider range of treatment options are available, including less aggressive surgeries (like lumpectomy instead of mastectomy) and potentially less intensive chemotherapy or radiation.
- Higher Survival Rates: The 5-year survival rate for localized breast cancer (cancer confined to the breast) is very high. The survival rate decreases significantly once the cancer has spread to lymph nodes or distant organs.
- Less Invasive Treatment: Treating cancer at an early stage often requires less extensive surgery and other treatments, leading to less morbidity and better quality of life during and after treatment.
6. Discuss the treatment options for early-stage breast cancer.
Treatment for early-stage breast cancer typically involves a combination of modalities aimed at removing the cancer and reducing the risk of it returning. The specific plan depends on the type and characteristics of the cancer, the stage, and the woman's preferences and health status.
- Surgery: This is the primary treatment to remove the tumor.
- **Breast-Conserving Surgery (Lumpectomy):** Removal of only the cancerous lump and a small amount of surrounding healthy tissue. Followed by radiation therapy in most cases.
- **Mastectomy:** Removal of the entire breast. May be recommended depending on the size and location of the tumor, if there are multiple tumors, or based on patient preference or genetic risk.
- Lymph Node Surgery: Removal of lymph nodes in the armpit to check if cancer has spread. May involve sentinel lymph node biopsy (removing only the first few nodes) or axillary lymph node dissection (removing more nodes).
- Radiation Therapy: Often given after lumpectomy to kill any remaining cancer cells in the breast tissue and reduce the risk of local recurrence. May also be used after mastectomy in some cases, depending on the stage.
- Systemic Therapy (Treatments that affect the whole body): These are given after surgery (adjuvant therapy) or sometimes before (neoadjuvant therapy) to kill cancer cells that may have spread outside the breast to reduce the risk of recurrence. The type depends on the cancer's characteristics:
- **Chemotherapy:** Using drugs to kill cancer cells. Recommended for cancers with a higher risk of recurrence, based on stage, tumor size, grade, and lymph node involvement.
- **Hormone Therapy:** For hormone receptor-positive breast cancers (cancer cells have receptors for estrogen or progesterone). Medications (like Tamoxifen or aromatase inhibitors) are used to block hormones or lower their levels to stop cancer growth. Taken for several years.
- **Targeted Therapy:** For HER2-positive breast cancers. Medications (like Trastuzumab) target the HER2 protein.
7. Mention three complications of untreated breast cancer.
If breast cancer is not treated, it will continue to grow and spread, leading to serious complications:
- Local Spread: The tumor can grow larger and invade surrounding tissues in the breast and chest wall.
- Ulceration and Infection: The tumor may break through the skin, forming an open sore that can become infected and painful.
- Spread to Lymph Nodes (Regional Metastasis): Cancer cells can travel to nearby lymph nodes, usually in the armpit, causing swelling and becoming a source for further spread.
- Distant Metastasis: Cancer cells can spread through the bloodstream or lymphatic system to distant organs, such as the bones, lungs, liver, or brain. This is advanced or metastatic breast cancer, which is generally not curable and the main cause of death.
- Pain: Growing tumors and spread to bone or other organs can cause significant pain.
- Lymphedema: Swelling in the arm or hand due to blockage or removal of lymph nodes.
- Cachexia: Severe weight loss and wasting in advanced stages.
- Death: Ultimately, untreated breast cancer is a fatal disease.
8. Describe the psychosocial impact of breast cancer on patients.
A breast cancer diagnosis and its treatment can have a profound psychosocial impact on a woman, affecting her emotional health, self-esteem, body image, and relationships.
- Emotional Distress: Diagnosis often triggers intense fear, anxiety, shock, and sadness. Uncertainty about the future, treatment side effects, and prognosis contribute to stress.
- Anxiety and Depression: The entire cancer journey, from diagnosis through treatment and survivorship, increases the risk of anxiety and depression.
- Body Image Changes: Surgery (mastectomy or lumpectomy), scarring, radiation effects on the skin, hair loss from chemotherapy, and weight changes can significantly impact a woman's body image and how she feels about herself.
- Loss of Femininity: For some women, changes to the breast can affect their sense of femininity and identity.
- Impact on Sexuality and Intimacy: Physical changes, fatigue, pain, and emotional distress can affect sexual desire and function, impacting intimate relationships.
- Fear of Recurrence: Even after successful treatment, many women live with the fear that the cancer will come back, which can cause ongoing anxiety.
- Social Isolation: Fatigue from treatment, changes in appearance, or emotional distress can sometimes lead to withdrawal from social activities.
- Relationship Changes: The cancer experience can strain relationships with partners, family, and friends, but it can also strengthen bonds. Communication about needs and feelings is important.
- Financial Stress: The costs of treatment and inability to work can create significant financial burden.
- Fatigue: Cancer and its treatment often cause severe fatigue, which affects all aspects of life and can worsen emotional distress.
9. Describe the nursing care plan for a woman receiving chemotherapy for breast cancer.
Nursing care for a woman receiving chemotherapy for breast cancer is comprehensive, focusing on administering the treatment safely, managing side effects, preventing complications, and providing emotional support and education.
Nursing Care Plan Components:
- Pre-Chemotherapy Assessment:
- Assess vital signs, physical condition, and hydration status.
- Review blood counts (CBC) to ensure they are adequate for chemotherapy administration (especially white blood cells, neutrophils, platelets).
- Assess nutritional status and assess for nausea/vomiting history.
- Assess psychological state and understanding of the treatment plan.
- Chemotherapy Administration:
- Verify the correct chemotherapy drugs, dosage, and administration route according to the physician's order.
- Administer pre-medications (e.g., anti-nausea drugs) as ordered.
- Monitor the patient closely during infusion for any immediate reactions (allergic reactions).
- Ensure proper IV access and monitor for extravasation (leaking of drug into surrounding tissue).
- Managing Side Effects:
- Nausea and Vomiting: Administer anti-emetic medications proactively and as needed. Advise on dietary strategies (small, frequent meals, bland foods).
- Fatigue: Assess fatigue level. Advise on balancing rest and gentle activity.
- Alopecia (Hair Loss): Provide education and emotional support regarding hair loss. Discuss options like wigs, scarves, or hats.
- Mouth Sores (Mucositis): Advise on good oral hygiene and mouth rinses.
- Neuropathy: Assess for tingling, numbness, or pain in hands/feet.
- Bowel Changes: Manage constipation or diarrhea with appropriate medications and dietary advice.
- Preventing Complications:
- Infection (Neutropenia): Monitor CBC for low white blood cell count (neutropenia). Educate on signs of infection (fever is a key sign and medical emergency), avoiding crowds and sick people, and meticulous hygiene (handwashing).
- Bleeding (Thrombocytopenia): Monitor CBC for low platelet count. Educate on bleeding precautions (avoiding injury, using soft toothbrush).
- Anemia: Monitor CBC for low red blood cell count. Advise on managing fatigue.
- Education: Provide detailed education about the specific chemotherapy drugs, their side effects, when they are expected, and how to manage them at home. Educate on when to call the doctor immediately. Discuss the treatment schedule and the importance of keeping appointments.
- Emotional Support: Provide ongoing emotional support throughout the treatment cycles. Acknowledge the physical and emotional burden of chemotherapy.
- Nutritional Support: Encourage adequate fluid intake and nutrition. Monitor for weight changes and refer to a dietitian if needed.
- Monitoring Treatment Response: While the doctor assesses cancer response, nurses monitor for changes in symptoms and overall well-being that might indicate the treatment is working or if adjustments are needed.
10. Describe the role of health education in the prevention of breast cancer.
Health education plays a significant role in the prevention of breast cancer by empowering women with knowledge about risk factors, healthy lifestyle choices, and the importance of screening for early detection. Prevention strategies encompass both reducing modifiable risks and promoting early detection.
Key Areas for Health Education in Breast Cancer Prevention:
- Understanding Risk Factors:
- Educate women about both modifiable (changeable) and non-modifiable (unchangeable) risk factors for breast cancer, such as age, family history, genetics, reproductive history, obesity, physical activity, alcohol, and hormone therapy use.
- Help women understand their individual risk profile.
- Promoting Healthy Lifestyle Choices (Modifiable Risk Reduction):
- Weight Management: Educate on the link between obesity (especially after menopause) and increased breast cancer risk. Provide information and support on achieving and maintaining a healthy weight through balanced diet and regular exercise.
- Physical Activity: Explain how regular physical exercise can reduce breast cancer risk. Encourage engaging in recommended levels of physical activity.
- Alcohol Consumption: Educate on the increased risk associated with alcohol intake and advise limiting alcohol consumption.
- Healthy Diet: Promote a diet rich in fruits, vegetables, and whole grains. While diet is less directly linked than obesity or alcohol, a healthy diet supports overall health.
- Informing about Hormone Therapy Risks:
- Provide clear information about the risks and benefits of using hormone therapy for menopausal symptoms, particularly the increased risk with combined estrogen and progestin therapy.
- Support women in making informed decisions about HRT in consultation with their doctor.
- Importance of Breastfeeding: Educate women that breastfeeding for at least a year can slightly lower breast cancer risk.
- Education on Early Detection Methods:
- Screening Mammography: Explain the importance of regular screening mammography for women in the recommended age groups (usually starting at 40 or 50, depending on guidelines and risk factors). Explain who should be screened and how often.
- Breast Self-Awareness: Educate women on being familiar with the normal look and feel of their breasts and reporting any changes to a healthcare provider promptly. While routine breast self-exams are no longer universally recommended for screening, breast awareness is still important.
- Clinical Breast Examination: Explain the role of clinical breast exams by a healthcare provider during routine check-ups.
- Genetic Counseling and Testing: For women with a strong family history or other risk factors suggesting a possible inherited gene mutation (like BRCA), educate them about genetic counseling and testing and facilitate access to these services.
- Addressing Misinformation: Provide accurate, evidence-based information about breast cancer prevention and address common myths or misinformation.
SECTION D: Long Essay Questions (10 Marks Each)
1. Discuss the causes, risk factors, and clinical presentation of breast cancer.
What is Breast Cancer?
- Breast cancer is a disease in which cells in the breast grow out of control and form tumors.
- It usually starts in the cells of the milk ducts or lobules.
- It can be invasive (spreading into surrounding tissues) or non-invasive (confined to the ducts or lobules).
Causes:
- The exact cause of breast cancer in any individual is often unknown, but it results from damage or changes (mutations) to DNA within breast cells.
- These mutations can be inherited (passed down from parents) or acquired during a person's lifetime due to various factors (lifestyle, environment, aging).
- Uncontrolled cell growth occurs due to these genetic changes.
- Hormones (especially estrogen and progesterone) play a significant role in the development of many breast cancers.
Risk Factors (Factors that increase the likelihood of developing breast cancer):
- Gender: Being female is the strongest risk factor.
- Age: Risk increases with age, particularly after menopause.
- Family History: Having a close relative (mother, sister, daughter, father, son) with breast, ovarian, prostate, or pancreatic cancer, especially at a young age or if multiple family members are affected.
- Inherited Gene Mutations: Mutations in BRCA1, BRCA2, and other genes.
- Personal History of Breast Cancer or Certain Non-Cancerous Breast Conditions: Increases risk of developing a new cancer.
- Race/Ethnicity: White women have a higher incidence overall, but African-American women are more likely to develop aggressive subtypes and die from breast cancer.
- Reproductive History:
- Early Menarche (before 12) or Late Menopause (after 55): Longer exposure to estrogen.
- Nulliparity (never having a full-term pregnancy).
- First full-term pregnancy after age 30.
- Hormone Therapy: Combined estrogen and progestin therapy after menopause.
- Oral Contraceptive Use: A slight increase in risk, which decreases after stopping use.
- Obesity: Especially postmenopausal obesity, linked to higher estrogen levels.
- Alcohol Consumption: Increased risk with higher intake.
- Lack of Physical Exercise.
- Radiation Exposure: To the chest area, especially at a young age.
- Breast Density: Dense breast tissue on a mammogram makes it harder to detect cancer and is also an independent risk factor.
Clinical Presentation (Signs and Symptoms):
- The most common clinical presentation is a new lump or mass in the breast. This may be found by the woman herself (breast self-exam or breast awareness) or during a clinical breast examination. Lumps can be painful or painless, hard or soft, with regular or irregular edges.
- Changes in the Size or Shape of the Breast.
- Changes in the Skin of the Breast: Redness, swelling, warmth, dimpling (orange peel appearance), thickening, scaling, or rash.
- Nipple Changes: Inversion (turning inward), discharge (clear, bloody, or other), redness, scaling, itching.
- Pain in the Breast or Nipple: Although pain is less common as the only symptom of cancer, it can occur.
- Swelling under the Arm or near the Collarbone: May indicate spread to lymph nodes.
- Inflammatory Breast Cancer: A rare, aggressive type that presents with redness, swelling, warmth, and pitted skin, often without a distinct lump.
2. Explain the diagnostic methods used for breast cancer, including imaging and biopsy.
Diagnosing breast cancer involves a combination of clinical evaluation, imaging tests, and obtaining tissue for examination (biopsy). The process aims to confirm the presence of cancer, determine its type and characteristics, and assess its extent.
Clinical Evaluation:
- Medical History: Gathering information about symptoms, risk factors, family history, and previous breast conditions.
- Clinical Breast Examination (CBE): A physical examination of the breasts and underarms by a healthcare professional to check for lumps, changes in size, shape, skin, or nipples.
Imaging Methods:
- Mammography: The primary imaging tool for screening and diagnosis. It uses X-rays to create images of the breast.
- Screening Mammography: For women without symptoms to detect abnormalities.
- Diagnostic Mammography: For women with symptoms or abnormal findings on screening mammogram or CBE. It involves more detailed images.
- Breast Ultrasound: Uses sound waves to create images. It is often used after an abnormal mammogram to:
- Determine if a lump is solid (more likely to be cancer) or fluid-filled (cyst, usually benign).
- Evaluate abnormalities in women with dense breast tissue where mammography is less effective.
- Guide biopsy procedures.
- Breast MRI (Magnetic Resonance Imaging): Uses magnetic fields and radio waves to create detailed images. It may be used:
- For screening women at high risk (e.g., with BRCA mutations).
- To determine the extent of cancer after diagnosis.
- To evaluate abnormalities that are difficult to see on mammography or ultrasound.
Biopsy (Obtaining Tissue Sample):
- If imaging tests or CBE find a suspicious area, a biopsy is necessary to confirm if it is cancer. A small sample of the abnormal tissue is removed and examined under a microscope by a pathologist. Biopsy is the definitive method for diagnosing breast cancer.
- Types of Biopsy:
- Fine-Needle Aspiration (FNA) Biopsy: A thin needle is used to withdraw fluid or cells from a lump. Less invasive, but may not provide enough tissue for all tests.
- Core Needle Biopsy: Uses a larger, hollow needle to remove small cylinders (cores) of tissue. More tissue is obtained than with FNA, allowing for more comprehensive testing of the cancer characteristics (like hormone receptors, HER2 status). Often guided by ultrasound or mammography (stereotactic biopsy).
- Surgical (Open) Biopsy: Removal of part or all of the lump surgically. Less common now but may be used if core needle biopsy is not possible or conclusive.
- Pathological Examination: The removed tissue is examined by a pathologist to determine if cancer cells are present, the type of breast cancer (e.g., ductal, lobular), the grade (how aggressive the cells look), and other important characteristics like hormone receptor status (ER/PR) and HER2 status. This information guides treatment decisions.
3. Discuss the medical and surgical management options for breast cancer, including chemotherapy and radiation therapy.
Managing breast cancer involves a multidisciplinary approach, often combining several treatment modalities tailored to the individual patient and the characteristics of her cancer. Treatment options include surgery, radiation therapy, chemotherapy, hormone therapy, and targeted therapy.
Surgical Management:
- Goal: To remove the cancerous tumor from the breast.
- Breast-Conserving Surgery (Lumpectomy): Removal of the tumor and a small margin of healthy tissue. The majority of the breast is left intact. Usually followed by radiation therapy.
- Mastectomy: Removal of the entire breast. May be necessary for larger tumors, multiple tumors, if lumpectomy margins are not clear, or if radiation is not possible. Various types exist (e.g., total mastectomy, skin-sparing mastectomy, nipple-sparing mastectomy). Breast reconstruction may be an option.
- Lymph Node Surgery: Removal of lymph nodes in the armpit to check for and remove cancer that has spread.
- Sentinel Lymph Node Biopsy: Removal of only the first 1-3 lymph nodes the cancer is most likely to spread to. If cancer is found, more nodes may be removed.
- Axillary Lymph Node Dissection: Removal of a larger number of lymph nodes from the armpit.
Medical Management (Systemic Therapies - affect the whole body):
- Chemotherapy:
- Role: Uses powerful drugs to kill cancer cells or stop them from growing. Given intravenously or orally.
- Use: May be used adjuvantly (after surgery) to kill any remaining cancer cells that may have spread elsewhere in the body and reduce the risk of recurrence. Used neoadjuvantly (before surgery) to shrink large tumors, make lumpectomy possible, or assess treatment response. Used for metastatic breast cancer (cancer that has spread to distant organs) to control the disease and manage symptoms.
- Regimens: Often involves a combination of different chemotherapy drugs given in cycles.
- Hormone Therapy (Endocrine Therapy):
- Role: Used for hormone receptor-positive breast cancers (ER+ and/or PR+). Works by blocking the effects of estrogen or lowering estrogen levels to slow or stop cancer cell growth.
- Use: Typically taken for several years (e.g., 5-10 years) after surgery (adjuvant). Can also be used neoadjuvantly or for metastatic disease.
- Types: Tamoxifen (blocks estrogen receptors), Aromatase Inhibitors (lower estrogen levels in postmenopausal women).
- Targeted Therapy:
- Role: Drugs that target specific proteins or pathways involved in cancer cell growth.
- Use: For cancers with specific characteristics, like HER2-positive breast cancer. Targeted drugs (e.g., Trastuzumab, Pertuzumab, Lapatinib) block the HER2 protein. Other targeted therapies exist for specific genetic mutations or cancer types.
Radiation Therapy:
- Role: Uses high-energy rays to kill cancer cells in a specific area.
- Use: Commonly given after lumpectomy to the remaining breast tissue to reduce the risk of local recurrence. May be given after mastectomy if the tumor was large, involved many lymph nodes, or invaded skin/muscle. Can also be used to treat cancer that has spread to bones or the brain for pain relief.
- Types: External beam radiation (most common), partial breast irradiation (shorter course for selected early cancers).
4. Outline the nursing care plan for a patient undergoing mastectomy for breast cancer.
A nursing care plan for a woman undergoing mastectomy (surgical removal of the entire breast) for breast cancer involves comprehensive care before, during, and after the procedure, addressing physical needs, pain management, wound care, and emotional support.
Nursing Care Plan Components:
- Pre-Operative Phase:
- Assessment: Assess vital signs, general health, and any existing medical conditions. Assess the patient's understanding of the mastectomy procedure, including whether lymph nodes will be removed and if reconstruction is planned. Assess her emotional state, fears, and concerns about the surgery, body image changes, and cancer diagnosis.
- Nursing Diagnosis (Example): Fear related to surgical procedure and cancer diagnosis.
- Goal: Patient will verbalize understanding and express reduced fear.
- Interventions: Provide clear, age-appropriate explanation of the surgery and expected post-operative experience. Address her concerns and answer questions honestly. Ensure pre-operative tests are completed and consents are signed. Administer pre-operative medications. Offer emotional support and a calm environment. If reconstruction is planned, discuss this aspect.
- Intra-Operative Phase:
- Assessment: Monitor vital signs and patient status continuously during anesthesia and surgery.
- Interventions: Assist the surgical team, maintain sterile technique, ensure patient safety and positioning.
- Post-Operative Phase:
- Assessment: Monitor vital signs regularly. Assess and manage pain effectively using a pain scale and administering prescribed analgesics (IV, oral, PCA). Assess surgical incision site(s) for bleeding, drainage, swelling, redness, or signs of infection. Monitor drainage from surgical drains (Jackson-Pratt or JP drains are common after mastectomy and lymph node removal), record output, and ensure they are functioning properly. Assess for signs of complications (bleeding, infection, blood clots, respiratory issues, nerve injury). Assess range of motion in the affected arm. Assess for lymphedema (swelling).
- Nursing Diagnosis (Example): Acute Pain related to surgical incision and tissue removal.
- Goal: Patient will report manageable pain levels and participate in post-operative exercises.
- Interventions: Administer pain medication on schedule. Encourage and assist with deep breathing, coughing, and use of incentive spirometer. Encourage early ambulation. Provide wound care and drain care (emptying drains, recording output). Teach the patient or caregiver how to manage drains at home if applicable. Encourage gentle range of motion exercises for the affected arm (as approved by the surgeon/physical therapist) to prevent stiffness and promote lymphatic drainage. Monitor for signs of infection.
- Discharge Planning and Education:
- Assessment: Assess patient's readiness for discharge, support system, and understanding of home care.
- Nursing Diagnosis (Example): Disturbed Body Image related to loss of breast.
- Goal: Patient will verbalize feelings about body image changes and identify support systems.
- Interventions: Provide detailed verbal and written instructions on wound and drain care, pain management at home, activity restrictions and gradual increase in activity, signs of complications to report, and follow-up appointments. Discuss the loss of the breast and its potential emotional impact. Provide information on breast prosthetics, specialized bras, and reconstruction options. Offer resources for counseling and support groups (specifically for breast cancer survivors and those who have had mastectomy). Discuss potential for lymphedema and advise on exercises and precautions.
5. Describe the importance of genetic testing and counseling in women at high risk for breast cancer.
Genetic testing and counseling are increasingly important tools in the management of women at high risk for breast cancer, particularly those with a strong family history or certain personal characteristics. They provide valuable information that can guide risk assessment, prevention strategies, and treatment decisions.
Importance of Genetic Counseling:
- Assessing Risk: A genetic counselor collects a detailed personal and family medical history to assess the likelihood that a woman has an inherited gene mutation that increases her risk of breast cancer (e.g., BRCA1, BRCA2, TP53, PTEN, CDH1, ATM, CHEK2).
- Informed Decision-Making about Testing: Counselors explain the process of genetic testing, the genes being tested, the potential results (positive, negative, variant of uncertain significance), the implications of the results for the individual and their family members, and the potential benefits and limitations of testing. They help women make an informed decision about whether or not to pursue genetic testing.
- Emotional Support: Genetic counseling can be emotionally challenging. Counselors provide support as women process information about their risk and potential implications for themselves and their families.
Importance of Genetic Testing (if indicated by counseling):
- Identifying High-Risk Individuals: A positive genetic test result confirms that a woman has an inherited mutation that significantly increases her lifetime risk of developing breast cancer and potentially other cancers (like ovarian cancer with BRCA mutations).
- Guiding Risk Reduction Strategies: For women with identified mutations, genetic testing results inform personalized risk reduction strategies. These may include:
- Increased cancer surveillance (e.g., earlier and more frequent mammography, breast MRI).
- Risk-reducing medications (e.g., Tamoxifen or aromatase inhibitors).
- Prophylactic surgery (e.g., preventative mastectomy to significantly reduce breast cancer risk, preventative salpingo-oophorectomy to reduce ovarian cancer risk with BRCA mutations).
- Informing Treatment Decisions (if cancer is diagnosed): If a woman with a known mutation is diagnosed with breast cancer, the genetic information can influence treatment choices (e.g., type of surgery, use of certain targeted therapies like PARP inhibitors for BRCA-mutated cancers).
- Family Planning: Genetic testing results can have implications for family planning and reproductive options.
- Informing Family Members: Positive test results allow other family members to be tested and, if they also carry the mutation, take steps to manage their own risk.
6. Discuss the role of hormone therapy in the treatment of hormone receptor-positive breast cancer.
Hormone therapy, also known as endocrine therapy, is a critical treatment modality for breast cancers that are hormone receptor-positive. These cancers have receptors on their cells that allow them to use hormones, primarily estrogen and progesterone, to grow. Hormone therapy works by blocking the effects of these hormones or lowering their levels, thereby slowing or stopping the growth of cancer cells.
Role of Hormone Therapy:
- Adjuvant Therapy: The most common use is after surgery to treat early-stage hormone receptor-positive breast cancer. It is given to reduce the risk of the cancer coming back (recurrence) in the breast or elsewhere in the body. It is typically taken for 5 to 10 years.
- Neoadjuvant Therapy: May be given before surgery for some larger hormone receptor-positive tumors to shrink them, potentially making breast-conserving surgery possible or easier.
- Treatment of Metastatic Disease: Hormone therapy is often the first-line treatment for hormone receptor-positive breast cancer that has spread to distant parts of the body (metastatic disease). It can help control the cancer and manage symptoms for a period.
- Risk Reduction: For women at high risk of developing hormone receptor-positive breast cancer (e.g., with atypical hyperplasia or certain genetic mutations), hormone therapy (like Tamoxifen or Raloxifene) may be used to reduce the risk of developing the disease.
Types of Hormone Therapy Medications:
- Selective Estrogen Receptor Modulators (SERMs): Like Tamoxifen, they block estrogen from binding to receptors in breast cancer cells. Tamoxifen can be used in both premenopausal and postmenopausal women.
- Aromatase Inhibitors (AIs): Such as Anastrozole, Letrozole, and Exemestane, they work by blocking the enzyme aromatase, which converts other hormones into small amounts of estrogen in postmenopausal women. AIs are only used in postmenopausal women.
- Estrogen Receptor Downregulators (ERDs): Like Fulvestrant, they bind to and block estrogen receptors and also cause the receptors to be degraded. Used for metastatic disease.
- Luteinizing Hormone-Releasing Hormone (LHRH) Agonists: Used in premenopausal women to shut down the ovaries' production of estrogen, essentially inducing a temporary menopause. Often used in combination with AIs or Tamoxifen.
How it Works to Control Cancer:
- By reducing the amount of estrogen available to the cancer cells or blocking the estrogen receptors, hormone therapy inhibits the growth and division of hormone receptor-positive cancer cells.
- It does not directly kill the cancer cells but keeps them from growing, acting as a maintenance or control therapy.
7. Explain the role of chemotherapy in metastatic breast cancer and its potential side effects.
Chemotherapy is a crucial systemic treatment for metastatic breast cancer, which is cancer that has spread from the breast to distant organs (like bones, lungs, liver, brain). Unlike early-stage cancer where the goal is often cure, for metastatic breast cancer, the primary goals of chemotherapy are usually to control the disease, shrink tumors, relieve symptoms, improve quality of life, and extend survival.
Role of Chemotherapy in Metastatic Breast Cancer:
- Systemic Treatment: Chemotherapy drugs travel through the bloodstream to reach cancer cells throughout the body, including those that have spread to distant sites.
- Controlling Disease Progression: Chemotherapy can slow down or stop the growth and spread of metastatic breast cancer.
- Shrinking Tumors: It can reduce the size of tumors in the metastatic sites, which can help alleviate symptoms caused by the tumors pressing on organs or tissues.
- Relieving Symptoms: By shrinking tumors and controlling the disease, chemotherapy can help reduce pain, improve breathing (if spread to lungs), and relieve other symptoms associated with metastatic cancer.
- Improving Quality of Life: By managing symptoms and controlling the disease, chemotherapy can improve a patient's overall well-being and ability to function.
- Extending Survival: While typically not curative for metastatic disease, chemotherapy can often extend life compared to receiving no systemic treatment.
Potential Side Effects of Chemotherapy:
- Chemotherapy drugs target rapidly dividing cells, including cancer cells, but also healthy cells that divide quickly, such as those in the bone marrow, hair follicles, mouth, and digestive tract. This leads to various side effects, which vary depending on the specific drugs used.
- Myelosuppression (Bone Marrow Suppression): Reduced production of blood cells:
- Neutropenia: Low white blood cells, increasing risk of infection (fever is a medical emergency).
- Anemia: Low red blood cells, causing fatigue and weakness.
- Thrombocytopenia: Low platelets, increasing risk of bruising and bleeding.
- Nausea and Vomiting: Common side effects, often managed with anti-nausea medications.
- Fatigue: Severe tiredness and lack of energy.
- Alopecia (Hair Loss): Often temporary, hair usually grows back after treatment.
- Mouth Sores (Mucositis): Inflammation and sores in the mouth and throat.
- Neuropathy: Nerve damage causing tingling, numbness, pain, or weakness, usually in hands and feet.
- Gastrointestinal Issues: Diarrhea or constipation.
- Changes in Appetite and Weight.
- Skin and Nail Changes.
- Menopausal Symptoms: Can cause temporary or permanent cessation of periods and menopausal symptoms in premenopausal women.
- Cardiotoxicity: Some drugs can affect the heart.
- Increased Risk of Second Cancers (rare, long-term).
8. Describe the psychological and emotional support needed for breast cancer patients throughout their treatment.
A breast cancer diagnosis and the subsequent treatment journey are emotionally challenging. Patients require significant psychological and emotional support from healthcare providers, family, and support networks throughout this process.
Psychological and Emotional Challenges Throughout Treatment:
- Diagnosis Phase: Shock, disbelief, fear of death, anxiety about the future, sadness, anger, difficulty processing information.
- Treatment Decision Phase: Stress and anxiety about choosing the right treatment plan, weighing risks and benefits, potential impact on body image and fertility.
- Surgery Phase: Anxiety about the procedure, fear of pain, concerns about body image changes (especially after mastectomy), grief related to breast loss or scarring.
- Chemotherapy Phase: Fear of side effects (hair loss, nausea, fatigue, weakened immune system), anxiety about treatment effectiveness, feeling unwell, impact on daily life, emotional ups and downs.
- Radiation Therapy Phase: Fatigue, skin reactions, fear of long-term effects, managing daily treatment schedule.
- Hormone Therapy Phase: Coping with side effects (hot flashes, joint pain, mood changes), impact on sexuality, worry about taking medication for a long time.
- Throughout Treatment: Constant anxiety about treatment effectiveness, potential recurrence, impact on relationships, financial burden, fatigue, feeling isolated, difficulty maintaining a sense of normalcy.
Nursing Role in Providing Psychological and Emotional Support:
- Establish a Trusting Relationship: Build rapport and create a safe space for the patient to express her feelings and concerns without judgment.
- Listen Actively and Empathetically: Allow the patient to talk about her fears, worries, and emotional struggles. Validate her feelings and let her know that her reactions are normal responses to a difficult situation.
- Provide Clear and Consistent Information: Uncertainty fuels anxiety. Provide clear, accurate, and consistent information about the diagnosis, treatment plan, what to expect at each stage, and potential side effects. Address her questions and concerns directly and patiently.
- Address Body Image Concerns: Be sensitive to the impact of surgery (mastectomy, lumpectomy) and other treatments on body image. Encourage her to express her feelings. Provide information on breast prosthetics, specialized clothing, and reconstruction options.
- Support Coping Mechanisms: Help the patient identify and utilize healthy coping strategies (e.g., mindfulness, relaxation techniques, journaling, connecting with others).
- Facilitate Communication: Encourage open communication between the patient, her partner, family, and the healthcare team.
- Provide Resources: Connect the patient and her family with counseling services, psychologists, social workers, and support groups specifically for breast cancer patients or survivors. Peer support can be invaluable.
- Address Specific Concerns: Provide tailored support for concerns about fertility preservation, sexual health, returning to work, or financial issues.
- Monitor for Distress: Be vigilant for signs of significant psychological distress, anxiety disorders, or depression and refer for professional mental health evaluation and support as needed.
- Celebrate Milestones: Acknowledge and celebrate completion of treatment phases or positive milestones to maintain hope and motivation.
9. Outline the surgical options for the management of breast cancer and the factors that influence the choice of surgery.
Surgery is a primary treatment for most stages of breast cancer, aiming to remove the tumor. The choice of surgical procedure depends on several factors and is made in consultation with the patient.
Surgical Options for Breast Cancer:
- Breast-Conserving Surgery (BCS) or Lumpectomy:
- Procedure: Removal of the cancerous lump and a small margin of healthy tissue around it. The majority of the breast is left intact.
- Requirement: Usually followed by radiation therapy to the remaining breast tissue to reduce the risk of local recurrence.
- Mastectomy:
- Procedure: Surgical removal of the entire breast.
- Types:
- Total (Simple) Mastectomy: Removal of the whole breast, including the nipple, areola, and skin, but usually not the underarm lymph nodes.
- Skin-Sparing Mastectomy: Removal of breast tissue, nipple, and areola, but most of the breast skin is left for immediate or delayed reconstruction.
- Nipple-Sparing Mastectomy: Removal of breast tissue while preserving the nipple and areola (not suitable for all cancers, especially those close to the nipple).
- Modified Radical Mastectomy: Removal of the entire breast, nipple, areola, and most of the underarm lymph nodes.
- Breast Reconstruction: Surgery to rebuild the shape of the breast after mastectomy. Can be immediate (at the time of mastectomy) or delayed.
- Lymph Node Surgery: Removal of lymph nodes in the armpit to check for and remove any cancer that has spread to them.
- Sentinel Lymph Node Biopsy (SLNB): Removal of only the first 1-3 lymph nodes that drain the breast. If cancer is found in these nodes, further lymph nodes may be removed (axillary dissection). Preferred when possible as it has fewer side effects than full axillary dissection.
- Axillary Lymph Node Dissection (ALND): Removal of a larger number of lymph nodes from the armpit. Done if cancer is found in the sentinel nodes or if there is suspicion of extensive lymph node involvement. Can lead to lymphedema.
Factors Influencing the Choice of Surgery:
- Tumor Size and Location: Larger tumors or those in certain locations (e.g., centrally located, involving the nipple) may require mastectomy.
- Presence of Multiple Tumors: If there are multiple areas of cancer in the breast, mastectomy may be recommended.
- Stage of Cancer: More advanced local disease may necessitate mastectomy and more extensive lymph node removal.
- Ability to Receive Radiation Therapy: Lumpectomy usually requires follow-up radiation. If a woman cannot undergo radiation (e.g., due to previous radiation to the chest, pregnancy, or certain medical conditions), mastectomy may be necessary.
- Genetic Mutations: Women with BRCA mutations or other high-risk genes may choose prophylactic mastectomy of the unaffected breast to reduce future risk.
- Breast Size and Shape: Women with very small breasts may not be good candidates for lumpectomy if a large portion of tissue needs to be removed.
- Patient Preference: A woman's personal preference and comfort level with each surgical option are important factors in the decision-making process. Some women prefer mastectomy for peace of mind.
- Availability of Reconstruction: Access to and desire for breast reconstruction can influence the choice of mastectomy type.
- Previous Breast Surgery or Biopsy Scarring: Can sometimes make lumpectomy more challenging.
10. Discuss the importance of follow-up care after breast cancer treatment, including monitoring for recurrence.
Follow-up care after completing primary breast cancer treatment (surgery, chemotherapy, radiation) is a critical and lifelong component of comprehensive cancer care. Its main purposes are to monitor for signs of cancer recurrence, manage long-term side effects of treatment, and support the patient's overall health and well-being.
Importance of Follow-up Care:
- Monitoring for Recurrence: The primary goal is to detect if the cancer has returned as early as possible. Recurrence can be local (in the same breast or chest wall), regional (in nearby lymph nodes), or distant (spread to other organs). Early detection of recurrence often allows for more effective treatment compared to detecting it at a later stage.
- Managing Treatment Side Effects: Many treatments for breast cancer can have long-term side effects (e.g., lymphedema after lymph node removal, fatigue, neuropathy from chemotherapy, vaginal dryness from hormone therapy, bone thinning). Follow-up care provides an opportunity to monitor for and manage these side effects to improve the patient's quality of life.
- Screening for Second Cancers: Breast cancer survivors are at increased risk for developing new cancers, including cancer in the opposite breast or other types of cancers (depending on treatment received and genetic risk factors). Follow-up care includes recommendations for screening for these second cancers.
- Monitoring for New Primary Breast Cancer: Women who had lumpectomy are at risk of developing a new cancer in the same breast. All survivors are at risk of a new cancer in the opposite breast.
- Addressing Psychosocial Needs: Follow-up appointments are an opportunity to assess the patient's emotional well-being, address anxiety about recurrence, and provide ongoing psychological and emotional support or referrals to counseling/support groups.
- Promoting Healthy Lifestyle: Reinforce education on healthy lifestyle choices (diet, exercise, weight management, avoiding smoking and excessive alcohol) that can reduce the risk of recurrence and improve overall health.
- Monitoring for Symptoms: Encourage patients to be aware of symptoms that might indicate recurrence or other health problems and to report them promptly.
- Medication Adherence: For patients on long-term hormone therapy, follow-up appointments are important to monitor for side effects, address concerns, and support adherence to the treatment regimen.
Components of Follow-up Monitoring for Recurrence:
- Regular Physical Examinations: By a healthcare provider (oncologist or primary care physician), including examination of the breasts, chest wall, and lymph nodes. Frequency is typically more often in the first few years after treatment and then annually.
- Mammography: Regular mammograms of the remaining breast (after lumpectomy) or the opposite breast (after mastectomy). Frequency is usually annual.
- Imaging for Symptoms: Imaging tests (CT scans, bone scans, MRI) are generally *not* recommended for routine surveillance in asymptomatic patients but are used to investigate specific symptoms that might suggest recurrence (e.g., new lump, persistent pain, unexplained weight loss).
- Blood Tests: While tumor markers (like CA 15-3, CA 27-29) are sometimes monitored, they are generally not recommended for routine surveillance in asymptomatic patients as they are not sensitive enough to detect recurrence early consistently. They may be used in monitoring response to treatment for metastatic disease.
Gynecology Question for Revision - Topic 12
This section covers Uterine Prolapse and Genital Prolapse.
SECTION A: Multiple Choice Questions (40 Marks)
1. Uterine prolapse refers to:
2. The most common risk factor for uterine prolapse is:
3. The severity of uterine prolapse is classified based on:
4. A woman with uterine prolapse might present with:
5. The first-degree uterine prolapse is characterized by:
6. Which of the following symptoms is NOT typically associated with uterine prolapse?
7. A woman with advanced uterine prolapse might experience:
8. The primary method used to diagnose uterine prolapse is:
9. Non-surgical management of uterine prolapse may include:
10. Surgical management for uterine prolapse typically involves:
SECTION B: Fill in the Blanks (10 Marks)
1. Uterine prolapse occurs when the uterus ________ into the vaginal canal.
2. The most common cause of uterine prolapse is ________.
3. A woman with uterine prolapse may experience a sensation of ________ in the vaginal area.
4. Pelvic floor ________ are important in the prevention and management of uterine prolapse.
5. The severity of uterine prolapse is classified into ________ stages.
6. A ________ is often used to manage symptoms in women with uterine prolapse.
7. Surgical treatment for uterine prolapse often involves a ________.
8. The cervix in second-degree uterine prolapse reaches the ________ of the vaginal opening.
9. A common symptom of uterine prolapse is urinary ________.
10. Conservative management of uterine prolapse may include ________ exercises.
SECTION C: Short Essay Questions (10 Marks)
1. Define uterine prolapse and describe its clinical presentation.
Definition:
- Uterine prolapse is a condition where the uterus descends from its normal position in the pelvis and bulges into the vagina.
- It occurs due to weakening or damage to the pelvic floor muscles and supporting ligaments.
- It is a type of pelvic organ prolapse.
Clinical Presentation:
- Symptoms vary depending on the severity (degree) of the prolapse. Mild prolapse may have no symptoms.
- Common symptoms include a feeling of pressure, heaviness, or fullness in the pelvis or vagina.
- A sensation of "something falling out" of the vagina or a palpable bulge in the vaginal area.
- Lower back ache.
- Urinary symptoms like incontinence (leaking urine), frequency, or urgency, or difficulty emptying the bladder (often if there is associated bladder prolapse).
- Bowel symptoms like constipation or difficulty with bowel movements (if there is associated rectal prolapse).
- Pain or discomfort during sexual intercourse.
- Symptoms may worsen with standing, walking, coughing, or straining, and improve with lying down.
2. List three risk factors for uterine prolapse.
Risk factors that increase the likelihood of developing uterine prolapse include:
- Vaginal Childbirth: Especially multiple vaginal deliveries, delivering large babies, prolonged pushing during labor, or assisted deliveries (e.g., forceps). The trauma of childbirth significantly weakens pelvic floor support.
- Aging and Menopause: As women age, the pelvic floor muscles and connective tissues naturally lose strength and elasticity. The decline in estrogen levels after menopause contributes to tissue thinning and weakening.
- Increased Abdominal Pressure: Conditions that repeatedly increase pressure inside the abdomen and push down on the pelvic floor. Examples include chronic cough (e.g., from smoking or lung disease), chronic constipation and straining during bowel movements, and regularly lifting heavy objects.
- Obesity: Excess body weight puts additional strain on the pelvic floor.
- Genetics: Some women may have a genetic predisposition to weaker connective tissues.
- Certain Medical Conditions: Conditions that cause chronic coughing or straining.
3. Describe the non-surgical management of uterine prolapse.
Non-surgical management options for uterine prolapse are suitable for women with mild to moderate prolapse, those who do not wish to have surgery, or those for whom surgery is not medically advisable. These methods aim to provide support and alleviate symptoms.
- Watchful Waiting: For very mild prolapse with minimal or no symptoms, simply monitoring the condition may be sufficient.
- Lifestyle Modifications:
- Weight Loss: If overweight or obese, losing weight reduces abdominal pressure on the pelvic floor.
- Managing Chronic Cough and Constipation: Treating these conditions reduces straining and pressure. Ensuring adequate fiber and fluids in the diet helps prevent constipation.
- Avoiding Heavy Lifting: Reducing activities that significantly increase abdominal pressure.
- Pelvic Floor Muscle Training (Kegel Exercises):
- Learning and regularly performing exercises to strengthen the muscles of the pelvic floor.
- Can help improve symptoms, especially in mild prolapse, and may help prevent progression. Often most effective when done correctly and consistently.
- Vaginal Pessaries:
- These are removable devices made of silicone or rubber that are inserted into the vagina to provide support to the pelvic organs, holding the uterus and other prolapsed organs in a better position.
- Available in various shapes and sizes and must be fitted by a healthcare professional.
- Requires regular cleaning and follow-up appointments to ensure it fits well and is not causing complications (like irritation or infection).
- Estrogen Therapy (for postmenopausal women): Topical vaginal estrogen (cream, ring, tablet) can help improve the health and elasticity of vaginal and pelvic floor tissues in postmenopausal women, which may help support prolapse symptoms, especially when used with pessaries. It does not typically fix the prolapse itself.
4. Mention three symptoms commonly associated with uterine prolapse.
Common symptoms that a woman with uterine prolapse might experience include:
- Pelvic Pressure or Heaviness: A feeling of dragging, fullness, or weight in the lower abdomen or pelvis.
- Vaginal Bulging Sensation: A feeling of something coming down or sticking out of the vagina, or being able to feel a lump in the vagina.
- Urinary Problems: May include leaking urine (incontinence), needing to urinate frequently, feeling an urgent need to urinate, or sometimes difficulty emptying the bladder.
- Bowel Problems: May include constipation or needing to push on the vagina to have a bowel movement (if there is associated rectocele).
- Lower Back Ache: Pain in the lower back that may worsen with prolonged standing.
- Painful Intercourse: Discomfort or pain during sexual activity, especially with more advanced prolapse.
5. Explain the role of a vaginal pessary in the management of uterine prolapse.
A vaginal pessary is a significant non-surgical option in the management of uterine prolapse. Its role is primarily to provide support and relieve symptoms:
- Mechanism of Action: A pessary is a device, usually made of flexible silicone, that is inserted into the vagina and placed in a position that physically supports the prolapsed uterus and other pelvic organs. It acts as a kind of internal brace.
- Symptom Relief: By providing support, the pessary helps to lift the uterus out of the vagina, reducing the feeling of pressure, fullness, or bulging. It can also improve associated urinary or bowel symptoms caused by the prolapse.
- Alternative to Surgery: Pessaries are a valuable option for women who do not wish to undergo surgery, are not candidates for surgery due to other health conditions, or are waiting for surgery.
- Temporary or Long-Term Use: Pessaries can be used temporarily (e.g., during pregnancy or while awaiting surgery) or as a long-term management option.
- Fitting and Care: Pessaries must be properly fitted by a healthcare professional. Women need to be taught how to insert and remove the pessary for cleaning, or they need to return to the clinic regularly for cleaning and check-ups.
- Considerations: While effective, pessaries can sometimes cause vaginal irritation, discharge, or infection. Regular follow-up is necessary to ensure proper fit and manage any complications.
6. Discuss the psychological impact of uterine prolapse on a woman's quality of life.
Uterine prolapse, particularly when symptomatic, can have a significant negative impact on a woman's psychological well-being and overall quality of life, extending beyond the physical discomfort.
- Loss of Control and Embarrassment: The inability to control bodily functions, especially if urinary or fecal leakage is present, can be deeply embarrassing and lead to feelings of shame and loss of control over one's body.
- Anxiety and Depression: Chronic symptoms, the discomfort, fear of accidental leakage, and the impact on daily activities can contribute to increased anxiety and symptoms of depression.
- Social Isolation: Fear of odor, leakage, or embarrassment can lead women to avoid social situations, work, exercise, and other activities, leading to social isolation and loneliness.
- Impact on Sexuality and Intimacy: Pain during intercourse, the physical presence of the prolapse, and feelings of embarrassment can negatively impact a woman's sexual desire and function, straining intimate relationships.
- Reduced Self-Esteem and Body Image: The physical changes and symptoms can affect a woman's self-esteem and body image, making her feel less confident or less feminine.
- Sleep Disturbances: Discomfort, pain, or anxiety related to the prolapse can interfere with sleep.
- Frustration and Helplessness: Dealing with persistent symptoms and the impact on daily life can lead to feelings of frustration or helplessness.
7. Outline the nursing care for a woman with uterine prolapse.
Nursing care for a woman with uterine prolapse involves assessment, education, support, and assistance with management strategies, both non-surgical and surgical.
- Assessment: Assess symptoms (pressure, pain, urinary/bowel issues, vaginal bulge), their severity, and impact on quality of life. Assess risk factors (childbirth history, age, chronic conditions). Assess knowledge about prolapse and management options.
- Education:
- Explain what uterine prolapse is in simple terms and its common causes.
- Educate on conservative management options: importance of lifestyle changes (weight loss, managing cough/constipation), and how to perform pelvic floor (Kegel) exercises correctly and consistently.
- If a pessary is used, teach insertion, removal, cleaning, and when to seek help (irritation, increased discharge, pain). Explain the importance of follow-up for pessary care.
- If surgery is planned, educate on the procedure, pre-operative instructions, expected recovery, and post-operative care.
- Emotional Support: Provide a supportive and non-judgmental environment. Listen to her concerns about symptoms, embarrassment, impact on sexuality, or fear of surgery. Address any feelings of shame or guilt related to the condition.
- Symptom Management Support: Advise on strategies to manage specific symptoms, such as dietary changes for constipation, or products for managing urinary incontinence (e.g., pads) while awaiting other treatment.
- Prepare for Procedures: Prepare the patient for physical examination and any diagnostic tests (e.g., asking her to cough or strain during the exam).
- Post-Operative Care (if applicable): Provide care as per the surgical care plan, focusing on pain management, wound care, monitoring for complications, and gradual mobilization.
- Follow-up: Emphasize the importance of attending follow-up appointments to monitor the prolapse or the success of treatment.
- Promote Healthy Lifestyle: Reinforce education on healthy weight management and avoiding heavy lifting to prevent worsening prolapse.
8. Mention three complications that may arise from untreated uterine prolapse.
If uterine prolapse is left untreated, particularly in moderate to severe cases, complications can develop:
- Ulceration and Infection: If the cervix or part of the uterus protrudes outside the vagina (Stage 3 or 4), the exposed tissue can rub against clothing, become irritated, and develop sores or ulcers. These ulcers can become infected.
- Urinary Problems: While some women with prolapse have incontinence, others may experience difficulty completely emptying their bladder. In severe cases, the prolapse can kink the urethra or press on the bladder, leading to urinary retention (inability to urinate) or hydronephrosis (swelling of the kidneys due to urine backup if the ureters are compressed in very rare, severe cases). Recurrent urinary tract infections are also more common.
- Bowel Problems: If there is an associated rectocele (rectum prolapsing into the vagina), untreated prolapse can worsen constipation and make it difficult to have a bowel movement, sometimes requiring manual assistance (splinting).
- Pain and Discomfort: While not always the case, untreated prolapse can lead to ongoing or worsening pelvic pressure, pain, and discomfort, significantly impacting quality of life.
- Sexual Dysfunction: Painful intercourse or the presence of a mass in the vagina can make sexual activity difficult or impossible.
9. Describe the diagnostic methods used to confirm uterine prolapse.
Diagnosing uterine prolapse is primarily based on physical examination and clinical assessment:
- Medical History: Gathering information about the woman's symptoms (pelvic pressure, bulging, urinary/bowel issues, pain), childbirth history, chronic health conditions, and lifestyle factors (e.g., heavy lifting, chronic cough, constipation).
- Physical Examination (Pelvic Exam): This is the main diagnostic method.
- The woman is examined while lying down and sometimes also while standing or sitting.
- The healthcare provider visually inspects the vaginal opening and inside the vagina using a speculum.
- The woman is asked to cough or strain (Valsalva maneuver) to make the prolapse more apparent, allowing the provider to assess how far the uterus and other pelvic organs descend.
- A bimanual examination (feeling with fingers in the vagina and on the abdomen) is done to assess the position and size of the uterus.
- The severity of the prolapse is graded or staged during this examination based on the degree of descent.
- Bladder Function Tests (Urodynamic Studies): If urinary symptoms are present (especially incontinence or difficulty emptying), tests may be performed to assess bladder function and how the prolapse affects it.
- Bowel Function Tests: If bowel symptoms are prominent, tests may be done to assess bowel function and identify associated rectocele or enterocele.
- Imaging Studies (Less Common for Primary Diagnosis of Prolapse): While not routinely used for initial diagnosis, pelvic ultrasound or MRI may sometimes be used in complex cases or to rule out other pelvic conditions that might cause similar symptoms.
10. State three preventive measures for uterine prolapse.
Preventing uterine prolapse involves maintaining the strength of the pelvic floor and minimizing factors that increase abdominal pressure:
- Pelvic Floor Muscle Training (Kegel Exercises): Regularly performing Kegel exercises to strengthen the pelvic floor muscles. This is especially important during and after pregnancy and as women age. Proper technique is key for effectiveness.
- Maintaining a Healthy Weight: Avoiding or managing obesity reduces the chronic strain on the pelvic floor from excess abdominal weight.
- Preventing and Managing Constipation: Straining during bowel movements puts significant pressure on the pelvic floor. Eating a diet high in fiber, drinking plenty of fluids, and using stool softeners if needed helps maintain regular, soft bowel movements.
- Avoiding Heavy Lifting and Straining: Reducing the amount of weight lifted and using proper lifting techniques to minimize increased abdominal pressure.
- Managing Chronic Cough: Seeking treatment for conditions that cause chronic coughing (e.g., smoking, asthma) to reduce repeated downward pressure on the pelvic floor.
- Proper Technique During Childbirth (if possible): While not always controllable, minimizing the duration of the pushing phase and avoiding unnecessary forceful deliveries may potentially reduce pelvic floor trauma.
SECTION D: Long Essay Questions (10 Marks Each)
1. Discuss the causes, risk factors, clinical presentation, and complications of uterine prolapse.
What is Uterine Prolapse?
- Uterine prolapse is the descent or dropping of the uterus from its normal position into or out of the vagina.
- It occurs due to weakness or damage to the pelvic floor muscles and supporting ligaments that hold the uterus in place.
- It is a common type of pelvic organ prolapse.
Causes:
- The primary cause is damage or stretching of the pelvic floor muscles and connective tissues.
- Vaginal Childbirth: The most significant cause. The forces of labor and delivery, especially multiple deliveries, large babies, prolonged pushing, or instrumental deliveries (forceps, vacuum), stretch and injure the pelvic floor muscles and ligaments.
- Aging: Natural loss of muscle tone and tissue elasticity with age weakens the pelvic support structures.
- Menopause: The decline in estrogen levels after menopause contributes to thinning and weakening of pelvic tissues.
- Increased Abdominal Pressure: Chronic conditions that repeatedly increase pressure on the pelvic floor, such as:
- Chronic cough (e.g., from smoking, asthma, chronic bronchitis).
- Chronic constipation and straining during defecation.
- Regular heavy lifting (occupational or recreational).
- Obesity.
- Genetics: Some women may have a genetic predisposition to weaker connective tissues.
- Prior Pelvic Surgery: Hysterectomy (removal of the uterus) itself removes one prolapsed organ but can sometimes predispose to prolapse of the vaginal vault if not properly supported, or make prolapse of other organs more noticeable.
Risk Factors:
- Number of vaginal deliveries (higher number, higher risk).
- Increasing age.
- Menopause.
- Obesity.
- History of chronic cough or constipation.
- History of heavy lifting.
- Family history of prolapse.
- Race (some studies suggest higher rates in Caucasian women, but can affect all races).
Clinical Presentation (Signs and Symptoms):
- Symptoms vary with the stage of prolapse; mild prolapse may be asymptomatic.
- Pelvic Pressure or Heaviness: A dragging sensation or feeling of fullness in the pelvis or vagina, often worsening with standing and improving with lying down.
- Vaginal Bulge: A sensation of "something falling out" or a palpable mass or bulge in the vagina, which may be the cervix or uterus itself.
- Urinary Symptoms:
- Urinary incontinence (stress incontinence - leaking with cough/sneeze, or urgency incontinence).
- Urinary frequency or urgency.
- Difficulty initiating urination or feeling of incomplete bladder emptying.
- Rarely, urinary retention or kinking of ureters leading to kidney issues.
- Bowel Symptoms:
- Constipation.
- Difficulty with defecation, sometimes requiring manual pressure on the vagina to assist bowel movement (splinting).
- Lower Back Pain: Can be associated with the dragging sensation.
- Painful Intercourse (Dyspareunia): May be due to the physical presence of the prolapse or associated tissue changes.
Complications of Untreated Uterine Prolapse:
- Ulceration and Infection: Exposure of the prolapsed tissue outside the vagina can lead to irritation, sores, and infection.
- Urinary Tract Issues: Recurrent UTIs, difficulty emptying bladder, urinary retention, and rarely kidney damage.
- Bowel Dysfunction: Worsening constipation and difficulty with defecation.
- Pain and Discomfort: Ongoing or increasing pain and pressure impacting quality of life.
- Sexual Dysfunction: Continued pain or discomfort with sexual activity.
- Psychosocial Impact: As discussed previously, can lead to social isolation, embarrassment, anxiety, and depression.
2. Describe the stages of uterine prolapse and how they are clinically classified.
Uterine prolapse is clinically classified or staged based on the degree of descent of the uterus into or out of the vagina. Different staging systems exist, but a common approach uses four main stages, often determined during a pelvic examination where the woman is asked to strain (cough or bear down).
Stages of Uterine Prolapse (Based on Descent Relative to the Hymen):
- Stage 0: No prolapse. The cervix (lowest part of the uterus) is at the normal position (above the level of the hymen).
- Stage 1: Mild prolapse. The cervix has descended into the upper half of the vagina, but it is still more than 1 cm above the level of the hymen (the vaginal opening).
- Stage 2: Moderate prolapse. The cervix has descended further and is within 1 cm above or below the level of the hymen. It may be visible at the vaginal opening, especially with straining.
- Stage 3: Severe prolapse. The cervix has descended more than 1 cm below the level of the hymen but the entire uterus has not prolapsed completely outside the vagina.
- Stage 4: Complete prolapse (Procidentia). The entire uterus, including the cervix and uterine body, has prolapsed completely outside the vagina.
Clinical Classification (How it's determined):
- Pelvic Examination: The staging is primarily done during a pelvic examination.
- Assessment During Straining: The healthcare provider asks the woman to strain or cough while inspecting the vagina. This maneuver increases abdominal pressure and makes any prolapse more evident.
- Reference Point: The plane of the hymen (the vaginal opening) is used as a key reference point for staging. Measurements are taken relative to this point.
- POPQ System: The Pelvic Organ Prolapse Quantification (POPQ) system is a more detailed and objective system that uses specific anatomical points in the vagina and pelvis and measures their position relative to the hymen during straining. It provides a precise description of the prolapse of different vaginal segments (anterior, posterior, apical) and the uterus. While more detailed, the simpler 4-stage system is also widely used for clinical purposes.
- Assessment of Associated Prolapse: During classification, the provider also assesses for the presence and stage of other pelvic organ prolapses that often occur with uterine prolapse, such as cystocele (bladder into vagina), rectocele (rectum into vagina), or enterocele (small intestine into vagina).
3. Explain the surgical management options for uterine prolapse and the postoperative care required.
Surgical management is often the preferred option for symptomatic uterine prolapse, particularly Stage 2 or higher, or when non-surgical methods like pessaries are ineffective or not desired. Surgery aims to restore the normal position of the pelvic organs and repair the weakened support structures.
Surgical Management Options:
- Hysterectomy with Vaginal Support: This is a common approach, especially for more severe uterine prolapse or in women who have completed childbearing.
- Procedure: The uterus is removed (hysterectomy), often through a vaginal approach (vaginal hysterectomy), which allows access to repair the pelvic floor muscles and attach the top of the vagina (vaginal cuff) to stable ligaments in the pelvis (e.g., sacrospinous ligament fixation, uterosacral ligament suspension) to prevent vaginal vault prolapse. An abdominal or laparoscopic approach may also be used for the hysterectomy, followed by a procedure to suspend the vagina.
- Goal: Removes the prolapsed uterus and provides support to the vaginal vault to prevent subsequent vaginal prolapse.
- Uterus Preservation Surgery: For women with uterine prolapse who wish to preserve their uterus (e.g., for future pregnancy, though this is less common with significant prolapse requiring surgery, or for personal preference), procedures can be done to suspend the uterus.
- Procedure: The uterus is attached to ligaments or mesh to lift and secure it in a higher position within the pelvis. This can be done abdominally (e.g., sacrohysteropexy, attaching the uterus to the sacrum with mesh) or laparoscopically/robotically.
- Goal: Corrects the prolapse while preserving the uterus.
- Colpocleisis (Vaginal Closure Surgery):
- Procedure: The vaginal canal is partially or completely closed surgically. This is a simpler procedure with a lower risk of complications compared to reconstructive surgery.
- Indications: An option for older women with severe prolapse who no longer plan to be sexually active and desire a less invasive, highly effective procedure to eliminate the prolapse and associated symptoms. It prevents future vaginal intercourse.
- Repair of Associated Prolapse: Surgery for uterine prolapse often includes repair of any associated cystocele (bladder prolapse) or rectocele (rectum prolapse) at the same time.
Postoperative Care Required:
- Pain Management: Assess and manage post-operative pain effectively with prescribed analgesics.
- Monitoring: Monitor vital signs, incision sites (if applicable), and vaginal bleeding/discharge. Monitor urine output, especially if a urinary catheter is in place (common after pelvic surgery).
- Catheter Care (if applicable): If a urinary catheter is used (e.g., for a few days after repair), provide meticulous care and monitor for signs of UTI.
- Bowel Management: Prevent constipation and straining by encouraging adequate fluid and fiber intake and administering stool softeners as ordered.
- Activity Restrictions: Educate the patient on activity restrictions, typically avoiding heavy lifting, strenuous exercise, and sometimes prolonged sitting for several weeks to months to allow the repair to heal properly and prevent tension on the surgical site. Gradual increase in activity is encouraged.
- Wound Care: Provide care for any surgical incisions (abdominal or vaginal).
- Avoiding Sexual Intercourse: Advise abstaining from sexual intercourse for a specified period (usually several weeks to months) to allow complete healing of the vaginal repair.
- Monitoring for Complications: Be vigilant for signs of complications such as infection (fever, increased pain, wound issues, foul discharge), bleeding, blood clots, difficulty urinating or having a bowel movement, or signs of the prolapse returning.
- Education for Discharge: Provide clear verbal and written instructions on home care, symptom management, activity restrictions, warning signs, and follow-up appointments.
- Emotional Support: Continue to provide emotional support as recovery from surgery can be challenging.
4. Discuss the role of pelvic floor exercises in the prevention and management of uterine prolapse.
Pelvic floor exercises, commonly known as Kegel exercises, play a significant role in both preventing uterine prolapse from worsening and managing symptoms, particularly in mild to moderate cases. They focus on strengthening the muscles that support the pelvic organs.
How Pelvic Floor Exercises Work:
- The pelvic floor is a group of muscles and connective tissues at the bottom of the pelvis that act like a hammock, supporting the bladder, uterus, rectum, and vagina.
- Pelvic floor exercises involve consciously contracting and relaxing these muscles, making them stronger and potentially thicker.
Role in Prevention:
- Strengthening Support: By strengthening the pelvic floor muscles, these exercises provide better support for the pelvic organs, helping to prevent or reduce the likelihood of the uterus descending.
- Maintaining Muscle Tone: Regular exercises help maintain the tone and strength of these muscles throughout life, especially as women age and hormone levels decline.
- During Pregnancy and Postpartum: Performing pelvic floor exercises during pregnancy and in the postpartum period is particularly important to help the muscles recover from the strain of pregnancy and childbirth.
Role in Management:
- Symptom Improvement: Pelvic floor exercises can help improve symptoms associated with mild to moderate uterine prolapse and associated bladder or bowel prolapse. Strengthening the muscles can provide better support, reducing the feeling of pressure or bulging, and can improve urinary incontinence.
- Slowing Progression: While they may not reverse significant prolapse, regular exercises can potentially help slow down the worsening of the prolapse.
- Before and After Surgery: Exercises may be recommended before surgery to improve muscle tone and after surgery to help with recovery and strengthen the pelvic floor after the repair.
- Adjunct to Pessary Use: Strengthening the pelvic floor can sometimes help a pessary stay in place better.
Important Considerations:
- Correct Technique: It is crucial to perform Kegel exercises correctly. This involves identifying the right muscles (the ones used to stop the flow of urine or prevent passing gas) and squeezing and lifting them without using abdominal, thigh, or buttock muscles.
- Consistency: Exercises need to be done regularly and consistently over time to see results.
- Guidance: Sometimes, guidance from a healthcare provider, physical therapist specializing in pelvic floor health, or biofeedback can help ensure correct technique and improve effectiveness.
- Limitations: Pelvic floor exercises are generally most effective for mild to moderate prolapse and are not a cure for severe prolapse, which usually requires surgical intervention. They address muscle weakness but not severe damage to ligaments.
5. Write an essay on the psychological and emotional impact of uterine prolapse on women and the nurse's role in supporting them.
Uterine prolapse, a condition characterized by the descent of the uterus into the vagina, extends its impact far beyond physical discomfort. It can significantly affect a woman's psychological and emotional well-being, often leading to feelings of embarrassment, shame, and a reduced quality of life. Nurses play a crucial role in providing holistic care that addresses these sensitive psychosocial aspects, alongside managing the physical symptoms.
The most prominent psychological impacts often stem from the embarrassment and shame associated with the symptoms, particularly if there is associated urinary or fecal leakage. The constant feeling of a bulge in the vagina, the odor of urine, or the inability to control bodily functions can be deeply humiliating. This shame often leads to social isolation, as women may avoid activities like exercise, social gatherings, or even leaving their homes for fear of accidental leakage or being discovered. They may withdraw from friends and family, leading to loneliness and a loss of social support.
Living with chronic symptoms and their impact on daily life can contribute to anxiety and depression. The constant discomfort, worry about accidents, and the feeling of being "broken" or not in control of one's body can significantly impact mental health. Women may feel frustrated, hopeless, and despair about their condition and its effect on their future.
Uterine prolapse can also significantly affect a woman's sexuality and intimate relationships. Pain or the physical presence of the prolapse during intercourse can make sexual activity difficult or impossible. This can lead to a loss of intimacy, frustration, and strain in relationships with partners. Women may feel less desirable or worry about their partner's perception of their body. The emotional burden of dealing with the condition can also reduce sexual desire.
Furthermore, uterine prolapse can impact a woman's body image and self-esteem. The physical changes and symptoms can make women feel less feminine or attractive. This is particularly challenging as women age and navigate other body changes. The condition can challenge their sense of self-worth and confidence.
Recognizing these significant psychosocial impacts, the nurse's role in supporting women with uterine prolapse is vital. Empathetic listening is a crucial first step. Providing a safe, confidential, and non-judgmental space allows women to openly share their experiences, fears, and emotions. Nurses should actively listen to their concerns, validate their feelings, and reassure them that their experiences are common and that help is available.
Education is also key. Explaining what uterine prolapse is, its causes, and that it is a treatable condition can help reduce anxiety and self-blame. Discussing management options, both surgical and non-surgical, provides a sense of hope and control. Educating on managing physical symptoms effectively can also alleviate associated emotional distress.
Nurses can also facilitate psychosocial support by connecting women with counseling services, psychologists, or support groups for women with pelvic floor disorders. Peer support can be invaluable, allowing women to connect with others who understand their experiences. Encouraging open communication with partners and family members can help build support systems.
Finally, advocating for respectful and dignified care within the healthcare setting is important to counter any potential stigma. By addressing the psychological and emotional burden with sensitivity and providing comprehensive support, nurses empower women to cope with the challenges of uterine prolapse, improve their quality of life, and regain a sense of dignity and well-being.
6. Outline a comprehensive nursing care plan for a woman with uterine prolapse.
A comprehensive nursing care plan for a woman with uterine prolapse addresses her physical symptoms, emotional needs, knowledge deficits, and potential for complications, guiding her through management options and recovery.
Nursing Care Plan Components:
- Assessment:
- Assess the type, severity, and duration of symptoms (pelvic pressure, bulging, urinary issues, bowel issues, pain).
- Assess the impact of symptoms on her quality of life, daily activities, social interactions, and sexual function.
- Assess risk factors (childbirth history, age, weight, chronic cough/constipation, family history).
- Assess psychological state (anxiety, embarrassment, depression, self-esteem).
- Assess knowledge about uterine prolapse, management options, and potential complications.
- Assess support system.
- Nursing Diagnoses (Examples):
- Pelvic Pressure/Discomfort related to uterine descent.
- Stress Urinary Incontinence related to altered pelvic floor support.
- Risk for Constipation related to associated rectocele and pressure.
- Disturbed Body Image related to vaginal bulging and leakage.
- Social Isolation related to embarrassment and fear of symptoms.
- Deficient Knowledge regarding condition and management options.
- Goals:
- Patient will report reduced pelvic pressure and discomfort.
- Patient will experience improved urinary and bowel function.
- Patient will express feelings about body image and feel more confident.
- Patient will verbalize understanding of uterine prolapse and management options.
- Patient will participate in chosen management plan.
- Nursing Interventions:
- Symptom Management Support:
- Pressure/Discomfort: Advise on rest, proper positioning (lying down), and managing underlying factors like constipation.
- Urinary Issues: Educate on pelvic floor exercises. Discuss products for managing incontinence (pads). Advise on timely voiding. If urinary retention is a risk, educate on signs and when to seek help.
- Bowel Issues: Advise on dietary changes (fiber, fluids) and activity to prevent constipation. Educate on proper toileting posture.
- Education on Management Options:
- Provide detailed education on non-surgical options (lifestyle changes, pelvic floor exercises, pessaries) and surgical options, discussing benefits, risks, and expectations for each.
- If a pessary is chosen, provide thorough teaching on insertion, removal, cleaning, and necessary follow-up.
- If surgery is planned, provide pre- and post-operative education and care.
- Emotional and Psychosocial Support:
- Create a safe, non-judgmental space. Listen actively and validate her feelings of embarrassment, anxiety, or sadness.
- Address body image concerns sensitively.
- Provide resources for counseling or support groups.
- Education on Prevention: Reinforce education on preventing worsening prolapse through weight management, avoiding heavy lifting, and managing chronic cough/constipation.
- Promote Healthy Lifestyle: Encourage a balanced diet, adequate hydration, and regular, appropriate exercise.
- Monitor for Complications: Educate on warning signs of complications (ulceration, infection, urinary retention) and when to seek medical help.
- Follow-up Care: Emphasize the importance of attending follow-up appointments to monitor progress and effectiveness of management.
- Symptom Management Support:
- Evaluation: Monitor changes in symptoms, assess effectiveness of chosen management, assess patient's understanding and adherence, and evaluate her overall well-being.
7. Discuss the importance of health education in the management and prevention of uterine prolapse.
Health education is a cornerstone of effective management and prevention of uterine prolapse. By providing women with accurate information and empowering them with knowledge, healthcare providers can significantly impact their ability to make informed decisions, adopt preventive behaviors, and manage their condition effectively.
Importance of Health Education in Prevention:
- Awareness of Risk Factors: Educating women about the factors that increase their risk of prolapse (e.g., childbirth, aging, obesity, chronic cough/constipation, heavy lifting) helps them understand why they might be susceptible and highlights areas where they can take action.
- Promotion of Pelvic Floor Exercises: Teaching women how to perform Kegel exercises correctly and explaining their importance in strengthening the pelvic floor muscles provides them with a powerful tool for preventing prolapse or reducing its severity. This education should start early, ideally during antenatal and postnatal care.
- Healthy Lifestyle Promotion: Educating on the benefits of maintaining a healthy weight, eating a high-fiber diet to prevent constipation, and avoiding smoking (which causes chronic cough) empowers women to adopt lifestyle habits that reduce strain on the pelvic floor.
- Proper Body Mechanics: Teaching safe lifting techniques can help reduce the risk of injury to the pelvic floor.
Importance of Health Education in Management:
- Understanding the Condition: Explaining what uterine prolapse is, the different stages, and how it causes symptoms helps reduce anxiety and empowers women to understand their diagnosis.
- Informed Decision-Making: Providing clear, unbiased information about all available management options (lifestyle changes, pelvic floor exercises, pessaries, surgery) allows women to weigh the benefits and risks of each and make decisions that align with their preferences, goals (e.g., future fertility), and lifestyle.
- Effective Use of Management Strategies: Detailed education on how to correctly perform pelvic floor exercises, how to insert and care for a pessary (if chosen), or what to expect with surgical recovery and post-operative care is crucial for the success of the chosen management plan.
- Managing Symptoms: Education on strategies to manage associated urinary or bowel symptoms improves comfort and quality of life.
- Recognizing Complications: Teaching women the warning signs of complications (ulceration, infection, urinary retention) ensures they seek timely medical attention if problems arise.
- Emotional Support: Education can help normalize the condition and reduce feelings of embarrassment or shame, facilitating emotional coping.
8. Explain how lifestyle changes and physical therapy can aid in the management of uterine prolapse.
Lifestyle changes and physical therapy, particularly pelvic floor physical therapy, are important components of the non-surgical management of uterine prolapse, especially for mild to moderate cases, and as supportive measures alongside other treatments.
Lifestyle Changes in Management:
- Weight Management: If overweight or obese, losing even a small amount of weight can significantly reduce the chronic downward pressure on the pelvic floor, which can help alleviate symptoms and potentially slow down the progression of the prolapse.
- Preventing and Managing Constipation: Straining during bowel movements puts considerable pressure on the pelvic floor. Increasing dietary fiber intake, drinking plenty of fluids, and using stool softeners or laxatives as needed to ensure soft, easy-to-pass stools reduces this strain.
- Avoiding Heavy Lifting and Straining: Activities that involve lifting heavy objects or significant physical straining increase abdominal pressure, pushing down on the pelvic organs. Modifying lifting techniques or avoiding such activities helps reduce stress on the pelvic floor.
- Managing Chronic Cough: Chronic coughing also increases abdominal pressure. Seeking treatment for conditions that cause chronic cough (e.g., smoking cessation, managing asthma or bronchitis) is important.
Role of Physical Therapy (Pelvic Floor Physical Therapy):
- Assessment: A specialized physical therapist will assess the strength, endurance, and coordination of the pelvic floor muscles.
- Correct Technique for Pelvic Floor Exercises: Physical therapists teach women how to correctly identify and contract their pelvic floor muscles (Kegel exercises). Many women perform these exercises incorrectly.
- Strengthening and Rehabilitation: They design individualized exercise programs to strengthen the pelvic floor muscles, improve muscle control, and increase endurance. This can involve various exercises, not just Kegels.
- Biofeedback: Some physical therapists use biofeedback techniques, where sensors are placed near the pelvic floor muscles, and the patient can see on a screen whether they are contracting the correct muscles effectively. This helps improve technique.
- Electrical Stimulation: In some cases, electrical stimulation may be used to help identify and strengthen weak pelvic floor muscles.
- Education: Physical therapists provide education on pelvic anatomy, how the pelvic floor muscles work, proper body mechanics, and strategies to reduce strain during daily activities (e.g., proper posture, bracing the pelvic floor with lifting/coughing).
- Managing Associated Symptoms: Physical therapy can also help manage associated symptoms like urinary incontinence or pelvic pain.
9. Discuss the potential complications of untreated uterine prolapse and the importance of early intervention.
Untreated uterine prolapse, particularly as it progresses to more advanced stages, can lead to a range of complications that affect physical health, increase the risk of infections, and significantly impact a woman's quality of life. Early intervention is important to prevent these complications from developing or worsening.
Potential Complications of Untreated Uterine Prolapse:
- Ulceration and Infection: In Stage 3 or 4 prolapse where the cervix or uterus protrudes outside the vagina, the exposed tissues are constantly rubbing against clothing and exposed to the environment. This can lead to irritation, breakdown of the skin (ulceration), and secondary infection of the ulcers.
- Urinary Tract Infections (UTIs): Prolapse, especially if it involves the bladder (cystocele), can prevent the bladder from emptying completely, leaving residual urine. This stagnant urine is a breeding ground for bacteria, increasing the risk of recurrent UTIs. In severe cases, the prolapse might also make it difficult to maintain proper hygiene, further contributing to UTIs.
- Urinary Retention: In some cases, particularly with severe prolapse, the kinking of the urethra or pressure on the bladder neck can make it difficult or impossible to urinate, leading to urinary retention. This requires catheterization and, if chronic, can potentially impact kidney function over time.
- Bowel Dysfunction: If there is an associated rectocele, untreated prolapse can worsen constipation and make bowel movements difficult and incomplete.
- Progression of Prolapse: Without intervention, the prolapse is likely to worsen over time as the pelvic floor muscles and ligaments continue to weaken or are subjected to ongoing strain.
- Pain and Discomfort: While not always present, ongoing pressure, aching, and potential nerve compression from worsening prolapse can lead to chronic pelvic pain, back pain, and discomfort.
- Sexual Dysfunction: Untreated prolapse can severely impact sexual health due to pain, discomfort, or physical obstruction, leading to avoidance of sexual activity and relationship strain.
- Psychosocial Impact: As discussed previously, the chronic symptoms, embarrassment, and physical limitations can lead to significant anxiety, depression, social isolation, and reduced quality of life.
Importance of Early Intervention:
- Preventing Progression: Starting with conservative measures like pelvic floor exercises and lifestyle changes in mild prolapse may help prevent or slow down its progression to more severe stages, reducing the likelihood of needing surgery.
- Managing Symptoms Early: Addressing symptoms like urinary incontinence or constipation early improves comfort and quality of life and can prevent them from worsening.
- Avoiding Complications: Treating prolapse before it reaches advanced stages reduces the risk of ulceration, severe infections, and significant urinary or bowel dysfunction.
- More Treatment Options: Early or moderate prolapse may be effectively managed with non-surgical options like pessaries or pelvic floor physical therapy, which may not be sufficient for severe prolapse.
- Better Surgical Outcomes (if needed): While severe prolapse requires surgery, addressing it earlier can sometimes lead to less complex surgical procedures and potentially better long-term outcomes, although this depends on the individual case.
- Improved Quality of Life: Early intervention focuses on alleviating symptoms and preventing their impact on daily life, social interactions, and emotional well-being.
10. Explain the role of a multidisciplinary approach in managing severe uterine prolapse.
Managing severe uterine prolapse, especially when it is complex or involves multiple pelvic organs and has significant impact on a woman's life, often requires a multidisciplinary approach involving several healthcare specialists working together. This ensures that all aspects of the condition and the woman's overall health are addressed for the best possible outcome.
Role of a Multidisciplinary Approach:
- Accurate Diagnosis and Assessment:
- Gynecologist/Urogynecologist: Specialists in female pelvic medicine and reconstructive surgery are essential for accurate diagnosis and staging of the uterine prolapse and any associated bladder, rectal, or vaginal prolapse. They assess the integrity of the pelvic floor support structures.
- Radiologist: May be involved for imaging studies (e.g., pelvic MRI, dynamic MRI) in complex cases to better visualize the extent of prolapse and associated issues.
- Comprehensive Treatment Planning:
- Surgeon (Gynecologic Surgeon or Urogynecologist): Plans and performs the surgical repair, choosing the most appropriate procedure based on the type and severity of prolapse, the woman's anatomy, and her goals (e.g., hysterectomy vs. uterus preservation, type of suspension).
- Urologist: May be involved if there are significant or complex urinary symptoms (e.g., severe incontinence, urinary retention) requiring specialized evaluation (urodynamic studies) or management.
- Colorectal Surgeon: May be involved if there are significant or complex bowel issues or a large rectocele requiring specialized repair.
- Anesthesiologist: Essential for managing anesthesia during surgery.
- Addressing Associated Conditions:
- Primary Care Physician/Internist: Manages the woman's overall health, including chronic conditions (e.g., diabetes, hypertension, lung disease causing chronic cough) that can affect surgical risk or contribute to prolapse. Optimizing these conditions before surgery is crucial.
- Physical Therapist (Pelvic Floor Specialist): Provides pre-operative conditioning and post-operative rehabilitation, teaching pelvic floor exercises and strategies to reduce strain, which are important for improving muscle function and preventing recurrence.
- Dietitian: Can help manage obesity or chronic constipation through dietary advice.
- Psychosocial Support:
- Psychologist/Counselor: Provides emotional support and counseling to help the woman cope with the physical, emotional, and social impact of severe prolapse, anxiety about surgery, and body image concerns.
- Social Worker: May assist with practical issues related to hospitalization, recovery, and support systems.
- Optimizing Recovery and Follow-up:
- The entire team collaborates on post-operative care protocols.
- Follow-up involves assessment by relevant specialists to monitor the success of the repair, manage any ongoing symptoms, and prevent recurrence.
Gynecology Question for Revision - Topic 13
This section covers Genital Prolapse (Continued from Topic 12).
SECTION A: Multiple Choice Questions (40 Marks)
1. Genital prolapse refers to:
2. The most common cause of genital prolapse is:
3. A key risk factor for genital prolapse is:
4. The main symptom of genital prolapse is:
5. The classification of genital prolapse is based on:
6. The most common type of genital prolapse is:
7. One of the complications of untreated genital prolapse is:
8. Genital prolapse is most commonly seen in women who:
9. The diagnosis of genital prolapse is confirmed by:
10. The treatment of genital prolapse often includes:
SECTION B: Fill in the Blanks (10 Marks)
1. Genital prolapse is often associated with the descent of the ________ into the vaginal canal.
2. The most common risk factor for genital prolapse is ________.
3. A prolapsed bladder is known as a ________.
4. ________ is a common symptom where women feel a bulge or fullness in the vagina.
5. In severe cases of genital prolapse, the uterus may protrude outside the ________.
6. A vaginal ________ is used to provide support to the prolapsed pelvic organs.
7. Pelvic floor ________ can be used to strengthen muscles and prevent further prolapse.
8. Genital prolapse is commonly seen in women over the age of ________.
9. One type of genital prolapse involves the descent of the rectum, which is called ________.
10. The first-line treatment for genital prolapse may include ________ exercises.
SECTION C: Short Essay Questions (10 Marks)
1. Define genital prolapse and describe its clinical presentation.
Definition:
- Genital prolapse, or pelvic organ prolapse, is a condition where one or more pelvic organs (uterus, bladder, rectum, small intestine, or vaginal vault) drop down from their normal position.
- These organs bulge or protrude into or outside the vaginal canal.
- It is caused by weakness or damage to the pelvic floor muscles and connective tissues that provide support.
Clinical Presentation:
- Symptoms vary with the type and severity of prolapse, from asymptomatic to severe.
- Vaginal Bulging/Pressure: The most common symptom is a feeling of a bulge, pressure, or something coming down or out of the vagina, often worsening with standing or straining.
- Urinary Symptoms: May include stress incontinence (leaking with cough/sneeze), urgency, frequency, difficulty emptying bladder, or urinary retention (in severe cases).
- Bowel Symptoms: Constipation, difficulty with defecation, or needing to splint (push on the vagina) to empty the rectum (with rectocele).
- Pelvic Pain or Discomfort: A dragging sensation or lower back pain.
- Painful Intercourse (Dyspareunia).
2. List three risk factors for genital prolapse.
Factors that increase the risk of developing genital prolapse include:
- Vaginal Childbirth: Especially multiple births, difficult deliveries, or large babies, which stretch and damage the pelvic floor.
- Aging and Menopause: Loss of muscle tone and tissue elasticity with age and declining estrogen levels.
- Increased Abdominal Pressure: Chronic cough, chronic constipation/straining, heavy lifting, and obesity put repeated pressure on the pelvic floor.
- Genetics: Some women have a predisposition to weaker connective tissues.
- Pelvic Surgery: Hysterectomy can sometimes be a risk factor for vaginal vault prolapse, although it removes uterine prolapse.
3. Discuss the different types of genital prolapse (e.g., cystocele, rectocele, uterine prolapse).
Genital prolapse involves the descent of various pelvic organs into or through the vagina:
- Cystocele: Prolapse of the bladder into the front wall of the vagina. Often causes urinary symptoms like incontinence or difficulty emptying.
- Rectocele: Prolapse of the rectum into the back wall of the vagina. Can cause difficulty with bowel movements.
- Uterine Prolapse: Descent of the uterus into or through the vagina. Discussed in Topic 12.
- Enterocele: Prolapse of the small intestine into the upper part of the vagina, often occurring after hysterectomy. Can cause a feeling of pressure or pain.
- Vaginal Vault Prolapse: Prolapse of the top of the vagina (vaginal cuff) after hysterectomy (removal of the uterus).
4. State three symptoms of genital prolapse.
Common symptoms experienced by women with genital prolapse include:
- Feeling of Bulging or Something Falling Out: A sensation of pressure or a lump in the vagina.
- Urinary Problems: Leaking urine (incontinence), needing to urinate often or urgently, or difficulty emptying the bladder.
- Bowel Problems: Constipation, difficulty passing stool, or needing to push on the vagina to have a bowel movement.
- Pelvic Pressure or Heaviness: A dragging sensation in the lower abdomen or pelvis.
- Painful Intercourse (Dyspareunia).
5. Describe how pelvic floor exercises can help prevent genital prolapse.
Pelvic floor exercises, like Kegel exercises, are a key strategy for preventing genital prolapse by strengthening the muscles that support the pelvic organs:
- Muscle Strengthening: Regularly contracting and relaxing the pelvic floor muscles builds their strength and endurance.
- Improved Support: Stronger pelvic floor muscles provide better support for the bladder, uterus, rectum, and vagina, helping to counteract the forces that cause them to descend.
- Counteracting Pressure: They help the pelvic floor better withstand increased abdominal pressure from activities like coughing, straining, or lifting.
- Tone Maintenance: Consistent exercise helps maintain muscle tone as women age.
- Postpartum Recovery: Exercises are particularly important after childbirth to help the pelvic floor muscles recover from stretching and trauma.
6. Explain the role of a pessary in managing genital prolapse.
A vaginal pessary is a non-surgical device used in the management of genital prolapse, serving to provide physical support and alleviate symptoms:
- Mechanical Support: The pessary, typically made of silicone, is inserted into the vagina and positioned to support the prolapsed organs (bladder, uterus, rectum, etc.).
- Symptom Relief: By holding the organs in a better position, the pessary reduces the feeling of vaginal bulging, pressure, and discomfort. It can also improve associated urinary and bowel symptoms.
- Alternative to Surgery: It's a valuable option for women who prefer not to have surgery, have health conditions that make surgery risky, or are waiting for surgery.
- Types: Pessaries come in various shapes and sizes and must be fitted by a healthcare professional.
- Care and Follow-up: Pessaries require regular removal and cleaning (either by the woman or at the clinic) and periodic follow-up appointments to ensure proper fit and check for complications like irritation or infection.
7. Mention three complications that can result from untreated genital prolapse.
If genital prolapse is not treated, especially in advanced stages, it can lead to several complications:
- Ulceration and Infection: When prolapsed tissues protrude outside the vagina, they can become irritated, develop sores (ulcers), and get infected due to friction and exposure.
- Urinary Problems: This can range from recurrent urinary tract infections (UTIs) due to incomplete bladder emptying to, in severe cases, urinary retention (inability to urinate) or even damage to the kidneys if the ureters are compressed.
- Bowel Dysfunction: Severe rectocele can lead to chronic constipation, difficult bowel movements, and the need for manual assistance.
- Pain and Discomfort: Untreated prolapse can cause ongoing or worsening pelvic pressure and pain.
- Sexual Dysfunction: Painful intercourse or physical obstruction from the prolapse can lead to avoidance of sexual activity.
- Psychosocial Impact: Untreated symptoms can severely impact a woman's emotional well-being, leading to isolation, embarrassment, anxiety, and depression.
8. Outline the nursing care for a woman with genital prolapse undergoing surgery.
Nursing care for a woman undergoing surgical repair for genital prolapse involves preparing her physically and emotionally, managing post-operative recovery, and providing education for successful healing at home.
- Pre-Operative Care:
- Assess vital signs, general health, and understanding of the surgical procedure (e.g., type of repair, hysterectomy if applicable).
- Address fears and anxieties about surgery, potential outcomes, and impact on body image/sexuality. Provide emotional support.
- Educate on pre-operative instructions (fasting, bowel preparation if needed).
- Teach post-operative exercises (deep breathing, coughing, leg exercises).
- Ensure consents are signed. Administer pre-operative medications (e.g., antibiotics).
- Post-Operative Care:
- Monitor vital signs regularly. Assess and manage pain effectively.
- Monitor surgical sites (vaginal and/or abdominal) for bleeding, swelling, or signs of infection.
- Monitor urine output and provide catheter care if a urinary catheter is in place.
- Monitor for return of bowel function and manage constipation (fluids, fiber, stool softeners).
- Encourage and assist with early ambulation to prevent blood clots and aid recovery.
- Provide wound care as needed.
- Assess for signs of complications (bleeding, infection, difficulty urinating/defecating, leg swelling).
- Discharge Planning and Education:
- Provide detailed instructions on wound care, expected vaginal bleeding/discharge, pain management at home, activity restrictions (avoiding heavy lifting, strenuous exercise), and when to resume normal activities and sexual intercourse (usually several months).
- Educate on signs of complications to report.
- Discuss the importance of follow-up appointments.
- Continue emotional support and address concerns about body image or sexual function.
- Reinforce education on lifestyle changes and pelvic floor exercises for long-term support.
9. Describe the psychosocial impact of genital prolapse on women.
The psychosocial impact of genital prolapse can be significant, affecting a woman's emotional well-being, social life, and intimate relationships due to the physical symptoms and their sensitive location.
- Embarrassment and Shame: The visible bulge or feeling of something falling out, along with potential leakage of urine or feces, can lead to deep embarrassment and shame.
- Social Isolation: Fear of odor or accidents can cause women to withdraw from social activities, work, and exercise, leading to loneliness and isolation.
- Anxiety and Depression: Chronic symptoms, discomfort, and the impact on daily life contribute to increased anxiety and risk of depression.
- Impact on Sexuality: Pain during intercourse, the physical presence of the prolapse, and body image concerns can severely affect sexual desire and function, straining intimate relationships.
- Loss of Dignity and Self-Esteem: The inability to control bodily functions can lead to a loss of dignity, reduced self-esteem, and a feeling of being "less than."
- Frustration: Dealing with persistent symptoms and the challenges of management can be frustrating.
10. Mention three preventive measures for genital prolapse.
Preventing genital prolapse focuses on maintaining the strength of the pelvic floor and minimizing factors that increase pressure on it:
- Pelvic Floor Muscle Training (Kegel Exercises): Regularly performing these exercises correctly to strengthen the supporting muscles. This is particularly important during and after pregnancy and as women age.
- Maintaining a Healthy Weight: Avoiding or managing obesity reduces the strain on the pelvic floor.
- Preventing and Managing Constipation: Eating a high-fiber diet, drinking enough fluids, and avoiding straining during bowel movements reduces downward pressure.
- Avoiding Heavy Lifting and Straining: Reducing activities that involve lifting heavy objects or using proper lifting techniques.
- Managing Chronic Cough: Seeking treatment for conditions that cause chronic coughing (like smoking-related cough or asthma) to reduce repeated pressure on the pelvic floor.
SECTION D: Long Essay Questions (10 Marks Each)
1. Discuss the causes, risk factors, clinical features, and classification of genital prolapse.
What is Genital Prolapse?
- Genital prolapse, or pelvic organ prolapse, is the descent or bulging of one or more pelvic organs (uterus, bladder, rectum, small intestine) from their normal positions into or through the vaginal canal.
- It is caused by weakness or damage to the pelvic floor muscles, ligaments, and connective tissues that provide support.
Causes:
- The primary cause is damage to the pelvic floor support structures.
- Vaginal Childbirth: The most significant cause. The stretching and trauma of labor and delivery, especially with multiple births, large babies, prolonged pushing, or instrumental deliveries, injure the pelvic floor muscles and connective tissues.
- Aging: Natural loss of muscle tone and tissue elasticity occurs with age, weakening support.
- Menopause: Decline in estrogen after menopause contributes to thinning and weakening of pelvic tissues.
- Increased Abdominal Pressure: Chronic conditions causing increased pressure (chronic cough, constipation, heavy lifting, obesity) strain the pelvic floor.
- Genetics: Predisposition to weaker connective tissues.
- Pelvic Surgery: Hysterectomy can remove uterine prolapse but may predispose to vaginal vault prolapse or make other types of prolapse more apparent.
Risk Factors:
- Number of vaginal deliveries.
- Increasing age.
- Menopause.
- Obesity.
- Chronic cough or constipation.
- History of heavy lifting.
- Family history of prolapse.
- Certain racial groups may have varying risks.
Clinical Features (Signs and Symptoms):
- Symptoms vary from asymptomatic to severe.
- Vaginal Bulging/Pressure: Feeling of something coming down or out of the vagina, pressure, or heaviness.
- Urinary Symptoms: Incontinence, frequency, urgency, difficulty emptying, retention (rare).
- Bowel Symptoms: Constipation, difficulty defecating, splinting (manual assistance).
- Pelvic Pain/Discomfort: Dragging sensation, lower back pain.
- Painful Intercourse (Dyspareunia).
- Symptoms often worsen with standing/straining and improve with lying down.
Classification (Staging):
- Genital prolapse is classified based on the degree of descent of the pelvic organs into or through the vagina, typically relative to the hymenal plane (vaginal opening).
- POPQ System: A detailed system using specific points and measurements to describe the position of different pelvic organs (anterior, posterior, apical compartments) relative to the hymen during straining. Provides a precise, objective description.
- Simpler Staging Systems: Often use 4 or 5 stages (e.g., Stage 0: no prolapse; Stage 1: descent into upper vagina; Stage 2: descent to vaginal opening; Stage 3: descent past vaginal opening; Stage 4: complete protrusion).
- Classification is determined during a pelvic examination, especially with straining.
2. Explain the stages of genital prolapse and how they are clinically classified.
Genital prolapse is staged to describe the severity of the descent of the pelvic organs relative to the vaginal opening (hymen). This staging is done during a clinical pelvic examination and is crucial for determining the appropriate management plan.
Clinical Classification and Stages (Commonly using a 4 or 5-stage system based on the Hymenal Plane):
- Reference Point: The Hymenal Plane: This is the level of the vaginal opening. Prolapse above the hymen is given negative numbers (e.g., -1 cm, -2 cm), at the hymen is 0 cm, and below the hymen is given positive numbers (e.g., +1 cm, +2 cm).
- Stage 0:
- Description: No prolapse. The pelvic organs are in their normal anatomical position.
- Position relative to Hymen: The lowest part of the prolapsed organ is at least 1 cm above the hymenal plane.
- Stage 1:
- Description: Mild prolapse. There is some descent, but it is less than halfway to the hymenal plane.
- Position relative to Hymen: The lowest part of the prolapsed organ is more than 1 cm above the hymenal plane.
- Stage 2:
- Description: Moderate prolapse. The prolapsed organ has descended further and is close to or at the vaginal opening.
- Position relative to Hymen: The lowest part of the prolapsed organ is within 1 cm above or below the hymenal plane.
- Stage 3:
- Description: Severe prolapse. The prolapsed organ has descended significantly past the vaginal opening.
- Position relative to Hymen: The lowest part of the prolapsed organ is more than 1 cm below the hymenal plane, but it is not complete prolapse.
- Stage 4:
- Description: Complete prolapse (Procidentia). The entire prolapsed organ (or combination of organs) has protruded completely outside the vaginal opening.
- Position relative to Hymen: The prolapsed organ is fully outside the vaginal opening.
Clinical Classification Method:
- Pelvic Examination: Performed by a healthcare provider.
- Assessment During Straining: The patient is asked to strain down or cough (Valsalva maneuver). This increases abdominal pressure, pushing the pelvic organs downwards and making the extent of prolapse visible and measurable.
- Visual Inspection and Measurement: The provider visually assesses the descent of the vaginal walls (anterior and posterior), the cervix/uterus (if present), and the vaginal vault (if hysterectomy has been done). They may use a ruler to measure the distance of the most descended part relative to the hymen.
- Assessment of Multiple Compartments: The examination evaluates the prolapse in different parts of the vagina: the anterior compartment (bladder/cystocele), the posterior compartment (rectum/rectocele, enterocele), and the apical compartment (uterus/cervix or vaginal vault).
- POPQ System: A more detailed and standardized system for clinical classification that involves measuring the position of multiple specific points in the vagina relative to the hymen using a grid system. It provides a more objective and reproducible description of the prolapse than simpler systems.
3. Discuss the conservative management of genital prolapse, including pelvic floor exercises and the use of pessaries.
Conservative, or non-surgical, management of genital prolapse is a valuable option for women with mild to moderate symptoms, those who wish to avoid surgery, or those for whom surgery is not currently recommended. It focuses on strengthening the pelvic floor, reducing contributing factors, and providing mechanical support.
Pelvic Floor Exercises (Kegel Exercises):
- Mechanism: Consciously contracting and relaxing the muscles of the pelvic floor. This group of muscles supports the bladder, uterus, rectum, and vagina.
- Goal: To strengthen and increase the endurance of the pelvic floor muscles.
- How they help: Stronger pelvic floor muscles provide better support to the pelvic organs, which can help alleviate symptoms of mild to moderate prolapse, such as the feeling of pressure or bulging, and can improve associated urinary incontinence.
- Effectiveness: Most effective when done correctly and consistently. Guidance from a healthcare provider or a specialized pelvic floor physical therapist is often beneficial to ensure proper technique.
- Role in Prevention: Also a key strategy for preventing prolapse or slowing its progression.
Use of Vaginal Pessaries:
- Mechanism: A removable device, usually made of silicone, inserted into the vagina to provide mechanical support to the prolapsed pelvic organs, holding them in a more normal position.
- Types: Pessaries come in various shapes (e.g., ring, cube, gelhorn) and sizes. The appropriate type and size are determined by a healthcare provider based on the type and severity of the prolapse and the woman's anatomy.
- How they help: By physically supporting the organs, pessaries reduce symptoms like vaginal bulging, pressure, and associated urinary or bowel difficulties. They do not cure the prolapse but effectively manage symptoms.
- Use: Can be used temporarily or as a long-term management option for women who do not want or cannot have surgery.
- Care and Follow-up: Pessaries require regular removal and cleaning (either by the woman or by a healthcare provider) to prevent odor, discharge, and infection. Regular follow-up appointments are necessary to ensure proper fit, check for complications (like irritation or ulceration of the vaginal wall), and manage any issues.
Lifestyle Modifications:
- As discussed previously, managing weight (if obese), preventing and treating chronic constipation, avoiding heavy lifting, and managing chronic cough are crucial lifestyle changes that reduce abdominal pressure on the pelvic floor and support conservative management.
4. Describe the surgical management options for genital prolapse and the postoperative care required.
Surgical management is often the preferred option for symptomatic genital prolapse when conservative treatments are ineffective or when the prolapse is severe. Surgery aims to restore the normal anatomy and support of the pelvic organs and vaginal canal.
Surgical Management Options:
- Type of Surgery: The specific procedure depends on which organs are prolapsed (bladder, rectum, uterus, vaginal vault), the severity, the woman's age, overall health, and her desire for future sexual activity or pregnancy.
- Anterior Vaginal Repair (Anterior Colporrhaphy): Repairs a cystocele (bladder prolapse) by strengthening the tissue between the bladder and the vagina.
- Posterior Vaginal Repair (Posterior Colporrhaphy): Repairs a rectocele (rectum prolapse) by strengthening the tissue between the rectum and the vagina.
- Apical Repair (for Uterine or Vaginal Vault Prolapse): Repairs the support at the top of the vagina.
- Hysterectomy with Suspension: If the uterus is present and prolapsed, it may be removed (vaginal or laparoscopic hysterectomy), and the top of the vagina (vaginal cuff) is attached to strong pelvic ligaments (e.g., sacrospinous ligament suspension, uterosacral ligament suspension) or mesh to provide support.
- Sacrocolpopexy: For vaginal vault prolapse (after hysterectomy) or uterine prolapse (uterus preservation), the top of the vagina or the uterus is attached to the sacrum (tailbone) using a mesh graft. This is typically done abdominally, often laparoscopically or robotically.
- Colpocleisis (Vaginal Closure): For severe prolapse in women who do not plan to be sexually active, the vaginal canal is surgically closed. It is a simpler procedure with lower surgical risk but eliminates vaginal intercourse.
- Use of Surgical Mesh: In some complex or recurrent cases, surgical mesh may be used to reinforce the weakened tissues and support the repair, although the use of mesh has potential complications.
Postoperative Care Required:
- Pain Management: Assess and manage post-operative pain effectively with prescribed analgesics.
- Monitoring: Monitor vital signs, incision sites (if abdominal), and vaginal bleeding/discharge. Monitor urine output, especially if a urinary catheter is in place (common after anterior repair).
- Catheter Care (if applicable): Provide meticulous care for urinary catheters and monitor for signs of UTI.
- Bowel Management (especially after posterior repair): Prevent constipation and straining. Ensure adequate fluid and fiber intake. Administer stool softeners as ordered. Monitor for return of normal bowel function.
- Activity Restrictions: Educate on and enforce activity restrictions, typically avoiding heavy lifting, strenuous exercise, and sometimes prolonged sitting for several weeks to months to allow the repairs to heal properly and prevent tension. Gradual increase in activity is encouraged.
- Wound Care: Provide care for any surgical incisions (vaginal stitches dissolve; abdominal incisions need cleaning and monitoring).
- Avoiding Sexual Intercourse: Advise abstaining from sexual intercourse for a specified period (usually several months) to allow complete healing of the surgical repairs.
- Monitoring for Complications: Be vigilant for signs of complications such as infection (fever, increased pain, wound issues, foul discharge), bleeding, blood clots, difficulty urinating or defecating, or signs of the prolapse returning.
- Education for Discharge: Provide clear verbal and written instructions on home care, symptom management, activity restrictions, warning signs, importance of avoiding straining, and follow-up appointments.
- Emotional Support: Continue to provide emotional support throughout the recovery period.
5. Discuss the role of nursing in managing genital prolapse, focusing on patient education and emotional support.
Nurses play a vital and multi-faceted role in managing genital prolapse, extending beyond physical care to encompass crucial aspects of patient education, emotional support, and advocacy.
Role in Patient Education:
- Explaining the Condition: Educate women about what genital prolapse is in simple, understandable terms, including which organs are involved in their specific case and the likely causes.
- Discussing Symptoms and Impact: Help women understand how their symptoms are related to the prolapse and how the condition can affect their quality of life.
- Educating on Management Options: Provide clear, unbiased information about all available treatment options, including lifestyle changes, pelvic floor exercises, pessaries, and surgical procedures. Explain the benefits, risks, expected outcomes, and recovery for each option, empowering women to make informed decisions in consultation with their doctor.
- Teaching Self-Care Strategies: Provide detailed instructions on how to perform pelvic floor exercises correctly, how to care for a pessary (if used), manage constipation (diet, fluids), and maintain hygiene.
- Pre- and Post-Operative Education: For women undergoing surgery, provide comprehensive education about preparing for the procedure, the surgical process, expected recovery, pain management, activity restrictions, wound care, and signs of complications.
- Preventive Education: Reinforce education on lifestyle measures that can help prevent the prolapse from worsening or prevent recurrence after treatment.
Role in Emotional Support:
- Creating a Safe Space: Provide a confidential, non-judgmental environment where women feel comfortable discussing their symptoms and how the prolapse affects them, including sensitive issues like embarrassment, shame, and impact on sexuality.
- Listening and Validating: Actively listen to their concerns, fears, and emotional struggles. Validate their feelings and reassure them that their experiences are common and that they are not alone.
- Addressing Embarrassment and Stigma: Help women cope with feelings of embarrassment and stigma related to leakage or physical changes. Provide practical advice on managing symptoms and maintaining hygiene to reduce odor and discomfort.
- Supporting Body Image: Be sensitive to potential body image concerns and provide support.
- Addressing Sexual Health Concerns: Initiate conversations about sexual health in a sensitive manner. Provide information and strategies for managing discomfort or pain during intercourse. Encourage communication with partners.
- Connecting with Resources: Refer women to counseling services, psychologists, or support groups for emotional support if needed.
- Providing Reassurance: Offer reassurance about the effectiveness of treatment options and the possibility of improving symptoms and quality of life.
6. Write an essay on the impact of genital prolapse on a woman's physical, emotional, and social well-being.
Genital prolapse, while a physical condition, can have a wide-ranging and significant impact on a woman's life, affecting her physical comfort, emotional health, social interactions, and overall sense of well-being. The symptoms, often embarrassing and disruptive, contribute to this burden.
Physically, the most direct impact is the sensation of pelvic pressure or a bulge in the vagina, which can be constant and uncomfortable, worsening with daily activities. This physical presence can interfere with sitting, standing, and walking. Associated symptoms like urinary incontinence (leaking urine) or difficulty with urination can lead to significant physical discomfort, the need for frequent bathroom trips, and the use of pads or other protective measures. Bowel problems, such as constipation or the need for manual assistance during defecation, add to the physical burden. Pain in the pelvis or lower back can also be present, limiting activity. In advanced cases, the prolapsed tissue can become ulcerated and infected, causing further pain and requiring medical attention.
Emotionally, the experience of genital prolapse can be deeply distressing. The lack of control over bodily functions, especially leakage of urine or feces, leads to profound embarrassment and shame. This can be a hidden suffering, as women may be reluctant to discuss their symptoms even with loved ones or healthcare providers due to the sensitive nature of the condition. This shame contributes to anxiety and depression, as women cope with the physical discomfort, fear of accidents, and the impact on their lives. The feeling of something "falling out" can affect their body image and self-esteem, making them feel less feminine or confident.
Socially, the impact is often significant. The fear of odor or accidental leakage can cause women to withdraw from social activities, exercise, work, and other commitments. They may avoid situations where they are far from a toilet or where physical exertion could worsen symptoms. This leads to social isolation and a sense of being cut off from friends and community. The condition can also strain intimate relationships due to painful intercourse (dyspareunia) or the woman's own discomfort and embarrassment, affecting sexual intimacy and closeness.
Overall, genital prolapse can diminish a woman's quality of life in multiple ways. It can limit physical activity, interfere with sleep due to discomfort or anxiety, and impact mental well-being. The chronic nature of the condition and the potential need for ongoing management or surgery can add to the stress and burden. However, it is important to emphasize that genital prolapse is treatable, and effective management can significantly improve symptoms and quality of life, allowing women to regain their physical comfort, emotional well-being, and social engagement.
7. Describe a comprehensive nursing care plan for a woman diagnosed with severe genital prolapse requiring surgical intervention.
A comprehensive nursing care plan for a woman with severe genital prolapse requiring surgical intervention addresses her complex physical, emotional, and educational needs throughout the perioperative period (before, during, and after surgery).
Nursing Care Plan Components:
- Pre-Operative Phase:
- Assessment: Assess vital signs, overall health status, and any co-existing medical conditions (e.g., chronic cough, constipation, diabetes). Assess the type and severity of all pelvic organ prolapses present (e.g., cystocele, rectocele, uterine/vault prolapse). Assess associated symptoms (uri nary, bowel, pain, sexual function). Assess the woman's understanding of her condition and the planned surgical procedure. Assess her emotional state, fears (e.g., about surgery, recovery, outcome, body image), and expectations. Assess her support system.
- Nursing Diagnosis (Example): Anxiety related to surgical intervention and potential impact on body image/function.
- Goal: Patient will verbalize understanding of the procedure and express reduced anxiety.
- Interventions: Provide clear, age-appropriate explanation of the specific surgical procedure(s) planned (e.g., anterior/posterior repair, apical suspension, hysterectomy if applicable). Discuss expected outcomes, potential risks, and recovery timeline. Teach pre-operative instructions (fasting, bowel prep if needed). Teach post-operative exercises (deep breathing, coughing, leg exercises). Ensure pre-operative tests are completed and consents are signed. Administer pre-operative medications. Provide emotional support, listen to her concerns, and create a trusting environment. Address any body image or sexuality concerns sensitively. Optimize management of chronic conditions (e.g., manage cough, prevent constipation).
- Intra-Operative Phase:
- Assessment: Monitor vital signs, fluid balance, and patient status continuously.
- Interventions: Assist the surgical team, maintain sterile technique, ensure patient safety and positioning.
- Post-Operative Phase:
- Assessment: Monitor vital signs regularly. Assess and manage pain effectively using a pain scale and administering prescribed analgesics. Assess surgical sites (vaginal and/or abdominal) for bleeding, swelling, or signs of infection. Monitor urine output (most women will have a urinary catheter). Assess bowel sounds and monitor for return of bowel function. Assess for signs of complications (bleeding, infection, blood clots, respiratory issues, difficulty urinating/defecating, signs of repair breakdown).
- Nursing Diagnosis (Example): Acute Pain related to surgical repair and tissue manipulation.
- Goal: Patient will report manageable pain levels and participate in recovery activities.
- Interventions: Administer pain medication on schedule. Encourage and assist with deep breathing, coughing, and use of incentive spirometer. Encourage early ambulation to prevent blood clots and aid bowel function. Provide wound care and meticulous perineal hygiene. Provide catheter care and monitor urine output. Manage bowel function (stool softeners, dietary adjustments) to prevent straining. Monitor for signs of infection and bleeding. Enforce prescribed activity restrictions.
- Discharge Planning and Education:
- Assessment: Assess patient's readiness for discharge, support system, and understanding of home care instructions.
- Nursing Diagnosis (Example): Deficient Knowledge regarding post-operative care, activity restrictions, and long-term prevention.
- Goal: Patient will verbalize understanding of home care instructions and follow-up plan.
- Interventions: Provide detailed verbal and written instructions on wound care, expected vaginal discharge/bleeding, pain management at home, strict activity restrictions (especially avoiding heavy lifting and straining for several months), when to resume normal activities and sexual intercourse (emphasizing the importance of adequate healing time), and signs of complications to report. Discuss the importance of long-term adherence to lifestyle changes (weight, cough, constipation). Reinforce the role of pelvic floor exercises (once cleared by the surgeon). Discuss importance of follow-up appointments. Address any ongoing body image or sexuality concerns and provide resources for support.
8. Discuss the potential complications that may arise from untreated genital prolapse and the importance of early diagnosis.
Untreated genital prolapse, particularly as it advances, can lead to a cascade of physical and psychosocial complications. Early diagnosis is crucial to intervene before these complications become severe and more difficult to manage.
Potential Complications of Untreated Genital Prolapse:
- Ulceration and Infection: When prolapsed tissues protrude outside the vaginal opening, they are constantly exposed to friction and potential trauma from clothing. This can cause the delicate vaginal lining to break down, forming painful ulcers. These ulcers are susceptible to infection, leading to increased pain, discharge, and odor.
- Severe Urinary Dysfunction: While some women with prolapse have incontinence, others may experience difficulty emptying their bladder completely due to kinking of the urethra or pressure on the bladder neck. In severe cases, this can lead to chronic urinary retention, increasing the risk of recurrent urinary tract infections (UTIs) and, in very rare severe long-standing cases, potential damage to the kidneys from urine backing up.
- Severe Bowel Dysfunction: A large rectocele can make defecation very difficult and incomplete, requiring the woman to manually push on the vagina to empty her rectum (splinting). This can lead to chronic constipation and related discomfort.
- Progression of Prolapse: Without intervention, the weakened pelvic floor may continue to give way, leading to the prolapse worsening over time, increasing the severity of all associated symptoms and complications.
- Pain and Discomfort: Ongoing pressure, aching, and potentially nerve irritation from the prolapse can lead to chronic pelvic pain and lower back pain, impacting daily activities and quality of life.
- Sexual Dysfunction: As the prolapse worsens, painful intercourse, physical obstruction, and body image issues can severely impact sexual activity and intimacy.
- Psychosocial Distress: The cumulative effect of chronic symptoms, embarrassment, and limitations can lead to significant anxiety, depression, social isolation, and a severe reduction in quality of life.
Importance of Early Diagnosis:
- Preventing Progression: Diagnosing prolapse in its early stages (mild to moderate) allows for the initiation of conservative management strategies (pelvic floor exercises, lifestyle changes) which can help strengthen the pelvic floor and potentially prevent or slow down the progression to more severe stages and their associated complications.
- Enabling Less Invasive Treatment Options: Early diagnosis means that symptoms may be effectively managed with non-surgical options like pessaries or pelvic floor physical therapy, potentially avoiding the need for surgery.
- Improving Treatment Outcomes: While surgery is necessary for severe prolapse, addressing the condition before complications like extensive ulceration or severe organ dysfunction develop can sometimes lead to less complex surgical procedures and potentially better outcomes.
- Preventing Severe Physical Complications: Early intervention can prevent the development of severe ulcers, chronic UTIs, urinary retention, or significant bowel dysfunction.
- Minimizing Psychosocial Impact: Early management of symptoms can alleviate embarrassment and discomfort, preventing the development of severe anxiety, depression, and social isolation.
- Maintaining Quality of Life: Early diagnosis and intervention focus on improving symptoms and preventing their negative impact on a woman's daily activities and overall well-being.
9. Explain the role of health education in the prevention and management of genital prolapse.
Health education is a fundamental tool in both preventing genital prolapse and effectively managing it once it occurs. Empowering women with knowledge allows them to understand their risks, adopt preventive behaviors, recognize symptoms early, and participate actively in their care.
Role of Health Education in Prevention:
- Awareness of Risk Factors: Educating women about the primary risk factors (childbirth, aging, increased abdominal pressure from chronic cough, constipation, heavy lifting, obesity) helps them understand who is at risk and why, encouraging them to be proactive.
- Promotion of Pelvic Floor Exercises: Teaching the importance and correct technique of pelvic floor muscle exercises (Kegels) is crucial. This education should begin during antenatal and postnatal care and continue throughout a woman's life, as regular exercise helps maintain pelvic floor strength.
- Lifestyle Counseling: Providing education on maintaining a healthy weight, adopting a high-fiber diet and adequate fluid intake to prevent constipation and straining, avoiding smoking (to prevent chronic cough), and using proper body mechanics for lifting heavy objects empowers women to reduce modifiable risks.
- Education during Pregnancy and Postpartum: Emphasizing pelvic health during these critical periods, including safe pushing techniques during labor (when appropriate) and the importance of postpartum pelvic floor exercises, is vital.
Role of Health Education in Management:
- Understanding the Condition: Explaining what genital prolapse is, which organs are involved, and the staging helps women understand their diagnosis and its severity.
- Symptom Recognition: Educating women about the common symptoms (bulging, pressure, urinary/bowel issues, pain) encourages them to seek medical attention early if they experience these signs, leading to timely diagnosis.
- Information on Management Options: Providing clear, unbiased information about all available management strategies (conservative, pessaries, surgery) allows women to participate in informed decision-making based on their individual needs and preferences. Discussing the benefits, risks, and expectations for each option is essential.
- Teaching Self-Care Techniques: Providing detailed instructions on how to correctly perform pelvic floor exercises, care for a pessary (if used), manage constipation, and maintain hygiene allows women to actively participate in managing their condition and alleviating symptoms.
- Pre- and Post-Treatment Education: For women undergoing surgery or using a pessary, providing clear instructions on what to expect, how to care for themselves, and recognizing warning signs of complications is crucial for successful outcomes and safety.
- Addressing Psychosocial Issues: Education can help normalize the condition and reduce feelings of embarrassment or shame, encouraging women to seek support and discuss their concerns openly.
- Importance of Follow-up: Emphasizing the need for regular follow-up appointments to monitor the condition, assess treatment effectiveness, and check for complications reinforces adherence to the care plan.
10. Discuss how lifestyle factors such as obesity, aging, and pregnancy contribute to the development of genital prolapse.
Genital prolapse is a complex condition influenced by various factors, but several key lifestyle factors and life events significantly contribute to its development by impacting the strength and integrity of the pelvic floor support system.
Obesity:
- Obesity contributes to genital prolapse primarily by increasing chronic abdominal pressure. The extra weight in the abdomen puts constant downward pressure on the pelvic floor muscles and connective tissues.
- Over time, this sustained pressure can cause the supporting structures to stretch, weaken, and eventually give way, allowing the pelvic organs to descend.
- Obesity is also often associated with conditions like chronic cough and constipation, which further increase abdominal pressure, compounding the risk.
Aging:
- Aging is a significant risk factor for genital prolapse due to the natural loss of muscle tone and tissue elasticity that occurs throughout the body, including the pelvic floor.
- As women age, the muscles in the pelvic floor may become weaker, and the supporting ligaments and connective tissues can become thinner and less elastic. This reduces their ability to hold the pelvic organs in their correct positions.
- The decline in estrogen levels after menopause further contributes to this tissue thinning and weakening, making older and postmenopausal women particularly susceptible to prolapse.
Pregnancy and Childbirth:
- Pregnancy: The weight of the growing fetus and the expanding uterus puts increasing pressure on the pelvic floor throughout pregnancy. Hormonal changes during pregnancy also cause ligaments to soften, which can contribute to some relaxation of the pelvic support.
- Vaginal Childbirth: This is considered the most significant contributing factor to genital prolapse. The process of labor and delivery, especially the pushing phase, involves significant stretching and trauma to the pelvic floor muscles, fascia, and nerves.
- Muscle and Ligament Damage: The muscles and ligaments can be torn, stretched, or detached from their attachments.
- Nerve Damage: Nerves controlling the pelvic floor muscles can be injured.
- The number of vaginal deliveries, the size of the baby, prolonged labor, and instrumental deliveries (forceps, vacuum) are associated with a higher degree of pelvic floor trauma and increased risk of prolapse.
Gynaecology Full Revision Papers Read More »

Medicine UNMEB PASTPAPERS Q&A
Medicine Nursing III - UNMEB Past Papers
SECTION A: Objective Questions (20 marks)
(c) Give plenty of carbohydrate diet: Diet is important but not the priority intervention. Carbohydrates don't address the immediate complication of immobility.
(d) Encourage plenty of oral fluids: While hydration is important, unrestricted fluids can worsen edema and don't address the primary immobility risk.
(c) Use glass utensils: Tremors and rigors increase risk of dropping and breaking glass; use lightweight, non-breakable utensils to prevent injury.
(d) Tightly fitting shoes: Foot rigidity and swelling (edema) make tight shoes painful; increases fall risk; use well-fitting supportive shoes.
(c) Encourage plenty of vitamin C: Not specific to SAH management; doesn't address neurological complications.
(d) Massage whole body: Contraindicated in acute phase - increases ICP, risk of dislodging clots, and may cause autonomic instability.
(b) Control red meat: RECOMMENDED - purine-rich foods (organ meats, anchovies, shellfish) increase uric acid.
(d) Rest affected joint: RECOMMENDED during acute attacks to reduce pain and inflammation.
(b) Hyperparathyroidism: Presents with hypercalcemia symptoms (bone pain, kidney stones, polyuria), not coarse skin or reduced appetite.
(c) Hypoparathyroidism: Causes hypocalcemia (tetany, muscle cramps), not the described constitutional symptoms.
(c) Altered nutrition: May coexist but not the primary cause of edema.
(d) Altered body image: May be a psychosocial response to edema but not the physiological nursing diagnosis.
(b) Obesity: Too general - specific pattern of fat distribution is characteristic, not generalized obesity.
(c) Skin hypertrophy: Skin actually becomes thin and atrophic in Cushing's, not hypertrophied.
(c) Restrict high carbohydrate: Not relevant - carbs don't affect proteinuria or edema.
(d) Give plenty of fluids: WORSENS fluid overload and would be dangerous.
(b) Glomerulonephritis: Inflammatory kidney disease typically immune-mediated; dehydration doesn't cause primary glomerular disease.
(c) Nephrotic syndrome: Characterized by proteinuria and edema; opposite of volume depletion.
(c) Provide high salt diet: Not indicated; may worsen hypertension or cardiac complications.
(d) Increase IV infusion: Not first priority; IV access is important but airway must be secured first.
(c) Fatty diet: No therapeutic benefit; promotes obesity which worsens back pain.
(d) Plenty of IV fluids: Not indicated for back pain unless dehydration present.
(c) Polyphagia: Characteristic of diabetes mellitus due to cellular starvation, not DI.
(d) Weight gain: DI causes weight LOSS due to fluid excretion; weight gain suggests DM or other endocrine disorder.
(b) Chicken pox: Primary infection causes widespread vesicular rash, not unilateral dermatomal pain.
(d) Impetigo: Superficial bacterial infection; causes crusted lesions, not neuropathic pain.
(c) Avoid weight bearing exercises: CONTRAINDICATED - weight-bearing exercises stimulate osteoblastic activity and increase bone density.
(d) More progesterone than estrogen: Incorrect hormone balance; estrogen is more critical for bone protection; HRT should be individualized.
(c) Sedentary life: IS a risk factor - lack of mechanical stress on bones reduces density.
(d) No pregnancies: IS a risk factor - pregnancy and lactation have complex effects but nulliparity slightly increases risk.
(b) Irritability: This is a consequence of sleep deprivation, not the cause of sleep disturbance.
(d) Reduced osmolality: This is a pathophysiological finding, not a symptom causing sleep disturbance.
(b) Parkinson's disease: Affects basal ganglia (substantia nigra), not cranial nerves.
(c) Myasthenia Gravis: Autoimmune disease of neuromuscular junction, affecting voluntary muscles, not specific cranial nerves.
(c) Call doctor: Important but not the first immediate action; you can elevate the bed while calling.
(d) Administer oxygen: May be needed but positioning should be done first; also requires order unless emergency protocol.
(b) Grip strength: Assesses muscle power, not range of motion.
(c) Rapid palm movement: Tests pronation/supination only, not comprehensive hand function.
(c) Crepitus: Bone-on-bone grinding indicates cartilage damage/osteoarthritis, not effusion.
(d) Redness and skin breakdown: Infection (septic arthritis) or trauma, not simple non-inflammatory effusion.
SECTION B: Fill in the Blank Spaces (10 marks)
SECTION B: Short Essay Questions (10 marks)
SECTION C: Long Essay Questions (60 marks)
(b) Outline ten (10) nursing interventions for managing a patient with osteoarthritis. (10 marks)
(c) Outline five (5) effects of osteoarthritis on a patient's daily life. (5 marks)
(a) Signs and Symptoms of Osteoarthritis:
(b) Nursing Interventions for Osteoarthritis:
(c) Effects of Osteoarthritis on Daily Life:
(b) Explain ten (10) responsibilities of a nurse in assessment for suicidal behaviour. (10 marks)
(a) Hospital Suicide Prevention Measures:
(b) Nurse Responsibilities in Suicidal Behaviour Assessment:
(b) Describe four (4) methods used to diagnose mental retardation. (8 marks)
(c) State seven (7) primary prevention measures of mental retardation. (7 marks)
(a) Physical Features of Severe Mental Retardation (IQ 20-34):
(b) Methods to Diagnose Mental Retardation:
(c) Primary Prevention Measures of Mental Retardation:
🏥 Nurses Revision Uganda
📱 WhatsApp: 0726113908 | 🌐 Website: https://nursesrevisionuganda.com
Your trusted partner in nursing excellence
Medical Nursing III Revision Guide
Paper Code: DNE 112 | Year 1, Semester 1 | June 2022
SECTION A: Objective Questions (20 marks)
(b) Staphylococcus: Can cause rare forms of GN, but streptococcal is far more common.
(d) Proteins: Proteinuria is a symptom, not a cause of glomerulonephritis.
(c) Limited protein, low carbohydrates, adequate calories: Low carbohydrates make it impossible to meet calorie needs without excess fat.
(d) Low calories, limited protein, low carbohydrates: Malnutrition guaranteed; increases mortality risk.
(c) Hyperglycaemia: Causes osmotic diuresis but urine contains glucose; not described as "very dilute".
(d) Hypoglycaemia: No polyuria or polydipsia; causes sweating, tremor, confusion.
(b) Increase the secretion of insulin: Partial goal for Type 2 only, not universal goal for all DM.
(c) Reduce the uptake of insulin by the cells: Opposite of desired effect; would worsen insulin resistance.
(c) Increased range of motion in the legs: Decreased ROM in knees, ankles, hips from inflammation.
(d) Absence of joint swelling: Synovitis with swelling is hallmark finding.
(b) Back-pain relieved by rest: Typical mechanical pain pattern of OA.
(c) Fracture: Indirectly associated - OA patients are often elderly with osteoporosis risk.
(b) Sudden vision loss: IS true - homonymous hemianopia or monocular blindness.
(c) Sudden trouble speaking: IS true - dysarthria or aphasia.
(c) Infarction: Tissue death from ischemia caused by embolus/thrombus, not the traveling mass itself.
(d) Necrosis: Cell death, a result, not the circulating material.
(b) Cortisol: Glucocorticoid; deficiency causes Addison's disease, short stature but not classic dwarfism.
(c) Renin: Enzyme for blood pressure regulation; not a growth hormone.
(c) Administer amphotericin B as ordered: Antifungal for cryptococcal meningitis, not bacterial meningococcal.
(d) Observe patient for skin lesions: Non-specific; petechial rash may occur but isolation is the critical specific action.
(b) Glomerulonephritis: Hematuria, proteinuria, edema, not urethral pain/discharge.
(d) Pyelonephritis: Flank pain, fever, chills, not vaginal discharge or dyspareunia.
(c) Low specific gravity: Non-specific; may occur with fluid overload but not diagnostic.
(d) Hypotension: Hypertension is characteristic from fluid retention and RAAS.
(b) Their bodies cannot sustain the process of dialysis: Incorrect - dialysis is life-sustaining.
(d) They need to gain body weight: Individualized; some need weight loss. Not universal goal.
(c) Tension headache: Bilateral band-like pressure, non-throbbing.
(d) Cluster headache: Severe but sharp/stabbing around eye, with autonomic symptoms.
(b) Huntington's disease: Chorea (involuntary dance-like movements), dementia.
(c) Glycogen storage disease: Metabolic disorder causing hypoglycemia, hepatomegaly.
(b) Peripheral neuropathy: Peripheral nerve damage, typically distal symmetric, not CNS.
(d) Transverse myelitis: Focal spinal cord inflammation, not patchy CNS demyelination.
(c) Atrophy: Muscle wasting consequence, not spine degeneration.
(d) Neuropathy: Nerve disease, may result but not the diagnosis.
(c) Neuromuscular disorders: Affects nerve-muscle junction (myasthenia gravis), not spinal cord transmission.
(d) Spinal haematoma: Hemorrhage causing compression; can cause blockage but is mechanical, not inflammatory.
(c) General paralysis of the insane: Outdated term for neurosyphilis; psychiatric management is primary.
(d) Demyelinating disorders: Too broad; includes MS which is chronic, not acute emergency.
(c) Hyperpituitarism: Excess hormone production causes opposite symptoms.
(d) Hyperthyroidism: Causes tachycardia, increased CO, heat intolerance, warm moist skin.
SECTION B: Fill in the Blank Spaces (10 marks)
SECTION B: Short Essay Questions (10 marks)
SECTION C: Long Essay Questions (60 marks)
(b) Outline ten (10) specific nursing interventions that should be implemented during management of a patient admitted with Glomerulonephritis in the first 24 hours.
(a) Benefits of Physical Exercise in Diabetes Mellitus:
(b) Nursing Interventions for Glomerulonephritis (First 24 Hours):
(b) List five (5) complications of hyperthyroidism.
(a) Nursing Interventions for Hyperthyroidism (First 48 Hours):
(b) Complications of Hyperthyroidism:
(b) State ten (10) clinical manifestations of Addison's disease.
(c) Outline ten (10) specific nursing interventions for a patient with Addison's disease, till discharge.
(a) Causes of Addison's Disease:
(b) Clinical Manifestations of Addison's Disease:
(c) Nursing Interventions for Addison's Disease (Till Discharge):
🏥 Nurses Revision Uganda
📱 WhatsApp: 0726113908 | 🌐 Website: https://nursesrevisionuganda.com
Your trusted partner in nursing excellence
Medicine UNMEB PASTPAPERS Q&A Read More »

Cardiovascular System Notes
Module Unit CN-111: Anatomy and Physiology (I)
Contact Hours: 60
Module Unit Description: Introduces students to the anatomy and physiology of the human body, covering the structure and function of different body parts and systems, specifically skeletal, muscular, circulatory, and digestive systems.
Learning Outcomes for this Unit:
By the end of this unit, the student shall be able to:
- Identify various parts of the human body and their functions.
- Differentiate the normal structure and functioning of various systems from that of abnormal conditions of the skeletal, muscular, cardiovascular and digestive systems.
Topic: Structures and functions of various body systems - Cardiovascular System (PEX 1.8.1)
The Cardiovascular system is the transport system of the body, through which the nutrients are conveyed to places where these are utilized, and the metabolites (waste products) are conveyed to appropriate places from where these are expelled.
The conveying medium is a liquid tissue, the blood, which flows in tubular channels called blood vessels. The circulation is maintained by the central pumping organ called the heart.

The Heart
The heart is a small muscular hollow organ—roughly the size of your fist. It is located in mediastinum near the anterior chest wall, directly posterior to the sternum. The mediastinum contains the great vessels, which are attached at the base of the heart, as well as the thymus, esophagus, and trachea.

The heart has four muscular chambers, the right and left atria and right and left ventricles. These four chambers work together, pumping blood through a network of blood vessels that connect the heart to peripheral tissues.
The network of vessels is divided into two circuits: the pulmonary circuit and the systemic circuit. The pulmonary circuit carries carbon dioxide–rich blood from the heart to the gas exchange surfaces of the lungs and returns oxygen- rich blood to the heart. The systemic circuit transports oxygen–rich blood from the heart to the rest of the body’s cells and returns carbon dioxide-rich blood back to the heart. The right atrium receives blood from the systemic circuit, and the right ventricle pumps blood into the pulmonary circuit. The left atrium receives blood from the pulmonary circuit, and the left ventricle pumps blood into the systemic circuit.

With each heartbeat, the atria contract first, followed by the ventricles. The two ventricles contract at the same time and eject equal volumes of blood into the pulmonary and systemic circuits.
Each circuit begins and ends at the heart, and blood flows through these circuits in sequence. Thus, blood returning to the heart from the systemic circuit must complete the pulmonary circuit before re-entering the systemic circuit. The blood vessels of both circuits are arteries, veins, and capillaries.
The Cardiovascular system, also called the circulatory system, is like the body's transport network. It is responsible for moving essential substances throughout the body.
Main Parts:
This system has two main parts:
- The heart, which acts as the pump.
- Blood vessels (arteries, veins, capillaries), which are like the tubes or pipes that carry the blood.
Function:
The main job of the cardiovascular system is to circulate blood to all parts of the body. Blood carries:
- Oxygen from the lungs to the body tissues.
- Nutrients (like sugar, amino acids) from the digestive system to the tissues.
- Hormones from endocrine glands to their target organs.
- Waste products (like carbon dioxide, urea) from the tissues to organs that remove them (lungs, kidneys, liver).
- Heat to help maintain body temperature.
- Cells and substances that protect the body (part of the immune system).
The Heart (The Pump)
The heart is a muscular organ located in the chest, between the lungs, slightly towards the left side. It is about the size of your fist. The heart works continuously, pumping blood throughout your entire life.
Structure of the Heart:
The heart is divided into four chambers.
- Two upper chambers called atria (singular: atrium). The right atrium receives blood from the body, and the left atrium receives blood from the lungs.
- Two lower, thicker, muscular chambers called ventricles. The right ventricle pumps blood to the lungs, and the left ventricle pumps blood to the rest of the body.
A wall called the septum separates the right side of the heart from the left side, ensuring blood from the two sides does not mix.
The heart also has valves between the chambers and at the exits of the ventricles. These valves act like one-way doors, making sure blood flows in the correct direction through the heart. When the heart beats, these valves open and close.

How the Heart Pumps:
The heart muscle contracts and relaxes in a repeating cycle called the cardiac cycle or heartbeat.
- Systole: This is when the heart muscle contracts and pushes blood out of the chambers.
- Diastole: This is when the heart muscle relaxes and the chambers fill with blood.
The right side of the heart receives blood from the body and pumps it to the lungs. The left side of the heart receives blood from the lungs and pumps it to the body. (This happens at the same time).
Blood Vessels (The Pipes)
There are three main types of blood vessels:
Arteries:
These vessels carry blood away from the heart.
- They usually carry oxygenated blood (blood rich in oxygen), except for the pulmonary artery, which carries deoxygenated blood to the lungs.
- Arteries have thick, muscular, and elastic walls to withstand the high pressure of blood pumped directly from the heart.
- Large arteries branch into smaller arteries, which then branch into even smaller vessels called arterioles. Arterioles control blood flow into the tiny capillaries.

Veins:
These vessels carry blood towards the heart.
- They usually carry deoxygenated blood (blood low in oxygen), except for the pulmonary veins, which carry oxygenated blood from the lungs to the heart.
- Veins have thinner walls and carry blood at lower pressure than arteries.
- Many veins, especially in the arms and legs, have valves inside them. These valves help prevent blood from flowing backwards, especially against gravity. Muscle contractions around the veins also help push blood towards the heart (this is called the skeletal muscle pump).
- Tiny veins, called venules, collect blood from the capillaries and merge to form larger veins.
Capillaries:
These are the smallest blood vessels, connecting arterioles and venules. They form extensive networks within tissues.
Function: This is where the real work of exchange happens! Capillary walls are very thin (only one cell layer thick), allowing oxygen, nutrients, and other substances to pass out of the blood into the surrounding tissues. At the same time, waste products (like carbon dioxide) pass from the tissues into the blood through the capillary walls.

Blood Circulation (The Route)
Blood follows two main routes through the body:
Pulmonary Circulation:
This is the route between the heart and the lungs.
- Deoxygenated blood from the body enters the right side of the heart.
- The right ventricle pumps this blood into the pulmonary artery, which carries it to the lungs.
- In the lungs, carbon dioxide leaves the blood, and oxygen enters the blood.
- Oxygenated blood returns from the lungs to the left side of the heart through the pulmonary veins.

Systemic Circulation:
This is the route between the heart and the rest of the body (all organs and tissues except the lungs).
- Oxygenated blood from the lungs enters the left side of the heart.
- The left ventricle pumps this blood into the aorta (the largest artery).
- The aorta branches into smaller arteries that carry oxygenated blood to all body tissues.
- In the tissues, oxygen and nutrients are delivered, and waste products are collected.
- Deoxygenated blood returns from the tissues to the right side of the heart through veins, which merge to form the superior vena cava (from the upper body) and the inferior vena cava (from the lower body).

Portal circulation:
Portal circulation is the circulation which starts by capillaries and ends in capillaries (or sinusoids) without entering the systemic or pulmonary circulation. A blood vessel connecting two capillary beds is called a portal vessel, and the network is a portal system. The most common type is the hepatic portal circulation where the venous blood from the capillaries of the gastrointestinal tract is collected into veins that join to form the portal vein. The later enters the liver where it breaks into the liver sinusoids. Blood flowing in the hepatic portal system is quite different from blood in other systemic veins because it contains substances absorbed from the stomach and intestines. For example, levels of blood glucose and amino acids in the hepatic portal vein often exceed those found anywhere else in the cardiovascular system. The hepatic portal system delivers these and other absorbed compounds directly to the liver for storage, metabolic conversion, or excretion. The sinusoids then drained by 2 hepatic veins which open in the Inferior vena cava Figure 22.22.
Pathway (Hepatic Portal): Veins from gastrointestinal tract portal vein liver sinusoids 2 hepatic veins IVC

Orientation and Superficial Anatomy of the Heart
The heart is located within the mediastinum, between the two lungs. Because the heart lies slightly to the left of midline, the cardiac notch within the medial surface of the left lung is deeper than the cardiac notch in the medial surface of the right lung. The base of the heart is the broad, superior portion of the heart, where it is attached to the major arteries and veins of the systemic and pulmonary circuits. The base of the heart begins at the origins of the major vessels and the superior surfaces of the two atria. Thinking back to our balloon analogy, the base of the heart corresponds to your wrist (Figure 21.2b). The base sits posterior to the sternum, approximately at the third costal cartilage (Figure 21.4). The apex of the heart is the inferior, pointed tip of the heart and is formed mainly by the left ventricle. It points laterally. The apex reaches the fifth intercostal space and extends to the left of the midline.
External grooves, or sulci, of the heart show the approximate borders of the four internal chambers of the heart (Figure 21.5). A shallow interatrial groove separates the two atria. The deeper coronary sulcus marks the border between the atria and the ventricles. On the anterior surface the anterior interventricular sulcus separates the left and right ventricles. The posterior interventricular sulcus separates the left and right ventricles.

Internal Anatomy and Organization of the Heart
The interatrial septum (septum, wall) separates the atria, and the interventricular septum separates the ventricles. Blood flows from each atrium into the ventricle of the same side. The valves are folds of endocardium extending into the openings between the atria and ventricles. These valves open and close to prevent the backflow of blood, maintaining a one way flow of blood from the atria into the ventricles. The atria collect blood returning to the heart and then deliver it to the attached ventricle see Figure 21.7.
The Right Atrium
Oxygen-poor (deoxygenated) venous blood travels from the right atrium into the right ventricle. In doing so, the blood passes through an opening guarded by three fibrous flaps. These flaps, or cusps, form the right atrioventricular (AV) valve, or tricuspid valve (Figures 21.7 and 21.8). On one side, the cusps are attached to the cardiac skeleton of the heart. Their free edges are attached to connective tissue fibers called chordae tendineae. These fibers arise from the papillary muscles— cone-shaped muscular projections of the inner surface of the right ventricle. The chordae tendineae limit the movement of the cusps when the valve closes. This prevents backflow of blood from the right ventricle into the right atrium. The superior end of the right ventricle tapers to the conus arteriosus, a smooth-walled, cone-shaped pouch. The conus arteriosus ends at the pulmonary valve (pulmonary semilunar valve). This valve consists of three thick semilunar (half moon–shaped) cusps. As blood is pumped out of the right ventricle, it passes through this valve and enters the pulmonary trunk. The pulmonary trunk is the first vessel of the pulmonary circuit. The pulmonary valve prevents the backflow of blood into the right ventricle when that chamber relaxes. From the pulmonary trunk, blood flows into both the left and right pulmonary arteries (Figure 21.5). These vessels branch repeatedly within the lungs before supplying the pulmonary capillaries, where gas exchange occurs.

The Left Atrium
Oxygen enters the bloodstream at the pulmonary capillaries. The oxygen-rich (oxygenated) blood flows from the pulmonary capillaries into small veins. These ultimately unite to form four pulmonary veins, usually two for each lung. These left and right pulmonary veins empty into the posterior portion of the left atrium (Figures 21.5, and 21.7b). As blood flows from the left atrium into the left ventricle, it passes through the left atrioventricular (AV) valve, also known as the bicuspid valve or mitral valve. This valve has two cusps compared to the three seen in the right AV valve. The left AV valve permits the flow of oxygen-rich blood from the left atrium into the left ventricle, but prevents blood flow in the reverse direction.
The Left Ventricle
The wall of the left ventricle is approximately three times thicker than the wall of the right ventricle. Contractions of the left ventricle must produce enough pressure to push the blood through the entire systemic circuit. The right ventricle, in contrast, has a relatively thin wall. It only has to develop enough pressure to push blood to the lungs and then back to the heart, a total distance of only about 30 cm (1 ft.). The internal organization of the left ventricle closely resembles that of the right ventricle (Figure 21.7). Blood leaving the left ventricle passes through the aortic valve (aortic semilunar valve) into the ascending aorta. The arrangement of the cusps in the aortic valve is similar to that in the pulmonary valve. Small, saclike dilations of the base of the ascending aorta occur next to each cusp of the aortic valve. These sacs, called aortic sinuses, prevent the individual cusps from sticking to the wall of the aorta when the valve opens. The right and left coronary arteries, which deliver blood to the myocardium, originate at the aortic sinuses. The aortic valve prevents the backflow of blood into the left ventricle once it has been pumped out of the heart and into the systemic circuit. From the ascending aorta, blood flows into the aortic arch and then into the descending aorta (Figures 21.5 and 21.7b).
Structure of the Heart Wall
The wall of the heart is composed of three layers (Figure 21.3):
- An outer epicardium
- A middle myocardium
- An inner endocardium

1. Epicardium: It is the visceral layer of the serous pericardium which covers the surface of the heart.
2. Myocardium: The myocardium is cardiac muscle tissue that forms the atria and ventricles.
3. Endocardium: The endocardium covers the inner surfaces of the heart, including those of the heart valves.
The Pericardium
The pericardium surrounds the heart and is composed of two parts:
- An outer fibrous pericardium
- An inner serous pericardium (Figure 21.2b)
The potential, fluid-filled space between these two serous layers is the pericardial cavity (Figure 21.2b–d). The pericardial cavity normally contains up to 50 mL of pericardial fluid, secreted by the pericardial membranes. This fluid acts as a lubricant, reducing friction between the opposing visceral and parietal surfaces as the heart beats.
Blood circulations
The circulation of the blood within the cardiovascular system can be distinguished into 3 types of circulations, which are communicating together. These are:
Blood vessels
The cardiovascular system is a closed system that circulates blood throughout the body. Blood vessels can be divided into Arteries & veins and capillaries. The pulmonary circuit supplies the lungs, and the systemic circuit supplies the rest of the body. The heart pumps blood into the pulmonary and systemic circuits simultaneously.
The pulmonary circuit begins at the pulmonary valve and ends at the entrance to the left atrium. Pulmonary arteries branch from the pulmonary trunk and carry blood to the lungs for gas exchange.
The systemic circuit begins at the aortic valve and ends at the entrance to the right atrium. Systemic arteries branch from the aorta and distribute blood to all other organs for nutrient, gas, and waste exchange.
After blood vessels enter an organ, further branching occurs, forming smaller and smaller blood vessels.
All chemical and gaseous exchange between the blood and interstitial fluid takes place across capillary walls. Tissue cells rely on capillary diffusion to obtain nutrients and oxygen and remove metabolic wastes. Blood leaving the capillary networks enters a network of small veins that gradually merge to form larger vessels. These larger vessels ultimately drain into either the pulmonary veins (pulmonary circuit) or the inferior or superior vena cava (systemic circuit).
Structure of blood vessels
The walls of arteries and veins contain three distinct layers, from superficial to deep:
- an outer (adventitia)
- A middle (media)
- An inner (intima)
The middle layer contains concentric layers of smooth muscle tissue supported by a framework of loose connective tissue. The smooth muscle cells of the media encircle the lumen of the blood vessel. When stimulated by the sympathetic branch of the autonomic nervous system, these smooth muscles contract, reducing the luminal diameter of the blood vessel. This process is called vasoconstriction. Relaxation of the smooth muscles increases the diameter of the lumen, a process called vasodilation. Any change in vessel diameter affects both blood pressure and blood flow.
Distinguishing arteries from veins
- Vessel walls: The walls of arteries are thicker than those of veins. The media of an artery contains more smooth muscle and elastic fibers than a vein.
- Vessel lumen: The lumen of an artery appears smaller than an accompanying vein. Arteries retain their circular shape in histological sections. In contrast, cut veins collapse, and in a histological section they often look flattened or distorted.
- Valves: Veins typically contain valves - internal structures that prevent the backflow of blood toward the capillaries. Arteries do not have valves.
Arteries
- They are elastic vessels, which carry blood away from the heart.
- They are branching so that; a big artery gives medium-sized arteries, which in turn give small-sized arteries, arterioles, small arterioles and finally arterial capillaries.
- Elastic arteries are the largest arteries e.g. aorta and other nearby branches. They contain a large amount of elastic tissue, which enables them to expand as blood enters their lumen from the contracting heart.
- Muscular arteries are medium-sized arteries e.g. arteries of the limbs. They contain abundant smooth muscle fibers, which allow them to regulate blood flow by vasoconstriction or vasodilatation.
- Arterioles are small arteries. Most arterioles contain considerable smooth muscles. The smallest arterioles consist of endothelium surrounded by a single layer of smooth muscle. Arterioles regulate the flow of blood into capillaries by vasoconstriction and vasodilatation.
There are 3 kinds of arteries (according to size and function):
Arteries may communicate together, forming "arterial anastomosis", through which the blood can find an alternative channels if the main pathway is obstructed.
- Anastomosis is rich in the regions where movements can interfere with continuous constant circulation e.g. around knee and elbow.
- The arteries which have no communications with the neighboring arteries are called "end arteries" e.g. coronary arteries.
Capillaries
Capillaries are microscopic and most delicate blood vessels. They is the only blood vessels whose walls allow the exchange of nutrients and wastes between the blood and the surrounding interstitial fluids. Because the walls are thin, the diffusion distances are short. As a result, the exchange between the blood and interstitial fluids occurs quickly. In addition, blood flows slowly through capillaries, allowing sufficient time for diffusion or active transport of materials across the capillary walls. Some substances cross the capillary walls by diffusing across the endothelial cell lining. Other substances pass through gaps between adjacent endothelial cells. The fine structure of each capillary determines its ability to regulate the two-way exchange of substances between blood and interstitial fluid. A typical capillary wall consists of one to three endothelial cells sitting on a delicate basil lamina. The average luminal diameter of a capillary is only 8 µm, close to that of a single red blood cell.
Four mechanisms are responsible for the exchange of materials across the walls of capillaries and sinusoids:
- Diffusion across the capillary endothelial cells (lipid-soluble materials, gases, and water by osmosis)
- Diffusion through gaps between adjacent endothelial cells (water and small solutes; larger solutes in the case of sinusoids)
- Diffusion through the pores in fenestrated capillaries and sinusoids (water and solutes)
- Vesicular transport by endothelial cells (endocytosis at luminal side, exocytosis at basal side), water, and specific bound and unbound solutes.
Capillary Beds
Capillaries are the site of nutrient, waste, O2, and CO2 exchange with interstitial tissues. A collection of capillaries is called a capillary bed. A single arteriole gives rise to dozens of capillaries, which empty into several venules Fig 22.3.

Veins
- Wide, thin-walled vessels, which carry blood towards the heart.
- Their walls are thinner than those of corresponding arteries because the blood pressure in veins is lower than in arteries.
- Veins collect blood from all tissues and organs and return it to the heart.
- Many veins, especially those in the limbs, have valves, formed from folds of the tunica intima that prevent the backflow of blood.
- They are either superficial or deep.
- The deep veins accompany the arteries, so that each artery is accompanied by a vein but, in some parts the artery is accompanied by 2 veins "venae comitantes".
- Like the arteries, they have tributaries.
- Venous capillaries collect into venules → small veins and finally → large veins.
- Veins are classified as large veins, medium-sized veins and venules.
Venous Valves
The blood pressure in venules and medium-sized veins is so low that it cannot overcome the force of gravity. For example, when you are standing, blood returning from your feet must overcome the pull of gravity to ascend to your heart. In the limbs, medium-sized veins contain one-way valves that form from infoldings of the intima (Figure 22.4).

These valves act like the valves in the heart, preventing the backflow of blood. Valves compartmentalize the blood within the veins, dividing the weight of the blood between the compartments.
As long as the valves function normally, any movement in the surrounding skeletal muscles squeezes the blood toward the heart. This mechanism is called a skeletal muscle pump.
Connections between arteries and veins
- Capillaries: Are microscopic blood vessels with extremely thin walls. They are lined with single layer of endothelium. Capillaries penetrate most body tissues forming network called capillary beds. The thin walls of the capillaries allow the diffusion of O2 and nutrients out of the capillaries, while allowing CO2 and wastes into the capillaries Fig 22.3.
- Sinusoids: Are similar to capillaries in that they are thin-walled blood vessels, but they have irregular and wider spaces than capillaries. They are seen in many sites e.g. liver, spleen, bone marrow and suprarenal gland. The cells lining the sinusoids include phagocytic cells Fig 22.3.
- Arterio-venous anastomosis (shunts): Are direct connections between small arterioles and small venules without the intervention of the capillaries. They are numerous in the in the skin of lips, nose, tips of the fingers and toes, intestinal mucosa and in the cavernous tissues of the sex organs. Their walls are surrounded by sphincters which open and close controlling the blood supply to the involved organs Fig 22.3.
Major arteries
Aorta: Arises from the left ventricle of the heart. It has three parts:
- Ascending aorta: as it ascends from the left ventricle. It gives:
- Right coronary artery
- Left coronary artery
- Arch of aorta: as its shape is like an arch. It gives:
- Brachiocephalic artery (right common carotid , subclavian arteries)
- Left common carotid artery
- Left subclavian artery
Each common carotid artery divides into:
- Internal carotid (for the brain)
- External carotid (for the face and neck)
Each subclavian artery enters the upper limb Fig.22.14.

Descending aorta: as it descends downwards, firstly in the thorax "thoracic aorta" then, it pierces the diaphragm at level of 12th thoracic vertebra and enters into the abdomen where is called "abdominal aorta".
- ➢ Thoracic aorta: gives bronchial arteries to the lungs, branches to trachea, oesophagus and intercostal spaces.
- ➢ Abdominal aorta: gives
- Single branches to the GIT, Celiac trunk, Superior mesenteric artery, Inferior mesenteric artery
- Paired branches: Renal arteries to the kidneys, Gonadal (testicular or ovarian) arteries
Finally the aorta divides into two common iliac arteries (right and left) at the level of 4th lumbar vertebra. The common iliac arteries divide into two branches internal iliac and external iliac Fig.22.14.
Pulmonary trunk
It arises from the right ventricle of the heart.
It gives right and left pulmonary arteries which enter the right and left lungs.

The upper limb Arteries:
The subclavian artery continues in the upper limb and as it enters the axilla, it is called axillary artery. The later continues in the upper arm as brachial artery. The brachial artery divides into radial and ulnar arteries in front of the elbow joint.

The lower limb Arteries:
The femoral artery gives branches in the thigh and then goes behind the knee joint and here it is called popliteal artery. Popliteal artery divides into anterior tibial and posterior tibial arteries in the leg.

Major veins
Superior vena cava (SVC): It drains the venous blood from head and neck, upper limbs and thorax. It is formed by the union of right and left innominate veins. Each innominate vein is formed by of subclavian vein (continuation of the axillary vein) and internal jugular vein (from the head and neck).

Inferior vena cava (IVC): It drains the venous blood from all the body below the diaphragm. It is formed in the abdomen by the union of right and left common iliac veins at the level of 5th lumbar vertebra. It ascends on the right side of the aorta, pierces the diaphragm and enters the thorax and finally opens into the right atrium of the heart Fig.22.20.
Superficial veins of upper limb:
Superficial veins of upper limb are used for venipuncture and blood transfusion. The constant position of the cephalic vein makes it available even if not seen as in obese patients.
- 1-Basilic vein begins from the medial side of the hand and ascends up in the forearm and finally in the upper arm where it becomes as the axillary vein.
- 2-Cephalic vein begins from the lateral side of the hand and ascends up in the forearm and finally in the upper arm.
- 3-The median cubital vein is a communication between the basilica and cephalic veins in front of the elbow joint. This vein is used for giving intravenous injections Fig 22.20.
Superficial veins of the lower limb:
- 1-Great (long) saphenous vein begins from the medial side of the foot and ascends up in the leg and then in the thigh and finally drain into the femoral vein. This is the longest vein in the body.
- 2-Small saphenous vein begins from the lateral side of the foot and then ascends into the leg and finally drains into the popliteal vein at the back of the knee joint.

Abnormal Conditions:
When the cardiovascular system does not work normally, it can lead to various problems. For example:
- If the heart muscle is weak, it might not pump blood effectively (heart failure).
- If blood vessels are narrowed or blocked, blood flow to tissues can be reduced (e.g., in atherosclerosis).
- High blood pressure (hypertension) or low blood pressure (hypotension) can affect blood flow and damage vessels.
- Problems with heart valves can disrupt the normal flow of blood through the heart.
Underpinning knowledge/ theory for Cardiovascular System:
(This is covered within the sections above, extracting relevant concepts from the provided notes.)
- Detailed diagrammatic description of the circulatory system.
- Definitions of key structures (Heart chambers, valves, major vessels).
- Functions of key structures (Pumping action, blood flow).
- Types of circulation (Pulmonary, Systemic, Portal).
- Structure of blood vessel walls.
- Differences between arteries and veins.
- Major arteries and veins and their locations/branches.
- Mechanisms of exchange in capillaries.
- Abnormal conditions related to these structures and functions.
Revision Questions for Cardiovascular System:
1. What are the two main parts of the cardiovascular system, and what is its primary function?
2. Describe the four chambers of the heart and the main role of each.
3. Explain the main difference between the pulmonary circulation and the systemic circulation in terms of blood flow and oxygenation.
4. Differentiate between arteries, veins, and capillaries in terms of structure and function.
5. What is the function of valves found in veins?
6. Name the three layers of the walls of arteries and veins.
7. Briefly describe the hepatic portal circulation.
8. Name the three main parts of the aorta and at least one major artery branching from each part.
9. Identify two superficial veins commonly used for venipuncture in the upper limb.
10. List two examples of abnormal conditions that can affect the cardiovascular system.
References (from Curriculum for CN-1102):
Below are the core and other references listed in the curriculum for Module CN-1102. Refer to the original document for full details.
- Cohen, JB and Hull, L.K (2016) Memmlers – The Human body in Health and diseases 13th Edition, Wolters, Kluwer. (Core Reference)
- Cohen, J.B and Hull, L.K (2016) Memmler's Structure and Function of the Human Body. 11th Edition. Wolters Kluwer, China
- Kumar, M and Anand, M (2010) Human Anatomy and Physiology for Nursing and Allied Sciences. 2nd Edition. Jaypee Brothers Medical Publishers Ltd.
- Scott, N.W. (2011) Anatomy and Physiology made incredibly easy. 1st Edition. Wolwers Kluwers, Lippincotts Williams and Wilkins.
- Moore, L. K, Agur, M.R.A and Dailey, F.A. (2015) Essential Clinical Anatomy.15th Edition. Wolters Kluwer.
- Snell, S. R. (2012) Clinical Anatomy by Regions. 9th Edition. Wolters Kluwer, Lippincott Williams and Wilkins, China
- Wingerd, B, (2014) The Human Body-Concepts of Anatomy and Physiology. 3rd Edition Lippincott Williams and Wilkins and Wolters Kluwer.
- Rohen, Y.H-Orecoll. (2015) Anatomy.A Photographic Atlas 8th Edition. Lippincott Williams & Wilkins
- Waugh, A., & Grant, A. (2014). Ross and Wilson Anatomy & Physiology in Health and Illness (12th ed.). Churchill Livingstone Elsevier. (Added as per user's reference)
Cardiovascular System Notes Read More »

Atoms, molecules and compounds
Module Unit CN-111: Anatomy and Physiology (I)
Contact Hours: 60
Module Unit Description: Introduces students to the anatomy and physiology of the human body, covering the structure and function of different body parts and systems, specifically skeletal, muscular, circulatory, and digestive systems.
Learning Outcomes for this Unit:
By the end of this unit, the student shall be able to:
- Identify various parts of the human body and their functions.
- Differentiate the normal structure and functioning of various systems from that of abnormal conditions of the skeletal, muscular, cardiovascular and digestive systems.
Topic: Introduction to Anatomy and Physiology (Part 2)
Atoms, molecules and compounds
Everything around us, including our bodies, is made up of tiny particles. Let's look at these basic chemical components.
- Atoms: These are the smallest particles of an element. An element is a pure substance like oxygen, hydrogen, or carbon. Atoms are extremely small. Inside an atom, there's a central nucleus (like the sun in our solar system). The nucleus contains positively charged particles called protons and particles with no charge called neutrons. Tiny, negatively charged particles called electrons orbit around the nucleus. In a neutral atom, the number of protons and electrons is equal, so the positive and negative charges balance out.
- Molecules: When two or more atoms are joined together by a strong link called a chemical bond, they form a molecule. If the molecule is made of atoms from the same element (like O₂, two oxygen atoms joined), it's just a molecule of that element. If the molecule is made of atoms from different elements joined together (like H₂O, two hydrogen atoms and one oxygen atom joined), it's called a compound. Water is a compound. Many substances in the body are compounds.
- Chemical Bonds: The links that hold atoms together in molecules are chemical bonds. They are formed by the electrons in the outer part of the atoms.
- Covalent bonds: Atoms share electrons to become more stable. These bonds are often strong and create stable molecules like water.
- Ionic bonds: Electrons are transferred from one atom to another. This creates electrically charged atoms called ions (e.g., sodium atom loses an electron and becomes a positive sodium ion, Na⁺; chlorine atom gains an electron and becomes a negative chloride ion, Cl⁻). These charged ions are attracted to each other, forming an ionic bond.
- Electrolytes: When ionic compounds (like sodium chloride, NaCl, which is table salt) dissolve in water, they separate into their positive and negative ions (Na⁺ and Cl⁻). These ions in water can conduct electricity. In the body, these ions are called electrolytes and are very important for nerve signals, muscle contraction, and balancing fluids.
(A simple diagram of an atom showing a nucleus with protons and neutrons, and electrons orbiting it.)
Cell structure and its functions
Cell: Cell is the basic living structural and functional unit of the body, and the study of cells is called Cytology.
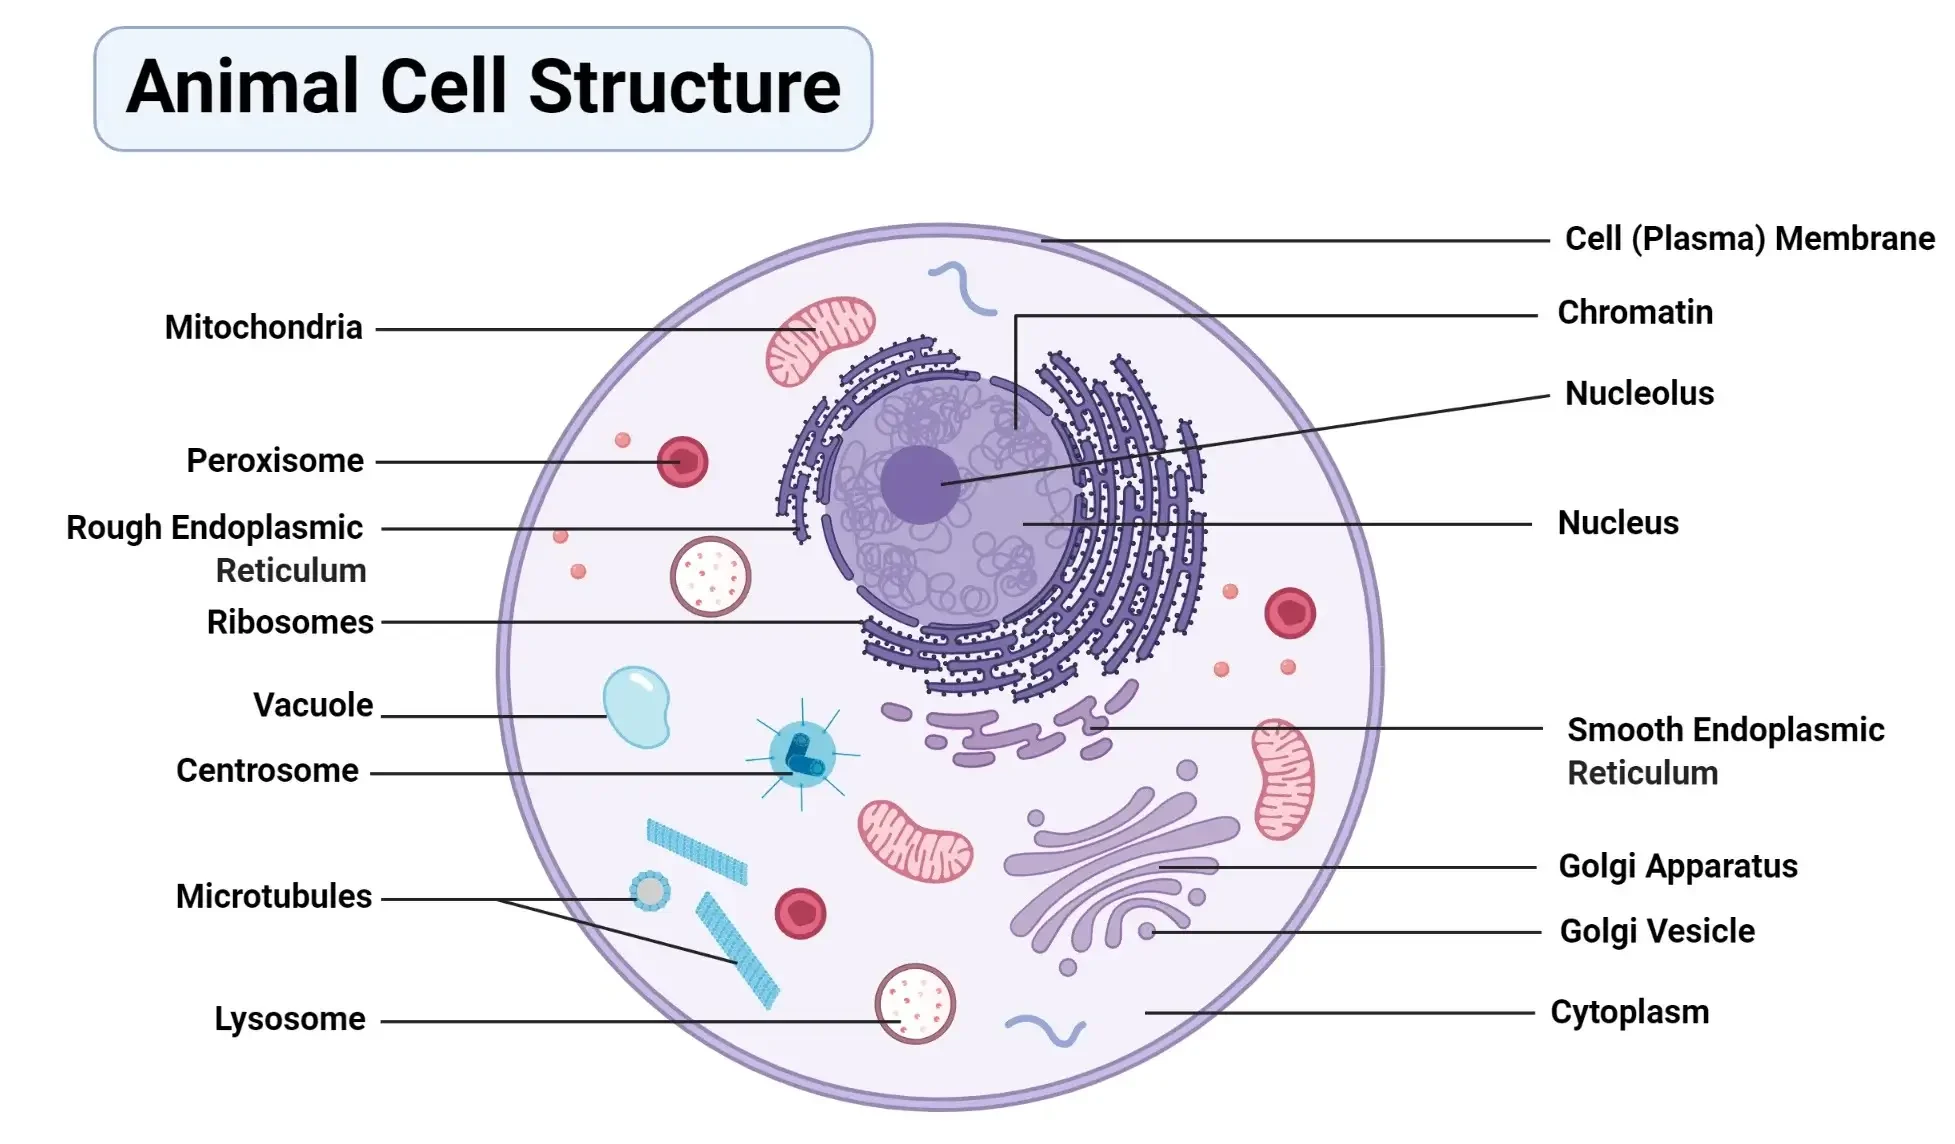
- Cell membrane: This separates the cells from their external environment. Cell membrane also protects the cell from injury.
- Cytoplasm: This is the substance that surrounds the organelles and is located between the nucleus and the plasma membrane. This contains raw materials and provides these raw materials to cell organelles for their normal functioning.
- Nucleus: This is usually the largest organelle and is often found near the center of the cell. It's the control center. It contains the cell's genetic material (DNA), organized into structures called chromosomes. The DNA contains the instructions for all the cell's activities, like making proteins and dividing. The nucleus is surrounded by a nuclear envelope (a membrane with pores).
- Organelles (The Cell's "Machines"): These are small structures within the cytoplasm, each doing a specific job:
- Mitochondria: Often called the "powerhouses" of the cell. They perform a process called aerobic respiration, using oxygen to convert sugar and fats into energy (ATP). Cells that need a lot of energy (like muscle cells) have many mitochondria.
- Ribosomes: Tiny structures that are the sites of protein synthesis. They read instructions from the nucleus (carried by mRNA) and assemble amino acids into proteins. Some are free in the cytoplasm, others are attached to the ER.
- Endoplasmic Reticulum (ER): A network of interconnected membranes that extends throughout the cytoplasm. Rough ER: Has ribosomes attached and is involved in making proteins that will be sent outside the cell or to other organelles. Smooth ER: Involved in making fats and steroids, and detoxifying harmful substances like drugs.
- Golgi Apparatus: Modifies, sorts, and packages proteins and fats made in the ER. It prepares them for transport out of the cell or to other parts of the cell. Think of it as the cell's "packaging and shipping department."
- Lysosomes: Contain powerful enzymes that break down waste materials, old organelles, bacteria, and other foreign invaders. They are like the cell's "recycling and waste disposal center."
- Cytoskeleton: A network of protein fibres that provides support for the cell, helps maintain its shape, and is involved in cell movement and moving organelles within the cell.
Tissue structure and function
TISSUE Cells are highly organized units. But in multi-cultural organisms, they don’t function alone. They work together in groups of similar cells called tissues. A tissue is a group of similar cell and their inter-cellular substance that have the similar embryological origin and they function together to perform a specialized activity. The study of tissues or a science that deals with the study of tissues is called Histology
Tissues are classified according to their structure and their function:
- Epithelial tissue
- Connective tissue
- Muscle tissue
- Nervous tissue
Epithelial Tissue
Epithelial tissues cover body surfaces, lines the body cavities and ducts and form glands. They are subdivided into:
- – Covering & lining epithelium
- – Glandular epithelium

Covering and lining epithelium:
This forms the outer covering of the external body surface and outer covering of some internal organs. It lines body cavity, interior of respiratory and gastrointestinal tracts, blood vessels and ducts and make up along with the nervous tissue (the parts of sense organs for smell, hearing, vision and touch). This is a tissue from which gametes (egg and sperm) develop from.
Covering and lining epithelium are classified based on the arrangement of layers and cell shape.
According to the arrangement of layers covering and lining epithelium is grouped into:
- a) Simple epithelium: This is specialized for absorption, and filtration with minimal wear and tear. It is a single layered.
- b) Stratified epithelium: This is many layered and found in an area with high degree of wear and tear.
- c) Pseudo-stratified: This is a single layered but seam to have many layer.
Based on the cell shape covering and lining the epithelium, is grouped into:
- a) Squamous Epithelium: – These are flattened and scale like
- b) Cuboidal Epithelium: – These are cube shaped
- c) Columnar Epithelium: – These are tall and cylindrical
- d) Transitional Epithelium: – These are combinations of cell shape found where there is a great degree of distention or expansion, these may be cuboidal to columnar, cuboidal to polyhedral and cuboidal to Squamous
Therefore considering the number of layers and cell shape we can classify covering and lining epithelium in to the following groups:
Simple epithelium:
- a) Simple – Squamous epithelium:, contain single layer of flat, scale like resemble tiled floor. It is highly adapted to diffusion, osmosis & filtration. Thus, it lines the air sacs of lung, in kidneys, blood vessels and lymph vessels.
- b) Simple – cuboidal epithelium:, Flat polygon that covers the surface of ovary, lines the anterior surface of lens of the eye, retina & tubules of kidney
- c) Simple – columnar epithelium:, Similar to simple cuboidal. It is modified in several ways depending on location & function. It lines the gastro-intestinal tract gall bladder, excretory ducts of many glands. It functions in secretions, absorption, protection & lubrication.
Stratified epithelium: It is more durable, protects underlying tissues form external environment and from wear & tear.
- a) Stratified Squamous epithelium: In this type of epithelium, the outer cells are flat. Stratified squamous epithelium is subdivided in to two based on presence of keratin. These are Non-Keratinized and Keratinized stratified squamous epithelium. Non-Keratinized stratified squamous epithelium is found in wet surface that are subjected to considerable wear and tear. Example: – Mouth, tongue and vagina. In Keratinized stratified squamous epithelium the surface cell of this type forms a tough layer of material containing keratin. Example: skin. Keratin, is a waterproof protein, resists friction and bacterial invasion.
- b) Stratified cuboidal epithelium:, rare type of epithelium. It is found in seat glands duct, conjunctiva of eye, and cavernous urethra of the male urogenital system, pharynx & epiglottis. Its main function is secretion.
- c) Stratified columnar epithelium:, uncommon to the body. Stratified columnar epithelium is found in milk duct of mammary gland & anus layers. It functions in protection and secretion.
Transitional epithelium: The distinction is that cells of the outer layer in transitional epithelium tend to be large and rounded rather than flat. The feature allows the tissue to be stretched with out breakage. It is found in Urinary bladder, part of Ureters & urethra.
Pseudo stratified epithelium: Lines the larger excretory ducts of many glands, epididymis, parts of male urethra and auditory tubes. Its main function is protection & secretion.
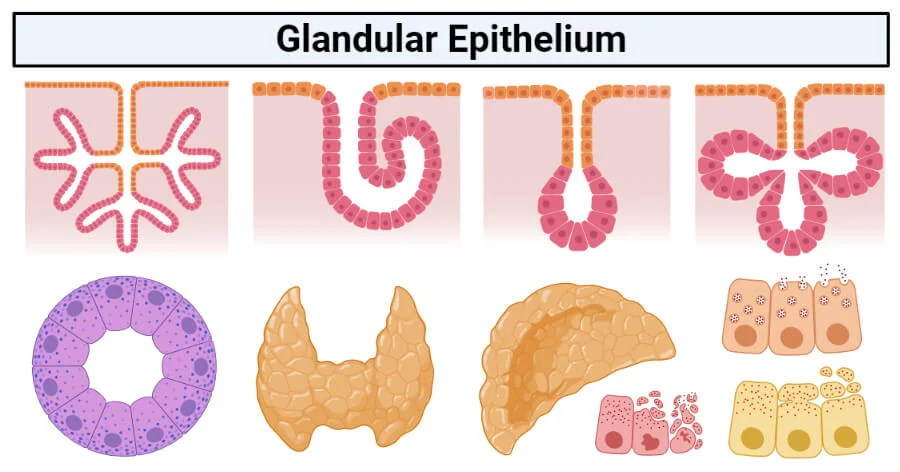
Glandular Epithelium
Their main function is secretion. A gland may consist of one cell or a group of highly specialized epithelial cell. Glands can be classified into exocrine and endocrine according to where they release their secretion.
- Exocrine: Those glands that empties their secretion in to ducts/tubes that empty at the surface of covering. Their main products are mucous, oil, wax, perspiration and digestive enzyme. Sweat & salivary glands are exocrine glands.
- Endocrine: They ultimately secret their products into the blood system. The secretions of endocrine glands are always hormones. Hormones are chemicals that regulate various physiological activities. Pituitary, thyroid & adrenal glands are endocrine.

Classification of exocrine glands
They are classified by their structure and shape of the secretary portion. According to structural classification they are grouped into:
- Unicellular gland: Single celled. The best examples are goblet cell in Respiratory, Gastrointestinal & Genitourinary system.
- Multicultural gland: Found in several different forms. By looking in to the secretary portion, exocrine glands are grouped into
- (a) Tubular gland: If the secretary portion of a gland is tubular.
- (b) Acinar gland: If the secretary portion is flask like.
- (c) Tubulo-acinar: if it contains both tubular & flask shaped secretary portion.

Connective tissue
Connective tissues of the body are classified into embryonic connective tissue and adult connective tissue.
Embryonic connective tissue:
Embryonic connective tissue contains mesenchyme & mucous connective tissue. Mesenchyme is the tissue from which all other connective tissue eventually arises. It is located beneath the skin and along the developing bone of the embryo. Mucous (Wharton’s Jelly) connective tissue is found primarily in the fetus and located in the umbilical cord of the fetus where it supports the cord.
Adult connective tissue: It is differentiated from mesenchyme and does not change after birth. Adult connective tissue composes connective tissue proper, cartilage, osseous (bone) & vascular (blood) tissue
- a) Connective tissue proper:, connective tissue proper has a more or less fluid intercellular martial and fibroblast. The various forms of connective tissue proper are:
- • Loose (areolar) connectives tissue:, which are widely distributed and consists collagenic, elastic & reticular fibers and several cells embedded in semi fluid intercellular substances. It supports tissues, organ blood vessels & nerves. It also forms subcutaneous layer/superficial fascia/hypodermis.
- • Adipose tissue: It is the subcutaneous layer below the skin, specialized for fat storage. Found where there is loose connective tissue. It is common around the kidney, at the base and on the surface of the heart, in the marrow of long bone, as a padding around joints and behind the eye ball. It is poor conductor of heat, so it decrease heat loss from the body
- • Dense (Collagenous) connective tissue: Fibers are closely packed than in loose connective tissue. Exists in areas where tensions are exerted in various directions. In areas where fibers are interwoven with out regular orientation the forces exerted are in many directions. This occurs in most fascia like deeper region of dermis, periosteum of bone and membrane capsules. In other areas dense connective tissue adapted tension in one direction and fibers have parallel arrangement. Examples are tendons and ligaments. Dense connective tissues provide support & protection and connect muscle to bone.
- • Elastic connective tissue: Posses freely branching elastic fibers. They stretch and snap back in to original shape. They are components of wall of arteries, trachea, bronchial tubes & lungs. It also forms vocal cord. Elastic connective tissue allows stretching, and provides support & suspension.
- • Reticular connective tissue: Lattice of fine, interwoven threads that branch freely, forming connecting and supporting framework. It helps to form a delicate supporting stoma for many organs including liver, spleen and lymph nodes. It also helps to bind together the fibers (cells) of smooth muscle tissue.
- b) Cartilage: Unlike other connective tissue, cartilages have no blood vessels and nerves. It consists of a dense network of collagenous fibers and elastic fibers firmly embedded in chondroitin sulfate. The strength is because of collagenous fibers. The cells of a matured cartilage are called chondrocyte. The surface of a cartilage is surrounded by irregularly arranged dense connective tissue called perichondrium. Cartilages are classified in to hyaline, fibro and elastic cartilage.
- Hyaline cartilage is called gristle, most abundant, blue white in color & able to bear weight. Found at joints over long bones as articular cartilage and forms costal cartilage (at ventral end of ribs). It also forms nose, larynx, trachea, bronchi and bronchial tubes. It forms embryonic skeleton, reinforce respiration, aids in free movement of joints and assists rib cage to move during breathing.
- Fibro cartilage: they are found at the symphysis pubis, in the inter-vertebral discs and knee. It provides support and protection.
- Elastic cartilage: in elastic cartilage the chondrocyte are located in thread like network of elastic fibers. Elastic cartilage provides strength and elasticity and maintains the shape of certain organs like epiglottis, larynx, external part of the ear and Eustachian tube.
- c) Osseous tissue (Bone): The matured bone cell osteocytes, embedded in the intercellular substance consisting mineral salts (calcium phosphate and calcium carbonate) with collagenous fibers. The osseous tissue together with cartilage and joints it comprises the skeletal system.
- d) Vascular tissue (Blood tissue): It is a liquid connective tissue. It contains intercellular substance plasma. Plasma is a straw colored liquid, consists water and dissolved material. The formed elements of the blood are erythrocytes, leukocytes and thrombocytes. The fibrous characteristics of a blood revealed when clotted
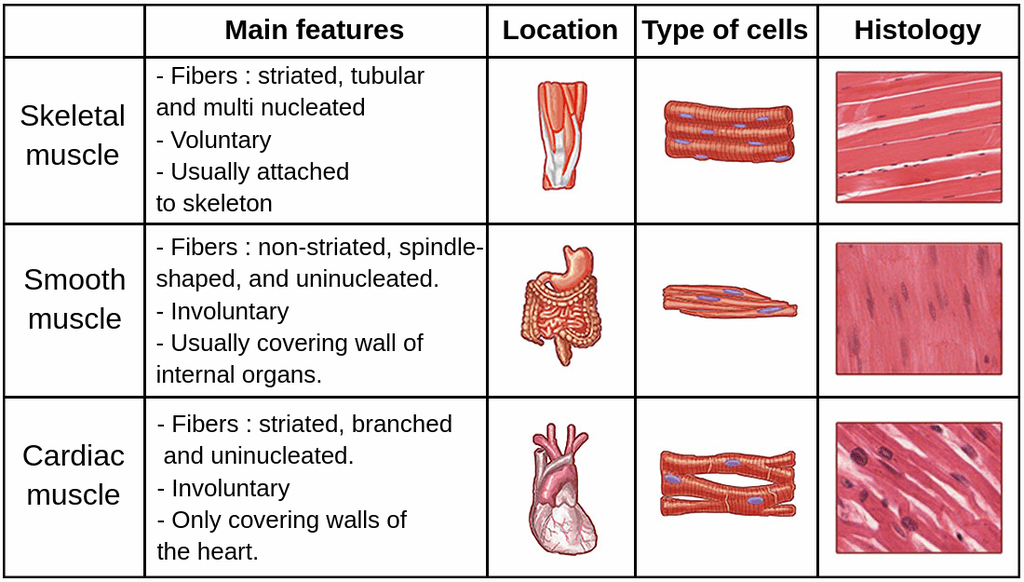
Muscle tissue
Muscle tissue consists of highly specialized cells, which provides motion, maintenance of posture and heat production.
Classification of muscles is made by structure and function.
Muscle tissues are grouped in to skeletal, cardiac and smooth muscle tissue.
- – Skeletal muscle tissue are attached to bones, it is voluntary, cylindrical, multinucleated & striated
- – Cardiac muscle tissue: It forms the wall of the heart; it is involuntary, un-nucleated and striated.
- – Smooth muscle tissue: located in the wall of hallow internal structure like Blood vessels, stomach, intestine, and urinary bladder. It is involuntary and non-striated.
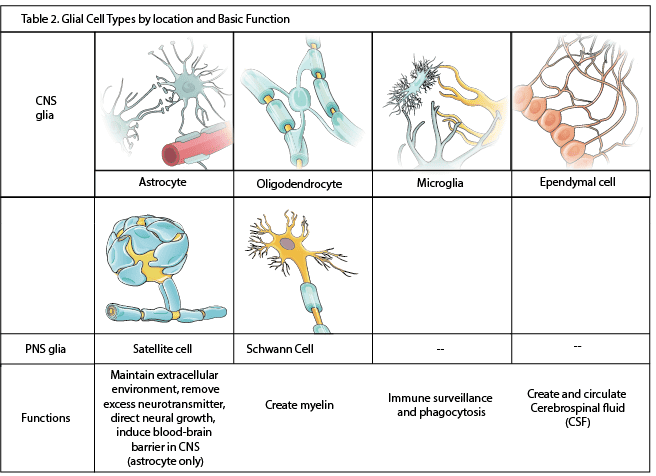
Nervous tissue
Nervous tissue contains two principal cell types. These are the neurons and the neuroglia. Neurons are nerve cells, sensitive to various stimuli. It converts stimuli to nerve impulse. Neurons are the structural and functional unit of the nervous system. It contains 3 basic portions. These are cell body, axons and dendrites. Neuroglia’s are cells that protect, nourish and support neurons. Clinically they are important because they are potential to replicate and produce cancerous growths.

Membranes
Membranes are thin pliable layers of epithelial and/or connective tissue. They line body cavities, cover surfaces, connect, or separate regions, structures and organs of the body. The three kinds of membranes are mucous, serous and synovial.
- • Mucous membranes (mucosa) lines body cavity that opens directly to the exterior. It is an epithelial layer. Mucous membranes line the entire gastro intestine, respiratory excretory and reproductive tracts and constitute a lining layer of epithelium. The connective tissue layer of mucous membrane is lamina propria. To prevent dry out and to trap particles mucous membranes secret mucous.
- • Serous membrane / serosa: contains loose connective tissue covered by a layer of mesothelium. It lines body cavity that does not open directly to the exterior. Covers the organs that lie with in the cavity. Serosa is composed of parietal layer (pertaining to be outer) and visceral layer (pertaining to be near to the organ). Pleura and pericardium are serous membrane that line thoracic and heart cavity respectively. The epithelial layer of a serious membrane secret a lubricating fluid called serious fluid. The fluid allows organs to glide one another easily.
- • Synovial membrane: Unlike to other membranes this membrane does not contain epithelium. Therefore, it is not epithelial membrane. It lines the cavities of the freely movable joints. Like serious membrane it lines structures that do not open to the exterior. Synovial membranes secret synovial fluid that lubricate articular cartilage at the ends of bones as they move at joints.

Blood and its composition
Blood is a vital connective tissue that circulates throughout the body, acting as a transport system and playing roles in defense and maintaining balance. About 7% of your body weight is blood.
Blood Composition: Blood is made of a liquid part and solid (cell) parts:
- Plasma: This is the liquid matrix (about 55% of blood volume). Mostly water (about 90%), contains proteins (like albumin for fluid balance, globulins for defense, fibrinogen for clotting), nutrients (like sugar, amino acids, fats), waste products (like urea), hormones, salts (electrolytes), and gases (like a small amount of oxygen and carbon dioxide). Function: transport of substances.
- Formed Elements: The blood cells (about 45% of blood volume): They are produced in the bone marrow.
- Erythrocytes (Red Blood Cells - RBCs): These are the most numerous blood cells. Their main job is to transport oxygen from the lungs to the body tissues and also carry some carbon dioxide back to the lungs. They contain a protein called haemoglobin which binds to oxygen and makes the cells red.
- Leukocytes (White Blood Cells - WBCs): These are larger than RBCs and are part of the body's defence system (immune system). Function: defend against infection and disease. Different types exist (e.g., neutrophils, lymphocytes).
- Platelets (Thrombocytes): These are very small cell fragments. Their main job is to help stop bleeding (blood clotting) by forming a plug at the site of injury in a blood vessel.

Revision Questions for Page 1 (Part 2):
1. Describe the basic structure of an atom.
2. What is the difference between a molecule and a compound?
3. What are electrolytes and why are they important in the body?
4. List the main parts of a cell and briefly describe the function of the mitochondria and the nucleus.
5. Name the four main types of tissue found in the human body.
6. Briefly describe the main function of epithelial tissue, connective tissue, muscle tissue, and nervous tissue.
7. Name the three types of muscle tissue and state whether each is voluntary or involuntary.
8. Describe the two main parts of blood and list the three main types of blood cells found in the blood.
9. What is the main function of red blood cells, white blood cells, and platelets?
10. Name the three kinds of membranes found in the body and give an example of where each is located.
References (from Curriculum for CN-111):
Below are the core and other references listed in the curriculum for Module CN-1102. Refer to the original document for full details.
- Cohen, JB and Hull, L.K (2016) Memmlers – The Human body in Health and diseases 13th Edition, Wolters, Kluwer. (Core Reference)
- Cohen, J.B and Hull, L.K (2016) Memmler's Structure and Function of the Human Body. 11th Edition. Wolters Kluwer, China
- Kumar, M and Anand, M (2010) Human Anatomy and Physiology for Nursing and Allied Sciences. 2nd Edition. Jaypee Brothers Medical Publishers Ltd.
- Scott, N.W. (2011) Anatomy and Physiology made incredibly easy. 1st Edition. Wolwers Kluwers, Lippincotts Williams and Wilkins.
- Moore, L. K, Agur, M.R.A and Dailey, F.A. (2015) Essential Clinical Anatomy.15th Edition. Wolters Kluwer.
- Snell, S. R. (2012) Clinical Anatomy by Regions. 9th Edition. Wolters Kluwer, Lippincott Williams and Wilkins, China
- Wingerd, B, (2014) The Human Body-Concepts of Anatomy and Physiology. 3rd Edition Lippincott Williams and Wilkins and Wolters Kluwer.
- Rohen, Y.H-Orecoll. (2015) Anatomy.A Photographic Atlas 8th Edition. Lippincott Williams & Wilkins
- Waugh, A., & Grant, A. (2014). Ross and Wilson Anatomy & Physiology in Health and Illness (12th ed.). Churchill Livingstone Elsevier. (Added as per user's reference)
Atoms, molecules and compounds Read More »

Last Office
Last Office (PEX 2.1.9: Perform Last Office)
Objectives:
- Define the term last offices.
- Perform preliminary steps of last offices.
- Identify the requirements for carrying out last offices.
- Prepare the requirements for carrying out last offices.
- Perform procedure of first phase of last offices.
Definition:
Last offices (also known as post-mortem care or care of the deceased) is the care given to a deceased person to ensure a clean body and maintain dignity, respect, and prepare the body according to cultural, religious, and legal requirements.
Aims:
- To prepare the deceased for mortuary or a funeral home or morgue (a place where dead bodies are kept pending identification, autopsy or burial.
- To minimize any risk of cross infection to relatives, health care workers or persons who may need to handle the deceased.
Requirements:
Trolley (Top Shelf):
- Two jugs of warm and cold water
- Small tray with:
- Soap in a dish
- Nail brush
- Vaseline or lubricant
- Comb
- Nail cutter
- Pair of scissors
- 2 Receivers (kidney dishes)
- Dissecting forceps (or artery forceps) - often for packing orifices
- Mortuary labels with tapes (at least 3 - wrist, toe, and shroud)
- A roll of toilet paper (or cotton wool)
- Brown cotton wool in a bowl (for packing orifices) - **Note:** Brown cotton wool is less common now; plain cotton wool or gauze is typically used.
- Dressing pack (or sterile pack with swabs)
- Flannels (or washcloths)
- Antiseptic lotion
- Jik (or other disinfectant for surfaces/equipment)
Trolley (Bottom Shelf):
- Plastic apron
- 2 pairs of clean sheets (one for the bed, one for the shroud)
- Dressing mackintosh and sheets
- A pair of mortuary sheets (or shroud/body bag)
- Strapping and sticking plaster (adhesive tape/bandage)
- Notification of death forms
- Bottle of antiseptic lotion (for washing body)
- 2 buckets (one containing disinfectant solution for contaminated items)
Bedside:
- Hand washing equipment (access to sink, soap, water, towel)
- Screens (for privacy)
- Bucket for wastes (clinical and general)
- Dirty linen container
- Deceased Burial Clothes:
- Clean sheets
- Dressing clothes as preferred by family/culture (e.g., Men - underwear, trousers, shirt, coat, tie; Traditional wear according to culture or religion).
- Diapers/pads (if needed)
Procedure (Preliminary Steps & First Phase):
| Steps | Action | Rationale |
|---|---|---|
| 1. | Observe the general rules. | Promotes adherence to standards and patient safety/dignity. |
| 2. | Confirm the patient has ceased breathing and check for absence of pulse, heart sounds, and pupillary reflexes. Note the exact time of death. | To confirm death and for legal and documentation purposes. Ensures timely attendance by the medical team. |
| 3. | Notify the In-charge or Doctor immediately as soon as the patient ceases to breathe. | To confirm death and for legal purposes. Ensures timely attendance by the medical team. |
| 4. | Provide a calm and respectful environment. Remove excess equipment from around the bed. Close adjacent windows and screen the bed/room for privacy. | To promote serenity in the ward, respect the dignity of the deceased, and provide privacy for the procedure and the remaining patients/staff. |
| 5. | Inform the relatives or next of kin about the death with empathy and counsel them appropriately. Allow relatives time to be with the deceased if desired, providing them with privacy and support. Request relatives to bring burial clothes if applicable. Ask about cultural/religious preferences for handling the body. | To support the grieving family, fulfill emotional needs, and gather information about specific requests or cultural/religious practices for handling the body. |
| 6. | Remove any jewelry, necklace, watches, or other valuables that have been worn by the deceased. Document these items carefully and hand them over to the next of kin or store them according to hospital policy, obtaining signatures on an accountability book/form. | To prevent loss of personal effects and ensure proper handling and accountability. |
| 7. | Remove any tubes, catheters (e.g., IV lines, NG tubes, urinary catheters, drainage tubes) as per policy or doctor's order. Clamp or tie off puncture sites. Note: If a medico-legal case, tubes may need to remain in situ. |
To prepare the body for cleaning and dressing and to prevent leakage from sites. Prevents misinterpretation in medico-legal cases. |
| 8. | Stop any running IV infusions. | Not applicable after death. |
| 9. | Put on protective wear (plastic apron, gloves). | To prevent cross-infection and protect staff from contact with body fluids. |
| 10. | Strip the bed of soiled linen, carefully removing and placing it in the dirty linen container. If the body has soiled the bed, place a clean sheet under the body. If infectious disease, decontaminate linen in an antiseptic solution before sending to laundry. | To maintain cleanliness of the environment and prevent spread of infection. |
| 11. | Clean the body thoroughly, providing a full wash (refer to Bed Bath procedure 5.1), paying attention to all areas. If necessary, shave the face (for males) or comb/style hair as preferred by the deceased or next of kin. | To ensure the body is clean and presentable, respecting the dignity of the deceased. To maintain good memories for the family. |
| 12. | Final Care Given to the deceased: Laying out of the deceased is done with respect and according to the dead person's religious rights and cultural values. - Straighten the upper limbs and tie the lower limbs together at the big toes (ankles) with a bandage or piece of soft material. - Close the eyes gently if they cannot remain closed; place a wet swab over the eyelids if needed. - Close the mouth; if necessary, place a small rolled towel under the chin or use a bandage around the head and chin to keep the mouth closed. Dentures should be left in place if possible. - Pack orifices (mouth, nostrils, anus, vagina in females) with cotton wool or gauze using forceps to prevent leakage of body fluids. Ensure packing is not visible. |
This is for continuity of respect of human beings even after death. To allow correct body alignment before rigor mortis sets in. To create a natural, peaceful appearance. To prevent soiling of the linen and body from natural discharges. |
| 13. | Dress the body in clean clothes or the burial clothes provided by the family, according to cultural/religious practices. If burial clothes are not available or used, use a clean shroud or mortuary sheet/body bag. | To respect the dignity of the deceased and prepare the body for viewing or transfer. |
| 14. | Place a clean sheet over the body, covering up to the neck or as appropriate for cultural/religious viewing. | To maintain modesty and dignity. |
| 15. | Fill out the mortuary labels with the particulars: name, age, date and time of death, ward, next of kin, any specific instructions (e.g., infectious precautions). Attach one label to the wrist, one to the ankle/toe, and one to the shroud/body bag. | To ensure accurate identification of the deceased for legal and administrative purposes. |
| 16. | Assist with transferring the body to the mortuary trolley or body bag as per policy. | To prepare the body for transfer. |
| 17. | Transport the body to the mortuary securely and respectfully. | Ensures safe custody and transfer. |
| 18. | Document the procedure fully, including the time of death, time last offices were completed, care given, items removed (valuables, tubes) and their disposition, persons notified, and any specific instructions or cultural considerations followed. | For continuity of care, monitoring, and legal record. |
| 19. | Clear away and disinfect all used equipment, surfaces (bed, locker, floor), and the room as per terminal disinfection policy. Dispose of waste appropriately. Wash hands. | To prevent the spread of infection and maintain a clean environment. |
Points to Remember (Adult Last Offices):
- Maintain a calm, quiet, and respectful atmosphere throughout the procedure.
- Always handle the deceased body gently and with dignity.
- Be sensitive to the cultural and religious beliefs of the patient and family regarding death and body preparation. Consult with the family or spiritual advisors if unsure.
- If the death is a medico-legal case, follow specific protocols regarding removal of tubes, handling of clothing, and notification of authorities.
- Ensure proper identification of the body with labels before transfer to the mortuary.
- Wash hands thoroughly before and after the procedure.
- Terminal disinfection of the patient's unit is essential.
LAST OFFICE IN PERINATAL DEATH
Objectives:
- Define the term perinatal mortality.
- Display the ability to break news of death and counsel the parents of a deceased baby.
- Identify the requirements for carrying out last office to a deceased new born baby.
- Prepare the requirements for carrying out last office to a deceased new born baby.
- Perform last office of the deceased new born baby.
Definition:
Perinatal mortality is the death of a baby in the first 28 days of life, including stillbirths (death before birth after 28 weeks gestation).
Requirements (Perinatal Death):
Additional requirements to adult last office requirements:
- Baby clothes (as provided by parents/family)
- Diapers (or pads)
- Small artery forceps (for packing orifices)
- Small blanket or receiving cloth (for wrapping the baby)
- Mortuary label (specifically for stillbirths/neonates)
Procedure (Last Office in Perinatal Death):
| Steps | Action | Rationale |
|---|---|---|
| 1. | Observe the general rules. | Promotes adherence to standards. |
| 2. | Communicate the news of the death to the mother and father empathetically, providing privacy and support. Counsel them appropriately about the cause of death (if known) and the next steps. | To initiate coping mechanism and support the parents through their grief. |
| 3. | If the death was an intra-uterine fetal death (stillbirth), inform the mother and next of kin of what has happened and the next steps (e.g., delivery process). | To provide necessary information and prepare the parents for the process ahead. |
| 4. | Ask the parents if they would like to see, hold, and spend time with the baby. Handle the baby gently and wrap in a clean cloth. Remove any tubes or lines. Wash hands and put on protective wear (gloves). | To allow parents to bond with their baby, initiate the grieving process, and create memories. Maintains hygiene and safety. |
| 5. | Ask the parents if they would like to take a photo of their dead baby. | A photo can be used for future remembrance and healing. |
| 6. | Bathe the baby gently with warm water and mild soap. Dry thoroughly with a soft towel. | To provide a clean body, respecting the dignity of the deceased baby, and create a descent appearance. |
| 7. | Pack all orifices (mouth, nostrils, anus, and vagina if applicable) with cotton wool or gauze using small forceps. Ensure the packing is not visible. Apply a diaper. | Packing reduces the risk of soiling the linen and body from natural discharges and prevents the spread of infection. Maintains cleanliness and dignity. |
| 8. | Dress the baby fully in the clothes provided by the parents or in clean hospital clothes. Wrap the baby completely in a clean blanket or receiving cloth. | To make the baby presentable, respect the parents' wishes, and provide a sense of comfort and completeness. |
| 9. | Fill the mortuary label with the necessary particulars: baby's name (if given), mother's name, date and time of birth (if born alive), date and time of death, sex, state if stillbirth or not, ward name. Attach the label securely to the baby's wrist or ankle. | To ensure accurate identification of the deceased baby for legal, administrative, and ethical purposes. |
| 10. | Ask the mother and next of kin where the body is to be kept or sent (e.g., mortuary, specific location as per cultural practice). Inform them of the process for collecting the body. | Promotes safe custody and transfer, builds confidence in the parents/next of kin, and ensures legal/cultural requirements are met. |
| 11. | Take the body to the mortuary well labeled, or hand over to the designated person according to policy/request, obtaining signatures on a handover form/accountability book. | Enables identification and for ethical and legal purposes. Ensures accountability for the body. |
| 12. | Clear away and disinfect all used equipment and the environment as per policy. Dispose of waste appropriately. Wash hands. | To prevent spread of infection and maintain cleanliness. |
| 13. | Document the procedure completely, including the time of death, time last offices were completed, care given, interactions with parents (seeing/holding baby, photos taken), disposition of the body, and any specific cultural considerations followed. | For continuity of care, monitoring, and legal record. Essential documentation for perinatal deaths. |
Points to Remember (Perinatal Death):
- Be exceptionally sensitive, supportive, and compassionate when caring for parents experiencing perinatal loss.
- Allow parents adequate time to see and hold their baby if they wish. This is a vital part of the grieving process.
- Provide privacy for the family. Ideally, the last offices for a perinatal death should be performed in a separate room, not in the main ward where other mothers with babies are present.
- Ensure the environment is quiet and conducive to grieving.
- Handle the baby gently and with the utmost respect throughout the procedure.
- Follow hospital policy and cultural/religious practices regarding the disposition of the body.
- Minimize psychological trauma for the mother and family.
- Ensure appropriate follow-up support is offered to the parents.
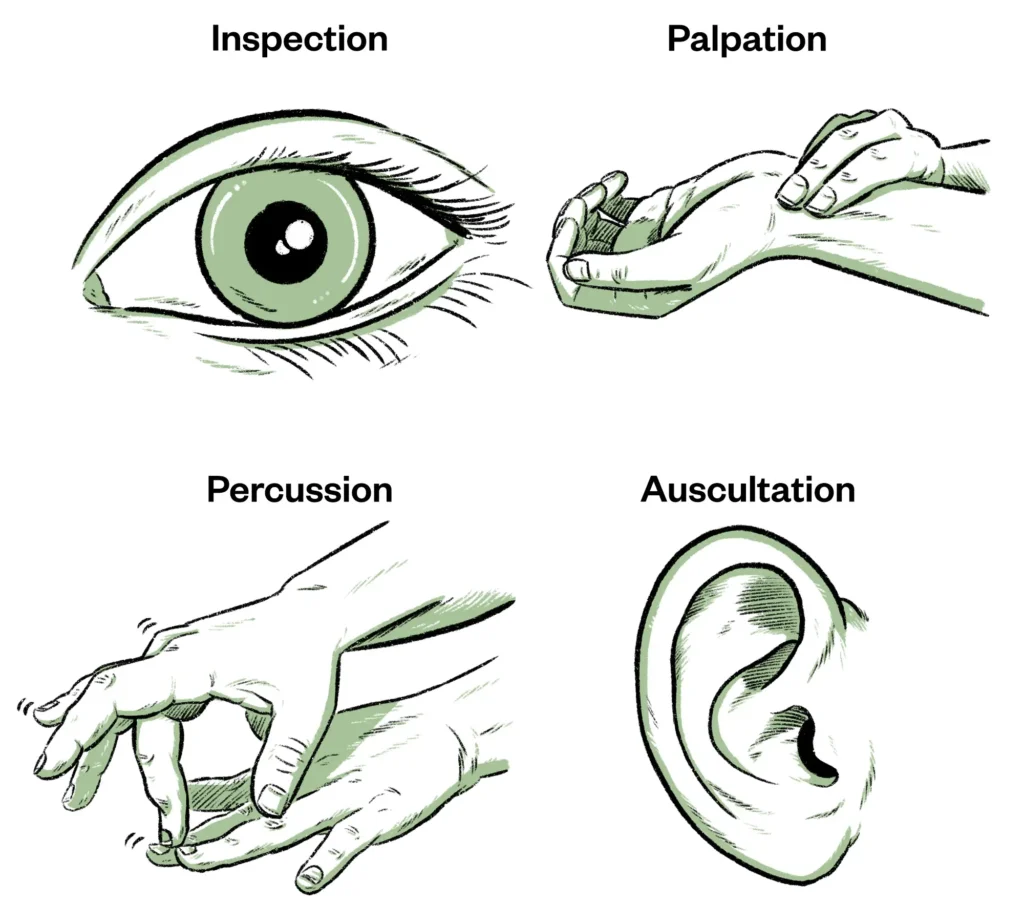
Physical Examination of the Patient
Physical Examination of the Patient (PEX 2.3.3: Perform physical examination of the patient)
Objectives:
- Identify the requirements for assessing the patient.
- Prepare the requirements for assessing the patient.
- Carry out assessment of the patient.
- Define the term nursing process (part of 3.0).
- State the characteristics of the nursing process (part of 3.0).
- Describe the components of the nursing process (part of 3.0).
- Apply nursing process when giving nursing care (part of 3.0).
Definition:
Physical examination of a patient is done from head to toe and assessment of the major systems.
Physical Examination calls for 4 techniques :
- Inspection: Means looking at the client carefully to discover any signs of illness.
- Palpation: Means using hands to touch and feel. Different parts of hands are used for different sensations such as temperature, texture of skin, vibration, tenderness, etc. (e.g., fingertips for fine tactile surfaces, back of fingers for temperature, flat of palm and fingers for vibrations).
- Percussion: Determines the density of various parts of the body from the sound produced by them, when they are tapped with fingers. Helps find abnormal solid masses, fluid, and gas, and map out size and borders of organs. Methods include indirect percussion (tapping a finger placed on the body).
- Auscultation: Means listening to the sounds transmitted by a stethoscope, used to listen to the heart, lungs, and bowel sounds.

Functional health pattern approach (from 3.2):
Based on Gordon's functional health patterns, allows collection of data according to each pattern. Includes eleven health functional patterns (e.g., Health perception, Nutritional, Elimination, Activity/Exercise, Sleep/Rest, Cognitive/Perceptual, Self-perception, Role/Relationship, Sexuality/Reproductive, Coping/Stress, Value/Belief).
Requirements:
Same as for Taking History (from 3.1), particularly the Observation Tray contents and equipment for vital signs, measurements, and physical assessment tools.
Top Shelf (Observation Tray):
- Thermometer
- Watch (with seconds hand)
- Stethoscope
- Blood pressure machine (Sphygmomanometer)
- Neurological tray (Torch light/penlight, Spatula, Patella hammer, Otoscope, Tuning fork, Gallipot with cotton swabs/gauzes, Skin pencil, Snellens chart, Ophthalmoscope, Atropine 1% eye drops)
- Auroscope set (Jobson Horne ring probe, Wool and applicator, Dissecting aural forceps)
- Sterile throat swab
- Dental mirror laryngoscope
- Nasal speculum
- Alcohol swabs
- Lubricant
- Drape
- Vaginal speculum
- Disposal pads
Bottom Shelf:
- Record forms (History forms, assessment charts)
- Disposable gloves
- Specimen bottles
At the side:
- Weight scale (electronic or sling scale)
- Measuring tape
- Ruler
- Record chart
- Screen (for privacy)
- Examination table (if needed)
- Hand washing equipment
Special Senses Assessment tools (from 3.1.1/3.2):
- Bottle for cold and hot water (to test temperature sensation).
- Bottles with distinctive smelling liquids e.g. lavender (to test olfactory sense).
- Bottles with salt, sugar, bitter, and sour substances (to test taste sensation).
Procedure (General Physical Examination - Head to Toe Approach):
| Steps | Action | Rationale |
|---|---|---|
| 1. | Observe the general rules of nursing procedure. | Promotes adherence to standards. |
| 2. | Explain the purpose of the physical examination to the patient. Ensure privacy, provide adequate lighting, and assist the patient into a comfortable position. | To gain cooperation, reduce anxiety, and ensure a proper examination environment. |
| 3. | General Appearance: Observe overall appearance: posture, gait, movement, hygiene, state of nourishment, level of consciousness, and apparent age. Note any obvious changes or distress. | To identify obvious changes, assess mobility, hygiene, and overall health status. |
| 4. | Vital Signs: Measure temperature, pulse, respiration, and blood pressure. Obtain height and weight (as per procedure 3.1.2). | Provides baseline data on patient's physiological status. |
| 5. | Orientation & Cognitive Function: Observe patient's ability to respond to verbal commands, level of consciousness, orientation to person, place, and time. Note ability to think, remember, process information, and communicate. Note articulation on speech, style, and content. | Responses and cognitive processes indicate the patient's brain function and mental status. |
| 6. | Integumentary System (Skin, Hair, Nails): Inspect and palpate the skin: Note appearance, color, texture, sensation, moisture, temperature, turgor. Observe for any lesions, rashes, growths, trauma, edema. Check capillary refill by pressing the nail bed, noting the return of color. Assess hair for color, texture, growth, distribution. Inspect nails for color, shape, texture, and condition. | To assess the integrity and function of the skin, hair, and nails. Helps identify dehydration, anemia, circulation problems, or skin abnormalities. |
| 7. | Head: Inspect and palpate the head: Note size, shape, and symmetry. Palpate for any deformities, depressions, or tenderness. Inspect face for facial expression, asymmetry, involuntary movements, edema, and masses. | To detect abnormalities, assess for signs of paralysis, or masses. |
| 8. | Eyes: Inspect both eyes for position and alignment, symmetry, colour (sclera, conjunctiva). Observe pupils for size, shape, equality, and reaction to light (PERRLA). Test visual acuity (using Snellen chart if available). Observe ability to see. | To detect any abnormalities, assess visual function and neurological status related to the eyes. |
| 9. | Ears: Inspect and palpate ear shape, size, symmetry, and patency of the ear canal using an otoscope. Test hearing (e.g., whisper test or tuning fork tests). Observe ability to hear. | To detect abnormalities in ear structure and canal, and assess auditory function. |
| 10. | Nose: Inspect the anterior and inferior surface of the nose. Palpate the nose. Inspect the nasal vestibule with penlight; observe symmetry, size, flaring, and sensation. Observe ability to smell. | To detect any abnormalities or obstruction in the nasal passages. |
| 11. | Mouth: Observe lips, mucous membrane, gum, tongue, teeth, and palate for color, moisture, texture, and sensation. Inspect the throat (uvula, tonsils, pharynx) using a penlight and tongue depressor. Observe ability to taste. | To detect any abnormalities or signs of infection in the oral cavity and throat. |
| 12. | Neck: Inspect and palpate the neck: Note symmetry, range of motion. Inspect and palpate the lymph nodes (pre-auricular, post-auricular, occipital, tonsillar, submandibular, submental, superficial cervical, posterior cervical, deep cervical chain, supra clavicular) for location, size, shape, texture, and pain. Inspect and palpate jugular veins. Inspect and palpate thyroid gland for enlargement, contour, and symmetry. Ask patient to swallow while palpating the thyroid. | To detect enlargement of lymph nodes (infections/conditions), assess jugular venous distension (JVD - indicates increased venous pressure), and assess thyroid abnormalities. |
| 13. | Chest, Lungs, and Heart: Inspect chest movement and symmetry during breathing. Palpate chest. Auscultate lung sounds in all lobes (anterior, posterior, lateral) for normal breath sounds and adventitious sounds (crackles, wheezes). Percuss the chest. Auscultate heart sounds (rate, rhythm, murmurs) at the appropriate locations. | To assess respiratory and cardiovascular function and detect abnormalities such as congestion or abnormal heart rhythms. |
| 14. | Breasts and Axilla: Inspect breasts appearance, color, size, symmetry, shape, and texture. Palpate breasts for lumps or tenderness. Inspect nipples for symmetry, shape, dry scaling, fissure, ulceration, bleeding or other discharge. Inspect and palpate axilla for lymph nodes. | To detect any abnormalities, lumps, or signs of infection/inflammation. |
| 15. | Abdomen: Assist patient to lie in supine position with knees slightly flexed (if possible) to relax abdominal muscles. Inspect the abdomen: Note skin color, symmetry, shape, distension. Observe pulsations from the aorta (if visible). Auscultate bowel sounds in all four quadrants (presence, character, frequency). Percuss the abdomen for tone. Palpate the abdomen (light and deep palpation) for tenderness, masses, and size/consistency of organs (liver, spleen, kidneys). | To assess abdominal function, detect abnormalities such as distension, abnormal bowel sounds, tenderness, masses, or organ enlargement. |
| 16. | Musculoskeletal System: Inspect and palpate neck, shoulders, arms, hands, hips, knees, legs, ankles, and feet for symmetry, size, contour of joints, skin condition, tenderness, swelling, or deformities. Assess range of motion (active and passive) of all major joints, noting any pain or limitation. Assess muscle strength and tone. Observe gait. | To detect swelling, deformities, pain, and limitations in movement. Assesses functional mobility. |
| 17. | Neurological System: Assess level of consciousness (already done in step 5), orientation, cognitive function. Assess cranial nerves. Assess motor function (strength, coordination, balance). Assess sensory function (light touch, pain, temperature, vibration, position). Assess reflexes. | To assess the function of the nervous system and detect any deficits. |
| 18. | Thank the patient for their cooperation and assist them back to a comfortable position. Dispose of used materials and clean equipment. Wash hands. | To conclude the examination respectfully and maintain hygiene. |
| 19. | Document findings accurately and completely on the patient's chart. Report any significant or abnormal findings immediately to the doctor. | For continuity of care, monitoring, and legal record. |
Physical Examination of the Patient Read More »

Taking History of the Patient
Taking History of the Patient (PEX 2.3.2: Take history of the patient)
Objectives:
- Identify the requirements for assessing the patient.
- Prepare the requirements for assessing the patient.
- Carry out assessment of the patient.
Definition of Data Collection (from 3.1):
Data collection consists of gathering information about the patient in order to develop a "data base" which can be analyzed in various ways depending on the intended use. There are two types of data:
- Subjective data (Symptoms felt by the patient)
- Objective data (Observable signs)
Sources of Data:
- Patient (primary source of data)
- Family members and significant others
- Various patient's records (medical charts, previous notes)
- Other members of the health team.
Requirements :
Top Shelf (Observation Tray):
- Thermometer
- Watch (with seconds hand)
- Stethoscope
- Blood pressure machine (Sphygmomanometer)
- Neurological tray (Torch light/penlight, Spatula, Patella hammer, Otoscope, Tuning fork, Gallipot with cotton swabs/gauzes, Skin pencil, Snellens chart, Ophthalmoscope, Atropine 1% eye drops)
- Auroscope set (Jobson Horne ring probe, Wool and applicator, Dissecting aural forceps)
- Sterile throat swab
- Dental mirror laryngoscope
- Nasal speculum
- Alcohol swabs
- Lubricant
- Drape
- Vaginal speculum
- Disposal pads
Bottom Shelf:
- Record forms (History forms, assessment charts)
- Disposable gloves
- Specimen bottles
At the side:
- Weight scale (electronic or sling scale)
- Measuring tape
- Ruler
- Record chart
- Screen (for privacy)
- Examination table (if needed)
- Hand washing equipment
Procedure (Taking History of the Patient):
| Steps | Action | Rationale |
|---|---|---|
| 1. | Observe the general rules (e.g., introduce yourself, wash hands). | Promotes professionalism, hygiene, and sets a positive tone. |
| 2. | Explain the purpose of taking the history and ensure patient privacy by using screens or a private room. Build rapport and a therapeutic relationship with the patient. | Providing information fosters cooperation and helps reduce anxiety. Respecting privacy is fundamental. |
| 3. | Take history in the following order, encouraging the patient to speak freely and using open-ended questions: Biographical/Personal Information: Name, age, tribe, address, occupation, religion, marital status, level of education, next of kin, relationship to next of kin, telephone number patient or and next of kin, nearest health facility. |
To create a therapeutic relationship, identify the patient, for legal purposes and follows up. |
| 4. | Presenting/Main Complaint: Establish the reason for seeking health care, focusing on: - Onset (When did it begin; is it better, worse, or the same since it began). - Character (How does it feel, look, smell, sound, severity etc). - Anatomic location (Where is it? Where does it radiate). - Duration (How long it last/ does it recur). - The setting in which it occurs. - Pattern or precipitating factors (What makes it worse or better). - Associated factors (What other symptoms do you have with it?) |
A detailed description of the concern helps the nurse to gain an insight into the problem and is a basis to develop a nursing care plan for managing the patient. |
| 5. | Past Medical History: Inquire about past diseases or recurrent conditions (e.g., sickle cell, asthma, malaria, kidney diseases, diabetes, STIs, poliomyelitis, rickets, any past infection or hospitalization). | To identify previous conditions or complications that may be aggravating the presenting complaint. |
| 6. | Past Surgical History: Inquire about accidents, injury, blood transfusion history, and reasons for past surgeries/fractures. | To understand previous health events that may impact current condition or care. |
| 7. | Past Medications Received: Ask about patient's response to past/current medications, whether still on medication, any allergies (including food and environmental), use of home remedies or herbs. | To establish the past/current medication use, identify allergies, and assess potential side effects. |
| 8. | Social History: Inquire about alcohol and tobacco consumption, source of income, housing conditions, source of water, marital status, number of children, health of children and spouse, occupation and environment, sexual activities, sex partners, and family planning. | To identify risk of conditions or diseases related to stated social history and understand the patient's living situation. |
| 9. | Family History: Establish if both parents are dead or alive (if died, what was the cause?). Inquire about spouse, siblings (number, illness), and children (age, illness). Ask about inherited diseases in the family. | To find problems related to daily living activities and general wellbeing, and identify genetic predispositions. |
| 10. | Gynecological History (for female patients): Inquire about menarche (age of first period), menstrual cycle (number of days, amount of blood, regularity), date of last menstrual period (LMP), obstetric history (number of pregnancies, births, abortions, living children, complications), use of contraception, history of sexually transmitted infections (STIs), vaginal discharge, tumor history (cervical/uterine cancer), pap smear history (if applicable). | To rule out gender-related conditions and inform care related to reproductive health. |
| 11. | Male History (for male patients): Establish male fertility related conditions, prostate problems (e.g., BPH), history of STIs, scrotal or penile problems. | To rule out gender-related conditions and inform care related to reproductive health. |
| 12. | Systems Review: Ask about symptoms related to each body system (e.g., respiratory, cardiovascular, gastrointestinal, genitourinary, neurological, musculoskeletal, integumentary). | To identify additional symptoms or problems the patient may not have mentioned initially. |
| 13. | Thank the patient for their cooperation. | To conclude the interview respectfully. |
| 14. | Document the complete history accurately and legibly on the patient's chart/form. | For continuity of care and legal record. |
Special Senses Assessment :
- (Note: This seems like a sensory assessment included in the section)
- Bottle for cold and hot water (to test temperature sensation).
- Bottles with distinctive smelling liquids e.g. lavender (to test olfactory sense).
- Bottles with salt, sugar, bitter, and sour substances (to test taste sensation).
Taking History of the Patient Read More »

Catheterization
Catheterization (PEX 2.1.13: Prepare and perform Catheterization)
Objectives:
- Define the term catheterization.
- Name the types of catheters according to:
- Nature of procedure done (e.g., intermittent, indwelling)
- Types of catheter (e.g., non-retaining, self-retaining, metallic, non-metallic, rubber, plastic)
- State the indications for catheterization.
- Identify the requirements for passing a urethral catheter.
- Prepare the requirements for passing a urethral catheter.
- Perform the procedure of passing a urethral catheter.
Definition:
Catheterization is the introduction of a fine plastic or rubber tube (catheter) through the urethra into the urinary bladder in order to remove urine or to keep the urethra open.

Types of Catheters:
- Non-retaining or self-retaining (e.g., Foley catheter with inflatable balloon).
- Metallic and non-metallic (e.g., plastic, rubber, silicone).
- Rubber catheters.
- Plastic catheters.
Catheter sizes are according to the French (Fr) scale. Sizes include 8 to 10 Fr for children, 14 to 16 Fr for adult females, and 18 to 20 Fr for adult males. Generally, sizes range from 8 to 24 Fr. The smallest effective size should be used to minimize trauma.
Indications for Catheterization:
- To obtain a sterile specimen of urine for examination or investigations (e.g., when a clean catch midstream sample is not possible).
- To relieve urinary retention when other nursing measures have failed (e.g., after surgery, due to obstruction, or neurogenic bladder).
- To ensure that the bladder is empty before (pre-operatively), during, and after pelvic or abdominal surgeries to prevent injuries to the bladder.
- To measure the amount of residual urine after voiding (post-void residual). It is done when partial obstruction of the bladder outlet is suspected (e.g., in BPH, VVF patients, patients on bladder training).
- Emptying the bladder before giving a bladder irrigation or installation of medication.
- Splinting the urethra following urethral surgery or trauma.
- In cases of incontinence of urine to prevent bed sores which may occur in diseases of the nervous system, trauma, and other conditions requiring strict intake and output monitoring.
- Monitoring accurate hourly urine output in critically ill patients.
Requirements:
Trolley (Top Shelf):
- A sterile catheterization pack containing: Sterile towels (2), Drape (1), Sterile receiver (2), Gauze swabs, Cotton wool swabs.
- Sterile Foley catheter (appropriate size, have a spare)
- Sterile KY Jelly or Lubricant (water-soluble)
- Antiseptic solution (e.g., Povidone-iodine or Chlorhexidine solution) in a gallipot
- A 10 ml syringe (for inflating the balloon)
- Sterile water (or normal saline) for inflating the balloon (amount specified on catheter)
- Specimen bottle(s) with labels (if specimen is required)
- Spigot or clamp
- Drainage bag and tubing (if inserting an indwelling catheter)
- Dressing mackintosh and towel
- Sterile gloves (at least 2 pairs)
- Non-sterile gloves (for initial preparation)
Bedside:
- Hand washing equipment (access to sink, soap, water, towel)
- Screens (for privacy)
- Adequate lighting (e.g., torch or lamp)
- Waste receptacle
- Urine collection container (if not using a drainage bag, e.g., receiver or measuring jug)
- Patient's chart and Fluid balance chart (if monitoring output)

Procedure (Catheterization of a Female Patient):
| Steps | Action | Rationale |
|---|---|---|
| 1. | Observe the general rules. | Promotes adherence to standards. |
| 2. | Explain the procedure to the patient, obtain consent (if conscious). Provide privacy with screens. | To reduce anxiety, gain cooperation, and respect patient rights. |
| 3. | Assist the patient to adopt the dorsal recumbent position (lying on back with knees flexed and spread apart). | Dorsal position makes it easy for the nurse to carry out the procedure by exposing the meatus. |
| 4. | Place the dressing mackintosh and towel under the patient's buttocks. | To protect the bed linen from urine spillage. |
| 5. | Wash hands and put on clean non-sterile gloves. Open the outer wrapper of the sterile catheterization pack and place on the trolley. Open sterile gloves and place on the trolley. | Prevents infection and prepares the sterile field. |
| 6. | Pour antiseptic solution into a gallipot. Open sterile catheter and place on the sterile area. Draw up sterile water/saline into the syringe for balloon inflation. Lubricate the catheter tip (about 2-4 cm). | Maintains sterility and prepares the catheter for insertion. |
| 7. | Remove non-sterile gloves and wash hands. Put on sterile gloves. | Maintains sterile technique. |
| 8. | Drape the patient's genitalia, exposing the urethral orifice. Place a sterile receiver on the drape between the patient's thighs to collect urine. | To create a sterile field and prepare for urine collection. |
| 9. | Separate the labia with the thumb and index finger of the non-dominant hand to visualize the urethral meatus. Maintain separation throughout the procedure (this hand is now contaminated). | To visualize the meatus clearly and prevent contamination from the labia. |
| 10. | Clean the urethral meatus thoroughly with cotton wool swabs soaked in antiseptic solution, using the forceps. Wipe from anterior to posterior (front to back), using a fresh swab for each stroke. Clean from the meatus outwards. Discard used swabs. | To prevent the introduction of microorganisms into the bladder. |
| 11. | Using the dominant hand (which is sterile), gently insert the lubricated catheter tip into the urethral meatus. Advance the catheter slowly 4-6 cm until urine begins to flow into the receiver. | Lubrication minimizes trauma to the urethra. Gentle insertion prevents injury. Length ensures entry into the bladder. |
| 12. | Once urine flows, advance the catheter a further 2-3 cm to ensure the balloon is fully within the bladder. Hold the catheter in place with the non-dominant hand. | To ensure the balloon is not inflated in the urethra, which would cause pain and damage. |
| 13. | Inflate the balloon slowly with the pre-drawn sterile water/saline using the syringe. The amount is specified on the catheter (usually 5-10 ml for adult Foley). | To secure the catheter in the bladder and prevent it from slipping out. |
| 14. | Gently pull back on the catheter slightly until resistance is met, indicating the balloon is seated at the bladder neck. | Confirms correct placement and anchors the catheter. |
| 15. | Connect the catheter to the drainage bag and tubing system, ensuring a closed system. Ensure the drainage bag is positioned below the level of the bladder. | To allow continuous drainage of urine and maintain a closed sterile system to prevent infection. |
| 16. | Secure the catheter to the patient's inner thigh with adhesive tape, allowing for some slack to prevent tension on the meatus. | Prevents accidental dislodgement and irritation of the urethra. |
| 17. | Dispose of used equipment and materials appropriately. Wash hands. | Maintains cleanliness and infection control. |
| 18. | Leave the patient comfortable and check that urine is draining freely into the bag. Provide post-procedure care and instructions to the patient (e.g., signs of infection, hydration). | To ensure patient comfort and well-being and prevent complications. |
| 19. | Document the procedure, including the date, time, type and size of catheter inserted, amount of fluid used to inflate the balloon, characteristics and amount of urine obtained (if initial drainage), patient's response, and name/signature of nurse. | For continuity of care, monitoring, and legal record. |
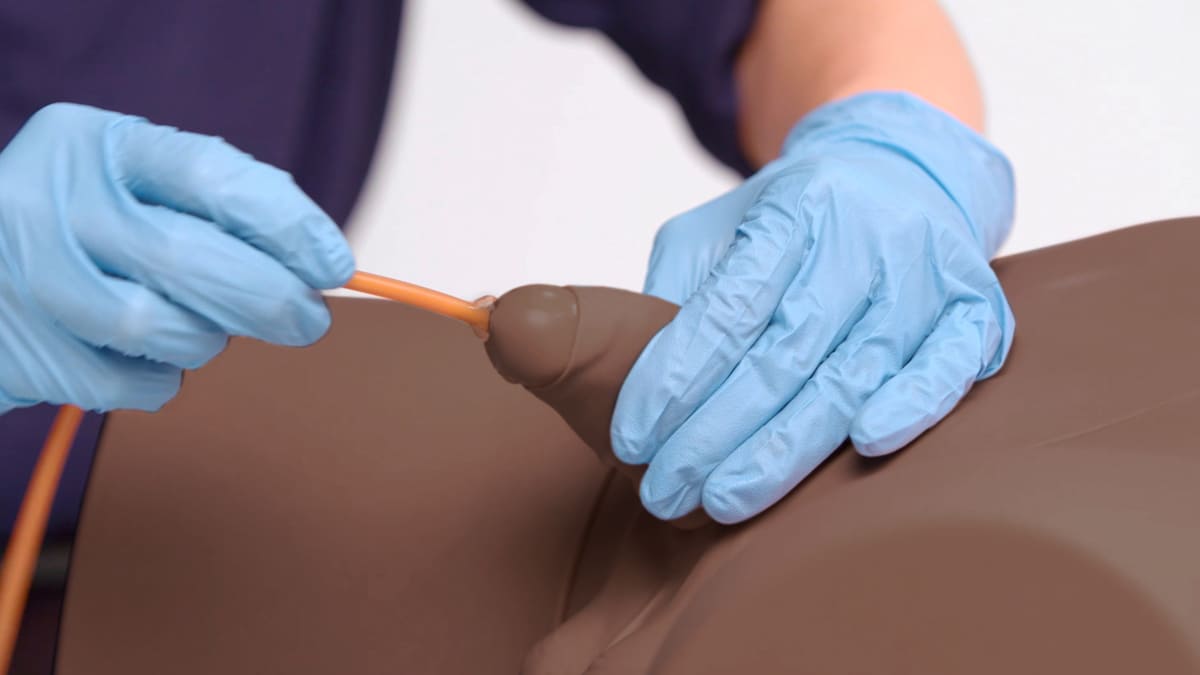
Procedure (Catheterization of a Male Patient):
| Steps | Action | Rationale |
|---|---|---|
| 1. | Follow the general steps for catheterization preparation as for a female patient (Steps 1-7 Female Procedure), including explaining the procedure, ensuring privacy, preparing equipment, and washing hands/donning sterile gloves. | The principles of catheterization preparation remain the same in both male and female patients. |
| 2. | Assist the patient to lie in the supine position with legs extended. Drape the patient's genitalia, exposing the penis. | To provide privacy and easy access to the penis. |
| 3. | Using the non-dominant hand (now contaminated), grasp the penis just below the glans and retract the foreskin if uncircumcised. Hold the penis perpendicular to the body. | To expose the urethral meatus and straighten the urethra for easier catheter passage. |
| 4. | Cleanse the glans penis with cotton wool swabs soaked in antiseptic solution, using the forceps. Wipe in a circular motion from the meatus outwards, using a fresh swab for each stroke. Discard used swabs. Maintain hold of the penis with the non-dominant hand. | To prevent the introduction of microorganisms into the bladder. |
| 5. | Lubricate the tip of the catheter (about 6-8 inches) and inject some lubricant directly into the urethra using the syringe (or use a pre-lubricated catheter). | Lubrication minimizes trauma and friction and helps the catheter pass through the longer male urethra. |
| 6. | Using the dominant hand (which is sterile), gently insert the lubricated catheter tip into the urethral meatus. Ask the patient to take slow, deep breaths or bear down gently as if to void, and advance the catheter slowly. | Deep breathing helps relax the external sphincter. Gentle insertion follows the natural curves of the urethra. |
| 7. | Advance the catheter about 15-20 cm until urine flows into the receiver. The male urethra is longer than the female. | Ensures the catheter reaches the bladder. |
| 8. | If resistance is met, do not force. Ask the patient to relax and breathe deeply. Gently rotate the catheter or apply slight traction to the penis. If resistance persists, withdraw the catheter and consult the mentor or doctor. | Forcing can cause trauma, stricture, or false passages in the urethra. Relaxing can help the sphincters open. |
| 9. | Once urine flows, advance the catheter a further 2-3 cm to ensure the balloon is fully within the bladder. | To ensure the balloon is not inflated in the urethra. |
| 10. | Inflate the balloon slowly with the pre-drawn sterile water/saline using the syringe. Amount specified on catheter (usually 5-10 ml for adult Foley). | To secure the catheter in the bladder. |
| 11. | Gently pull back on the catheter slightly until resistance is met. | Confirms correct placement. |
| 12. | Replace the foreskin if it was retracted. | To prevent paraphimosis (foreskin trapped behind the glans). |
| 13. | Connect the catheter to the drainage bag and tubing system, ensuring a closed system. Ensure the drainage bag is below the level of the bladder. | To allow continuous drainage and maintain a closed sterile system. |
| 14. | Secure the catheter to the patient's inner thigh or lower abdomen with adhesive tape, allowing for some slack. Securing to the abdomen directs the catheter upwards, reducing pressure on the penoscrotal angle of the urethra. | Prevents accidental dislodgement and tension on the meatus. |
| 15. | Complete the procedure as per steps 17-19 of the female catheterization procedure (Dispose of equipment, Wash hands, Patient comfort, Documentation). | Maintains cleanliness, ensures patient comfort, and provides a record. |
Points to Remember (Catheterization):
- Catheterization is a sterile procedure; therefore, strict aseptic precautions must always be followed throughout the procedure. Any break in sterile technique should be corrected immediately.
- The procedure should be performed with extreme care to prevent trauma to the delicate urethral and bladder organs.
- Always verify catheter placement before inflating the balloon.
- Never force the catheter against resistance.
- Use adequate lubrication, especially for male patients.
- Choose the correct size catheter to minimize discomfort and trauma.
- Ensure the drainage system is always below the level of the bladder to facilitate gravity drainage and prevent backflow.
- Provide ongoing catheter care (cleaning meatus, checking drainage, ensuring patency) to prevent infection.
- Monitor the patient for signs of complications such as pain, bleeding, inability to pass urine, or signs of infection (fever, cloudy urine, foul odor).

Naso-Gastric Tube and Tube Feeding
Passing Naso-Gastric Tube and Tube Feeding (PEX 2.1.10)

Indications for Passing Naso-Gastric Tube:
- Unconscious patients.
- After operations in the mouth, pharynx or larynx.
- Obstruction or stricture of the oesophagus due to inflammation or tumour.
- Severe dysphagia (difficulty swallowing).
- Babies; too weak to feed or to suck.
- Severely burnt patients (due to increased metabolic needs or inability to take oral feeds).
- Mentally ill patient who cannot eat.
- In cases of persistent nausea and vomiting (to decompress the stomach or provide nutrition).
- Gastric lavage (washing out the stomach).
- Collection of gastric specimens.
Requirements:
Trolley (Top Shelf):
- Sterile naso-gastric tubes (appropriate size) in a bowl
- A bowl of warm water (to soften the tube)
- A gallipot with gauze swabs
- Orange sticks (or nasal speculum if needed for nostril inspection)
- Receiver (or kidney dish) with blue litmus paper
- Mackintosh cape and towel/dressing mackintosh
- A 10 ml syringe
- Spigot (or clamp)
- Cup of water (for rinsing patient's mouth)
- Vomit bowl (kidney dish)
- Strapping (adhesive tape to secure the tube)
- A receiver for used swabs/materials
Bedside:
- Hand washing equipment (access to sink, soap, water, towel)
- Screens (for privacy)
- Stethoscope (for checking placement)
- Patient's chart (for checking order and documentation)
- Waste receptacle
Procedure (Passing Naso-Gastric Tube):
| Steps | Action | Rationale |
|---|---|---|
| 1. | Observe the general rules. | Promotes adherence to standards and patient safety. |
| 2. | Assist the patient to be in a sitting up position or lateral position if unconscious but slightly raised to an angle of about 450. | Promotes patient ability to swallow during the procedure. |
| 3. | Explain the procedure to the patient (if conscious). Protect the patient's neck and chest with a mackintosh cape and towel. | To gain cooperation, reduce anxiety, and protect the linen from soiling. |
| 4. | Assess the patency of the nostrils and clean the nostrils using orange sticks or gauze. Identify the preferred nostril (usually the more patent one). | To facilitate easy passage of the tube and promote hygiene. |
| 5. | Wash hands and put on clean gloves. | Minimize the risk of infection. |
| 6. | Measure the required length of the tube which should be inserted. This should start from the tip of the nose to the ear lobe, and then down to the xiphoid process (chest bone). Mark the measured distance on the tube with a small piece of tape. | To ensure that the tube reaches the stomach. |
| 7. | Lubricate the tip of the tube (about 4-6 inches) with KY jelly or warm water. | For easy insertion and to prevent traumatizing the mucous membranes. |
| 8. | Select the clear nostril and insert the lubricated tube gently, directing it backward and downward. | To follow the natural passage and prevent trauma. |
| 9. | Once the tube reaches the nasopharynx (usually felt as resistance or gagging), ask the conscious patient to bend their head slightly forward (chin to chest) and swallow repeatedly (dry swallows or sips of water). Advance the tube as the patient swallows. | Swallowing closes the epiglottis over the trachea and helps guide the tube into the esophagus. Bending the head forward helps close the airway entrance. |
| 10. | If the patient coughs or shows signs of respiratory distress (cyanosis, inability to speak), the tube may be in the trachea. Withdraw the tube immediately, allow the patient to recover, and re-attempt insertion. | To prevent choking and aspiration. |
| 11. | Continue passing the tube until the measured length is reached. If there is any resistance, rotate the tube gently; avoid using force. | Forcing against resistance can cause trauma to mucosa and cause anxiety. |
| 12. | Secure the tube temporarily with tape while checking for placement. | To prevent displacement while confirming location. |
| 13. | Check to make sure the tube is in the stomach by: a. Aspirating stomach contents with a syringe and testing aspirates with blue litmus paper. If blue litmus paper turns red (acidic), it indicates that the tube is in the stomach. b. Injecting air (about 10-20 ml) using a syringe into the tube while listening over the stomach area with a stethoscope. A whooshing or bubbling sound should be heard as air enters the stomach. c. X-ray confirmation (most reliable method, especially for critical patients or those at high risk of aspiration). |
Aspiration of contents provides evidence of placement. Testing pH confirms the acidic environment of the stomach. Hearing air confirms the location in the stomach. X-ray is definitive. |
| 14. | Once placement is confirmed, secure the tube firmly to the patient's nose or cheek with adhesive tape, avoiding pressure points. Ensure the tape is not too tight. | Secures the tube in position and prevents dislodgement. |
| 15. | Clamp the end of the tube with a spigot or connect it to a drainage bag if the purpose is drainage or decompression. | Prevents leakage or allows continuous drainage. |
| 16. | Clear away the equipment and ensure the patient is comfortable. Wash hands. | Maintain cleanliness and patient comfort. |
| 17. | Document the procedure, including the date, time, type and size of tube, nostril used, measured length, method of placement confirmation, amount and characteristics of aspirate (if any), patient's response, and name/signature of nurse. | To promote follow up and ensure continuity of care. |
Points to Remember (Passing NG Tube):
- Never force the tube if resistance is met.
- Listen carefully for signs of respiratory distress during insertion.
- Always verify tube placement before administering anything through the tube.
- Change the tube as per policy or doctor's prescription (often weekly).
- Ensure a communication system (e.g., pen and paper, bell) is available for the patient if they cannot speak.

Feeding the patient using a naso-gastric tube (PEX 2.1.10 - Continued)
Naso-gastric feeding can be given in two ways:
- Intermittent feeding: Given at intervals as ordered by the doctor (e.g., four hourly).
- Continuous drip: Given as a continuous infusion over a specified period (e.g., 24-hour period).
Requirements (Feeding):
Trolley:
- Prepared feed (correct type, amount, and temperature)
- A feed bowl of warm water (if feed needs warming)
- A cup with warm water (for rinsing the tube)
- A 50 ml syringe barrel or a funnel with tubing and connection (appropriate for the tube)
- Vomit bowl (kidney dish)
- Mackintosh cape and towel/dressing mackintosh
- Stethoscope (for checking placement)
- Spigot or clamp
- Patient's chart
- Waste receptacle
Bedside:
- Hand washing equipment
- Screens (for privacy)
Procedure (Feeding):
| Steps | Action | Rationale |
|---|---|---|
| 1. | Observe the general rules. | Promotes adherence to standards and patient safety. |
| 2. | Assist the patient to be in a sitting up position or lateral position if unconscious but slightly raised to an angle of about 450 (or higher, up to 90 degrees for conscious patients). Ensure patient is comfortable. | Promotes patient ability to swallow (if conscious) and reduces the risk of aspiration during feeding. |
| 3. | Protect the patient's neck and chest with a mackintosh cape and towel. | To protect the bed linen and patient's clothing from spillage. |
| 4. | Wash hands and put on clean gloves. | Minimize the risk of infection. |
| 5. | Check tube placement and patency: a. Aspirate stomach contents and check pH with litmus paper (should be acidic, pH 1-4). b. Inject air (about 10-20 ml) while listening over the stomach with a stethoscope. c. Observe for signs of distress (coughing, cyanosis) during injection of air. d. Flush the tube with 10-20 ml of water to check patency and clear any obstruction. |
To confirm that the tube is still in situ in the stomach and is not blocked. |
| 6. | Prepare the feed. Ensure the feed is at the correct temperature (room temperature or slightly warmed in a warm water bath, 37°C-38°C). Check the feed amount as per order. | To ensure patient comfort and prevent discomfort or cramping. |
| 7. | Pinch the tube and remove the spigot. Connect the syringe barrel or funnel to the end of the NG tube. | To prevent air entry into the stomach. |
| 8. | Pour the warm water (about 10-20 ml) into the syringe barrel/funnel to prime the tube. Allow it to flow by gravity. | To ensure patency and clear any residual material. |
| 9. | Pour the prescribed feed slowly into the syringe barrel/funnel. Adjust the height of the syringe/funnel (usually about 12-18 inches above the patient) to control the rate of flow by gravity. Do not push the feed. | Allows gravity to facilitate flow and prevents overloading the stomach, reducing the risk of vomiting and aspiration. |
| 10. | As the level of the feed in the syringe barrel/funnel gets low, add more feed before it completely empties to prevent air from entering the stomach. | To prevent entry of air into the stomach which can cause discomfort and distension. |
| 11. | After the feed has run through, rinse the tube with a prescribed amount of warm water (e.g., 10-20 ml or as ordered) to clear any remaining feed. | Prevents clogging of the feeding tube. |
| 12. | Pinch the tube and remove the syringe barrel/funnel. Clamp the end of the tube with the spigot. | To prevent leakage and air entry. |
| 13. | Keep the patient in the upright or semi-upright position (at least 30-45 degrees) for at least 30-60 minutes after feeding. | To promote digestion and reduce the risk of regurgitation and aspiration. |
| 14. | Give the patient water to rinse the mouth and provide oral hygiene. | To stimulate secretion of saliva and promote oral hygiene and comfort. |
| 15. | Clear away the equipment and wash hands. | Maintain cleanliness and infection control. |
| 16. | Document the feeding, including the date, time, type and amount of feed given, amount of water for rinsing, patient's tolerance, any complications (e.g., nausea, vomiting, distension), and confirmation of tube placement method used. | Monitor input and output, ensure continuity of care. |
Points to Note (Feeding):
- Always verify tube placement before each feeding or medication administration.
- Never push feeds into the tube using the plunger of the syringe; allow gravity to control the flow rate.
- Keep the patient in a semi-Fowler's or Fowler's position during and after feeding.
- Monitor the patient for signs of intolerance such as nausea, vomiting, abdominal distension, diarrhea, or coughing.
Naso-Gastric Tube and Tube Feeding Read More »

Vulva Toilet / Swabbing
Vulva Toilet / Swabbing (PEX 2.1.6: Perform Vulval Toilet (Swabbing))
Objectives:
- State the indications for vulva swabbing.
- Identify the requirements for vulva swabbing.
- Prepare requirements for vulva swabbing.
- Perform vulva swabbing procedure.
- Prepare requirements for vulva swabbing.
- Perform vulva swabbing procedure.
Indications:
- To remove vaginal discharge.
- To keep the vulva clean and dry.
Requirements:
A Trolley (Top Shelf):
- 3 Bowels
- 2 Receivers
- Sponge holding forceps (or artery forceps)
- Sims speculum (if needed for inspection/discharge)
- 1 Drum of swabs
- 1 Drum of cotton balls
- 1 Drum of drapes
- Antiseptic solution (e.g., warm sterile water, saline, or mild soap solution as per policy)
Bedside:
- Bedpan (if patient is unable to use the toilet)
- Mackintosh (or waterproof sheet)
- Sanitary towels (or pads)
- Screens (for privacy)
- Hand washing equipment (access to sink, soap, water, towel)
- Waste receptacle (for soiled swabs and pads)
- Adequate lighting
- Clean gloves
Procedure:
| Steps | Action | Rationale |
|---|---|---|
| 1. | Observe the general rules. | Promotes adherence to standards and patient safety. |
| 2. | Offer a bed pan if necessary. | Promotes patient comfort and avoids interruption during procedure. |
| 3. | Position the patient in a dorsal position and cover the trunk. | To enable easy performance of the procedure and provide privacy. |
| 4. | Place the dressing mackintosh and towel under the patient's buttocks. | To expose the required part and protect the bed linen from soiling. |
| 5. | Assemble the equipment on the top shelf. | To save time and ensure efficiency. |
| 6. | Wash hands and put on clean gloves. | Prevents cross infection. |
| 7. | Drape the thighs. | To minimize exposure and provide a sterile area. |
| 8. | Observe the vulva for any discharge or any abnormality. | To provide appropriate intervention and assess the need for swabbing. |
| 9. | Separate the labia majora and minora with the left hand (non-dominant). Swab the vulva using a fresh swab held with forceps for each part, wiping from front to back (anterior to posterior). | To provide a sterile area and prevent contamination from the anal region. |
| 10. | Swab the following areas, using a fresh swab for each stroke and discarding each used swab into the waste receptacle: - Left labia Majora - Right labia Majora - Left labia Minora - Right labia Minora - The vagina introitus - Perineum (if necessary) | To ensure thorough cleaning and prevent spread of microorganisms. |
| 11. | Dry the vulva and perineum using a fresh swab or cotton ball for each stroke, wiping from front to back. Apply a sanitary pad as required. | Promotes hygiene and comfort. |
| 12. | Turn the patient on her left hand side, clean and dry the perianal area with fresh swabs using a front to back motion. | To prevent irritation and promote comfort. |
| 13. | Leave the patient in a comfortable position and ensure their privacy. | To promote rest and comfort. |
| 14. | Clear away the equipment and wash hands thoroughly. | Promotes hygiene and infection control. |
| 15. | Document the procedure, including the amount and nature of discharge, the patient's response, and any abnormalities observed. | To promote follow-up and ensure continuity of care. |
Points to Remember:
- In case of too much discharge or if internal inspection is needed, a Sims speculum may be used to visualize the vaginal walls and cervix.
- Always wipe from front to back (anterior to posterior) to prevent contamination of the urethra and vagina with fecal microorganisms.
- Dispose of soiled materials immediately and appropriately in the designated waste receptacle.
- Maintain clear communication with the patient throughout the procedure to ensure comfort and cooperation.
Vulva Toilet / Swabbing Read More »