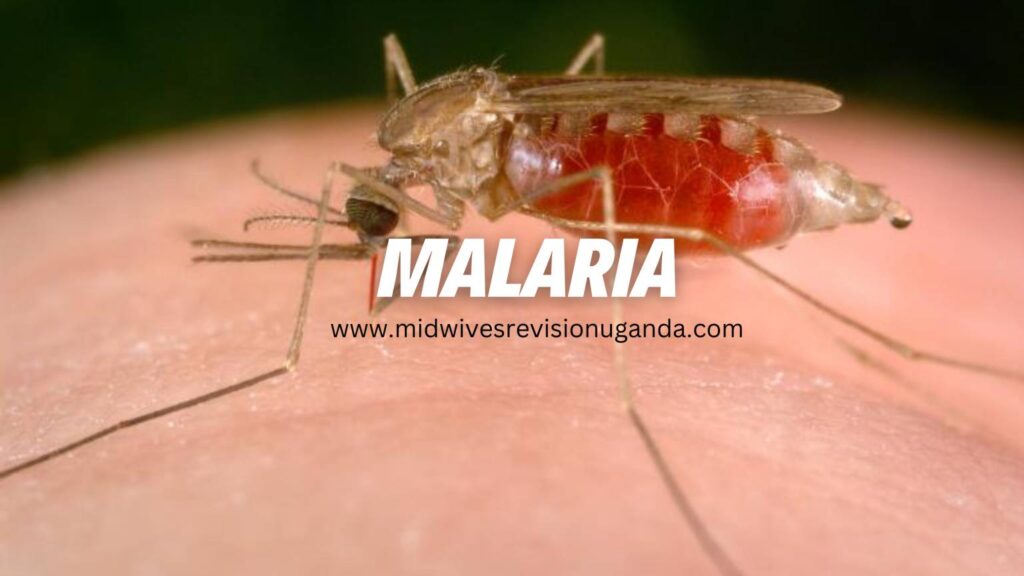
Malaria is an infectious disease caused by a parasite belonging to the Plasmodium genus. It is primarily transmitted from one person to another through female mosquitoes of the Anopheles genus. The illness presents with acute febrile symptoms, including cycles of chills, fever, pain, and sweating.
Historical records indicate that malaria has been afflicting humans since ancient times. There are four main species of malaria parasites that affect humans, namely:
Plasmodium falciparum
Plasmodium vivax
Plasmodium malariae
Plasmodium ovale
Plasmodium knowlesi
Among these, Plasmodium falciparum stands out as the most virulent malaria parasite worldwide and also happens to be the most prevalent one in Uganda.
Signs and Symptoms of Malaria
Malaria manifests through a variety of signs and symptoms, with fever being the most prominent and characteristic feature. The fever in malaria follows an intermittent pattern, coming and going repeatedly. A typical malaria attack can be categorized into three phases:
The Cold Stage: During this stage, the patient experiences a sensation of coldness and shivers.
The Hot Stage: In this stage, the patient feels intense heat and feverish.
The Sweating Stage: This stage is accompanied by profuse sweating and a sense of relief from symptoms.
Apart from fever, other common symptoms of malaria include:
Loss of appetite
Weakness and lethargy
Nausea and vomiting
Headache
Joint and muscle pains
Diarrhea
Dehydration
Enlarged spleen (spleenomegaly)
In severe and complicated cases of malaria, the following symptoms may arise:
Changes in behavior, confusion, or drowsiness
Altered level of consciousness or coma
Convulsions
Hypoglycemia (low blood sugar levels)
Acidosis (excess acid in the body)
Difficulty in breathing, often due to pulmonary edema or respiratory distress syndrome
Acute renal failure
Severe anemia
Shock
Presence of hemoglobin in urine (haemoglobinuria)
Oliguria with very dark urine (similar to the color of coca-cola or coffee)
Malaria is transmitted to humans through the bite of an infected female Anopheles mosquito, which injects malaria parasites (sporozoites) into the bloodstream. The life cycle of the malaria parasite (Plasmodium) is complex and involves two hosts: humans and Anopheles mosquitoes.
Illustration of the Malaria Parasite Life Cycle:
Infection begins when an infected female Anopheles mosquito bites a person, introducing Plasmodium sporozoites into the bloodstream.
The sporozoites swiftly move into the human liver.
Over the next 7 to 10 days, the sporozoites multiply asexually in liver cells, causing no noticeable symptoms.
The parasites, now in the form of merozoites, are released from liver cells and travel through the heart to the lungs, where they settle within lung capillaries. The vesicles eventually disintegrate, releasing merozoites into the blood phase of their development.
In the bloodstream, the merozoites invade red blood cells (erythrocytes) and undergo further multiplication until the cells burst. They then invade more erythrocytes, repeating this cycle and causing fever each time they break free and infect new blood cells.
Some of the infected blood cells deviate from the asexual multiplication cycle and instead develop into sexual forms of the parasite known as gametocytes, which circulate in the bloodstream.
When an infected mosquito bites a human, it ingests these gametocytes, which further mature into sexually active gametes within the mosquito.
The fertilized female gametes transform into mobile ookinetes that penetrate the mosquito\’s midgut wall, forming oocysts on its exterior surface.
Inside the oocyst, numerous active sporozoites develop. Eventually, the oocyst bursts, releasing sporozoites into the mosquito\’s body cavity, which then migrate to its salivary glands.
The cycle of human infection begins anew when the mosquito bites another person.
Incubation Period:
The period between the mosquito bite and the onset of malarial illness typically ranges from one to three weeks (7 to 21 days).
However, certain types of malaria, such as P. vivax and P. ovale, may take much longer, up to eight to 10 months, to cause symptoms. These parasites remain dormant (inactive or hibernating) in the liver cells during this extended period.
Unfortunately, some dormant parasites may persist even after a patient recovers from malaria, leading to the possibility of relapsing malaria, wherein the patient may fall ill again.
Diagnosis of Malaria
Diagnosing malaria involves considering the patient\’s clinical signs and symptoms, which can be challenging due to the similarity of malaria symptoms with other diseases, including yellow fever, typhoid fever, respiratory tract infections, meningitis, otitis media, tonsillitis, skin sepsis, and measles.
The following investigations are crucial in accurately confirming a malaria diagnosis:
Blood Smear Examination (Malaria Parasite Smear – MPS): The classic and widely used diagnostic test for malaria involves examining a blood smear under a microscope. A small amount of the patient\’s blood is placed on a microscope slide, stained, and then observed for the presence of malaria parasites inside red blood cells. This test helps identify the Plasmodium species.
Rapid Diagnostic Tests (RDTs): Rapid diagnostic tests detect specific malaria antigens or proteins in the patient\’s blood. RDTs are especially useful in areas with limited access to microscopy facilities and can provide rapid results for immediate management.
Complete Blood Count (CBC): A CBC is essential for evaluating the overall health of the patient and can reveal valuable information about the levels of different blood components, including red blood cells and white blood cells. In malaria, a decrease in red blood cells (anemia) is often observed.
Hemoglobin Estimation: Hemoglobin estimation provides information about the patient\’s hemoglobin levels, which can be significantly affected in malaria due to the destruction of red blood cells.
Liver Function Tests (LFTs): In certain cases, liver function tests may be conducted to assess liver health, as the malaria parasites initially multiply in the liver.
Blood Chemistry Panel: A blood chemistry panel may be performed to evaluate various parameters, including electrolyte levels, kidney function, and liver enzymes, providing a comprehensive picture of the patient\’s overall health status.
Polymerase Chain Reaction (PCR): PCR is a highly sensitive molecular technique that can detect the genetic material of malaria parasites in the blood. It is particularly useful for detecting low levels of parasites and differentiating between various Plasmodium species.
Serological Tests: Serological tests detect specific antibodies produced by the body in response to malaria infection. These tests may not be suitable for early diagnosis but can be valuable for determining past exposure to malaria.
Treatment of Malaria
Treatment of Uncomplicated Malaria:
The recommended first-line medication for uncomplicated malaria is Artemether/Lumefantrine (Coartem).
In case Artemether/Lumefantrine is unavailable, the first-line alternative treatment is Atesunate + Amodiaquine.
The recommended second-line medication is Dihydroartemisinin + Piperaquine (Duocotecxin).
Treatment of Severe and Complicated Malaria:
Parenteral Artesunate is the recommended treatment for managing severe malaria in all patients.
In the absence of Artesunate, Parenteral Quinine or Artemether can be used as alternatives.
Treatment of Malaria in Pregnancy:
Uncomplicated malaria:
First trimester: Quinine tablets.
Second and third trimesters: Artemether/Lumefantrine or Quinine tablets.
Severe malaria in pregnancy should be treated with intravenous Artesunate.
Additional Treatment Measures:
Antipyretic to Reduce Body Temperature:
Paracetamol: 10mg/kg body weight every six hours in children, 1g 6-8 hourly in adults.
Tepid sponging or fanning can also be used to reduce fever.
Anticonvulsants:
Diazepam: 0.2mg/kg body weight intravenously or intramuscularly in adults.
Treat Detectable Causes of Convulsions:
For example, hypoglycemia can be managed with Dextrose administration.
Nursing Care:
Provide supportive care and symptomatic treatment, such as tepid sponging for fever.
Regularly observe temperature, pulse, respiration rate, and blood pressure. Record all observations.
Educate patients on personal protection, malaria prevention, and the importance of adhering to treatment.
Administer antiemetic medicine 30 minutes to 1 hour before antimalarial drugs if vomiting occurs.
Advise patients to rest for 1-2 hours after taking the medicine to avoid dizziness, vomiting, and hypotension.
Offer psychological support and comfort to patients.
Encourage a nourishing diet with plenty of oral fluids. In cases of difficulty in eating or drinking, consider passing a naso-gastric tube.
Monitor fluid intake and output and maintain a fluid balance chart.
Ensure proper patient and environmental hygiene.
Complications of Malaria:
Impaired consciousness/coma
Severe anemia
Renal failure
Pulmonary edema
Acute respiratory distress syndrome
Shock
Spontaneous bleeding
Acidosis
Hemoglobinuria (hemoglobin in urine)
Jaundice
Repeated generalized convulsions.
Prevention and Control of Malaria
Implement Effective Treatment and Prophylaxis:
Early diagnosis and prompt treatment are essential to eliminate parasites from the human population. Timely treatment helps prevent the spread of malaria.
Vulnerable groups, such as pregnant women, should receive chemoprophylaxis (preventive medication). The following drugs are used for this purpose: Chloroquine, Doxycycline, Mefloquine, and Primaquine.
All pregnant women should be provided with Intermittent Preventive Treatment (IPT) to protect both the mother and the unborn child from malaria.
Reduce Human-Mosquito Contact:
Encourage the use of insecticide-treated nets (ITNs) while sleeping to create a physical barrier between individuals and malaria-carrying mosquitoes.
Implement indoor residual spraying of dwellings with insecticides or use knockdown sprays to control adult mosquitoes within households.
Advise individuals to wear clothing that covers the arms and legs, and to use mosquito repellent coils and creams when sitting outdoors at night to prevent mosquito bites.
Control Breeding Sites:
Eliminate stagnant water collection sites where mosquitoes breed, such as empty cans/containers, potholes, old car tires, and plastic bags. This can be achieved through proper disposal, draining, or covering with soil.
Use insecticides to treat stagnant water bodies to destroy mosquito larvae, or employ biological methods such as introducing larvae-eating fish to these water sources.
Provide Public Health Education:
Conduct public health education campaigns to raise awareness about malaria prevention measures, including the use of mosquito nets, personal protection measures, and the importance of seeking early diagnosis and treatment.
Educate communities about the significance of eliminating breeding sites and promoting good environmental hygiene to reduce mosquito populations.
Test Questions.
What is the primary mode of transmission of malaria to humans? a) Contaminated food and water b) Contact with infected animals c) Bites from female Anopheles mosquitoes d) Airborne droplets from infected individuals Answer: c) Bites from female Anopheles mosquitoes Explanation: Female Anopheles mosquitoes transmit malaria by injecting malaria parasites (sporozoites) into the bloodstream during their bite. Which diagnostic test is considered the gold standard for confirming malaria infection?
a) Rapid Diagnostic Test (RDT) b) Polymerase Chain Reaction (PCR) c) Complete Blood Count (CBC) d) Blood smear examination Answer: d) Blood smear examination
Explanation: The blood smear examination under a microscope is the classic and most widely used diagnostic test for malaria. It allows visualization of malaria parasites inside red blood cells, helping to identify the Plasmodium species and guide appropriate treatment.
What is the recommended first-line treatment for uncomplicated malaria? a) Artemether/Lumefantrine (Coartem) b) Dihydroartemisinin + Piperaquine (Duocotecxin) c) Quinine tablets d) Doxycycline Answer: a) Artemether/Lumefantrine (Coartem)
Explanation: Artemether/Lumefantrine is the recommended first-line medicine for treating uncomplicated malaria cases.
Which antimalarial drug is used as chemoprophylaxis to protect vulnerable groups from malaria? a) Paracetamol b) Chloroquine c) Artemether d) Diazepam Answer: b) Chloroquine
Explanation: Chloroquine is one of the drugs used for chemoprophylaxis to protect vulnerable groups, such as pregnant women, from contracting malaria.
What intervention can help reduce human-mosquito contact and prevent malaria transmission? a) Wearing clothes that cover the arms and legs b) Spraying dwellings with insecticides c) Drinking boiled water d) Applying sunscreen Answer: a) Wearing clothes that cover the arms and legs
Explanation: Wearing clothes that cover the arms and legs can help reduce mosquito bites and lower the risk of malaria transmission.
In severe malaria cases, what is the recommended first-line treatment for all patients? a) Parenteral Quinine b) Parenteral Artesunate c) Intramuscular Artemether d) Parenteral Mefloquine Answer: b) Parenteral Artesunate
Explanation: Parenteral Artesunate is the recommended first-line treatment for severe malaria in all patients.
How long is the incubation period for malaria? a) 1-3 days b) 1-3 weeks c) 1-3 months d) 1-3 years Answer: b) 1-3 weeks
Explanation: The incubation period for malaria is usually 1-3 weeks (7 to 21 days) after the mosquito bite.
Which complication of malaria is characterized by the presence of hemoglobin in urine? a) Severe anemia b) Jaundice c) Acidosis d) Hemoglobinuria Answer: d) Hemoglobinuria
Explanation: Hemoglobinuria is the presence of hemoglobin in urine, which can occur as a complication of malaria.
What method is used to control mosquito breeding sites and prevent malaria transmission? a) Introducing larvae-eating fish b) Using insect repellent coils c) Administering antimalarial drugs d) Fumigating dwellings with pesticides Answer: a) Introducing larvae-eating fish
Explanation: Introducing larvae-eating fish to stagnant water bodies is a biological method used to control mosquito larvae and prevent malaria transmission.
How can midwifery students contribute to malaria prevention in pregnant women? a) Administering chemoprophylaxis during pregnancy b) Providing insecticide-treated nets to pregnant women c) Educating pregnant women about personal protection measures d) All of the above Answer: d) All of the above
Explanation: Midwifery students can play a vital role in malaria prevention for pregnant women by administering chemoprophylaxis, distributing insecticide-treated nets, and educating them about personal protection measures against malaria.
Typhoid fever is an acute bacterial infection characterized by fever and is primarily spread through contaminated food and water.
Causes
Typhoid fever is caused by Salmonella typhi and Salmonella paratyphi A and B.
Transmission:
Typhoid fever is contracted by the ingestion of the bacteria in contaminated food or water.
Patients with acute illness can contaminate the surrounding water supply through stool, which contains a high concentration of the bacteria.
About 3-5% of patients become carriers of the bacteria after the acute illness. Some patients suffer a very mild illness that goes unrecognized, and these patients can become long-term carriers of the bacteria.
The bacteria multiply in the gallbladder, bile ducts, or liver and pass into the bowel.
The bacteria can survive for weeks in water or dried sewage.
The chronic carriers may have no symptoms and can be the source of new outbreaks of typhoid fever for many years.
Signs and Symptoms of Typhoid Fever
Classically, the course of untreated typhoid fever is divided into four stages, each lasting approximately one week.
First week:
In the first week, there is a gradual rise in temperature (step-ladder fashion) accompanied by bradycardia, malaise, headache, generalized body aching, restlessness, and cough.
Epistaxis (nosebleeds) is observed in about a quarter of cases.
Abdominal pain may also be present.
Leukopenia, eosinopenia, and relative lymphocytosis are evident in blood tests.
The classic Widal test, used to detect antibodies against Salmonella, is negative in the first week, but blood culture reveals the presence of Salmonella typhi.
The payer patches of the distal end of the ileum are invaded by the bacillus and become inflamed, resulting in various manifestations such as slow pulse rate, severe persistent frontal headache, general malaise, anorexia, nausea, vomiting, intestinal upset (diarrhea and constipation), and depression of bone marrow.
Second week:
The payer patches form a slough (a layer of dead skin).
In the second week of the infection, the patient becomes severely ill with high fever, often reaching around 40°C (104°F), and bradycardia.
Delirium is common, characterized by a state of calmness or, at times, agitation.
Rose spots, which are pink spots, appear on the lower chest and abdomen in about one-third of patients.
The abdomen becomes distended and painful, especially in the right lower quadrant.
Diarrhea may occur, with stool appearing green and having a characteristic smell resembling pea soup. However, constipation can also be frequent.
The spleen and liver enlarge (hepatosplenomegaly) and become tender.
The Widal reaction shows strong positivity with anti-O and anti-H antibodies, while blood cultures may still be positive at this stage.
The tongue is coated with a brownish fur, and sordes indicate severe toxemia.
Dehydration becomes evident.
Third week:
In the third week of typhoid fever, several complications may arise:
The slough separates, leaving deep ulcers in the intestines.
Ulcers may erode blood vessels, leading to hemorrhage, or perforate the ileum, causing leakage of intestinal contents into the peritoneal cavity.
The patient becomes extremely ill and toxic.
Temperature remains very high and intermittent.
Pulse becomes feeble.
The patient lapses into a typhoid state, experiencing delirium and confusion.
Twitching of limbs may occur due to loss of calcium in the diarrhea state.
Carforragic picking may lead to clotting issues and blood-stained clothes.
Tough dries and flurried lips are observed due to severe dehydration from profuse diarrhea.
Signs of congestive cardiac failure (CCF) due to weakened myocardium may be present.
The patient may experience coma every eight hours.
Peritonitis, inflammation of the peritoneum, may occur.
By the end of the third week, the patient becomes emaciated, fever starts to subside, abdominal symptoms become more pronounced, and mental disturbances become prominent.
Fourth week:
The ulcers begin to heal through granulation.
At the beginning of the fourth week, the fever begins to decline, and the other symptoms gradually reduce as the patient\’s temperature returns to normal.
Recovery is slow during this stage, and relapses are common.
If left untreated, typhoid fever can prove fatal in up to 25% of all cases.
Investigations for Typhoid Fever:
Stool Culture: Stool culture involves collecting a sample of the patient\’s stool and incubating it under specific conditions to identify and isolate the causative bacteria, usually Salmonella typhi or Salmonella paratyphi. The presence of these bacteria in the stool confirms the diagnosis of typhoid fever.
Blood Culture: Blood sample is collected and cultured in a suitable medium to identify and isolate the bacteria causing typhoid fever. A blood culture is an effective method to confirm the diagnosis, especially in the early stages of the disease when stool cultures might be negative.
Widal Test: The Widal test is a serological test used to detect antibodies produced by the body in response to the infection by Salmonella typhi. The test measures the presence of specific antibodies, including anti-O and anti-H antibodies, in the patient\’s blood. A positive Widal test suggests a recent or past infection with typhoid fever. However, it is important to note that the Widal test results should be interpreted cautiously, as false-positive results can occur due to cross-reactivity with other infections or previous vaccinations.
Additional Investigations (optional):
Polymerase Chain Reaction (PCR) Test: PCR is a molecular diagnostic test that can detect the genetic material (DNA or RNA) of the Salmonella bacteria directly from clinical samples, such as blood or stool. PCR is a highly sensitive and specific method, and it can provide rapid results, aiding in early detection and timely treatment of typhoid fever.
Typhoid Serology: Typhoid serology involves analyzing the patient\’s blood for specific antibodies against Salmonella typhi. This test, similar to the Widal test, helps in confirming a recent or past infection, but it may have limitations in terms of sensitivity and specificity.
Complete Blood Count (CBC): A CBC is a routine blood test that provides information about the number and types of blood cells. In typhoid fever, the CBC may show leucopenia (low white blood cell count), eosinopenia (low eosinophil count), and relative lymphocytosis (increased lymphocyte percentage). These abnormalities can help in supporting the diagnosis of typhoid fever.
Liver Function Tests (LFTs): Liver function tests assess the health of the liver and its ability to function properly. In typhoid fever, liver involvement is common, and LFTs can reveal elevated liver enzymes and other liver-related abnormalities.
Urinalysis: Urinalysis may be performed to check for the presence of white blood cells or other indicators of kidney involvement, which can occur in severe cases of typhoid fever.
Complications of Typhoid Fever:
I. Gastrointestinal Complications: A. Perforation: The ulcerated areas in the intestines can lead to perforation, causing leakage of intestinal contents into the abdominal cavity. This can result in severe abdominal pain and peritonitis. B. Hemorrhage: The erosion of blood vessels by ulcers can cause gastrointestinal bleeding, leading to blood loss and anemia. C. Peritonitis: Perforation of the intestine can lead to peritonitis, an inflammation of the peritoneum (the lining of the abdominal cavity), causing severe abdominal pain and tenderness.
II. Gallbladder Complications: A. Cholecystitis: The infection can spread to the gallbladder, causing inflammation known as cholecystitis, which leads to abdominal pain, fever, and tenderness in the right upper abdomen.
III. Respiratory Complications: A. Pneumonia: In severe cases, typhoid fever can lead to pneumonia, a lung infection characterized by fever, cough, and difficulty breathing.
IV. Cardiovascular Complications: A. Heart Failure: Severe and untreated typhoid fever can put a strain on the heart, leading to congestive heart failure, a condition where the heart fails to pump blood effectively, resulting in fluid accumulation in the body.
V. Musculoskeletal Complications: A. Osteomyelitis: In rare cases, typhoid fever bacteria can spread to the bones, causing osteomyelitis, which is an infection of the bone and bone marrow.
VI. Neurological Complications: A. Encephalitis: Typhoid fever can lead to encephalitis, which is inflammation of the brain. This can cause symptoms such as headache, confusion, and altered mental state.
B. Meningitis: In some instances, the infection may also spread to the meninges, the protective membranes covering the brain and spinal cord, leading to meningitis.
C. Mental Confusion: During the advanced stages of the disease, mental confusion and delirium may occur due to the systemic effects of the infection on the central nervous system.
Management of Typhoid Fever
Hospital Admission:
In severe cases of typhoid fever, hospital admission is necessary to provide close monitoring and appropriate medical care.
Isolation or Barrier Nursing:
Patients with typhoid fever should be isolated or barrier nursed to prevent the spread of the infection to others.
Investigations:
Blood for Culture and Sensitivity (C/S) should be performed during the first week to identify the causative bacteria and determine its sensitivity to antibiotics.
Full Blood Sample (FBS) analysis will reveal low Hemoglobin (Hb) levels, low White Blood Cell (WBC) count, and an increased Erythrocyte Sedimentation Rate (ESR).
The Widal test can be done around 10/7 days after the onset of symptoms to detect antibodies against typhoid bacilli.
Blood Smear (B/S) examination should be conducted to rule out malaria.
Stool analysis and urinalysis are important to assess gastrointestinal and urinary involvement in typhoid fever.
Drug Therapy:
Antibiotic therapy is a cornerstone of typhoid fever management:
Ciprofloxacin at a dose of 500-750 mg twice daily for 10/7 (10 days).
Azithromycin at a dose of 10 mg/kg daily.
Cotrimoxazole at a dose of 960 mg twice daily for 3/7 (3 days) or as per a weight-based calculation for 10/7 (10 days).
Long-Term Carriers:
After signs have passed, stool tests should be conducted to check if Salmonella typhi bacilli are still present. Patients may become potential long-term carriers of the bacteria, requiring a 28-day course of antibiotics to eliminate the bacteria until they are free from it.
Fluid and Electrolyte Management:
Monitor intravenous (IV) fluid administration for rehydration.
Correct fluid and electrolyte imbalances with Normal Saline (N/S), Dextrose 5% (D5%) solutions, and oral fluids.
Nutrition:
Ensure adequate nutrition and provide a soft, easily digestible diet, unless the patient has abdominal complications or ileus.
Antipyretics:
Administer antipyretics like Paracetamol (PCM) to manage fever.
Hygiene and Infection Control:
Pay close attention to handwashing and limit close contact with individuals during the acute phase of the infection to prevent its spread.
Encourage proper waste disposal, covering of food, and proper food preparation to reduce contamination risks.
Encourage early screening and management to prevent the worsening of the disease.
Proper Water Treatment and Storage:
Educate patients on the proper treatment and storage of water to avoid waterborne transmission of the bacteria.
Regular Follow-Up and Monitoring:
Ensure regular follow-up and monitor for complications and clinical relapses.
Management of Delirium:
Encourage the use of Phenobarbital at a dose of 30-60 mg in case of delirium.
Prevention:
Maintain cleanliness in the premises and ensure proper disposal of rubbish.
Keep hands clean and maintain trimmed fingernails.
Wash hands thoroughly with soap and water before eating or handling food and after using the toilet or changing diapers.
Drinking water should be free from microorganisms; it is preferable to boil water before consumption.
Avoid high-risk foods, such as raw or semi-cooked food.
During food preparation, wear clean, washable aprons, and caps.
Clean and wash food thoroughly, including scrubbing and rinsing fruits in clean water.
Store perishable food in the refrigerator, covering it properly.
Cook food thoroughly before consumption.
Consume food as soon as it is prepared.
If necessary, refrigerate cooked leftover food and consume it promptly. Reheat it thoroughly before consumption.
Exclude infected individuals and asymptomatic carriers from handling food and providing care to children.
Consider immunization, especially for those traveling to high-risk areas, where vaccines are available in oral and injectable forms.
Test MCQ Questions
Question 1: What is the primary mode of transmission for typhoid fever? A) Mosquito bites B) Contaminated food and water C) Airborne droplets D) Direct physical contact
Question 2: Which bacterium is responsible for causing typhoid fever? A) Escherichia coli B) Salmonella typhi C) Streptococcus pneumoniae D) Staphylococcus aureus
Question 3: Which of the following complications can occur in severe cases of typhoid fever? A) Fractures B) Renal failure C) Dental caries D) Cholecystitis
Question 4: Which diagnostic test is used to identify the presence of Salmonella typhi in the blood? A) Blood smear examination B) Stool culture C) Urinalysis D) Blood culture
Question 5: What is the recommended antibiotic therapy for treating typhoid fever? A) Penicillin B) Amoxicillin C) Ciprofloxacin D) Erythromycin
Question 6: Why is hospital admission often recommended in severe cases of typhoid fever? A) To provide psychological support to the patient B) To administer vaccines for long-term immunity C) To ensure isolation and prevent disease transmission D) To allow close monitoring and provide appropriate medical care
Question 7: What is the primary preventive measure to avoid typhoid fever transmission in the community? A) Proper handwashing with soap and water B) Mosquito net usage C) Wearing masks in public places D) Vaccination against other bacterial infections
Question 8: Which gastrointestinal complication can occur due to typhoid fever? A) Pneumonia B) Peritonitis C) Otitis media D) Conjunctivitis
Question 9: Which of the following is NOT a recommended step to prevent typhoid fever? A) Drinking untreated water from natural sources B) Cooking food thoroughly C) Washing hands properly before eating D) Proper waste disposal
Question 10: Who should be excluded from handling food and providing care to children during a typhoid fever outbreak? A) Asymptomatic carriers and infected individuals B) Healthcare professionals only C) Pregnant women D) Children under 5 years of age
Answers:
B – Contaminated food and water
B – Salmonella typhi
D – Cholecystitis
D – Blood culture
C – Ciprofloxacin
D – To allow close monitoring and provide appropriate medical care
A – Proper handwashing with soap and water
B – Peritonitis
A – Drinking untreated water from natural sources
A – Asymptomatic carriers and infected individuals
Explanation:
Typhoid fever is primarily spread through contaminated food and water, making option B the correct answer.
Salmonella typhi is the bacterium responsible for causing typhoid fever, making option B the correct answer.
Cholecystitis is one of the gastrointestinal complications associated with typhoid fever, making option D the correct answer.
Blood culture is used to identify the presence of Salmonella typhi in the blood, making option D the correct answer.
Ciprofloxacin is one of the recommended antibiotics for treating typhoid fever, making option C the correct answer.
Hospital admission is recommended in severe cases of typhoid fever for close monitoring and appropriate medical care, making option D the correct answer.
Proper handwashing with soap and water is the primary preventive measure to avoid typhoid fever transmission, making option A the correct answer.
Peritonitis is a gastrointestinal complication that can occur due to typhoid fever, making option B the correct answer.
Drinking untreated water from natural sources is NOT a recommended step to prevent typhoid fever, making option A the correct answer.
Asymptomatic carriers and infected individuals should be excluded from handling food and providing care to children during a typhoid fever outbreak, making option A the correct answer.
Bacillary dysentery is an acute bacterial disease that primarily affects the large and small intestine, leading to symptoms such as bloody mucoid diarrhea.
It is important not to confuse bacillary dysentery with diarrhea caused by other bacterial infections, as one of the distinguishing characteristics of bacillary dysentery is the presence of blood in the stool, resulting from the invasion of the pathogen into the mucosa.
Cause:
Bacillary dysentery is caused by different types of Shigella bacteria, including Shigella sonnei, Shigella flexneri, and Shigella dysenteriae.
Mode of Transmission:
Bacillary dysentery can be transmitted directly through fecal material of a patient or carrier.
It can also be transmitted indirectly through contaminated food and water.
Infection can occur even after consuming a small number of bacteria, making household spread and transmission in institutions highly likely.
Young children are particularly susceptible to this infection.
Clinical Features:
Incubation period: 1-3 days (can extend up to 7 days).
Common symptoms include:
Sudden onset of mucoid bloody diarrhea.
Fever.
Nausea and vomiting.
Abdominal cramps.
Tenesmus (sensation of desire to defecate without producing significant amounts of feces).
Flatulence.
Headache and fatigue.
Dehydration.
Diagnosis:
Fresh stool samples are collected for culture and sensitivity testing, as well as microscopy to identify the causative bacteria.
Management:
Admission to a medical ward in isolation.
Strict personal hygiene (barrier nursing) to prevent infecting others.
Disinfection of the patient\’s bed and other items used.
Proper disposal of fecal matter and vomit into a pit latrine.
Regular monitoring of temperature, pulse, respiration, blood pressure, hydration levels, and level of consciousness.
Providing reassurance and support to the patient and relatives.
Fluid intake maintenance using Oral Rehydration Solution (ORS) or intravenous fluids in severe cases.
Antibiotic treatment with drugs like nalidixic acid or ciprofloxacin.
Implementing a BRAT diet (bananas, rice, applesauce, toast) to aid in recovery.
Use of a nasogastric tube for feeding and medication administration if oral intake is not possible.
Medications for managing nausea and vomiting, such as metoclopramide (plasil).
Close monitoring of hydration levels and maintenance of a fluid balance chart.
Prevention:
Maintain cleanliness in premises and kitchen utensils.
Proper disposal of rubbish.
Practice proper hand hygiene before eating or handling food, and after using the toilet or changing diapers.
Boil or treat drinking water.
Avoid high-risk foods like shellfish, raw or semi-cooked food.
Use clean washable aprons and caps during food preparation.
Thoroughly clean and wash food items, including fruits, in clean water.
Store perishable food in a well-covered refrigerator.
Ensure thorough cooking of food before consumption.
Consume food promptly or refrigerate leftovers and reheat thoroughly before eating.
Exclude infected individuals and asymptomatic carriers from handling food or providing care to children.
Amoebic Dysentery (Amoebiasis)
Amoebic dysentery is a parasitic infection of the gastrointestinal system that is caused by the parasite Entamoeba histolytica.
The infection is most commonly acquired through oral-fecal contamination, which can occur by consuming contaminated food or water, or by coming into contact with contaminated feces and not washing your hands properly.
Symptoms of amoebic dysentery
Violent diarrhea, often with blood and/or mucus in the stools
Severe colitis
Frequent flatulence
Dehydration
Abdominal cramps and tenderness
Slight weight loss
Moderate anemia
Moderate fever
Mild fatigue
Unrelated symptoms such as liver abscess, lung involvement, amoeboma swelling, and anal ulceration
Diagnosis
The diagnosis of amoebic dysentery is usually made by examining a stool sample under a microscope to look for cysts or motile organisms. Ultrasound scans may also be performed.
Treatment
The treatment of amoebic dysentery involves several steps:
Correcting any dehydration
Initiating a 10-day course of the antimicrobial drug metronidazole (Flagyl) or tinidazole to eliminate the infection
Administering amoebicidal (lumenal) drugs such as diloxanide furoate, paromomycin, or iodoquinol to eradicate any remaining parasites
Isolating infected individuals to prevent further spread of the infection
Emphasizing personal hygiene practices
Prevention
To prevent the occurrence and transmission of amoebic dysentery, the following preventive measures should be followed:
Educate the public about proper handwashing before eating and appropriate fecal disposal practices.
Ensure the proper management of carriers of the infection.
Promote the use of clean drinking water and safe food handling practices.
Cholera is an infection of the small intestine caused by the bacterium Vibrio cholerae.
The infection is characterized by profuse watery stools, vomiting, dehydration, and collapse.
Cause
Cholera is specifically caused by the bacterium Vibrio cholerae.
This bacterium is Gram stain negative and possesses a flagellum, a long projecting part that enables it to move, and pili, hair-like structures that it uses to attach to the intestinal tissue.
Transmission
The primary mode of transmission for cholera is through the fecal contamination of food and water, often resulting from poor sanitation practices. When individuals infected with cholera have untreated diarrheal discharge, the bacteria can enter waterways or drinking water supplies, contaminating them.
Consuming food that has been washed in contaminated water can also lead to transmission. It is important to note that cholera is rarely spread directly from person to person.
Susceptibility: Several factors influence the susceptibility to cholera:
Ingestion of bacteria: In a normal, healthy adult, approximately 100 million bacteria must typically be ingested to cause cholera. This highlights the importance of a significant bacterial load for infection to occur.
Age: Children, particularly those between the ages of two and four, are more susceptible to cholera infection. This could be attributed to their underdeveloped immune systems and increased likelihood of exposure due to their behavior and hygiene practices.
Lowered immunity: Individuals with weakened immune systems, such as those with AIDS or malnourished children, are at higher risk of experiencing severe cases if they become infected with cholera. Their compromised immune function makes it more difficult for their bodies to fight off the infection effectively.
Pathophysiology of Cholera
Cholera is a gastrointestinal illness caused by the bacterium Vibrio cholerae. The bacteria produce a toxin that causes the body to lose water and electrolytes, leading to severe diarrhea.
How the Bacteria Enter the Body
MostVibrio cholerae bacteria are killed by the acidic environment of the stomach. However, a small number of bacteria can survive and travel to the small intestine. The bacteria attach to the intestinal wall and produce a toxin that causes the body to lose water and electrolytes.
The Toxin
The toxin produced by Vibrio cholerae is called cholera enterotoxin. The toxin binds to cells in the small intestine and activates an enzyme that causes the cells to pump water and electrolytes into the intestine. This results in the production of large amounts of watery diarrhea.
More Detailed Pathophysiology: Upon consumption, most Vibrio cholerae bacteria do not survive the acidic conditions of the human stomach. However, a small number of bacteria manage to survive. As they exit the stomach and reach the small intestine, they need to navigate through the thick mucus lining in order to reach the intestinal walls, where they can establish themselves and multiply. Vibrio cholerae bacteria possess flagella for mobility and pili to attach to the intestinal tissue.
Vibrio cholerae bacteria produce a toxin that is responsible for causing the most severe symptoms of cholera. This toxin, known as an enterotoxin, acts on human cells, prompting them to extract water and electrolytes from the body, primarily from the upper gastrointestinal tract. The extracted fluid and electrolytes are then pumped into the intestinal lumen, resulting in the excretion of diarrheal fluid.
Signs and Symptoms
The incubation period for cholera is typically 2-3 days. The first signs and symptoms of cholera are watery diarrhea and vomiting. The diarrhea can be so profuse that it can lead to dehydration and shock.
In a typical case of severe cholera, the disease progresses through three stages:
Stage I:
Profuse watery stools are expelled by the patient. Over time, fecal matter becomes nearly clear fluid with mucous flakes, giving it the characteristic \”rice-water\” appearance.
Vomiting occurs, initially expelling food and later becoming restricted to rice-water-like fluid.
Severe cramps develop in the abdomen and limbs due to salt loss.
Stage II:
Dehydration and collapse occur during this stage.
The body becomes cold, and the skin appears dry and inelastic.
Blood pressure drops, sometimes becoming unrecordable.
The pulse becomes rapid and weak.
Urine production stops, and the patient may be at risk of shock.
Stage III:
This stage marks the recovery phase, which can happen spontaneously or with treatment.
Diarrhea decreases, allowing the patient to tolerate fluids.
The general condition of the patient rapidly improves.
Diagnosis of Cholera
The diagnosis of cholera is based on the following:
History: The patient may have a history of travel to an area where cholera is common, or they may have been in contact with someone who has cholera.
Symptoms: The patient will typically have watery diarrhea and vomiting. The diarrhea may be so profuse that it can lead to dehydration and shock.
Physical examination: The doctor will examine the patient for signs of dehydration, such as dry skin, sunken eyes, and decreased urination.
Laboratory tests: The following laboratory tests may be performed to diagnose cholera:
Stool culture: This test is used to grow the bacteria in the laboratory.
Polymerase chain reaction (PCR): This test is used to detect the genetic material of the bacteria.
Rapid diagnostic test (RDT): This test is a rapid way to detect the bacteria.
Prevention of Cholera
Cholera is a serious disease that can be fatal, but it is preventable. The best way to prevent cholera is to follow proper sanitation practices.
Here are some specific steps you can take to prevent cholera:
Hand hygiene: Always wash hands with water and soap before preparing, serving, or consuming food. Additionally, it is important to wash hands with soap and water after using a latrine.
Safe drinking water: Boil all drinking water or treat it with chlorine. Store the treated water in a clean container to prevent recontamination.
Food safety: Consume food when it is still hot. If consuming raw foods such as fruits and vegetables, ensure they are properly washed, and when possible, peeled before eating.
Food storage: Cover all foods to prevent contamination by dust, house flies, and cockroaches.
Reporting and burial practices: In the unfortunate event of a cholera-related death, report it immediately to health authorities. Burial should take place promptly, and it is crucial to avoid serving food during this time.
Surveillance and reporting: Active surveillance and prompt reporting of suspected cases allow for the rapid containment of cholera epidemics.
Disinfection: Kill the germs by sprinkling germ-killing solutions, such as JIK, on stool or vomitus, as well as on any other materials used by the person suffering from cholera.
Water and sanitation improvement: Enhance water and sanitation infrastructure to reduce the transmission of infection, such as by improving access to clean water sources and implementing proper waste management systems.
Outbreak investigations: Conduct thorough investigations of diarrheal outbreaks to identify the source of contamination and implement appropriate control measures.
Cholera vaccination: Consider immunization with cholera vaccines in areas prone to outbreaks or for individuals at high risk of exposure.
Treatment of malnutrition: Address malnutrition, as individuals with weakened immune systems are more susceptible to severe cholera. Providing adequate nutrition can help improve their overall resilience.
Management and Treatment
Patient admission: The patient can be admitted to temporary hospitals, schools, or churches. Cholera beds with a central hole are used, allowing continuous stools to pass into a calibrated bucket containing a disinfectant.
Oral Rehydration Solution (ORS): ORS is the primary treatment for cholera. It is recommended for rehydrating patients and replenishing electrolytes lost through diarrhea. In cases of severe dehydration, intravenous Ringer\’s lactate or normal saline, along with ORS, may be administered. The patient should be reassessed every one to two hours, and hydration should be continued. If there is no improvement in hydration, the intravenous drip rate may be increased. During the first 24 hours of treatment, the patient may require 200ml/kg or more of fluid. If hydration improves and the patient is able to drink, switching to ORS solution is recommended.
Nasogastric tube: In young children, a nasogastric tube can be used to administer fluids if necessary, ensuring adequate hydration.
Antibiotics: In certain cases, antibiotics may be prescribed. Doxycycline 300mg or ciprofloxacin as a single dose can be given, but they are contraindicated in pregnancy. For pregnant women, septrin can be used. In children, cotrimoxazole, doxycycline, ciprofloxacin, or erythromycin may be considered based on the specific circumstances.
Hypoglycemia management: If hypoglycemia is present, intravenous dextrose should be administered to correct low blood sugar levels.
Zinc supplementation: Zinc supplementation is effective in treating and preventing diarrhea, especially among children. It can be provided to aid in recovery.
Isolation and infection control: Patients should be isolated to prevent the spread of infection, as stools and vomit are highly infectious. Proper disposal of stools and vomit should be carried out, preferably into a pit latrine.
Equipment and instrument disinfection: Hospital equipment should be cleaned with a disinfectant such as JIK. Instruments can be cleaned with JIK or sterilized to prevent the transmission of the infection.
Fluid balance chart: A fluid balance chart should be instituted to monitor the patient\’s hydration status closely.
Gastroenteritis is a medical condition characterized by inflammation of the gastrointestinal tract that involves both the stomach (\”gastro\”-) and the small intestine (\”entero\”-), resulting in some combination of diarrhea, vomiting, and abdominal pain and cramping.
The severity of infectious gastroenteritis depends on the immune system’s ability to resist the infection.
Electrolytes (mainly sodium and potassium) may be lost as the infected individual vomits and experiences diarrhea.
Causes of Gastroenteritis
Viruses
Rotavirus, norovirus, adenovirus, and astrovirus are known to cause viral gastroenteritis.
Rotavirus is the most common cause of gastroenteritis in children.
Norovirus is the leading cause of gastroenteritis among adults, causing greater than 90% of outbreaks.
Bacteria
In the developed world Campylobacter jejuni is the primary cause of bacterial GE.
Escherichia coli
Salmonella, Shigella, and Campylobacter species.
Salmonella is contracted by ingesting the bacteria in contaminated food or water and by handling poultry.
Campylobacter occurs by the consumption of raw or undercooked poultry meat and other foods. It is also associated with unpasteurized milk or contaminated water.
Clostridium difficile is an important cause of diarrhea that occurs more often in the elderly. It is a common cause of diarrhea in those who are hospitalized and is frequently associated with antibiotic use.
Staphylococcus aureus infectious diarrhea may also occur in those who have used antibiotics.
Parasites
A number of protozoans can cause gastroenteritis – most commonly: – Giardia lamblia
– Entamoeba histolytica
– Cryptosporidium
Non-infectious causes
– Medications like NSAIDs
– Certain foods such as lactose (in those who are intolerant).
– Crohn\’s disease.
Transmission:
The transmission of germs occurs through the feces or vomit of individuals infected with the illness. Gastroenteritis can be spread through the following means:
Consuming untreated or unboiled water from rivers, streams, lakes, ponds, or unprotected springs.
Eating cold food that has been exposed to dust, flies, or cockroaches.
Neglecting to wash hands with soap and water after using a latrine.
Eating unwashed fruits and vegetables.
Serving food and drinks in dirty containers.
Storing drinking water in unclean containers.
Improper disposal of feces.
Presence of open rubbish in areas that attract flies and cockroaches.
Signs and Symptoms:
The primary symptom is diarrhea, often accompanied by vomiting. Infected individuals may notice the presence of blood or mucus in their stools. Crampy abdominal pain is a common occurrence, which may temporarily ease after passing stool. There may be a low-grade fever, headache, and body aches. Symptoms of dehydration may include:
Muscular cramps, sunken eyes, decreased urine output, dry mouth and tongue, weakness, and irritability. In severe cases, adults may experience symptoms such as fatigue, dizziness or lightheadedness, headache, weakness, confusion, rapid heart rate, coma, and significantly reduced urine production.
Diagnosis:
Gastroenteritis is diagnosed clinically, based on a person\’s signs and symptoms.
Stool cultures should be performed especially in those with blood in the stool.
Management:
Gastroenteritis is usually an acute and self-limiting disease that does not require medication.
The preferred treatment in those with mild to moderate dehydration is oral rehydration therapy (ORT).
Intravenous delivery may be required if there is a decreased level of consciousness or if dehydration is severe.
Plain water may be used if more specific and effective ORT preparations are unavailable or not palatable.
A nasogastric tube can be used in young children to administer fluids if necessary.
Institute a fluid balance chart.
Metoclopramide may be helpful in some children, and butylscopolamine is useful in treating abdominal pain.
Fermented milk products (such as yogurt) are similarly beneficial.
Zinc supplementation is effective in both treating and preventing diarrhea among children.
Antibiotics are not usually used for gastroenteritis, although they are sometimes recommended if symptoms are particularly severe or if a susceptible bacterial cause is isolated or suspected.
If antibiotics are to be employed, a macrolide (such as azithromycin) is preferred. Metronidazole or Tinidazole is used if the cause is protozoa.
Isolation of the patient to prevent cross-infection.
Proper disinfection and disposal of stool and vomit.
Prevention and Control:
Always wash hands with water and soap before preparing, serving, or eating food.
Always wash hands with soap and water after using a latrine.
Boil all drinking water or treat it with chlorine. Store it in a clean container.
Consume food while it is still hot.
Ensure that raw foods such as fruits and vegetables are properly washed and, whenever possible, peeled before eating.
Cover all foods to prevent contamination by dust, house flies, and cockroaches.
In the event of a person\’s death due to diarrhea, report it immediately to the health authorities.
Kill germs by using germ-killing solutions like JIK (bleach) on stool or vomit and on all other materials used by the person suffering from diarrhea.
Improve water and sanitation to reduce the transmission of infection.
Conduct investigations of diarrheal outbreaks.
Treat other infections such as typhoid, dysentery, etc.
Address and treat malnutrition.
Consider immunization with Rota vaccine, which provides protection against rotavirus, a common cause of gastroenteritis.
Communicable diseases, also known as infectious diseases or transmissible diseases are diseases that spreads from one person or animal to another or from a surface to a person.
Communicable diseases occur at all age groups outmost serious in childhood due to intensive exposure and poorly developed immunity. These diseases are to a great extent preventable
In countries where the disease have been largely prevented, other conditions like accidents, and degenerative and malignant diseases that occur at an old age have become the commonest, the process known as epidemiological transmission
Tropical countries, Uganda, inclusive have continued to struggle with poverty related diseases that occur at an old age which include: diarrhea, parasite infestations, respiratory infections, immunizable childhood infections, eye infections and malnutrition. These countries are at the same time facing steady increase of diabetes, CVA, rheumatic conditions and cancer
Communicable’ diseases are divided into
Contact contagious diseases
STDs and HIV/AIDs
Vector borne diseases
Diseases related to contaminated water and food
Airborne diseases
Blood borne diseases
Diseases from the animals and their products
Helminthic diseases
Some Communicable diseases and there causative agents.
Causative Organism
Disease/Infection
Rabies virus
Rabies
Influenza A virus
Avian influenza (Bird flu)
Vibrio cholerae
Cholera
Plasmodium species
Malaria
Severe acute respiratory syndrome coronavirus (SARS-CoV)
Severe acute respiratory syndrome (SARS)
Trypanosoma species
Trypanosomiasis
Tsetse fly
Sleeping sickness (African trypanosomiasis)
Wuchereria bancrofti
Elephantiasis
Dracunculus medinensis
Guinea worm disease
Rotavirus
Diarrhea (caused by rotavirus)
Mumps virus
Mumps
Human immunodeficiency virus (HIV)
HIV/AIDS
Varicella-zoster virus
Chickenpox
Measles virus
Measles
Yellow fever virus
Yellow fever
Arboviruses
Arboviral diseases
African swine fever virus
African swine fever
Brucella species
Brucellosis
Salmonella enterica serovar Typhi
Typhoid fever
Schistosoma species
Schistosomiasis
Poliovirus
Poliomyelitis
Shigella species
Dysentery
Bacillus anthracis
Anthrax
Why are communicable diseases important in Africa?
Many of them are very common
Some of them are very serious and cause death and disability
Some of them cause widespread outbreaks of the disease- epidemics 4. Many of them are preventable by fairly simple means
Many are particularly serious and more common in infants and children.
Organisms and agents of disease
The living organisms that cause communicable diseases are of different sizes and sorts. The largest, like tape or filarial worms are visible to the eyes. They are made of many cells and are called metazoa.
Complicated but single celled organisms like malaria parasites and amoeba are called protozoa. They are smaller and can only be seen when magnified with a microscope. Smaller still are bacteria which are simple, single cell, best seen under a microscope after they have been stained with dyes.
Rickettsiae and chlamydiae are smaller and can only multiply within cells. Smallest of all are the viruses. These cannot be seen with an ordinary microscope.
Epidemiological Triad
Patterns of communicable diseases
Different diseases are common in different places and different times. To understand why this happens we need to consider the living organisms of disease- the agent; the people they infect the hostand the surrounding in which they live- the environment.
The agents need a suitable environment in which to grow and multiply and must be able to spread and infect other hosts. If they do not succeed in doing this, they die out.
There is therefore a balance between the agent, the host and the environment which can change and be made to change in different ways.
Hosts (people) are affected by environment, for example, they may live in a hot climate in which there many mosquitoes. But people can also change this environment by draining swamps, changing the vegetation and adding competing hosts such as animals.
Similarly, the environment can affect the agent, for example, the altitude and the temperature for malaria.
Terminology
Infectious disease
An infectious disease is an illness due to a specific infectious agent or its toxic products that arise through a transmission of that agent or its products from an infected person, animal or reservoir to a susceptible host, either directly through an intermediate plant or animal host, vector or inanimate environment.
Infection
Infection is the entry and development of an infectious agent in the body accompanied by an immune response.
Disease
Manifestation of infection through symptoms and signs
Exposed
Someone who has met with an infectious agent in a way that is known to cause disease
Colonization
Colonization is the presence of a replicating microorganism without clinical or subclinical infection or disease. No immune response.
Carrier
Carrier is a person that harbours a specific infectious agent in the absence of clinical disease and serves as a potential source of infection.
Reservoir
The reservoir of infection is the animal or place in which a particular organism usually lives and multiplies. Most of the important communicable diseases humans are the main reservoirs.
Route of transmission
The route of transmission is the way in which an organism leaves the infected host or source and travels to a new susceptible person.
Source
The source of infection is the animal or place from which the particular organism spreads to its new host.
Incubation period
The incubation period is the time between infection and the appearance of signs and symptoms of illness.
Epidemiology
Epidemiology is the study of the distribution and patterns of health events, health characteristics and their causes or influences in a well defined population. Or
It is a branch of medicine that deals with the study of the causes, distribution and control of diseases in the population.
Endemic
It means the disease is present in the community at all times but in a relatively low frequency Something that is endemic is typically restricted or peculiar to a locality or region. For example malaria is endemic in some areas of Africa.
Epidemic
An epidemic is a sudden severe outbreak of an infectious disease that spreads rapidly within a region or group, affecting a large proportion of people.
Pandemic
A pandemic occurs when an epidemic becomes widespread and affects a whole region, a continent or the entire world.
Clinical disease
A clinical disease is a disease which has physical manifestations (clinical signs and symptoms).
Susceptible host
A susceptible is someone that is exposed to an infectious disease.
Vector
A vector is an animal, usually an insect that transmits parasitic microorganisms from person to person or from infected animals to human beings.
Transmission cycle
The transmission cycle describes how organisms grow, multiply and spread. In some cases humans may be the only host, in which case the infection spreads directly from person to person, e.g. measles. In other cases, humans are the final hosts from whom the organism has no chance to pass further, e.g. tetanus.
There are three parts of a transmission cycle for an agent or organism:
Source —-> Transmission —-> Susceptible Host
Source
The source of an infection can be an infected person or animal, or soil. People and animals may have clinical disease, subclinical disease or be carriers.
Transmission
The main routes of transmission are:
❖ Direct contact (skin, mucous membrane, sexual intercourse)
❖ Vector transmission
❖ Fecal contamination of soil, food and water which are ingested.
❖ Contact with animals or their products (e.g. biting)
A susceptible host is one with low resistance to a particular infection. Low resistance may be due to:
Not having met the organism before and therefore not having any immunity to it. For example, at the age of 6-12 months, a child loses the passive immunity against measles which was acquired from the mother during pregnancy. When in contact with another child who has measles, the child will develop the disease because of no immunity against measles
Having another serious illness like AIDS at the same time. Such people have a higher risk of developing tuberculosis.
Malnutrition which can make the infection worse.
Principles of communicable disease control and prevention
The aim of control is to tip the balance against the agent. This may be done by:
Teaching technology refers to all teaching or instructional tools/aids/equipment that make learning more successful and interesting.
Examples of teaching Aids/Technology
Category
Examples
Visual Aids
Charts
Posters
Graphs
Diagrams
Maps
Infographics
Illustrations
Visual organizers
Digital Tools
Computers
Laptops
Tablets
Smartphones
Interactive whiteboards
Projectors
Educational software
Online learning platforms
Multimedia presentations
Audio Aids
Radios
MP3 players
Speakers
Audio recordings
Podcasts
Music
Language learning apps
Print Materials
Textbooks
Worksheets
Handouts
Study guides
Reference books
Journals
Newspapers
Magazines
Flashcards
Manipulatives
Postcards
Storybooks
Graphic novels
Brochures
Other
Models
Globes
Science kits
Educational games
Virtual reality tools
Augmented reality apps
Microscopes
Telescopes
Calculators
Interactive quizzes
Simulations
Robots
Dictionaries
Learners remember 10% of what they read, 20% of what they hear, 30% of what they see and 40% of what they do.
Therefore, the teaching tools or technology should be designed and prepared in a way that learners are given an opportunity to have hands-on or practice what they are learning.
TYPES (FORMS) OF TEACHING AIDS/TECHNOLOGY
There are various types or forms of teaching aids/technology that can enhance the learning experience. They can be broadly classified into the following categories:
Visual Aids: Visual aids are teaching tools that can be seen or read by the learners. They help in presenting information in a visual format, making it easier for learners to understand and remember. Examples of visual aids include charts, whiteboards, maps, models, diagrams, graphs, illustrations, infographics, and visual organizers. These aids facilitate better comprehension and retention of information.
Audio Aids: Audio aids are teaching tools that produce sound, which is beneficial for learning. They engage the sense of hearing and can be used to deliver audio-based content or support verbal instructions. Examples of audio aids include headsets, radios, microphones, speakers, audio recordings, podcasts, music, and language learning apps. These aids enable auditory learning and enhance the understanding of concepts through sound.
Audio-Visual Aids: Audio-visual aids are tools that combine both visual and audio elements. They provide a multisensory learning experience by integrating visual presentations with accompanying sound. Examples of audio-visual aids include PowerPoint projectors, videos, smart devices (such as smartphones and tablets), multimedia presentations, and interactive whiteboards. These aids offer a dynamic and engaging approach to teaching, incorporating both sight and sound to reinforce learning.
In addition to these three primary categories, it’s important to note that teachers themselves can be effective teaching tools. They possess the ability to speak, act, dance, and demonstrate various concepts, employing diverse instructional techniques to help learners understand. Their presence and interactive teaching methods contribute significantly to the learning process.
Characteristics of a Good Teaching Aid
A good teaching aid possesses several characteristics that contribute to its effectiveness in enhancing the learning process. Some key characteristics of a good teaching aid are:
Visibility: The teaching aid should be large enough for learners to see clearly. It should be appropriately sized to ensure that all learners can view the content without difficulty, enabling them to grasp the information being presented.
Audibility: The teaching aid should provide clear and audible sound, especially in the case of audio aids. Whether it is a microphone, headset, or audio recording, the sound should be easily heard by all learners, ensuring that they can follow along with the auditory content.
Relevance: The teaching aid should be relevant and appropriate to the content or topic being taught. It should align with the learning objectives and curriculum, reinforcing the concepts being discussed and supporting the overall instructional goals.
Up-to-date and Reliable: A good teaching aid should be up-to-date and modern, incorporating the latest advancements in technology and knowledge. It should be free from technical faults or inaccuracies, ensuring that learners receive accurate and reliable information.
Accuracy: The teaching aid must provide accurate content and information. Whether it is the text on charts, slides, or visuals presented, the information should be factually correct, promoting a solid understanding of the subject matter.
Simplicity and Clarity: A good teaching aid should be simple and easily understood. It should present information in a clear and concise manner, avoiding complexity that may confuse learners. The visual elements, language used, and overall design should be student-friendly and facilitate learning.
Accessibility and Affordability: The teaching aid should be easily accessible by the teacher, without requiring significant financial resources. It should be affordable and readily available, allowing educators to incorporate it into their teaching practices conveniently.
Suitability to Learners’ Mental Ability: The teaching aid should be appropriate to the mental ability and developmental stage of the learners. It should consider the cognitive capacities and age group of the students to ensure that the content and presentation align with their understanding levels.
Reusability: A good teaching aid should be reusable. It should be durable and capable of being used multiple times without significant wear or deterioration. This allows teachers to utilize the aid repeatedly, making it a cost-effective and sustainable educational resource.
Cleanliness: The teaching aid must be kept clean and well-maintained. Regular cleaning and upkeep ensure that the aid remains visually appealing and free from any distractions or obstructions that may hinder the learning experience.
Portability: A good teaching aid should be portable and easy to carry. This enables teachers to use the aid in different teaching environments and facilitates its mobility between classrooms or educational settings.
Motivational and Engaging: The teaching aid should be motivational and interesting to capture learners’ attention and foster their engagement. It should stimulate curiosity, creativity, and active participation, promoting a positive learning atmosphere.
Application of Information Technology in Teaching
Information technology has revolutionized the field of education, offering a lot of opportunities to enhance teaching and learning processes. Here are some key applications of information technology in teaching:
PowerPoint: PowerPoint projectors enable teachers to create visually appealing presentations that can incorporate text, images, and multimedia elements. These presentations make the content more engaging and facilitate better understanding among students.
Zoom Meetings: Zoom is a video conferencing platform that allows teachers and students to connect remotely. It enables virtual classrooms, online discussions, and real-time interactions, making distance learning possible and convenient.
YouTube: YouTube offers a vast repository of educational videos on various topics. Teachers can utilize these videos as supplementary resources to explain complex concepts, provide visual demonstrations, or engage students through interactive content.
WhatsApp: WhatsApp, a popular messaging application, can be utilized as a communication tool in education. Teachers can create groups to share announcements, assignments, and resources, fostering effective communication and collaboration among students.
e-Learning Management System/Moodle: e-Learning management systems like Moodle provide a comprehensive platform for online course delivery and management. Teachers can organize learning materials, create assessments, track student progress, and facilitate interactive discussions within a virtual learning environment.
Online Collaboration Tools: Information technology enables the use of various online collaboration tools such as Google Docs, Microsoft Teams. These tools promote collaborative learning by allowing students to work together on projects, share ideas, and provide feedback in real-time.
Virtual Simulations and Skills Laboratories: Information technology facilitates the use of virtual simulations and skills laboratories, providing students with hands-on learning experiences in subjects such as science, engineering, and medicine. Virtual simulations allow students to conduct experiments and practice skills in a safe and controlled environment.
Online Assessment Tools: With the help of information technology, teachers can utilize online assessment tools to create quizzes, tests, and assignments. These tools streamline the assessment process, provide immediate feedback, and enable teachers to track and analyze students’ performance efficiently.
Educational Apps and Software: There is a wide range of educational apps and software available for different subjects and grade levels. These interactive applications provide personalized learning experiences, adaptive assessments, and interactive tutorials, catering to individual student needs.
Online Resources and Digital Libraries: Information technology provides access to vast online resources and digital libraries. Students can explore e-books, research articles, educational websites, and online databases to gather information and conduct research, expanding their learning beyond traditional textbooks.
Foundational Physiology: What You Must Know Before Exams
Before memorizing the steps of a dressing or a bandage, you must understand the underlying physiology of tissue repair and vascular dynamics. Nursing is not just completing tasks; it is applied physiology. If you understand why a wound heals or how a bone dies from lack of blood, the procedures will make perfect logical sense.
The 4 Phases of Wound Healing
Every wound, from a tiny paper cut to a massive surgical incision, heals through four distinct, overlapping phases. Aseptic dressing techniques are designed to protect these fragile stages:
Hemostasis (Minutes): Blood vessels constrict, and platelets aggregate to form a fibrin clot to stop bleeding.
Inflammation (Days 1-4): White blood cells (neutrophils and macrophages) flood the area to eat dead tissue and kill bacteria. The wound is red, warm, and swollen.
Proliferation (Days 4-21): New blood vessels form (angiogenesis), and fibroblasts lay down collagen. Bright red, bumpy Granulation Tissue fills the wound bed. (Rough bandaging or peeling off a dry dressing rips this new, fragile tissue away!)
Maturation/Remodeling (Months to Years): Collagen cross-links and strengthens, forming a scar.
Venous Return & Bandaging
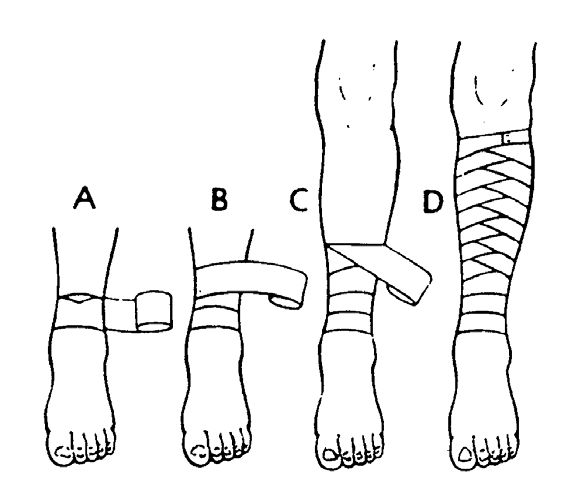
Veins have one-way valves to push blood back to the heart against gravity. When you bandage a limb, you must always bandage from below, upwards (distal to proximal). This physically squeezes the blood back toward the heart. If you bandage downwards, you trap blood in the extremity, causing massive, painful swelling.
Principles of Asepsis
The skin is heavily colonized with normal flora (like Staphylococcus epidermidis). When the skin breaks, these bacteria become deadly pathogens. Aseptic technique utilizes a strict clean-to-dirty workflow to ensure that zero bacteria are pushed from the outside skin into the sterile wound bed.
Part A: Wound Dressing
A1. Theory — Wound Dressing
Definition
A Dressing is a sterile pad or compress applied directly to a wound to promote healing, protect it, and/or absorb exudate (fluids).
Wound Dressing is the systematic, aseptic procedure of cleaning a wound and applying a sterile covering using strict sterile technique and sterile equipment.
Purposes / Indications of Wound Dressing
Why do we dress wounds? As a nurse, you must know these indications for your OSCEs:
To protect the wound from further mechanical injury or external bacterial infection.
To absorb exudates such as pus, blood, or serum (preventing the skin from macerating).
To immobilise and support the injured part, reducing pain.
To apply pressure on the wound to control bleeding (hemostasis) or to approximate (bring together) the wound edges.
To provide psychological and physical comfort for the patient (hiding a severe, traumatic wound drastically reduces patient anxiety).
To keep the wound environment moist for optimal healing (dry cells die!) and to allow for regular inspection/monitoring of the wound bed.
Types of Wounds that Need Dressing
Surgical wounds: Sutured incisions directly from the operating theatre. These are usually clean, primary-intention wounds.
Traumatic wounds: Abrasions, lacerations, and deep punctures from accidents (high risk for tetanus and gross contamination).
Infected wounds: Wounds actively discharging foul-smelling fluids or pus ("dirty wounds").
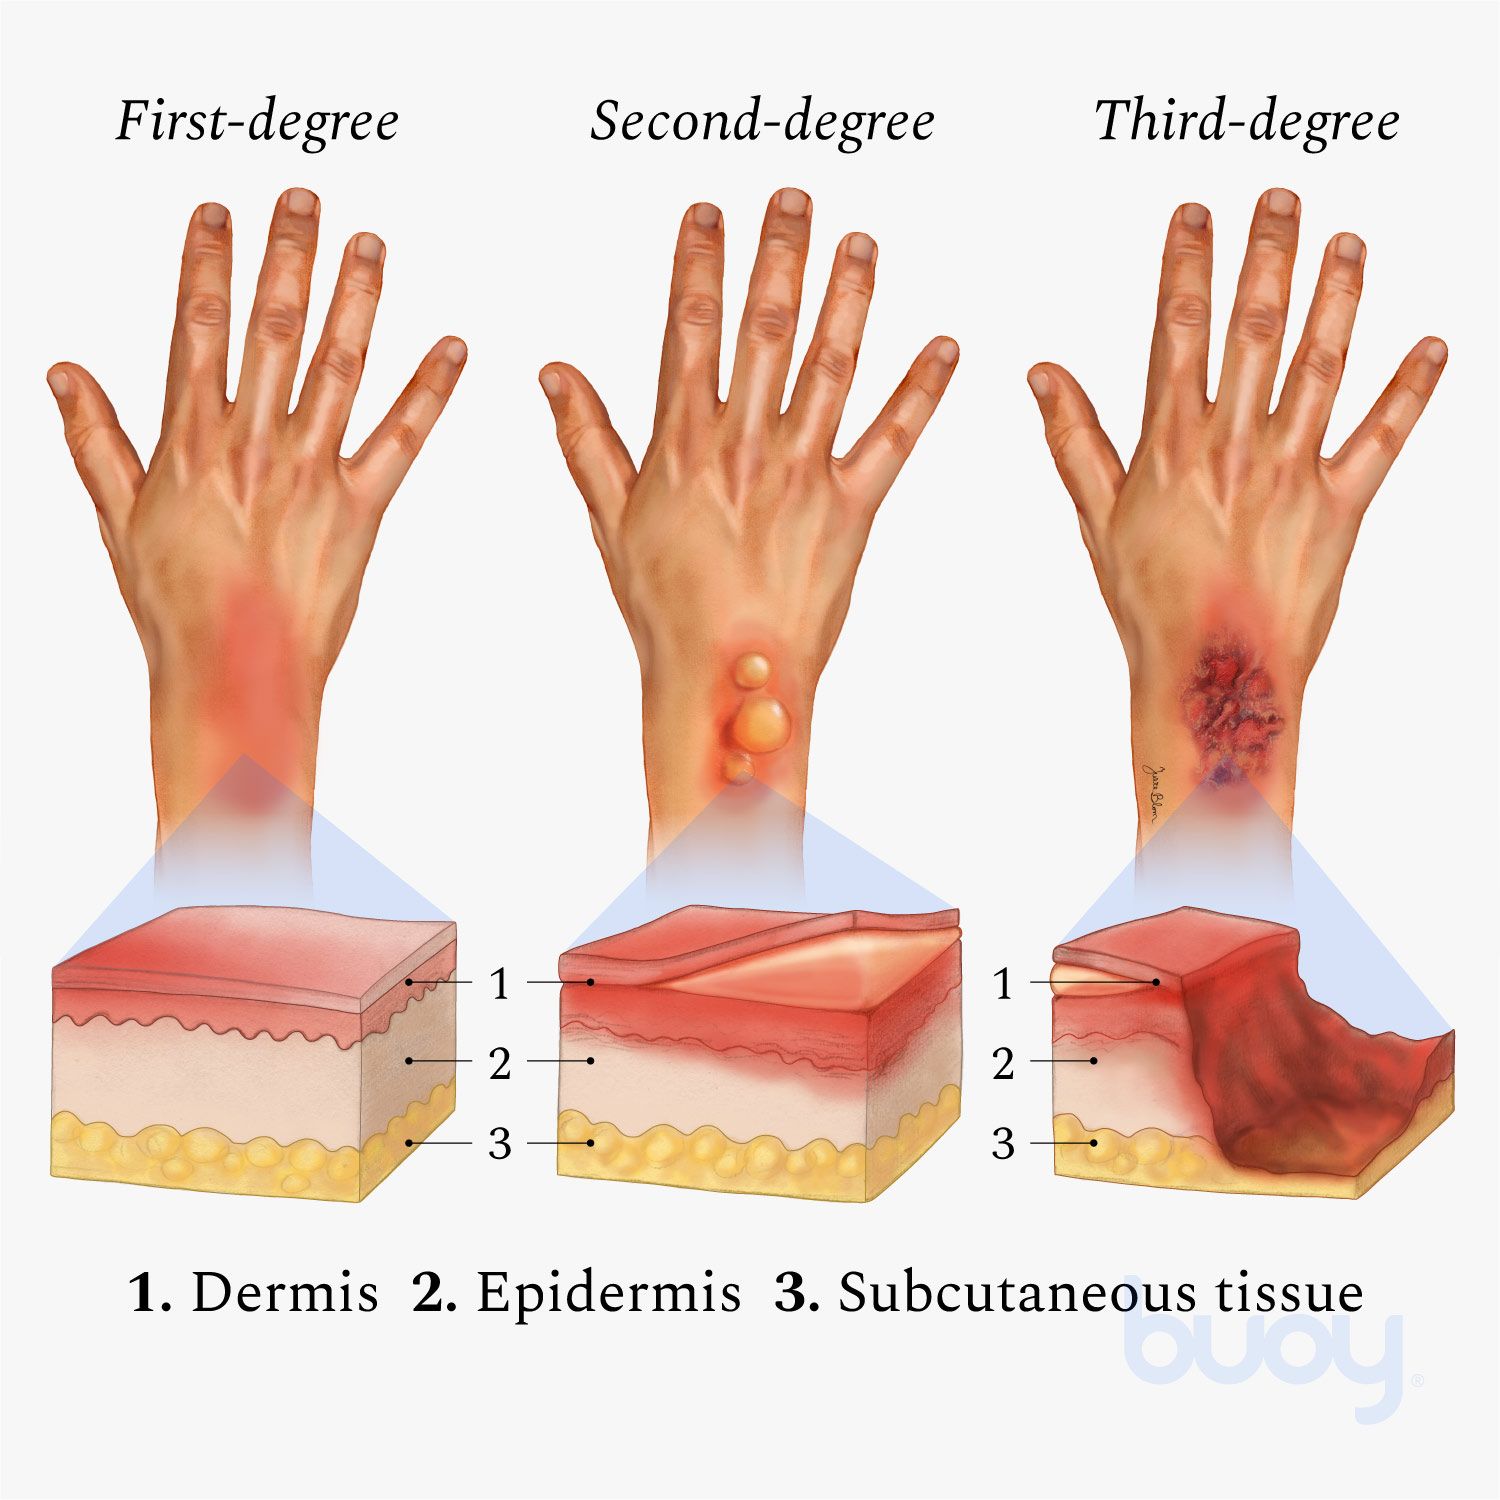
Burn wounds: Requiring highly specialized, sterile, non-adherent care to prevent peeling off massive sheets of skin.
Chronic wounds: Pressure sores (bedsores from ischemia), diabetic foot ulcers (neuropathy), and venous leg ulcers.
Types of Dressings Used
Type of Dressing
Clinical Description & Specific Use
Dry sterile dressings (Gauze)
Basic sterile woven/non-woven gauze. Used primarily for covering clean, dry, sutured surgical wounds.
Non-adherent dressings
Dressings treated with petroleum jelly (e.g., Paraffin gauze / Jelonet). They do not stick to the raw, weeping wound surface, making removal completely painless. Ideal for burns, grazes, and fragile skin grafts.
Wet-to-dry dressings
Saline-moistened gauze is packed deep into a dirty wound. As the gauze dries, it physically binds to dead, necrotic tissue. When pulled out, it mechanically debrides (rips out) the dead tissue. Used exclusively for dirty/sloughy wounds.
Occlusive / Semi-permeable films
Clear, waterproof polyurethane films (e.g., Tegaderm). They keep the wound moist while allowing oxygen/carbon dioxide gas exchange. Perfect for protecting IV insertion sites and superficial minor burns.
Hydrocolloid / Alginate / Foam
Advanced modern dressings. Alginates (derived from seaweed) can absorb up to 20x their weight in extremely heavy exudate. Hydrocolloids turn into a soothing gel to promote rapid granulation tissue growth.
Principles of Aseptic Technique
Aseptic technique is the absolute foundation of wound care. The core principles are to:
Prevent cross-infection (spreading nosocomial germs like MRSA from one patient to another) and wound sepsis.
Protect both the patient and the nurse by following Universal Precautions (treating all blood/body fluids as potentially infectious for HIV, Hepatitis B, and C).
Ensure that ONLY sterile articles touch the wound bed.
Maintain a strict clean-to-dirty workflow, performing rigorous hand hygiene before and after the procedure.
Pre-Procedure Wound Assessment
Before you clean a wound, you must scientifically observe and document its status:
Anatomy: Site, exact size (length x width), depth, and shape of the wound.
Exudate: Type and amount of discharge: Serous (clear fluid), Sanguineous (fresh blood), Serosanguineous (pinkish), or Purulent (thick, foul-smelling pus).
Wound Edges: Are they approximated (closed nicely) or gaping open? Check the integrity of any stitches, clips, or surgical drains.
Signs of Infection: Redness (erythema), heat, localized swelling, severe pain out of proportion, fever, or dangerous red streaks tracking up the limb (lymphangitis).
Periwound: The condition of the surrounding skin (is it macerated/soggy?) and the patient's general systemic vital signs.
💡 The Dangers of Poor Dressing Technique:
If a nurse is sloppy with asepsis or aggressive with cleaning, it leads to severe wound sepsis, system-wide bacteremia, drastically delayed healing, wound dehiscence (a horrific complication where a surgical wound bursts completely open), excessive bleeding, or the destruction of fragile new granulation tissue from rough handling. Always respect the sterile field!
A2. Procedure: 7.3 Dressing of Wounds
OSCE EXAM PROCEDURE: 7.3
Examiner Objectives:
1. Mention the indications for wound dressing.
2. Mention the general rules of wound dressing.
3. Identify requirements for wound dressing.
4. Prepare requirements for wound dressing.
5. Perform the wound dressing flawlessly.
General Rules for Wound Dressing (Crucial for Exams)
No.
Clinical Rule
Physiological Rationale
1.
All bed making, mopping of the floor and dusting must be finished at least one hour before the dressing round is started.
To prevent the spread of infections (allows airborne dust and aerosolized bacteria to settle completely).
2.
Before the dressing round, wash the trolley thoroughly with soap and water and dry it.
Mechanical removal of gross organic matter.
3.
Before each individual dressing, wipe the trolley shelves with a potent disinfectant using a moppar.
Chemical destruction of remaining pathogens.
4.
Sterile articles are placed strictly on the TOP shelf; un-sterile articles on the BOTTOM shelf.
Prevents accidental contamination from unsterile items dropping onto sterile ones.
5.
Clean, uninfected wounds are ALWAYS dressed first.
Prevents tracking deadly bacteria from dirty wounds into clean surgical wounds.
6.
Limit movements in the ward; windows/fans near the patient being dressed must be closed.
To prevent drafts from blowing cross-infectious pathogens onto the sterile field.
7.
Do not carry out dressing when having a focal wound or droplet infection (e.g., a cold/flu).
Protects the highly vulnerable patient from the nurse's pathogens.
8.
If possible, 2 nurses should be available to carry out the dressing.
One "clean" nurse handles the patient; one "sterile" nurse handles the instruments. Prevents contamination and saves time.
9.
Apply universal infection prevention and control before and after each procedure.
Standard protocol to prevent the spread of bloodborne infections.
10.
Nails must be cut short; watches and rings MUST be removed.
Jewelry harbors immense colonies of bacteria and tears sterile gloves.
11.
Masks are worn if required. Once in position, they must not be touched. • When removing, handle only the tapes and dispose immediately. • NEVER put a used mask in a uniform pocket.
The front of the mask acts as a filter and is heavily contaminated with bacteria.
12.
Lotions: The dressing assistant should pour only enough lotion for one single dressing. Unused lotion must be disposed of.
To avoid wastage and eliminate the risk of cross-infection from contaminated bottles.
13.
The trolley MUST be reset for each individual dressing.
Maintains strict single-patient use standards.
14.
All used equipment must be decontaminated in chlorine, washed with soapy water, brushed, dried, and sterilised (Autoclaved).
To ensure absolute sterility ready for the next dressing.
15.
The trolley is cleaned with disinfectant post-procedure.
Leaves the environment safe.
Requirements (Setting the Trolley for OSCEs)
You must memorize this exact layout for your practical exams to avoid failing on safety protocols:
Top Shelf (Strictly Sterile)
Bottom Shelf (Unsterile / Clean)
Bed Side / Environment
Sterile Dressing Pack containing:
- 2 dressing towels (drapes).
- 2 non-toothed dissecting forceps.
- 2 dressing forceps.
- 3 gallipots:
• 1 for sterile swabs.
• 1 for the cleaning lotion (e.g., Normal Saline).
• 1 for gauze dressing.
- A pair of stitch scissors or a clip remover (if specifically required).
- A dressing mackintosh (waterproof sheet) and towel.
- Receiver for soiled/dirty dressings.
- Receiver for used/dirty instruments.
- A bottle of approved antiseptic lotions.
- A drum for extra sterile dressings.
- A drum for extra sterile swabs.
- A tray with bandages, scissors, safety pins, strapping/tape.
- A container of Cheatle forceps (for transferring sterile items).
- A pair of sterile gloves and a pair of clean exam gloves.
- A bowl.
- Hand washing equipment (Soap, water, sterile towels, or alcohol hand rub).
🚨 EXAM TRAP: The "DIRTY" Wound Requirements
If the examiner verbally tells you or the scenario dictates that the wound is dirty, necrotic, or infected, you MUST dynamically add these specific items to your trolley setup:
Probe: To assess the depth of sinuses/fistulas.
Hydrogen peroxide (H2O2): For effervescent lifting of dead slough and necrotic debris.
Pedal bin: For immediate disposal of highly infectious waste.
Sinus forceps: For packing deep cavities.
Pus swab + Laboratory form: For collecting a vital microbiology Culture & Sensitivity (C&S) sample before giving antibiotics.
Hypotonic/Hypertonic saline: Based on osmotic requirements for the slough.
The Procedure for Wound Dressing
Step
Nursing Action
Rationale
1.
Refer to general rules. Introduce yourself, identify the patient, and explain the procedure.
To maintain sterility, ensure the correct patient, and reduce anxiety.
2.
Dressing assistant positions the patient appropriately.
Ensures optimal lighting and access to the wound.
3.
Place the mackintosh and towel directly under the part to be dressed.
Provides physical comfort and prevents potentially infectious fluids from soiling the bed linen.
4.
Dressing assistant puts on clean gloves, removes the outer bandage, and loosens the strapping.
For easy and painless removal of the old dressing.
5.
Dressing assistant removes gloves, washes hands, opens the sterile dressing pack, and adds any additional sterile equipment using Cheatle forceps.
To arrange the materials logically for easy use while maintaining an unbroken sterile field.
6.
Add the sterile cleaning solution required into the gallipot.
Preparation for wound irrigation.
7.
Dressing assistant puts on new clean gloves, carefully removes the inner dressing, and discards it directly in the receiver.
To prevent the spread of infections from the saturated old dressing.
8.
Dressing nurse washes hands thoroughly with soap and water and dries with a sterile towel (or uses surgical rub).
To absolutely reduce the transient flora on the hands.
9.
Put on sterile gloves using proper surgical technique.
To maintain strict surgical asepsis.
10.
Drape the wound meticulously with the sterile dressing towels.
To create and provide an isolated sterile environment around the wound.
11.
Using forceps, swab the wound in the following specific way, discarding EACH swab after a single use: • First, wipe the exact centre of the wound. • Then wipe each side of the wound, always working from the middle outwards.
Minimizes the spread of infection. Swabbing from clean (centre) to dirty (periphery) ensures you never drag skin bacteria into the raw wound bed.
12.
For a dirty wound, perform the necessary toilet as prescribed. This may involve the removal of stitches/clips, probing the wound depth, or packing the wound with ribbon gauze.
Removes barriers to healing (slough) and promotes granulation from the base up.
13.
Apply a sterile primary dressing to cover the wound. Add a secondary absorbent pad if oozing or heavy discharge is anticipated.
To protect the wound from trauma and prevent strike-through soiling of the linen.
14.
Place all used, sharp, or contaminated instruments immediately into a dedicated receiver.
To avoid sharps injuries and cross-infections.
15.
Remove gloves, apply strapping (tape) or a supportive bandage over the dressing as required.
To secure the dressing while maintaining hygiene and comfort.
16.
Wash your hands, clear away the trolley, and leave the patient comfortable.
Standard infection control protocol.
17.
Document the procedure (wound appearance, exudate, patient tolerance) and report any abnormalities immediately.
For legal continuity of care and surgical follow-up.
Critical Points to Remember
Use surgical spirit or alcohol for easy, painless removal of sticky adhesive marks from previous strapping.
If the inner strapping/gauze is stuck and adherent to the raw skin, do not rip it! Soften it by soaking it with warm normal saline or antiseptic lotion.
For a dirty wound, Hydrogen Peroxide is used specifically to bubble out hidden debris from deep crevices.
Avoid excessive, aggressive surgical toilet. Scrubbing too hard destroys the delicate, new angiogenesis (blood vessels) required for wound healing and causes unnecessary bleeding.
📝 EXAM TECHNIQUE: The Golden Rule of Wound Cleaning
Always clean in ONE direction only, from the cleanest part to the dirtiest part.
1st swab: Straight down the centre of the surgical incision. (Discard)
2nd swab: Down one side of the wound, moving slightly outward. (Discard)
3rd swab: Down the other side of the wound, moving slightly outward. (Discard)
Physiological Rule: Each swab is discarded after a single continuous stroke. Never return a used swab to the wound bed; doing so carries the patient's own skin flora (bacteria) back into the open tissues, causing iatrogenic infection.
A3. Procedure: 7.4 Removal of Sutures or Clips
OSCE EXAM PROCEDURE: 7.4
Objectives:
1. Identify the exact requirements for the safe removal of sutures/clips.
2. Demonstrate the correct removal of sutures/clips without causing dehiscence.
Requirements: Same trolley setup as standard wound dressing, plus stitch scissors or a specialized clip remover.
Step
Nursing Action
Rationale
1.
Refer to general rules. Review the patient's surgical chart and doctor's orders.
To confirm the correct patient, the correct procedure, and ensure it is the correct postoperative day for removal.
2.
Follow the standard procedure for opening a surgical wound dressing.
To promote strict infection prevention and control.
STITCH (SUTURE) REMOVAL
1.
Grasp the knot of the stitch using a pair of non-toothed dissecting forceps and pull gently upward. Cut the suture wire as close to the skin as possible on the side beneath the knot, and pull the stitch out smoothly.
Crucial: This ensures that the dirty, exposed part of the stitch resting on the outside skin is NOT dragged through the clean internal wound tract, preventing deep infection.
2.
Use antiseptic lotion for dirty wounds after the removal of stitches. If the skin is completely healed, clean, and dry, do not over-clean.
Maintains normal skin integrity.
CLIP (STAPLE) REMOVAL
4.
Insert the lower jaw of the sterile clip remover completely under the centre of the metallic clip; squeeze the handles firmly until the clip bends completely in the middle and the edges lift out.
The clip remover mechanically bends the staple, allowing the prongs to back out of the skin safely without tearing tissue.
5.
When the wound has healed perfectly with no discharge, a new heavy dressing is not necessary. A simple light covering or exposing to air is sufficient.
Exposure to air promotes drying and ultimate epidermization (quick healing).
6.
Strictly COUNT the stitches or clips removed.
To compare against the surgical operation notes and ensure absolutely none are left embedded inside to cause a foreign body reaction or abscess.
7.
Document the procedure, the number of sutures removed, and the status of the wound line.
For legal records and surgical follow-up.
Points to Remember
Stitches or clips are normally removed between the 5th and 10th day post-operatively, depending on the tissue vascularity (face/neck heal fast in 5 days; joints/abdomens take 10-14 days).
Sometimes the stitches or clips are removed alternatively (every other stitch) on day 7, and the rest on day 9. This prevents the nightmare complication of the wound bursting open (dehiscence) prematurely if it hasn't gained enough tensile strength.
On some occasions, absorbable sutures (like Vicryl or Monocryl) may be used internally or subcuticularly, in which case they dissolve and are not removed.
Supplementary Theory: Suture Materials
For advanced exams, know the difference:
Non-absorbable: Silk, nylon, polypropylene, stainless steel clips. The body cannot digest these; they retain strength indefinitely and must be physically cut and removed.
Absorbable: Catgut, Vicryl, Dexon. Broken down via enzymatic digestion or hydrolysis naturally inside the body. Used for deep tissues.
Wound Healing Intentions
First Intention: Clean, neatly sutured edges that heal quickly with minimal scar tissue.
Second Intention: A dirty, infected, or gaping wound that is intentionally left open. It heals slowly by massive granulation tissue filling the defect from the base upwards. Leaves a prominent, large scar.
Part B: Bandaging
B1. Theory — Bandaging
Definition
A Bandage is a continuous strip of material used to bind, support, cover, or immobilise a specific part of the body.
Bandaging is the clinical technique of applying these bandages firmly, evenly, and safely to hold dressings in place, support muscular injuries, or apply hemostatic pressure.
Purposes / Indications of Bandaging
To keep a sterile dressing securely in position on a wound without using skin-damaging adhesive tape.
To apply direct mechanical pressure and control severe bleeding (e.g., a pressure bandage for arterial hemorrhage).
To support and immobilise an injured musculoskeletal part (sprains, strains, or undisplaced fractures).
To prevent or rapidly reduce swelling (using compression combined with elevation).
To secure rigid splints firmly in place against a broken limb.
To correct or prevent physical deformity (e.g., clubfoot strapping) and to provide thermal warmth to a joint.
To mechanically assist in venous blood return and reduce dependent oedema in the lower limbs.
Types of Bandages & Materials
Roller bandages: Long strips rolled tightly on themselves. Made of Cotton (breathable), Crepe (highly elastic for compression), Domette, or Flannel.
Triangular bandages: Extremely versatile First Aid staples! Made by cutting a large square of cloth diagonally. Used for arm slings, tourniquets, and securing massive dressings.
Tubular bandages: E.g., stockinet, tube gauze, or elastic tubing. Slipped seamlessly over fingers, arms, and legs.
Adhesive strapping (plaster): Sticky tape for exact fixation of dressings or strapping joints (e.g., sports taping).
Plaster of Paris (POP) bandage: Gauze infused with dry calcium sulfate dihydrate. When soaked in water, it undergoes an exothermic reaction and hardens into rigid splints/casts for broken bones.
Basic Bandaging Turns/Patterns
Turn / Pattern Name
Clinical Description & Specific Use
Fixing (anchor) turn
2 overlapping circular turns applied to firmly anchor the bandage to the limb before the real directional bandaging starts.
Circular turns
Each turn goes directly over the exact previous one. Used at the start/end of bandaging, or on perfectly cylindrical parts like fingers and toes.
Spiral turns
Each turn overlaps the previous by ½ to ⅔ of the width, ascending the limb smoothly and evenly.
Spiral-reverse turns
Required for limbs that rapidly change width or taper (like the muscular forearm or calf). You must fold/reverse the bandage 180 degrees at each turn to make it lie flat against the conical shape.
Figure-of-eight turns
The classic pattern used specifically for hinge joints (ankle, wrist, knee, elbow). It allows for movement while providing immense structural support.
Spica (basket-weave) turns
Crossing turns over a fixed joint or specific anatomical area (shoulder, hip, thumb). A Divergent spica is used for joints bent at an angle with fixed dressings (knee/elbow/heel).
Recurrent turns
Folding the bandage forwards and backwards over a blind stump/end (e.g., finger tip, severe amputation stump, or the dome of the head).
🚨 The Dangers of Wrong Bandaging
Too tight (The Ischemic Threat): Obstructs arterial blood flow and venous return, causing severe distal swelling, excruciating throbbing pain, numbness, a cold/blue (cyanotic) limb, and eventual tissue death (gangrene) requiring amputation.
Too loose: Slips off instantly as the patient moves, completely failing to support the injury or apply life-saving pressure to bleeding.
Too much tension on fragile skin: Causes severe friction blisters, shear tears, and pressure sores over bony prominences.
THE GOLDEN RULE - ALWAYS CHECK CSM: After applying ANY bandage, immediately check the Circulation (capillary refill < 2 secs), Sensation (can they feel you touching?), and Movement (can they wiggle their toes/fingers?) of the part beyond the bandage. Recheck rigorously after 15–30 minutes!
B2. Procedure: 17.10 Bandaging
OSCE EXAM PROCEDURE: 17.10
Objectives:
1. Mention the general physiological principles of bandaging.
2. Outline indications for bandaging.
3. Identify requirements for bandaging.
4. Prepare materials for bandaging.
5. Perform bandaging of various body parts flawlessly.
General Rules of Bandaging
No.
Rule
Rationale
1.
Use a tightly rolled bandage of suitable width (narrow for fingers, wide for thighs) and appropriate material.
To promote neatness, prevent wrinkling, and ensure efficiency.
2.
Always face the patient when bandaging limbs.
To constantly observe the patient's facial expression for wincing/signs of sudden pain indicating the bandage is too tight.
3.
Hold the head (roll) of the bandage uppermost (facing you).
Allows the bandage to unroll naturally, applying even tension and pressure without dropping it.
4.
Bandage the limb well aligned in its natural anatomical position.
To prevent long-term joint deformity, contractures, and extreme discomfort.
5.
Hold the bandage in the right hand when bandaging a left limb and vice versa.
To promote ergonomic, correct bandaging technique.
6.
Bandage the limb from inside outwards and from BELOW upwards, keeping the bandage even throughout.
Absolutely vital: Wrapping distal-to-proximal mechanically supports venous return and lymphatic drainage back to the heart, preventing distal pooling and severe oedema.
7.
Ensure that the bandage is neither too tight nor too loose.
To prevent catastrophic interference with arterial circulation, while avoiding useless slippage.
8.
Finish off the bandage with a straight circular turn, fold in the raw end, and secure it. Always avoid placing the pin over joints, bony prominences, or the actual site of injury.
To prevent localized pressure necrosis, irritation, and extreme discomfort when the patient rests.
9.
Fasten with safety pins or with the provided elastic metal fastener.
To prevent unravelling and loosening of the compression.
10.
Apply medical tape in psychiatric, mentally handicapped, or paediatric patients instead of metal pins or sharp clips.
Safety protocol to prevent severe injury (e.g., children swallowing pins or psychiatric patients using pins for self-harm).
Materials Used to Make Various Bandages
Material Type
Clinical Description / Use
Cotton
Heavy weaves are strong and used for slings. Thin, porous ones form "open weave" bandages which are cheap, light, highly breathable, and disposable. Firmer cotton can be washed and autoclaved repeatedly.
Domette
This woven material with a slightly fluffed, soft surface makes a firm supporting bandage. It has mild resilience but provides robust, comfortable support for splints.
Flannel
Soft, warm strips. Historically used for dressing and padding rigid splints like the heavy metal Thomas splint.
Crepe
These bandages are highly elastic. The degree to which they are stretched when applied dictates the exact amount of hydrostatic pressure they exert. Widely used for compressing massive sprains and treating varicose veins.
Plaster (POP)
Plaster muslin is the fabric basis for making plaster of Paris (POP) rigid bandages.
Stockinet
A soft, seamless tubular cotton material. Applied directly to the skin beneath harsh fiberglass or plaster casts to protect the skin from friction and plaster burns.
Proprietary Tubular
Such as TubeGauze or Helodast. Applied with a special metal applicator for fast, seamless, perfectly even coverage over fingers and toes.
Bandaging Patterns — Step-by-Step OSCE Procedures
A. Figure of Eight (The Standard for Joints like Ankle/Wrist)
Step
Nursing Action
Rationale
1.
Observe general rules of all nursing procedures (Hand hygiene, patient ID, explanation).
To maintain clinical standards.
2.
Put patient in a comfortable position, fully exposing the affected joint.
To promote comfort, assess baseline circulation, and prevent deformity.
3.
Hold bandage with the roll (drum) facing upwards in your hand.
Allows smooth unrolling and application of even tension/pressure.
4.
Wrap the bandage around the limb twice (fixing turns) distally (below) the joint.
To securely anchor and stabilize the bandage and provide a firm starting base.
5.
Use alternating ascending and descending diagonal turns across the joint to form a continuous "figure of eight". Overlap each turn of the bandage by one-half to two-thirds the width of the strip.
Provides dynamic, flexible support that allows joint mobility while maintaining strict compression. Overlapping promotes firmness and aesthetic neatness.
6.
Wrap the bandage around the limb twice, proximally (above) the joint to anchor the final tail and secure with a clip, tape, or safety pin.
Locks the entire structural weave in place.
7.
Elevate the newly bandaged extremity for 15 to 30 minutes after application.
Gravity assists venous return, working with the compression to rapidly reduce oedema and throbbing pain.
8.
Assess the skin beyond the bandage for colour, integrity, pain, and temperature (CSM Check).
To detect deadly complications (like blocked arterial circulation or nerve compression) extremely early.
9.
Leave the patient comfortable, clean away the trolley, and document.
Maintain standards and legal records.
B. Spiral Bandaging (e.g., Bandaging the Ear or Tapered Limbs)
Used when simple circular turns would leave gaping gaps due to anatomy.
Make a fixing (anchor) turn firmly around the forehead/head.
Bring the bandage diagonally under the affected ear, pulling it straight over the head and down the back, deliberately leaving the normal, healthy ear un-bandaged for hearing and comfort.
Repeat these diagonal turns three or four times, overlapping each by 2/3, until the thick dressing on the affected ear is gradually and completely covered.
Finish with a final circular fixing turn and secure the bandage at the centre of the forehead (where the patient isn't resting their head) using a safety pin, clip, or medical tape.
C. Divergent Spica (For heavily bent, fixed joints like Knee, Heel, Elbow)
This pattern weaves away from the centre, accommodating extreme angles.
Make two locking anchor turns directly over the exact centre (apex) of the bent joint (e.g., right over the point of the elbow or kneecap). (Rationale: To instantly stabilize the dressing at the point of highest tension).
Now make alternate figure-of-8 turns spreading outwards: one turn above the joint, then the next turn below the joint, diverging further outward each time. This forms a perfect, snug basket-weave pattern at each side of the joint without bunching up in the crease.
D. Triangular Bandaging / Broad Arm Sling
The ultimate first-aid tool for stabilizing upper extremity fractures.
Place the injured arm gently across the patient's chest so that the fingers are elevated and almost touching the opposite (healthy) shoulder. (Rationale: To physically mobilise the fracture, reduce muscle spasm, and relieve severe pain).
Slide the unfolded triangular bandage between the chest and the injured arm. Place one upper corner over the uninjured shoulder, letting the right-angled corner (the point) stick out just beyond the elbow on the injured side.
Bring the bottom corner up over the injured forearm, carrying it over the injured shoulder.
Carry both corner ends around the back of the neck and tie the ends securely with a reef knot (square knot). The knot MUST lie in the fleshy hollow just above the clavicle on the UNINJURED side.(Rationale: Never tie a knot directly on the cervical spine/neck bone; the weight of the arm will cause excruciating pressure and nerve damage).
The protruding right-angle point at the elbow is neatly folded forward and pinned securely to the front of the sling to enclose the elbow tightly in a pocket. (Rationale: To prevent the elbow from sliding out and prevent raw edge skin irritation).
E. Bandaging the Eye
Facing the patient, hold the sterile eye pad firmly in position over the affected eye until the first turn of the bandage locks it. (Rationale: To secure the dressing and maintain gentle pressure).
Begin from the affected side, pulling toward the normal side. Go across the forehead and round the head in a circular fixing turn.
From the back of the head, bring the bandage under the ear on the affected side, diagonally up across the cheek, covering the lower (nasal) side of the eye pad, and pull it straight over the top of the head and down the back.
The next turn repeats this, but comes slightly higher, overlapping the first eye turn by 2/3. It crosses the fixing turn at the exact same point above the ear, covers the rest of the pad, and comes round to the front.
Fix a safety pin or tape safely in the centre of the forehead.
F. Capeline Bandage (For massive head trauma - requires a double-headed roller)
Position the patient comfortably in a sitting up position and stand directly behind them.
Place the centre of the outer surface of the bandage precisely in the centre of the forehead/head.
Bring both heads of the bandage round the sides, over the temples, and strictly above the ears to the nape of the neck where the ends cross over each other. (Rationale: Ensure that the delicate cartilage of the ear is not caught or folded over).
Bring one bandage horizontally around the head (the locking band), while the other bandage is pulled vertically over the centre of the top of the scalp (the dome) down to the root of the nose.
Bring the horizontal locking bandage over the forehead, pinning down the vertical bandage. The vertical bandage is then flipped back over the head to the nape of the neck.
Ensure that each vertical turn across the scalp overlaps 2/3 of the previous turn. (Rationale: Ensures the bandage adheres snugly to the spherical shape of the skull without slipping).
Cross it again at the back, lock it with the horizontal bandage, and bring it forward over the scalp to the opposite side of the midline.
Repeat these alternating backward and forward turns to the left and right of the centre until the entire scalp is completely woven and covered.
Take two final, tight circular turns entirely around the head with the horizontal bandage to lock all the pleats, and secure with a safety pin or tape.
G. Recurrent Bandaging (For amputation stumps / fingertips)
Apply longitudinal strips back and forth over the end of the stump. Overlap each layer by half to two-thirds the width. Wrap firmly to shape the stump, but not tightly enough to cause ischemia. Ask the patient frequently if they feel any numbness, tingling, loose skin rubbing, tightening, aching, or throbbing pain.
Stand directly facing the patient and take a circular fixing turn around the base of the stump. (Rationale: To constantly observe their facial expression for signs of hidden pain).
Fold the bandage forward across the front of the stump at a 45° angle, fold it over the blind end, and bring it backwards. Lock it in place by crossing the first circular turn at a right angle.
Repeat these recurrent, folding turns—locking each one with a circular turn—until the stump is fully enclosed and protected.
B3. Theory — Specific Types of Slings
You must know the specific indications for each sling type for clinical scenarios:
Triangular arm sling (Broad Arm Sling): Supports the entire weight of the forearm and the wrist horizontally. Used primarily for fractures of the radius/ulna (forearm) or wrist sprains.
High arm (Elevation) sling: The arm is folded tightly and elevated high against the opposite chest wall, with the fingers pointing to the collarbone. Used to drastically reduce severe swelling of the hand/wrist post-injury, and to use gravity to control severe arterial bleeding from the arm.
Collar-and-cuff sling: A simple loop of material forming a clove hitch around the wrist, suspended from the neck. It supports ONLY the wrist. Used specifically for fractures of the upper arm (humerus), shoulder, or clavicle. Rationale: It allows the heavy humerus bone to hang vertically by gravity, pulling the broken bone ends into perfect, natural alignment without needing a heavy cast.
Part C: Splinting & Orthopaedics
C1. Theory — Splinting
Definition
A Splint is any rigid or flexible device used to immobilise, structurally support, and protect an injured part of the musculoskeletal system (such as a bone fracture, joint dislocation, or severe tendon/ligament sprain) or to forcefully maintain a body part in correct anatomical alignment during the long healing process.
Splinting is the precise clinical act of applying this device safely.
Purposes / Indications of Splinting
Why is splinting a life-saving first aid skill?
To strictly immobilise unstable fractures and dislocations. Rationale: Broken bone ends are as sharp as razor blades. If they move, they will slice through nearby major nerves and deadly arteries (converting a closed fracture into a massive internal hemorrhage).
To drastically relieve excruciating pain and instantly reduce severe, damaging muscle spasms around the break.
To prevent or mechanically correct severe deformity, maintaining proper alignment during bone healing (callus formation).
To support massively injured soft tissues (severe Grade III sprains and muscle tears).
To secure and protect life-saving dressings and IV lines inserted on agitated patients' limbs.
To allow the safe, pain-free, and shock-preventing transport of the injured casualty from the field to the hospital.
Types of Splints
Rigid splints: Made of wood, solid metal, hard plastic, or stiff cardboard. Rule: They must be physically long enough to completely immobilise the joint ABOVE and the joint BELOW the fracture.
Soft splints: Using a thick pillow wrapped around an ankle, a heavy blanket roll, or a simple arm sling tied to the torso. Used for minor/stable injuries.
Traction splints (e.g., The Thomas Splint): Used specifically and exclusively for mid-shaft Femur (thigh) fractures. The thigh muscles are massive; when the femur breaks, the muscles spasm and pull the bone ends over each other, causing massive internal bleeding (up to 1.5 Liters!). The traction splint applies continuous, powerful mechanical pulling (traction) to realign the massive bone, stopping the spasm and saving the leg.
Plaster of Paris (POP) casts / slabs: Used definitively in hospitals for long-term (6-8 weeks) rigid immobilisation while the bone fuses.
Air (pneumatic) splints: Inflatable, clear plastic sleeves commonly used in modern ambulance/field rescue. They provide uniform 360-degree compression to stop bleeding and immobilize simultaneously.
General Rules of Emergency Splinting
If you fail to follow these golden rules in the field, you can cause permanent paralysis, massive bleeding, or forced amputation:
Always assess the casualty's ABCs first (DRABC) and definitively control severe, spurting arterial bleeding before attempting to apply a splint.
Splint the limb in the EXACT position it was found. NEVER, ever attempt to forcefully straighten or realign a severe fracture or dislocation in the field. You will sever the artery. Let the ER doctors do it under X-ray.
Always immobilise the joint strictly above and the joint strictly below the fracture site. (e.g., For a shin/tibia fracture, you must lock both the knee and the ankle).
Pad the rigid splint extremely well with cotton or clothing, especially around bony prominences (ankles, knees). Secure it with bandages tightly above and below the fracture site — never tie a constricting knot directly over the broken bone.
Always expose the tips of the fingers or toes. Check CSM (Circulation, Sensation, Movement) before applying the splint, AND immediately after tying it. Recheck every 15 minutes!
The splint must be mechanically snug, but never tight enough to act as a tourniquet and cut off blood flow.
Elevate the shattered limb after splinting, treat the patient for systemic hemorrhagic shock (keep them warm, lie them flat), and arrange urgent surgical referral.
🚨 DEADLY COMPLICATION: Compartment Syndrome
This is an absolute orthopaedic emergency. It occurs when a bone breaks, causing massive internal bleeding and swelling inside a rigid, non-expanding muscle compartment (or inside a tight POP cast/bandage). The pressure builds until it crushes and collapses the arteries and veins. Muscle tissue and nerves begin to die (necrosis) within 4-6 hours, leading to irreversible paralysis and amputation.
You must continuously check the "6 Ps" of arterial ischemia:
1. Pain: Severe, relentless, out of proportion to the injury, and agonizingly worse on passive stretching of the toes/fingers.
2. Pallor: The skin becomes pale, white, and completely drained of blood.
3. Paresthesia: Numbness, tingling, or "pins and needles" (the nerves are screaming as they die).
4. Paralysis: The patient is completely unable to move the fingers/toes.
5. Pulselessness: No palpable pulse beyond the cast (a very late, ominous sign).
6. Poikilothermia: The limb feels ice cold to the touch compared to the rest of the body.
Action: This is a massive EMERGENCY. The cast or tight bandage must be split down the middle (bivalved) or removed entirely immediately! If pressure doesn't drop, the surgeon must perform an emergency fasciotomy (slicing the leg open to relieve pressure).
Nursing Care of a Patient in a Splint/Cast (POP Care)
While the plaster dries (The critical first 24–48 hours): A wet cast is fragile. Handle it using the flat palms of your hands only! Using your fingertips will create inward dents in the wet plaster; when it dries hard as rock, these dents will press into the patient's skin, cutting off blood supply and causing deep, rotting pressure sores. Support the wet cast on soft, plastic-covered pillows. Keep it completely uncovered and exposed to room air to facilitate rapid drying. Use a bed cradle (a metal cage) to keep the heavy weight of bedclothes off a wet leg plaster.
After drying: Keep the plaster strictly clean and dry. (Cover it with a plastic bag when washing/sponging the patient, but do not leave the plastic enclosed long-term, or the trapped sweat will macerate the skin). Keep the hard edges of the cast smooth and heavily padded with adhesive tape (petaling) to prevent it from slicing into the skin.
Neurovascular observations (CSM): As the nurse, you must constantly, obsessively check the colour, warmth, capillary refill, pulses, sensation, and movement of the exposed fingers/toes. Always compare them directly with the uninjured, normal limb. Report coldness, blueness (cyanosis), massive swelling, numbness, or severe unremitting pain immediately!
Elevate: Keep the casted limb elevated high on pillows above the level of the heart for the first 24–48 hours. Gravity is your best friend to drastically reduce massive inflammatory swelling.
Exercises: Forcefully encourage the patient to actively and frequently move their fingers/toes and the joints that are NOT locked inside the cast. Rationale: This prevents severe joint stiffness, muscle atrophy, and promotes venous return, preventing deadly Deep Vein Thrombosis (DVT) blood clots.
The "Itch" Warning: Warn the patient to never, ever insert foreign objects (like rulers, knitting needles, or pens) deep inside a cast to scratch a maddening itch. It breaks the fragile, unseen skin, introduces bacteria, and causes horrific hidden, rotting staph infections under the plaster.
Objectives:
1. Identify the exact clinical requirements used for preparing and applying orthopaedic POP splints.
2. Demonstrate the application of an orthopaedic splint correctly and safely.
Requirements for Application of Plaster of Paris (POP) — Trolley Setup
Top Shelf (Application Tools)
Bottom Shelf (Heavy/Cutting Tools)
At the Bed Side (Cleanup)
• Basin of warm water (Speeds up the exothermic hardening reaction).
• A tray of dry plaster (POP) bandages of various widths.
• Skin marking pencil, bandage scissors, and thick orthopaedic cotton wool (Webril) for padding.
• Stockinet (tubular cotton to protect the skin).
• Tape measure (to accurately measure the slab length).
• Long protective mackintoshes (for the bed).
• Plastic mackintosh (for the nurse).
• Heavy-duty Plaster Shears (for cutting or modifying hardened casts).
• Crepe rolled bandages (to secure the wet slab to the limb).
• Used/dirty dressing container.
• A separate basin of warm water.
• Flannel washcloth, towel, and mild soap. (Crucial Rationale: This must be kept purely for scrubbing and cleaning pieces of wet plaster splashes off the patient's delicate skin immediately after application, before it sets like concrete into their arm hair).
How to Dry a Plaster Cast Safely
Understand the chemistry: Plaster sets (hardens) in just a few minutes due to an exothermic chemical reaction (it gets very warm), but it takes several hours to up to 48 hours to dry completely and reach maximum structural strength.
To assist the splint in maintaining the exact correct anatomical position, allow absolutely nothing hard to press against a wet plaster (e.g., resting it on the metal bed frame, a chair edge, or a cradle). Keep the rest of the patient's body warm with blankets to prevent systemic chilling from the wet, evaporating cast.
Leave the new plaster completely exposed to the circulating room air, supported gently on soft, yielding pillows if necessary.
For a massive leg plaster, a bed cradle should be used to suspend the heavy, warm bed clothes off the wet cast, allowing air flow and preventing deformation.
Critical Points to Remember When Applying Plaster to an Arm
The patient should receive a thorough, soapy bath of the limb before the plaster is applied to remove oils and dead skin; fingernails should also be cut very short to prevent the patient from blindly scratching inside the cast and causing infection.
The fingernails must be completely clean, and absolutely no plaster splash should be left dried on them. (Rationale: Plaster stuck on nails makes it physically impossible for nurses to accurately check capillary refill and assess life-saving circulation).
The fingers and toes should feel subjectively warm to the patient and be completely free to move voluntarily.
REPORT IMMEDIATELY to the surgeon if the fingers become ice cold, pale, or blue (cyanotic) in colour! This is an active compartment syndrome.
The patient should be able to move their fingers and toes freely without agony, and neurological sensation (sharp vs dull touch) should be tested regularly to ascertain that the neurovascular circulation is perfectly satisfactory and the cast is not crushing a major nerve (like the radial or peroneal nerve).
References
Note: Content required for references was not provided in the source text.
Quick Quiz
Dressings, Bandages and Splints Quiz
First Aid
Privacy: Your details are used only for quiz tracking and certificates.
An injury is defined as damage to the body caused by an external force or agent. This external force can be mechanical (a blow), thermal (heat/fire), chemical (acids), electrical, or radiant energy. Injuries may be intentional (e.g., violence, assault, suicide attempts) or unintentional/accidental (e.g., falls, burns, drowning, occupational accidents).
1.2 Classification of Injuries
To treat an injury correctly, a nurse must rapidly classify it using the following criteria:
(a) By Nature of the Breaking of Skin/Tissue
Open injuries: The skin is completely broken, and the underlying tissues are exposed to the outside environment. Blood escapes externally, and there is a high risk of bacterial infection. Examples: Abrasions, lacerations, incisions, punctures, avulsions, amputations, and open (compound) fractures.
Closed injuries: The skin remains intact, meaning the damage is entirely under the surface. Blood and tissue fluid collect internally. Examples: Contusions (bruises), closed simple fractures, dislocations, sprains, strains, internal bleeding, and severe crush injuries.
(b) By Severity
Minor injuries: Small wounds, superficial (first-degree) burns, mild sprains. These can usually be managed effectively at home or at the basic first aid level.
Major injuries: Deep/large wounds, severe arterial bleeding, fractures, head/spinal/chest/abdominal injuries, burns covering >10% of the body surface, and crush injuries. These ALWAYS require urgent professional medical attention.
(c) By Mechanism (Cause of Injury)
Mechanical / Physical: Blunt force (falls, blows from a stick, road crashes) or sharp force (cuts, stabs from a knife).
Thermal: Burns and scalds from fire/hot water, or extreme cold (frostbite).
Chemical: Damage from acids, alkalis (like bleach or caustic soda), and irritant gases.
Electrical: Household electric current, high-voltage power lines, or natural lightning strikes.
Radiation: Severe sunburn (UV rays), X-ray overexposure, or radioactive sources.
Asphyxia-type / Environmental: Drowning, choking, and poisoning-related injuries.
Bone and joint injuries (fractures, dislocations).
Head and spinal injuries (central nervous system).
Chest, abdominal, and pelvic injuries (involving delicate internal organs like the liver or lungs).
Special sense organ injuries (eye, ear, nose trauma).
📝 Why Classification Matters (The Nurse's Thinking)
If you see an Open injury, your immediate priority is bleeding control followed by infection prevention (cleaning the wound, applying a sterile dressing, and checking the patient's tetanus vaccination status).
If you see a Closed injury, you must anticipate the severe danger of hidden internal bleeding and shock. Always suspect that there is much more damage than what you can visually see on the skin surface.
For a Major injury, you must immediately drop everything and perform a primary survey (DRABC), treat life threats first, immobilise the patient, and arrange an urgent referral.
Topic 2: Wounds (Minor and Major)
2.1 Definition
A wound is a break in the continuity of the skin or mucous membrane, caused by physical means. It opens a doorway for massive blood loss and deadly infections.
2.2 Types of Wounds
Memorize this table to quickly identify the type of wound and its specific risks:
Type
Description & Appearance
Typical Causes
Bleeding & Infection Risk
Abrasion (Graze)
Superficial scraping of the top layer of skin (epidermis) only. Leaves a raw, weeping surface.
Falls on rough ground, road rash from a boda-boda fall.
Oozes slightly (minor bleeding). Moderate infection risk due to embedded dirt.
Incision
A clean, straight, neat cut completely through the tissues.
Knife, razor blade, broken glass, surgical cuts.
Usually moderate to heavy; cuts bleed freely. Lower infection risk due to clean edges.
Laceration
Irregular, messy tearing of skin and underlying tissue with jagged, crushed edges.
Machinery accidents, barbed wire, blunt trauma tearing the skin.
Often heavy bleeding. High infection risk because tissue edges are crushed and contaminated.
Puncture / Stab
Deep, narrow wound. Has a very small surface opening but a deep, dangerous track inside.
Stepping on a nail, needles, spear, bullet entry, deep thorn.
Often very little external bleeding, but massive deep internal damage. Very high infection risk (especially tetanus, as the deep track lacks oxygen/anaerobic).
Avulsion
Tissue is forcibly torn away and left hanging loose (a flap), or is completely detached (amputation).
Heavy machinery, animal bites, explosions.
Often severe and life-threatening bleeding. High infection risk.
Contusion (Bruise)
A blunt blow damages small blood vessels under intact skin. (A closed wound).
Blows from a stick, falls, seatbelt trauma.
Internal oozing leads to swelling and discolouration. Low surface infection risk, but watch for deeper organ injury.
Gunshot Wound
High-velocity entry (and sometimes exit) wound. Features a deep tract and massive internal tissue cavitation.
Firearms (bullets, shrapnel).
Variable bleeding — but often severe internal organ destruction. Very high infection risk.
Bite Wound
A nasty mix of a crush, puncture, and laceration all at once.
Human, dog, or wild animal bites.
Moderate to severe bleeding. Extremely high infection risk (plus massive risk of Rabies from animal saliva).
2.3 General First Aid for Wounds
The core aims of wound care are: Stop bleeding, prevent infection, prevent shock, and promote healing.
DRABC first: Treat immediate life threats before focusing on the messy wound.
Protect yourself: Wash your hands or wear gloves if possible. Standard precautions are vital to protect yourself from blood-borne infections like HIV and Hepatitis B.
Control bleeding: Apply direct, firm pressure over the wound using a clean dressing or cloth (detailed in Topic 3).
Clean the wound (For MINOR wounds only): Rinse thoroughly with clean running water or normal saline. Clean the intact skin around the wound with soap and water. Use clean tweezers to pick out visible loose dirt. DO NOT scrub deep wounds. DO NOT use strong antiseptics like concentrated hydrogen peroxide or undiluted iodine inside the open wound (it destroys exposed healthy tissue and delays healing).
Let it bleed slightly: If it is a very minor wound, leaving it to bleed for a few seconds actually helps flush microscopic germs out from the inside, before you apply pressure.
Apply a dressing: Use a sterile/clean non-adherent dressing. Bandage it firmly enough to hold it in place, but not so tight that it acts as a tourniquet and cuts off distal circulation.
Do NOT close deep/dirty wounds: Never attempt home suturing or using superglue on deep cuts. Deep wounds require professional medical assessment, surgical cleaning (debridement), tetanus prophylaxis, and proper sterile stitches.
Check Tetanus Status: The patient needs a Tetanus Toxoid (TT) booster if they are not fully immunised, or if the wound is dirty/deep and their last dose was more than 5 years ago (per Uganda Clinical Guidelines).
Raise and rest: Elevate the injured part to reduce throbbing pain and bleeding. Give nothing by mouth if a referral for surgery is likely.
Monitor for infection: Advise the patient to watch for danger signs over the following days: increasing throbbing pain, expanding redness, unnatural warmth, massive swelling, yellow pus, high fever, or red streaks traveling up the limb toward the heart (lymphangitis).
2.4 Wounds That Must ALWAYS Be Referred (Major Wounds)
Never try to manage these at home. Send immediately to the hospital:
Deep, gaping wounds, or any wound where yellow fat, muscle, or bone is visible.
Wounds that will not stop bleeding even after 10 full minutes of hard direct pressure.
All puncture/stab wounds (due to the hidden deep track and high tetanus risk).
All bites (human or animal, due to massive infection and rabies risk).
Wounds situated over major joints, on the face, hands, or genitals (high risk of permanent disability or scarring).
Wounds with deeply embedded foreign bodies (like glass or knives).
Amputations: Wrap the severed body part in a clean, slightly moist cloth. Place it inside a sealed, water-tight plastic bag. Put that bag onto ice or in cold water. Never immerse the severed part directly into water or ice, as it destroys the tissue and ruins any chance of surgical replantation!
Any wound in a casualty who is showing signs of clinical shock (cold, clammy, confused).
Topic 3: Bleeding and Haemorrhage Control
3.1 Definitions
Haemorrhage: The loss of blood from a ruptured blood vessel. It may be external (visible on the skin) or internal (concealed inside body cavities).
Mild haemorrhage: Bleeding from injured superficial capillaries; the blood oozes slowly or flows in a steady, manageable stream.
Severe haemorrhage: Bleeding from a severed artery or large vein; blood exits with massive force (arterial) or in a heavy steady flow (venous). Large volumes of blood are lost very quickly, leading rapidly to Hypovolaemic Shock and death.
3.2 Classification of Haemorrhage
(a) By Time of Occurrence
Primary haemorrhage: Occurs exactly at the time of the injury.
Reactionary haemorrhage: Occurs within 24 hours of the injury. When the patient's blood pressure eventually recovers after the initial shock, the rising pressure physically dislodges the weak blood clot that had formed, restarting the bleeding.
Secondary haemorrhage: Occurs after 48 hours up to 7 days later. It is usually caused by severe bacterial infection (sepsis) that rots and erodes the wall of the injured blood vessel, causing it to burst open again.
(b) By Vessel (Source)
Arterial bleeding: The blood is bright red (highly oxygenated). It spurts out in violent jets synchronized with each heartbeat. This is the MOST dangerous type due to rapid, high-pressure blood loss.
Venous bleeding: The blood is dark red/purplish (deoxygenated). It flows in a heavy, steady stream. It can also be rapidly life-threatening if a major deep vein (like the jugular or femoral) is cut.
Capillary bleeding: Dark red blood that oozes slowly from the entire surface of the wound. It is the most common and is usually self-limiting (stops on its own).
(c) By Site — Internal vs External
External: Bleeding is clearly visible on the body surface.
Internal (Concealed): Blood collects silently inside body cavities (chest, abdomen, skull). It is extremely dangerous because it is hidden from the first aider. Blood eventually appears at natural body orifices. As a nurse, memorize these clinical terms:
Haemoptysis: Bright red, frothy blood coughed up from the lungs/respiratory airways.
Haematemesis: Blood vomited from the upper GI tract (stomach). If it looks like dark red "coffee-grounds", it means stomach acid has digested a bleeding stomach ulcer.
Haematuria: Smoky or blood-stained urine, indicating severe kidney or bladder trauma.
Melaena: Black, tarry, highly offensive-smelling stool. Indicates massive bleeding from the upper bowel (the blood is digested as it travels down).
Fresh bright red blood per rectum indicates bleeding from the lower bowel or anus.
Vaginal bleeding: Can indicate a miscarriage, heavy menstruation, injury to the genital tract, or a deadly ectopic pregnancy.
Thin, watery blood leaking from the ear or nose after a head injury = highly suspicious for a CSF (Cerebrospinal Fluid) leak from a skull fracture.
The Golden Rule: After any severe blunt injury, if the casualty shows signs of clinical shock without any obvious external blood loss — suspect massive internal bleeding immediately.
3.3 The Clotting Mechanism (How the Body Stops Bleeding)
When a vessel is cut, the body triggers a highly complex chemical cascade to save your life. You must understand these physiological steps:
The injured blood vessel constricts (narrows) immediately to reduce the size of the hole.
Local blood pressure drops slightly, slowing the flow of blood escaping.
Platelets rapidly collect at the rough, injured site and stick together to form a temporary "plug" in the gap.
The damaged platelets and surrounding torn tissues release a chemical enzyme called thrombokinase (thromboplastin).
Thrombokinase converts the inactive blood protein prothrombin into active thrombin.
Thrombin then acts as an enzyme to convert soluble fibrinogen (found in blood plasma) into insoluble solid threads called fibrin.
Fibrin forms a dense, sticky mesh web across the wound. This web traps more platelets and red blood cells, forming a solid clot (scab) as the clear yellowish serum oozes away.
3.4 Signs and Symptoms of Significant Haemorrhage
Whether the bleeding is external or internal, massive blood loss triggers identical systemic shock signs:
History of severe injury or known medical condition (e.g., bleeding stomach ulcer).
Pain and severe tenderness over the injury site; rapid swelling; visible deformity.
Pale face and lips; cold, clammy (sweaty) skin; profuse cold sweating.
A rapid, very weak (thready) pulse.
Breathing becomes very shallow, fast, and is often accompanied by "air hunger" (deep sighing or yawning as the brain begs for oxygen).
Dizziness, blurred vision, roaring in the ears, and fainting.
Intense, unquenchable thirst; extreme anxiety, restlessness, and a feeling of impending doom.
Falling blood pressure (a late and very dangerous sign!); lower body temperature; significantly reduced urine output (oliguria) as the kidneys shut down to save fluid.
In internal bleeding: Blood appearing at orifices + the shock signs above.
3.5 General Management of Haemorrhage
Primary Aim: STOP THE BLEEDING immediately and arrange fast medical aid. The principles of controlling blood loss are to restrict blood flow to the wound and encourage rapid clotting. This is achieved by Direct Pressure and Elevation.
Step-by-Step Management
Put your gloves on (standard precautions).
Place the casualty in a suitable, safe position (usually lying down flat to prevent fainting and protect the brain).
Expose the wound: Remove or cut around as little clothing as possible to clearly see where the blood is coming from.
Apply DIRECT PRESSURE on the wound:
Use a clean dressing, thick pad, or cloth and press down extremely hard with your palm.
Hold the pressure continuously for 10 to 15 minutes without peeking! Lifting the pad to check if it has stopped simply rips off the fragile fibrin clot that is forming, restarting the bleeding.
If a foreign body (like a knife or glass) is embedded — press firmly AROUND it, never ON it, and build up padding around it.
If blood soaks completely through your pad — add more dry layers directly on top. NEVER remove the first blood-soaked pad.
Elevate: Raise the bleeding limb high above heart level and support it. Gravity reduces the hydrostatic blood pressure reaching the wound. (Do not elevate if you suspect a bone fracture in that limb, as movement will cause agony and sever nerves).
Bandage: Wrap a bandage firmly over the pad to maintain the pressure. Ensure it is not so tight that it cuts off arterial circulation (check that fingers/toes remain warm).
Immobilise: Keep the injured part perfectly still.
Treat/prevent shock: Lay them flat, raise their uninjured legs to send blood to the brain, keep them warm with a blanket, reassure them constantly, and give absolutely nothing by mouth.
Urgent transport: Rush to the hospital — a severe severed artery can drain a human body of blood in under 3 minutes.
Indirect Pressure (Pressure Points)
This is used only if direct pressure fails or is physically impossible. You physically compress the main supplying artery against the underlying bone, located between the heart and the wound.
For an upper limb bleed: Compress the brachial artery (on the inside of the upper arm).
For a lower limb bleed: Compress the femoral artery (deep in the groin crease).
Danger: Prolonged pressure point compression deprives the entire healthy limb of oxygen. Only use it as a temporary bridge while arranging urgent help, and carefully note the time.
🚑 OSCE FOCUS: The Tourniquet (Exams & Real Life)
A tourniquet is the absolute last resort for life-threatening limb bleeding that massive direct pressure cannot stop (e.g., traumatic amputation).
Place it 5 to 7 cm exactly above the wound (between the wound and the heart). Never place it directly over a joint like a knee or elbow.
Tighten the windlass twisting stick until the bright red bleeding completely stops, and the distal pulse disappears.
CRITICAL: WRITE THE EXACT TIME OF APPLICATION on the casualty's forehead or on a highly visible tag.
Never loosen it once applied. Only a surgeon in an operating theatre should remove a tourniquet, to prevent fatal toxins that built up in the dead limb from rushing back into the heart.
If improvising, use a very wide band of cloth (at least 5cm wide). Never use thin wire or shoe strings, as they will slice straight through the skin and permanently sever nerves.
3.6 Bleeding from Special Sites
(a) Scalp Wounds
Dangers: The scalp has an incredibly rich blood supply, so even minor cuts bleed profusely and look terrifying. Furthermore, a heavy scalp bleed may hide a depressed skull fracture underneath.
Signs: Severe pain, massive bleeding, rapid swelling (a "goose egg"). Possible loss of consciousness. If you see blood or clear fluid leaking from the nose or ears, strongly suspect a basal skull fracture.
Management: Apply direct pressure on the wound. However, press very gently at first—if the skull feels soft or dented inward (depressed fracture), do not press on it! Build a thick ring pad around the dent instead. Bandage firmly. If the casualty is unconscious, keep their head slightly raised (if spinal injury is ruled out), monitor breathing, and refer urgently.
(b) Epistaxis (Nosebleed)
Bleeding from the delicate vessels inside the nostrils. It may follow a punch to the face, violent nose picking, heavy sneezing, extreme high blood pressure (hypertension), or it may be a deadly sign of a skull fracture (thin watery blood mixed with CSF).
Aims: Safeguard the airway (prevent blood from being swallowed or inhaled into the lungs) and stop the bleeding.
Management:
Sit the casualty down and have them lean SLIGHTLY FORWARD. (Exam Trap: NEVER tilt the head back! Blood will run down the throat, causing violent coughing, choking, or severe vomiting when it hits the stomach).
Loosen any tight clothing around the neck.
Advise them to breathe exclusively through their mouth.
Pinch the soft, fleshy part of the nose (not the hard bony bridge) tightly closed for 10 to 15 uninterrupted minutes.
Instruct them: No speaking, no swallowing, no coughing, and no spitting during this time. Let any blood in the mouth simply dribble out into a bowl.
Do not stuff the nose with raw cotton wool (it pulls the clot out when removed).
After bleeding stops: Clean gently around the nose with lukewarm water. Advise them to have no hot drinks for several hours (heat dilates vessels and restarts bleeding), and avoid blowing or picking the nose for 24 hours.
Refer if: Bleeding lasts more than 30 minutes, keeps recurring, or follows a significant head injury.
(c) Bleeding from the Mouth / Tooth Socket
Causes: Severe cuts to the tongue/cheeks, knocked-out teeth, recent tooth extractions, or a fractured jaw.
Aims: Protect the airway (blood is easily inhaled) and control the bleeding.
Management:
Sit the casualty up, with their head tilted slightly toward the bleeding side to let blood drain out.
Apply direct pressure — use a thick sterile gauze pad over the bleeding tooth socket and ask the casualty to bite down hard on it for 10 to 20 minutes.
If a thick dark clot has formed in the socket, do not disturb it! Change pads carefully without pulling the clot out.
No vigorous rinsing or washing of the mouth. No hot drinks for 12 hours (hot liquids dissolve the fragile blood clot). Tell them to gently spit out blood, not swallow it.
Knocked-out permanent tooth: Handle it only by the white crown (never touch the delicate root). Rinse it very briefly if dirty. Store it submerged in a cup of milk, sterile saline, or have the casualty hold it carefully inside their cheek. Rush to a dentist within one hour for successful replantation.
Refer if bleeding persists heavily or recurs.
3.7 Complications of Haemorrhage
Hypovolaemic (Haemorrhagic) Shock: The absolute killer complication.
Anaemia: A delayed complication due to massive red blood cell loss.
Asphyxia: If bleeding occurs in the mouth/airway and blood is inhaled into the lungs.
Unconsciousness and eventual death due to brain hypoxia.
Hypothermia if bleeding is prolonged and the body loses its warm fluid.
📝 When to Suspect Internal Bleeding (Summary)
If a patient suffers a severe injury (e.g., a femur fracture, a high-speed car crash, a penetrating stab wound, a ruptured spleen from a fall, a bleeding stomach ulcer, or a ruptured ectopic pregnancy) AND they exhibit signs of severe shock (pale, sweating, fast weak pulse) WITHOUT any visible pools of blood on the floor = Treat it as massive internal haemorrhage until proven otherwise by a doctor. First aid: Lay flat, enforce complete rest, loosen tight clothing, keep them warm, monitor pulse/breathing, save any vomit/urine specimens for the doctor to examine, give absolutely nothing by mouth (they will need emergency surgery), and arrange extremely urgent, gentle transport.
This category involves damage to the skin, subcutaneous fat, muscles, tendons, and ligaments. Mechanisms include blunt force (causing contusions or crush injuries) and overstretching/overuse (causing sprains, strains, and tendon tears).
4.2 Contusion (Bruise) — Closed Injury
A blunt blow violently ruptures tiny blood vessels under intact skin. This leads to throbbing pain, rapid swelling, and a blue-black discolouration (which slowly changes to green/yellow over days as the blood is reabsorbed).
Management: Apply a cold compress or ice wrapped in a thick cloth to the area for up to 20 minutes to constrict bleeding vessels. Rest the injured part. Elevate it to reduce swelling. (Later, after 48 hours have passed, gentle warmth may help the body absorb the old blood).
Refer if: There is a huge, expanding swelling (could hide a bone fracture or a much deeper severed artery), if the bruise is over the soft abdomen/chest after severe trauma (internal organ bleeding), or if the casualty is taking prescribed blood-thinning medicines.
4.3 Sprain
A sprain is the severe stretching or tearing of LIGAMENTS (the tough, inelastic fibrous bands that hold bone firmly to bone around a joint).
Causes: A joint is violently forced beyond its normal range of motion — e.g., twisting an ankle on uneven ground, twisting a knee during football, or bending a wrist backward during a fall.
Common sites:Ankle, knee, wrist, and fingers.
Signs: Intense, immediate pain, rapid and massive swelling, severe bruising appearing shortly after, extreme joint instability, and painful restricted movement. The casualty usually cannot bear any weight on the joint.
4.4 Strain
A strain is the severe stretching or tearing of MUSCLES or TENDONS (the thick cords attaching muscle to bone).
Causes: Chronic overuse, sudden unaccustomed violent effort, lifting heavy loads with poor posture, or athletic sprinting without a proper warm-up.
Common sites:Lower back, thigh (hamstrings), calf, and neck.
Signs: Deep muscle pain, severe stiffness, profound muscle weakness, painful muscle spasms/cramps, mild swelling. Sometimes a loud "pop" or "snap" is felt or heard at the exact moment of injury.
📝 Sprain vs. Strain — Quick Comparison Table
Feature
SPRAIN
STRAIN
Tissue injured
Ligament (Connects Bone to Bone)
Muscle or Tendon (Connects Muscle to Bone)
Usual site
Joints (ankle, knee, wrist)
Large muscle bellies (back, thigh, calf)
Swelling / Bruising
Marked and rapid
Mild to moderate
Movement
Painful, joint feels loose/unstable
Painful, muscle feels extremely weak
First aid
RICE / POLICE protocol
RICE / POLICE protocol
4.6 First Aid: The RICE / POLICE Protocol
For any soft tissue injury, immediately apply this standard protocol:
P — Protect: Stop the activity immediately. Protect the injured part from further weight-bearing or trauma.
OL — Optimal Loading: Allow gentle, pain-free movement as tolerated. (Modern sports medicine guidance states that total, prolonged rest is no longer advised, as it causes stiffening. Moving it gently promotes blood flow and healing).
I — Ice: Apply a cold pack (or ice wrapped inside a wet cloth) to the injury for 15–20 minutes at a time, several times a day. Cold constricts bleeding vessels and numbs pain. (Warning: NEVER put raw ice directly onto bare skin, it causes severe frostbite tissue damage).
C — Compression: Wrap the joint firmly with an elastic (crepe) bandage to physically squeeze the swelling out. It must be firm, but not tight! Always check that the toes/fingers below the bandage stay warm and pink.
E — Elevation: Raise the injured limb high above heart level using pillows. Gravity pulls the inflammatory fluid away from the injury, drastically limiting swelling.
Other actions: Remove rings or tight watches early, before the swelling becomes massive and cuts off circulation. For analgesia, give paracetamol. Avoid giving aspirin early on, as it thins the blood and increases bleeding into the torn tissues.
4.7 When to Refer a Soft Tissue Injury
If the casualty absolutely cannot bear weight or use the limb at all → treat it as a suspected fracture and refer for an X-ray.
If there is obvious unnatural deformity, extreme bony tenderness, severe swelling, numbness/tingling, or loss of circulation in the toes/fingers below the injury.
If there is no improvement after a few days of RICE, or if the pain/swelling worsens.
The Golden Rule: If you are in any doubt whether an injury is a severe sprain, a strain, or a broken bone — always treat it and splint it as a fracture.
Topic 5: Fractures and Dislocations
5.1 Definitions
Fracture: A break or crack in the continuity of a bone. It can be a complete snap or a partial crack. (Note: A "broken bone" and a "fracture" mean the exact same thing medically).
Dislocation: The bones that form a joint are violently forced out of their normal anatomical position, severely tearing or lengthening the surrounding joint capsule and ligaments. (If it pops out and then pops back into place by itself, it is called a subluxation).
5.2 Types of Fractures
Closed (Simple) fracture: The bone breaks, but the skin above it remains perfectly intact.
Open (Compound) fracture: The sharp, broken bone end violently pierces and breaks through the skin, or an external wound leads deep down to the broken bone. This is a massive emergency due to severe bleeding and the extreme risk of deep bone infection (osteomyelitis).
Complicated fracture: The sharp bone ends damage vital nearby structures (e.g., severing major blood vessels, slicing nerves, or a broken rib puncturing a lung).
Displaced vs. Non-displaced: Displaced means the bone ends are out of alignment (crooked). Non-displaced means the bone cracked but the pieces remained perfectly aligned.
Greenstick fracture: The bone bends and cracks only partway down one side, like trying to snap a young, green tree branch. This is extremely common in children because their bones are soft and flexible. It may look like mild swelling only, with no obvious deformity.
Comminuted fracture: The bone is violently shattered into several small fragments (usually from high-energy injuries like high-speed car crashes or bullet wounds).
Stress fracture: A tiny hairline crack resulting from repeated, prolonged minor stress (common in long-distance athletes or marching soldiers).
Colles' fracture: A very specific break of the distal radius bone in the wrist, causing a distinct "dinner fork" upward deformity. Extremely common when people fall and catch themselves on an outstretched hand.
Pathological fracture: The bone breaks due to an underlying disease (like bone cancer tumours or severe osteoporosis weakening the bone). It often breaks with trivial, everyday force, like simply standing up.
5.3 Signs and Symptoms of Fracture / Dislocation
Intense pain exactly at the site of the break, massively worsened by any movement or pressure.
Rapid swelling and severe bruising over the area.
Deformity / Angulation: The limb looks bent at an unnatural angle, shortened, or the joint looks weirdly "locked" out of place.
Loss of function: The casualty simply cannot move the limb or bear any weight on it.
Extreme bony tenderness when touched gently. Abnormal mobility (the limb bends where there is no joint).
Grating (Crepitus): The horrifying sound or feeling of dry bone ends grinding against each other. (Never intentionally try to feel for this!).
A loud "snapping" sound heard or felt at the exact moment of injury.
Numbness, tingling, or a pale, cold limb below the injury (indicating the broken bone has sliced a nerve or artery).
Signs of profound systemic shock — especially with femur, pelvic, and open fractures. A single closed femur fracture can hide up to 1.5 Liters of internal blood loss; a smashed pelvis can hide even more, causing death by hidden bleeding.
🔍 Fracture vs. Dislocation — Telling Them Apart
Feature
FRACTURE
DISLOCATION
What happened
The hard shaft of the bone cracked/snapped.
The joint surfaces were forced entirely apart.
Look
Swelling, bruising, bent deformity in the middle of a limb.
The joint feels completely locked, stuck, and fixed in place.
Common sites
Wrist, ankle, hip, collarbone, shin.
Shoulder, elbow, finger, knee cap.
Can occur together?
Yes — always consider both.
Yes — a dislocation may hide a severe fracture inside the joint.
5.5 General First Aid Management for Fractures
Aims: Prevent any further tissue damage, control bleeding, treat/prevent shock, and arrange safe transport.
DRABC first. Control any life-threatening bleeding before looking at the broken bone. If it is an open fracture, cover the exposed bone with a large sterile dressing.
Ask the casualty to keep absolutely still. Do not allow them to try and walk or move the broken limb.
Do NOT try to straighten it! Never try to push a protruding bone back under the skin, and never try to "pop" a dislocated joint back into place. You will sever nerves and arteries. Immobilise it exactly in the bizarre position you found it.
Immobilise (Splint) the fracture:
The golden rule of splinting: Immobilise the joint above AND the joint below the fracture site.
Use a rigid splint (smooth wood, stiff cardboard, rolled thick newspaper) heavily padded with cloth. Tie broad bandages above and below the fracture site.
For a broken leg, tie the feet/ankles together securely so the leg cannot rotate outward and grind the bone.
An injured arm can simply be splinted by tying it firmly to the patient's own body. An injured leg can be tied gently to the uninjured, healthy leg, using it as a biological splint.
For a fractured collarbone (clavicle) — support the arm on the injured side in a tight sling (e.g., St John elevation sling).
Check CSM (Circulation–Sensation–Movement): Check the fingers/toes below the injury before and after you tie the splint. If the limb becomes cold, blue, pale, or numb after you tie it, your bandages are too tight! Loosen them immediately and recheck every 15 minutes.
Apply a cold pack wrapped in cloth to the area to relieve pain and limit swelling.
Treat for shock: Lay them flat, keep them warm. Remember that femur, pelvic, and open fractures bleed massively internally.
Suspected spinal fracture: DO NOT move them unless they are in immediate danger of death (like a fire). Support their head and neck firmly in a neutral straight position with your hands. Wait for skilled paramedic help. If you absolutely must move them, use a team to "log-roll" them, keeping the spine perfectly straight.
Urgent transport: Transport to the hospital with the limb heavily supported. Monitor CSM and vital signs continuously in transit.
5.6 Open Fracture — Extra Emergency Points
Cover the horrific wound with a large sterile dressing. Do not attempt to wash dirt out deep inside, do not push the sticking-out bone back in, and do not probe the wound with fingers.
Control bleeding by applying firm pressure around the wound edges, never pressing down directly on the broken bone.
Immobilise the limb very carefully without disturbing the wound dressing.
This is an extreme surgical emergency — there is a massive infection risk to the bone marrow; IV antibiotics and urgent tetanus prophylaxis will be needed at the hospital.
🚨 WHAT NOT TO DO (First Aid Errors)
Never attempt to realign a crooked bone or relocate a dislocated joint (you will slice blood vessels, sever nerves, and crush muscle).
Never move a casualty with a suspected spinal injury unnecessarily.
Never let the casualty eat or drink anything (painkillers, water, or food), as they will likely need emergency surgery under general anaesthesia within hours.
Never bind a splint so tightly that distal circulation is cut off.
Topic 6: Head Injuries
6.1 Definition
A head injury involves any trauma to the scalp, skull, or the brain itself. It ranges from a minor, bloody scalp cut to a rapidly fatal, life-threatening brain injury. Crucial Concept: The brain can be severely injured even when the hard skull remains perfectly intact. The soft brain is violently shaken and slammed against the hard inside walls of the skull during an impact. Always suspect a hidden neck (cervical spine) injury whenever there is a significant head injury — especially in falls from a height, road crashes, or heavy blows that throw the head violently backwards.
6.2 Three Key Patterns to Recognise
(a) Scalp Injury
The scalp has a massive, rich blood supply. Even tiny superficial wounds bleed profusely, making the injury look terrifying. This heavy bleeding may hide a severe skull fracture underneath. Management: Apply direct pressure to stop bleeding, but press gently around the wound first to ensure there is no soft, depressed (caved-in) skull fracture beneath your hand. Bandage firmly and refer.
(b) Concussion (Mild Traumatic Brain Injury)
The brain is violently "shaken" inside the skull, temporarily disrupting its normal electrical function.
Signs: Brief, temporary unconsciousness (seconds to a few minutes), or no unconsciousness at all. The casualty feels dizzy, confused, nauseated, pale, and sweaty. They complain of a mild, all-over headache. They often suffer from amnesia (they cannot recall the accident or the events leading up to it). They may have blurred vision.
Prognosis: The casualty usually recovers fully. However, they must be strictly observed for 24–48 hours because deadly bleeding (compression) can develop slowly and delayed over hours.
(c) Cerebral Compression (Serious — Rising Pressure Inside the Skull)
This is a lethal emergency. Bleeding from a torn vessel or massive swelling of brain tissue causes pressure to build up inside the rigid, closed box of the skull. The rising pressure slowly squeezes and crushes the brain downwards toward the spinal cord.
Signs develop progressively and worsen:
An intense, severely worsening headache.
Declining level of consciousness: The patient becomes increasingly drowsy, hard to wake up, and eventually slips into a deep coma. (This is the most critical key sign!).
Unequal pupils: One pupil becomes huge and blown, while the other remains small.
Flushed, hot, dry skin with a rapidly raised body temperature.
A very slow, strong, bounding pulse, accompanied by very slow, noisy, irregular breathing.
Severe vomiting, and eventually fitting/seizures as the brain is crushed.
Prognosis: Without urgent neurosurgery to drill a hole and relieve the pressure, it is 100% fatal. Immediate emergency referral is required.
📝 Concussion vs. Compression — Master Table
Clinical Sign
CONCUSSION (Shaken Brain)
COMPRESSION (Crushed Brain)
Consciousness
Brief loss, then rapidly recovering and waking up.
Gradually deteriorating, becoming increasingly drowsy and comatose.
Skin
Pale, cold, clammy (sweaty).
Flushed red, dry, intensely hot.
Pulse
Rapid and weak.
Very slow, full, and bounding.
Pupils
Normal, equal, reactive to light.
Unequal (one dilated, one pinpoint), unreactive.
Headache
Mild, generalized.
Intense, severe, rapidly worsening.
Breathing
Normal, perhaps shallow.
Very slow, noisy, snoring, irregular.
Clinical Course
Slowly improves with rest.
Rapidly worsens — a life-threatening surgical emergency.
6.4 Danger Signs — Emergency Referral Immediately
If a casualty with a head bump shows ANY of these signs, rush them to the hospital:
Loss of consciousness (even for a second), or rapidly increasing drowsiness / extremely hard to wake up.
Repeated, forceful vomiting.
A severe or rapidly worsening headache.
Unequal pupils, or complaining of double/blurred vision.
Blood or clear, watery fluid leaking from the nose or ears (CSF leak).
Sudden seizures, slurred speech, deep confusion, or highly unusual aggressive behaviour.
Weakness, numbness, or poor coordination/paralysis of their arms or legs.
A massive soft bump on the head, or dark bruising appearing around both eyes ("raccoon eyes") or dark bruising behind the ears (Battle's sign).
If the casualty is on prescribed blood-thinning medicines, is over 65 years old, is heavily intoxicated with alcohol (hides symptoms), or lives alone with no one to observe them overnight.
6.5 First Aid Management for Head Injuries
DRABC: If they are unconscious but breathing normally, place them very carefully into the recovery position (mind the neck — keep the head, neck, and spine perfectly in line while rolling them).
Support the head and neck: Hold the head firmly in a neutral, straight-ahead position. Do not twist, bend, or tilt the neck. Do not remove a motorcycle helmet unless it is absolutely necessary to maintain an open airway or perform CPR.
Control scalp bleeding: Use gentle direct pressure around, not on, any depressed/caved-in skull area.
Conscious casualty: Have them sit or lie down quietly in a very comfortable, dark position. Apply a cold pack wrapped in cloth to the painful bump for up to 20 minutes to reduce swelling.
Nothing to eat or drink: They may need emergency brain surgery within hours.
Monitor and record: Track their level of response (AVPU), pulse, breathing, and pupil size every 10 minutes. Watch like a hawk for the danger signs above — deterioration from a slow brain bleed can be delayed for several hours.
Arrange urgent referral: To the hospital for anything beyond a trivial, tiny bump, and ALWAYS if the mechanism of injury was significant (e.g., fall from a height, road crash, heavy blow with a weapon, or penetration).
6.6 Aftercare Advice (Mild Head Injury, Observed at Home)
If the doctor discharges a mild concussion patient to go home, give this strict advice:
Strict rest; totally avoid looking at TV/phone screens and avoid any strenuous physical activity for 24–48 hours.
Do not take aspirin or ibuprofen (these thin the blood and increase the massive risk of a brain bleed) — use only simple paracetamol if pain relief is needed.
A responsible adult MUST stay with the casualty for 24 hours. The adult must wake the casualty up and check on their responses every few hours during the night.
Return IMMEDIATELY to the emergency room if: a worsening headache develops, vomiting starts, extreme drowsiness occurs, confusion sets in, pupils become unequal, weakness is felt, or fits/seizures happen.
Note: Any infant/child who is knocked out cold, or shows any danger signs, must be observed in the hospital, never at home.
Topic 7: Burns and Scalds
7.1 Definitions
Burn: Severe tissue injury caused by dry heat (open flames, hot metal objects), extreme cold, corrosive chemicals, severe friction, electricity, or radiation.
Scald: Severe tissue injury caused by wet heat (hot liquids like boiling water, hot cooking oil, hot porridge, soup, and extremely hot steam/vapour).
Clinical Note: Scalds are usually more superficial because the hot liquid quickly runs off the body, but they tend to cover much larger surface areas. Dry flame burns are usually much deeper and more destructive locally.
7.2 People at High Risk of Burns
As a nurse teaching prevention, focus on these vulnerable groups:
Children under 5 years: Pulling pots of boiling food/water off tables, or falling into hot bathing basins.
The elderly: They have very slow reaction times and thin, fragile skin.
Epileptics & people who faint: Frequently suffer horrific burns after collapsing face-first into cooking fires or hot stoves during a seizure.
Diabetics & Leprosy patients: Suffer from severe peripheral nerve damage (reduced sensation) — they may rest their feet against a boiling hot object and literally not feel their flesh burning.
Albinos: Lack protective melanin, suffering extreme sunburns (UV radiation burns) leading to skin cancer.
Factory workers, petrol station attendants, and commercial cooks.
People living in crowded slums using charcoal stoves, open fires, or cheap paraffin ("kerosene") stoves.
7.4 Types of Burns
Dry burns: Direct physical contact with roaring flames, glowing hot objects, or severe friction (road rash).
Electrical burns: High-voltage current passes violently through the body. Leaves distinctive, deep, charred "entry" and "exit" wounds. The deep internal tissue and muscle damage along the current's path is far worse than the tiny skin wound suggests. Extreme Danger: Immediate cardiac arrest.
Chemical burns: Strong acids or alkalis (like bleach, caustic soda, battery acid). Tissue destruction signs may develop very slowly (unlike instant heat burns). Alkalis are worse because they penetrate deep into the flesh like butter.
Radiation burns: Severe UV exposure (sunburn), X-ray overexposure, or "flash burns" to the eyes from industrial welding without a mask.
Cold injury (Frostbite/Cold burns): Exposure to extreme freezing temperatures or industrial cold liquid gases. The skin becomes numb, pale, waxy, and rock-hard.
7.5 Signs and Symptoms of Burns
Intense reddening of the skin (erythema), rapid swelling, and massive painful blisters.
Agonizing pain (paradoxically, pain is most severe in partial-thickness burns because the raw nerve endings are exposed but still alive).
Peeling of dead skin; dry, charred, black, or leathery white skin in deep burns.
Extreme restlessness and profound dehydration (fluid rapidly evaporates from the missing skin).
Airway burns (Inhalation injury): A deadly emergency. Look for singed nasal hairs, black soot around the mouth/nose, a hoarse raspy voice, severe difficulty breathing, and a high-pitched stridor sound. The airway will swell shut in minutes.
Violent shivering (massive heat loss) — this happens even if the casualty feels hot to the touch.
7.6 Classification by Depth
Depth
Clinical Features & Prognosis
Superficial (First-degree)
Damages the top layer (Epidermis) only. Causes intense redness, pain, tenderness, and mild swelling. There are NO blisters. Heals completely and well within days with simple prompt first aid.
Partial-thickness (Second-degree)
Damages the Epidermis + the deeper Dermis. Features massive blisters, incredibly severe pain (raw nerve endings exposed), a wet weeping surface, and moderate swelling. The skin often peels off. High risk of infection. Heals in 1–3 weeks, often requiring medical dressings.
Full-thickness (Third-degree)
Destroys ALL skin layers (epidermis, dermis, hypodermis) and may reach down to fat, muscle, and tendon. The skin looks absolutely dry, waxy, leathery, white, or charred black. Crucially, there is NO PAIN in the centre because the pain nerves are completely burned away and dead. This painlessness severely MISLEADS bystanders about how fatal the injury is. Always requires urgent, specialized hospital surgical care and skin grafting.
Fourth-degree burn
Extends violently straight through to deep muscle, bone, tendons, and ligaments. Threatens the entire limb and function. Extremely life-threatening.
7.7 Extent of Burns
The larger the surface area burned, the greater the massive fluid loss (plasma weeping from the skin), the greater the heat loss, and the higher the risk of fatal hypovolaemic shock and acute kidney failure.
🔍 The Rule of Nines (Wallace) — For Adults
Used to rapidly estimate the percentage of body surface area burned:
Head and neck — 9%
Front of trunk (chest/belly) — 18%
Back of trunk — 18%
Each arm — 9% (both arms total = 18%)
Each leg — 18% (both legs total = 36%)
Perineum (genitals) — 1%
Total = 100%
(Note for Children: Use the "Rule of Sevens" or modified Lund & Browder chart, because a baby's head is proportionally massive [approx. 18-28%] and their legs are much smaller). Approximate Palm Method: The casualty's own flat palm (including their fingers) equals exactly 1% of their body surface. This is highly useful for measuring small, scattered splash burns.
Clinical Danger Zones: If >60% of the body is burned (or just 40% in very young babies or the elderly), fatal kidney failure is highly likely up to 6 weeks later. Any burn covering 30–40% is incredibly severe and requires urgent hospitalization. Any burn >10% requires immediate IV fluid resuscitation.
7.8 First Aid Management of Burns
(a) MINOR Burns (Superficial, small area)
Aims: Relieve pain, halt the burning process, prevent infection, reassure.
Stop the burning: Pour water immediately on flames. If a person is on fire, wrap them tightly in a heavy blanket and roll them on the ground to smother the fire. Do NOT let a burning person run about in panic (running feeds oxygen to the flames and makes them burn hotter).
Cool the burn immediately: Flood the area with cool (not freezing ice-cold) running tap water for at least 10 full minutes (up to 20 minutes for chemical burns). The heat continues to burn deeper into the flesh long after the fire is out; water stops this. Never put raw ice directly on burned skin, as the freezing causes further cellular tissue destruction.
If running water is absent, a clean, cold, soaking wet towel may be applied.
Leave blisters totally intact: Never pop or burst them! The blister roof is nature's perfect sterile dressing. Bursting it opens a massive doorway for fatal infection.
Gently pat the area dry. Cover it loosely with a dry, sterile, non-adherent dressing or a clean plastic bag (which won't stick). Never put raw cotton wool directly onto a wet burn; it will stick permanently.
Absolutely no home remedies: Do not apply butter, cooking oil, toothpaste, raw egg, ash, mud, or aloe vera from unknown sources. They trap the heat inside the skin and cause horrific infections.
Protect the burn from pressure and rough friction. Reassure the casualty.
Check their tetanus immunisation status.
Refer to hospital if: The minor burn involves the delicate face, airway, eyes, hands, feet, genitals, covers a major flexing joint, wraps entirely around a limb (circumferential), is caused by chemicals/electricity, or begins showing signs of yellow pus infection days later.
(b) SUPERFICIAL BUT EXTENSIVE Burns (Large areas)
Call for professional help immediately.
Stop the burning process (water/heavy blanket).
Remove smouldering clothing ONLY if it comes off easily. If melted synthetic clothing is firmly stuck/melted into the flesh, never pull it off! Cut around the stuck pieces carefully with scissors.
Rapidly remove rings, tight watches, belts, and tight shoes — the burned area will swell massively within minutes, and jewelry will act like a tourniquet, cutting off the limb's blood supply.
Cooling rules for LARGE burns: If the burn is smaller than the casualty's chest → cool heavily with running water. If the burn is LARGER than the chest → do NOT immerse them in cold water or use cold showers. Because they have lost so much skin, massive cold water will cause fatal systemic hypothermia. Simply cover the vast burn with clean, dry, non-adherent sheets.
Carefully separate severely burnt fingers/toes with dry sterile dressings so the raw flesh does not heal and fuse together.
Treat for massive shock: Lay them flat, keep the unburned parts of their body warm with blankets (burnt skin loses body heat extremely fast).
Urgent hospital transfer. Keep their head still and supported during transit.
🚑 General Referral Criteria for Burns (Exam Gold)
You must refer the patient to a major hospital burn unit if you see ANY of the following:
Full-thickness (3rd degree) burns of absolutely any size.
Partial-thickness (2nd degree) burns covering > 5% of the body surface.
Any burn whatsoever on the face, hands, feet, genitals, perineum, or major joints.
Circumferential burns (burns wrapping entirely around an arm, leg, or the chest, which act like a shrinking corset and cut off blood/breathing).
All electrical, chemical, and inhalation (airway/smoke) burns.
Burns in tiny children, the frail elderly, or people with serious pre-existing illnesses (diabetes, epilepsy).
Any burn where you highly suspect non-accidental injury (child abuse/torture).
7.9 Complications of Burns
Immediate: Destruction of vessels, nerves, and tendons; melted foreign bodies embedded in the flesh; profound skin loss and necrosis; deadly airway obstruction/respiratory distress from inhaling superheated smoke.
Intermediate (Hours/Days later): Severe secondary bacterial infection; massive clinical shock from unbearable pain; profound dehydration and dangerously reduced circulating blood volume (gallons of plasma weep constantly from the raw burn); severe electrolyte imbalance.
Late (Weeks/Years later): Fatal sepsis; severe contractures (the thick scar tissue shrinks and tightly binds across joints, physically preventing the patient from straightening their arm or neck); massive renal (kidney) failure; ugly unstable/keloid scars; permanent alopecia (hair loss); and Marjolin's ulcer (a highly aggressive squamous cell carcinoma skin cancer that develops inside an old, severe burn scar years later).
7.10 Electrical Burns
Dangers: The massive, hidden danger is Cardiac Arrest (as the raw current passes straight through the heart, destroying its electrical rhythm). It causes severe, extremely deep internal burns (leaving small entry and exit wounds on the skin). The deep muscle and nerve tissue damage along the current's hidden path inside the body is far worse than the tiny skin wound suggests. It causes violent muscle spasms that throw the casualty across the room, causing secondary spine/head fractures. Note: Wearing damp clothing or wet footwear, or standing on wet ground, drastically increases conduction and makes the electrical damage fatal.
Management of Electrical Injury
Switch off the current / pull the plug immediately at the wall. NEVER touch the casualty while they are still in contact with the live source. You will be electrocuted instantly and become the second body on the floor.
If the casualty is lying in a pool of electrified water — stay completely out of it; water conducts electricity perfectly.
If you absolutely cannot find the switch and they are actively frying on a live wire: forcefully separate them from the wire using a long, completely dry wooden stick (like a broom handle). Stand on a dry, non-conductive surface (a wooden pallet, a thick pile of dry newspapers, or a rubber mat). Wear thick rubber gloves if available.
High-Voltage Power Lines: If a power pole falls on a car, do not approach within 18 meters! The ground itself is electrified. Wait until the national power company officially confirms the grid is dead.
Once contact is broken, perform DRABC. Give CPR immediately if they are unresponsive and not breathing (cardiac arrest is extremely common here).
Flood the visible skin burns with cool water for ≥ 10 minutes.
Remove jewellery/constrictions before massive swelling occurs. Cover with a sterile non-adherent dressing and bandage loosely.
Treat for shock. Give oral fluids if they are fully conscious. Monitor and record vital signs carefully.
URGENT hospital referral: Deep internal heart muscle damage and deadly arrhythmias may suddenly appear hours later. Therefore, ALL electrical injuries must be evaluated in a hospital with an ECG.
7.11 Chemical Burns
Caused by strong industrial acids or alkalis. The intense stinging pain is immediate, but the visible discoloration, massive blistering, peeling, and swelling develop very slowly over time (unlike instant heat burns). Note: Alkalis (like drain cleaner) are far more dangerous than acids because they penetrate deep into the flesh, liquefying fat and tissue.
Management (Aims: Disperse the chemical rapidly, make the area safe)
Assess scene safety (beware of toxic fumes or gas clouds; wear thick gloves and eye protection to protect yourself).
Move the casualty far away from the chemical spill zone.
Flood the affected area with massive amounts of copious running water for at least 20 full minutes. (Water dilutes and washes away the corrosive agent).
Gently remove contaminated, soaked clothing while you are flooding the area with water. (Use scissors to cut shirts off; do not pull chemical-soaked shirts over the face/head, or you will blind them).
Do NOT attempt to "neutralise" the burn (e.g., do not pour vinegar on an alkali burn). The chemical reaction will generate explosive thermal heat and boil the flesh. Do not delay washing while searching for a specific chemical antidote. Just use endless water!
Identify the chemical (grab the bottle or read the hazardous label) and pass this vital information to the hospital doctors.
Watch the airway closely if fumes were inhaled. Urgent referral.
7.12 Chemical Burn to the Eye — A FIRST AID EMERGENCY
Corrosive chemicals splashed into the delicate eye can scar the clear cornea in seconds, leading to permanent, irreversible blindness. Treatment speed is everything.
Irrigate immediately: Hold the affected eye under gently running, cold tap water for at least 10 minutes (ideally 15–20 minutes continuously).
Ensure the water flushes deeply under both sides of the eyelid. This is easier if you pour from a glass/jug, use a tap, or a proper eyewash station.
The intense pain will cause the eyelid to shut in a violent spasm. You must gently but firmly force the eyelid open with your fingers to let the water inside.
Ensure the contaminated, toxic rinse water drains away down the side of the face. Do NOT let it flow over the bridge of the nose and splash into the good, uninjured eye!
Wear gloves. Do not forcibly remove melted contact lenses. The casualty must not rub the eye under any circumstances.
After 20 minutes of irrigation: cover the eye gently with a sterile eye pad.
Rush to the hospital immediately. Bring the chemical bottle with you.
Topic 8: Eye, Ear and Nose Injuries
8.1 Eye Injuries
Core Principles for ALL Eye Injuries:
Do not let the patient rub, touch, or press the injured eye. Do not attempt to pull out embedded objects. Do not apply any random ointments or eye drops. Give absolutely NO aspirin or ibuprofen (these thin the blood and will cause massive bleeding inside the delicate eyeball). Rush them to an eye clinic. Crucial trick: Because human eyes are biologically wired to move together synchronously, you must cover the uninjured, good eye too with a pad. If the good eye is blindfolded, the patient will stop looking around, which perfectly paralyses and rests the injured eye.
(a) Foreign Body on the Eye (Dust, loose eyelash, flying grit, small insect)
Wash your hands thoroughly.
Tell the casualty not to rub. Ask them to blink repeatedly and let their natural tears wash the object out.
Gently pull the upper eyelid out and down over the lower lid (the lower eyelashes act as a brush to sweep the particle out from under the top lid).
Rinse the eye gently with clean water or sterile saline, pouring from the inner corner (near the nose) outward.
If it does not wash out easily, or feels scratched → cover the eye with a pad and refer to a clinic.
(b) Embedded / Penetrating Object in the Eye (Metal shard, broken glass, sharp stick)
MASSIVE EMERGENCY. Never attempt removal! Pulling it out will rip the eyeball open, causing all the internal fluids to leak out, leading to instant blindness and massive bleeding.
Leave the sharp object exactly in place. Do not press on it or touch it.
Pad around the object: Build a thick ring of sterile gauze (a "doughnut" pad) around the stick/glass, or place a hard plastic paper cup/shield over the entire large object. Tape the shield to the facial bones so that absolutely nothing touches or bumps the embedded object.
Cover the other, healthy eye with a dark pad to completely stop all eye movement.
Keep the casualty perfectly still (lying flat on their back if possible) and arrange immediate, smooth hospital transfer.
(c) Blow to the Eye / Black Eye / Blunt Eyeball Injury
Apply a cold compress very gently (for 10 minutes) to the surrounding bruising to reduce swelling. If the severe pain persists, vision becomes blurred or double, or the inside of the eye looks filled with pooling red blood (hyphaema) → refer instantly. There may be a devastating internal blowout fracture or retinal detachment. Never press hard on a swollen, painful eye.
8.2 Ear Injuries
(a) Foreign Body in the Ear (Beans, plastic beads, insects — very common in kids)
Do NOT poke blindly inside with matchsticks, hairpins, or cotton buds! You will push the hard object deeper and permanently rupture the delicate eardrum. For a live, buzzing insect: Tilt the head sideways and gently pour in a little warm (body-temperature) cooking oil or clean water to drown and float the insect out.
For any other solid object, leave it alone and refer to a health worker with proper suction/forceps.
(b) Bleeding / Clear Fluid from the Ear
If bleeding occurs after a severe head injury, and the blood is thin, watery, or mixed with clear yellowish fluid, this is a CSF (Cerebrospinal Fluid) leak indicating a catastrophic basal skull fracture. EMERGENCY:
Do NOT plug the ear with tight cotton wool! Plugging it traps the fluid, forcing bacteria backward into the brain, causing fatal meningitis. Let the fluid drain freely.
Do not clean deep inside. Simply tape a sterile pad loosely over the outer ear to catch the drips.
Keep the casualty completely still; arrange urgent referral; treat them as having a severe head and possible broken neck injury.
If the ear bleeds without a head injury history (e.g., eardrum rupture from a vicious slap to the side of the head, blast wave, loud noise, or severe middle ear infection): keep the ear totally dry, insert absolutely no ear drops, and refer.
(c) Perforated Eardrum
Signs: The patient had severe ear pain that suddenly felt "relieved" after a pop, followed by hearing loss, loud ringing (tinnitus), and sometimes a little blood trickling out. Keep the ear completely dry (no swimming, place cotton wool loosely when bathing to stop water entering). Apply absolutely no ear drops unless prescribed by a doctor. Refer. Most heal naturally in a few weeks, but infections need antibiotics.
8.3 Nose Injuries
(a) Fractured Nose
Signs: Extreme pain, massive rapid swelling, visible crooked deformity, profuse nosebleed, blocked nasal breathing, and dark black bruising developing under both eyes. Management: Have them sit leaning forward. Apply a cold compress gently on the bony bridge. Control bleeding by pinching the soft fleshy part. Do not try to forcefully straighten the crooked nose yourself. Encourage mouth-breathing. Urgent referral (doctors get the best cosmetic reduction results if it is fixed within the first few days before the bone sets).
(b) Foreign Body in the Nose (Children pushing beans/beads)
Do not attempt removal at home using tweezers (massive risk of pushing the smooth object backward down the throat into the airway, causing fatal choking). Keep the panicked child calm, tell them to breathe through their mouth, and refer to a clinic.
Topic 9: Bites and Stings
9.1 Human Bites
Human mouths carry incredibly dangerous, aggressive bacteria. There is a massive infection risk. Bites occurring over the knuckles (when someone punches another person in the teeth, known as a "fight bite") infect the deep joint capsule quickly and violently. Management: Wash the wound intensely and thoroughly with soap and running water. Control bleeding. Cover with a clean dressing. Refer immediately. The casualty will almost certainly need strong prophylactic antibiotics. The doctor will also check their tetanus status and assess the risk of Hepatitis B or HIV transmission. Document carefully and report if it was a violent assault.
Why it matters in Uganda: Uganda is highly rabies-endemic. Rabies is a terrifying viral disease that attacks the brain. It is 100% fatal once neurological symptoms start (killing ~59,000 people globally per year, mostly children in Africa). However, Post-Exposure Prophylaxis (PEP) given BEFORE symptoms appear is nearly 100% protective and life-saving. Stray dog bites are the main source. Unfortunately, studies in Uganda show that many poor bite victims delay treatment or consult useless traditional healers, and die. The nurse must insist on immediate hospital referral.
First Aid for a Rabid Animal Bite
Wash the wound IMMEDIATELY and vigorously with soap and running water for at least 15 uninterrupted minutes. This single mechanical step physically washes the fragile rabies virus out of the torn flesh, and combined with PEP, reduces rabies risk by up to 90%.
If available, apply a strong antiseptic that kills viruses (povidone-iodine or 70% alcohol) directly into the wound after washing.
Control severe bleeding with direct pressure and cover with a clean dressing.
Do NOT suture (stitch) the wound closed unless it is absolutely essential to stop fatal arterial bleeding. Stitching physically traps the deadly virus deep inside the tissues. If stitches are essential, doctors will do them loosely, and only after PEP injections have started.
URGENT referral to a major hospital for Rabies PEP and Tetanus prophylaxis.
Rabies Post-Exposure Prophylaxis (PEP) — WHO Categories
As a nurse, you must know how to categorize the exposure to give the right treatment:
Category
Type of Contact with Animal
Required Medical Action
Category I
Touching or feeding the animal; animal licks on perfectly intact, unbroken skin.
No exposure risk. Wash the skin with soap. No vaccine needed.
Category II
Animal nibbling on uncovered skin; minor scratches or tiny abrasions without drawing blood.
The Vaccine: A modern cell-culture vaccine given Intramuscularly on a strict schedule: Days 0, 3, 7, 14, and 28. You must strongly emphasise to the patient that they must return to complete all 5 doses, or they will die.
Rabies Immunoglobulin (RIG): For severe Category III bites, ready-made antibodies are injected directly into and around the bite wound ASAP to neutralize the virus before it reaches the nerves. Dose is 20 IU/kg (human) or 40 IU/kg (equine). Any remaining volume is injected IM at a distant site.
Observe the biting animal for 10 days (by vet authorities) if possible to see if it dies of rabies — but never delay starting the PEP injections while waiting for the dog to die!
9.3 Snake Bites
Uganda is home to highly venomous snakes (Cobras, Mambas, Vipers, Puff Adders). Most bites occur on the bare legs, feet, and hands of farmers working in bushes or reaching into dark holes. Many victims die or suffer horrific amputations because they visit traditional healers who cut the wound, delaying modern medical care. Antivenom is the ONLY definitive treatment that saves lives.
First Aid (What TO do)
Move the casualty safely away from the snake. Do not act brave and try to catch or kill it (the severed head of a snake can still bite and inject venom reflexively hours after death!). A quick photo from a safe distance helps doctors choose the right antivenom.
Keep the casualty completely STILL and CALM. Extreme panic, a racing heartbeat, and running around wildly pumps the deadly venom rapidly through their lymphatic system into the heart and brain. Lay them down. Splint the bitten limb heavily to completely stop muscle movement. Keep the limb roughly at heart level (or slightly below if you suspect a neurotoxic cobra bite).
Rapidly remove rings, bracelets, and tight clothing near the bite before massive, crushing swelling begins.
Wash the bloody bite wound gently with soap and water.
Use a pen to draw a circle around the leading edge of the swelling and write the exact time next to it. This brilliantly helps doctors track how fast the venom is destroying tissue.
Arrange incredibly urgent transport to a major facility stocking antivenom. Carry the casualty to the vehicle if possible (walking pumps the venom!).
Monitor breathing and pulse constantly. Be ready for CPR. If you see weak drooping eyelids, drooping face, or the patient complains of difficulty swallowing or breathing = this is a massive neurotoxic emergency. Their diaphragm is paralysing. Support their breathing with an Ambu bag and drive faster.
🚨 WHAT NOT TO DO (Classic Exam Traps & Deadly Myths)
Do NOT cut the wound open or make "X" incisions with a razor. It causes fatal bleeding and introduces tetanus.
Do NOT suck the venom out using your mouth or a pump. It does absolutely nothing to extract venom that has already bonded to tissues, and the bacteria in your mouth will infect the wound.
Do NOT apply a tight tourniquet that cuts off all arterial blood. It traps the highly destructive venom in the limb, concentrating the acid and guaranteeing the leg will rot and require amputation.
No ice packs, no electric shocks, no herbal poultices, no traditional "black stones", and no alcohol (which speeds up heart rate).
Do not give aspirin (snake venom already destroys the blood's ability to clot; aspirin will cause massive internal bleeding).
Note on bandages: A firm pressure-immobilisation bandage (like wrapping a sprain) is endorsed internationally for neurotoxic elapid bites (cobras/mambas) to slow lymph flow. However, for viper bites (puff adders) which cause massive blistering swelling, a tight bandage acts like a tourniquet and dramatically worsens flesh rotting. Because laypeople cannot identify snakes accurately, the safest universal rule taught in Uganda is: Splint it, keep them totally still, and transport extremely fast.
Signs of Envenomation (For clinical monitoring)
Local signs: Searing severe pain, massive rapid swelling, dark purple bruising, huge blood blisters, and continuous oozing bleeding from the tiny puncture fangs.
Haemotoxic (Vipers): Destroys blood clotting. Look for spontaneous bleeding from the gums, nose, blood in urine, or vomiting blood.
Neurotoxic (Cobras/Mambas): Paralyzes nerves. Look for drooping eyelids (ptosis), blurred/double vision, slurred drunken speech, trouble swallowing saliva, general severe weakness, and finally fatal respiratory muscle paralysis.
Profound shock, severe nausea, vomiting, and fainting.
9.4 Insect Stings (Bees, Wasps, Ants)
Most stings cause intense local burning pain, redness, and a swollen welt. Management: Swiftly scrape the stinger off sideways using a fingernail or the hard edge of a credit card. Do not squeeze the stinger with tweezers! Squeezing it acts like a syringe plunger, injecting the remaining venom sac into the skin. Wash the area, apply a cold compress to relieve pain, and observe. Dangerous situations: Multiple stings (disturbing a swarm of angry bees) or a sting directly inside the mouth/throat (the resulting massive swelling can quickly block the airway and choke the patient to death — give them ice cubes to suck on continuously and refer instantly). Anaphylaxis (Severe Deadly Allergy): A patient allergic to bee stings will develop sudden facial/tongue swelling, massive hives all over the body, severe wheezing/stridor, a hoarse voice, dizziness, and collapse. Treatment: Lay flat with legs raised (or sit up if struggling to breathe). Administer Adrenaline 0.5 mg IM (1:1000) deep into the anterolateral thigh immediately. Repeat every 5–10 minutes if no response. Use antihistamines + steroids as adjuncts. Urgent hospital referral. Casualties with known severe allergies should carry an adrenaline auto-injector (EpiPen) at all times.
9.5 Tick Bites
Ticks bury their heads in the skin and suck blood, transmitting dangerous fevers. Management: Grasp the tick's head with fine tweezers as close to the human skin as possible. Pull straight upward with steady, even pressure. Do not twist or jerk the tick (the head will snap off and remain stuck in the flesh). Do not burn it with a match or cover it in petrol/vaseline (this causes the tick to vomit its infected stomach contents into the patient's bloodstream before dying). Clean the site with alcohol. Watch for a strange rash or high fever in the following weeks, and refer to a clinic if illness develops.
Quick Revision Summary (High-Yield Exam Points)
Injury Type
KEY Action / Management
Severe bleeding
Direct pressure 10–15 mins, add layers, elevate, immobilise.
Arterial bleed
Bright red, spurting → brutal direct pressure, use pressure points (brachial/femoral).
Internal bleeding
Shock signs without visible blood → lay flat, strict NPO (nothing by mouth), urgent transport.
Epistaxis (Nosebleed)
Lean FORWARD, pinch the SOFT part of nose 10–15 mins continuously.
A medical emergency is a sudden illness or medical condition that threatens a person's life or long-term health, requiring immediate treatment.
Unlike trauma emergencies (which are caused by physical external forces like wounds, fractures, or burns), medical emergencies arise from inside the body due to failures in organs (heart, brain, lungs), metabolism, poisoning, or extreme heat.
When approaching someone who is suddenly ill, always follow a systematic approach to ensure you do not miss a life-threatening issue:
D — Danger: Check the scene is safe for you, the casualty, and bystanders. Look out for traffic, fire, chemical fumes, or live wires. (Remember: A dead rescuer helps no one!)
R — Response: Check if the casualty is responsive using the AVPU scale:
A — Alert (fully awake, eyes open).
V — Responds to Voice (opens eyes when you shout).
P — Responds to Pain (reacts when you firmly pinch their shoulder or earlobe).
U — Unresponsive (completely unconscious).
A — Airway: Open the airway using the head-tilt, chin-lift maneuver. Look inside for any visible obstruction (like vomit or food).
B — Breathing: Look, listen, and feel for normal breathing for up to 10 seconds.
If breathing normally but unconscious ➔ place them in the recovery position to keep the airway clear.
If NOT breathing normally (or just gasping) ➔ call for help and start CPR immediately.
C — Circulation: Check the pulse, note the skin colour (pale or blue?), check temperature (hot or cold?), and control any severe bleeding if present.
Call for help early: Shout for a bystander to call an ambulance or arrange transport to the nearest Health Centre while you stay with the casualty.
Reassure the casualty constantly: Severe anxiety makes the heart work harder and worsens most medical emergencies.
Do no harm: Never give food, drink, or oral medicine to a drowsy or unconscious casualty (they will aspirate/choke on it).
🧠 HISTORY-TAKING MNEMONIC: SAMPLE
To figure out exactly why the person is sick, ask these questions to them or their relatives:
Letter
Meaning
Description
S
Signs & Symptoms
What do you see? What does the casualty feel? (e.g., "My chest hurts").
A
Allergies
Are they allergic to any drugs, foods, or insect stings?
M
Medicines
What medicines do they take daily? (e.g., insulin, asthma inhalers, antihypertensives). This is a huge clue to their underlying disease.
P
Past Medical History
Do they suffer from diabetes, asthma, epilepsy, hypertension, or heart disease?
L
Last Meal
When did they last eat or drink? (Crucial if they need emergency surgery, or if they are hypoglycaemic).
E
Events
What exactly were they doing leading up to the emergency? (e.g., running in the hot sun).
1.4 The Nurse's Role in a Medical Emergency
Assess and recognise the emergency quickly (primary survey + SAMPLE history).
Give immediate first aid within your scope of practice to stabilize the patient.
Arrange urgent referral along the Uganda referral chain (Village Health Team ➔ HC II ➔ HC III ➔ HC IV/Hospital). You must write a clear referral note detailing what happened and what you did.
Document: Record the time of onset, vital signs, treatment given, and the patient's response.
Educate: Teach the casualty and family on how to prevent a recurrence of the emergency.
Topic 2: Fainting (Syncope)
2.1 Definition
Fainting (syncope) is a sudden, temporary loss of consciousness and postural tone (they collapse) caused by a short-lived reduction of blood flow (and therefore oxygen) to the brain.
Why it happens: The brain requires a constant, heavy supply of oxygenated blood. If blood pressure drops suddenly, gravity pulls blood away from the head. The brain shuts down consciousness to force the body to fall flat, putting the head and heart on the same level so blood can easily flow back to the brain! It usually lasts only seconds to a few minutes, and recovery is rapid and complete if the casualty is laid flat.
2.2 Types of Syncope
Vasovagal syncope (Commonest, ~50%+): A reflex drop in heart rate and blood pressure triggered by sudden pain, extreme fear, emotional shock, the sight of blood, or prolonged standing in a hot environment.
Orthostatic (postural) hypotension: Blood pools in the legs when standing up too quickly, causing dizzy spells. Very common in dehydration, older adults, pregnant women, and patients taking strong blood pressure drugs.
Situational syncope: Triggered by specific bodily actions like violent coughing, sneezing, swallowing, urination (micturition syncope), or severe straining during defecation.
Cardiac syncope: Caused by an abnormal heart rhythm (arrhythmia) or heart valve disease. This is serious and may occur suddenly during exertion, with absolutely no warning signs.
Other causes: Hypoglycaemia (low sugar), anaemia (low blood count), heat exposure, severe pain, vaginal bleeding (e.g., a ruptured ectopic pregnancy), and stroke (rare).
2.3 Signs and Symptoms
Before fainting (Prodrome/warning signs):
Light-headedness / dizziness ("feeling like the world is spinning").
Nausea, yawning heavily, feeling suddenly very warm.
Sweating, with cold, clammy (moist) skin.
Extreme paleness (pallor), blurring or narrowing of vision ("tunnel vision"), and ringing in the ears.
Pulse is initially slow, but may later quicken to compensate.
During fainting:
The person collapses; brief loss of consciousness. Usually recovers within 20–60 seconds once they are lying flat.
Brief, mild muscle twitching may occur (do not confuse this with full epilepsy).
After fainting:
Rapid recovery, but they may feel weak, embarrassed, and nauseated.
2.4 First Aid Management
Check DRABC. If you see the casualty falling, step in to ease them to the ground and protect their head from hitting hard surfaces.
Lay the casualty flat on their back and raise their legs about 30 cm (above heart level). Explanation: Raising the legs allows gravity to pull pooled blood from the legs directly back to the heart, which then pumps it straight to the brain, waking them up instantly. Loosen tight clothing (collar, belt, tie) to improve blood flow.
Ensure a good supply of fresh air — open windows and firmly ask crowds of bystanders to stand back and give them space.
Reassure the casualty once they recover; explain gently what happened to calm them down.
When fully recovered, let them sit up gradually (sitting for a few minutes first, then standing slowly to observe if the dizziness returns).
Once they are fully alert and can swallow perfectly, give them water or a sweet drink (especially if the faint was caused by hunger, dehydration, or heat).
If they are NOT breathing normally at any point ➔ assume cardiac arrest, start CPR, and call for emergency help.
🚨 What NOT To Do
Do not give anything to eat or drink while the casualty is drowsy or not fully awake (massive risk of choking and aspirating fluid into the lungs).
Do not crowd around the casualty or allow panic to spread.
Do not slap their face, shake them violently, or pour buckets of water over their face to "wake them up".
Do not let the person stand up quickly or walk away immediately; they will likely faint again.
2.6 When to Refer / Seek Medical Help
Urgently refer the patient to a health facility if:
Fainting occurred suddenly without warning, during exercise, or while they were lying down (this points to a dangerous heart problem).
The casualty does not wake up within 1 minute, or recovers but remains highly confused.
There is associated chest pain, severe breathlessness, or palpitations.
They sustained an injury during the collapse (e.g., they hit their head — watch closely for later drowsiness or vomiting indicating bleeding in the brain).
The casualty is pregnant, elderly, or has a history of heart disease, diabetes, or severe anaemia.
The fainting spells are recurrent.
Topic 3: Diabetic Emergencies
3.1 Background
Diabetes mellitus is a chronic metabolic condition where blood glucose (sugar) is poorly controlled due to issues with the hormone Insulin.
Type 1: The pancreas produces little to no insulin. The patient absolutely needs daily insulin injections to survive.
Type 2: The body has insulin resistance (it produces insulin, but the cells ignore it). Managed with diet, oral tablets, and sometimes insulin injections.
Normal fasting blood glucose is 3.9–6.1 mmol/L (70–110 mg/dL).
There are two major diabetic emergencies: HYPOglycaemia (dangerously low sugar) and HYPERglycaemia (dangerously high sugar, which may lead to DKA/HHS coma). Hypoglycaemia is the most common diabetic emergency in the community. It develops incredibly fast and can kill the brain quickly.
3.2 HYPOGLYCAEMIA (Low Blood Sugar)
Definition: Blood glucose falls to < 3.9 mmol/L (< 70 mg/dL) with symptoms.
Why it kills: The brain cannot store its own glucose. It relies on a continuous supply from the blood every single second. If blood sugar drops too low, the brain starves, leading to confusion, seizures, coma, and permanent brain death.
Causes (Think: "Too much insulin or Too little sugar")
Missed or delayed meals, or eating an inadequate amount of food.
Taking too much insulin or diabetes tablets (accidental overdose, or taking the wrong dose).
Unusual, heavy physical exertion or exercise without eating extra food to compensate.
Drinking alcohol (especially on an empty stomach, which blocks the liver from releasing stored sugar).
Vomiting or diarrhoea; severe fever or infection.
Signs and Symptoms (Develop SUDDENLY — in minutes)
Skin becomes very sweaty, cold, and clammy (moist).
Palpitations (heart pounding fast) and rapid pulse.
Pale skin.
Anxiety, irritability, sudden confusion, unusual bizarre behaviour, or aggression (the person may look and act like they are drunk!).
Blurred vision, dizziness, severe headache, and slurred speech.
Drowsiness progressing to deep unconsciousness and violent seizures if left untreated.
First Aid — CONSCIOUS Casualty
Give fast-acting sugar IMMEDIATELY (about 15–20 g):
3–4 glucose tablets, OR
150 ml of fruit juice or a regular (NOT diet) sugary soft drink, OR
2–3 teaspoons of ordinary sugar or honey dissolved in a little water.
Wait 15 minutes, then recheck their symptoms (or recheck blood glucose if you have a glucometer).
If their sugar is still low or they are still symptomatic ➔ repeat the fast-acting sugar dose.
Once they have recovered and feel better ➔ give them a longer-acting carbohydrate snack (like a slice of bread, a banana, or a glass of milk). Explanation: Fast sugar spikes the blood level quickly, but it crashes fast too. The complex carbs provide a slow, steady release of energy to prevent a relapse.
Help them find the cause of the drop, and advise the casualty to inform their health worker to review their treatment doses.
First Aid — UNCONSCIOUS Casualty (Severe Hypoglycaemia)
Do NOT give anything by mouth! (They will choke and die).
Place them carefully in the recovery position to protect their airway; check breathing continuously.
If at a health facility: Administer 50% Dextrose 50 ml IV slowly (this is a critical nursing role), or give Glucagon 1 mg IM/SC if available.
If in the community: You can carefully rub a thick paste of sugar or honey into their gums/buccal cavity (inside the cheek). It absorbs slowly through the lining of the mouth. Meanwhile, arrange URGENT transport to a health facility.
After regaining full consciousness, give oral sugar and a solid carbohydrate snack.
3.3 HYPERGLYCAEMIA (High Blood Sugar)
Definition: Persistently high blood glucose, usually > 11 mmol/L (> 200 mg/dL) causing symptoms. Severe untreated forms lead to Diabetic Ketoacidosis (DKA) or Hyperosmolar Hyperglycaemic State (HHS).
Causes
Missed insulin doses or running completely out of insulin.
Severe infection (e.g., Malaria, Pneumonia, Urinary Tract Infection), illness, injury, or surgery. (Infections cause the body to release stress hormones which drastically raise blood sugar).
Extreme stress, eating a very poor high-sugar diet, or being an undiagnosed diabetic.
Signs and Symptoms (Develop GRADUALLY — over hours to days)
Intense, unquenchable thirst (polydipsia) and exceptionally frequent urination (polyuria). The body is trying to flush the toxic levels of sugar out through the urine.
Dry mouth and extremely dry skin; a flushed, warm face.
Deep weakness, fatigue, and blurred vision.
Rapid, deep, sighing breathing (Kussmaul breathing). The body is trying to blow off toxic acids from the blood.
Fruity or acetone smell on the breath (smells like nail polish remover or rotting apples, caused by ketones).
Nausea, severe vomiting, and acute abdominal pain.
Confusion and drowsiness leading slowly to a deep coma (DKA/HHS).
First Aid
Sit or lay the casualty down comfortably; reassure them.
If they are fully conscious: give them plain water to sip (they are severely dehydrated from urinating so much). Do not give sugary drinks.
Urgent referral to hospital — DKA and HHS are highly life-threatening and require IV insulin drips and massive IV fluid replacement. You cannot fix this with first aid.
If unconscious: place in the recovery position, give absolutely nothing by mouth, check breathing constantly, and transport urgently.
📝 EXAM STRATEGY: Hypo vs Hyper Comparison
Feature
HYPOglycaemia (Low Sugar)
HYPERglycaemia (High Sugar)
Onset
Sudden (Minutes)
Gradual (Hours to Days)
Skin
Pale, cold, sweaty (clammy)
Dry, flushed, warm
Breathing
Normal
Rapid and deep (Kussmaul)
Breath Smell
Normal
Fruity / Acetone (Ketones)
Consciousness
Confused, aggressive ➔ sudden collapse
Drowsy, lethargic ➔ slow coma
Food Response
Responds very quickly to sugar
Does NOT improve with sugar
Emergency Action
Give sugar NOW!
Give water + Urgent hospital referral
Topic 4: Asthma Attack
4.1 Definition
Asthma is a chronic inflammatory disease of the airways characterized by reversible narrowing (bronchospasm), excess thick mucus production, and airway swelling. An asthma attack is a sudden, severe worsening of these symptoms; severe attacks can completely block the airway and be fatal.
4.2 Common Triggers
Dust, pollen, smoke (including firewood smoke — a massive trigger in rural Uganda), and animal dander (hair/skin flakes).
Respiratory infections like the common cold or flu.
Heavy exercise, breathing very cold air, or sudden weather changes.
Strong smells, harsh chemicals, and sprays (including some strong insecticides).
Extreme emotional stress, severe anxiety, or even violent laughter.
Certain medicines (like Aspirin, NSAIDs, or Beta-blockers) and some food preservatives.
4.3 Signs and Symptoms
Wheezing: A high-pitched whistling sound heard primarily when the patient is breathing out (exhaling).
Persistent dry cough (especially severe at night).
Extreme difficulty breathing; complaining of severe chest tightness.
Speaking in short sentences or single words because they are too breathless to complete a full thought.
Using accessory muscles to breathe (you can see the skin between their ribs sucking in deeply); sitting hunched forward in the "tripod" position to force air into their lungs.
Severe anxiety and visible fear in their eyes.
IN A SEVERE ATTACK:
Cyanosis: Blue lips and fingertips due to lack of oxygen.
They become utterly exhausted and drowsy.
"Silent Chest": You hear no wheeze at all. This is terrifying because it means the airways are so tight that air is hardly moving in or out. This is a pre-arrest sign!
4.4 First Aid Management
Keep the casualty UPRIGHT (Sitting): Have them sit leaning slightly forward with their arms resting on a table or their knees. Explanation: Sitting upright allows gravity to pull the diaphragm down, giving the lungs maximum room to expand. NEVER lay an asthma casualty flat on their back; they will suffocate.
Stay extremely calm and reassuring. Do not panic, and do not leave the casualty alone. Anxiety makes the airways constrict even tighter.
Help them take their RELIEVER inhaler (usually Blue — Salbutamol):
With a spacer (Best method): Spray 1 puff into the plastic spacer chamber, then have them take 4–6 deep breaths in and out of the spacer. Repeat this up to 4 puffs.
Without a spacer: Spray 1 puff while they are breathing in slowly and deeply; ask them to hold their breath for ~4 seconds so the medicine settles in the lungs. Repeat to 4 puffs.
Wait for 4 minutes. If their breathing has not returned to normal ➔ give another 4 puffs in the exact same way.
If there is little or no relief, or the attack was incredibly severe from the very start ➔ call an ambulance / arrange urgent transport immediately. Continue giving 4 puffs every 4 minutes while travelling to the hospital.
If the casualty becomes unconscious ➔ check DRABC, place in the recovery position if breathing, or start CPR if not breathing.
🚨 What NOT To Do
Do not lay the casualty flat.
Do not give them a paper or plastic bag to breathe into! (That technique is strictly for anxiety/hyperventilation, NOT asthma. An asthmatic desperately needs fresh oxygen, not their own recycled carbon dioxide).
Do not let them walk long distances to a health facility — the exertion will worsen the attack. Carry them or arrange transport.
Topic 5: Acute Chest Pain (Cardiac Emergency)
5.1 Definition and Causes
Chest pain becomes a critical cardiac emergency when it is caused by a severely reduced blood supply to the heart muscle itself.
Angina pectoris: A temporary, reversible narrowing of the coronary arteries. The pain is often triggered by heavy exertion or strong emotion, and is typically relieved by rest or medication.
Myocardial Infarction (Heart Attack): A coronary artery becomes completely blocked by a blood clot. The heart muscle begins to die from oxygen starvation. This is a massive emergency.
Other causes of chest pain: Pulmonary embolism, pneumonia, pleurisy, severe acid reflux, peptic ulcers, muscular strain, or extreme anxiety. Always rule out a heart attack first!
5.2 Signs and Symptoms of a Heart Attack
Central chest pain: Described as a crushing pressure, squeezing, tightness, or heavy ache ("It feels like an elephant is sitting on my chest"). It lasts more than a few minutes or comes and goes.
Radiation: The pain often radiates (spreads) to the left arm, both arms, up into the neck, the jaw, the back, or the upper abdomen.
Associated signs: Profuse, cold sweating; severe nausea and vomiting; sudden breathlessness; dizziness.
An overwhelming sense of impending doom and extreme anxiety. The skin turns pale, grey, and ashen.
Atypical signs: Women, the elderly, and diabetics may not have the classic crushing chest pain. They may present with unusual extreme fatigue, nausea, unexplained back or jaw pain, or mild abdominal discomfort. Do not ignore these!
May progress suddenly to cardiac arrest (they collapse and stop breathing normally).
5.3 First Aid Management
Stop all activity immediately. Sit the casualty down in a comfortable half-sitting (semi-reclined) position (e.g., sitting on the floor leaning back against a wall, with their knees bent and back supported). This eases the strain on the heart and makes breathing easier. Reassure them constantly.
Call for emergency help immediately (ambulance or transport to a facility with oxygen and ECG capabilities). In heart attacks, "Time equals Heart Muscle."
Loosen tight clothing around the neck, chest, and waist. Keep the casualty warm but not overheated.
Chewable Aspirin: If available, if the casualty is an adult, fully conscious, and has no known aspirin allergy or active bleeding disorder (like a stomach ulcer) ➔ give them Aspirin 300 mg to CHEW. Explanation: Aspirin is an anti-platelet drug. Chewing it absorbs it quickly into the blood, where it helps stop the deadly clot in the heart from growing larger.
If the casualty has their own prescribed Angina medication (like GTN spray or tablets under the tongue), help them take it.
Monitor them very closely: pulse, breathing, and level of response. Have your hands ready to start CPR the moment they collapse and stop breathing normally.
Urgent referral: Never let a suspected heart attack casualty walk to the car or drive themselves. Carry them.
Topic 6: Stroke (Cerebrovascular Accident)
6.1 Definition
A stroke is a sudden, catastrophic interruption of blood supply to a part of the brain.
Ischaemic stroke (~85%): An artery in the brain is completely blocked by a blood clot.
Haemorrhagic stroke (~15%): An artery bursts and bleeds heavily into or around the brain, creating crushing pressure.
Without fresh blood, brain cells begin dying within minutes. The medical mantra is "TIME IS BRAIN."
6.2 Risk Factors
Hypertension (high blood pressure) is the biggest risk factor — it is incredibly common and often undiagnosed in Uganda. Other risks include Diabetes, high cholesterol, smoking, excessive alcohol, heart arrhythmias (like Atrial Fibrillation), Sickle Cell Disease, obesity, physical inactivity, family history, and previous strokes.
6.3 Recognising Stroke — The FAST Test
If you suspect a stroke, perform this rapid test immediately:
F — Face: Ask the person to smile. Does one side of their face droop downwards?
A — Arms: Ask them to raise both arms in front of them. Does one arm drift downward, or can they not lift it at all? (Look for sudden weakness or numbness on one side of the body).
S — Speech: Ask them to repeat a simple, normal sentence ("The sky is blue"). Is their speech slurred, strange, or can they not understand what you are saying?
T — Time: If you see ANY ONE of these signs, it is TIME to call for emergency help immediately. Note the exact time the symptoms first started!
Other Sudden Signs of Stroke
Sudden weakness or numbness of one complete side of the body (face, arm, leg).
Sudden severe confusion, trouble speaking or understanding language.
Sudden trouble seeing in one or both eyes (vision goes black or blurred).
Sudden trouble walking, severe dizziness, loss of balance or coordination.
Sudden, inexplicably severe headache "like a bolt of lightning from the blue" (highly indicative of a bleeding Haemorrhagic stroke).
6.4 First Aid Management
Act FAST — arrange urgent transport immediately. Every passing minute delays hospital treatment and permanently increases brain damage.
Record the EXACT TIME the symptoms started. (This is critical because doctors only have a very short window of a few hours to give clot-busting drugs. If they don't know the time, they cannot give the drug safely).
Lay the casualty down with their head and shoulders slightly raised (on one pillow if available) to reduce pressure inside the skull.
Nothing by mouth (NPO): Give absolutely no food, water, or oral medicines. Explanation: Stroke heavily impairs the swallowing reflex. Giving them water will cause them to choke and aspirate fluid directly into their lungs, causing deadly pneumonia.
If they become unconscious but are still breathing ➔ place them in the recovery position. If possible, lay them on their affected/paralyzed side to keep the healthy lung clear. Monitor breathing continuously.
Reassure them constantly (they may understand you even if they cannot speak); keep them warm; loosen tight clothing.
🚨 What NOT To Do
Do NOT give Aspirin! You do not know if they are having a bleeding (haemorrhagic) stroke. If their brain is bleeding, Aspirin will thin the blood and cause them to bleed to death inside their skull.
Do NOT "wait and see" if they get better. Even if symptoms disappear quickly (a TIA or "mini-stroke"), it is a massive warning sign that a full, fatal stroke is coming soon.
Topic 7: Poisoning
7.1 Definition & Background
Poisoning is injury or illness caused by exposure to a harmful substance. A poison is any substance which, when taken into the body in sufficient quantities, can cause severe injury to health or completely destroy life. It can be taken either accidentally (children) or intentionally (suicide attempts).
How Poisons Enter the Body
Ingestion (Swallowing): The most common route. By eating or drinking a poisonous substance, it enters the circulatory system through the walls of the stomach and intestines.
Inhalation (Breathing in): Inhaling toxic fumes, gases (like Carbon Monoxide), or smoke from burning poisonous substances into the lungs.
Injection: Introduced directly into the bloodstream or tissues via needles, or venomous bites/stings (e.g., snake bites).
Absorption (Skin Contact): A strong acid or agricultural spray (like organophosphate pesticides) comes into contact with the skin and is absorbed directly into the blood.
Effects of Poisons on Our Bodies
When poisons reach inside the body, they cause massive destruction in various ways:
Central Nervous System (CNS) Depression: Once in the bloodstream, they suppress the brain, preventing vital activities like breathing, causing the patient to stop breathing and die.
Heart & Vital Organs: They affect the electrical action of the heart causing deadly arrhythmias.
Oxygen Distribution: Toxins like Carbon Monoxide bind to red blood cells, preventing them from carrying adequate oxygen to the tissues, leading to suffocation at the cellular level.
Brain Irritation: When poisons reach the brain, the person may suffer violent convulsions or become delirious/hallucinate.
Gastrointestinal Tract Damage: Swallowed poisons affect the food passages directly, causing severe vomiting, violent abdominal pain, and explosive diarrhea.
Corrosive Burns: If a person swallows a corrosive poison (strong acid or alkali), it literally burns and destroys the lips, mouth, throat, and the whole food passage.
Organ Failure: An overload of poison will overwhelm and completely damage the body’s poison filters — the liver and the kidneys.
7.2 Common Types of Poisoning in Uganda
A. Food Poisoning
Foodborne illness caused by consuming contaminated food or beverages. Contamination occurs due to harmful bacteria, viruses, parasites, or toxins.
Bacterial: Salmonella, E. coli, Listeria. Due to improper cooking, poor refrigeration, and bad hygiene.
Viral: Rotavirus, Hepatitis A. Usually through improper hand hygiene by food handlers.
Parasitic: Giardia, Cryptosporidium. From raw/undercooked meat or dirty water.
Toxins/Chemicals: Bacteria like Staphylococcus aureus leave toxins in food. Chemical contaminants include pesticide residue on unwashed fruits.
Symptoms: Nausea, vomiting, severe abdominal pain, explosive diarrhea, bloody stools. Systemic symptoms include fever, muscle aches, fatigue, and sometimes shock from dehydration.
Treatment: Give plenty of fluids (ORS) to prevent fatal dehydration. Collect vomitus for lab examination. Do not give anti-diarrheal drugs immediately (let the body flush the bacteria).
Prevention: Safe food handling, strict handwashing, proper cooking/storage temps, and avoiding cross-contamination (using different boards for raw meat and veg).
B. Alcohol Poisoning
A severe, potentially fatal condition when blood alcohol concentration rises to toxic levels, usually from binge drinking large amounts in a short period. Alcohol is a CNS depressant.
Symptoms: Confusion, disorientation, severe agitation, slow/irregular breathing, pale/bluish skin, severe vomiting, hypothermia, seizures, and progressing to respiratory failure or cardiac arrest.
First Aid: Call for emergency help. Do NOT leave the person alone. Place them strictly in the recovery position so they do not choke on their own vomit. Monitor breathing closely; be prepared to do CPR.
Complications: Brain damage from hypoxia, liver damage, choking death.
C. Drug Poisoning (Overdose)
Harmful effects caused by excessive amounts of medication, accidental overdoses, intentional self-harm (suicide), or dangerous interactions between drugs.
Cardiovascular Symptoms: Rapid/irregular heartbeat, very high/low blood pressure, chest pain.
Respiratory Symptoms: Shallow, slow, or labored breathing leading to respiratory failure.
Treatment: If conscious, place comfortably and quickly ask exactly what they took and how much. Keep empty pill bottles for the doctor. Monitor vitals. Refer immediately.
D. Industrial / Agricultural Poisoning
Exposure to hazardous substances in work environments (chemicals, heavy metals, biological agents).
🚨 CLASSIC EXAM FINDING: Organophosphate Poisoning
Agricultural pesticides are extremely common in suicides and accidental farmer poisonings in Uganda. Memorize the SLUDGE signs:
Salivation (drooling)
Lacrimation (crying/tears)
Urination (loss of bladder control)
Defecation (diarrhea)
GI cramps (stomach pain)
Emesis (vomiting)
Plus: Pinpoint (tiny) pupils, severe sweating, muscle twitching, progressing to coma and respiratory failure.
7.4 General Aims & Treatment for Poisoning
Aims of First Aid: Maintain ABCs (Airway, Breathing, Circulation), identify the type of poison, obtain medical aid rapidly, remove contaminated clothing, and remove the casualty from further danger.
General Rules for Swallowed Poisons:
Get medical aid as soon as possible (this can become a medico-legal case!).
Protect yourself first — wear gloves, do not touch the poison.
Keep any container, pill bottle, or leaf which you think might help doctors identify the poison.
Do not throw away the vomitus; keep a sample for laboratory examination.
Check the lips for signs of chemical burning. DO NOT induce vomiting if they swallowed a corrosive acid or alkali! (Vomiting brings the burning chemical back up the throat, causing double the damage and risking the chemical spilling into the lungs).
If the casualty is conscious and swallowed a non-corrosive substance, some guidelines suggest giving fluids to dilute it, but modern protocols prefer rapid transport without oral fluids unless directed by a doctor. Give soothing drinks (like milk or egg white) only if specifically trained/directed for certain corrosives to coat the stomach.
If the casualty is unconscious, place them in a semi-prone (recovery) position with the head turned to one side to prevent choking on vomit. Watch their breathing continuously. Start artificial respiration if necessary (use a pocket mask, NOT bare mouth-to-mouth if poison is on their lips!).
Keep the casualty warm, treat for shock, and loosen tight clothing.
Specific Poisoning Management
Acid Poisoning (e.g., Battery acid): Rinse affected skin areas with copious water for 20 mins. Do NOT induce vomiting. For ingestion, some traditional texts suggest giving an alkaline like sodium bicarbonate to counteract, but modern emergency medicine strongly prefers giving nothing by mouth and rushing to the hospital to avoid chemical reactions releasing massive heat in the stomach. Keep calm and transport.
Alkali Poisoning (e.g., Bleach/Lye): Rinse skin with huge amounts of water. If ingested, do NOT induce vomiting. Traditional first aid suggests small sips of water or milk to dilute, or a weak acid like diluted lime juice, but rapid transport is the absolute safest priority.
Mercury Poisoning (Liquid mercury): Isolate the area. Do not touch with bare hands (use gloves/barrier). Ventilate the room immediately by opening windows to let the toxic vapor disperse. Call emergency services for proper cleanup. Seek medical attention immediately.
Opium / Narcotic Overdose (e.g., Heroin, strong painkillers): The drug stops the brain's breathing center. If unconscious with slow/no breathing, call EMS immediately. Do not induce vomiting. Put in recovery position if breathing. Start CPR if breathing stops. (Hospital will administer Naloxone as an antidote).
Prevention of Poisoning
All medicine bottles and agricultural chemicals should be strictly labeled. Unlabeled medicines must be destroyed.
Toxic medicines must clearly indicate the word "POISON" (often with a skull and crossbones) and be kept under lock and key.
Always read the label 3 times before giving any medication.
All poisonous substances (including bleach, paraffin) MUST be kept strictly out of the reach of children. Never store kerosene in empty soda or water bottles!
Topic 8: Heat Stroke & Heat Exhaustion
Heat-related illnesses form a spectrum of severity, usually resulting from exposure to high environmental temperatures, high humidity, dehydration, and heavy physical work in the sun.
Painful muscle cramps or spasms (usually in the legs or abdomen) occurring after heavy sweating and physical exertion in the heat. The body loses salt and water. First aid: Stop the activity, rest in a cool shaded place, gently stretch and massage the cramping muscle, give fluids (water, ORS, or sports drinks). Avoid giving concentrated salt tablets.
8.2 Heat Exhaustion
Causes: Heavy sweating in hot/humid conditions leading to massive loss of water AND salts. Very common in farmers, builders, athletes, and boda boda riders working under the midday sun without drinking enough fluids.
Signs and Symptoms:
Heavy, profuse sweating; skin feels cool, pale, and clammy (moist). (The body's cooling system is still working, trying desperately to cool down).
Severe weakness, extreme tiredness, dizziness, and headache.
Nausea, vomiting, and muscle cramps.
Faintness when trying to stand up (blood pressure is dropping).
Body temperature is normal or only slightly raised.
First Aid Management:
Move the casualty immediately to a cool, shaded, and well-ventilated place. Loosen and remove any excess heavy clothing.
Lay them down flat and raise their legs slightly to prevent fainting/shock.
Cool the skin: Apply cool wet cloths or sponges to their skin, fan them vigorously, or spray them with cool water.
Give them small, frequent sips of cool water or ORS (about 100–120 ml every 15 minutes if they are fully awake). Do not let them gulp it, as they will vomit.
They should improve within 30 minutes. If they do not improve, begin vomiting, or their consciousness level drops ➔ treat it as Heat Stroke and refer urgently!
8.3 Heat Stroke (A Massive Emergency)
Definition: A highly life-threatening emergency in which the body's internal temperature-regulating system completely FAILS. The body temperature rises dangerously high (≥ 40°C / 104°F), cooking the brain and organs.
Two Types: Classic (occurs in hot weather, usually affecting the elderly or chronically ill) and Exertional (strenuous exercise in extreme heat, like soldiers or athletes).
Signs and Symptoms
Very high body temperature.
The skin is HOT, RED, and DRY (or only slightly moist). Sweating has completely stopped because the brain's thermostat has failed!
Severe confusion, extreme agitation, staggering, bizarre combative behaviour, slurred speech.
Violent seizures (fits), leading rapidly to collapse and coma.
First Aid Management
Call for emergency help / arrange URGENT transport immediately. Heat stroke kills quickly.
Move to a cool place. Remove as much outer clothing as possible.
Cool the body RAPIDLY and continuously:
Best method: Immerse the body (up to the neck) in cold water if a tub is feasible, OR douse and spray them with cold water continuously.
Alternative: Wrap them completely in a cold wet sheet and keep pouring cold water over the sheet while fanning them vigorously to force evaporation.
Apply ice packs or cold packs to the neck, armpits, and groin (where large blood vessels are close to the surface, cooling the blood rapidly).
Continue this aggressive cooling until their temperature falls to about 38°C, or their clinical state improves. (If you have no thermometer, cool them aggressively for ~20 minutes).
If they are conscious and alert: give sips of cool water. If they are drowsy or confused — give absolutely nothing by mouth (choking risk).
If unconscious but breathing ➔ place in the recovery position, monitor breathing constantly; perform CPR if breathing stops.
Even if they completely recover at the scene, they MUST be referred to a hospital for review — severe internal organ damage can follow hours later.
📝 Comparison Table: Exhaustion vs. Stroke
Feature
HEAT EXHAUSTION
HEAT STROKE
Severity
Moderate
LIFE-THREATENING EMERGENCY
Skin
Cool, pale, CLAMMY, heavy sweating
HOT, RED, DRY (or slightly moist)
Temperature
Normal or slightly raised
Very high (≥ 40°C)
Consciousness
Dizzy, weak but alert
Confused, bizarre behavior, seizures, coma
Sweating
Yes (The body is still trying to cool itself)
May have completely stopped (System failure)
First Aid Action
Rest, fluids, gentle cooling — improves in 30 min
RAPID aggressive cooling + Urgent hospital transport
Topic 9: Other Common Medical Emergencies
9.1 Seizures / Convulsions
Sudden, uncontrolled electrical activity in the brain causing violent jerking movements, loss of consciousness, incontinence, and tongue biting. In Uganda, always heavily suspect severe Malaria as the cause in children! Other causes: hypoglycaemia, meningitis, head injury, or eclampsia in pregnant women.
First Aid: Protect from injury (move hard objects, cushion the head). Note the exact time it started. Do NOT restrain them. Do NOT put spoons or cloths in their mouth. When the fit stops, place in the recovery position. Refer urgently if: the fit lasts > 5 minutes, repeats without waking up, it is their first-ever fit, they are pregnant, diabetic, or a child with a high fever.
A convulsion triggered strictly by a rapid rise in body temperature (fever), often from Malaria or severe respiratory infections. Usually brief and self-limiting. First Aid: Protect the child from injury as above. Actively cool the child (remove heavy blankets/sweaters, use tepid sponging, give paracetamol syrup if conscious). Place in recovery position after, and refer immediately for cause-finding (like a Malaria RDT test).
9.3 Anaphylaxis (Severe Allergic Reaction)
A severe, incredibly rapid allergic reaction to drugs (Penicillin), bee/wasp stings, or certain foods (peanuts). Signs include massive swelling of the face/lips/tongue, hives, severe wheezing/stridor, hoarse voice, crashing blood pressure, and collapse. First Aid: Call for help urgently. Lay flat with legs raised (or sit up ONLY if breathing is heavily impaired). The only life-saving treatment is Adrenaline (Epinephrine) 0.5 mg IM into the anterolateral thigh — repeat every 5–10 mins as needed per clinical guidelines. Referral is mandatory!
9.5 Hyperventilation (Anxiety/Panic)
Rapid over-breathing, often from extreme anxiety or panic. Signs: fast deep breathing, extreme dizziness, tingling/numbness in fingers and lips, chest tightness, feeling of suffocation. First Aid: First, rule out asthma or a heart attack! Once confirmed as anxiety, offer calm, firm reassurance. Take the casualty to a quiet place. Coach them to breathe slowly with you (in for 4 seconds, out for 4 seconds). Do NOT use a paper bag (modern guidelines reject this due to hypoxia risks). Refer if the cause is unclear.
9.6 Acute Abdominal Emergencies
Conditions like acute appendicitis, intestinal obstruction, perforated ulcers, or ectopic pregnancy. Red flags: Worsening pain localising to the lower right abdomen, a rigid "board-like" stomach, vomiting, inability to pass gas/stool, or fainting in a woman of child-bearing age (huge sign of ectopic internal bleeding!). First Aid: Give absolutely NOTHING by mouth (NPO). Rest, monitor vitals, arrange urgent surgical referral. Do NOT give strong painkillers that hide the symptoms from the surgeon, and NEVER give laxatives.
9.7 Severe Malaria (Ugandan Context)
In Uganda, malaria is a leading cause of emergency illness. Think of it in ANY case of fever, convulsions, confusion, severe anaemia, or "flu-like" illness. Danger signs: Impaired consciousness, violent convulsions, severe paleness (anaemia), jaundice (yellow eyes), dark coca-cola coloured urine, extreme weakness, and breathing difficulty. Action: Refer urgently. Facility management involves testing (RDT), IV Artesunate, treating convulsions with diazepam, correcting low sugar, and giving fluids very carefully.
9.8 Suffocation
Suffocation results when fresh air is prevented from reaching the air passages by an external physical obstruction. Causes include a plastic bag tied over the head, a soft pillow pressed over the face, or falling face-first into loose sand. A baby may easily be suffocated by simply lying face down on a soft pillow or cushion.
General Signs and Symptoms:
Severe difficulty in breathing. The rate and depth of breathing massively increases as they fight for air.
Breathing may become incredibly noisy, presenting with loud snoring or gurgling (a low bubbling sound).
Possible frothing at the mouth.
Cyanosis: Deep blueness of the face, lips, and fingernails due to oxygen starvation.
Severe confusion, extreme panic, and a rapid lowering of the level of responsiveness.
Possible unconsciousness, and eventually, breathing may stop completely.
Aim of First Aid: Restore the supply of fresh air to the casualty instantly and seek medical aid.
Management:
Immediately remove any obstruction (pull off the plastic bag, remove the pillow) or move the casualty to fresh air.
If the casualty is conscious and breathing: reassure them constantly and observe their breathing carefully.
If the casualty is unconscious: open the airway (head-tilt, chin-lift) and check breathing for 10 seconds.
Complete the ABC of resuscitation if required (start CPR if they are not breathing).
If they are unconscious but breathing normally, place the casualty safely in the recovery position.
Seek medical aid immediately. If in any doubt about their recovering condition, arrange for moving them to the hospital, as brain damage from suffocation can be delayed.
Quick Revision Summary (Exam Points)
Emergency
KEY Action to Memorize
Fainting
Lay flat, raise legs 30cm, fresh air, sit up gradually.
Hypoglycaemia
Give fast Sugar NOW (15g), repeat in 15 min. If unconscious ➔ IV dextrose/glucagon, give strictly NPO (nothing by mouth).
Hyperglycaemia
Give plain water + URGENT hospital referral (treats DKA).
Asthma attack
Sit UPRIGHT leaning forward, Salbutamol 4 puffs every 4 min, NEVER lay them flat.