Your Quiz is Ready
This quiz is for logged in users only.

Your Quiz is Ready Read More »

Foundations of Nursing related content
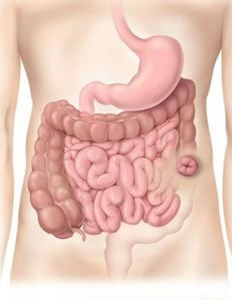


Procedure of the Colostomy care in children


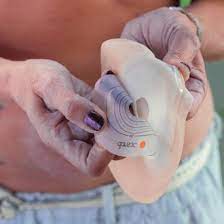

Perform Colostomy Care Read More »

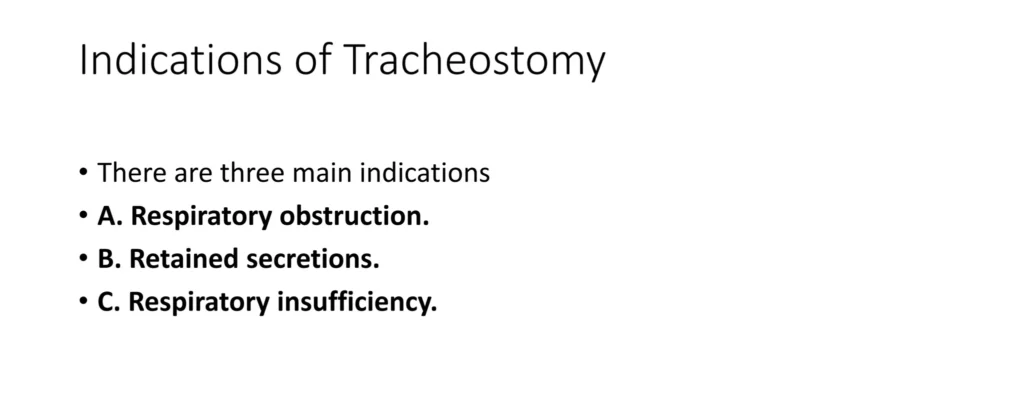
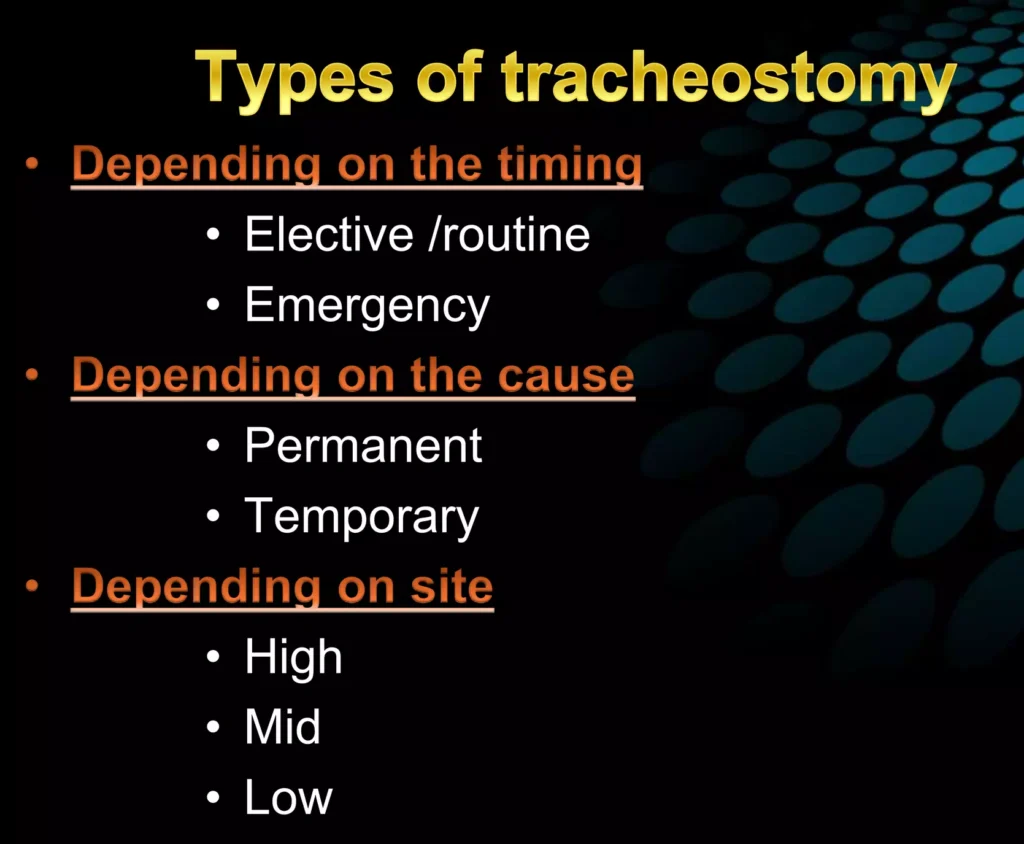
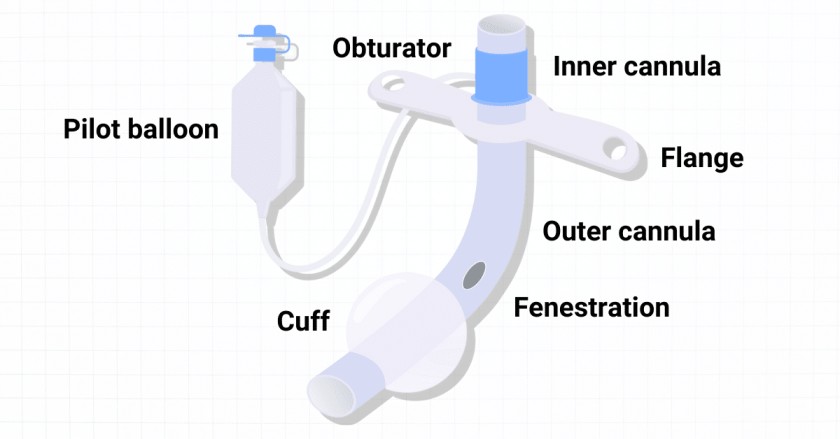
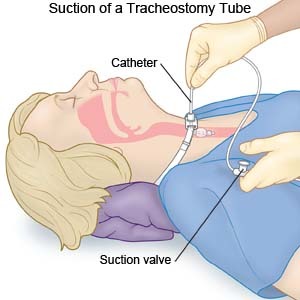
Tracheostomy tubes are essential for patients requiring a long-term airway management. These tubes come in various types and sizes, designed to meet individual needs and anatomical variations.
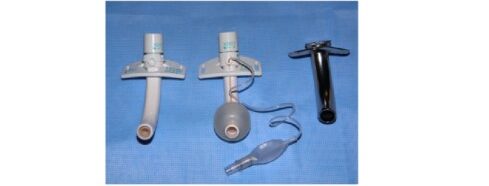
Types of Tracheostomy Tubes:
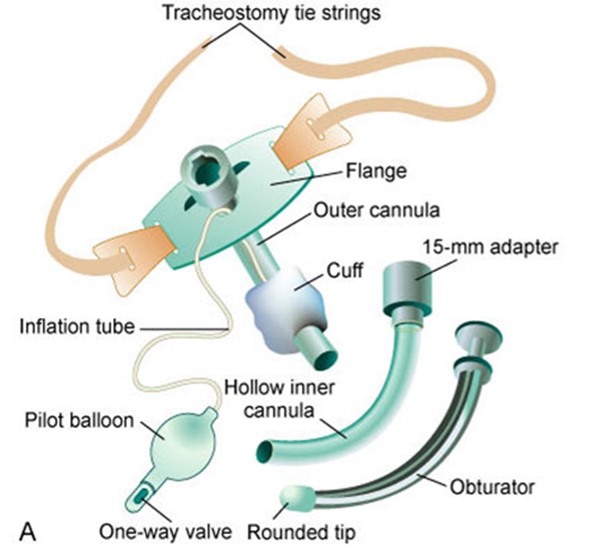
Components of a Tracheostomy Tube:
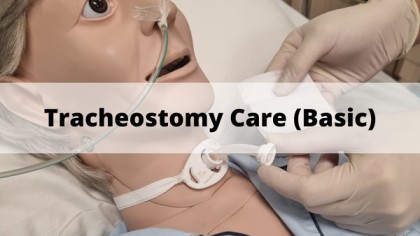
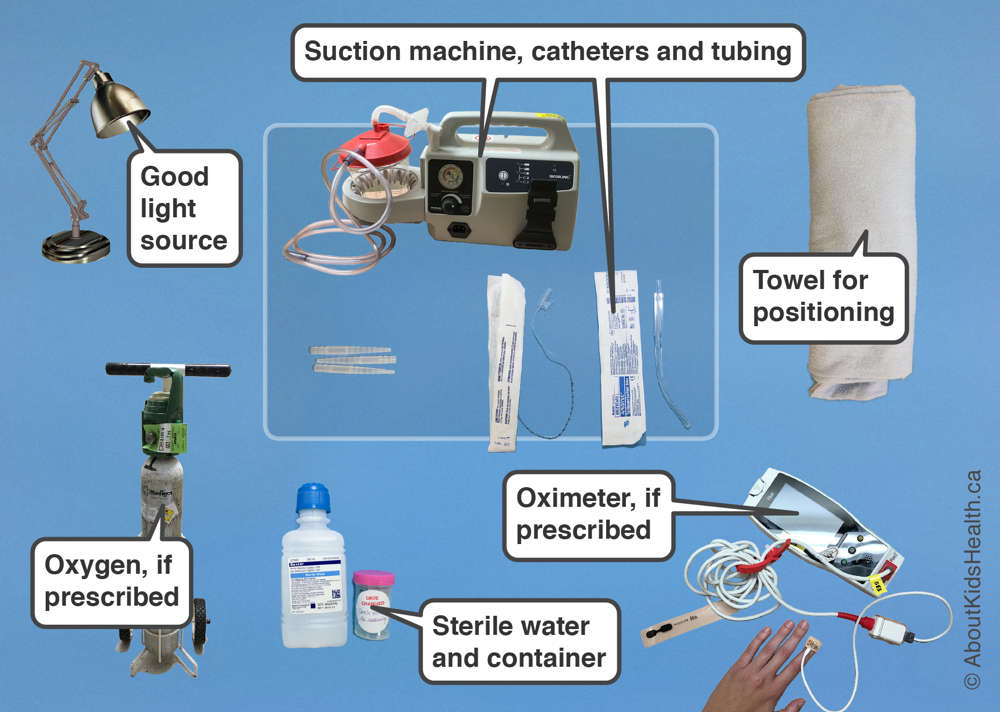
Suctioning of the tracheostomy tube is necessary to remove mucus, maintain a patent airway, and avoid tracheostomy tube blockages. The frequency of suctioning varies and is based on individual patient assessment.
Procedure
Note:
Special safety considerations:
Perform Tracheostomy Care Read More »

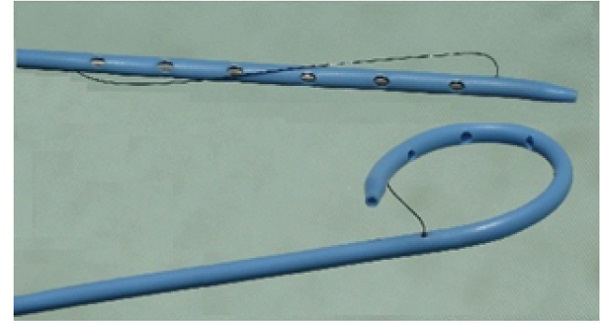
Pigtail Drain:
Disadvantages:
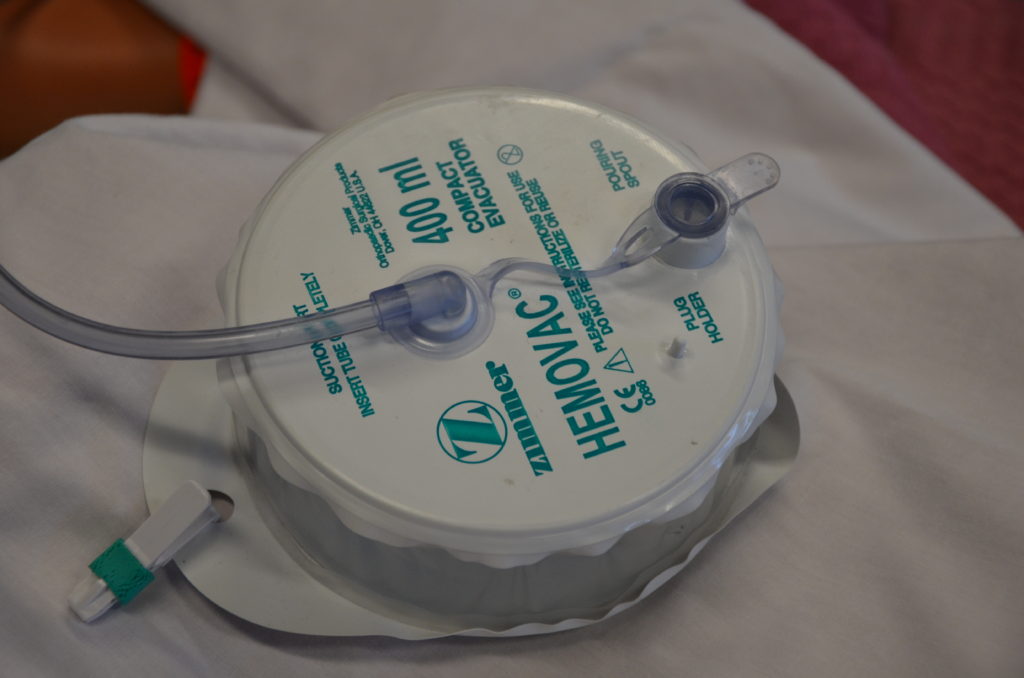
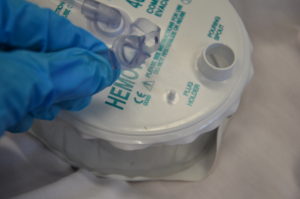
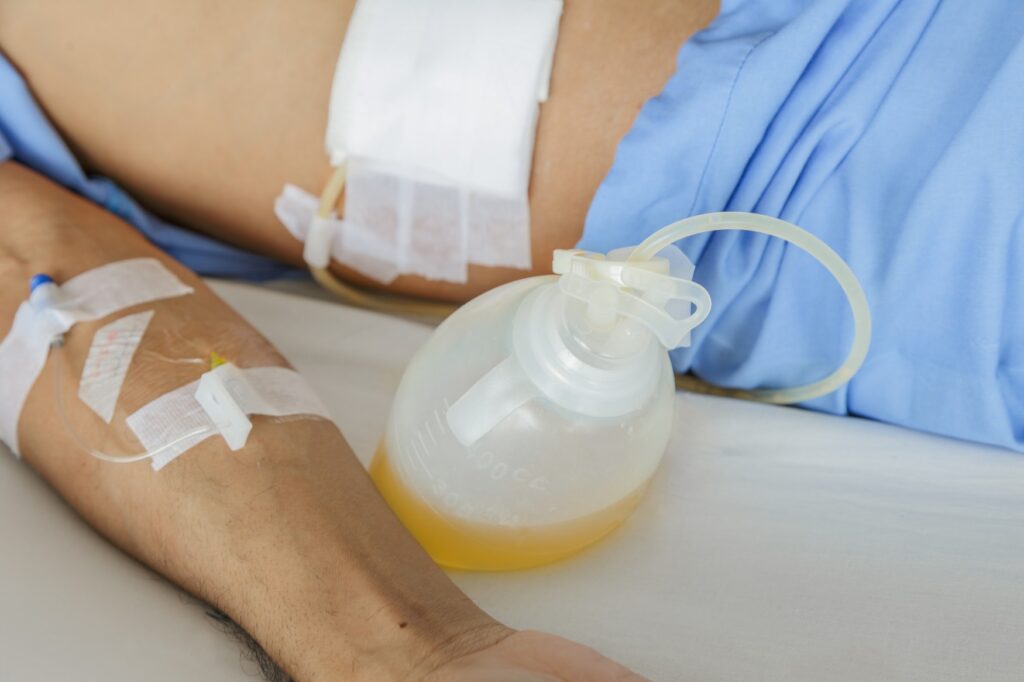
Hemovac Drain:
Disadvantages:
Penrose Drain (Open Drain):
Disadvantages:
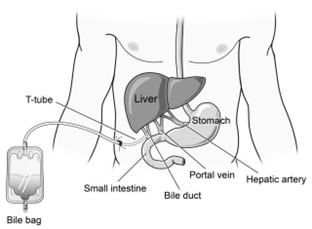
T-Tube:
Disadvantages:

Chest Tube (Closed Drain):
Disadvantages:
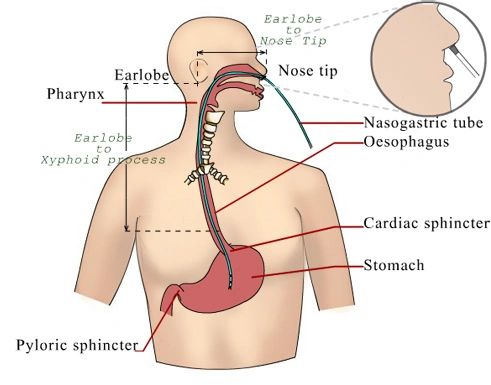
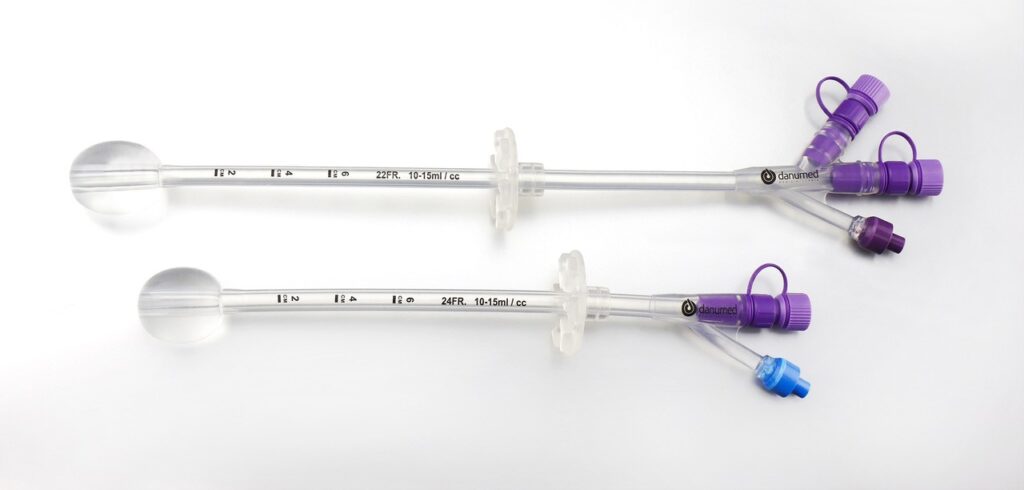
Nasogastric Tube (NG Tube):
Disadvantages:
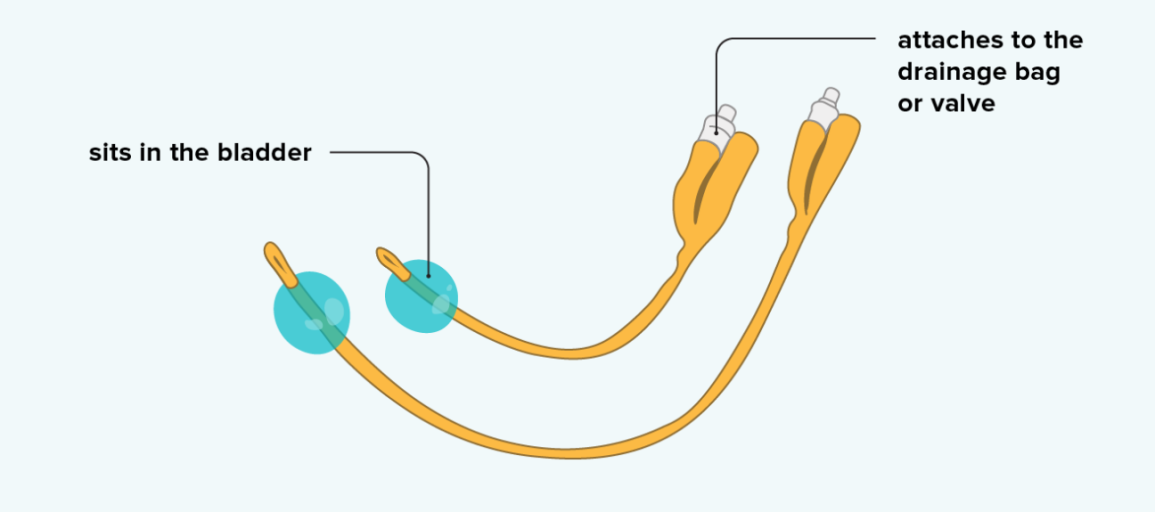
Urinary Catheters:
Disadvantages:
Hospital Standards Procedures.

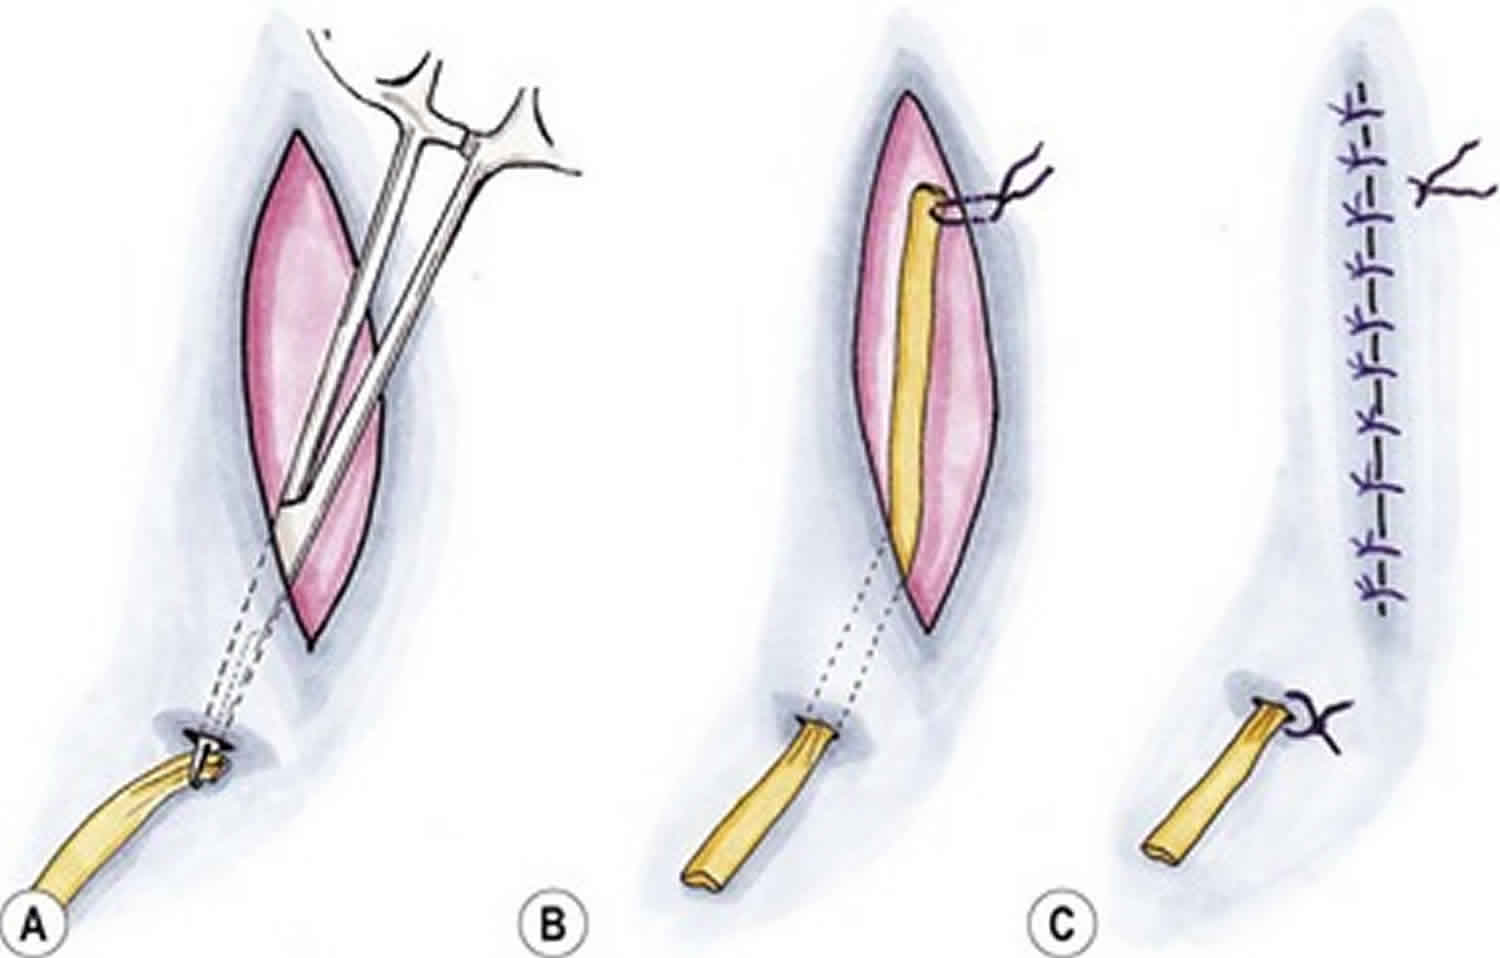
PERFORM SHORTENING AND REMOVAL OF DRAINS Read More »

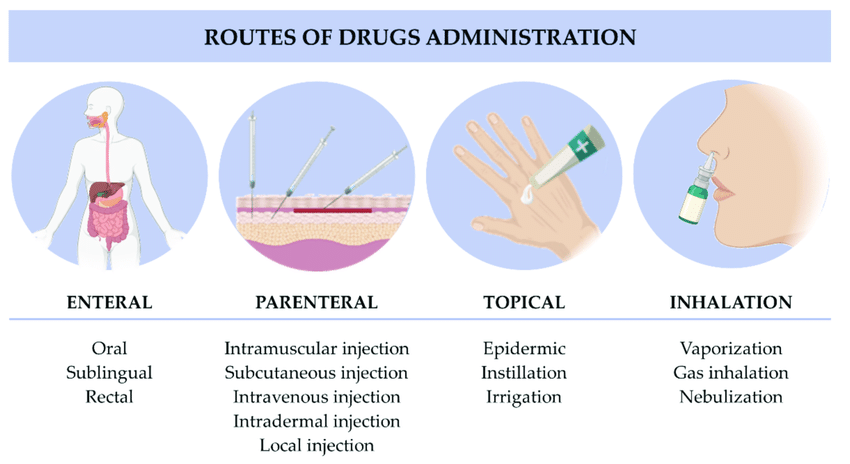
Inhalation is the breathing of air vapor or volatile medicine into the lungs.
Types
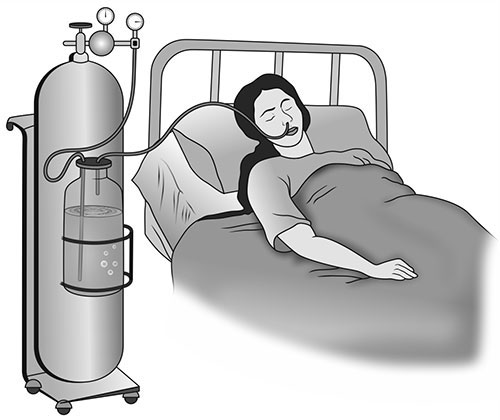
It is given when the respiratory tract is diminished as in chest injuries, cardiac failure and pneumonia.
REQUIREMENTS FOR OXYGEN ADMINISTRATION
Clean tray
Bedside
PROCEDURE
Parts of an Oxygen Flowmeter

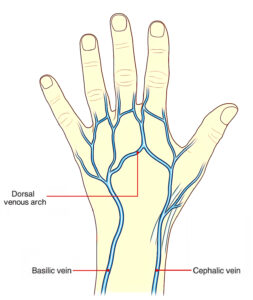
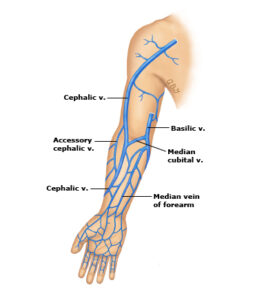
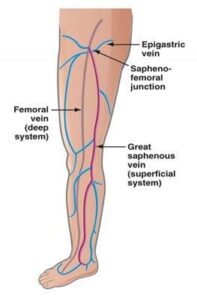
SOME OF THE RECOMMENDED VEINS FOR INTRAVENOUS INFUSION
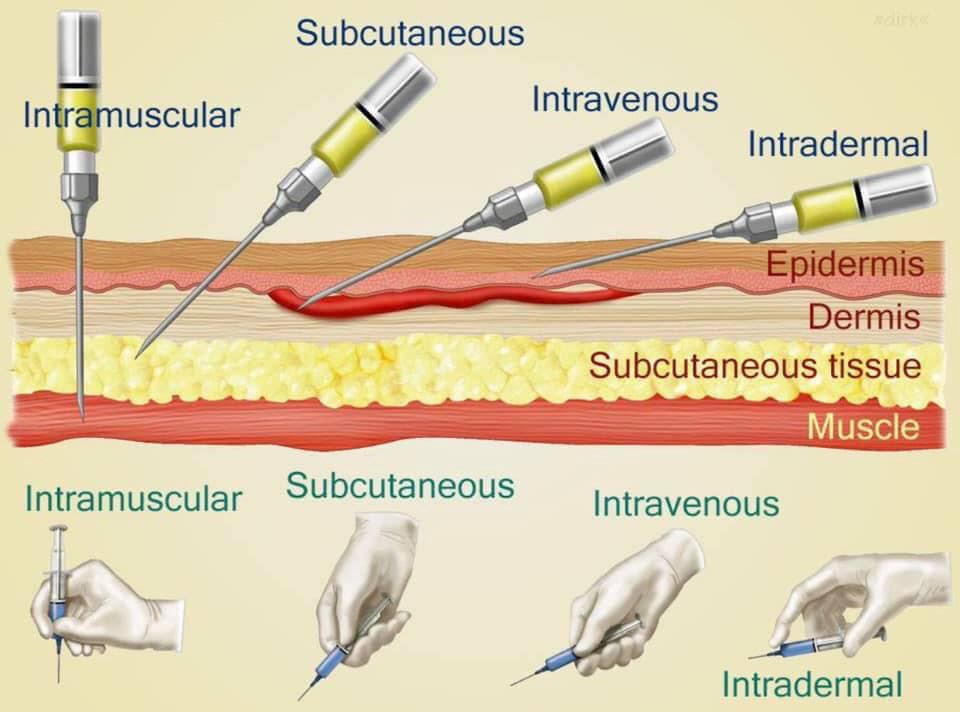
Common Sites for Intramuscular Injections
1. Abscess Formation: This occurs when unsterile needles and syringes are used, or when oily substances are not injected deep enough. The injection site becomes inflamed and filled with pus.
2. Nerve Injury: Incorrectly positioning the needle can damage nearby nerves, causing pain, numbness, weakness, or paralysis.
3. Tissue Damage/Necrosis: Injecting too much medication, using irritating substances, or repeated injections in the same site can lead to tissue damage and cell death.
4. Hematoma: A hematoma forms when blood leaks into the surrounding tissue after the injection, causing a bruise or swelling.
5. Pain and Discomfort: Intramuscular injections can be painful, especially if the medication is irritating or the injection technique is not correct.
6. Allergic Reactions: Some individuals may have an allergic reaction to the medication or the ingredients in the solution.
7. Injection into a Blood Vessel: The needle may unintentionally enter a blood vessel, leading to potential complications like drug overdose or embolism.
8. Delayed-Onset Muscle Soreness: Some medications can cause muscle soreness or stiffness that may not appear until several hours or days after the injection.
9. Infection: Improper sterile technique can lead to infection at the injection site.
10. Air Embolism: Although rare, air can be injected into the bloodstream, leading to complications like respiratory distress or cardiac arrest.
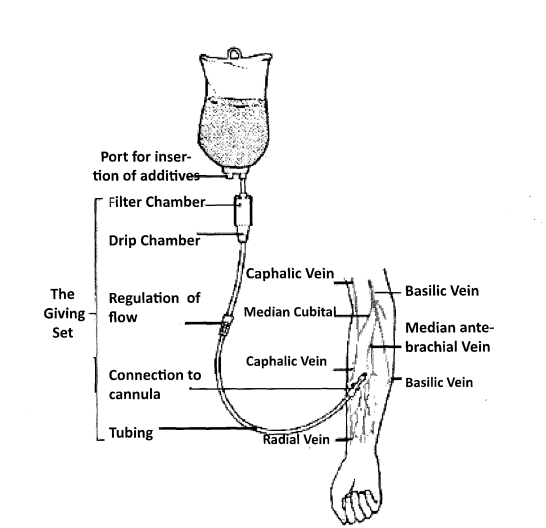
To calculate the drop rate, use the following formula:

Example:
The doctor has prescribed 1000 mls of 5% dextrose infusion to run in 10 hours. How many drops per minute will you regulate if the infusion set has a drop factor of 20?

Administer drugs appropriately Read More »
The Nursing process is an organized, systematic, dynamic method of giving individualized nursing care that focuses on identifying and treating unique responses of individuals or groups, to actual or potential alterations in health. (Nursing procedure Manual, 2015)
OR:
The nursing process is defined as a systematic, rational method of planning that guides all nursing actions in delivering holistic and patient-focused care.
The first phase of the nursing process is assessment. It involves collecting, organizing, validating, and documenting the clients’ health status. Assessment involves data collection which is the process of gathering information regarding a client’s health status. The main methods used to collect data are health interviews and physical examination.
A nursing diagnosis is a clinical judgment concerning a human response to health conditions/life processes, or a vulnerability to that response, by an individual, family, group, or community.
Scenario A: A patient complaining of fevers, on thermometer reading it indicates 38°C.
From NANDA 2024 – 2026 fevers have hyperthermia i.e.
Hyperthermia related to increased leukocyte activity evidenced by the thermometer reading of 38°C.
Scenario B: A patient complained of headache of the forehead since the last 2 days after a minor head injury following a fight. On examination the pain was at 3 on a 0 – 5 pain scale.
From NANDA 2024 – 2026 headache is described as Acute pain since it has been present less than 3 months.
- Acute pain related to trauma to the head evidenced by the patient’s verbalization of feeling headache of 3 on a 0 – 5 pain scale.
Scenario: A patient reported vomiting for 1 day after ingesting chips and chicken. On examination the patient had no signs of dehydration.
From NANDA 2024 – 2026 vomiting does not have an actual nursing diagnosis it only has a potential nursing diagnosis which is risk for inadequate fluid volume.
– Risk for inadequate fluid volume related to vomiting.
The planning stage is where goals and outcomes are formulated that directly impact patient care. Planning phase is divided into:
Goals should be:
Goals are divided into 3 categories i.e.
This what a nurse expects the patient to present after provision of the nursing interventions. Its divided into 2 i.e. short term and long term outcomes.
| No. | Short term goal | Expected outcome |
|---|---|---|
| 1. | To reduce the patient's temperature to between 36.0° C to 37.4°C within 30 minutes. | The patient will verbalize that he nologer feels feverish. Thermometer reading will be between 36.0° C to 37.4°C. |
| No. | Intermediate term goal | Expected outcome |
|---|---|---|
| 1. | To relieve patient from fevers within the 72 hours. | The patient will verbalize that he feels no fevers after the discontinuation of anti-pyretics. Thermometer reading will be between 36.0° C to 37.4°C. |
The implementation phase of the nursing process is when the nurse puts the treatment plan into effect. It involves action or doing and the actual carrying out of nursing interventions outlined in the plan of care.
The implementation phase is divided into two parts:
Nursing interventions are specific actions or treatments that nurses perform to help patients achieve the outcomes identified in the care plan. These interventions are based on scientific knowledge, clinical judgment, and the nurse's skills. They are designed to:
Nursing interventions can be categorized in various ways, such as:
The rationale in the implementation phase refers to the scientific reason or justification behind each nursing intervention. It explains *why* a particular intervention is chosen and *how* it is expected to achieve the desired patient outcomes. Providing a clear rationale for interventions is crucial for several reasons:
When documenting nursing interventions, it is often best practice to include a concise rationale, either explicitly or implicitly through the choice of evidence-based actions, to demonstrate the thoughtful and purposeful nature of nursing care.
| Interventions | Rationale |
|---|---|
| Provision of tepid sponging | to allow evaporative cooling |
| Loosen or remove excess clothing and covers. | Exposing skin to room air decreases heat and increases evaporative cooling. |
| Provide a tepid bath or sponge bath. | A tepid sponge bath is a non-pharmacological measure to allow evaporative cooling. Do not use alcohol as it can cool the skin rapidly and may cause shivering. |
| Apply ice packs to the patient covered in the towels i.e. by placing ice packs in the groin area, axillae, neck, and torso however when the patient’s core temperature is lowered to 39°C, it is necessary to remove the ice packs from the patient to avoid overcooling which can result in hypothermia. | To effectively cool the core temperature. |
| Monitor the skin during the cooling process. | To prevent damage to the skin which might occur due to prolonged exposure. |
| Raise the side rails and lower the bed at all times. | To ensure the patient’s safety even without the presence of seizure activity. |
| Administration of prescribed drugs 1. Antipyretics 2. Anti-seizure drugs 3. Antibiotics or anti-malarial |
To eliminate the cause of fevers |
| Keep clothing and bed linens dry. | To promote comfort and helps prevent chilling since diaphoresis occurs during defervescence. |
Evaluating is the fifth step of the nursing process. This final phase of the nursing process is vital to a positive patient outcome. Once all nursing intervention actions have taken place, the team now learns what works and what doesn’t by evaluating what was done beforehand. This is the past tense of the outcome if they have been achieved.
| Outcome |
|---|
| Short term outcome Patient verbalized that he no longer feels fevers of anti pyretics the end of 30minutes Thermometer reading was 36.7 C after 30 minutes |
| Inter-mediate outcome Patient verbalized that his fevers were relieved after 72 hours following discontinuation of anti-pyretics Thermometer reading was 36.7 C after 72 hours following discontinuation of anti-pyretics |
Assessment:
Diagnosis:
Planning (Goals/Expected Outcomes):
Goals:
Expected Outcomes:
The patient will verbalize that he no longer feels feverish. Thermometer reading will be between 36.0°C to 37.4°C.
Implementation:
Rationale:
Evaluation:
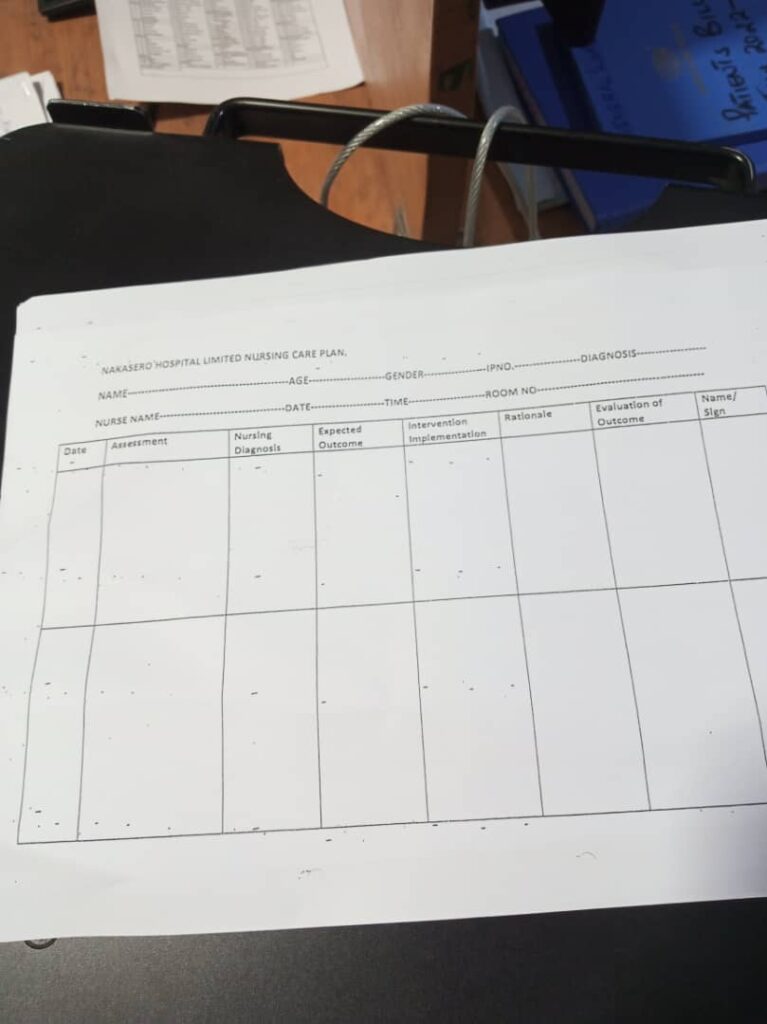
| Assessment | Diagnosis | Planning (Goals or Expected Outcomes) | Implementation/ Interventions | Rationale | Evaluation |
|---|---|---|---|---|---|
| Fever | Hyperthermia related to leucocyte activity as evidenced by an elevated temperature of 39° C. | Reduce fever to 37° C within 30 minutes. |
|
|
Fever reduced to 37° C |
| Headache | Acute Pain related to malarial infection evidenced by patient verbalizing headache. | Alleviate headache within 40 minutes. |
|
|
Headache Alleviated within 40 minutes. With a pain scale reading of 1/10. |
| Myalgias | Impaired Physical Mobility related to muscle pain and weakness as evidenced by difficulty in movement. | Improve mobility and reduce muscle pain within 5 days. |
|
|
Improved mobility and reduced muscle pain After 5 days. |
| Nausea | Nausea related to changes in eating habits as evidenced by patient complaints and increased salivation | Alleviate nausea within 1 hour. |
|
|
Patient verbalised That no nausea After 1 hour. |
| Vomiting | Risk for inadequate fluid volume related to unpleasant sensory stimuli | The client will report decreased severity or elimination of nausea and vomiting. |
|
|
The client reported elimination of nausea and vomiting. |
| Diarrhea | Risk for inadequate Nutritional intake related to less food intake as evidenced by watery stool. | Achieve optimal nutritional intake. |
|
|
Achieved optimal nutritional intake |
| Dehydration | Risk for impaired fluid volume balance related to diarrhea, nausea and vomiting. | Patient will maintain hydration as evidenced by adequate intake and output, vital signs, and skin turgor |
|
|
Patient maintained hydration. |
Expected outcomes while managing a patient with glomerulonephritis: Came as a Question in 2023
Expected outcomes, also known as patient outcomes or desired outcomes, are measurable, observable, and achievable goals that a patient is expected to attain as a result of nursing care. They represent the desired changes in a patient's health status, behaviors, or perceptions. Expected outcomes are crucial components of the planning phase of the nursing process, as they provide a benchmark against which the effectiveness of nursing interventions can be evaluated.
Expected outcomes are always written in the future tense. This is because they describe what the patient will do or will achieve after the nursing interventions have been implemented. The future tense emphasizes that these are goals to be reached, rather than current states. Examples include phrases like "patient will demonstrate," "patient will exhibit," "patient will regain," or "patient will verbalize."