Join Semester 1 Telegram group


Join Semester 1 Telegram group Read More »

Strictly for semester one.
Join Semester 1 Telegram group Read More »
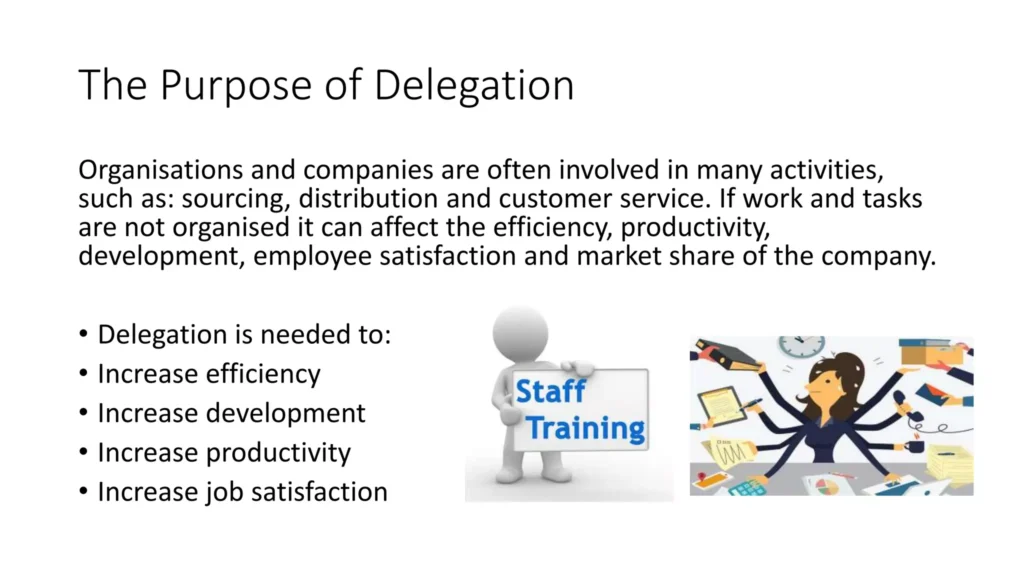
A manager alone cannot perform all the tasks assigned to him. In order to meet the targets, the manager should delegate authority. To delegate is to give another person some of one’s authority or in other words, to give another person the power to make decisions.
Delegation of Authority means division of authority and powers downwards to the subordinate.
Delegation of authority can be defined as subdivision and sub-allocation of powers to the subordinates in order to achieve effective results.
Delegation is the assignment of responsibility or authority to another person (normally from a manager to a subordinate) to carry out specific activities.
Delegation is the assignment/transfer of authority and responsibility to another person to carry out specific activities.
Delegation: Delegation is transferring to a competent individual the authority to perform a selected nursing task in a selected situation. (The National Council of State Boards in Nursing, 1995).
Delegator: The delegator possesses the authority to delegate by virtue of both positions in the agency.
Delegate: The delegate receives direction for what to do from the delegator.
While delegating, the delegator transfers to a competent individual (delegate) the authority and responsibility to perform a selected task (nursing task) in a selected situation (nursing situation). while retaining accountability for the outcome (Eleanor .J. Sullivan 2005,2013).
The following five rights to delegation are presented from the perspectives of both nursing service administrator and staff nurse.
These rights entail delegating tasks to:
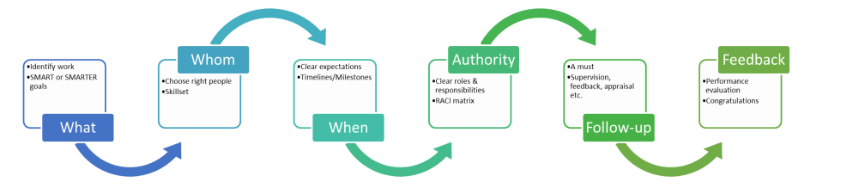
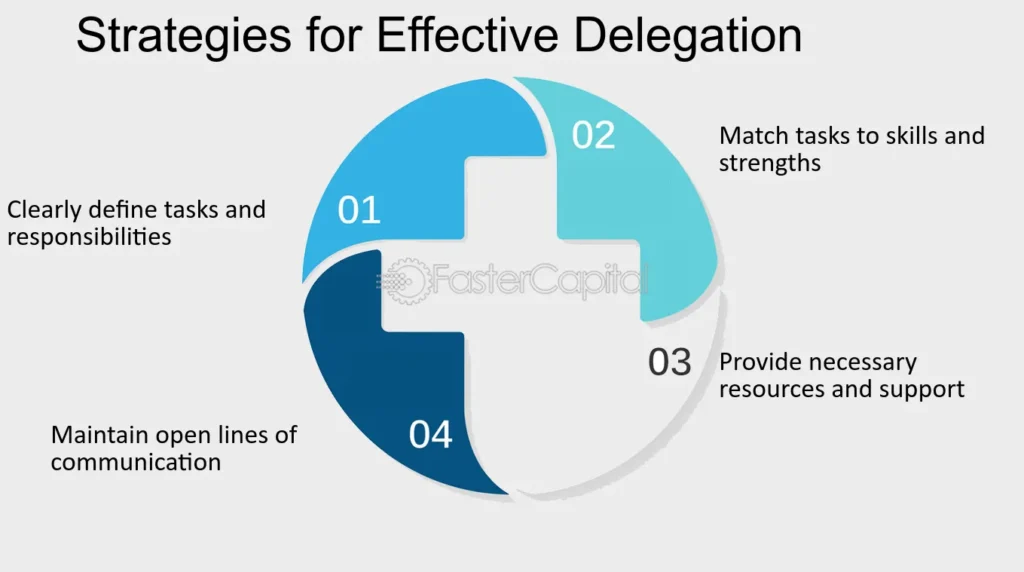
1. Define/Identify the task(Determine what you will delegate.): The first step is to identify the task or responsibility that can be delegated. Managers should consider the nature of the task, its complexity, and the skills required to complete it
2. Decide on the delegate/Select the right person: Once the task is identified, managers need to select the most suitable person to delegate it to. This involves considering the individual’s skills, knowledge, experience, and availability
3. Determine the task/Provide clear instructions/Clarify the desired results.: It’s important to provide clear and detailed instructions to the person who will be responsible for the task. This includes explaining the objectives, expectations, deadlines, and any specific guidelines or requirements
4. Reach an agreement/Delegate authority: Along with assigning the task, managers should delegate the necessary authority to the individual. This means granting them the power to make decisions, access resources, and take necessary actions to complete the task
5. Monitor performance/Monitor progress: Monitor the progress of the delegated task. Regular check-ins and updates help ensure that the task is on track and any issues or challenges can be addressed promptly
6. Provide feedback: Once the task is completed, managers should provide feedback to the individual. This includes recognizing their efforts, acknowledging their achievements, and offering constructive feedback for improvement
To the organization:
To the manager/delegator/In-charge
To the delegatory
Environmental Factors:
Nurse Manager:
Delegatory:

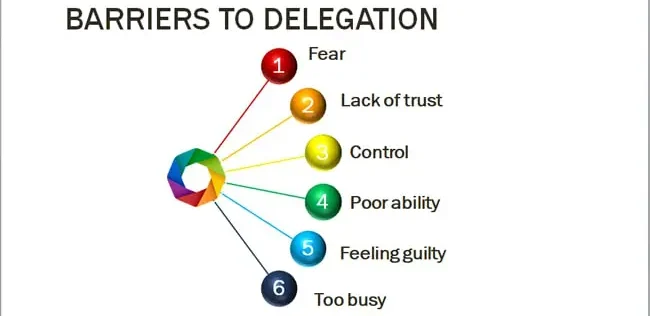
Under delegation: Under delegation happens when:
The person delegating doesn’t properly equip and guide the delegate.
Over delegation: Over delegation occurs when the person delegating gives the delegate too much authority (the right to act) and responsibility (the duty to accomplish a task). This can lead to loss of control over the situation.
Reverse delegation: In reverse delegation, someone with less authority delegates tasks to someone with more authority. For example, a staff member asks their manager to do a task that they should be doing themselves. This isn’t an efficient use of the manager’s time. Instead, the manager should help the staff member manage their time better and delegate responsibilities effectively.
Unnecessary duplication: If multiple staff members are doing the same task, it may be because the manager has assigned related tasks to too many people. To avoid unnecessary duplication, tasks should be delegated to as few people as possible. This streamlines reporting and prevents confusion about who is responsible for what task.
Improper delegation involves assigning tasks at the wrong time, to the wrong person, or for the wrong reasons. This can also include giving tasks that are beyond the capability of the person assigned.
Upward delegation happens when a subordinate delegates a task back to their manager, relying on the manager to complete the task instead of taking responsibility themselves.
Upward delegation involves a subordinate seeking assistance or guidance from their manager on tasks they should be handling themselves. It’s more about seeking help or approval from a higher authority rather than attempting to delegate tasks upward. On the other hand, reverse delegation involves a lower-ranking individual delegating tasks to someone with more authority or a higher rank, which goes against the usual flow of delegation within an organization.
Full Delegation: Full delegation involves assigning complete authority and responsibility for a task or role to another person or group. The person or group has the autonomy to make decisions and take actions without constant supervision or approval. E.G. A manager delegates the responsibility of managing a project to a team leader. The team leader has the authority to make decisions, allocate resources, and oversee the project from start to finish.
Partial Delegation: Partial delegation involves assigning a portion of authority and responsibility for a task or role to another person or group. The person or group shares the responsibility with the delegator but may require guidance or approval for certain aspects.E.G. A manager delegates the responsibility of handling customer complaints to a customer service representative. The representative can resolve most complaints independently but may need to consult the manager for complex or escalated issues.
Conditional Delegation: Conditional delegation involves assigning authority and responsibility to another person or group based on specific conditions or circumstances. The delegation is contingent upon meeting certain criteria or fulfilling certain requirements. E.G. A manager delegates the authority to approve expenses to an employee but only if the expenses fall within a specified budget limit. The employee can make decisions within the set limit, but any expenses exceeding that limit require approval from the manager.
Formal Delegation: Formal delegation occurs when authority and responsibility are granted according to the formal structure and hierarchy of an organization. It follows established procedures and is documented in official records or agreements. E.G. A company’s CEO delegates the authority to sign contracts to the Chief Legal Officer. This delegation is formalized through a written agreement that outlines the scope of authority, limitations, and reporting requirements.
Informal Delegation: Informal delegation occurs when authority and responsibility are granted outside the formal structure and hierarchy of an organization. It is based on trust, relationships, and informal agreements rather than official procedures. E.G. A team leader delegates the responsibility of coordinating team meetings to a team member who has shown strong organizational skills. This delegation is based on the leader’s trust in the team member’s abilities and does not involve formal documentation
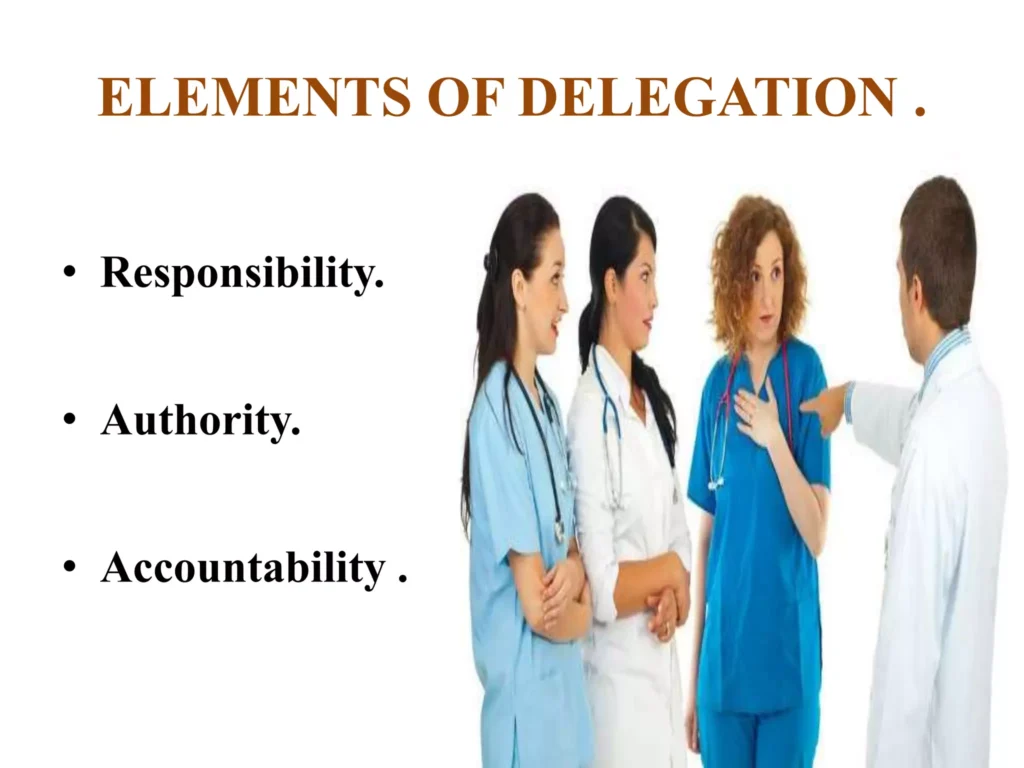
Delegation depends on a balance of responsibility, accountability and authority.
Functional clarity – The functions to be performed, methods of operation and results expected must be clearly defined.
Authority | Responsibility |
|
|
|
|
|
|
|
|
Dos:
Don’ts:
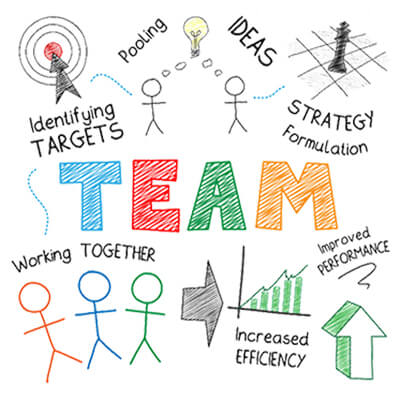
A team is a small number of people with complementary skills who are committed to a common purpose, set of performance goals, and approach for which they hold themselves mutually accountable (Eleanor.J.Sullivan,2005,2013) Effective leadership and management in nursing).
A team refers to two or more people acting interdependently in a unified manner towards the achievement of a common goal.
A health team is a group of people who share a common health goal.
Members of a health team include technical staff i.e. doctors, Clinical Officers, laboratory tech, nurses midwives, radiologists, and support staff i.e. cooks, cleaners, drivers, watch men etc.
Team planning is the process of developing strategic and operational plans for your team and aligning the team’s work with the business’s goals.
Teamwork: The process of people actively working together to accomplish common goals.
Group | Team | |
Focus | Strong, clearly focused | Shared leadership roles |
Leadership Roles | Shared | Individual and mutual |
Accountability | Individual | Individual and mutual |
Purpose | Same as broader organizational mission | Specific team purpose that the team delivers |
Work Products | Individual work products | Collective work products |
Meetings | Runs efficient meetings | Encourages open-ended discussions, active problem solving |
Performance Measurement | Indirectly by its influence on others | Directly by collective work products |
Decision Making | Discusses, decides, and delegates | Discusses, decides, and does real work together |
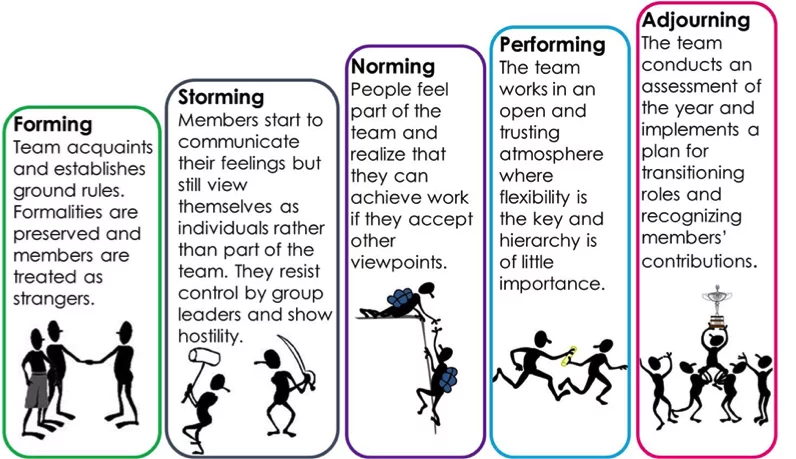
These stages are commonly known as: Forming, Storming, Norming, Performing, and Adjourning. Tuckman’s model explains that as the team develops maturity and ability, relationships establish, and leadership style changes to more collaborative or shared leadership.
1. Forming
2. Storming
3. Norming
4. Performing
5. Adjourning

Recognition:
Nature of work:
Responsibility:
Remuneration:
Adequate staffing:
Resources and equipment:
Incentives:
Other include;
TEAMWORK/TEAM PLANNING/TEAM PROCESS Read More »

The word “negotiation” originated from the Latin expression, “negotiatus“, which means “to carry on business”.
Defined:
Negotiating is the process of communicating back and forth, for the purpose of reaching a joint agreement about differing needs or ideas.
It is a collection of behaviors that involves communication, sales, marketing, psychology, sociology, assertiveness and conflict resolution.
A negotiator may be a buyer or seller, a customer or supplier, a boss or employee, a business partner, a diplomat or a civil servant. On a more personal level negotiation takes place between a spouse’s friends, parents or children.
In a hospital setting, there’s a negotiation taking place between the nursing staff and the hospital administration regarding staffing levels and workload management. Minimum two parties:
Predetermined goals:
Expecting an outcome:
Resolution and Consensus:
Parties willing to modify their positions:
Parties should understand the purpose of negotiation:
|
Negotiation is a process of communication in which two or more parties with different interests try to reach an agreement.
Two departments within a healthcare organization, the nursing department and the finance department, are engaged in a negotiation regarding budget allocation for staffing and equipment procurement. Define the Goals of Both Parties:
Establish a Neutral Position:
Encourage Mutual Understanding:
Provide More Than One Acceptable Solution:
Reach an Acceptable Agreement:
|
Day to Day Negotiation at workplace– Every day we negotiate something or the other at the workplace either with our superiors or with our fellow workers for the smooth flow of work. These are called day to day negotiations.
Example: Negotiating Work Schedule Sarah needs to attend her child’s school event during work hours. She negotiates with her supervisor to adjust her work schedule for that day, offering to make up the missed time later in the week. Her supervisor agrees to her request, understanding the importance of balancing work and personal commitments. |
Commercial negotiations– Commercial negotiations are generally done in the form of a contract. Two parties sit face to face across the table, discuss issues between them and come to conditions acceptable to both the parties. In such cases; everything should be in black and white. A contract is signed by both the parties and they both have to adhere to its terms and conditions.
Example: Supplier Contract Negotiation ABC Corporation is negotiating a contract with a supplier for the procurement of raw materials. Both parties sit down to discuss pricing, delivery schedules, quality standards, and payment terms. After thorough negotiations, they agree on the terms and conditions outlined in the contract, which is signed by both parties. |
Legal Negotiation– Legal negotiation takes place between individual and the law where the individual has to take by the rules and regulations laid by the legal system and the legal system also takes into account the needs and interest of the individual.
Example: Divorce Settlement Negotiation John and Mary are going through a divorce and need to negotiate the division of assets, child custody, and spousal support. They engage in legal negotiations with their respective lawyers to reach a settlement agreement that addresses their individual needs and interests while complying with legal requirements and regulations. |
Distributive Negotiation — Distributive negotiation ends up in a win-lose situation where some parties stand at an advantage and the others lose out.
Example: Salary Negotiation Jane is negotiating her salary with a potential employer for a new job position. During the negotiation, both parties aim to maximize their own gains. Jane seeks a higher salary and better benefits, while the employer aims to keep labor costs within budget. Eventually, they agree on a salary package that satisfies both parties, although Jane may have negotiated for a higher salary than initially offered. |
Integrative Negotiation– To find mutually beneficial solutions that meet the interests of all parties. (Win-Win)
Example: Staffing Company A staffing company and the employer negotiating a new contract that balances employee benefits with company profitability. |
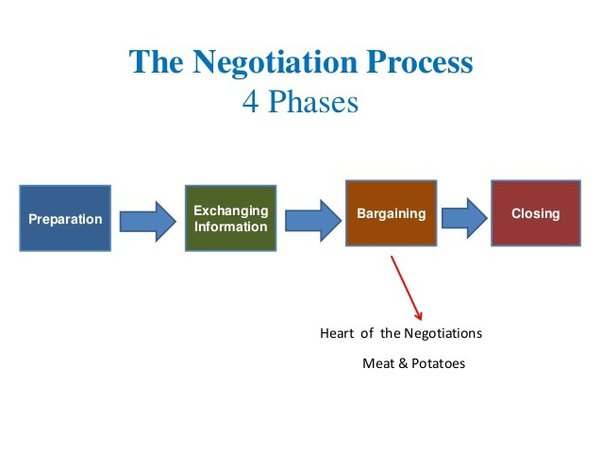
Preparation: One of the keys to effective negotiation is to be able to express your needs and your thoughts clearly to the other party. It is important that you carry out some research on your own about the other party before you begin the negotiation process.
Exchanging Information: The information you provide must always be well researched and must be communicated effectively. Do not be afraid to ask questions in plenty. That is the best way to understand the negotiator and look at the deal from his/her point of view. If you have any doubts, always clarify them.
Bargaining: The bargaining stage could be said to be the most important of the four stages. This is where most of the work is done by both parties. This is where the actual deal will begin to take shape. Terms and conditions are laid down. Bargaining is never easy. Both parties would have to learn to compromise on several aspects to come to a final agreement.
Closing and Commitment: The final stage would be where the last few adjustments to the deal are made by the parties involved, before closing the deal and placing their trust in each other for each to fulfill their role.
Negotiation Skills Read More »

A small business is one that is independently owned and operated and not dominant in its field of operation.
A small business is a business that uses small capital and it can be owned by one person or few people. The capital contribution is therefore from these few individuals who often control the decision-making process. In addition to this, small businesses have few employees.
Small Businesses are privately owned corporations, partnerships or sole proprietorships with fewer employees & revenue than regular-sized businesses.
A business which functions on a small scale level involves less capital investment, less number of labour and fewer machines to operate is known as a small business.

Small businesses are part of the backbone of the Ugandan economy, after Agriculture and Industry. Throughout Uganda’s history, small businesses have played a significant role, particularly in sectors such as agriculture, trade, and services.
During periods of colonial rule and subsequent independence, small businesses emerged as crucial drivers of economic activity, contributing to employment and income generation. Since the early days of independence, Uganda has recognized the importance of small businesses in driving economic growth and development.
Definition of Small Business in the Face of Uganda
According to the latest census data from 2019/2020, approximately 80% of establishments in Uganda are classified as small businesses, with fixed assets valued at less than 100 million Ugandan Shillings. These small businesses collectively employ over 70% of the country’s workforce, highlighting their significant contribution to job creation and livelihoods. More than 60% of Uganda’s economically active population is engaged in self-employment, with a considerable portion involved in small business activities, including agriculture, trade, and services.
SMALL BUSINESS IN THE ECONOMY Read More »
Leadership is first and foremost about influencing. But most people take the view that leadership style is the manner in which a leader approaches and deals with people in the context of one or more tasks to be addressed. Therefore, we can say by definition that:
A leadership style is the manner and approach of providing direction, implementing plans and motivating people all to achieve a desired goal or objective.
A leadership style is a leader’s way of providing direction, implementing plans, and motivating people.
A leadership style is about how decisions are made in an organization or unit. The decisions will be made based on the current circumstances in relation to the desired outcomes. For example: some situations will deserve a leader to make the decision and inform the employees to follow what he has decided. E.g. in case of an emergence. This style where the leader makes the decision is known as Authoritarian-Autocratic leadership style.
In 1939, psychologist Kurt Lewin led a group of researchers to identify different styles of leadership, and established three major leadership styles. These are
Max Weber, a German sociologist, also developed another leadership style as part of his broader theory of bureaucracy.
Bureaucratic leadership style.
Autocratic leadership, also known as authoritarian leadership or dictatorial leadership, is a leadership style characterized by individual control over all decisions and little input from group members. In this style, leaders make choices based on their own ideas and judgments and rarely accept advice from followers. Autocratic leadership involves absolute, authoritarian control over a group.
The autocratic leadership style allows managers to make decisions alone without the input of others or consultation of their team members even if their input would be useful. Managers possess total authority and impose their will on employees. No one challenges the decisions of autocratic leaders. This leadership style is found in large bureaucracies like the police, army, prisons.
Characteristics of autocratic leaders
|
Authoritarian leaders exhibit specific personality traits that influence their style of leadership.
Disadvantages of Autocratic Leadership
Others;

Democratic leadership is a leadership style that emphasizes the involvement of team members in decision-making processes and encourages active participation from all members of the group. It is also known as consultative or participatory leadership.
This style involves the leader including one or more employees in the decision making process (determining what to do and how to do it). Democratic leadership attempts to manage with democratic principles, such as self-determination, inclusiveness, equal participation and deliberation.
However, the leader maintains the final decision making authority. Using this style is not a sign of weakness, rather it is a sign of strength that your employees will respect.

Laissez-faire leadership is a leadership style characterized by a hands-off approach, where leaders provide minimal direction and allow team members to make decisions. However, the leader is still responsible for the decisions that are made.
This type of leadership involves little direction and lots of freedom for workers. The leaders sit back and watch the activity or results take effect.
This is used when employees are able to analyze the situation and determine what needs to be done and how to do it. The leader cannot do everything! You must set priorities and delegate certain tasks.
This is not a style for you to use so that you can blame others when things go wrong, rather this is a style to be used when you fully trust and have confidence in the people below you.
Very little guidance from leaders
Complete freedom for followers to make decisions
Leaders provide the tools and resources needed
Group members are expected to solve problems on their own.
Bureaucratic leadership style is a style that follows a hierarchical structure and emphasizes adherence to established rules and regulations. Decision-making in this style of leadership follows a clear chain of command, promoting efficient systems and maintaining order and discipline. It is red-tape leadership.
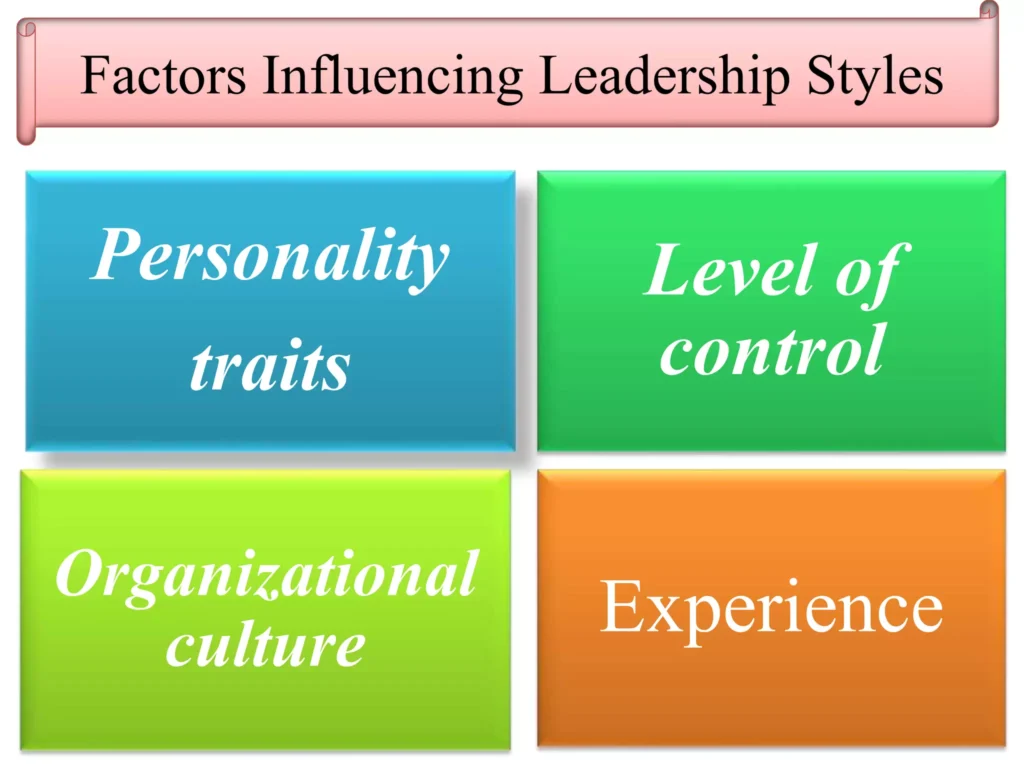
Manager’s Personal Background:
Staff Being Supervised:
Organizational Factors:
External Factors:
Direct Level:
Organization Level:
Strategic Level:
A head nurse plays a big role in managing and coordinating nursing teams in various healthcare facilities. They are responsible for overseeing the performance of their teams, ensuring that all job requirements are met, and coordinating nursing care.
A staff nurse is responsible for providing direct nursing care to patients based on the medical and nursing care plan.
LEADERSHIP STYLES/TYPES Read More »
Interest in leadership increased during the early part of the twentieth century. Early leadership theories focused on what qualities distinguish between leaders and followers, while subsequent theories looked at other variables such as situational factors and skill level.
While many different leadership theories have emerged, most can be classified as one of five major types:
5. Situational Theories.

This theory is associated with the historian Thomas Carlyle and was introduced in the 19th century (1840s) when history was believed to be primarily shaped by the influence of extraordinary individuals or heroes, suggesting that great leaders are inherently born, not made.
Assumptions of Great Man Theory
The Great Man Theory centers on two main assumptions:
Criticism: Herbert Spencer, a noted philosopher, sociologist, biologist and political theorist of the Victorian era, countered that the Great Man Theory was childish, primitive and unscientific. He believed leaders were products of their environment or the society in which they lived. He advocated that before a “great man” can remake his society, that society has to make him.
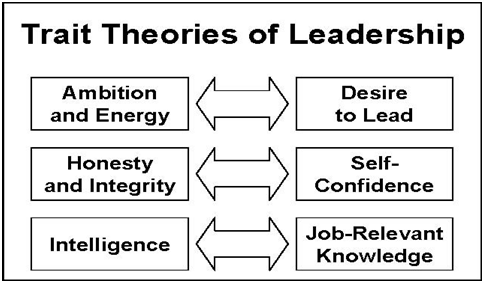
Trait Theories assume that some people have certain characteristics or personality traits that make them better leaders than others.
The trait theory is based on the great man theory, but it is more systematic in its analysis of leaders. Like the great man theory, this theory assumes that the leader’s personal traits are the key to leadership success.
Leadership Traits include;
Ambition and energy | Honesty and integrity | Intelligence |
The desire to lead | Self-confidence | Job-relevant knowledge |
Leadership Skills include;
Clever (intelligent) | Honesty and integrity | Intelligence |
Diplomatic and tactful | Conceptually skilled | Creative |
Knowledgeable about group task | Fluent in speaking | Socially skilled |
Assumptions of Traits Theory

In contrast with trait theory, behavioral theory attempts to describe leadership in terms of what leaders do, while trait theory seeks to explain leadership on the basis of what leaders are.
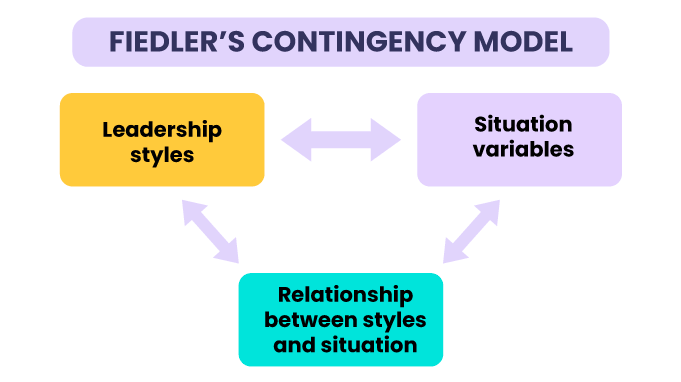
According to this theory, no leadership style is best in all situations. Success depends upon a number of variables, including the leadership style, qualities of the followers, and aspects of the situation. For example, an authoritarian style might be most appropriate in a situation where the leader is the most knowledgeable and experienced member of a group. In other instances where group members are skilled experts, a democratic style would be more effective.
There are basically three steps in the model;
Several contingency approaches were developed concurrently in the late 1960s, such as the Path-Goal Theory (1971) and the Vroom and Yetton’s DecisionMaking Model (1973).
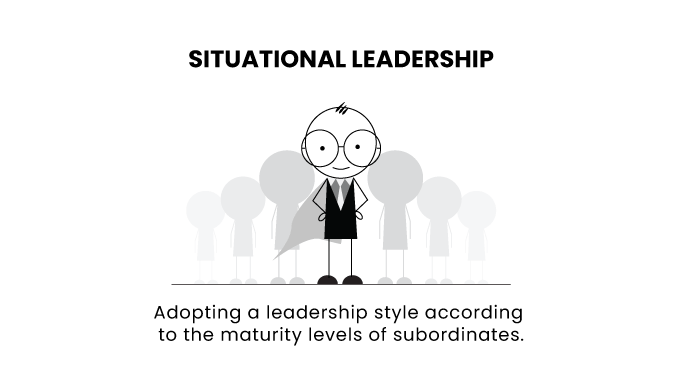
Hersey and Blanchard (1977), developed a Situational theory of leadership. Situational theories propose that leaders choose the best course of action based upon situational variables. Different styles of leadership may be more appropriate for certain types of decision making. These theories emphasize the importance of leaders being able to adapt their style and approach to different circumstances in order to be successful.
Such Factors are:
Then choose the best leadership style appropriate.
An example of situational leadership would be a leader adapting their approach based on the needs of their team members. One team member might be less experienced and require more oversight, while another might be more knowledgeable and capable of working independently.
LEADERSHIP THEORIES Read More »
Leadership does not mean dominating the subordinates as it is the case with leadership; however, the leader’s job is to get work done by other people, and make people willingly want to accomplish something. So effective leadership means effective and productive group performance.
Leadership is the process of influencing the thoughts and actions of other people to attain the desired objectives.
Leadership is the ability to influence and secure the cooperation of others to work to achieve certain goals without use of force.
Leading means influencing and inspiring people in such a way that they feel motivated to do their jobs. People find it easier to follow a leader. Following the orders of a manager is something that is done as a part of one’s job, but following a leader is something that is done more willingly by people.
Thus, every manager must aim at becoming a good leader. A leader focuses on interpersonal relations with each employee and constantly motivates them to perform better. By creating a positive working environment a leader can effectively help improve the employees’ job performance and hence their morale.
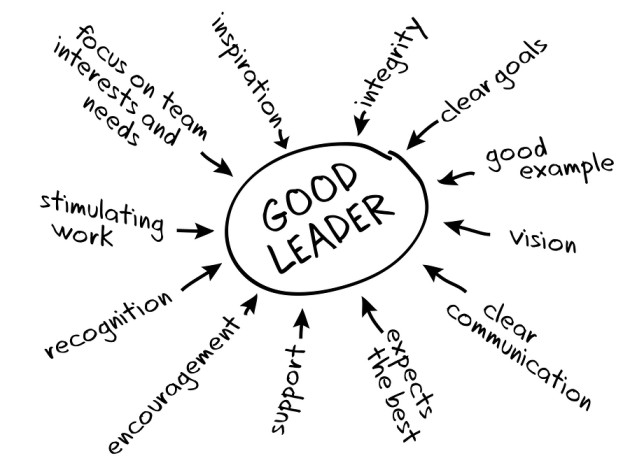
A leader is an individual who is able to direct activities of other people because he or she possesses the qualities and skills that the followers may not have.
OR
A leader is an influential person who has the ability to lead a group or department without necessarily holding a formal position.
An Effective Leader is a person who can induce followers to contribute voluntarily to the achievement of group tasks in a given situation.
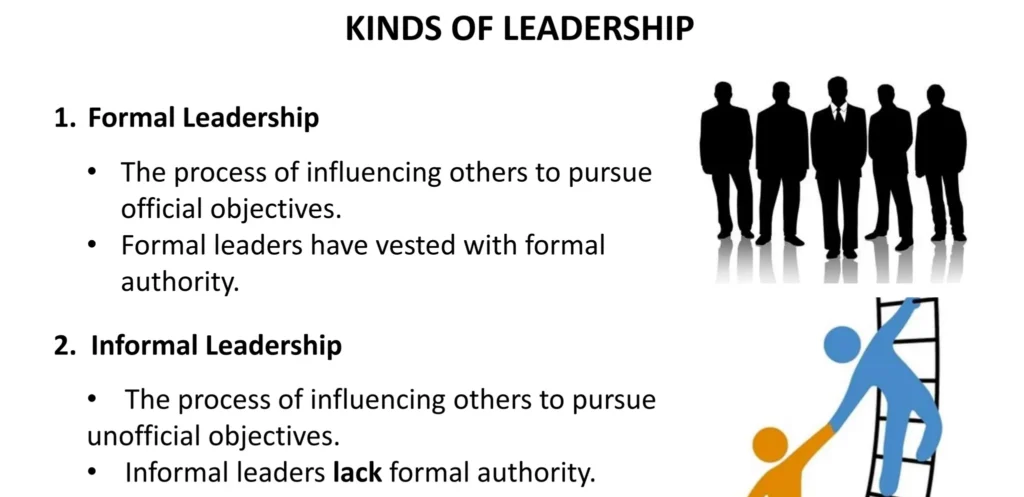
A leader may be formal or informal.
An effective and efficient leader or manager
Factors that affect efficient leadership can be both internal and external.
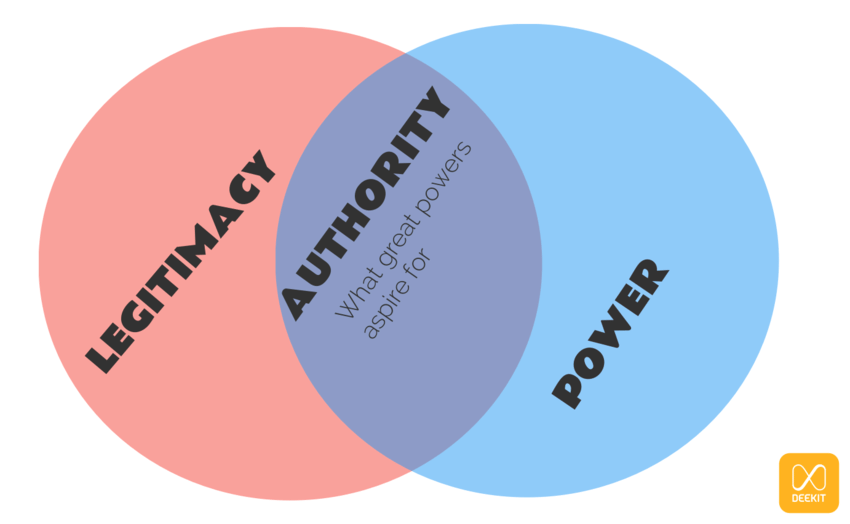
For effective leadership, one should exercise power and authority.
Power:
Legitimacy:
Authority: = Power+ Legitimacy
There are mainly five types of powers divided into two categories namely: Position Powers and Personal Powers. Each of these also has subsets of powers.
A Person in a Managerial Position has:
Personal powers which include:
1. Legitimate power. It refers to the power and influence derived from formal positions in the organizational hierarchy. It is based on the belief that individuals in certain positions have the right to exert authority and make decisions that affect others within the healthcare setting. This power is granted through organizational structures and job titles. This means that you have technical power to treat patients and manage resources that are within the health facility. No other person has this power except you in the health profession. It is usually associated with the job and rank in the organization hierarchy e.g staff will always comply with the in-charge or supervisors’ directives such as keeping time, not missing duty etc. Because they know she/he is their boss.
2. Coercive power. Coercive power is a type of power that relies on the use of force, threats, or punishment to influence others and achieve desired outcomes. This means a manager may exercise some force when you see that certain tasks are not being performed as expected. For instance; cleaning the health facility every morning. Another example is when a health worker is always late for duty, you as the Incharge may use coercive power to discipline such a health worker.
3. Reward power. Reward power in healthcare refers to the ability of a leader to reward or protect their followers from negative consequences. It is a type of formal power that can be used to motivate and incentivize healthcare professionals. You may exercise reward power to motivate staff that are performing very well in their tasks. For example giving bonuses, recognition programs, time off and vacation benefits, offering flexible work schedules, recommending staff for promotions or going for further studies etcetera.
4. Expert power. Expert power in healthcare refers to the influence and authority that individuals possess due to their specialized knowledge, skills, and experience in a particular area. It is a type of power that is derived from expertise and is often recognized and respected by others. Expert power is personal power, which a health worker like you may have. For example a midwife has a technical know-how on how to handle a woman in labour. Experienced healthcare professionals, such as doctors, nurses, and specialists, who have accumulated years of expertise in their respective fields, possess expert power.
5. Referent power. Referent power in healthcare refers to the influence a leader or healthcare professional has based on their personal qualities, charisma, and the admiration and respect they receive from others. It is derived from the attractiveness of the leader’s personality, values, or beliefs, rather than their formal position or expertise. Referent power refers to the influence that a manager has over others. The In-charge needs to have influence over other team members through good practices that may attract them to stay on and work for the organization.
Power is the ability to influence others and achieve desired outcomes. The most common reasons why power is used include:
1. To Gain a Competitive Advantage: Power can provide an edge over competitors in the market, allowing organizations to secure resources, market share, and influence.
2. To Acquire Information: Power can facilitate access to valuable information that is not readily available.
3. To Motivate People: Power can be used to inspire, motivate, and influence others to achieve desired goals.
4. To Communicate: Power can amplify the impact of communication, ensuring that messages are heard and understood.
5. To Improve Performance and Enhance Processes: Power can drive organizational change, improve efficiency, and enhance processes.
6. To Acquire Resources: Power can facilitate access to essential resources, such as funding, talent, and technology.
Structural Authority/Bureaucratic/Rational/Legitimate Authority: This type of authority is derived from the position one holds within the structure of the organization. It is based on job descriptions, responsibilities, rank, seniority, and formal organizational hierarchy.
Expert Authority: Expert authority is derived from an individual’s knowledge, skills, and experience in a specific area. It is based on the perception that the person has specialized expertise and can provide valuable information.
Moral Authority: Moral authority is obtained from an individual’s behaviors, integrity, respect, and goodness. A leader with moral authority is able to influence and inspire others through their ethical conduct and values.
Charismatic Authority: Charismatic authority is based on an individual’s personality and natural powers of leadership. Leaders with charismatic authority have the ability to inspire and motivate others through their charisma and charm.
Other Types of Authority:
Physical Authority: Authority based on physical superiority of an individual.
Parental Authority: God-given authority based on the relationship between parents and their children.
Clerical Authority: Authority based on the relationship between religious leaders and the laymen.
Economic Authority: Authority based on the ability to control money or material possessions.
Leadership/Leaders | Management/Managers |
A leader may or may not have an official appointment. | Appointed officially to the position. |
Leaders have the power and authority to enforce decisions as long as followers are willing to be led. | Managers have power and authority to enforce decisions using their position. |
Leaders influence others either formally or informally. Use interpersonal skills to achieve results/goals. | Managers carry out predetermined policies, rules, and regulations. Use rules, policies to achieve results/goals. |
Take risks and explore new ideas. Maintain an orderly, controlled, rational, and equitable structure. / Risk-averse. | Maintain an orderly, controlled, rational, and equitable structure. / Risk-averse. |
Relate to people personally in an emphatic manner. | Relate to people according to their roles or work expectations. |
Leaders feel rewarded from personal achievements. | Managers feel rewarded when fulfilling organizational goals or mission. |
Leaders may or may not be successful as a manager. They are managers as long as they hold the appointment. | N/A |
Addresses “why”, “What” What should be done and why? – Why are things done and going on that way, Why such results? | Addresses “how” and “when”. When and How can the activity/work be done, results be achieved? |
Leadership inspires, motivates, and influences people. | Management controls and clarifies to people. |
Leadership is service and people-focused. | Management is profit and result-focused. |
Leadership is strategy-focused. Concerned with bigger, long-term objectives. | Management is focused on short-term objectives, day-to-day operations/activities. |
Leadership is concerned with fulfillment of goals. | Management is concerned with performance of activities that lead to fulfillment of goals. |
Leadership is concerned with versatility/creativity of employees. | Management is concerned and preoccupied by consistency to standards of operations and procedures. |
Leadership is concerned with alignment of whatever goes on in the organization to policy and set standards and goals. | Management is concerned with accountability to the leadership of what is achieved and whether it’s achieved to the required standard and expectation. |
Leadership is concerned with aligning the people brought in the organization to the organizational policies, mission, and vision. | Management plans and staffs the organization. |
Leadership is more people-focused. | Management is more task-focused and achievement of work targets. |
Leadership originates. | Management Initiates. |
Similarities
LEADERSHIP INTRODUCTION Read More »
A policy is a comprehensive set of guidelines that outlines the desired direction of actions and operations.
A key government policy is a statement or set of statements that define the desired direction of operations or actions by a government.
It outlines the interests and values of the people it is meant to serve and provides guidance for present and future actions. Government policies are designed to address specific issues, challenges, or goals and often involve multiple sectors and stakeholders.
Government policies can cover a wide range of areas, including healthcare, education, economic development, environmental protection, social welfare, and more. They serve as a framework for decision-making, resource allocation, and the implementation of programs and initiatives.
Example of Key Government Policies realted to Health
1. National Health Policy (1999, 2010): The National Health Policy sets out the overall vision, goals, principles and strategies for the health sector in Uganda. It provides guidance on issues such as health service delivery, health financing, human resources for health, and health infrastructure development. This policy aims to improve the health status of Ugandans by promoting equitable access to quality healthcare services, empowering communities, and addressing health disparities. It emphasizes primary healthcare, disease prevention, and health promotion.
2. National Policy on Public-Private Partnership in Health (2012): This policy encourages collaboration between the government and private sector to enhance healthcare delivery. It aims to harness the strengths of both sectors to improve access, quality, and efficiency in healthcare provision. It outlines the framework for partnerships, including roles, responsibilities, and mechanisms for monitoring and evaluation.
3. Uganda National HIV and AIDS Policy (2011): This policy provides a comprehensive approach to combating HIV and AIDS in Uganda. It focuses on prevention, treatment, care, and support for affected individuals and communities.
4. Policy Guidelines for Prevention of Mother-to-Child Transmission of HIV (2006): These guidelines aim to reduce the transmission of HIV from mothers to their children during pregnancy, labor, and breastfeeding. They outline effective interventions, such as antiretroviral therapy and counseling.
5. Guidelines for Management of Private Wings of Health Units in Uganda (2010): These guidelines regulate the establishment and operation of private wings within public health facilities. They ensure quality standards, ethical practices, and accountability in the provision of healthcare services.
6. Safe Male Circumcision Policy (2010): This policy promotes safe male circumcision as an effective HIV prevention measure. It outlines the procedures, training requirements, and quality assurance mechanisms for circumcision services.
7. Uganda HIV Counseling and Testing Policy (2011): This policy provides guidance on the voluntary and confidential provision of HIV counseling and testing services. It emphasizes the importance of informed consent, confidentiality, and linkage to care and support.
8. Local Government Sector Workplace Policy on HIV/AIDS (2009): This policy addresses HIV/AIDS in the workplace, promoting prevention, awareness, and support for affected employees. It outlines the roles and responsibilities of employers and employees in creating a supportive and inclusive work environment.
9. Ministry of Education, The Education Sector HIV and AIDS Workplace Policy: This policy aims to reduce the impact of HIV/AIDS on the education sector. It provides guidance on prevention, care, and support for students, teachers, and staff.
10. Guidelines for HIV/AIDS Coordination at Decentralized Levels in Uganda (2013): These guidelines strengthen the coordination of HIV/AIDS services at the local level. They outline the roles and responsibilities of various stakeholders, including district health teams, local governments, and community organizations.
11. Village Health Team Strategy and Operational Guidelines: These guidelines provide a framework for engaging and utilizing Village Health Teams (VHTs) in community-based healthcare delivery. VHTs play a important role in promoting health education, disease surveillance, and access to healthcare services in rural areas.
The National Health Policy (NHP) and HSDP are formulated within the framework of the Constitution of the Republic of Uganda (1995) and the Local Government Act (1997), which decentralized governance and service delivery. They are also guided by the National Health Sector Reform Programme, the National Poverty Eradication Programme, and the Alma Ata Declaration of Health for All (HFA).
Mission Statement of the NHP:
“The overall goal of the health sector is the attainment of a good standard of health by all people in Uganda in order to promote a healthy and productive life.”
Objectives of the NHP:
Key Priorities of the NHP:
Guiding Principles of the NHP:
Primary Health Care (PHC) as the basic philosophy and strategy for national health development;
HSDP Priorities:
The government will prioritize cost-effective health services that have the greatest impact on reducing mortality and morbidity.
These interventions will be integrated into the Uganda National Minimum Healthcare Package, which will be regularly reviewed.
RATIONALE FOR HSDP:
Locally:
Regionally:
Internationally:
Aligned with Uganda’s global commitments, including:
STRATEGIC DIRECTION:
Medium-term plan (5 years) guiding the health sector towards achieving NHP II objectives
AIM:
To achieve Uganda Vision 2040 of a healthy and productive population contributing to socioeconomic growth and national development
STRATEGY:
GOAL:
To accelerate movement towards Universal Health Coverage (UHC), ensuring that all people receive essential and good quality health services without financial hardship.
GUIDING PRINCIPLES:
PRIORITY AREAS OF INTERVENTION:
HSDP INVESTMENT FOCUS:
WHO defines a health care system as –
“All the activities whose primary purpose is to promote, restore and/or maintain health”.
It incorporates the people, institutions and resources, arranged together in accordance with established policies, to improve the health of the population they serve, while responding to people’s legitimate expectations and protecting them against the cost of ill-health through a variety of activities whose primary intent is to improve health.
This definition encompasses Health actions and Non-Health actions within and outside the Health Sector that lead to desired health results.
The World Bank defines health systems more broadly to include factors interrelated to health, such as poverty, education, infrastructure and the broader social and political environment.
Well-functioning health systems are critical in the achievement of the Sustainable Development Goals (SDGs) by 2030.
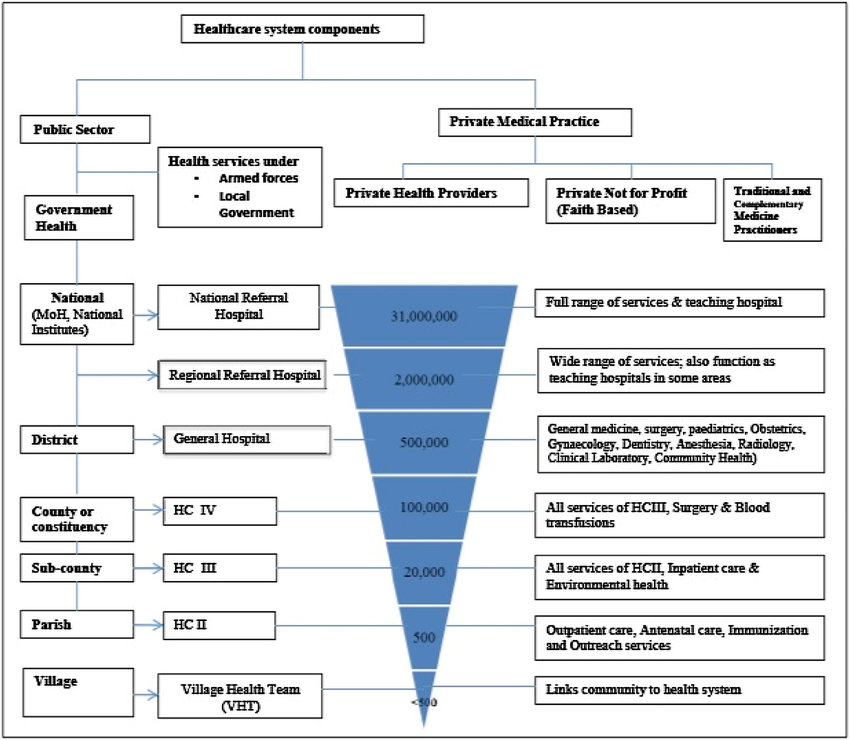
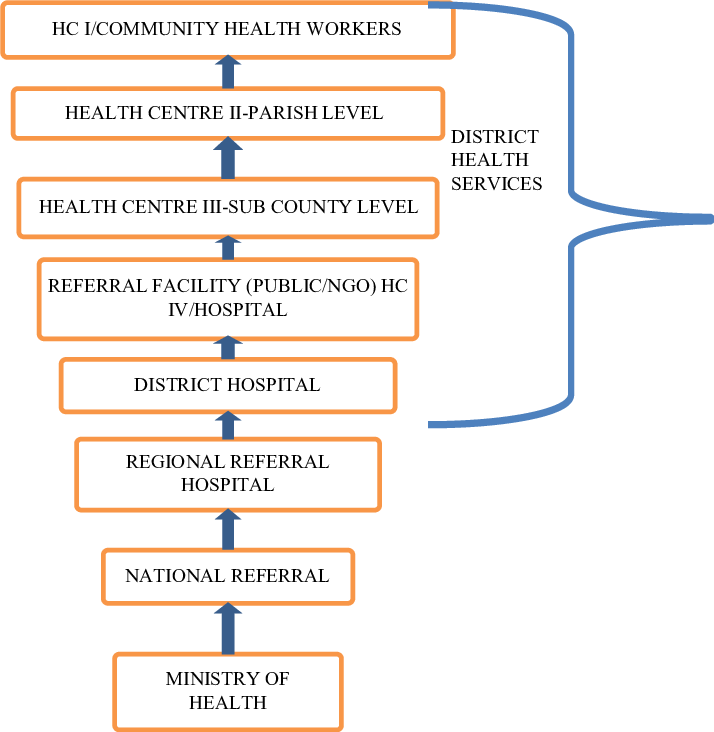
The Ugandan National Health Care System is a well-organized one built on a decentralized framework. Health care services are delivered through a referral system. In the provision of health services in Uganda, districts and Health Sub Districts (HSDs) are playing a key role in the delivery and management of health services at those levels. The district health structure is responsible for all the structures except the regional referral hospitals where they exist.
COMPONENTS:
The National Health System (NHS) is made up of the public and private sectors.
Public Sector:
Private Sector:
PUBLIC HEALTH SECTOR UNDER MOH:
The public health sector under MOH is structured directly from MOH headquarters, the national services (National Referral Hospitals (NRHs) and Regional Referral Hospitals (RRHPs), General Hospitals, District health headquarters (District health team), Health Centre (HC) IVs, HCIIIs, HCIIs, and community health services (community health centers and workers, households, Village Health Teams (VHTs-HCIs).
The core functions of the MOH headquarters are as follows:
The Ministry of Health and National Level Institutions
The Ministry of Health (MOH) is the central authority responsible for health care in Uganda. Its core functions include:
To enhance efficiency and effectiveness, the MOH has delegated some of its functions to autonomous institutions. These institutions include:
Specialized Clinical Services
Specialized Clinical Support Services
Regulatory Bodies / Authorities
Other National Level Institutions
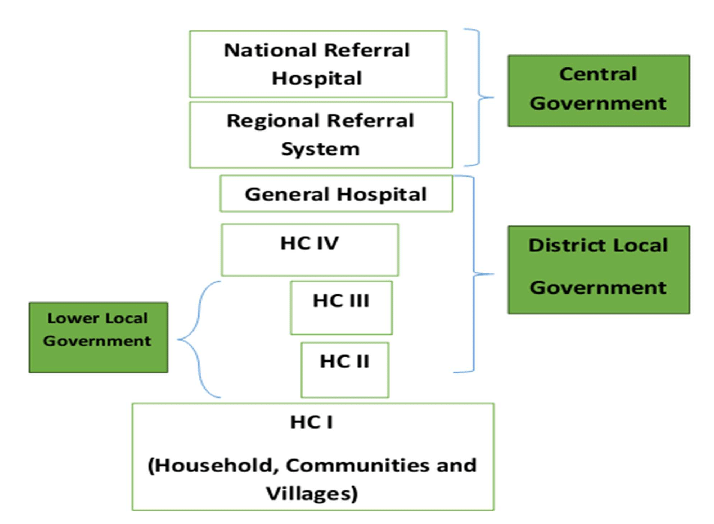
The constitution (1995) and local Government Act (1997) mandate the local Governments (LGs) to plan, budget, implement health policies and health sector plans. The LGs have the responsibility of:
Health sub-District system: The HSDs are mandated with planning, organization, budgeting and management of the health services at this and lower health centre levels. HSDs carry an oversight function of overseeing all curative, preventive, promotive and rehabilitative health activities including those carried out by the PNFPs and PFP service providers in the health sub-district. The headquarters of the HSD will and remain a HCIV or a selected general hospital.
Health centres III, II and village Health Teams (HCI): HCIIIs provide basic preventive, promotive and curative care. They also provide support supervision of the community and HCIIs under their jurisdiction. There are provisions for laboratory services for diagnosis, maternity care and first referral cover for the sub-county. The HCIIs provide the first level of interaction between the formal health sector and the communities. HCIIs only provide out patient care, community outreach services and linkages with the village Health Teams(VHTs).
According to HSDP 2015/016 the community health services will be delivered by training 15000 community health extension workers(CHEWS) distributed among 7500 parishes at community health centers. These will supervise and work with VHTs that are accountable for the health of certified model households/families. The ministry targets 300,000 model households in place by 2020.Eventually the entire country’ population/households should have a VHT who looks after their health, VHT reports to an assigned trained CHEW. Currently, CHEWS are being trained in pilot districts in eastern Uganda and this will spread out as planned by the sector.
A network of VHTs has been established in Uganda which is facilitating health promotion, service delivery, community participation and empowerment in access to and utilization of health services. The VHTs are responsible for:
While VHTs are playing an important role in health care promotion and provision, coverage of VHTs is however still limited: VHTs by 2010 had been established in 75% of the districts in Uganda but only 31% of the districts had trained VHTs in all the villages. Attrition was quite high among VHTs mainly because of lack of emoluments. (HSSIP 2010/11-2014/15).
The district health services are led by the District Health Officer (DHO), a medical officer with additional management training. The DHO, along with other health officials in the district, is responsible for the overall management of district health services.
Members of the District Health Management Team
The District Health Management Team (DHMT) usually includes the following members:
Functions of the District Health Management Team
The DHMT, led by the DHO, is responsible for all health-related activities in the district, including:
Health Care Setting Management Positions
In addition to the DHMT, various management positions exist within health care settings, including:
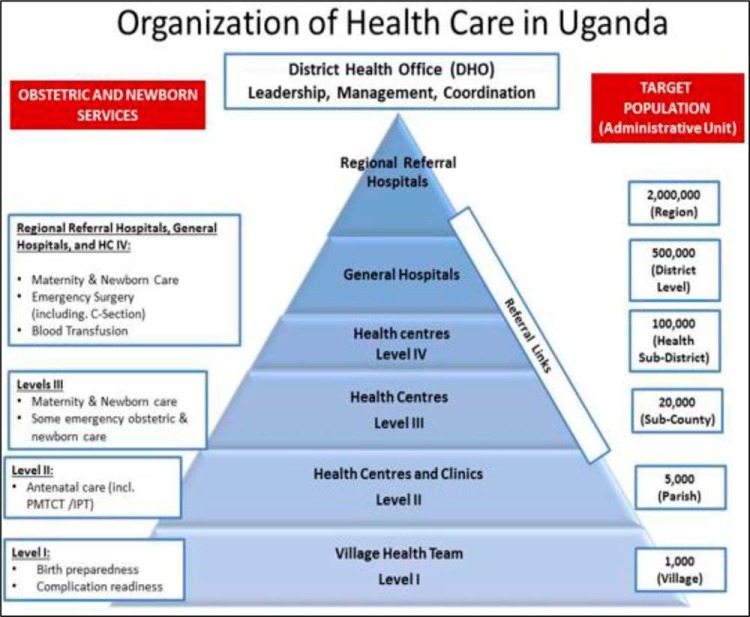
Summary: Organization of Health Services in Uganda
The Ugandan health care system is organized into eight levels:
1. Ministry of Health: Responsible for setting policies and standards, resource mobilization, capacity building, technical supervision, monitoring and evaluation, and overall regulation.
2. National Referral Hospitals Population:30,000,000: Provide comprehensive specialist services, teaching, and research.
3. Regional Referral Hospitals Population: 2,000,000: Serve a region of about 3 million people. Offer specialist services, teaching, and research.
4. District Hospitals Population: 500,000: Serve a district. Provide preventive, promotive, outpatient curative, maternity, inpatient health services, emergency surgery, blood transfusion, laboratory, and other general services.
5. Health Sub-Districts and HCIV: Population: 100,000
6. Health Center 3 (HCIII)Population: 20,000
7. Health Center 2 (HCII)Population:5,000: Represents the first level of interaction between the formal health sector and communities.
8. Village Health Team (Health Centre I)Population: 1,000
KEY GOVERNMENT POLICIES Read More »

Management of equipment and supplies refers to the processes and strategies implemented to effectively and efficiently handle and oversee the procurement, utilization, maintenance, and disposal of medical equipment and supplies within healthcare organizations.
It is important for ensuring the availability of necessary equipment and supplies, optimizing their utilization, and maintaining their quality and safety standards.

Supplies at a healthcare facility are stores of essential equipment, drugs and other supplies that you will need to use during your routine healthcare work.
There are two main types of supplies in your Health Post, referred to as non-consumables and consumables.
Category | Item | Description |
Non-Consumables | ||
Furniture | Desks, chairs, cabinets, examination tables, etc. | |
Equipment | Medical devices, diagnostic equipment, etc. | |
Vehicles | Ambulances, vans, motorcycles, etc. | |
Infrastructure | Buildings, fixtures, plumbing, electrical, etc. | |
Consumables | ||
Medical Supplies | Bandages, dressings, syringes, gloves, etc. | |
Pharmaceuticals | Medications, drugs, vaccines, etc. | |
Laboratory Supplies | Test tubes, slides, reagents, etc. | |
Office Supplies | Paper, pens, folders, staplers, etc. | |
Cleaning Supplies | Disinfectants, detergents, mops, buckets, etc. | |
Fuel | Gasoline, diesel, propane, etc. | |
Maintenance Supplies | Lubricants, spare parts, tools, etc. | |
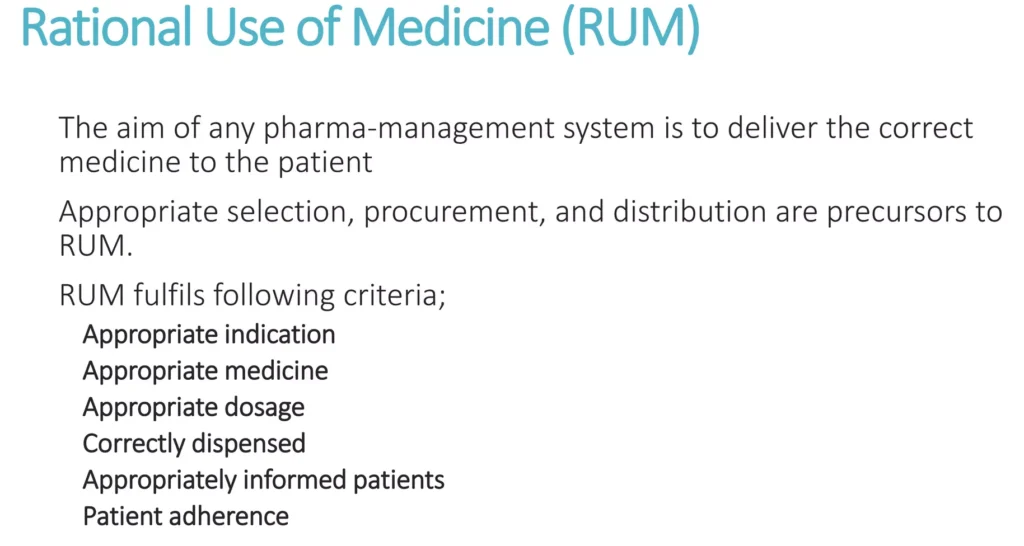
Rational medicine use: Refers to measures designed to avoid misuse of medicines, hence increases effectiveness, efficiency, and minimises waste and danger.
Or
This is the administration of the correct medications, for the appropriate patients, for the appropriate clinical needs, in doses and routes that meet their own individual requirements, for an adequate period of time, and at the lowest cost to them and their community.
Key Criteria for Rational Medicine Use:
Irrational medicine use can occur due to health worker wrong prescribing practices i.e.
Theft
Misuse
Lack of Record Keeping
Others common problems in handling medical supplies include;
Management of equipment and supplies Read More »
Javascript not detected. Javascript required for this site to function. Please enable it in your browser settings and refresh this page.