Immediate Care of the Newborn
Learning Outcomes
By the end of this section, the learner shall be able to:
- Describe the step-by-step procedure for immediate care of the newborn at birth.
- Accurately assess a newborn using the Apgar scoring system.
- Detail the essential components of daily care for a healthy newborn.
- Explain the principles of thermoregulation, feeding, hygiene, and infection prevention in neonates.
- Outline the key observations and assessments required to monitor a newborn's progress.
- Summarize the essential health education points for the new mother before discharge.
Introduction
The care a baby receives immediately after birth and during the first few days of life is critical for their survival, growth, and long-term health. As midwives and nurses, providing expert, timely, and compassionate care can prevent life-threatening complications and support the crucial bonding process between the mother and her new baby.
Immediate Care of the Newborn (The First Hour)
This period requires prompt, skilled, and sequential actions focused on establishing breathing, maintaining warmth, and preventing infection.
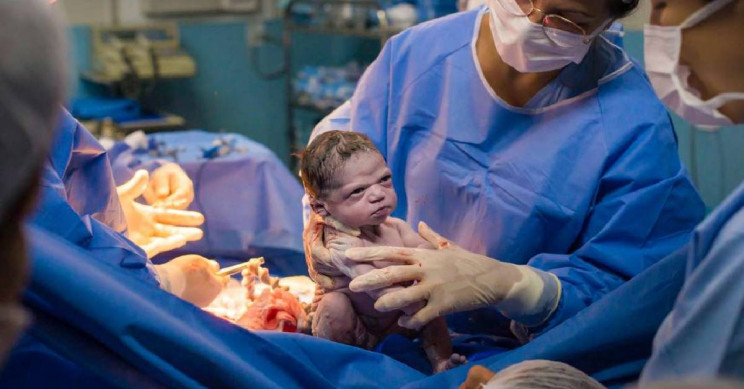
Care of the Baby at Birth
Ensure Infection Prevention and Control.
As soon as the head is born:
- Clean the eyes.
- Wipe the face.
- Clear the airway – clear mucus from the nose and mouth.
- Feel for the cord around the neck.
- Safely deliver the rest of the baby.
- Note the time of delivery.
- Dry and keep the baby warm.
- Establish respirations and maintain it.
- Apgar score and record.
- Clean the eyes.
- Instill tetracycline eye ointment.
- Cut the cord and tie it securely.
- Show the baby to the mother to identify sex and key features.
- Maintain warmth (use kangaroo method if the mother and baby are in good condition).
- Promote bonding.
- Initiate breastfeeding.
- Assess the baby’s condition at 1 and 5 minutes using APGAR.
Procedure at Birth
- Prepare the Environment: Ensure a clean, warm, and draft-free delivery area with all necessary equipment ready. Practice strict hand hygiene.
- Clear the Airway: As soon as the baby's head is born, gently wipe the face and eyes with a soft cloth. Use a bulb syringe or suction catheter to clear mucus from the mouth first, then the nose. Check if the umbilical cord is around the neck and manage it appropriately.
- Deliver and Note the Time: Safely deliver the rest of the baby's body and note the exact time of birth.
- DRY AND STIMULATE: This is the most critical step. Immediately place the baby on the mother's abdomen and dry them thoroughly with a warm, clean towel. The act of drying also provides stimulation that encourages the baby to breathe. Remove the wet towel and cover the baby with a dry one.
- Assess Respirations: Observe the baby's chest for respiratory effort. A healthy baby should be crying vigorously.
- Perform Apgar Score: Assess the baby's condition at 1 minute and again at 5 minutes after birth.
The Apgar Score
The Apgar score is a rapid method to assess the physical condition of a newborn and determine the need for resuscitation. It evaluates five signs, each scored from 0 to 2.
| Feature | Score 0 | Score 1 | Score 2 |
|---|---|---|---|
| Appearance (Skin Color) | Blue or Pale All Over | Body Pink, Extremities Blue (Acrocyanosis) | Completely Pink |
| Pulse (Heart Rate) | Absent | Below 100 bpm | Above 100 bpm |
| Grimace (Reflex Irritability) | No Response | Grimace or Weak Cry | Cries or Pulls Away |
| Activity (Muscle Tone) | Limp | Some Flexion of Extremities | Active Motion |
| Respiration (Breathing Effort) | Absent | Slow, Irregular, Weak Cry | Good, Strong Cry |
Interpretation of Apgar Scores
- Score 7-10: Good condition. Routine care is needed.
- Score 4-6: Moderately depressed. Some assistance, such as stimulation and oxygen, may be required.
- Score 0-3: Severely depressed. This indicates a need for immediate and active resuscitation.
Further Care within the First Hour
- Warmth: Maintain warmth by placing the baby skin-to-skin with the mother (Kangaroo Mother Care) and covering both with a warm blanket. A hat should be placed on the baby's head.
- Cord Care: Securely clamp and cut the umbilical cord using sterile technique. Check for any bleeding from the cord stump.
- Eye Care: Administer prophylactic eye ointment (e.g., 1% Tetracycline) to prevent ophthalmia neonatorum (gonococcal infection).
- Identification: Show the baby to the mother, confirming the sex and noting any identifying features. Apply identification bands as per facility protocol.
- Bonding and Breastfeeding: Encourage early initiation of breastfeeding, ideally within the first hour of life. This promotes bonding, provides vital nutrients (colostrum), and helps maintain the baby's temperature and blood sugar.
- Physical Assessment: Perform a quick head-to-toe examination to identify any obvious congenital abnormalities.
Care After 1 Hour
- Examine the baby’s head to toe for maturity, abnormalities, etc.
- Re-ligature and shorten the cord.
- Ascertain the passage of meconium and urine.
- Weigh the baby.
- Ensure warmth.
- Ensure no bleeding from the cord.
- Ensure bonding.
- Ensure the comfort of the mother and the baby.
- Communicate to the mother all the findings.
- Report to the ward in-charge and document.
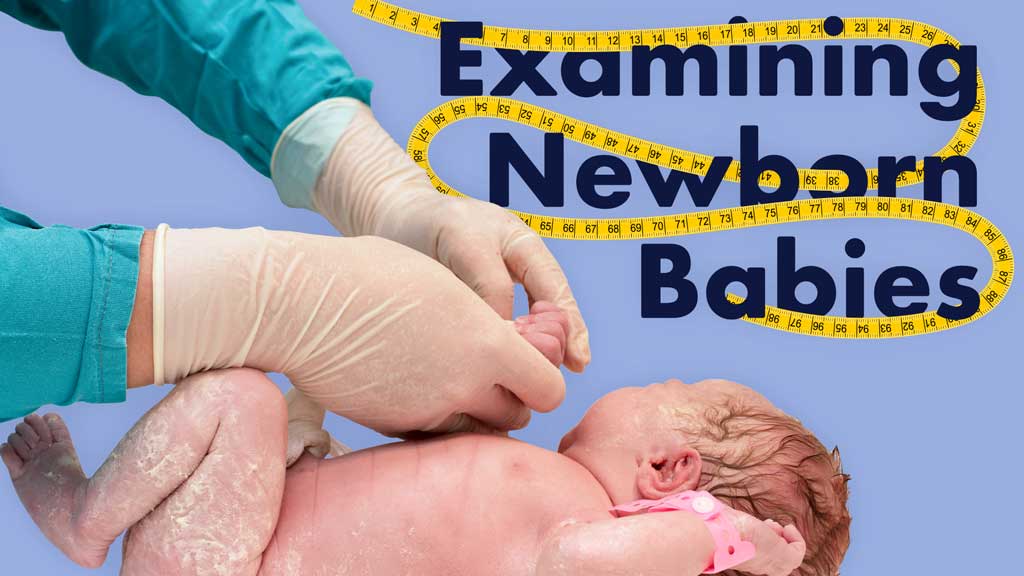
Examination of a Newborn
Aims/Reasons of Examination
- To detect certain malformations or abnormalities that may be a threat to the life of the baby and may need urgent intervention.
- To detect illness or injury that has arisen before or during delivery.
- To take body measurements and record them.
Important Points to Observe:
- Room should be warm and draught-free.
- Adequate light.
- Equipment prepared.
- Parent or caretaker should be around.
- Explain the procedure to the parent or caretaker.
- Baby should be in good condition.
Equipment
- Overhead warmer if required.
- Stethoscope.
- Ophthalmoscope.
- Tape measure.
- Infant scales.
- Documentation – infant personal health record and hospital medical record.
Procedure
- Use a systematic approach to examine the baby – ‘head to toe’ and ‘front to back.’
- Observe infection prevention measures, i.e., wash hands, put on gloves.
- Ensure hands are warm.
- Undress the baby and wrap in a warm towel. Expose the part you are to examine.
General Appearance
- The newborn assumes a flexion posture.
- While the baby is settled, observe skin color. It should be pink.
- Observe the state of alertness and activity.
- Observe the range of spontaneous movement, posture, and muscle tone.
Head
- Assess size, shape, and symmetry; rule out excessive molding which may suggest the possibility of intracranial injury.
- Scalp (vault) for swelling e.g. cephalohematoma, caput succedaneum, meningocele, etc.
- Fontanelles: anterior and posterior fontanels should be flat, soft, and firm, but abnormalities may be a bulge or swelling.
- Sutures; if separate or wide, it is suggestive of prematurity.
- Head circumference 33-35cm (use a tape measure). Encircle occipital protuberance and frontal eminences.
Face
- Assess the symmetry of structures, features, and movement.
- Inspect the eyes: setting, rule out Down’s syndrome – upward slanting of the eyes and the upper lip is shorter.
- Check for cataracts, subconjunctival, nystagmus, strabismus hemorrhage, discharge.
- Position in relation to the nasal bridge.
- Palpate the eye to confirm the presence of normal eyeballs. Do this gently.
- Hold the baby upright – eyes will open spontaneously.
- Note the space between the eyes (should be 3cm apart).
Nose
- Located in the middle of the eye.
- Check position, patency, and symmetry of the nares and septum. Nares should be equal in size and shape. Lack of patency may indicate choanal atresia (a congenital disorder where the back of the nasal passage (choana) is blocked, usually by abnormal bony or soft tissue).
Mouth
- Located in the midline.
- Size, shape, symmetry, and movement.
- Press the angle of the jaw to open the baby’s mouth.
- Check the tongue for tongue tie (ankyloglossia). The tongue should be pink.
- Lips and gums should be intact, pink, and moist.
- Inspect tongue, gum, and palate: Pass a little finger in the baby’s mouth and feel for the palate for abnormalities like cleft palate or cleft lip.
- Note the protrusion reflex of the tongue. The baby will suckle the finger.
- Excessive salivation may be indicative of tracheoesophageal fistula (TEF).
- Macroglossia, a protruding tongue that appears too large for the mouth, is indicative of a congenital disorder, e.g., Down’s syndrome or endocrine disorder like hypothyroidism.
Ears
- Assess for shape and cartilage development.
- Observe the tympanic membrane.
- Assess hearing acuity by evaluating the blink or startle reflex.
Neck
- The newborn’s neck is short.
- Note symmetry.
- The neck should be soft and free from masses.
- The thyroid is non-palpable, palpable in hyperthyroidism.
- Observe a web neck (extra and redundant skin).
- Flex the neck gently. A web neck is associated with genetic disorders, e.g., Down’s syndrome or Turner’s syndrome.
Clavicles, Arms, and Hands
- Assess length, proportions, structure.
- Count fingers and separate them.
- Check for extra digits.
- Rotate the wrists.
Chest
- Assess chest size, shape, and symmetry. Chest circumference is 30-36cm, approximately 2cm lower than the head circumference.
- Observe respiratory movement.
- Take respiration rate.
- Observe the location of the nipples. Note size and shape. Nipples should be equally spaced from the middle.
- Breast engorgement may be due to maternal hormones in both sexes.
Abnormalities (Chest)
- If the sternum is protruding, it indicates pectus carinatum, or pigeon chest, or sunken-pectus excavatum or funnel chest.
- Widely spaced nipples are commonly seen in genetic disorders like Turner’s syndrome.
- Supernumerary nipples 5-6cm below true nipples are often associated with congenital abnormalities.
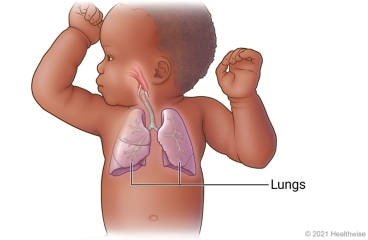
Lungs
- Newborns are diaphragmatic breathers.
- They may have paradoxical breathing: the thorax pulls inwards and the abdomen bulges.
- Periods of apnea may exist lasting less than 15 minutes.
- On auscultation, breath sounds should be equally distributed and clear.
- Abnormal sounds may be; crackles, stridor, and wheeze. These should be reported.
Heart
- Assessment of the cardiovascular system begins with the assessment of color. Skin should be pink, including the mucous membrane.
- Palpate chest point of maximum intensity.
- Auscultate for heart rate, rhythm, and quality of heart sounds.
- Assess peripheral pulses for rate, character, and quality. Pulses should be strong in the limbs.
Abnormalities (Heart)
- Bounding pulses are associated with patent ductus arteriosus.
- Weakened or absent femoral pulses are associated with aortic lesions, e.g., coarctation of the aorta or low cardiac output.
Abdomen
- The abdomen should be round and soft.
- Assess for visible peristalsis.
- Check for major organs.
- The umbilical cord should be located in the midline.
- Two arteries and one vein should be visible on the umbilical cord. Absence of one of the arteries is associated with cardiovascular or renal anomalies.
- Type of the cord.
- Auscultate bowel sounds before palpation. They are audible within 15 minutes after birth.
- Note the position of the liver, 1-2 cm below the right costal margin.
- The spleen is felt 1-2 cm below the left costal margin.
- The lower portion of the kidney is found 1-2 cm above the umbilicus on deep palpation.
Genitalia
Female Baby
- At birth, the female genitalia are edematous, especially in breech deliveries. Labia majora is enlarged in full-term babies.
- Inspect vulva for normal formation of: presence of labia, vaginal orifice, urethral orifice, and clitoris.
- White mucoid discharge is common in the first week. Blood-tinged discharge may be noted as a result of withdrawn hormones.
Male Baby
- The foreskin completely covers the glans penis.
- Abnormalities may include:
- Hypospadias, epispadias.
- Foreskin, check for phimosis.
- Testes are present in the scrotum.
- Scrotum: examine for undescended testes. The scrotum may be edematous at birth.
- If testes have not descended by age 18 months, surgical intervention is required.
Anus
- Inspect for patency and masses.
- Take the temperature, normal – 36.5-37°C.
- Abnormalities: Anorectal malformations (imperforate anus).
Musculoskeletal System
- Examine the back when a child is in a prone position.
- The back is gently rounded. Skin along the spine should be intact.
- Any depression or openings along the spine may indicate a neural tube defect e.g. spina bifida.
- Full range of motion should be easy in the newborn. When legs or arms are extended, they should return to the flexion position.
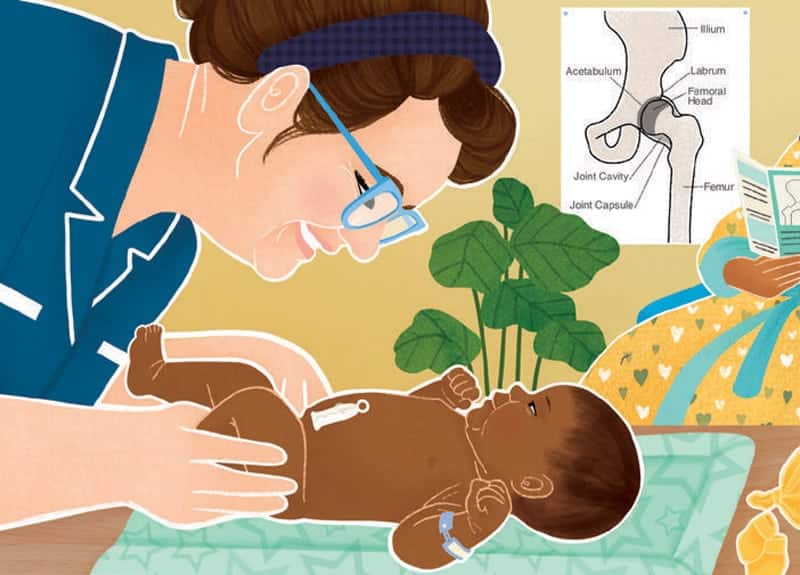
Hips, legs, and feet:
- Assess hips for stability.
- Assess legs and feet for length, proportions, and symmetry.
- Assess the structure and number of digits. Toes and fingers should be straight.
Abnormalities Hands and Feet
- Extra digits (polydactyly).
- Absence of a digit (syndactyly).
- Webbing of fingers or presence of a simian crease – a single long crease that crosses the entire palm is indicative of Down’s syndrome.
- Macrodactyly (enlarged fingers or toes): indicative of neurofibromatosis, and overlapping 2nd and 3rd fingers, seen in infants with trisomy 18.
- Clubfoot.
Neurologic
- Assess behavior.
- Posture: position the baby adopts. In normal full-term, a baby lies with limbs flexed while in a supine position. In preterm babies, limbs are stretched out along the side of the trunk.
- Muscle tone.
- Cry: it should be lusty and full cry.
- Reflexes: Moro, suck, rooting, grasp.
Gastrointestinal Tract
- Examine for rooting and swallowing reflexes.
- An immature cardiac sphincter often leads to regurgitation.
- Meconium is passed in the first 2 days after birth.
Renal System
- Expected urine output of a newborn is 250ml in 24hrs. The bladder capacity is 15mls full.
- Because the urinary system is immature, urine is not concentrated. Urine is colorless or clear yellow; odorless with a specific gravity of approximately 1.020.
Immune System
- Infants are born with passive immunity from the mother, IgG through the placenta, IgA through breast milk. The immunity lasts 3-6 months.
Thermoregulation
- Newborns have a limited capacity to regulate heat loss and pain. The child’s ability to produce heat is immature and ineffective, thus prone to hypothermia. Infants lose heat because:
- The metabolic rate is higher.
- The surface area for heat loss is large.
- Infants cannot shiver to generate heat.
- Infants metabolize brown fat to generate heat.
- Subcutaneous tissue is small.
- Newborns lose heat by or through conduction, evaporation, convection, and radiation.
Hemopoietic System
- The blood volume of a newborn is 80-110ml/kg.
- The lifespan of RBCs is 50-90 days.
Hepatic System
- There is unconjugated bilirubin in the 1st week of birth, and this is due to:
- Increased bilirubin load on hepatocytes.
- The lifespan of fetal RBCs is short.
- Increased enterohepatic bilirubin circulation.
- Defective bilirubin conjugation and excretion.
- Physiological jaundice occurs after 1st day. This is due to the increased number and short lifespan of RBCs, and an immature liver to conjugate bilirubin.
When the examination is completed, make the baby comfortable and warm.
Record findings
Report abnormalities detected to the in-charge of the ward pediatrician for appropriate action.
Danger Signs in a Newborn
- Breathing Difficulty: This includes rapid, labored, or irregular breathing patterns. If a newborn is struggling to breathe, it’s a serious concern.
- Convulsions, Spasms, Loss of Consciousness, or Arching of the Back: These signs may indicate neurological issues or seizures.
- Cyanosis (Blueness): Bluish discoloration of the skin or lips can be a sign of inadequate oxygenation and requires immediate attention.
- Hot to Touch (Fever) or Cold to Touch: Abnormal body temperature, whether too high (fever) or too low, is a concern.
- Bleeding: Any unexplained bleeding, especially from the umbilicus, eyes, or skin, is a danger sign.
- Jaundice: While some level of jaundice is common in newborns, excessive or rapidly progressing jaundice may indicate a problem.
- Pallor: An unusually pale complexion can signal anemia or other issues.
- Diarrhea: Persistent diarrhea in a newborn is a cause for concern and can lead to dehydration.
- Persistent Vomiting or Abdominal Distention: Frequent or forceful vomiting and abdominal swelling can indicate various medical conditions.
- Poor Sucking or Not Feeding: If the baby is not feeding properly or is experiencing difficulty in sucking, it may not be getting adequate nutrition.
- Pus or Redness of Umbilicus, Eyes, or Skin: Any sign of infection, such as pus or redness in these areas, should be addressed.
- Swollen Limb: Unexplained swelling of a limb is a sign that requires immediate attention.
- Lethargy: If the newborn is unusually tired, unresponsive, or lacks energy, it can indicate a medical issue.
Daily Care of the Baby
After one hour in the labor ward, the baby should be transferred with its mother in her arms to avoid heat loss and promote mother-baby attachment. The following are the main points considered during the care of the baby to prevent neonatal complications:
1. Maintenance of Respiration
- A baby with mucus should be observed and the airway cleared frequently using a suction catheter or bulb syringe.
2. Provision of Warmth
- The baby should be kept at a comfortable temperature between 21 – 25 degrees Celsius.
- Overdressing and overheating should be avoided.
- Baby’s temperature is maintained by proper monitoring of the incubator for those admitted in the nursery or skin-to-skin contact with the mother for babies who are sick.
3. Provision of Food
- A normal baby should be put onto the breast immediately after delivery or within the first 30 minutes.
- Exclusive breastfeeding is up to 6 months. Mother should breastfeed the baby on demand.
4. Protection from Injury and Infection
- Midwives as well as mothers should not keep long nails, and even those for babies should be cut short to avoid injuring themselves.
- Prevention of infection is important to minimize the risk of cross-infection to both midwives and mothers.
- Infected babies should be isolated.
- Installation of tetracycline eye drops as prophylaxis against gonococcal infection.
5. Hygiene
- The baby should be bathed daily and twice if the weather is not cold.
- Special care is paid where two skin folds meet, and this is important.
- The first and other non-urgent procedures may be deferred in order to minimize heat loss.
6. Umbilical Cord
- The cord is a source of infection in the neonatal period.
- The midwives should aim at preventing hemorrhage and getting the cord dried up and separate cord cleaned with normal saline 0.9% at least 3 times in 24 hours.
7. Prevention of Hemorrhage
- Prophylactic vitamin K (1 mg) is given intramuscularly or orally to promote prothrombin formation.
8. Observations
- Temperature, respiration, and heart rate are checked every four hours.
- The child is weighed twice weekly.
- The condition of the cord is observed.
- The color of the skin is monitored.
- Urine and stool color and amount passed are noted.
9. Assessment of Baby’s Progress
- A thriving baby is a baby who is growing well. A baby who is growing well has bright eyes.
- It is active and kicks rigorously.
- It is free from infection.
- Feeds well and is always eager to eat.
- Fontanelles are not depressed.
- Has a pink color with firm muscles.
- Baby sleeps well, and when it wakes up, it stretches and yawns.
- Passes normal quality of urine, stools are semi-solid and yellow.
- In order to assess the above, it is necessary to examine the baby thoroughly at least once daily.
10. Education of the Mother
- Education of the mother should start from the antenatal period.
- After delivery, the mother should be educated about the care of the baby and herself.
- As the baby and mother’s condition is good, discharge is considered.
- Every procedure that is carried out on the baby should be done when the mother is observing so that after discharge, she is able to carry it out, for example, dressing the baby, baby bathing, and care of the cord.
11. Immunization
- All neonates should be immunized with BCG vaccine and ‘OPV’ at birth.
- Mother should be given vitamin A so that the baby can get it through breast milk.
- The mother should be informed about the recommended national immunization schedules and the importance of completing immunization.
Follow-up
- Each infant should be followed up at least once every month for the first 3 months and subsequently at 3-month intervals until one year of age.
- Follow-up is necessary for assessment of growth and development, early detection and management of health problems, and health education for prevention of childhood illnesses.
Essential Elements of Daily Care
- Maintenance of Respiration: Continue to observe for signs of respiratory distress (grunting, nasal flaring, retractions). Keep the baby's nose and mouth clear of mucus.
- Provision of Warmth: Keep the room temperature comfortable (21-25°C). Avoid overdressing. Skin-to-skin contact remains an excellent method for temperature regulation.
- Provision of Food (Nutrition): Encourage exclusive breastfeeding on demand (typically every 2-3 hours). A breastfed baby is getting enough milk if they are passing urine 6-8 times a day and are gaining weight.
- Protection from Injury and Infection: Strict handwashing is the most important measure. Isolate any infected babies. Keep the baby's fingernails short.
- Hygiene:
- Bathing: Daily bathing is not always necessary and can cause heat loss. "Top and tail" washing (cleaning the face, neck, hands, and bottom) with warm water is sufficient. The first full bath should be delayed until the baby's temperature is stable.
- Skin Folds: Pay special attention to cleaning and drying skin folds (neck, armpits, groin) to prevent irritation.
- Umbilical Cord Care: The goal is to keep the cord clean and dry to prevent infection and promote separation. Clean the base of the cord with normal saline or sterile water if it becomes soiled with urine or stool. Fold the diaper down to expose the cord to air. Do not apply any traditional substances.
- Prevention of Haemorrhage: Administer Vitamin K (1mg) intramuscularly at birth to promote prothrombin formation and prevent bleeding.
- Observation and Assessment:
- Vital Signs: Monitor temperature, respiration, and heart rate regularly as per facility protocol.
- Weight: Weigh the baby at birth and then daily or twice weekly to monitor for appropriate weight gain (after the initial physiological weight loss).
- Elimination: Record the passage of urine and stool, noting frequency, color, and consistency.
- Overall Condition: Assess for skin color (jaundice), activity level, muscle tone, and feeding behaviour. A thriving baby is active, feeds eagerly, has a strong cry, and appears content after feeds.
- Education of the Mother: This is a continuous process. Teach the mother about feeding, bathing, cord care, signs of illness (e.g., fever, poor feeding, lethargy), and the importance of immunization. Ensure she is confident in caring for her baby before discharge.
- Immunization: Before discharge, ensure the baby receives the birth doses of vaccines according to the national schedule (BCG and Oral Polio Vaccine - OPV 0).
- Follow-up: Advise the mother on the schedule for postnatal and child welfare clinic visits for continued assessment of growth, development, and immunizations.
Revision Questions
- What is the very first and most important action a nurse should take immediately after a baby is born to stimulate breathing and prevent heat loss?
- A newborn at 1 minute of life has a pink body and blue extremities, a heart rate of 90 bpm, makes a weak grimace when suctioned, has some flexion in the arms, and a slow, irregular cry. Calculate the Apgar score.
- Why is breastfeeding within the first hour of life so important for both the mother and the newborn? List three reasons.
- Describe the correct procedure for daily umbilical cord care. What should you advise the mother NOT to do?
- List five signs that indicate a newborn baby is "thriving."
- A mother asks why her healthy baby needs an injection (Vitamin K) right after birth. How would you explain the reason to her in simple terms?
Immediate Care of the Newborn Read More »